Tag Archives: Own Design

scribble-y sundress

I’ve made a new dress, and how gorgeous is this splashy, scribbly, fireworks-y print!  And the way this divine rayon challis ripples breezily against my legs was actually quite quite delicious… it was extremely hot when I took these pictures, like 39C, so soft whisper-y cool, featherlight stuff felt like exactly the right thing to wear.

While we were in San Francisco, Shams took us to Britex.  According to basically everyone who knows; Britex is a “must-visit” for the fabric enthusiast… like, every single, San Francisco shopping recommendation to me included in some form or another ” …and Britex, of course”

And I most heartily concur.  This place is insanely fabulous and I could’ve happily spent all day there..  The walls are stacked floor to ceiling with, well it felt like thousands of bolts of strong solid colours, arranged by colour to make a rainbow mural of fabric itself.  What a sight to behold!  I was crossing the rainbow bridge!  Is this heaven?!!!

I die…

can you even…??  #sigh  And this was only ONE floor, there was another one too!

Shams introduced us to the lovely owner, Sharman Spector; who was so kind and welcoming to us foreigners.  I learned that Britex is a Legacy Business, which means it is one of a “longstanding community-serving business that is recognised as valuable cultural asset to San Francisco by the Office of Small Business. Preserving Legacy Businesses is critical to maintaining what makes San Francisco a unique and special place.”  … and thank you, Professor Google for that succinct explanation…

Obviously, this is a wonderful idea, one that I wish we would adopt over here.  Imagine a world populated by lots of small businesses offering unique and special services?! This, and many other utopian customs are just part of the enormous appeal of San Francisco, and I should add, New York City too.  I think they are very innovative and future-thinking over there, while still keeping firmly in mind what is important to the happiness of human beings.

Anyway… my dress!

Sharman kindly gave me a length of this lovely “scribbled flowers” rayon challis; it’s delightfully whisper thin and feels coolly divine against the skin.  So I envisioned a floaty, nothing-y little wisp of a dress.  The print is quite oversized, so I could’ve got away with a longer dress, I think, but I’m very happy with this length; I think it’s both cute and chic, and the higher neckline balances nicely with the higher hemline.

Pattern; is my own design.  It’s very simple because I really wanted this lovely eye-catching print to shine…   so I’d made a similar dress for my friend L at the beginning of the year, a clone of a favourite dress of hers, and I couldn’t get the design out of my head.  Mine has a few key differences which I wanted to implement; namely it’s quite a lot more A-line… MORE float!! … and has pockets.  I altered the width of the top bits too, and the armscye.  Actually, the armscye turned out to be a bit of a boo-boo…  once it was hemmed it was just a leeetle bit low-cut.

You could definitely see bra-action… and I decided that if the bra was going to be seen, at least it could be a bra designed to be seen, and that went beautifully with the dress, complementing it.  I toyed briefly with the idea of a hot pink thing, – sawww tempting!! – but in the end decided the perfect bra to match this was in fact a plain black, strapless bra.  Strapless, well obviously, and plain black in order to not fight with the amaaaaaazing print, and to offset the black fabric I used for the tie.

For the bra; I used my old faithful McCalls 2772 swimsuit pattern pieces for a strapless bandeau bra; the only mods I made were to make boning channels using the side seam allowances, and inserting a short strip of boning.  This keeps the bra structured and upright and not fold in on itself while I’m wearing it.

I also gathered the centre front onto a 7cm length of black elastic, just because I think it looks nice! and I also shortened the back straps by several inches, to make it nice and tight.  Strapless bras have a tendency to migrate south, if they are not quite tight!  I like my underwear to be in sets, so I also whipped up a matching pair of undies, using the bikini bottom pieces from the same pattern.

Oh, the dress neck-tie, I cut from a black satin remnant, leftovers I think from this black Forsythe dress I made for Cassie, three years ago.

The front and back of the dress are actually different from each other, even if they LOOK identical! so in order to identify the back I used this little Kylie and the Machine label I got in the Perth Frocktails goodie bag.  It’s pretty cute, isn’t it? even if I kinda had a fleeting wish it was one of the “the is the back” labels; well I can swap that out if I ever buy a set.

But for now; it’s finished, and ready to keep me chic-ly cool in this extreme heatwave!

Details:

Dress; my own design, in this beautiful printed rayon challis from Britex 
Bra and knickers; McCalls 2772, black poly
Shoes; Zomp, from Zomp boutique

pinterestmail

how to make a tulle petticoat

… so, I mentioned Cassie’s engagement? and of course I’m completely thrilled to be asked to make her wedding dress!  Thrilled, maybe tempered with a little nervousness, shall we say? but still nonetheless thrilled.  I might even have been anticipating this very thing every since she was born!

Anyway, I’ve made a start… with a coupla petticoats.   Yes, petticoats, plural.  I shall now proceed to explain…

First of all; a stiff, tulle petticoat, to give plenty of volume and oomph to her bridal ensemble.

I’d read a blog post YEARS ago about making a petticoat but couldn’t find it, and so I just plowed ahead and made the above petticoat with what I could remember.  But I do hate not giving credit, so after hunting and following links for what seemed like ages I finally found it!! this post here by Sugardale.  I remember being very impressed with Sugardale’s post when I first read it, but I still somehow neglected to bookmark it or save any useful details that would enable me to find it again upon the occasion that I would need to use it.  But eventually I did find it.  And straight away realised that I had failed dismally to follow any of her instructions when making my own petticoat, so hmmm, there’s that! For example; Sugardale recommended an odd number of tiers, I made mine with an even number; Sugardale recommended working from the bottom up, I, in fact, worked from the top down.  Honestly? I don’t think these issues are a big deal, I think either, or even any way is probably going to work out just fine…

After making a muslin for Cassie’s dress – two actually – we determined the length of the skirt would be 87 cm.  I decided upon 4 tiers, with the following finished heights:  from top down; 20cm, 21cm, 22cm, 24cm… staggered heights just because I believe it looks better and more balanced to have the lower tiers wider than the upper tiers.

I did remember enough of Sugardale’s instructions to know that the tiers started at 2yds from and top and needed to double in circumference with with each tier down; and the tulle I scoped out in Spotlight had a width of 126cm (49.6inches)  So I calculated the following dimensions for my pieces:

Please note:  tier 4 only has 1 single 1cm seam allowance added to the height, since the bottom edge is the lower edge of the petticoat and doesn’t need a seam allowance.

You can see by my calculations and measurements of the tulle I bought, that one and a half cut lengths measures 189cm which I decided didn’t need trimming down.  Yes, my tiers were going to end up with a wider circumference overall than recommended, but I decided that a bit of extra volume was definitely not a bad thing.  It is in fact a very good thing!

How much tulle to buy?

So, according to my calculations; I was going to need:

(2 x 22cm) + (3 x 23cm) + (6 x 24cm) + (12 x 25cm) = 6.6m of tulle  Allowing for errors, I bought 8m of ivory tulle.

I used my rotary cutter and mat to cut the pieces as cleanly and as neatly as possible, and I cut and finished all gathering and stitching of each tier completely at a time before proceeding to the next tier, so as to not mix up the pieces.  I can tell you, by the time  you get to the bottom tier of 12 pieces, you do NOT want to get them mixed up!!

For the top tier, (circumference 189cm); I stitched it not fully closed, but leaving an opening of about 15cm from the top edge, so that Cassie can step into the petticoat.   The seam allowance either side of the split opening I simply folded down and topstitched it down on either side of the split.  I then ran a gathering stitch around the entire top edge and pulled it up to roughly fit Cassie’s waist measurement.  I cut a bias-cut strip of white cotton poplin, measured off Cassie’s waist measurement of 63cm and pinned to mark, and gathered the top tier (189cm) into this length.

After stitching each tier, I topstitched the upper seam allowance of each tier to the skirt above, approx 7mm from the stitching line.  I think this gives it a bit of strength, and lends a bit of pretty visual structure to this ethereal thing too.  Not that it’s meant to be seen, but well, you know…

Sophie checks out a weird THING

To finish the waist tie, I pressed the raw edges of the waistband strip into the centreline, then pressed the strip in half, and topstitched in place, about 2mm from the opening edge.

When putting the petticoat on, Cassie steps into the skirt, then the long ends of the waistband are pulled across from each other, wrapped around her waist and tied in a simple knot or bow.


It stands up by itself!

I stuck it up on the kitchen bench for a while, while I had to do something else, and I dunno, the sight of it gave me such a laugh!  Like a little tulle volcano, or something.  Mt Petticoat!!


Because bare legs against a scratchy tulle petticoat will probably become very uncomfortable very quickly, I also made a simple full circle petticoat to be worn underneath, using ivory cotton voile from Spotlight.


This is also 87cm in length, and for this I bought 4m and used every single bit!  I cut this length in half, and then cut the half circles for the two halves the skirt by the “fold into halves, then quarters, then eighths, then again” and cut across the lower edge to get a rough, but good enough curve; method.

The waist opening is made by cutting off the top, just 8cm from the tip.  When stitching together the two half circles of the skirt, I again made sure to leave an opening of at least 15cm so she can step into the skirt!!  and same as for the tulle petticoat, to finish the slit edges I simply pressed down the seam allowances either side of this slit and topstitched them into place.

To finish the waistband and for closure, I again made a bias cut strip of the same fabric, and stitched it to the waistline, leaving long tails either side, pressed the raw edges to the middle of the strip and stitched it closed, same as for the tulle petticoat.  By the way; I usually stitch this; right side of strip, to wrong side of skirt; this means when you fold the raw edges of the strip over you’re actually topstitching from the right side of the skirt, which of course ends up looking much neater from the right side. Which is just what you want.

For the lower edge of the fabric petticoat, I overlocked the raw edge to provide a stable and even width guide for hemming; then folded the overlocked edge under twice and topstitched it down.

The two petticoats!  I think they look so pretty together!

LATER EDIT:

I made a second, voile petticoat!  It’s exactly the same as the first cream coloured one, except it’s white; because I think I cleaned Spotlight right out of the cream, whoops!  This will be worn over the tulle petticoat and be like the lining to the dress.  So the layers Cassie will be wearing, from the inside out are:  voile petticoat, tulle petticoat, voile petticoat, DRESS!

petticoat… junction…

pinterestmail

claremont shopping tote

There’s a new pattern in Le Shop!!
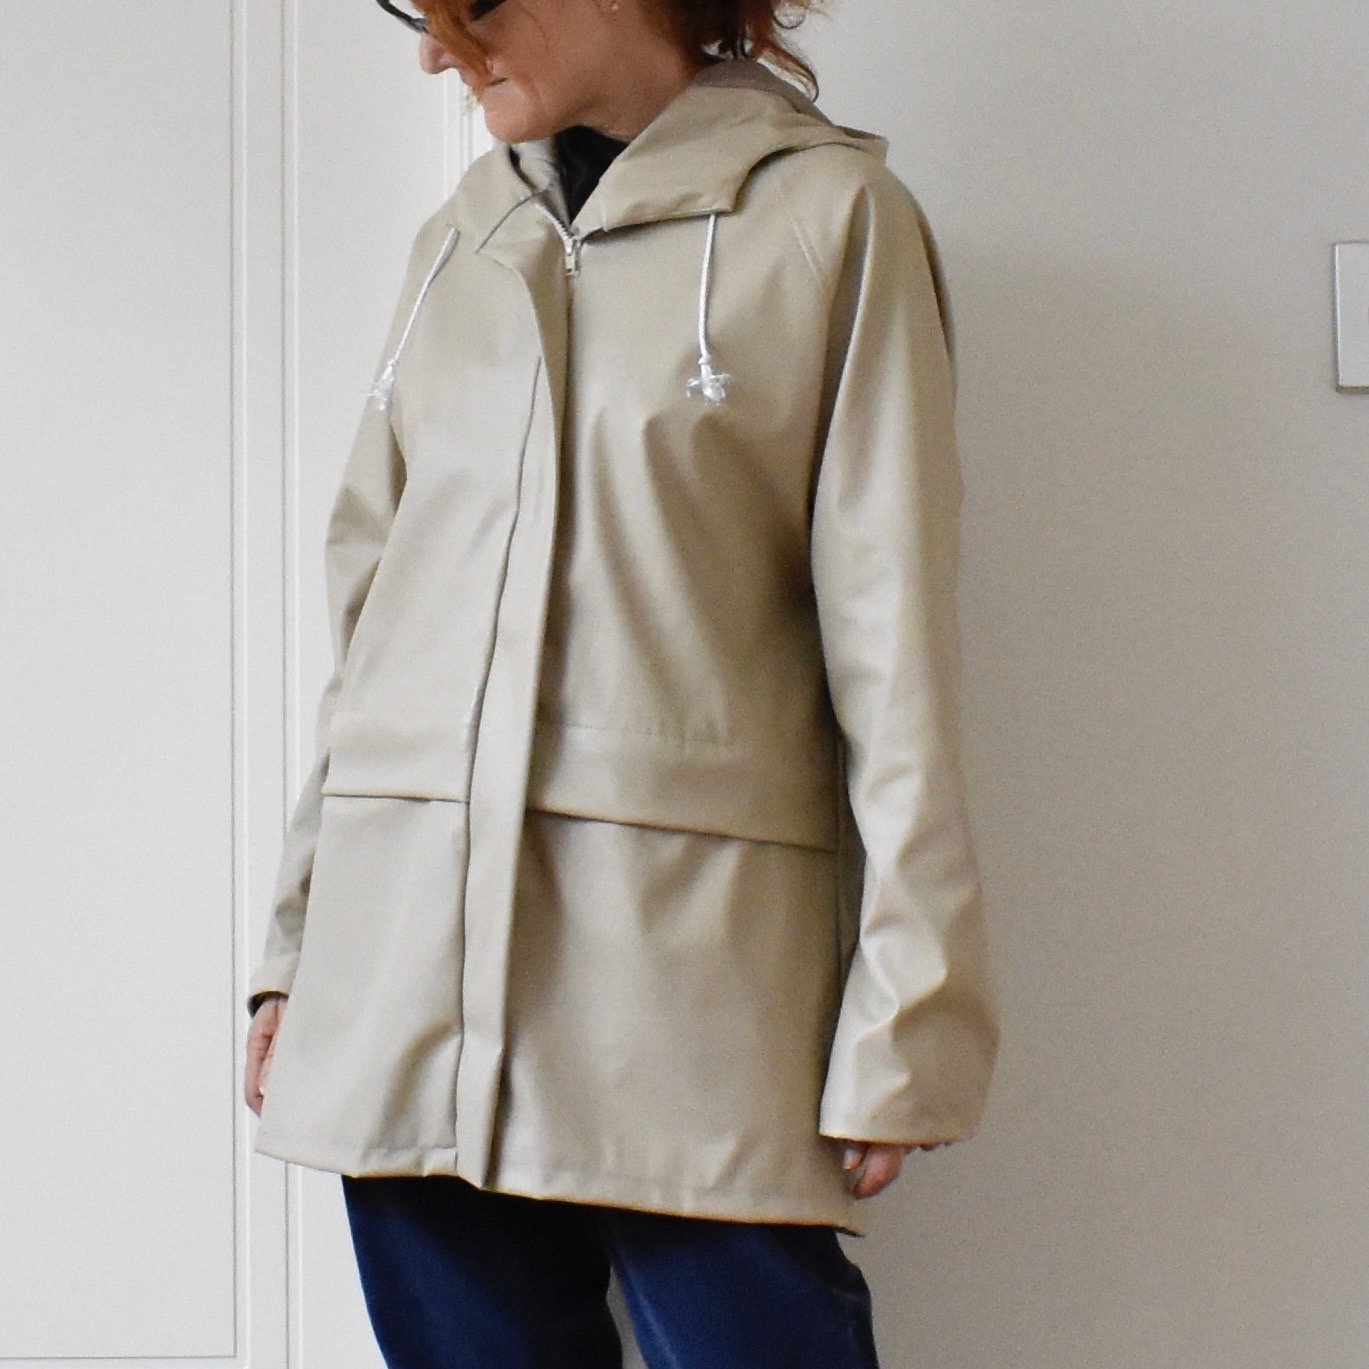
So, last Christmas I made a few shopping totes, one for Kelly and one for Sam’s lady L, and they were quite nice if I say so myself!  Kelly in particular carried hers around a tonne, bringing it around practically every week, packed full of her stuff.  She reckoned it was an incredibly useful size… 🙂  Shortly afterwards I received several requests from lovely readers who were interested in the pattern which made me feel, yeah we can do this, and; well, wedding sewing did put pattern-making on the back burner for quite a while but ta da! finally we made it happen… and it’s now live in our shop!

I asked Cassie to name this one, and she decided upon Claremont, after our favourite shopping centre.  Well, I should qualify; our actual favourite places to shop are like; Fabulous Fabrics, and Potters, and Spotlight, but well, you know  😉

Specifics; the Claremont is an unlined, shopping tote with box-base and cut-on handles, with two options for internal pockets . The base measures 30cm x 20cm (12” x 8”); the height of bag not including handles is 33cm (13”). The length of the shoulder straps enables a person to sling the tote easily on the shoulder and to still be able comfortably access inside the tote while you’re wearing it.  The cut-on handles makes for a very strong bag that can withstand a quite heavy load of shopping.

The totes I made for Kelly and L were quite simple with no pockets, however for the pattern itself we added pattern pieces and instructions for two internal pockets; an open pocket for your phone, and a zipped pocket for your keys.  I ran up a pocketed version for a birthday gift for a friend, using a really lovely Spindle and Ink canvas; this is called Flowering Gum in Bluestone and Stream.  Isn’t that a gorgeous name?!  It’s designed by Lara Cameron.

The pattern is available to purchase in digital pdf format; and also; in consideration of the fact that I understand that lots of people prefer paper sewing patterns, and/or do not easily have access to printing it out at home, or just don’t want to; we are also making available an actual paper pattern too.  

This is unavoidably a more expensive option, sorry! so sweeten the paper pattern deal; with the first five paper patterns sold I’m throwing in one of our pattern company labels.  These are produced by the Dutch Label company, and I currently only have the five.  Anyone who has  bought from them knows and no doubt loves the very high quality of their work!  I’m thinking of ordering more!


pinterestmail

mustard pietra shorts

Hack attack!

Despite initial appearances, my new shorts are actually based upon the Pietra shorts/pants pattern by Closet Case patterns… I loved this pattern immediately, loved the high waisted flat front with no waistband, and those cool side panels with pockets.  However, I was not quite so much in love with the elasticated back … or perhaps I should specify I was not quite so much in love with my own rear view in the aforementioned elastic waist version of the pattern?!

Yes, I did make up a test version with the elastic waist first … for version number one, I cut up an old linen dress given to me by Mum.  Unfortunately I decided I’m tragically allergic to elastic waistbands, with the one and only exception of pyjama bottoms.  Although looking at these pictures now my rear view is not as offensive to me as it was when I first looked at them!  at the same time, I am still much happier with the rear view of my second, non-elasticated and more streamlined version.

side view…

I was pretty sure I would be able to alter, modify, wrangle a de-elasticised waist with a bit of finagling… putting an invisible zip in the centre back seam and removing a whole lot of real estate from the back waist area, retaining that lovely flat front and pockets completely.

the front view looks exactly the same as the original, unsurprisingly since this is basically unaltered…

I shall now proceed to explain my butchery… and please note that these measurements laid out here are tailored to my own personal waist measurements and will obviously be different for other people.  Specific measurements for each of these modifications can best be determined from your own waist and hip measurements.

I removed 6cm from the waist of the back piece; and actually swung the side edge out towards the hem edge at the same time, adding a bit of flare to the back view of the shorts…

I also removed 2cm from the top/back edge of the side pieces, tapering off to nothing at the top edge of the pocket.  This wedge was also removed “mirror-image” from the front facing, shown already stitched on at the left…

I put a dart in the back piece… while my picture illustrates it to be 10.5cm, I actually stitched it a bit longer, closer to 11.5cm at its end point

… the dart is situated 10cm in from the centre back raw edge and is 3cm in width at its top edge

… I used the existing back waistband piece to cut my two new back waistbands to fit the new size…

… inserted an invisible zip into the centre back seam.  Note, the centre back seam is essentially unaltered, except that the back waistband now has a vertical centre back seam too.

Because I whimsically fancied something a bit different for the back of my waistband, specifically a V-shaped cut-out effect at the centre back … I put in the zip a bit lower and stitched the top edge in an angle like so…  Yes, I’m very much oversimplifying here, because making my two sides exactly identical actually took aaaaages and some super precise measuring.  I even unpicked one side completely and re-did it because it’s amazing how even 1 or 2mm difference will show up as a glaring inconsistency.  Hint; making a little paper template made it a lot easier to get everything perfectly mirror image; which yes, seems super obvious in retrospect!

corners trimmed and turned out…

I hand stitched the waistband self-facing down with tiny fell-stitches…

To finish; the side seams were pinned, and the already-understitched front facing was wrapped around over the top and over the back waistband piece.

Side seams were then stitched, corners trimmed and seam allowances finished etc. before pulling the whole thing right sides out.  And that’s it!


Oh! of course, the ever important fabric notes… this is actually just a super cheap cotton drill from Spotlight… I LOVE the orange-y mustard colour of course, SO MEEEEE! and the random vertical dashes.  The pattern sorta reminds me a lot of this felted wall hanging I made, many moons ago; my vision was of a sort of poem carved by an artistic cave man, in a language or alphabet wrought in colours and strokes of differing lengths and groupings.  This is still hanging up in our front room! and you can read more about it here

Details:

Shorts; both the Pietra shorts/pants pattern by Closet Case patterns
Drapey white top; based on the loose drape top no.1 in the Japanese pattern book “drape drape”, by Hisako Sato
Hat; Vogue 8844, in khaki drill
Plain white tee; Nettie tee by Closet Case patterns, white jersey

pinterestmail

a pink pinny

So, I loved my red velveteen pinafore so much… it’s such a lot of fun to wear.  I can’t believe I worried a little that I was too, er mature, for such a garment and I thought I might become the butt of mutton-dressed-as-lamb commentary but you know what? I wasn’t, and I’ve throughly enjoyed having a “pinny”.  So I made another! though I believe this is an improvement even upon its predecessor’s near-perfection because the pockets are a tonne better, in my opinion.

Again, I used the pauline alice Turia dungarees pattern for the bodice section, and modified so the bottom part is a skirt.  I put the pinafore on and pinned carefully so as to achieve the ideal proportion to suit my figure, but it actually turned out identical to the shape of my red one!  I’m really really happy with the shape and length of this, it’s absolutely perfect for me,I think…

I really love the front bib pocket of the Turia pattern, I think it’s super cute.

For the pockets, I got out the pattern pieces for Vogue 1115; the shape construction and placement of these pockets is also close to perfection, in my opinion!  I like my pockets to be a bit bigger, but instead of cutting the pockets bigger, I simply stitch the with a 6mm (1/4″) seam allowance instead of the regular 15mm, and boom! I have bigger pockets!

Fabric; cotton corduroy in the most totally divine shade of dusky pink!!  I saw it on Potters’ Textiles instagram and raced in immediately to snap some up!  Then, for some bizarre reason that I have absolutely no explanation for, I bought only 1.5m.  Sure; it’s quite wide; but still I was struggling to cut my pinafore out of such a small piece, especially since you do have to be strict about following the corduroy’s nap when laying out your pieces.  To be honest; I totally would have cut my pockets bigger, but was dealing with mere scraps after getting out my big, important pieces first.  Anyway, I did get everything I wanted successfully, thank goodness…  Normally you’d think, oh I can always get more fabric! but while I was buying it the lady in the store specifically mentioned that they were nearly out!

Like with my red pinny; I chose to line this one fully.  I cut the lining using three of Craig’s discarded old business shirts.  I’m kind of a stash-busting mission lately; really making an effort to reduce pieces in there that have been kept “just in case”; and particularly; fabrics/garments from my refashioning bag.  I carefully harvested all the buttons off the shirts first, of course…

these matching sets of buttons are quite valuable if you make shirts for the menfolk in your life; particularly the shirts that have those mini-buttons often found on the sleeve plackets and button-down collars.  It’s almost impossible to find the two sizes in complete matching sets like this in haberdashery stores.


So you’d think there’s loooooooads of fabric in 3 shirts; and surely more than enough to line a little pinafore??  but of course unless I want my lining to be a heavily patched/seamed, and therefore rather bulky thing, I could really only use the largest swathes of fabric from the backs of the shirts, and still had to join!  But that’s ok; I still feel good about using up at least a little bit more of the refashioning bag!  The lining for my straps was harvested from one sleeve.

THIS! is a cautionary tale…. so, when you’re making welt pockets, and you come to the all-important, ever-so-precise task of cutting the welt opening in your dress fabric?  It’s a good idea to check that your lining fabric has been flipped up out of the way first.  Yeah.  *kicking myself BAD over this disaster…. I used my rotary cutter, and cut the most beautiful clean neat welt pocket opening through the front of my pinny…. AND THE LINING UNDERNEATH AT THE SAME TIME TOO.  Fortunately this only happened once, on just one pocket I mean, and I realised straight away.  If I’d done it for both pockets, I would have seriously considered replacing the lining, for real.  Anyway; I bandaid-ed the problem by ironing on a strip of iron-on interfacing and indulging in some furious and thorough zig-zagging.  Not the most beautiful of repairs, but experience has taught me that this is both a durable and efficient method of fixing a cut like this.

Miraculously, I unearthed a very small length of pink, bias cotton cotton voile from my stash, that I made so long ago I barely remember it.  But it was just enough to finish the hem!!  STOKED!!!

So happy with my pinny!!!!!  I’ve worn it a couple of times already, and am over the moon with it!

I am wearing it here with one of my wool-mix Nettie tees, probably one of my most worn winter tees! my self-designed and -made black tights, and my favourite motorcycle boots.

Now… for something completely different!

Recently I had a conversation with my good friend E.  Now, E is one of my closest friends, we’ve been so for decades and I hold her opinion in high regard.  At the same time! she doesn’t even know I have a sewing blog really, and though she knows I have an instagram account I’m totally sure she has never looked at it… why? because the topic of our conversation on this day was about her recent holiday with her husband, and as an extension of that; how she feels super strongly that “instagrammers” are ruining the world and are just beyond despicable, in her eyes.  In her own words; she despises instagram, because people are obsessed with taking their pictures in the most beautiful places and are thus destroying these places for everyone else, in both the taking of the photos, and the damage they do while doing so.  And not to mention they look ridiculous in their ballgowns and long tresses blowing in the wind, out on the moors, or in front of a particularly picturesque cottage, that’s not even their cottage, or whatever…..  Now… on the one hand I can certainly see her point, especially when it comes to people monopolising key beautiful tourist spots, setting up tripods and preventing other people from enjoying the view because they are prancing around right in the middle of it.  Our conversation didn’t even touch on people leaving rubbish behind, or treading on and damaging delicate flora or anything physically destructive like that! though of course that is a problem too.  My friend blames instagram completely for all this.

Now of course, I have thoughts!  I personally love instagram! though I can see too that all of her points have validity.  I know exactly the type of instagrammer to which she is referring… I have seen them myself too.  And secretly thought how silly it all looks.  And I know I might well be accused of being one of “those prancers” sometimes…!!   HOWEVER; I would argue not! since I take great care to take my own photos in complete private.  I think this is something not many readers of my blog or viewers of my instagram understand about me; I am actually a very shy and quiet person; and would be terrified to take photos of myself in front of other people.  I need complete isolation!  If there were other people there enjoying the view and taking their own pictures or whatever, you can bet your bottom dollar I am NOT going to be getting in their way, or taking my own pictures.  So while the evidence is there on my blog that I do indeed take pictures of myself in beautiful locations, I’m not really making a spectacle of myself in the action of doing it; if that makes sense.

It’s always felt logical to take photos of my new creations in my favourite spots.  It just gives me lots of pleasure to make this happen.  Should I stop? because I’m being ridiculous? or continue because it gives me joy?  rhetorical question btw, no need to answer… I don’t even know why I’m going got all this effort to explain myself really, except maybe to lay out my own thoughts coherently.  Did she strike a nerve?  maybe.  I have a sense of the ridiculousness of it all, even while I’m doing it.  But at the same time, I want to take pictures of my clothes, and I like the idea of nice photos, though my commitment to this waxes and wanes. I did actually go for a fairly long period of time where I only took pictures in my own garage, or in our own house and garden.  I don’t know if it even went noticed on my blog here because I am fortunate to have some quite picturesque corners in my garden, but yes; I went off the idea of ” real” photos “out and about” for nearly a year…

And obviously; I am super opposed to damaging the environment in any way.  If I love a beautiful spot, I definitely want it to stay beautiful for the future!  Leave only footprints and take only pictures.  Am a big proponent of that.

I’m not sure what the right answer is, but I guess I should just continue to be super vigilant and careful about taking my photos only when alone.  It’s easy to “say”, like many people do in this time of (over?)-sharing; that I don’t care what other people think of me, but obviously that would not be true!

What a weird, double life I’m living!  Maybe I should just delete all this?!

pinterestmail

a raincoat for Cassie

Yes, I may be modelling it here, since maybe I stole it for a few days after finishing it, hehe, but this raincoat was always for Cassie and is now safely residing in her wardrobe, where it should be!  I ended up finally giving it to her a coupla weeks ago.  Luckily I had taken photos of me wearing it because it’s just not so easy anymore to take photos of her, now she’s moved out of home… *sob*  She popped over today for some Mum/daughter time and I asked her how it’s been.  She says it’s waterproof, it’s a good size to wear over regular winter clothes which is just what you want from a raincoat, and she loves it, all three of which are always very gratifying to hear!

Materials; So, I’ve had this beige pleather in my stash for aaaaaaaaages, so long that I barely even remember buying it! although I do remember it was from Spotlight.  I’m in a real stash-busting frame of mind lately, so TIME TO GET THIS STUFF MADE UP AND OOOOOUUTTA THERE!  It’s pretty hideous stuff to sew; slightly stretchy and with that “sticky-ness” of pleather so it doesn’t move nicely under the sewing machine foot at all.  I used strips of tissue paper for each and every top-stitching seam…  see here for my tips on sewing leather or pleather

Lining fabric from the deep stash; have no idea now whether I bought it originally or whether it was one of Mum’s throw-outs.  I used a slightly different beige lining fabric, also deep stash; for the sleeves.  All three zips, hood cord, cord stops and eyelets are all from Spotlight.

I couldn’t find the same seam sealer I’ve used for all my other raincoats; BCF is now stocking the above sticks of wax for the job.  I couldn’t help thinking they were basically candles without the wicks and maybe I could use one of the many candles I have already! but bought one anyway.  It proved not very easy to use, since it was quite “firm”, not really soft enough for the job; and  you have to rub it quite vigorously over the seam to get it insinuated into the stitch holes which seemed to stretch the fabric out a little.  Then, I tried melting it a little in a (real) candle flame, before dripping it over the seams, then eventually moved to softening the wax stick in the flame just a little before commencing to rub it in.  The last wasn’t particularly easy either, because the wax only stayed softened for about five seconds away from the flame before it hardened up again, and needed another “soften” in the flame; but in the end I decided this was the best way to get the wax well-worked thoroughly into the seam holes.

But it works! the raincoat is waterproof and that’s the main thing.  Though if I had a choice, I would probably choose the chemical seam sealer over the wax stick… actually I only just had a thought; I have some real beeswax somewhere, and wonder if this would actually work better?  It’s quite soft naturally and so might prove easier to massage into the seams….  something to think about trying next time!

Pattern; is my own.  I’ve made this up three times previously, my first go is here, my second, also for Cassie! is here, my third is here.  I’ve added little improvements and modifications each time I’ve made it up; this one is, dare I say, the nicest yet… although it’s always had the most awesomely practical and deep pockets, if I do say so myself!  I gave this one a big upgrade when I lined it fully with golden beige polyactate lining fabric.  This makes it quite delicious to wear, and makes me wish I’d properly lined my own raincoats with something more traditionally “dressmaker-y” like this.  I lined my first and second raincoats with a soft mesh, which is very nice, but the lining fabric is definitely silkier and far more luxurious against the skin.  Again… next time!

o hey you gorgeous thing!  fluffy photo bombers are always welcome!!


I also gave it an internal pocket, just a simple patch pocket on the left breast; simple but extremely useful.  Yes, ahem; I am realising this raincoat IS most definitely far nicer than my own!  I should have kept it!  jk

.. cheekily wearing it “out” another day!  I wore it to the sewing guild meeting with my dp studio “Eve” dress, my handmade black tights, and the booties Craig bought for my last birthday present…

pinterestmail

box of socks; the July edition

Dotty socks?  Socks with the pox? Poxy socks? A pox on socks!

Squeaking in under the wire at the very last minute for the month again, I present this month’s pair of socks… kinda fun, huh?  I absolutely love them retroactively.  While I was actually making them, hmmm, not so much!  I really struggled to get into these ones, funnily enough.  I liked the turquoise yarn with colourful flecks very much at first, but it rapidly became quite blah and too subtle to my eyes.   I felt it really lacked a certain necessary “something”, and I discovered some of that something when I laid the ball of bright yellow yarn against it.  Drab to fab in one fell swoop!  I experimented with several different ways of getting the yellow in there somewhere, but (obviously) in the end settled on embroidering random dots of various sizes here and there.  This gave exactly the fun and quirky look I craved, but was surprisingly difficult to get them looking neat, owing I think to the fact that the yarns were of completely different gauge.  This discrepancy can be seen most clearly in the heels and toes, where the yellow looks quite “puffy” and plumped up compared to the much finer turquoise yarn.  Yeah, it’s funny-looking but still, I love it.

I only had time to embroider a sprinkling of the dots around the top few inches of sock; but if I get some more time -which seems very unlikely – I may add some more “pox”…

Pattern; my usual plain Jane favourite, from a Patons 60s pamphlet with my own modifications

Yarns: flecked turquoise is Opal “Relief” sock yarn, colour 9494; with a yellow Piccolo multi-purpose craft yarn, made in Japan.  Both yarns purchased in Japan during our recent holiday there

oh hey there my lovely little photobomber… must be close to dinner time, mmmm?

The box of socks is looking a bit squished, but pretty!

pinterestmail

box of socks; the June edition. plus a bag!

Pair of no-frills socks, but look at those pretty stripes!  LOVE those bright pastels!!  Making these has dutifully used up some more of the leftovers from my advent jumper, from the Dingo Dyeworks advent calendar of last year…  pretty cute and frugal, huh? *self-back-pat*  and this yarn is so soft and divinely snuggly.

the box of socks is looking quite colourful!

Oh! and I also ran up a little bag, specifically for my sock knitting.  I’ve been using my pink bum bag for this purpose ever since Japan, which was… fine, I guess, but still not ideal.  It wasn’t really big enough, for one thing, and had zero pockets.  Hmmm, yes; ordinarily a zero-pocket bag would have its days very much numbered, except that I’m kinda sentimental about it since Mum and Dad gave it to me when I was quite a young teenager and it’s always been … well, one of those forever things, you know??  Anyway, I digress…  What I really wanted for my knitting bag was one identical to the one I made for Mum, blogged here.  So I rummaged through the old clothing chuck-out bag and came out with a pair of old chinos that I used to wear when the kids were really little. Haven’t worn them in decades and don’t really know why I kept these hideous things but probably for the usual reason, that the fabric would come in handy some day.

The new bag is terrible really; slapdash, ugly, just thrown together in a very uncaring way.  But man, it was so much fun to do a bit of rough, random, whatever sewing!  Quite a therapeutic project, in fact!   And/or cathartic!  Slicing, dicing and cutting on the fly, drawing straight onto the fabric, machine-stitching rather wildly, minimal measuring, if any.   FELT SO GOOD.  THIS HOUSE, IS CLEAN!!!

I used the back of the chinos, and gave the bag a “bottom”, so it can stand up by itself.  It is self-lined, using more of the same fabric from a leg of the chinos, and has five pockets including the two outside patch pockets with buttoned flaps, that were originally in situ on the seat of the chinos.  Inside, I stitched two new, rectangular open patch pockets to the lining, as well as the tiny and rather adorable coin pocket that I painstakingly unpicked from the chinos just because it was so super cute.

I slipped a few coins in there for … I dunno, just in case

The other pockets hold my kindy scissors, my notebook and pen, a wool needle, and my personal, basic knitting pattern.  Which is near-identical to the Patons one I’ve been using for years, but has one or two mods that I’ve developed along the way to make my own idea of the perfect sock.  Actually I recently re-typed it all into a new word document so I can print it out for myself any time, and now I no longer have to decipher the old photocopied one from the Patons pamphlet that is almost falling to bits from un-folding and re-folding, and has multiple crossing-outs and arrows and modifications and notes scribbled chaotically in the margins and on the back.  Hurrah!

The inside waistband of my old chinos had  a rather nice bias bound strip finishing, so I kept this and used it to edge the, also recycled zip for the bag,  Goodness knows why I once went to the trouble of ripping out and stowing away an old zip just in case, but hey.  I did indeed find a use for it in the end!

So, cute bag? or piece of trash?  completely rhetorical questions btw since I know that; yes it is a pretty rubbishy sort of a thing!  It’s nowhere near as nice as the one I made for Mum, which I did measure out, cut carefully, and sew somewhat meticulously, and also had really nice fabric going for it.  But it only cost me some thread and half a day, and it will do for now.  And I had a lot of fun making it!  Maybe I’ll treat myself to a proper one, one of these days.

couldn’t resist taking a picture showing my ever-present companion, wondering what the heck I’m doing…

pinterestmail
Switch to mobile version
↓