Tag Archives: Sienna

jingle bells

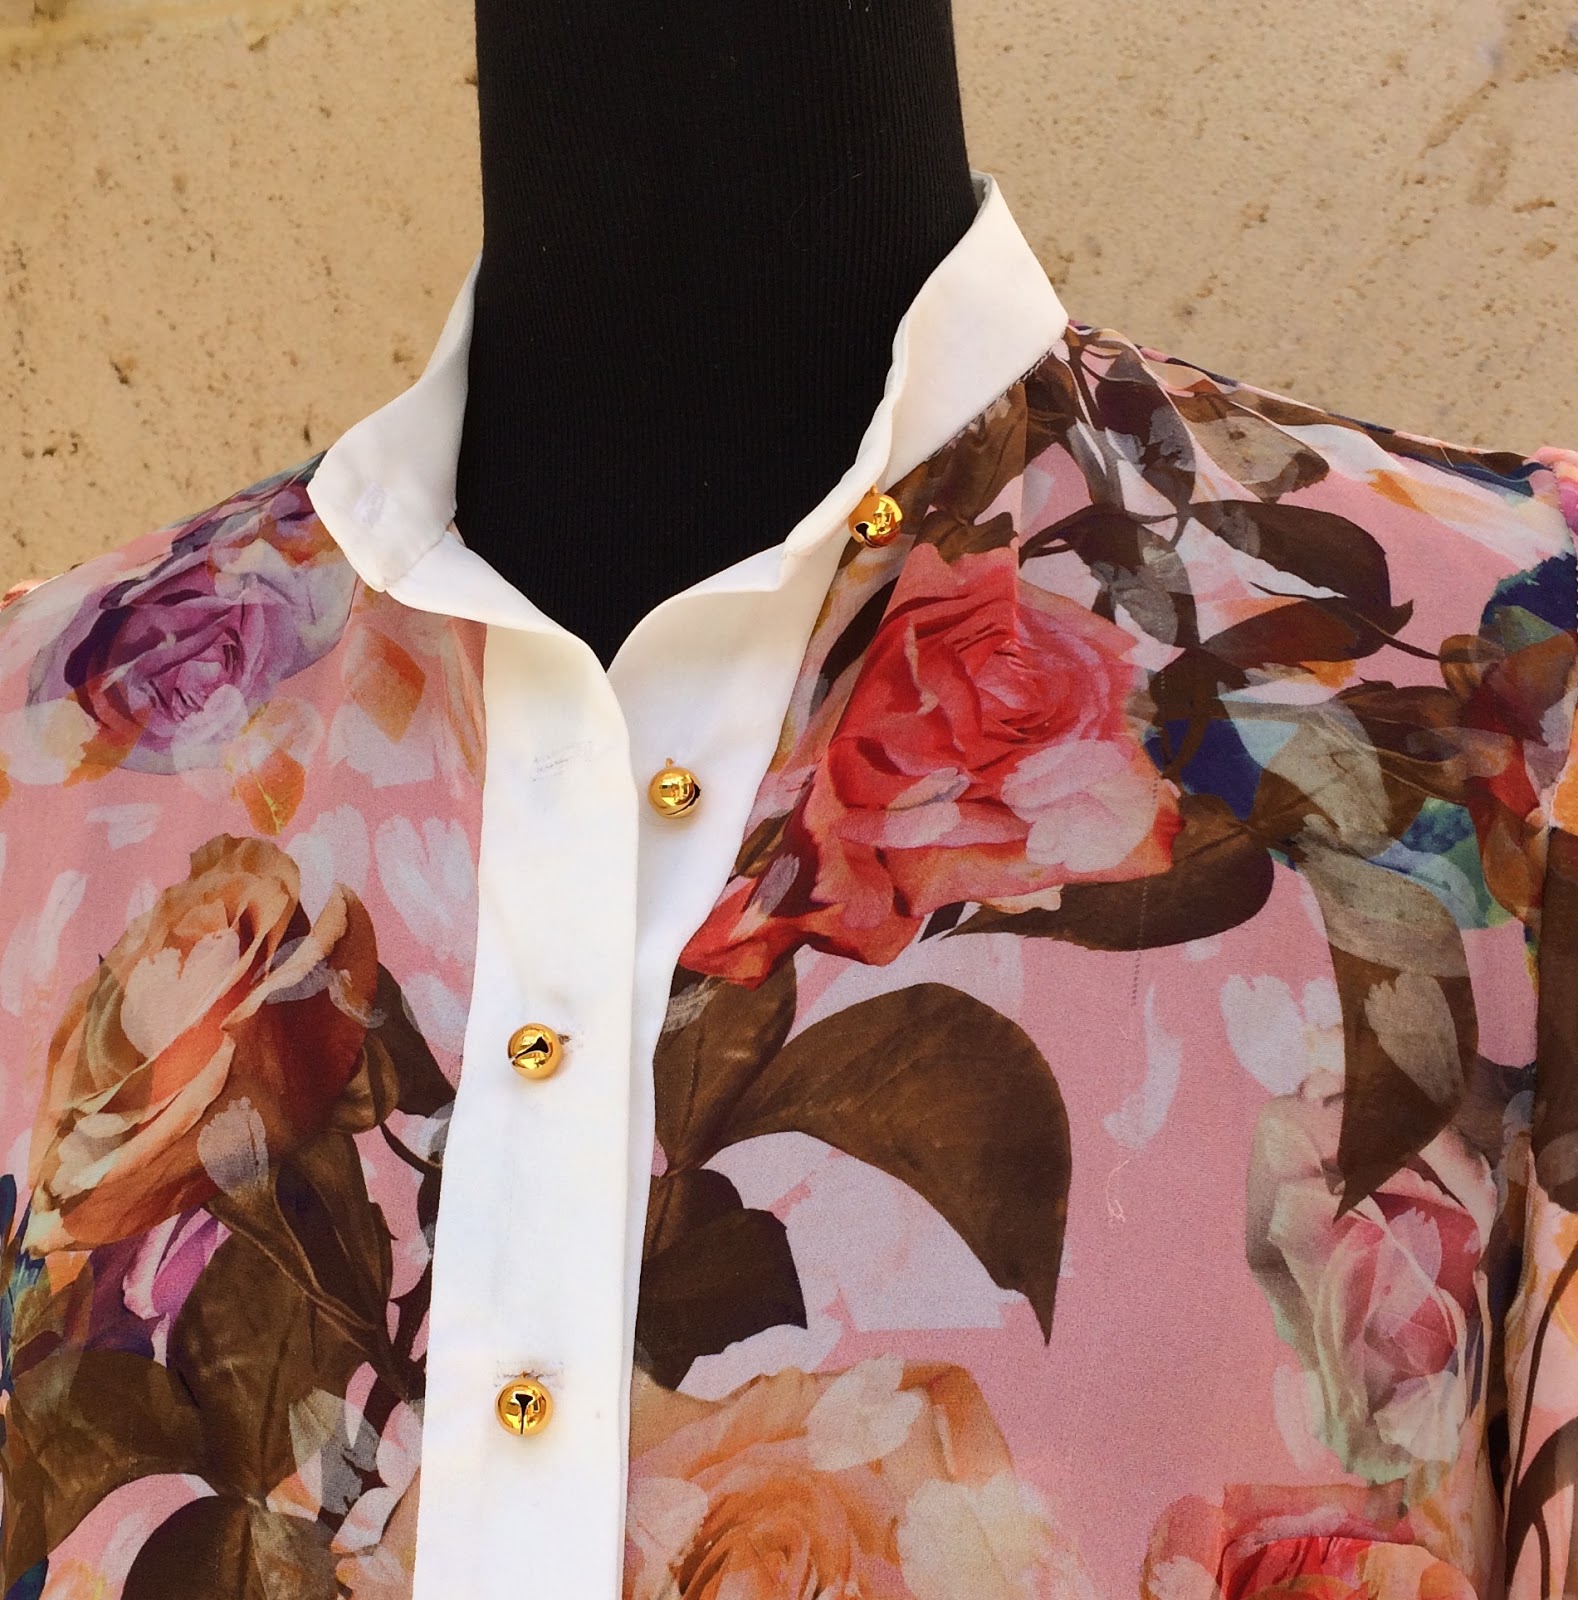
Yes, my new shirtdress literally does have bells on it.  The gold buttons are mini jingle bells, the type you put on cutesie wootsie Christmas decorations.  Whimsical and impractical although many of my sewing/knitting choices may be though, jingle-bells are just kinda… hmmm well the jury’s still out.  See, I just had my heart absolutely set on small rounded gold buttons and this was pretty much it.  I love the festivity of them and am clearly all set up to do Christmas Day with fabulous, jingly panache, but have fears that the relentlessly cheerful chirpy tingalingalinging will become a tad annoying in the interim, and not just to me but to the long-suffering souls who move in and about in my everyday orbit.  So I have not at this stage ruled out carefully injecting a blob of superglue into the opening of each jingle bell, to anchor the ringer thingie to the inside and restore peace and tranquility unto the world.
Glue is on standby and at the ready…

but pretty, non?

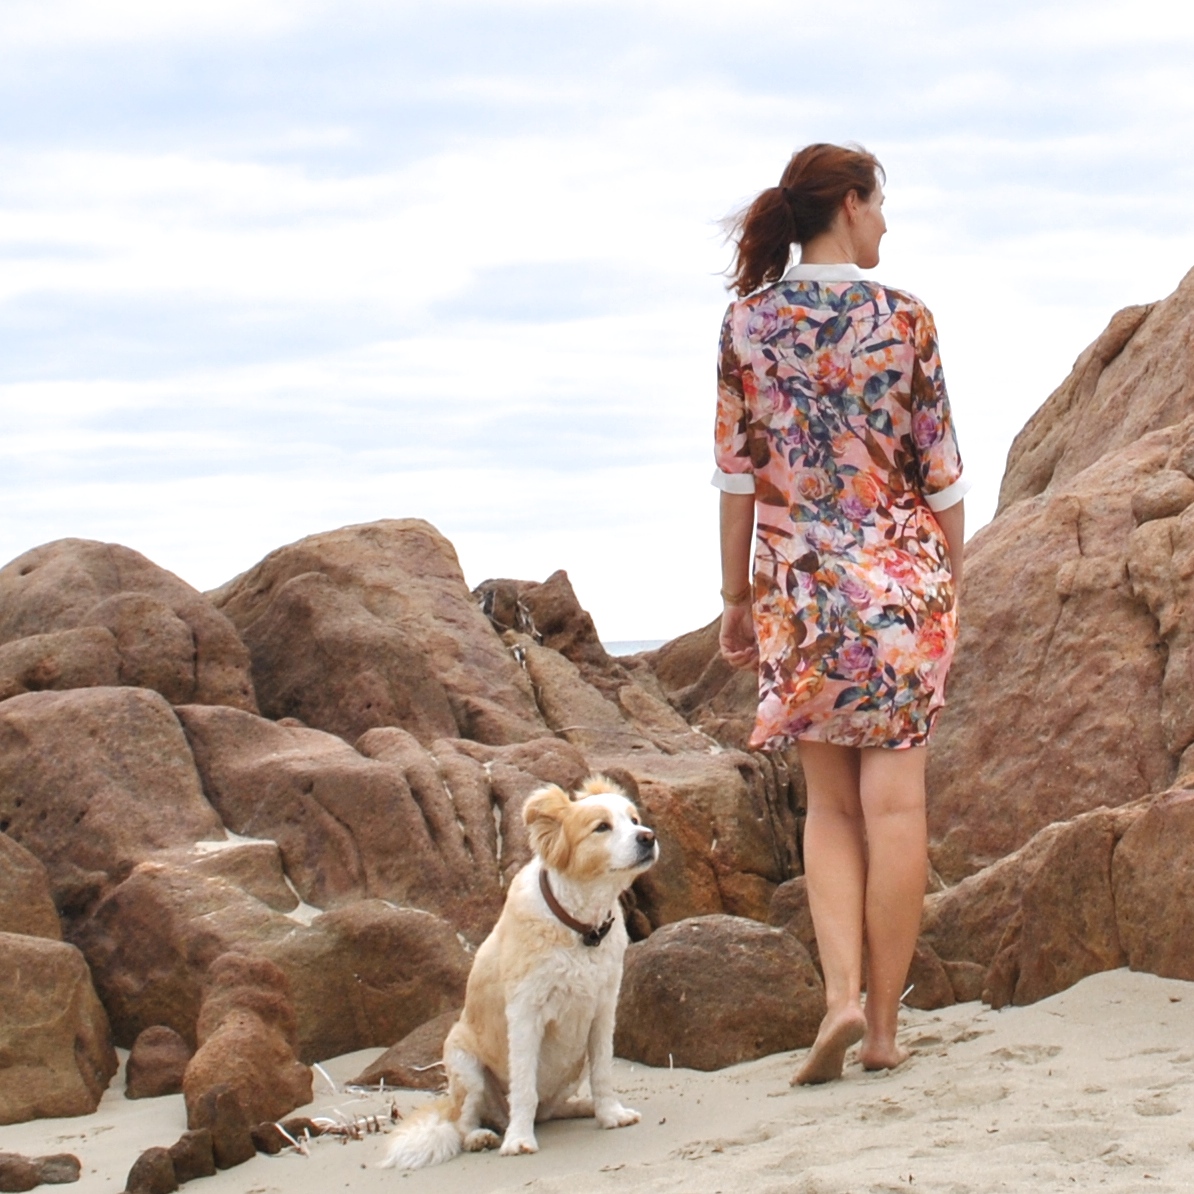
Fabric: a very fine coral floral silk georgette from Fabulous Fabric, the very last on the roll.  I bought it using a voucher given to me for my birthday by my dear friends; whom I’ve been meeting every week since our children were in the early school years…  They know my strange predilection for self-dressmaking so very well!  I also bought some ivory crepe; with which I made the slip to go under this dress, and which I also used for the button placket, the cuffs and the collar stand.  Jingle bells were also from Fabulous Fabrics.

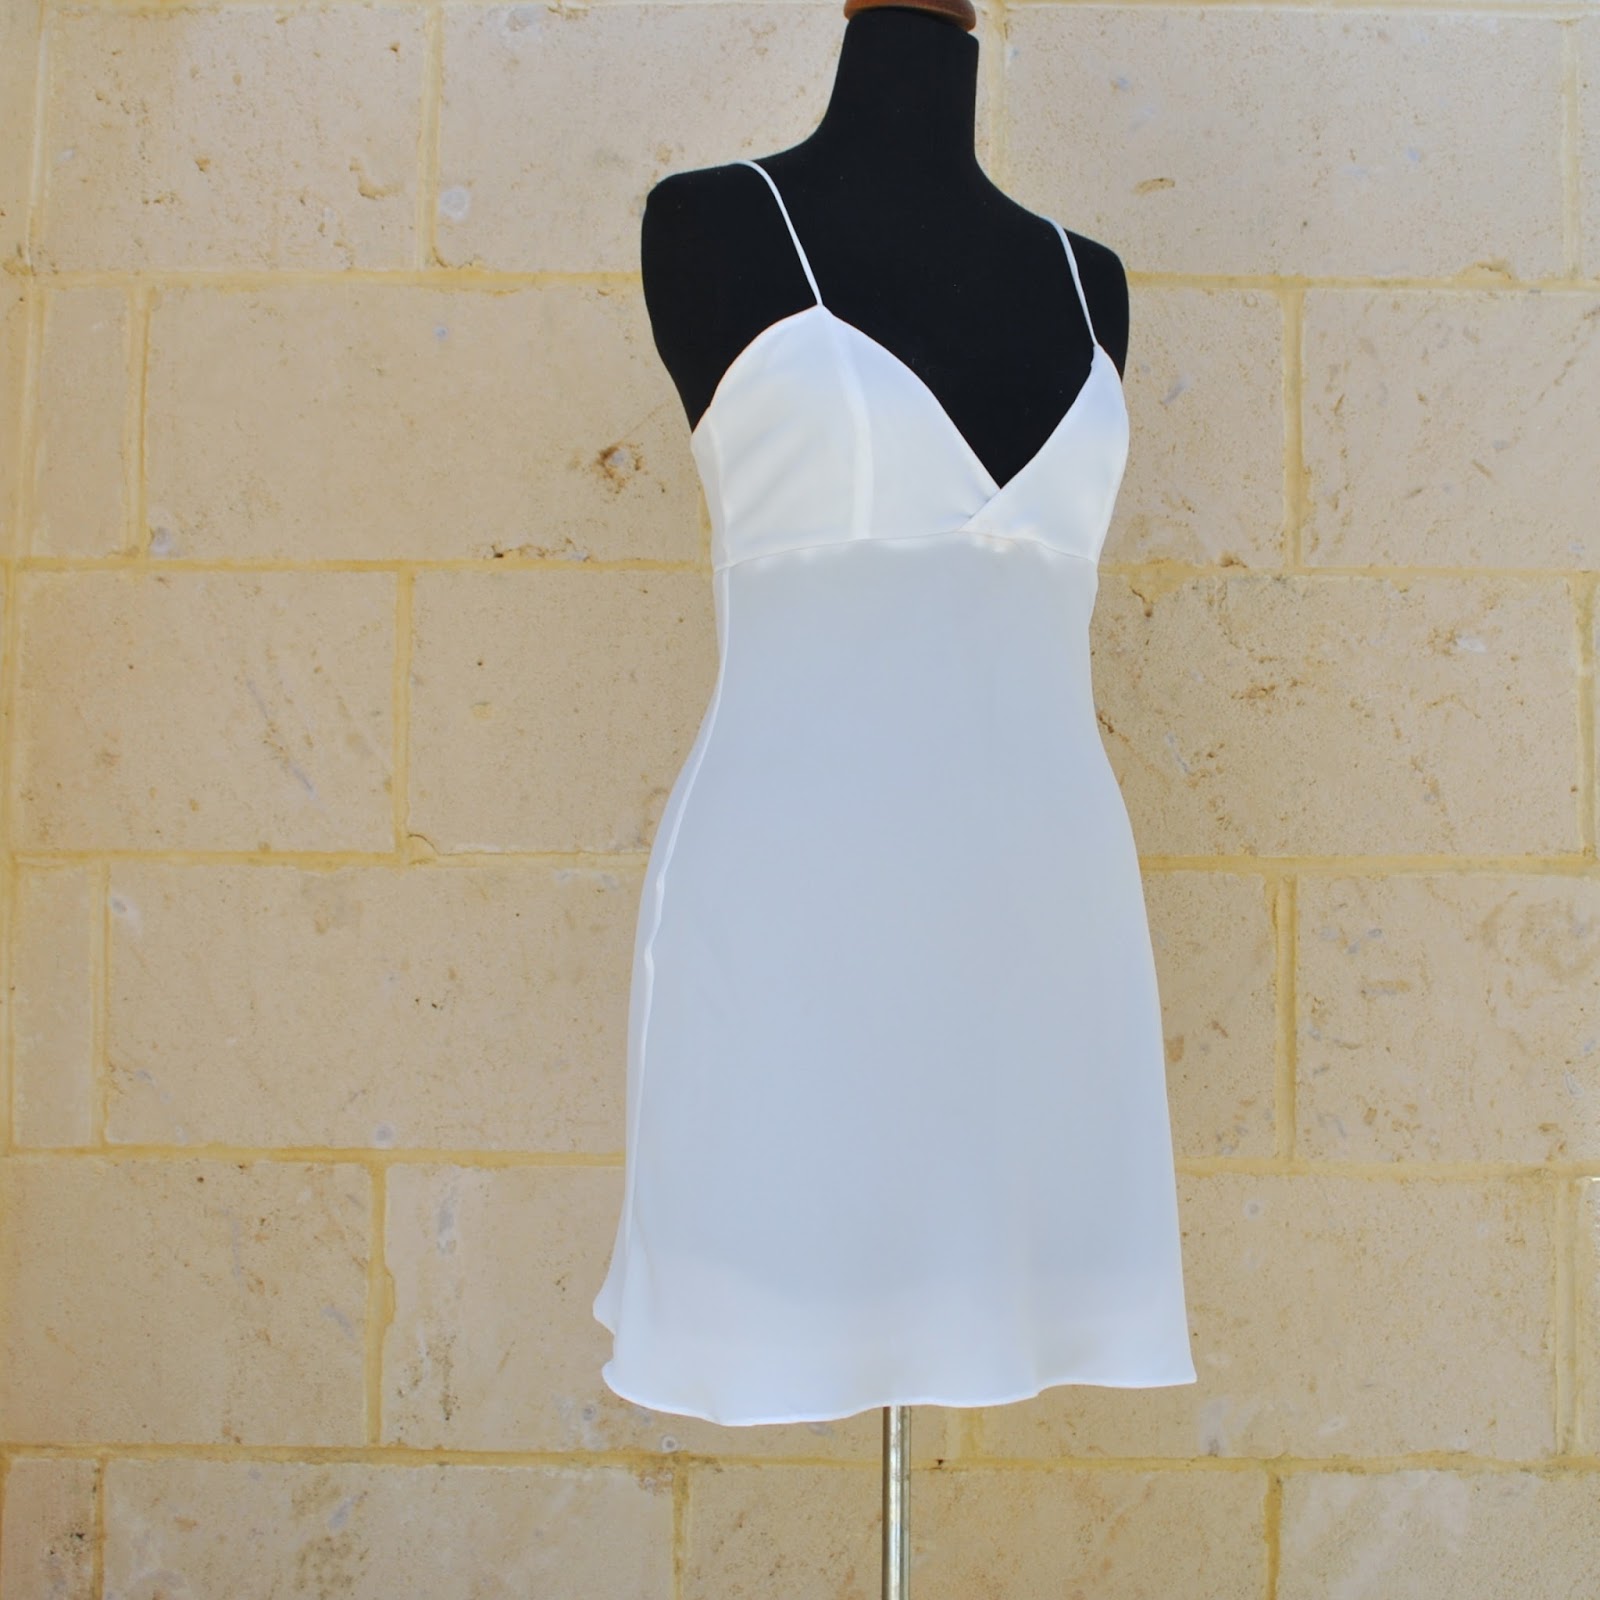
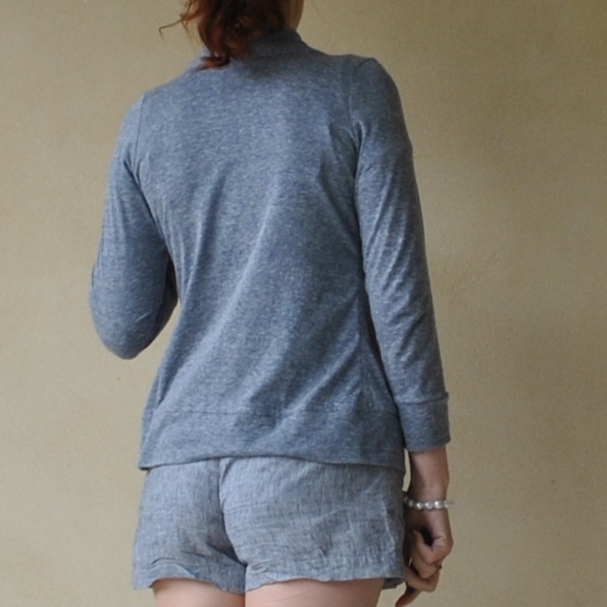
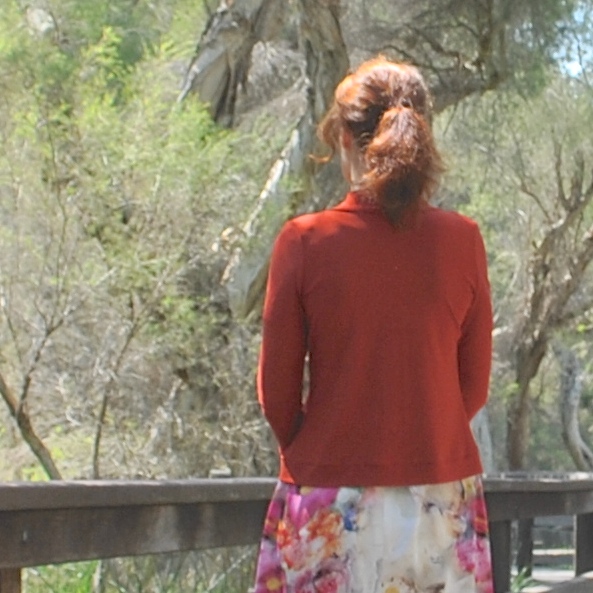
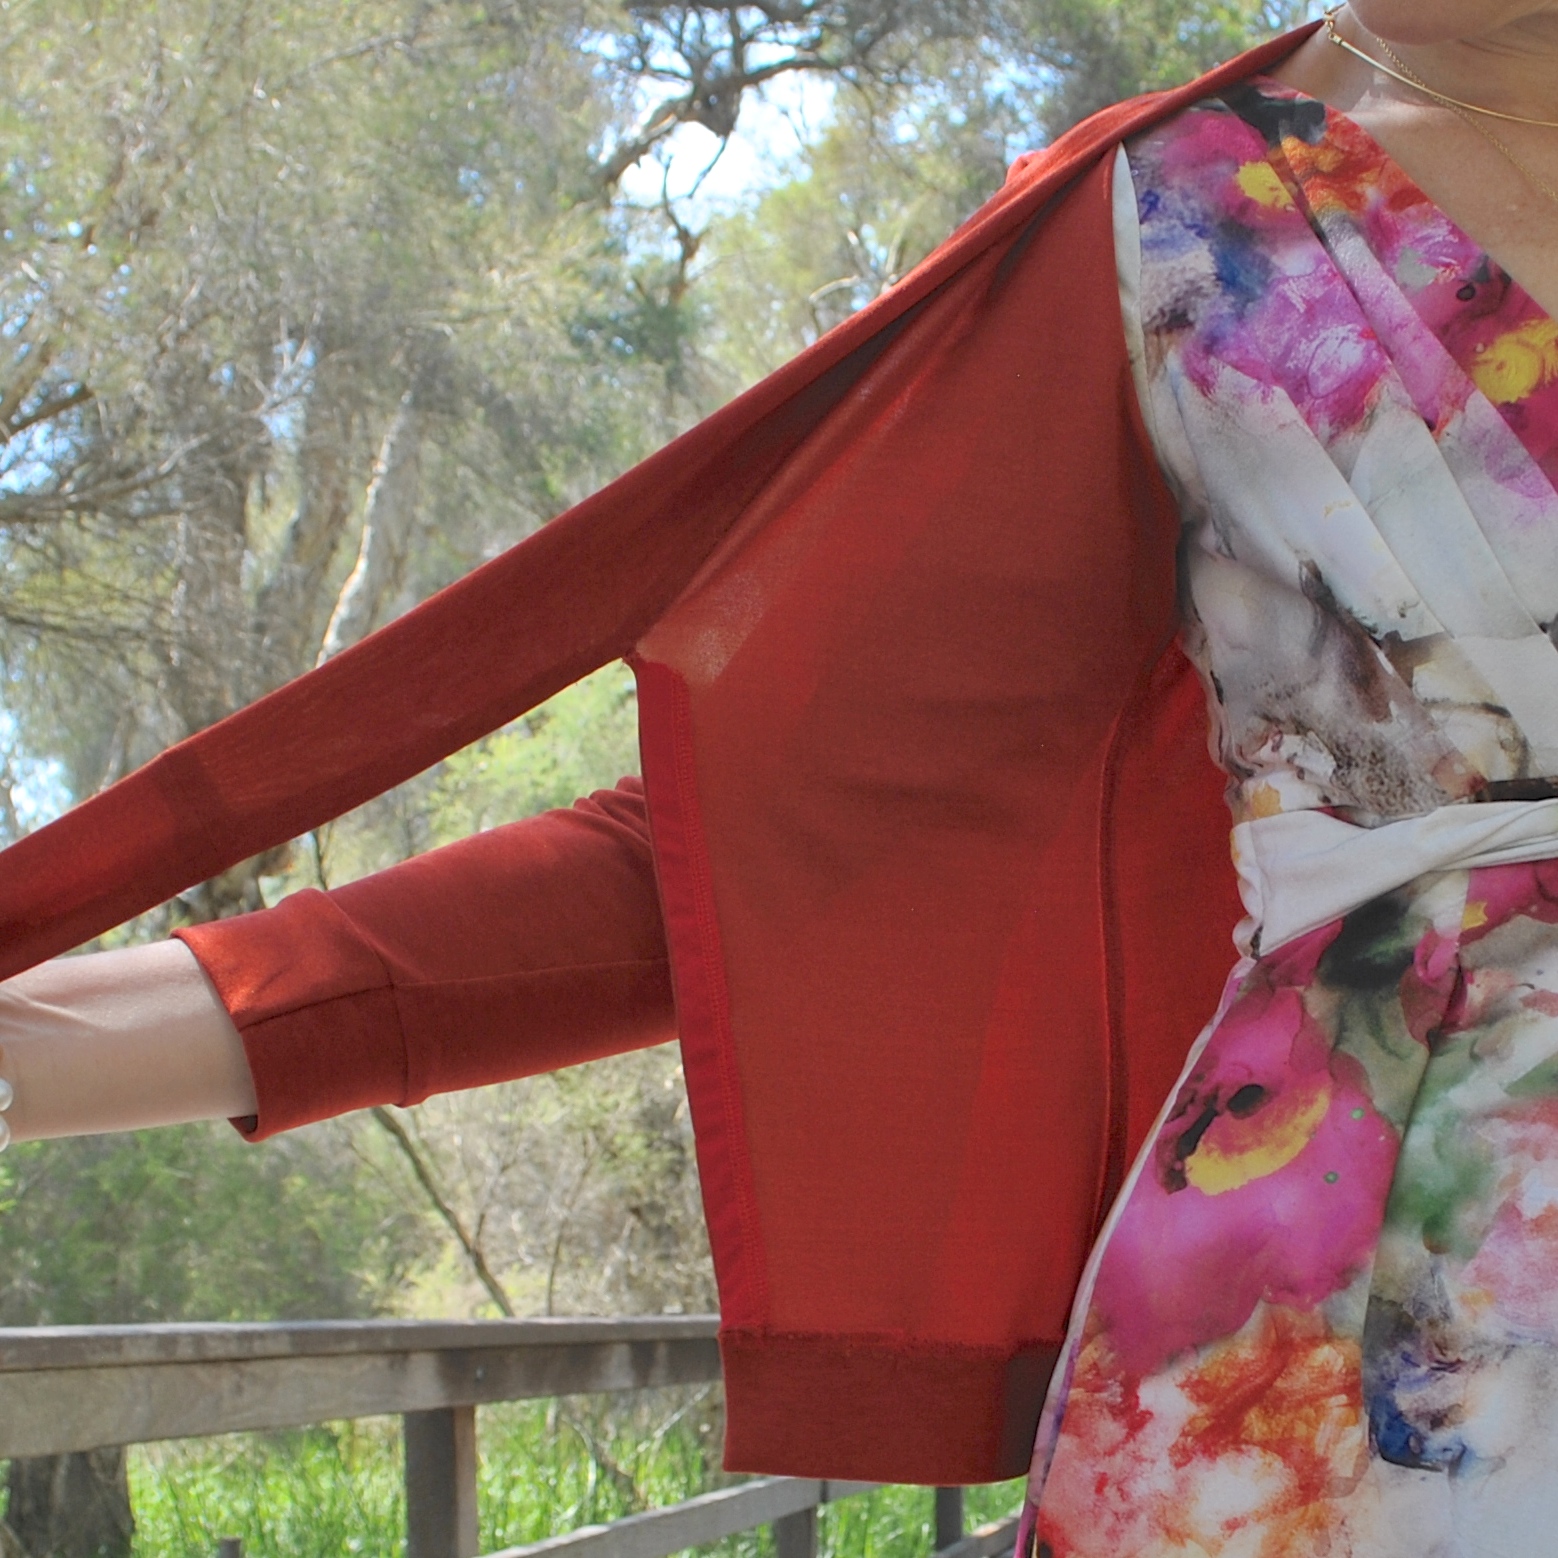
I’m so relieved I had the foresight to make a separate slip to wear under this sheer dress, rather than an attached lining… why? because when I go to hang the clothes on the clothesline I’ve found this to happen…

Hmmm, see; the slip, being sleeveless, does not ride up when you lift your arms up over your head, of course.  Just yet another reason to keep a healthy collection of nice slips and petticoats handy in the lingerie drawer.  I have about four hardworking slips currently in rotation and just lately I’m seriously considering increasing the population, particularly since some of the oldies are getting… well, old.  Maybe even double that number wouldn’t be too many.  Slips, seems such a quaint and old-fashioned thing, yeah? the kind of ladylike frippery my grandmother loved and would buy for my birthdays etc and that seemed unnecessary and even rather fuddyduddy-ish to my much younger, more foolish self.  Now I am wearing them.  Am I getting old?  Hmmm, no need to answer that!

arms in regular position, all is well

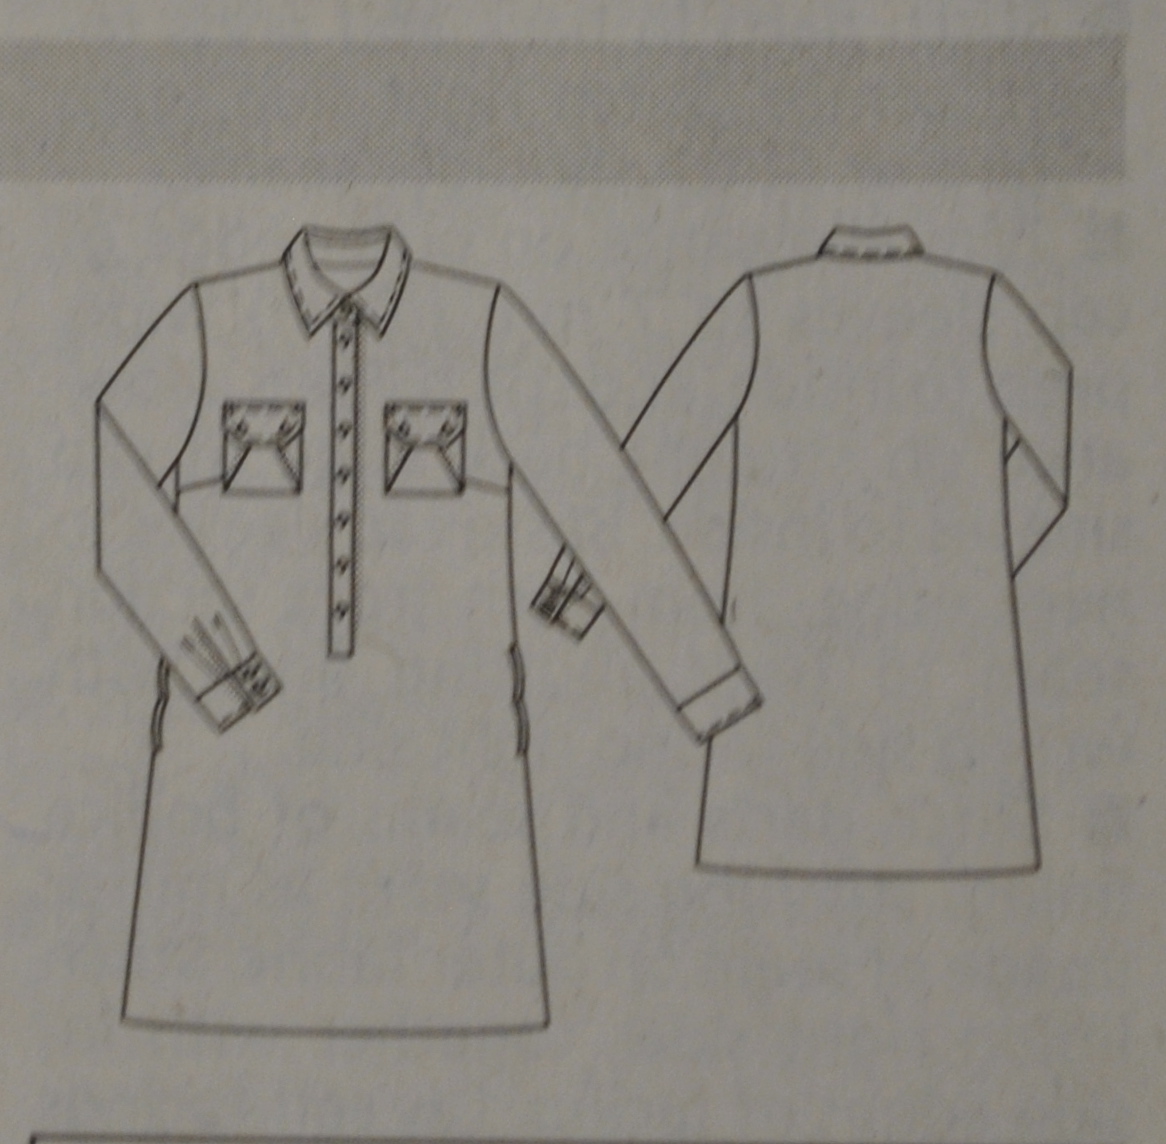
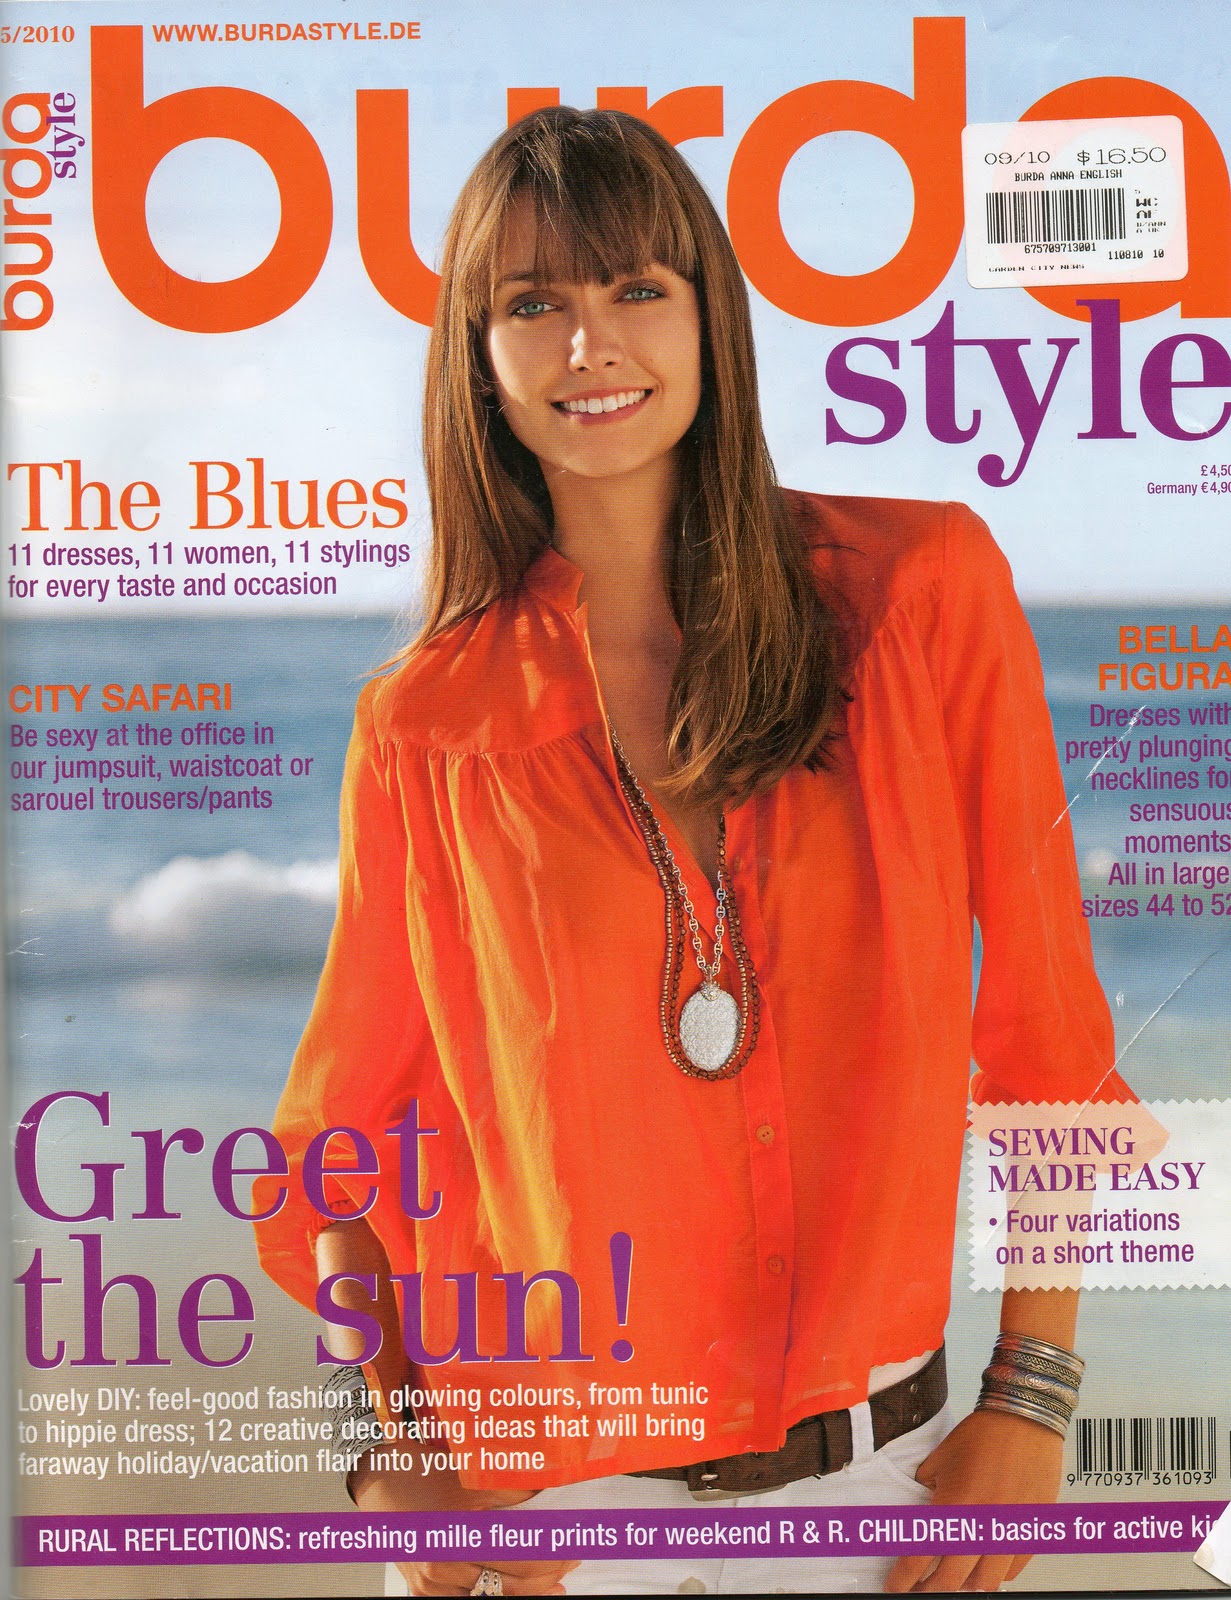
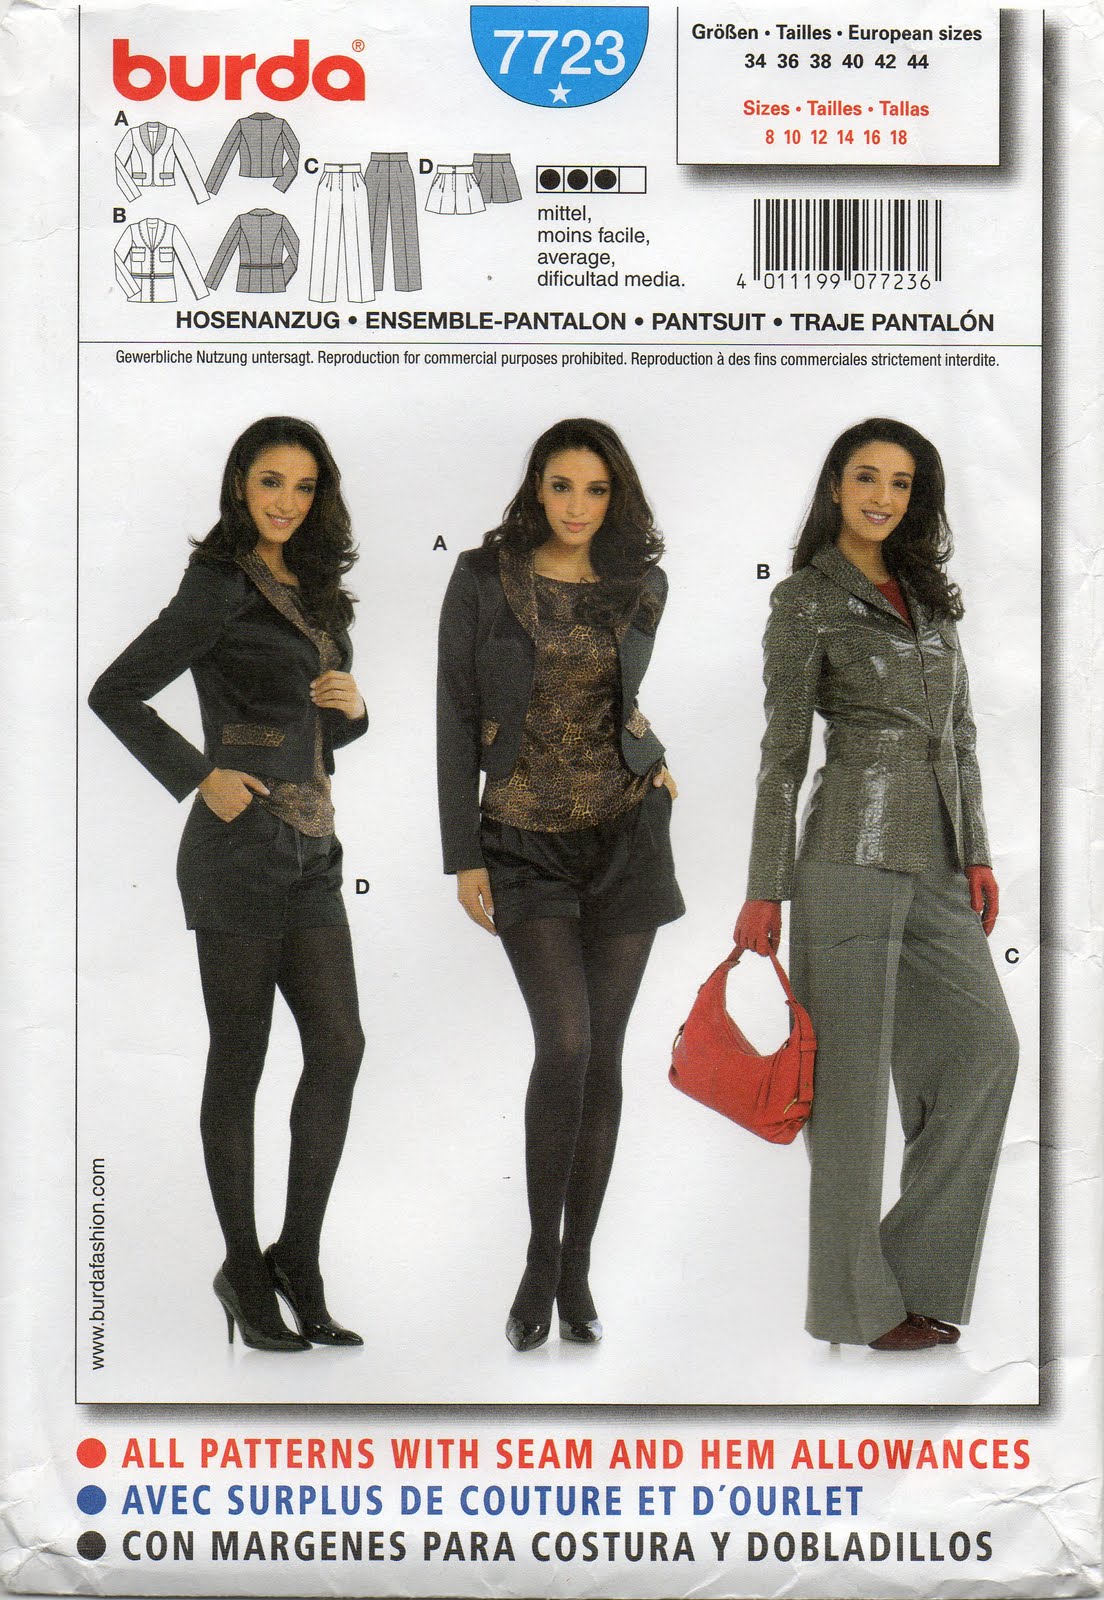
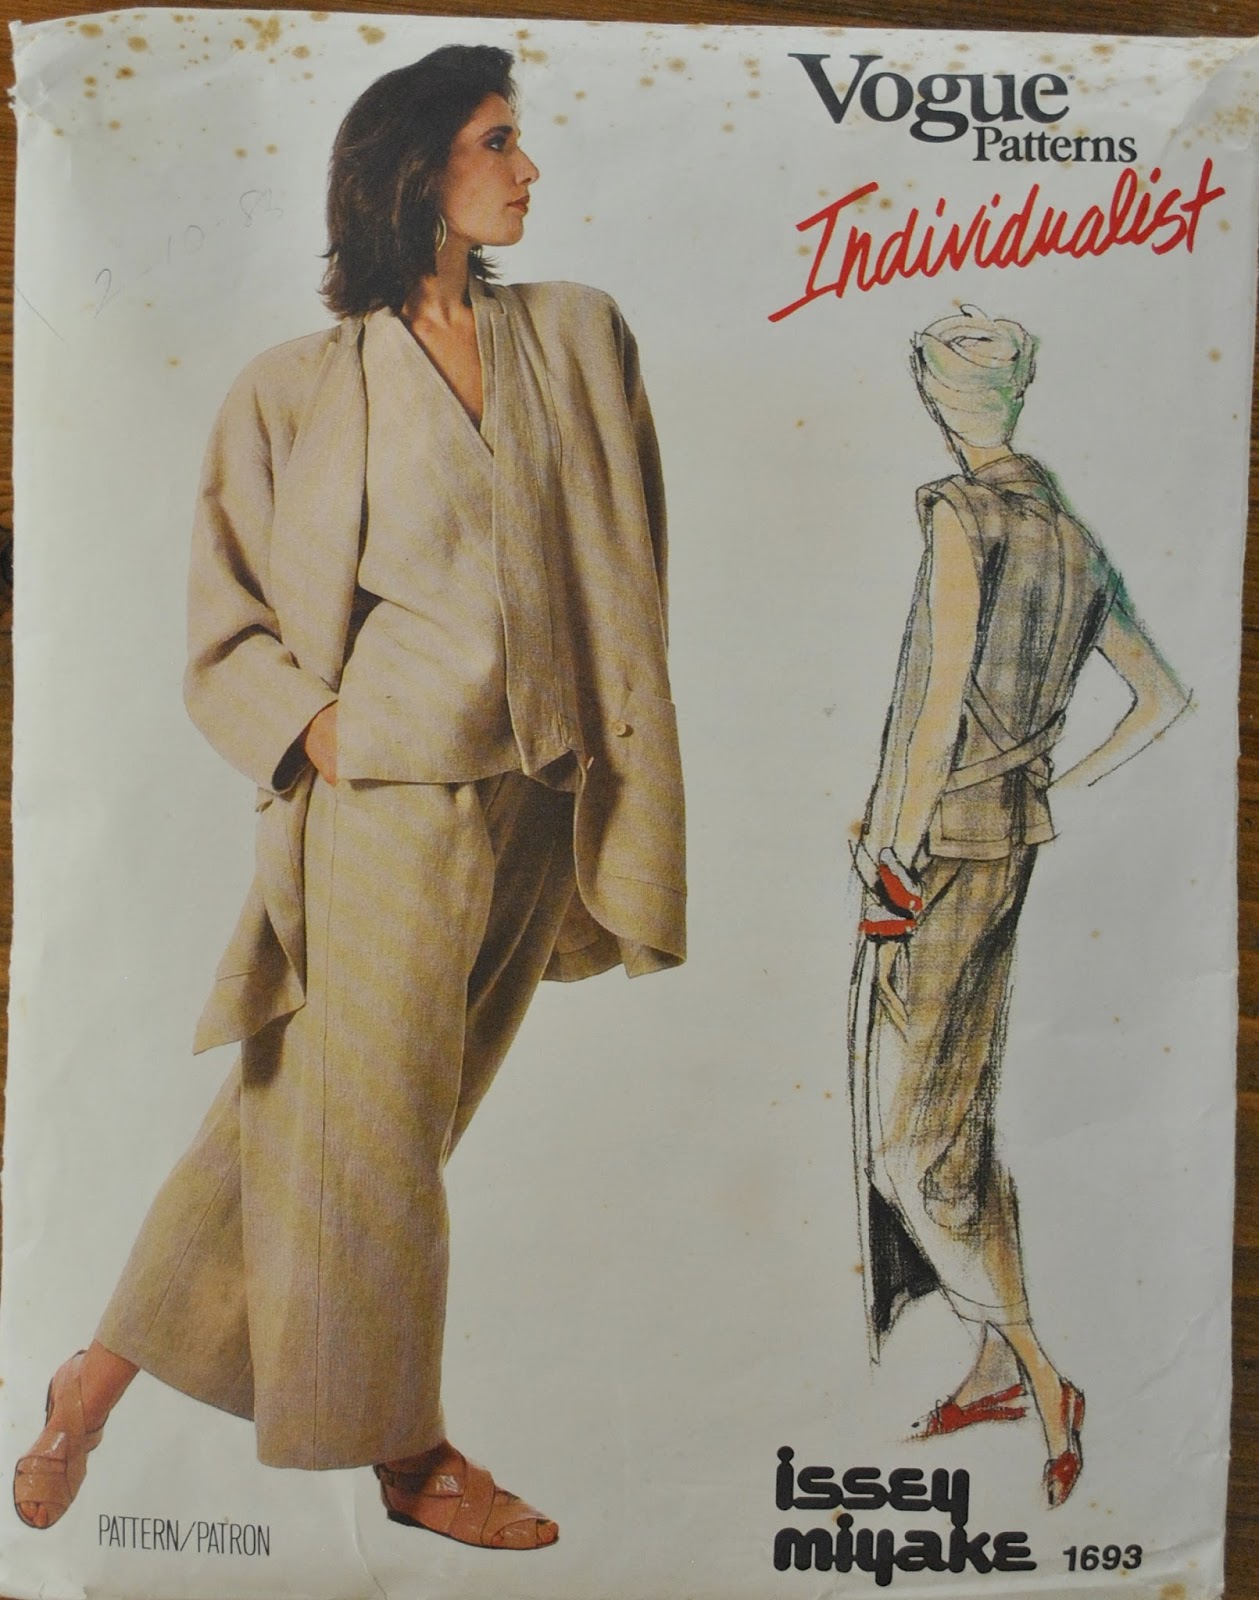
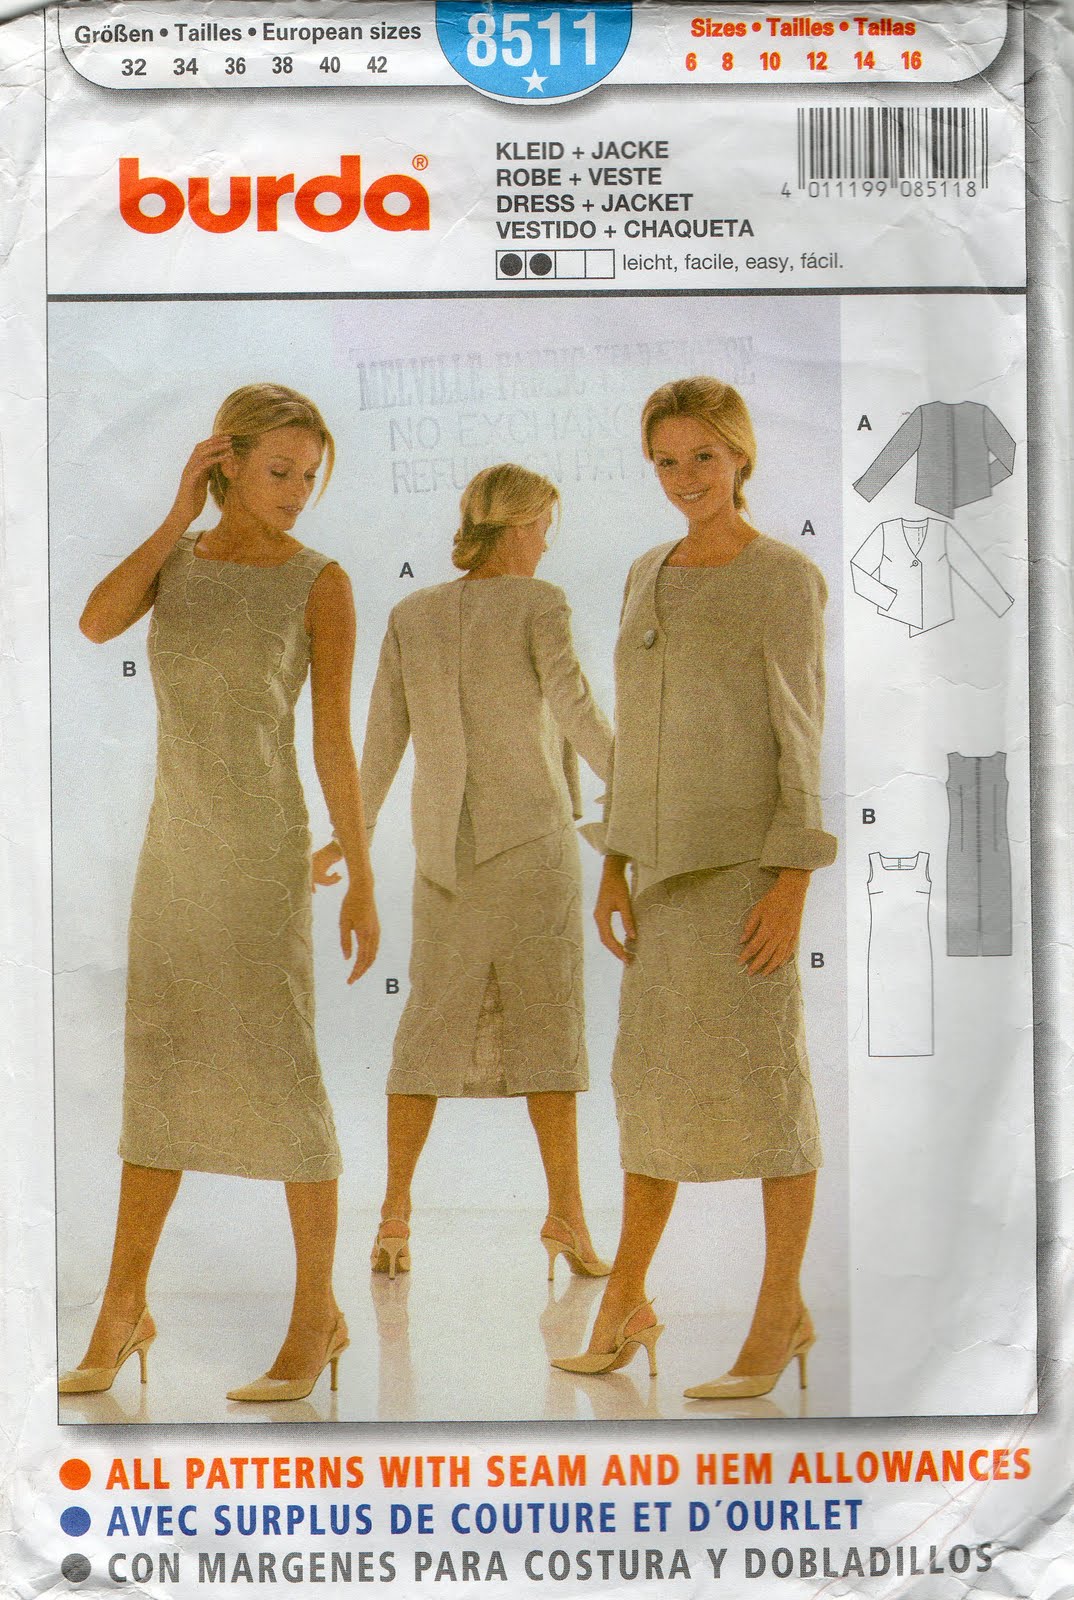
Pattern: Burda 05/2010;111, a shirtdress pattern I’ve used twice before, a plaid shirtdress and a lace version; with sleeves adapted from another Burda pattern, 05-2010-101.  I’ve used this same sleeve pattern also twice before on different, other Burda patterns; my black Pirate shirt and my pale blue silk shirt.  This is that same sleeve but cut shorter and with a shorter cuff to compensate for being a shorter sleeve.
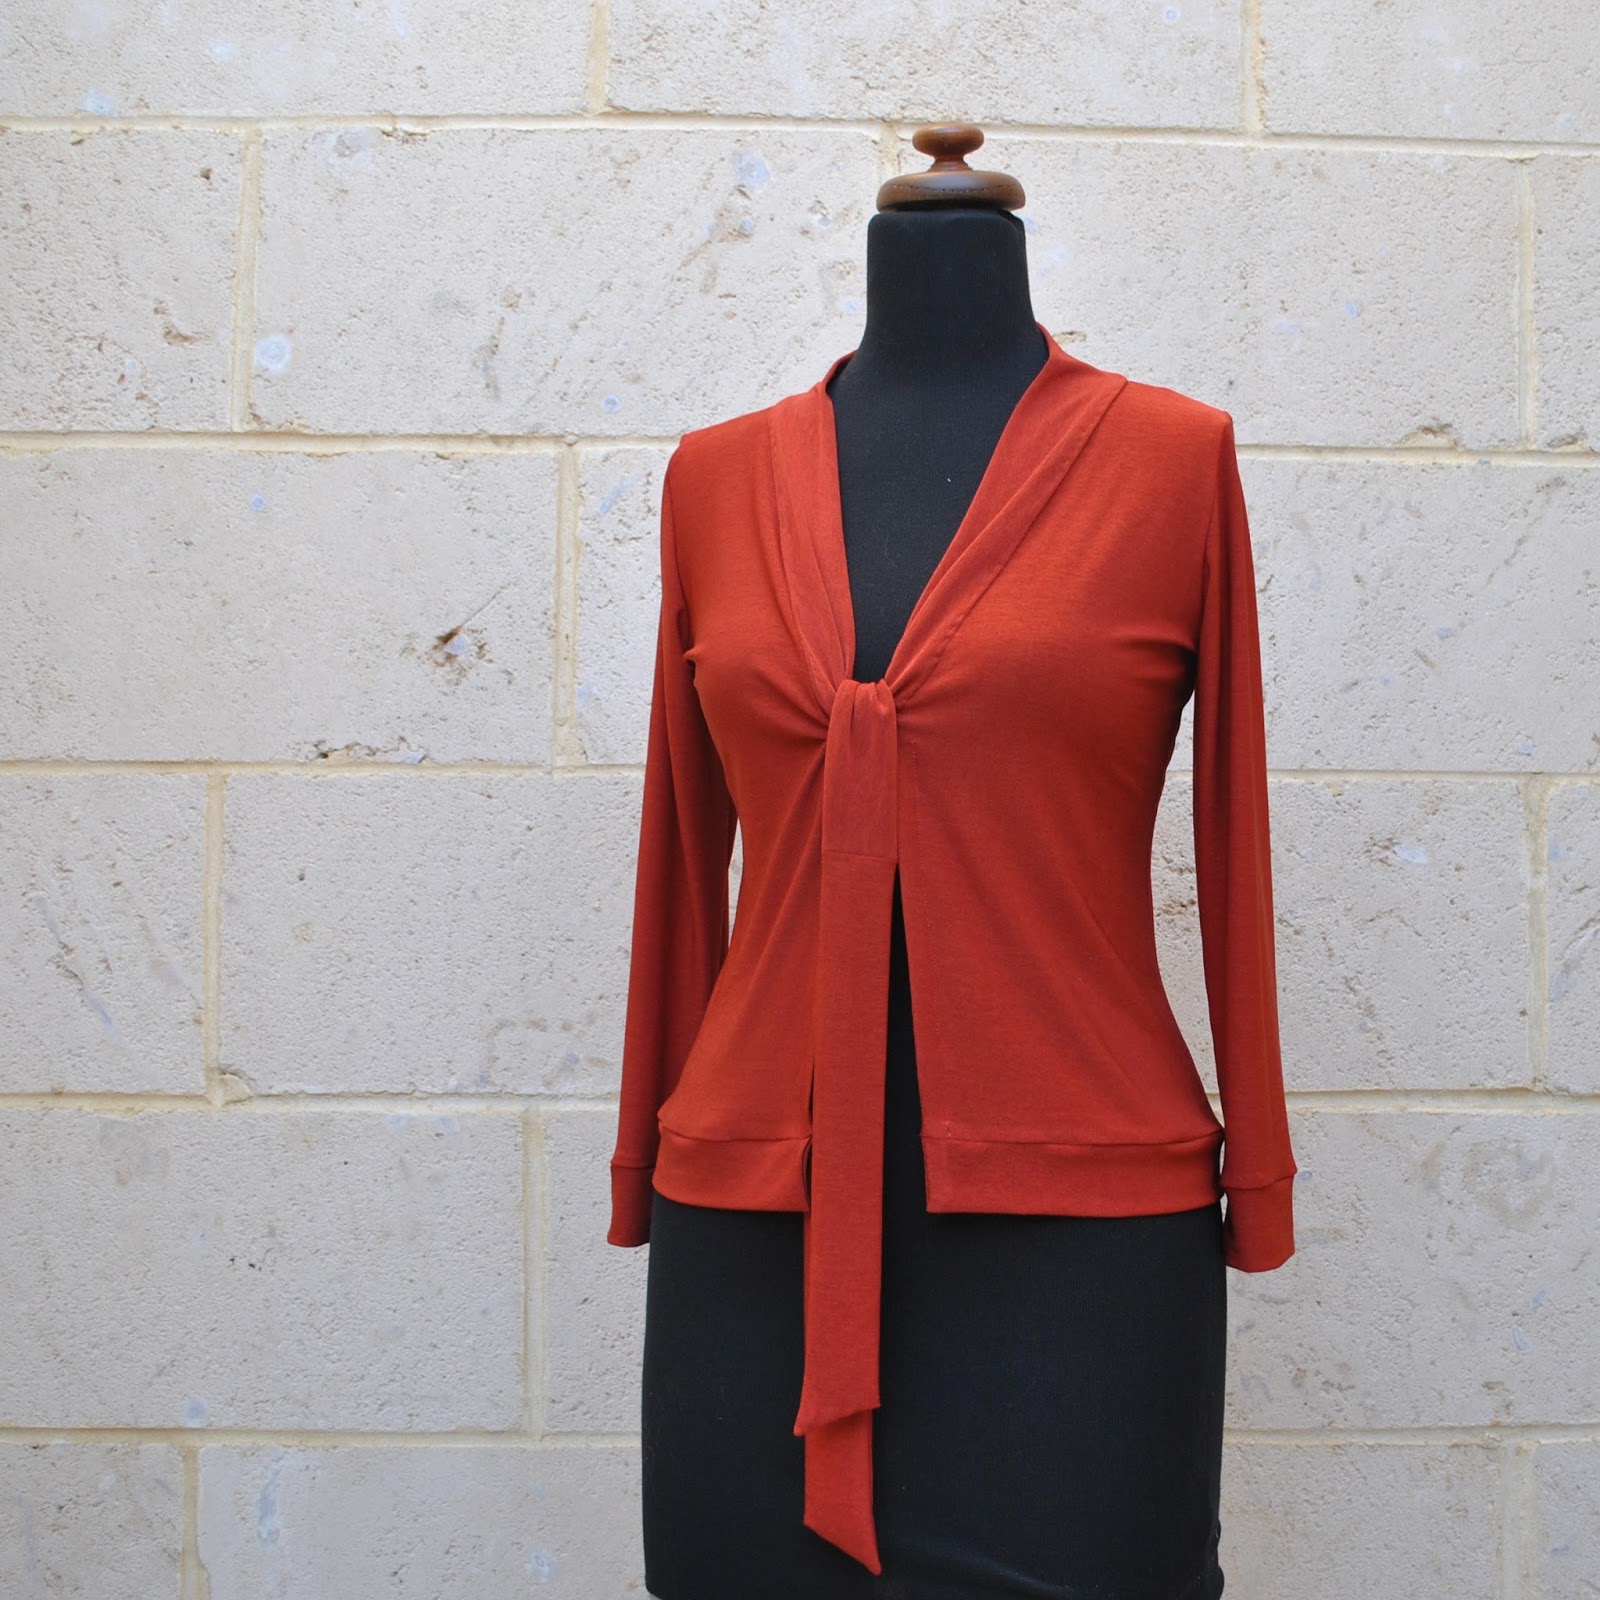
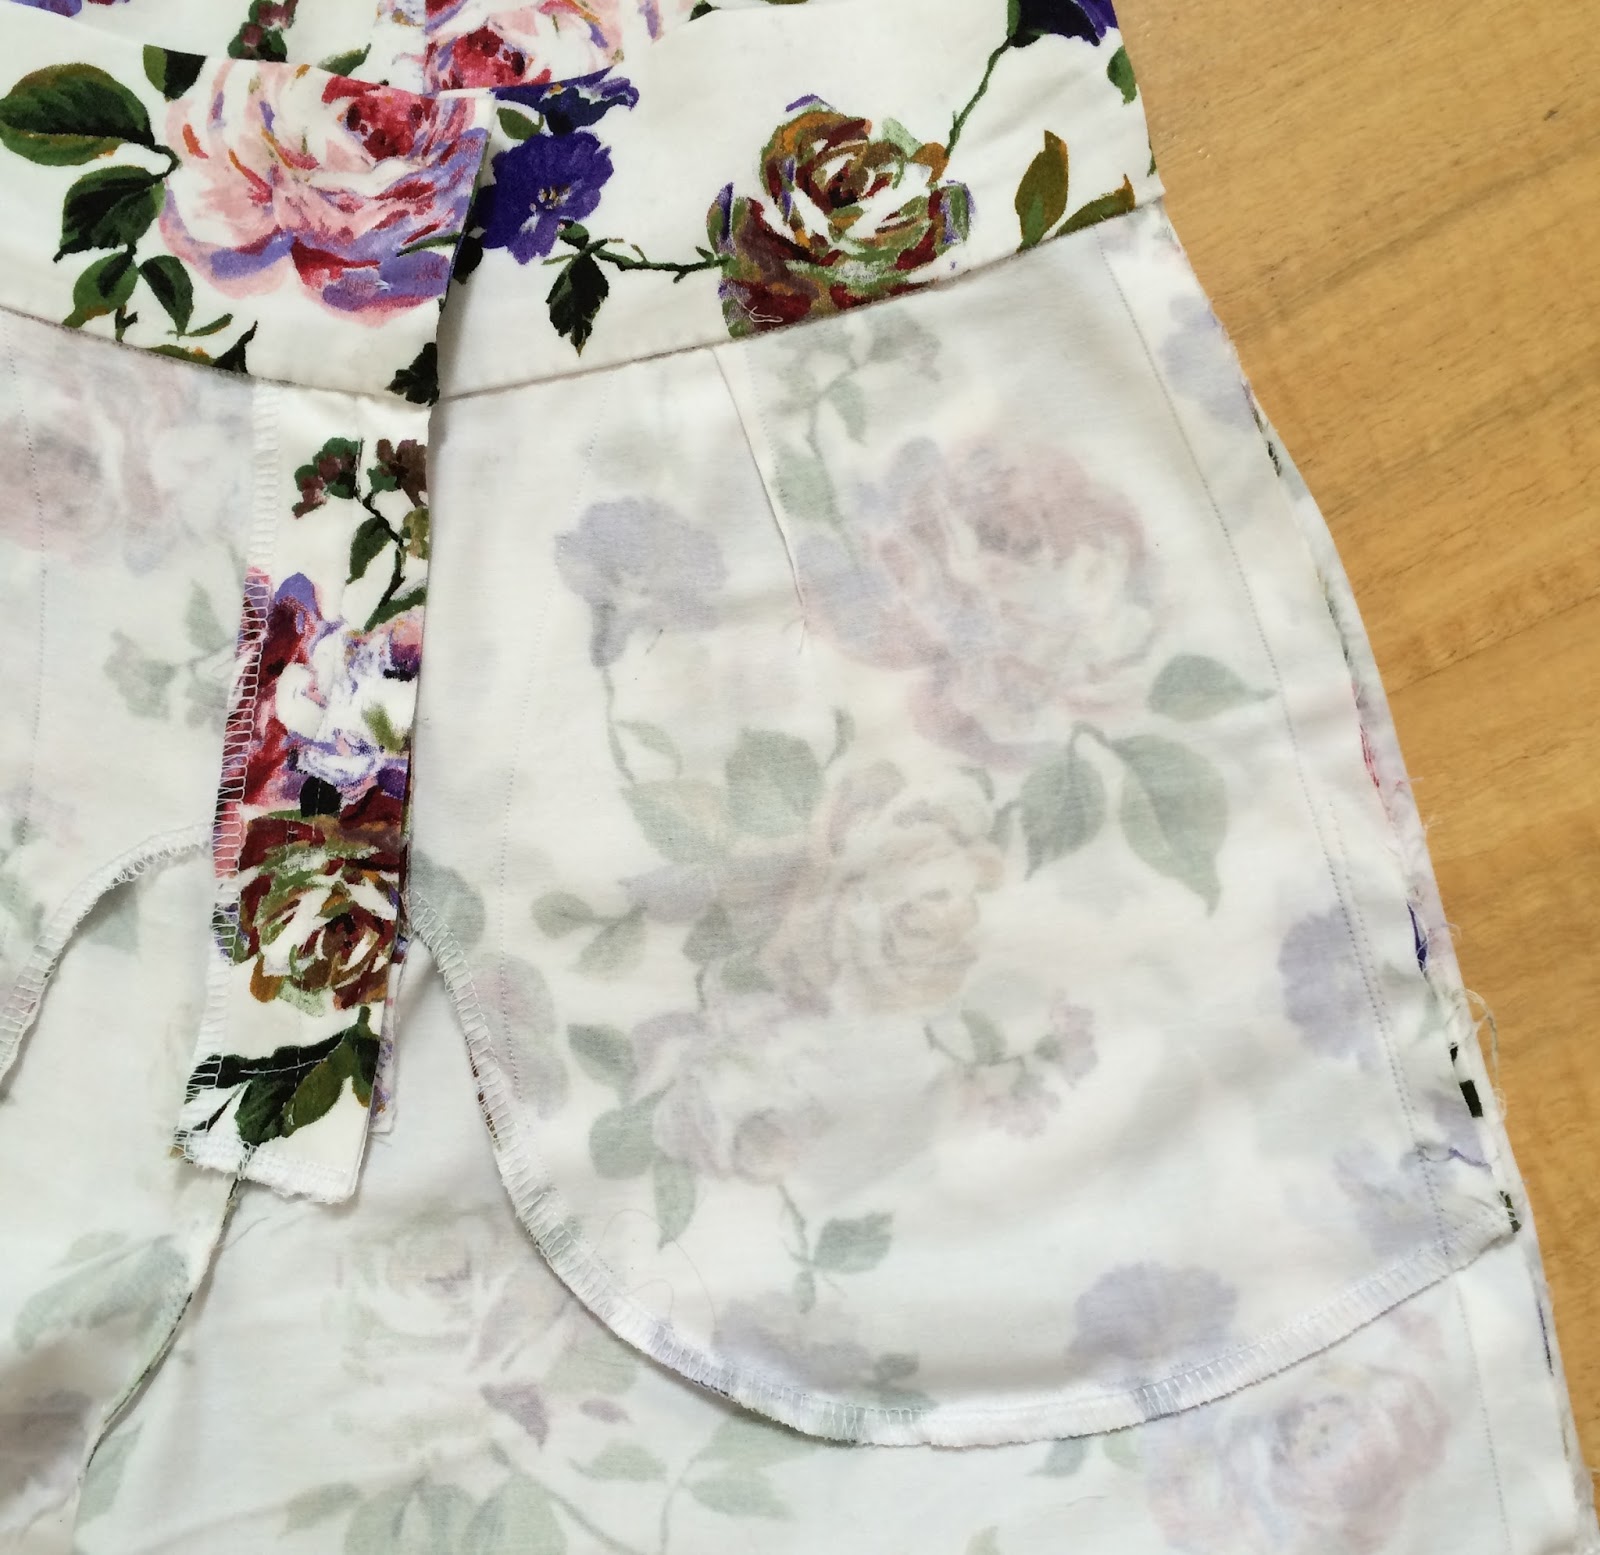
I chose to leave off the pockets, and the collar and just have the collar stand, I felt this lends a slightly more feminine look to a shirt, goes better with all that girly pink floral explosion that’s already going on in there.

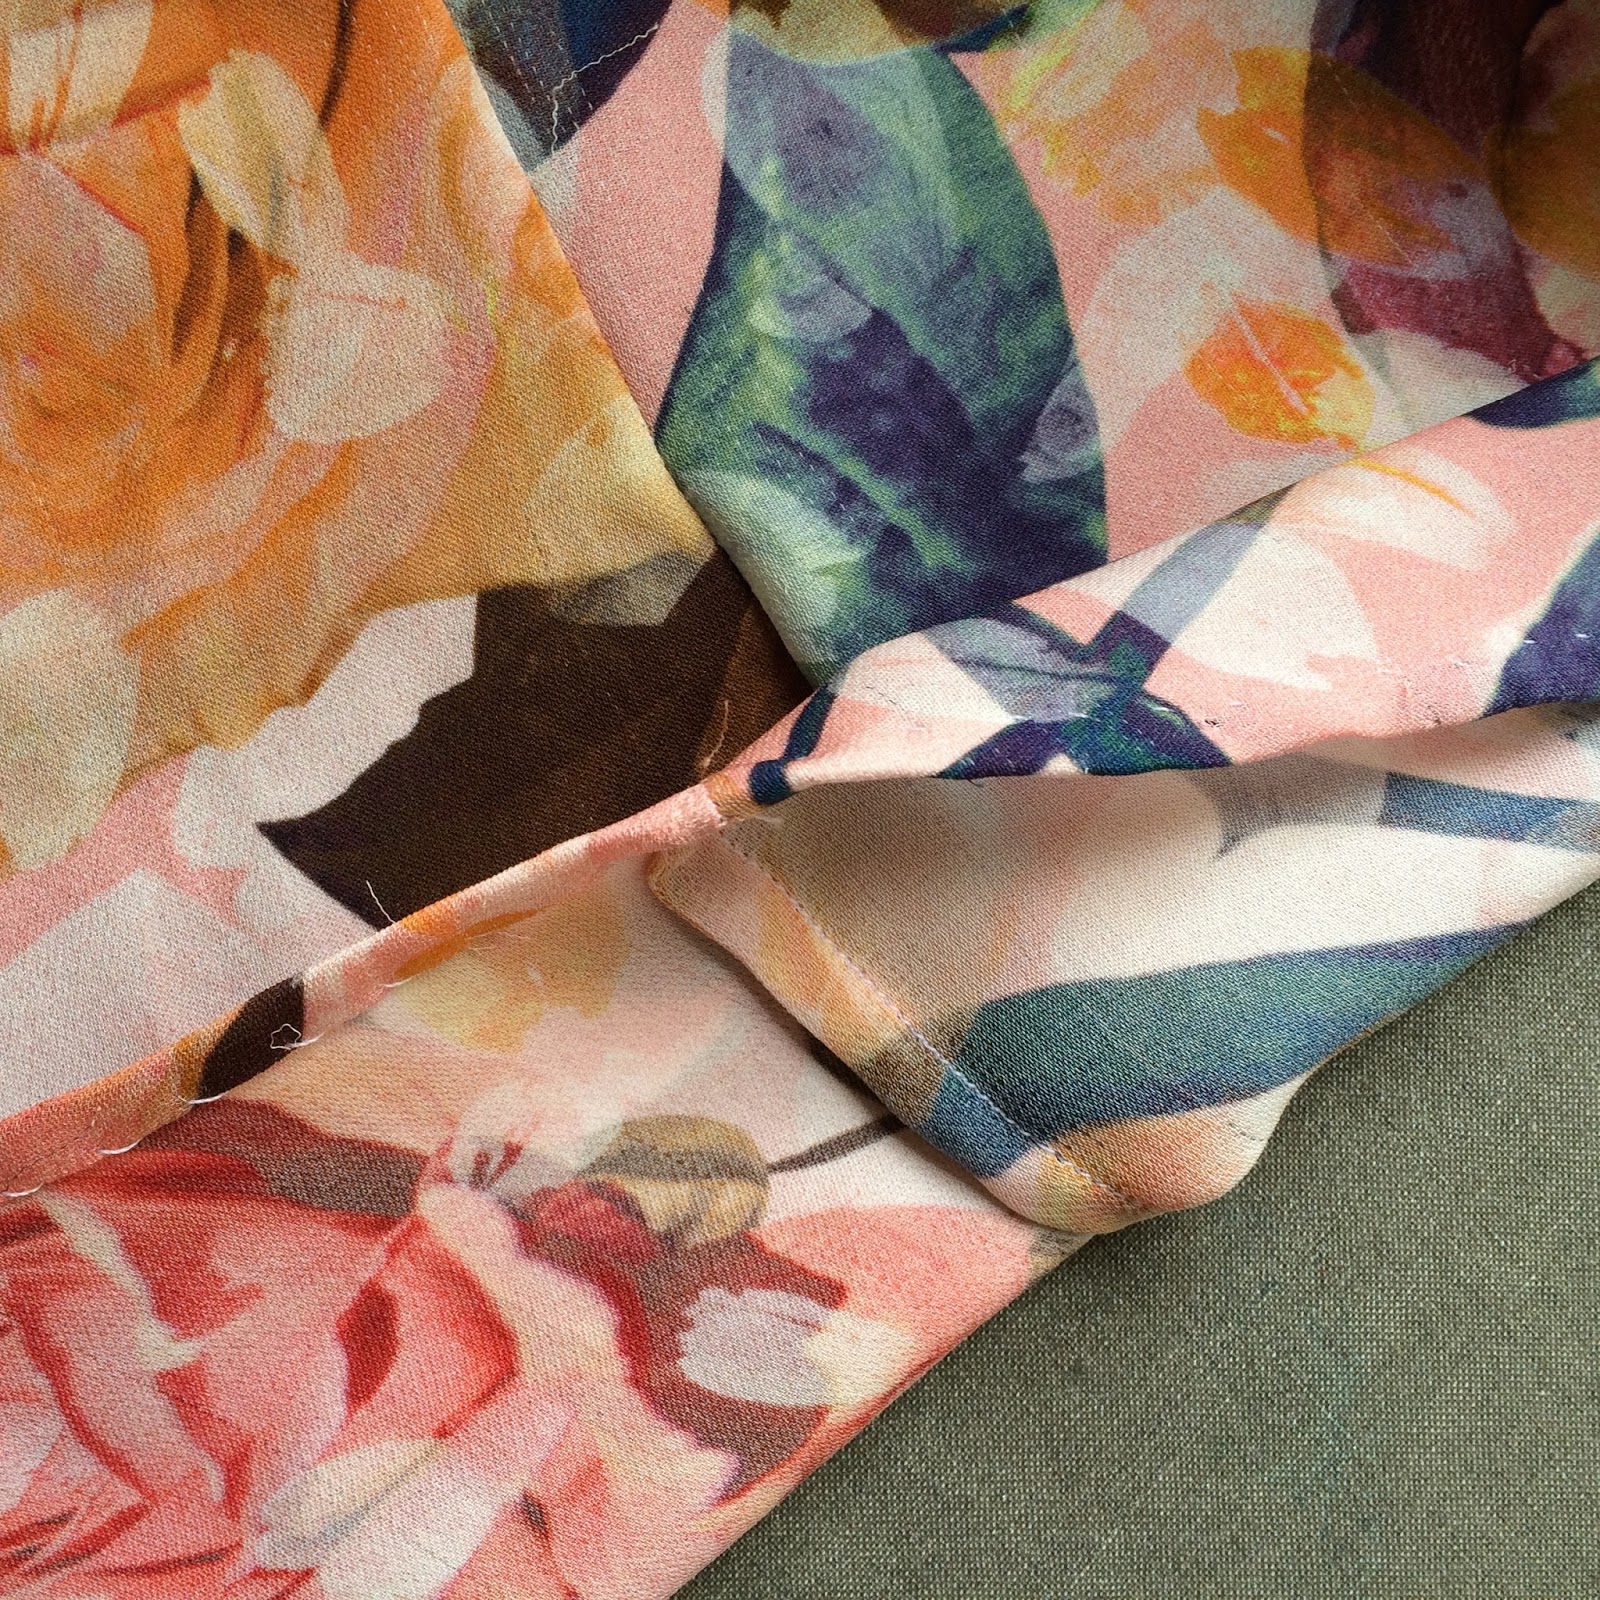
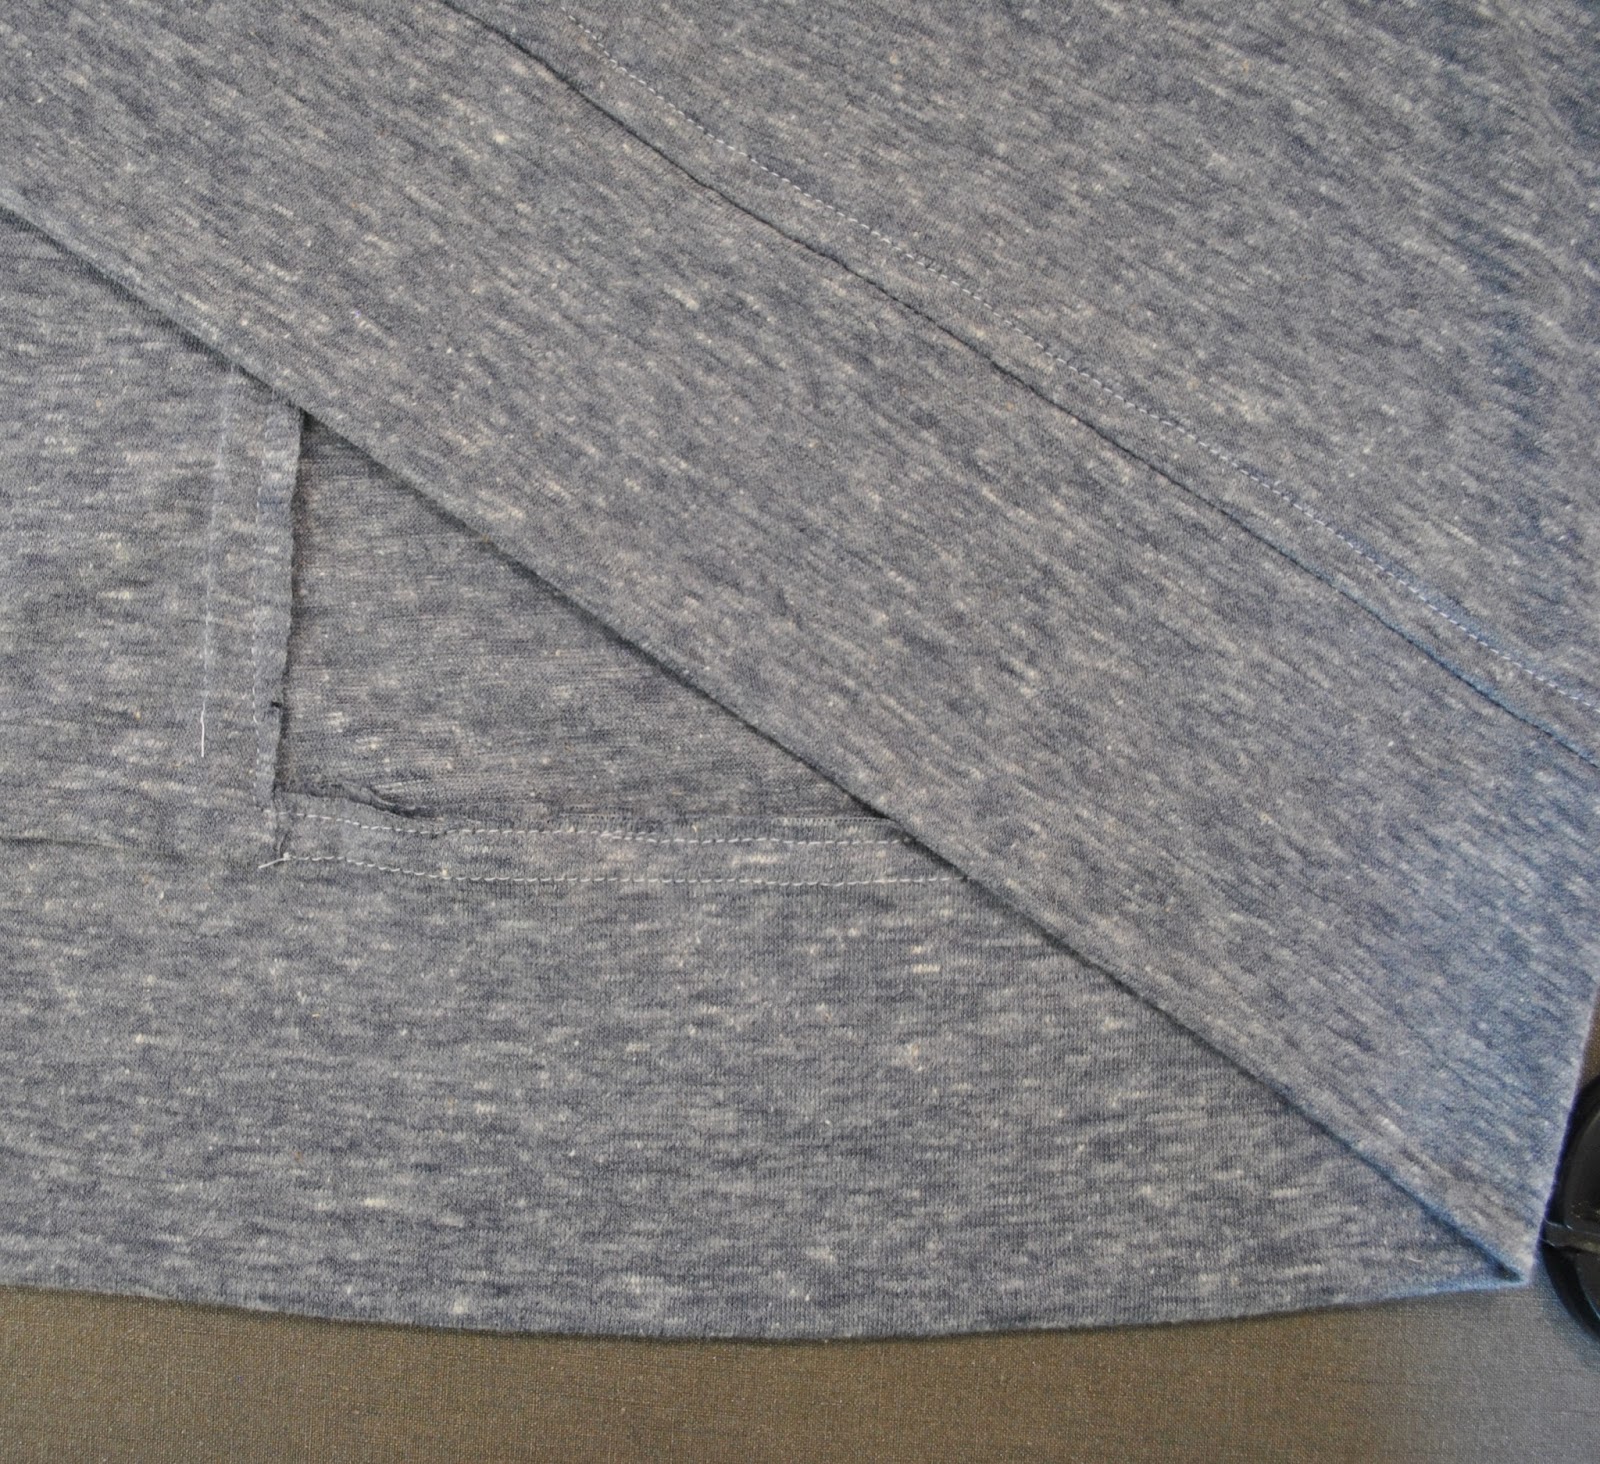
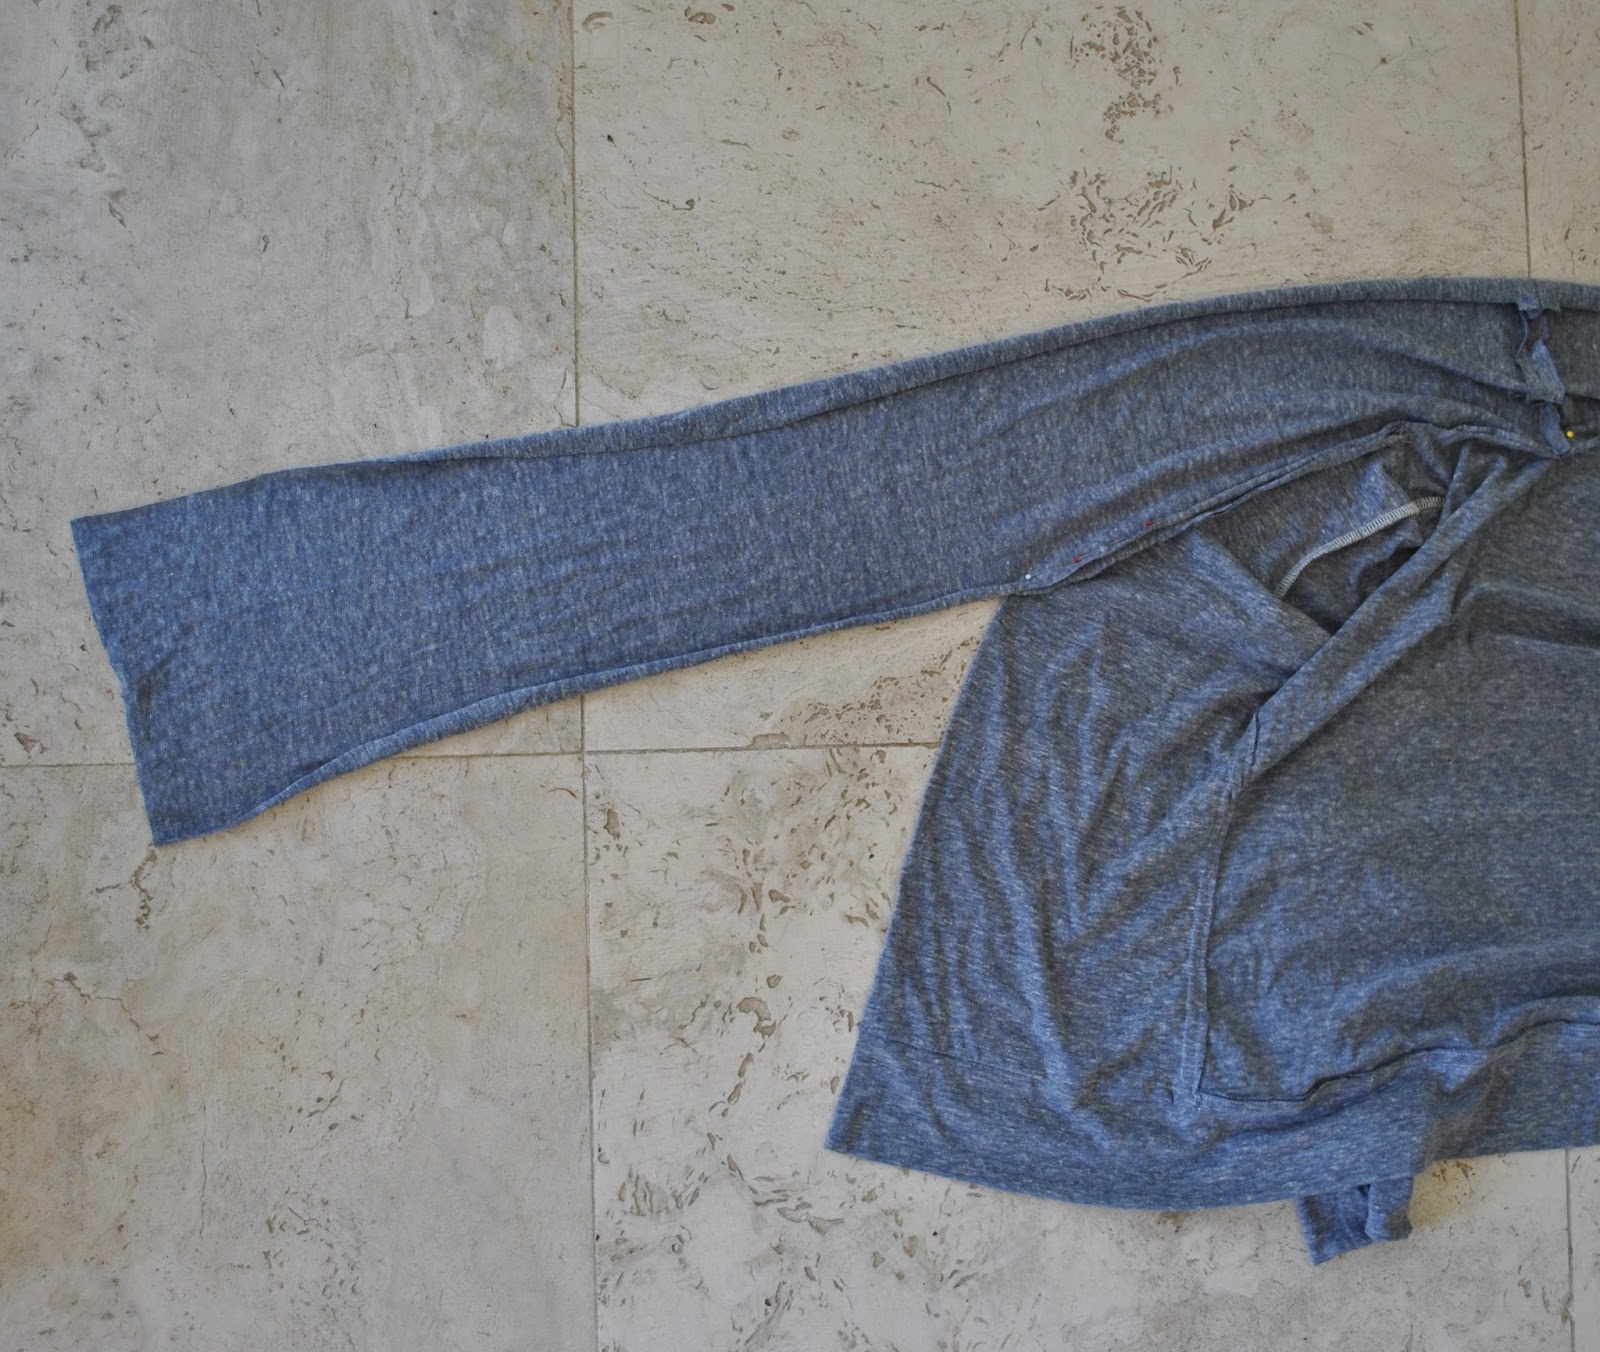
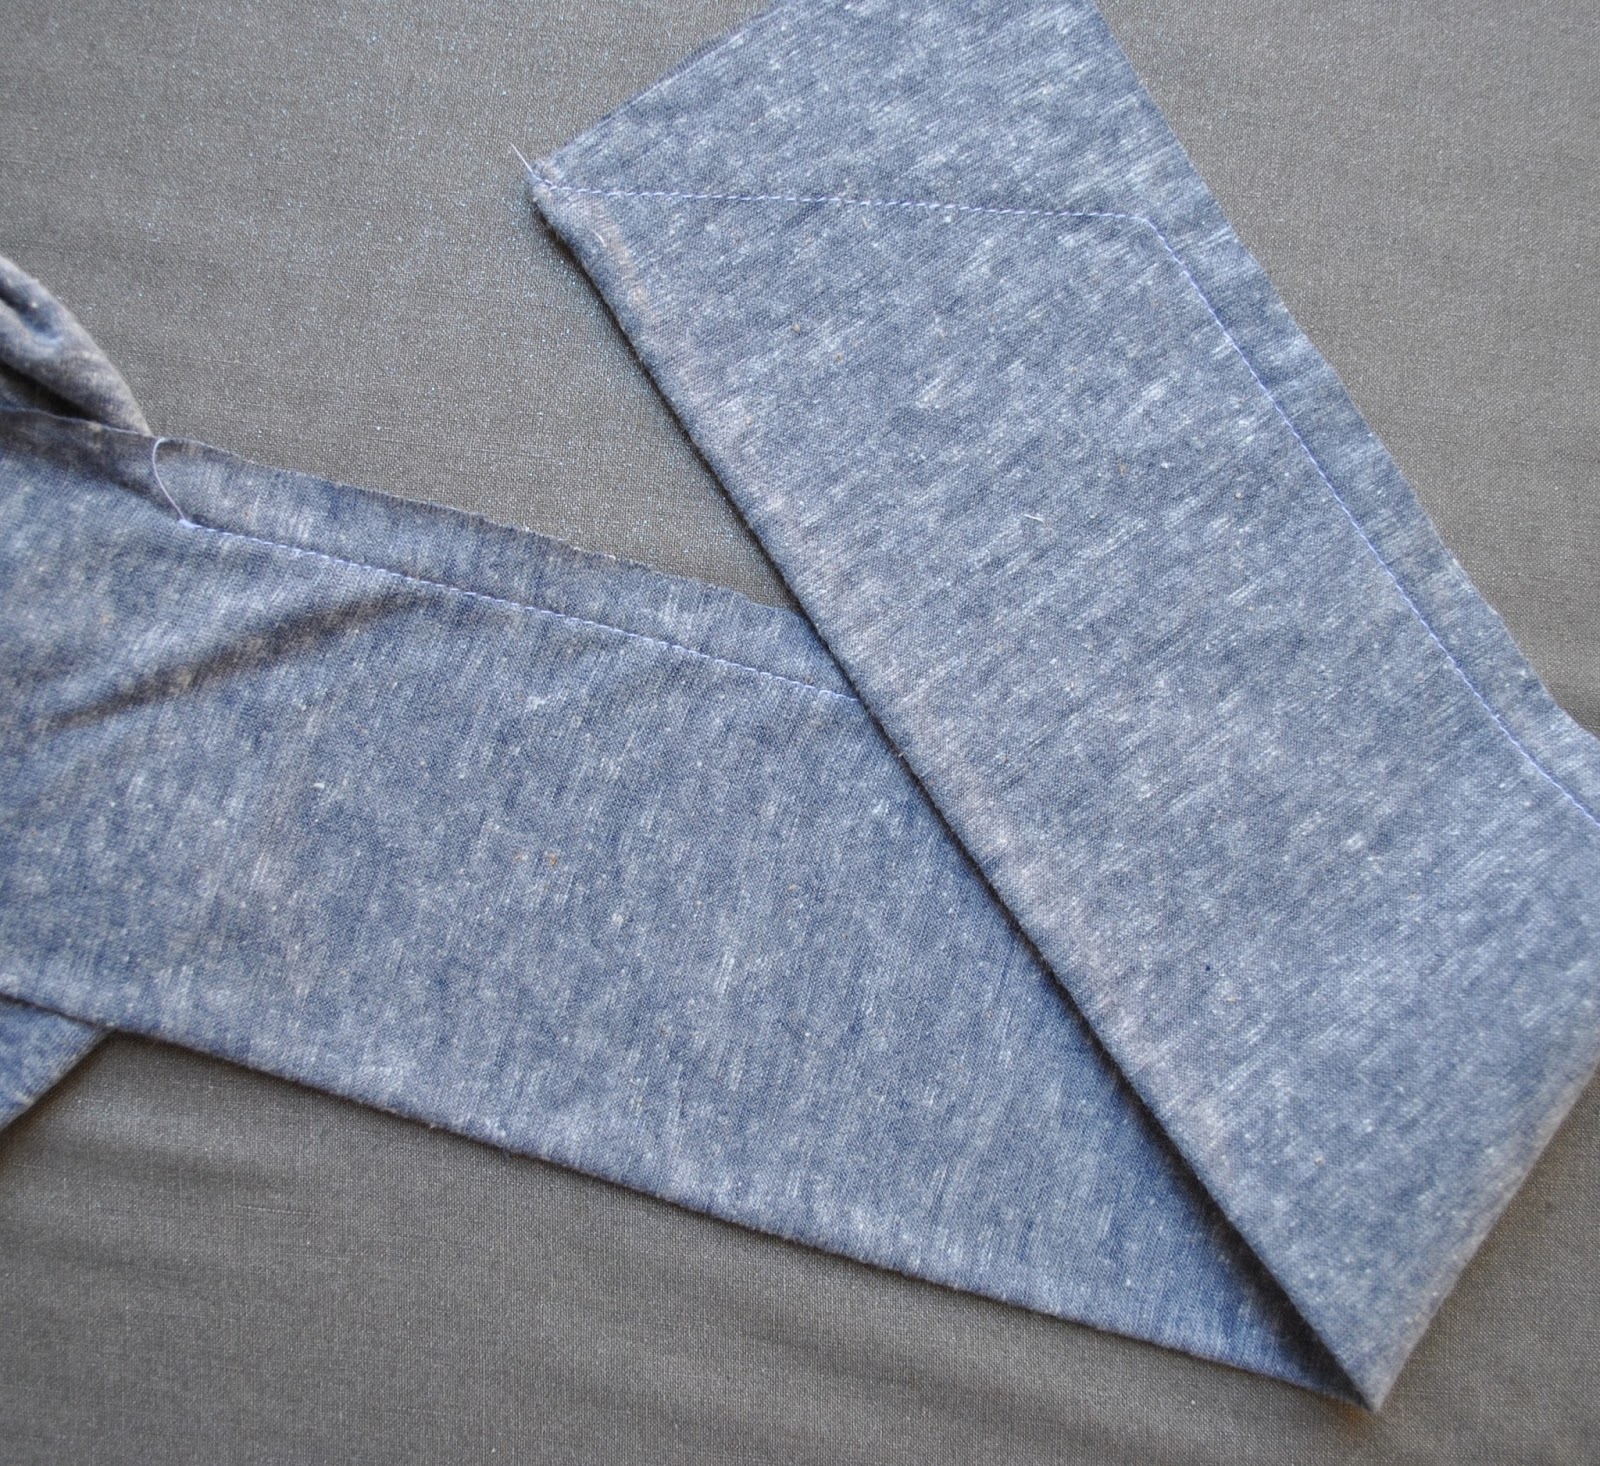
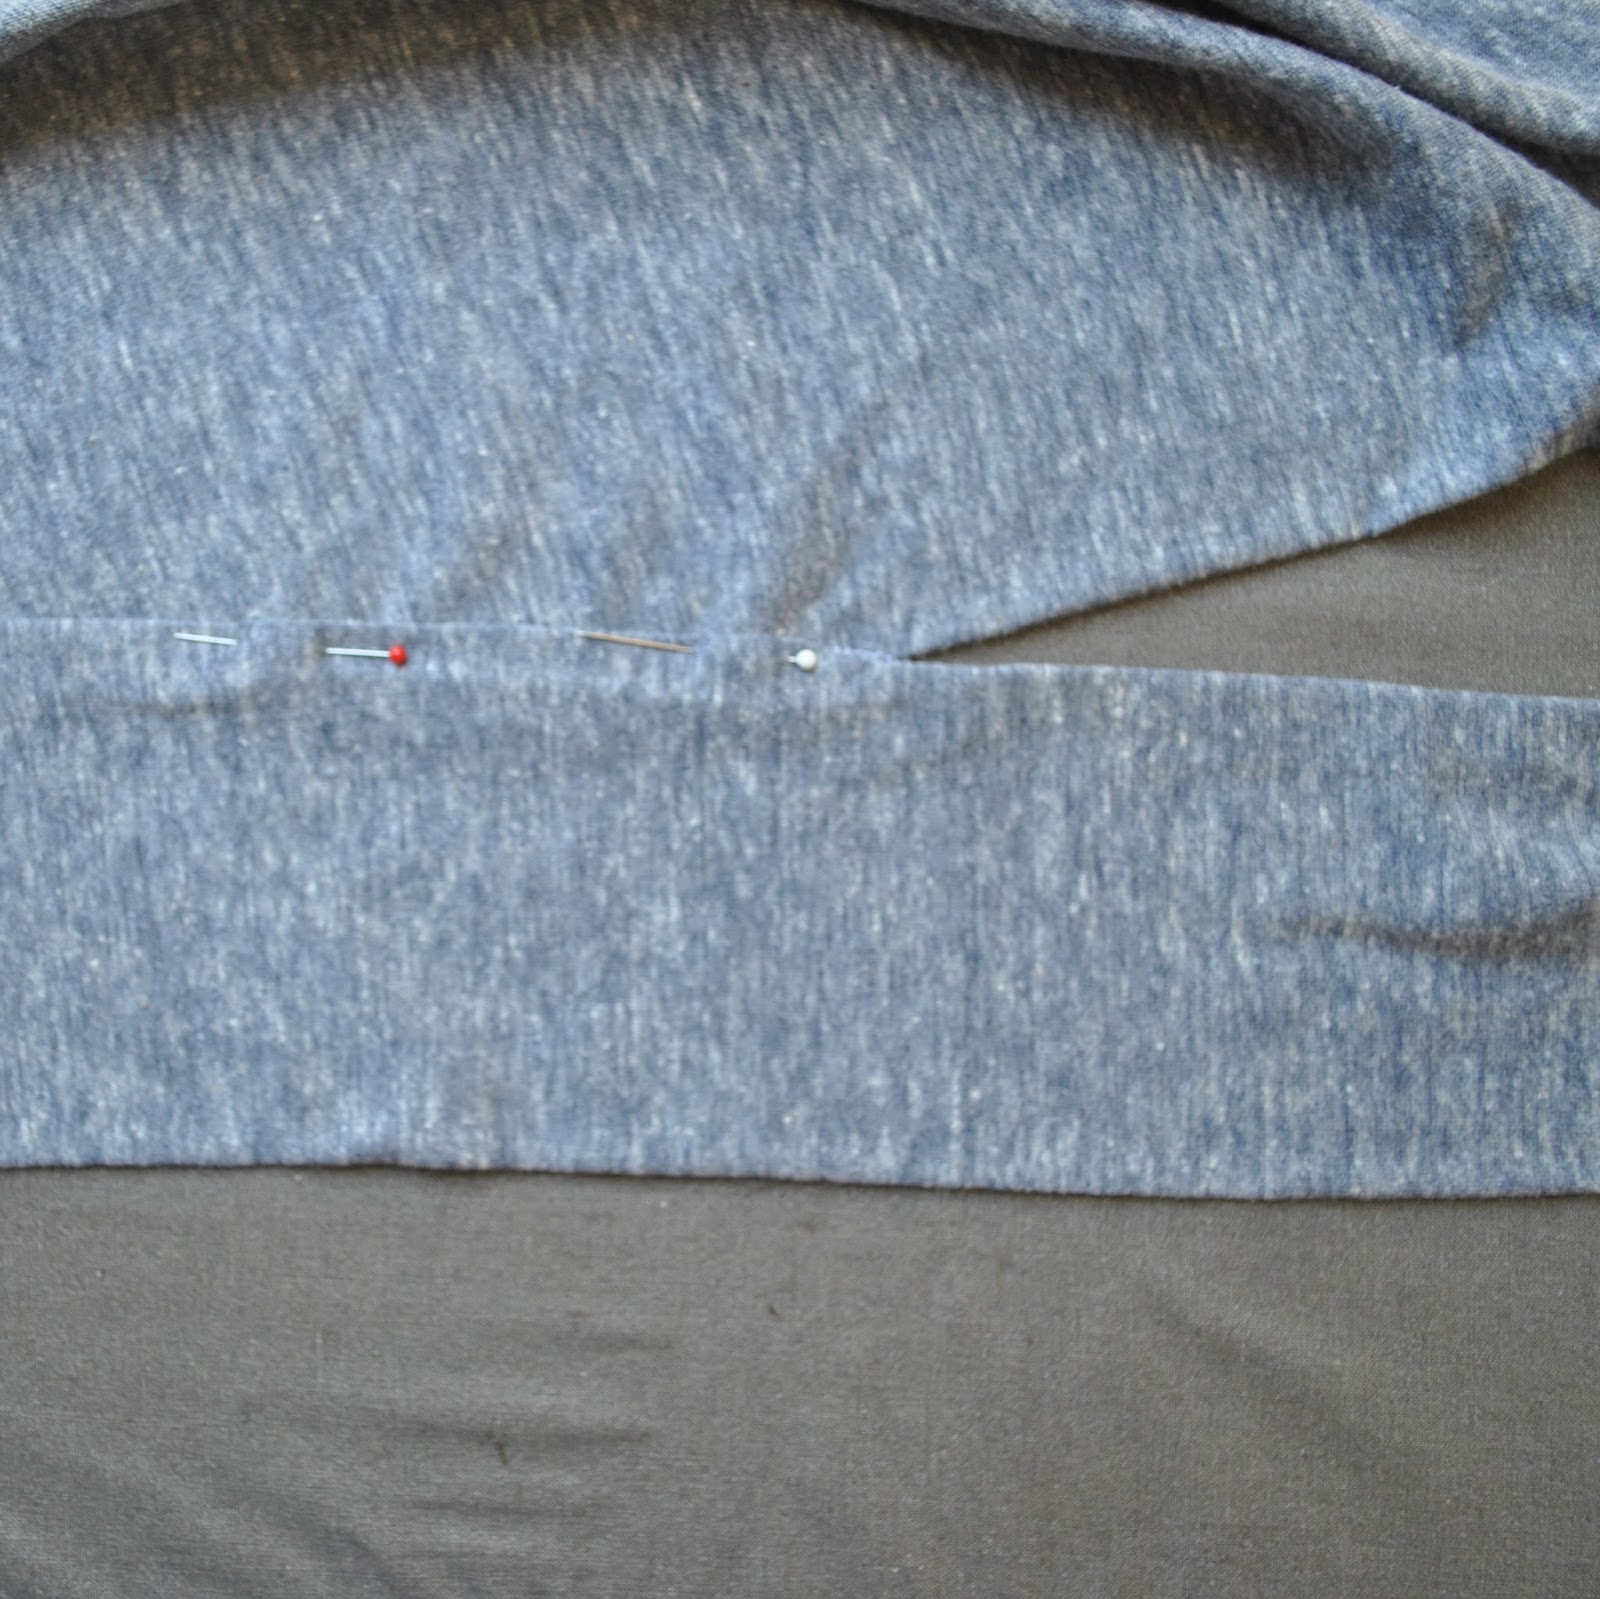
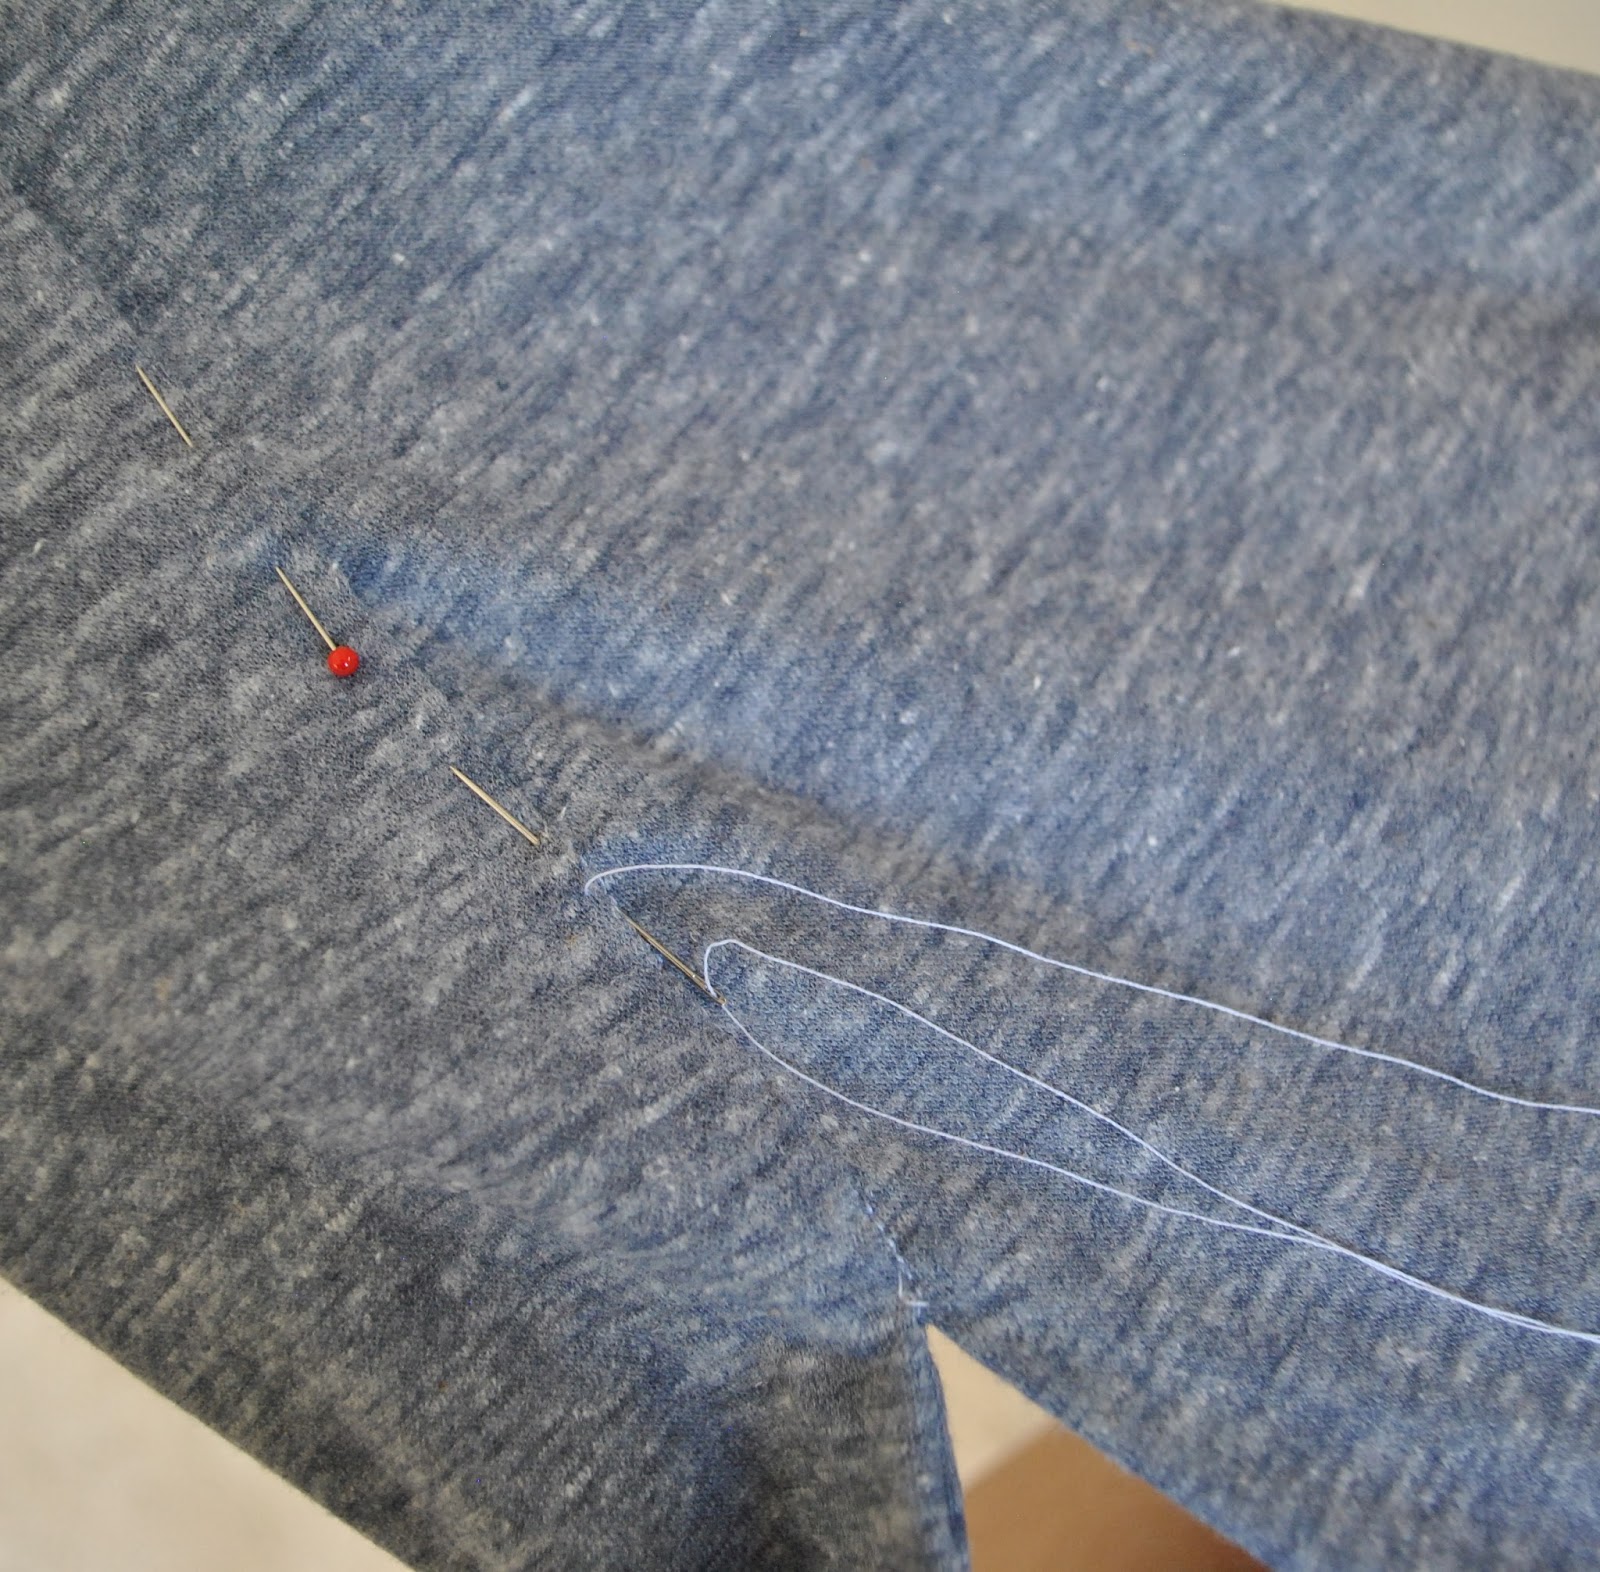
Construction notes: I went with all French seams throughout of course, silk georgette kinda demands those sorts of standards! being sheer and all high quality and all.  Only the armscye seams I overlocked the raw edges to finish.  In a shirting cotton or linen I would flat fell the armscye seam like so, but silk georgette just does not lend itself to that level of tailoring.
Collar, button placket and cuff facing were hand fell-stitched to secure them; I wished for no top-stitching to sully that clean-finished, pristine crepe!  In my opinion, topstitching makes a shirt look a lot more casual and maybe a little masculine? whereas absence of top-stitching keeps a thing looking polished and, somehow feminine.  I know, that’s kinda irrational and I cannot logically explain why I have that masculine/feminine impressions of topstitching, but there it is.
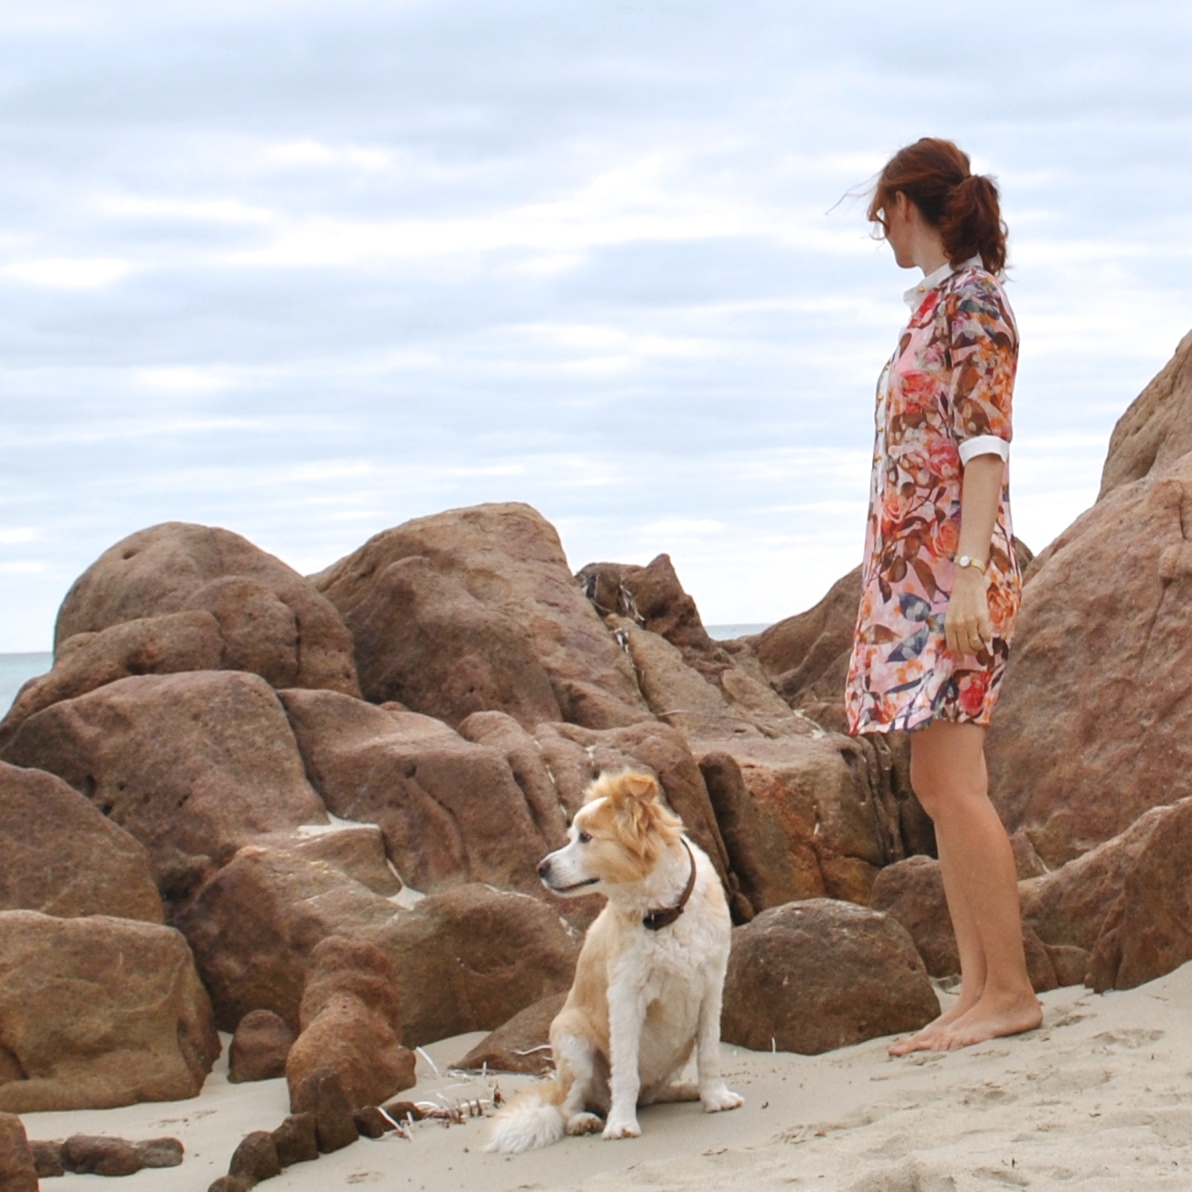
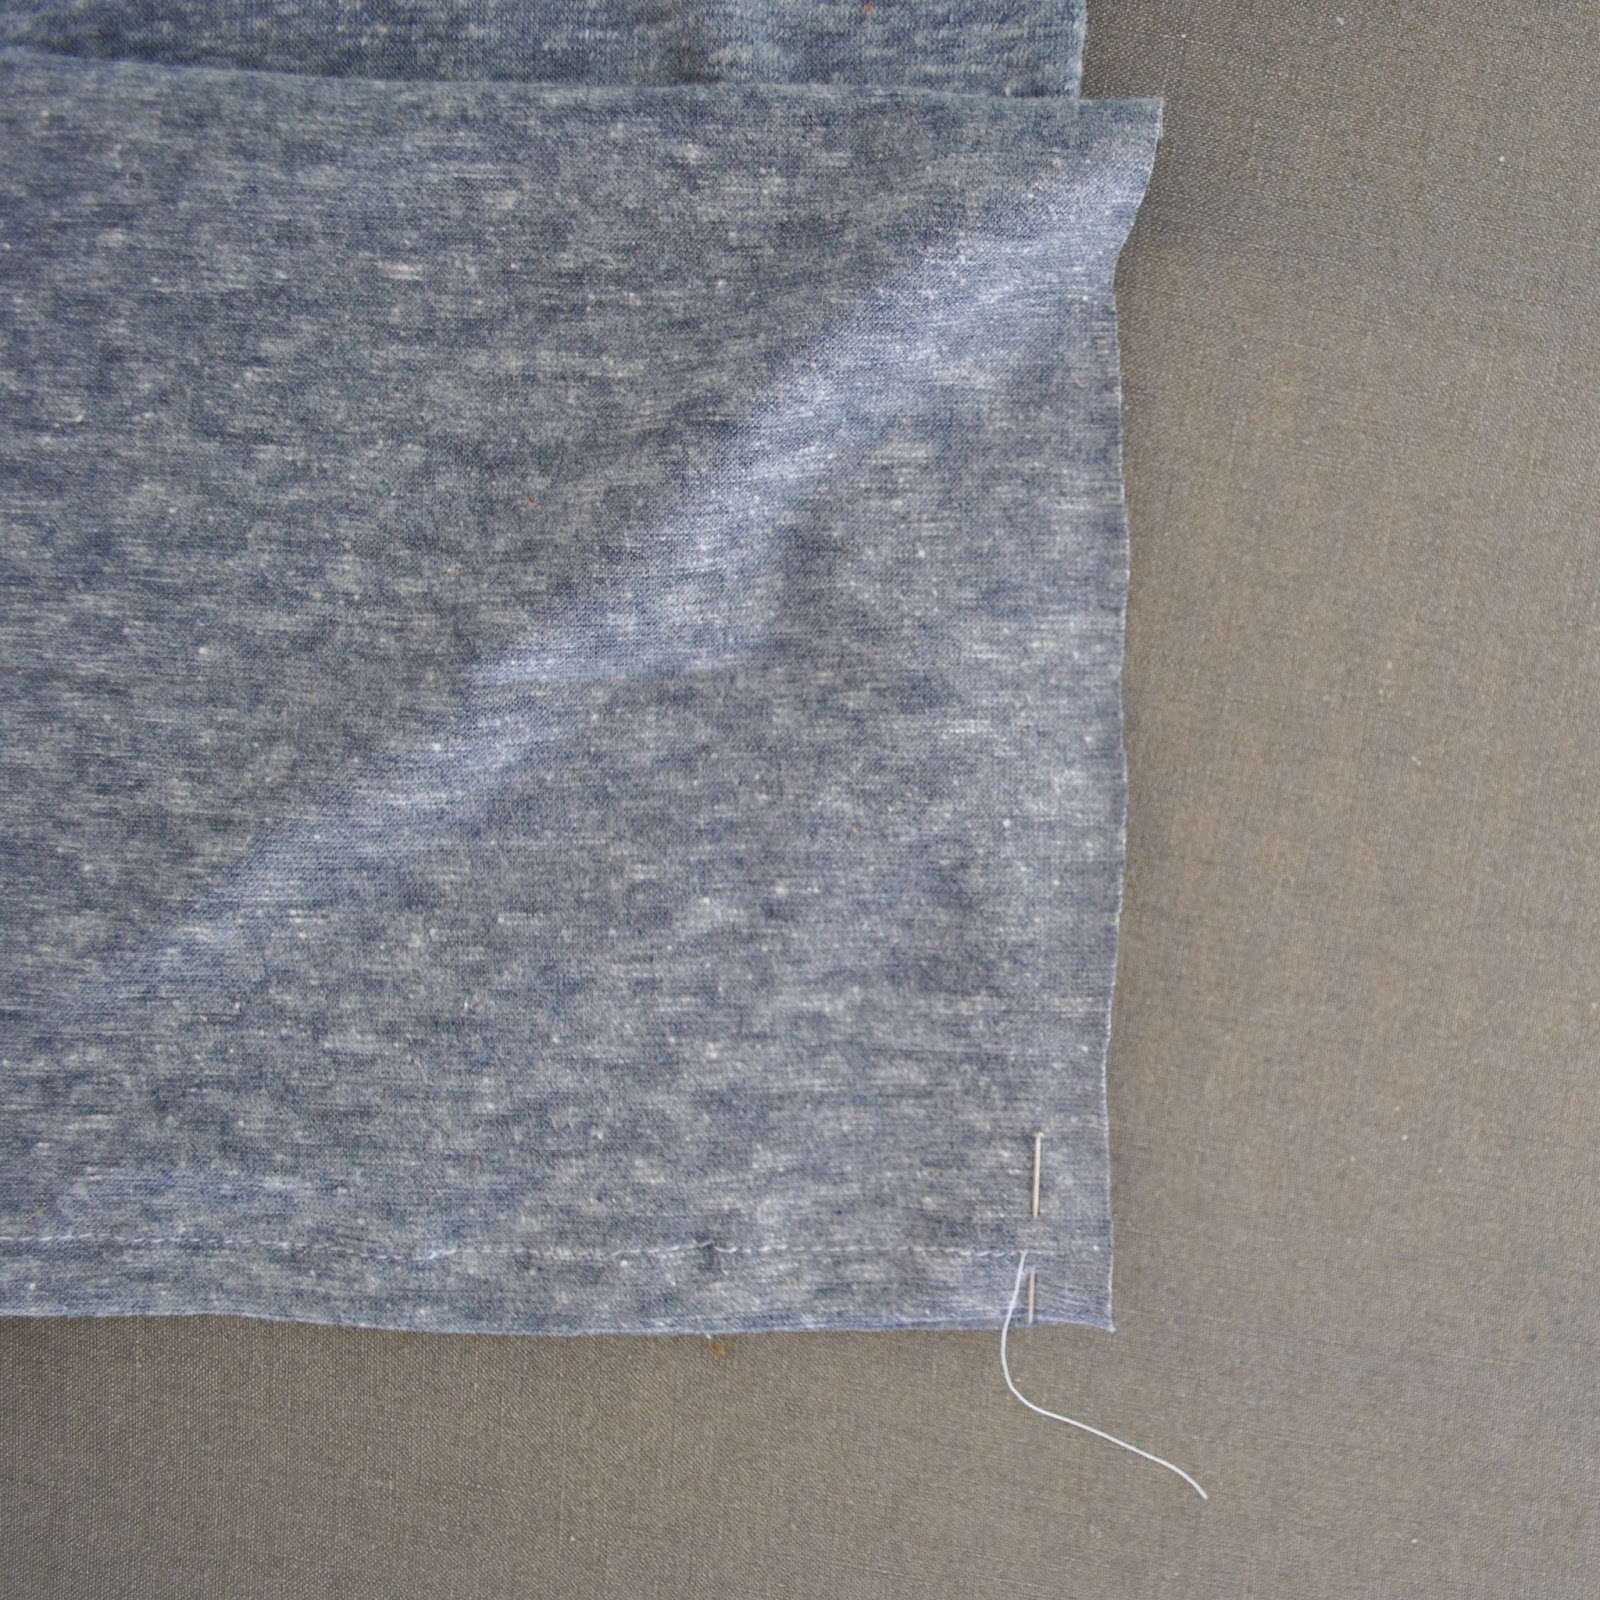
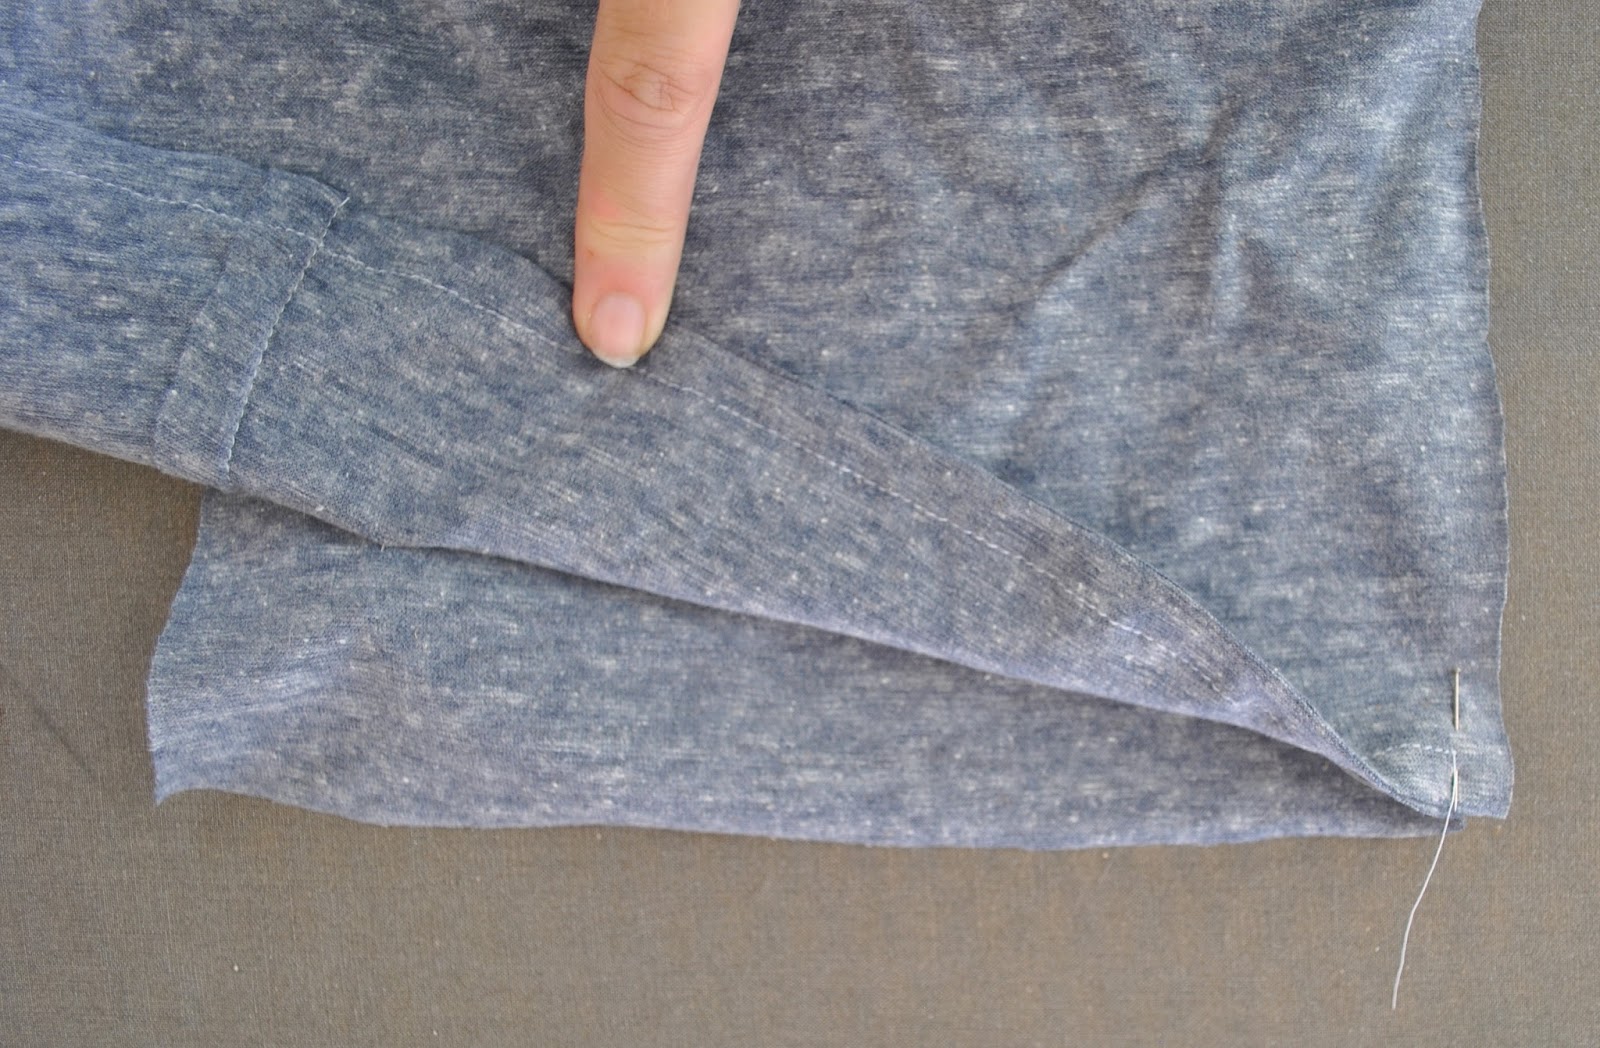
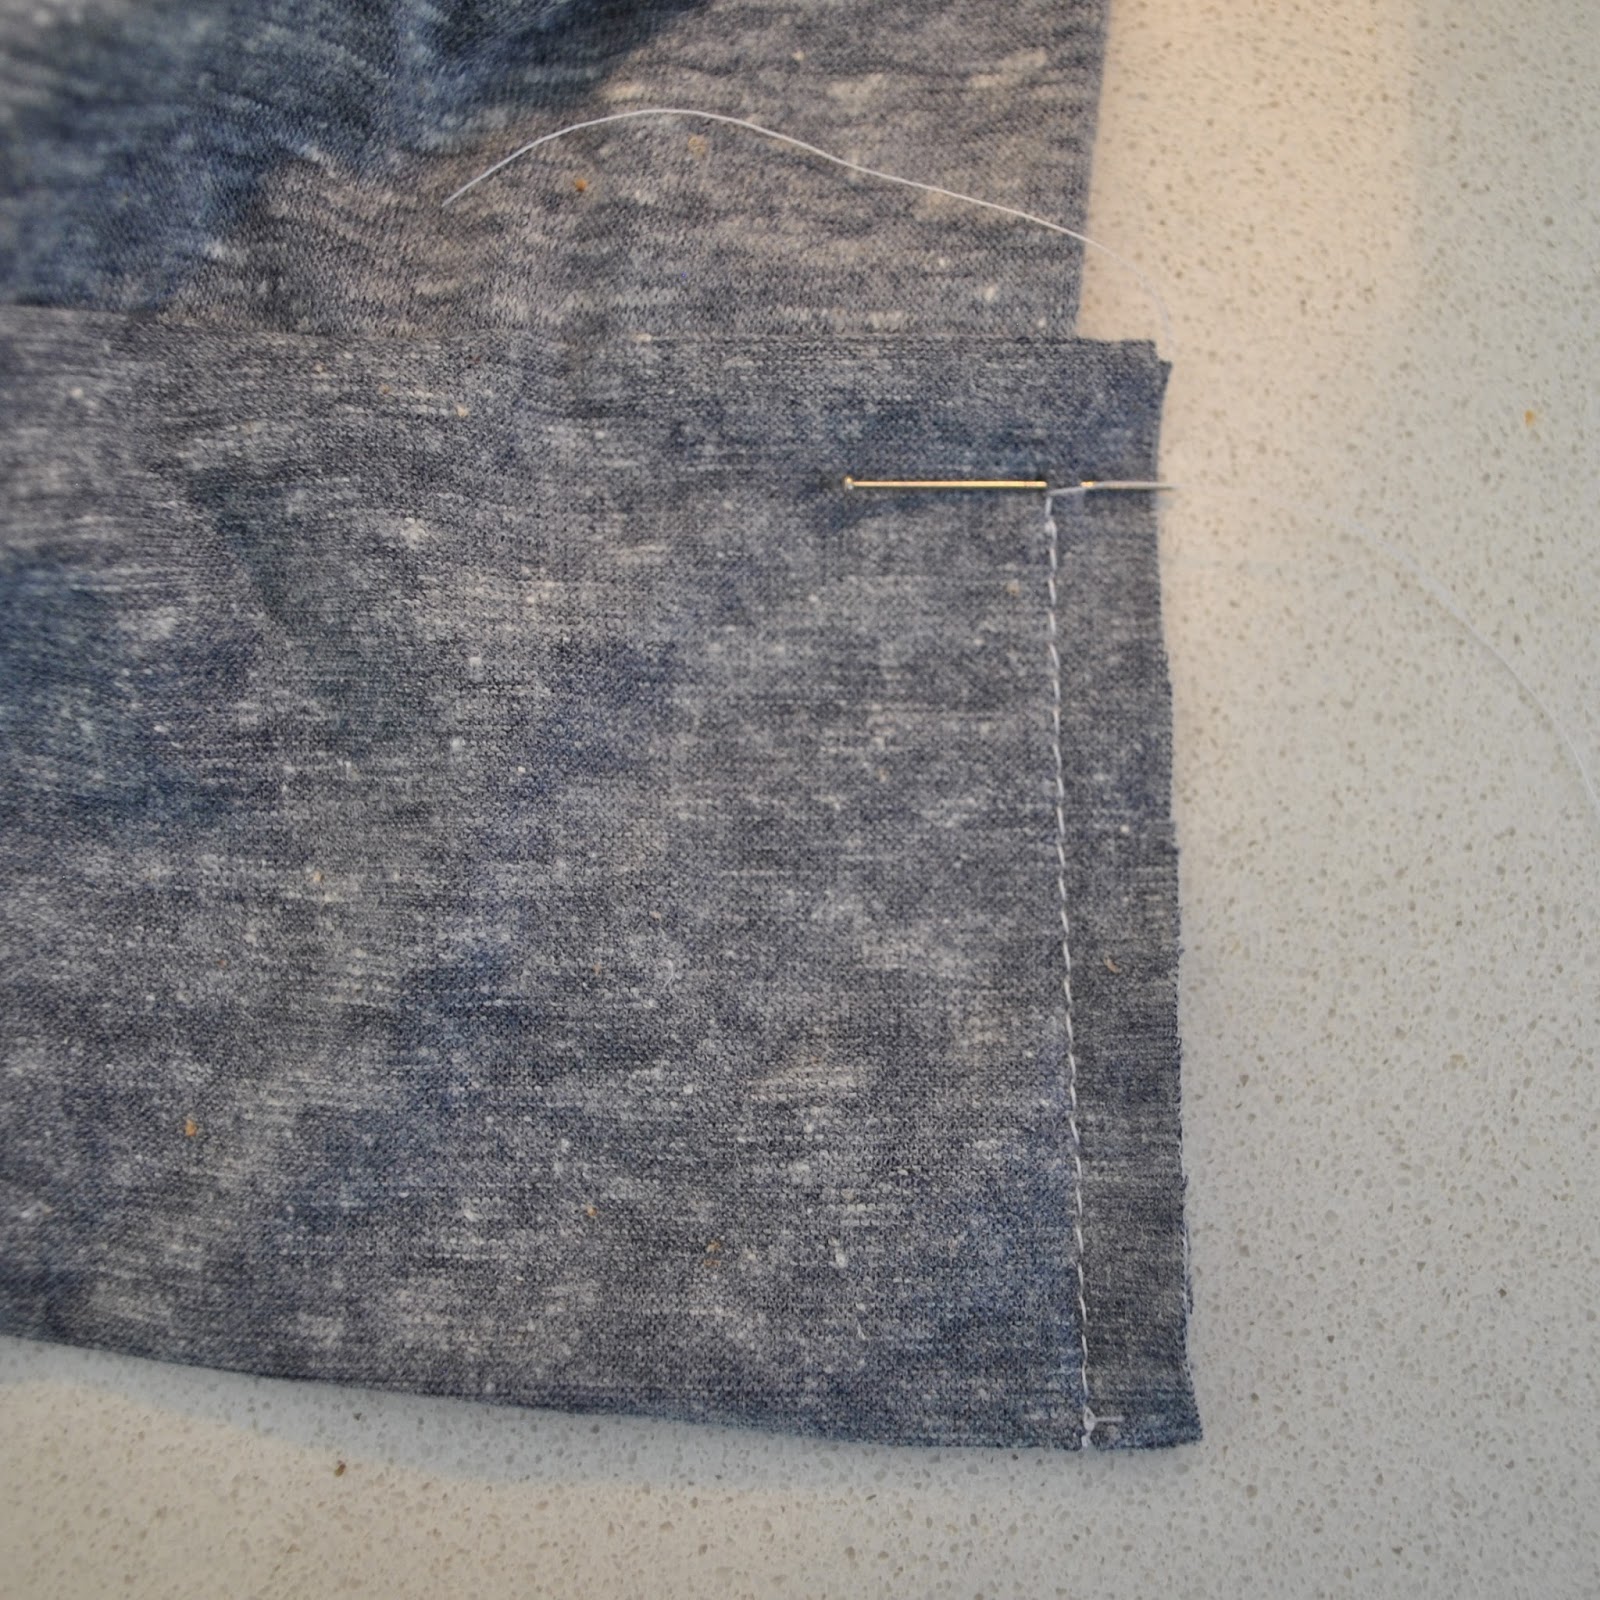
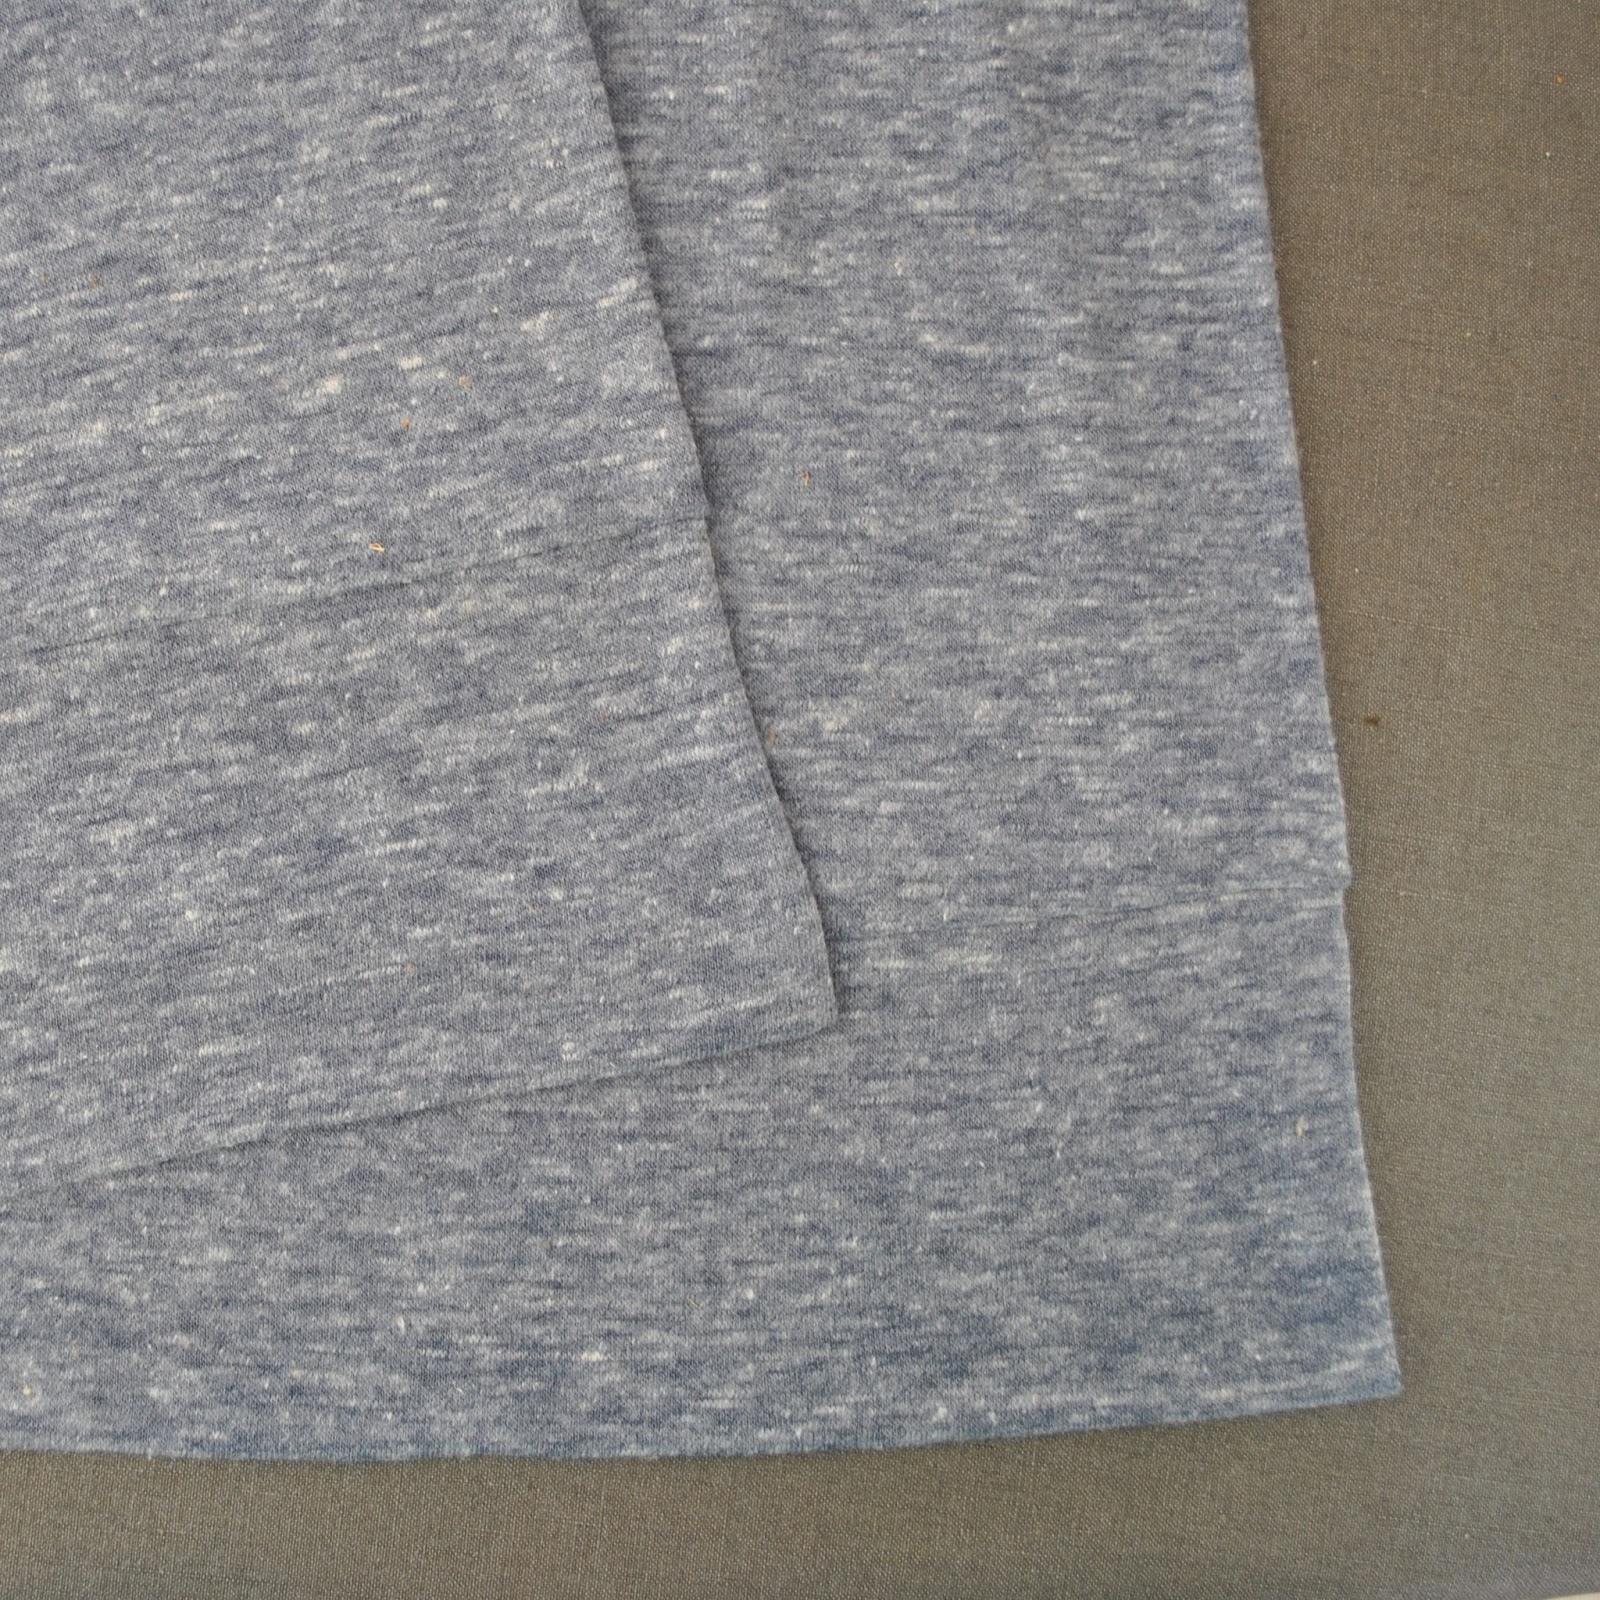
The hem is hand-rolled and stitched, and I did the same technique as I did for my slip, with stay-stitching.  I hemmed this before I hemmed the matching slip, to get the right length for both, but it’s taken me this long to finish all the other little details and get out and take photographs of it.
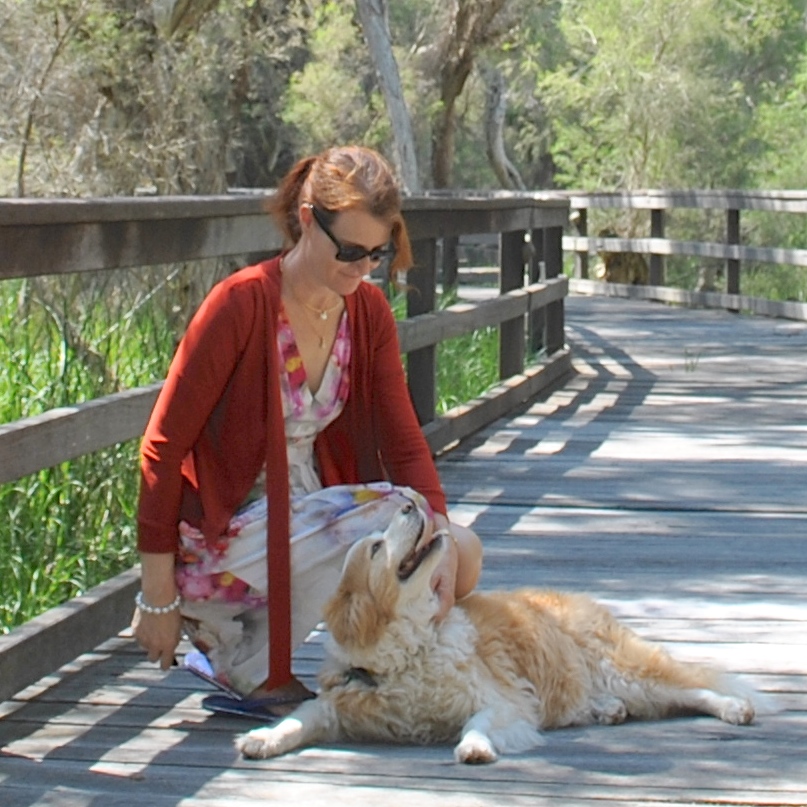
And I also wanted to wait for its first outing to be a day on which I would be meeting all my friends to show it to them, and simultaneously an appropriately weather-ed day, nice enough to wear it! it’s taken a while for those two things to coincide.  Today was that day! hurrah!

Details:
Dress; Burda 05-2010-111, Burda 05-2010-101 sleeves, floral silk georgette with ivory crepe detailing, my original review of this pattern here
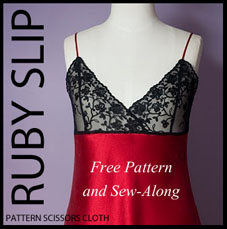
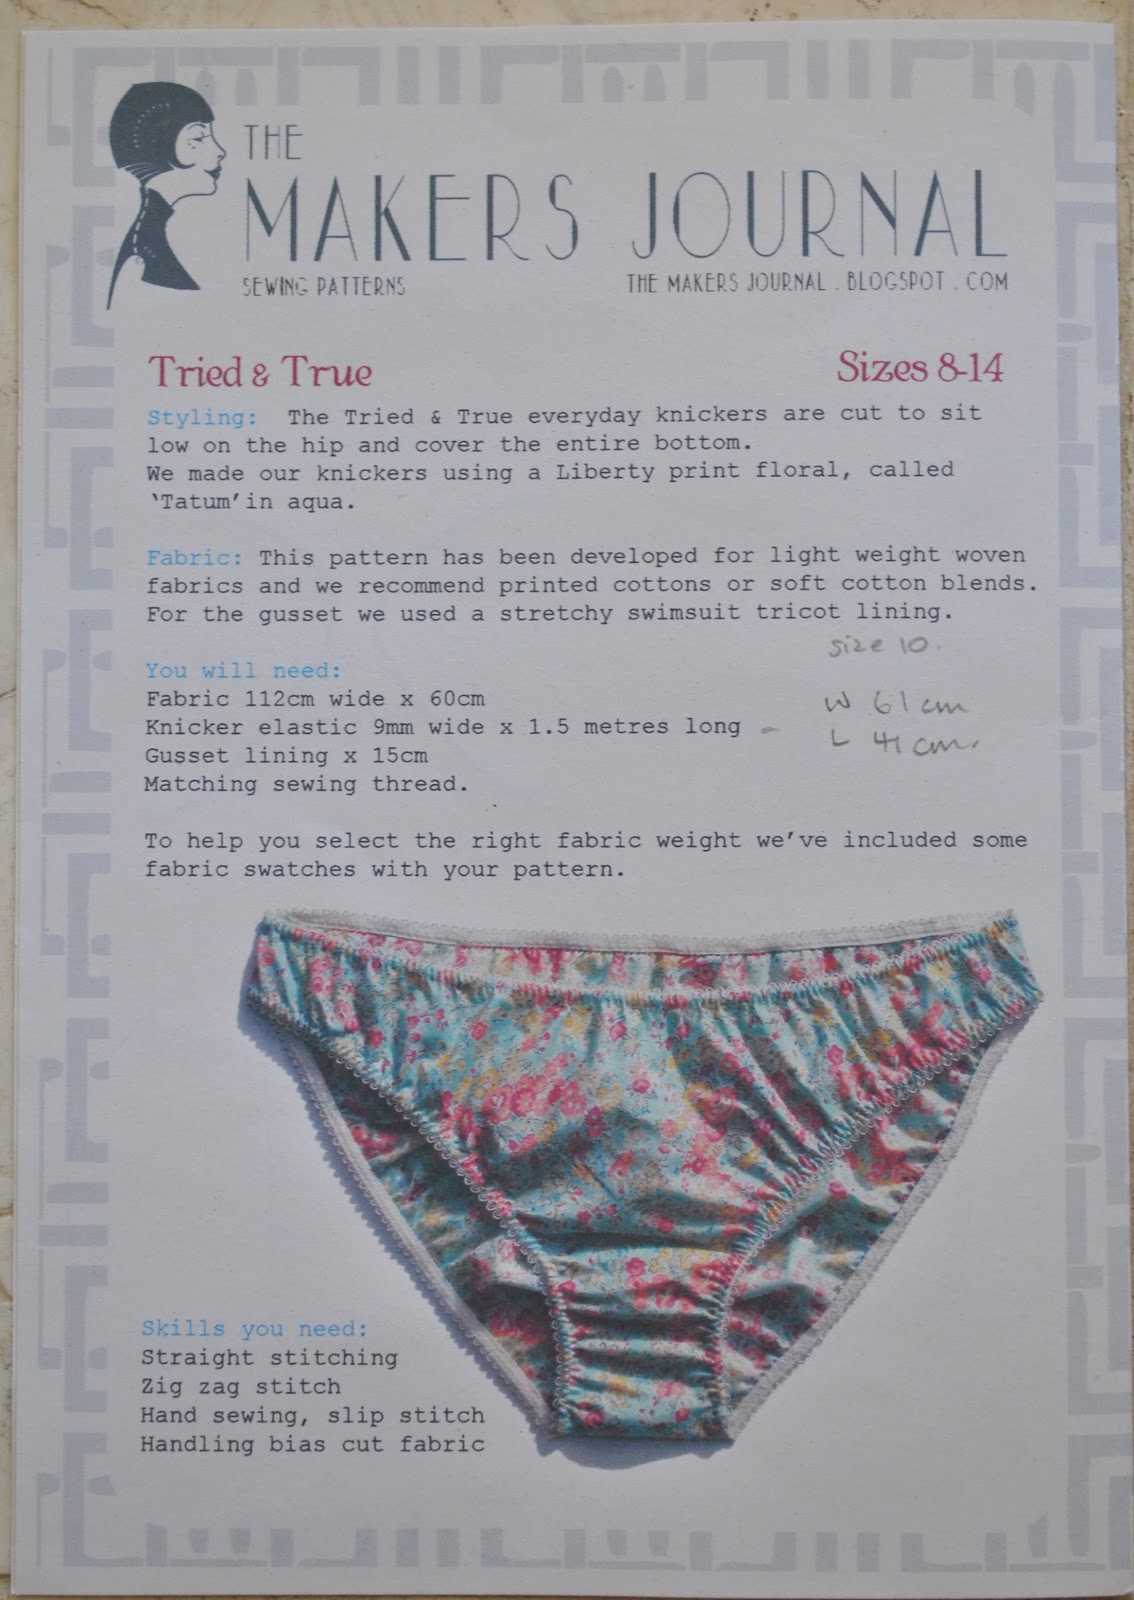
Slip (under); the Ruby slip, pattern by pattern scissors cloth, ivory crepe, details here

pinterestmail

tie-dye cardigan

I’ve made another little cardigan… the last, I promise! for at least a little while! 
I didn’t really need another one but I said I’d thought of yet another little way the construction of this design could be improved? naturally I just had to try it out…
Fabric; a toss-out from Mum, a cotton or something or another jersey, original provenance unknown.  I barely had enough for the cardigan but just managed to squeak out the pieces; the tie is a little on the short side and is pieced in several places but no biggie, I still got it out! and the joins are lost in the print.  I rather like the tie-dye print and my only concern was to avoid situating a bulls-eye in the boob-al region when cutting out.  Mission accomplished!

Pattern; the Nettie, by Closet Case patterns, modified to be a cardigan with a loose extended neckband that hangs down in a shawl-y type of a way.  The neck band on this, third, version of the design is a little short to be tied in the front like the last two iterations, so I’m planning to only wear them hanging loose like this.

My desire for a super-clean finish is finally satisfied with the insides on this last version… they are super neat and tidy! with no exposed seams or stitching, barring inside the sleeve/armhole.  *happy sigh*

I’ve written my order of construction to illustrate how it all went together…  it’s a little more fiddly than the previous methods but perfectly doable.

Cutting; cut the fronts on a centre fold so they are double layered.  Same picture as the previous cardigan because it’s identical.  I sized up a couple of sizes to get that looser cardigan fit, rather than the tight bodysuit-fit that the pattern is designed for.
NOW; the first step is to sew fronts to the back at the side seams, right sides together.

Now, fold the fronts in half, right sides together, and stitch the front facing to the back at the side seam over the previous stitching, enclosing the seam allowances within the front and front facing.  You will need to pull the pieces inside out a little to make this step possible, basically you are sewing the front piece in a tube with the back piece encased between the two side edges.  Grade seam allowances, turn out and press.

Cut the lower band to fit and stitch to the lower edge, keeping front facings free.  You will need to stitch each front section and the back section of this seam separately to each other, stopping and starting at the side seams; fiddly? yes, but worth it in the end.  Press open then down onto band.

Fold the band in half lengthwise and stitch the short edges, right sides together; trim and grade seam allowances, turn right sides out.

Snip all layers of the band seam allowances at the side seams, and also the lower band facing seam allowance at the same point.

Now, from the shoulders/top; reach inside the front/front facing “tube” and pull the lower edge where it’s stitched to the lower band through along with the loose facing edge and band facing edges.  Align all raw edges, taking care to make sure corners are sitting tight and accurately together because with a stretchy fabric it can be all too easy to stretch them out of place! and stitch the whole shebang together in one seam.  Trim corners, grade seam allowances, pull it all right sides out and press.

Voila!  yes it is a fiddly business but it look at that lovely absence of exposed seams on the fronts!

That last remainder of the lower band facing is turned under, pinned and hand-slipstitched in place.  Hiding those seam allowances, too  🙂

Now stitch the shoulder seams, front to back, enclosing the back between the two fronts as for the previous version of this cardigan, here, in fact the remainder of construction is exactly the same… stitch sleeve seams, finish; set in sleeves, finish likewise; sleeve cuffs, as per this method; neckband, as per this method described for my previous cardigan.

Details:
Cardigan; the Nettie by Closet Case Patterns, modified as stated
Tshirt under; another Nettie, white jersey, details here
Shorts; Burda 7723, details here
Location; Bunker Bay, Dunsborough… we had it completely to ourselves!  so lucky

photos courtesy of Craig
pinterestmail

tie-front cardigan from a Tshirt pattern; a brief tutorial

Remember recently I made a little paprika cardigan? and I wasn’t super happy with my construction technique of the fronts and could visualise a far better method of getting that front edge nice and neat … well, of course I could not rest until I had seen it through.
Voila; new, stormy-grey-blue cardigan
Essentially, the gist is to cut each front piece on the fold through the centre front; meaning the fronts are double thickness, with one half acting as a facing.  The fold at centre front is its own neat finish with no further need to do anything at all to it.  Also, the front plus facing enclose the lower band between their two layers.  For this reason, this technique works very well with very thin knits.
Fabric; thin blue/grey marl cotton jersey, leftover from Sam’s hoodie and originally a remnant bought from the Morrison sale, although when I say remnant there was at least 5m of it!  Morrison is tres generous with their “remnants”, to say the least!   I still have quite a lot left.  
Pattern; I used the Nettie from Closet Case patterns, which is my go-to basic now for form-fitting Tshirts/bodysuits, however any tried and true Tshirt pattern could be used for this same modification.

I cut my pieces like so: top parts; fabric folded along the right hand side; with the top two horizontal bands being the “rough cut” lower edge band and the sleeve cuff bands respectively; underneath are the back cut on the fold, the sleeves and at the left is the long neckband.  This last is joined right sides together along one short edge to make a double length band on the grain.
After cutting these: the fabric is then re-folded in from each edge so as to cut those two fronts (below) on a fold, with the centre front laid on each fold.  Cut from the inside shoulder edge out to the CF fold at bustline level on a straight diagonal line, to create the V-neck opening edge.

front piece at left is folded in half, front piece at right opened out along CF fold

Construction details:
first, stitch fronts to back at shoulders.  Sandwich the back between the two fronts so that the seam allowances get tucked away between the layers.  You have to twist it around it in a weird funny-looking way but it does work out.

Stitch front to back at side seams, keeping the front facing free.
Then trim the cardigan to the length you want it to be, taking into account the width of the lower band.  Measure the around the lower edge to determine the length of the lower band and cut it to fit; allowing for a 1cm seam allowance at each end.
Pin the band to the lower edge of the cardigan, again keeping the front facings free.  Stitch, between the seam allowances, right sides together.

 front facing free

Turn the band up in half, lengthwise, right sides together, and stitch the short edges closed, ceasing stitching at the end of the previous stitching.  Turn bands right side out and press.

Now fold the facing to the outside, laying it over the lower bands and keeping raw edges even, and stitch lower edge seam through all layers, keeping the stitching just a whiskers’  width outside the previous stitching.  The reason for keeping it just outside is so that the previous stitching does not show through on the right side of the band.
Now when you pull the band out and turn it all back right side out, the seam allowances are nice and neatly hidden away out of sight.  Yay!

outside of cardigan? inside? impossible to tell which is which!

To anchor the front facing to the side seams, I opted to simply lay the front facing down to the side seam allowances, aligning raw edges, and top-stitch from the right side, 6mm away from the seam.  The raw edge won’t fray, and it looks reasonably neat stitched down, also the top-stitching also accomplishes a sort of faux-felling of the seam allowances too.  However this is definitely not ideal and I have to admit I have since thought of a different and better way of doing this bit too! so there may well have to be yet another little cardi in my near future… to see that thought through too… eeek! am I getting a bit obsessive or what? hmmm could be could be…  😉

Sleeves; same technique as for every other Tshirt/cardigan ever invented.  Namely, stitch the sleeve seams, set sleeves in the armhole and stitch.  The raw edges can be finished with overlocking if desired.  
Attach sleeve cuffs, for this I nearly always employ this method, which gives a nice neat finish I think.
Last step; the neckband: pin the long neckband to the raw edges of the neck edge, including the facing, keeping raw edges even, right sides together and stitch.  

Fold the ties in half along the length, right sides together and stitch the long tie ends together, starting at the endpoints of the previous stitching.  Stitch the short ends in a diagonal point, if desired.

Trim, turn the ties right sides out and press.
Turn under the seam allowances of the remaining raw edge of the neckband, press, pin and slip-stitch closed by hand.

Finito!

Details:
Cardigan, the Nettie, by Closet Case patterns with my own design modifications
Tshirt (under); another Nettie, white jersey, details here
Shorts; Burda 7723, pinstripe linen, details here
Thongs: Havaianas
Location; Coode St jetty, South Perth

pinterestmail

brick bathers

It’s a yearly ritual; summer approaching, new bathers.
I’m very hard on my bathers.  I hardly ever wash the salt water or chlorine out; they get scrumpled up in a wet, sandy, salty towel, left in the boot of the car, dried out under the full blast of the harsh Australian sun.  I occasionally toss them in the washing machine but for the most part they are expected to do solid hard duty with the bare minimum of care.  Some fabrics perform better under these conditions than others, but I don’t stress about it for even one second if they don’t.  I just plan for a new pair per year, no worries; and don’t give it a thought besides some pleasant day-dreaming about what colour/print I should have next time.
This year, that decision was taken out of my hands by my very practical daughter, who announced she wanted to give me fabric for my bathers for my birthday.  So sweet!  Well, apart from the fact that she then had absolute control over the colour I would be wearing!  Aaaagh! giving over control of my wardrobe, so difficult for control-freak-me!  But, one sometimes has to bow down and accept the dictums of another.  And I think it’s good for me, helps me for a short while to relax my iron-clad expectations for myself and frequently surprises and delights me.
So, Cassie and I went shopping for the fabric in Fabulous Fabrics together; and I hopefully pointed out a nice navy blue and white striped fabric.  Aah, navy blue! you sure have me in your clutches at the mo!  I briefly entertained a vision of myself in some Fwanch-inspired, nautically navy/white striped number with a chic wide-brimmed hat set at an elegant angle, paddling about in the shallows in a ladylike manner.
But no!  I had not reckoned with the even more iron-clad will of my daughter; who firmly told me that navy/white stripes were so boring and that I would just look the same as everyone else.  
POP *bubble bursting*  

I was told I would be wearing this nice shade of brick instead.
You know, we have this saying in Australia about being built like a brick, er, house…  *   Haha! I jest;  obviously this deep coral/terracotta colour is very much moi, a tonne nicer for my colouring than navy and white, I admit it; and I think it also looks rather striking set against the sea-and-sky blues and sandy whites of summer.  It’s a bit Uluru actually, a very Australian colour.
Cassie chose well, very well indeed  🙂

Pattern is ye old fave; McCalls 2772; a halter neck bikini which I have modified to be a tankini, and with the matching bikini bottoms.  I was thinking; one day I should write for myself a little tute on how to do this.  Each time I do it I kind of have to think back through first principles.  Good for my brain, yes, but what if I stuff it up one year?

Details:
Bathers; McCalls 2772, bikini pattern modified to be a tankini
Hat; Country Road (from many years ago)
Location; Leighton Dog Beach

*just to explain; my Mum reads my blog sometimes, and I would get ticked off if I finished that there saying… yes, even at my age!

pinterestmail

paprika cardigan

I took some time out from making something far more time-consuming and complicated, ahem Alabama Chanin, cough cough…. ooo did I once say I would never get addicted to Alabama Chanin??? yaas, going back on my word, guilty as charged!!  Anyway, I took a day to put together this simple little cardigan from some scraps.  It’s a light and nothingy-to-it sort of a thing with no closure except for a necktie at the bust level.  A little something to throw over a summery ensemble on cooler summer evenings, or to cope with air conditioning.  
It’s mostly made from scraps; a piece of paprika stretch knit from Fabulous Fabrics, leftover from my paprika Nettie bodysuit and I bought a little extra to get out the pieces for this cardigan.  Once again I used the fabric wrong side out, because I prefer the duller, deeper, richer colour of it.  
Speaking of Nettie, I actually made this using the Nettie pattern too! just with a touch of ad-libbing.   Such a good basic pattern and a fantabulous springboard to a lot of other variations.  I can honestly see myself making like a tonne of these over my lifetime, with slightly different additions, subtractions and/or bits and bobs going on.

Changes to the pattern:
I cut size 18 which is a coupla sizes bigger than my usual, so as to get a looser “cardigan” fit rather than the skin-tight bodysuit fit; cut it to hip level with a wider shoulder, a low V-neck, and split the front up the middle.  I added a wide band all along the bottom edges and wide cuffs to the edges of the sleeves, a long wide necktie, which is basically a very long skinny rectangle sewn along the top edge and with the “tie” edges sewn right side together, with pointy points on the ends of the ties, then turned right side out.  The remaining gap of the necktie is slip-stitched closed to the cardigan on the inside. 

 The front edges I finished with strips of red crepe, itself leftover from my infinity dress here.  This was sewn on to the front edges, turned inside and topstitched down along the outside.  It’s a nice stable edge and the crepe takes away any tendency to stretch out, but I’m not wowed by my efforts here and in the making of this thing I conceived a much better way of doing the cardigan fronts.  I’ll probably make another one of these pretty soon, incorporating my imagined improved way of finishing the edge, but I’ll need a lot more fabric than the scraps I used for this one.
Hmmm, that’s all I need; an excuse to go fabric shopping! 

Project happiness factor; front edge satisfactory but I’m a bit meh about it and I’ve thought of a better way of doing it… otherwise it’s not too bad and I’m happy.  9/10

Details:
Cardigan; my own design modifications to the Nettie bodysuit, by Closet Case patterns, paprika stretch
Dress; Vogue 1194, floral stretch, details and my review of this pattern here
Thongs; Rusty
Sunnies; RayBan

pinterestmail

short and rose-y

…some new summer shorts  🙂

Pattern;  ye olde faithful Burda
7723.  Someone alerted me to the fact
that this pattern has been discontinued…. boooo!  This is fair dinkum one of my favourite
patterns… goodness knows why Burda would let go such a nice flattering design
as this  🙁  However, last time I was in
the fabric store I had a good squizz at the pattern catalogues, and while there are no Burdas like this any more, I noticed Vogue 8836 cut to shorts length might just be a pretty good substitute?  It has the same high rise with deep/wide waistband,
the same slightly flared leg, the same slanted front pockets, the same double
pleats at top to enable decent hand-shoving access to said pockets.
One thing I really loooove
about the Burda pattern is the way the pocket piece extends right into the fly;
which gives you a kind of inbuilt tummy control panel right across the front.  I don’t know if the Vogue has this feature but if not that would be sad, since this is a GIANT WIN!
Alterations; just the usual, the pattern doesn’t instruct to put a protective placket behind the fly but I always put
one in. It’s an easy add-on and always a nice finishing touch to any fly front.
Fabric; some lovely stretch sateen from Fabulous Fabrics; soft, sturdy without being very thick, and the print has a sharp, painterly appearance, like old-fashioned ceramics.  Mum bought it for
me for my birthday.  Actually, the fabric is very lovely and totally deserves to be something far more dressy.  Just that I’m a funny bun when I get an idea
in my head, sorry; and I really fancied some luxe-ish shorts.  I’m excited about the thought of wearing them
both pretty pretty style, with my ultra feminine broderie anglaise top; and also
more contrast-y like, with my more masculine, utilitiarian khaki linen shirt
too. 
The lovely Margo recently posted about showing your sewing creations in action, with an action shot… which inspired the following display of gawky awkwardness.  What was I thinking, I don’t know.
Thought bubble emanating from Sienna; what the flippin’ heck is she doing NOW!????
Action shot!  Sienna knows, you see, that in real life this particular action is pretty much non-existent from my daily repertoire of actions, haha.   Pegging clothes on the line or taking out the rubbish would be a more realistic action shot, if slightly less riveting for a picture!
Oh dear.  Well, it seemed like a good idea at the time, ahem…!
Okay! wrapping it up…
Happiness factor; well, a favourite pattern and totally lovely fabric, all going together as smooth as silk.  I’m giving
this project 10/10  🙂
Details:
Shorts; Burda 7723, floral sateen
Tshirt; the Nettie, Closet Case patterns, white bamboo jersey. details here
Cardigan; midnight blue Miette, details here
Thongs; Havaianas
pinterestmail

mustard Issey Miyake skirt

I’m scratching a long-standing itch by making something from this 1986 Issey Miyake pattern; Vogue 1693 …  see, I’ve used it once before, when it very first came out! to make a skirt and the top for myself.   I wore that outfit to a number of 21st birthday parties with my then brand new fiancé, now my husband  🙂  There’s probably a picture lobbing around somewhere of me wearing it, just don’t know where! perhaps in a few of our old schoolmates’ dusty old photo albums shoved in the back of a cupboard somewhere.   My first skirt and top from this pattern was in a sateen with a rather psychedelic splotchy print of bright yellow, purple, a bit of bright orange and I think, splashes of black thrown in there.    I remember being extremely proud of it, haha! I used to wear it with hydrangea purple court shoes, or pumps.  We used to call them court shoes back then.
So, I think maybe it’s ok for me to claim this as a vintage pattern! and item number three going towards fulfilling my vintage pattern pledge… to make five items from my vintage patterns.
Fabric; a loose woven, slubby wool blend from Tessuti’s, Melbourne bought during a holiday over there with my Mum and Cassie.  A bit rough in feel, but in a beautiful, high quality way, if that makes any sense at all; quite thick, probably too thick for the design in retrospect and it was a little difficult to make it work with the pattern,  Almost cried a few times when I thought I’d ruined it, but managed to wrangle it into submission eventually.  Major relief when it all worked out.  I used the hammer a few times to flatten some of the more bulky layers down thinner, so they would fit under my sewing machine foot.

Perfectly matching buttons from Calico and Ivy.
Technical notes; all seams flat felled as per the pattern.

To avoid bulk in the waistband, the inside edge was cut along the selvedge, and this is not folded inside the waistband but left out inside the skirt and topstitched down from the right side, stitching in-the-ditch.  I also cut the overlay against the selvedge and left the selvedge edge out along the edge of the turned in facing.  Same reason as the waistband treatment; to reduce the bulk of having a raw edge turned under.

Also HongKong bounds edges for an inside side edge and the hem, again to avoid as much unnecessary bulk as possible.  For this, I used a beige/light honey coloured poplin voile to make bias binding.  I bought about 2m of this a few years ago and have almost used all of it in HongKong binding for various things… need to get some more, asap!
Happiness scale; 9/10 at having another of these skirts, since the pattern is a sentimental favourite of all time for me.  It lost a point due to my struggles with the fabric, but if I had to do it all over again I would probably still want the skirt in this same fabric.  Feels great on, and like skirt and pattern were meant for each other, like star crossed lovers or something like that, go figure.  Next time I will choose something with a little less bulk though.

Details:
Skirt; Vogue 1693, slubby mustard wool blend
Tshirt; self-drafted, white/grey stripe cotton jersey, details here
Shoes; Diavolina, from Zomp shoes

pinterestmail

all Aussie adventures

MY OUTFIT IS FINISHED!!!
And I am showing it all together here for the first time.  Can I just say right here; wooooohooooot!
The challenge, as laid out by Nicki of this is moonlight, should you choose to accept it, and I did! was to make for yourself an entire outfit using ONLY locally sourced materials.  Sounds simple, right?  It has been anything but!
I’m very grateful to Nicki for conceiving this brilliant and very thought-provoking challenge, and for inviting me to take part.  This has been one exceedingly amazing ride, has blown my mind more than any other dressmaking challenge I’ve ever done, and really pushed my creativity to the limit.  At the beginning of the year I seriously did not think I would be taking my outfit to the levels I did…. I thought for sure I would be giving myself a pass on some things, for example;  thread, and allowing myself to use regular Gutermann’s thread.  As time went on though I toughened up, embraced the idea of going the whole hog; and I’m very pleased that I did manage to rise to the challenge and make the maximum possible from locally sourced products!
In fact, I’m quite proud and extremely happy! :))
For the challenge, I made:
a knitted alpaca cardigan/jacket
a merino felt dress
merino felt and pine shoes
a merino fleece bag
merino fleece undies and bra
In a nutshell, every single blinking thing I have on here is made by myself, using pretty close to 100% south-west Australian sourced materials

Those of us in Western Australia; SueMegan, Nicki and myself, have had to be quite innovative in our approach, I think.  I mean, forget zips, thread, elastic… there is not even any freaking fabric made in WA!  This was our single biggest hurdle, I think!
However, we are extremely fortunate in that we have wool available to us; lots and lots of wool!   Australia has the world’s biggest wool economy… did you know that 80% of the world’s apparel wool is from Australia? and Australian merino is the world’s best quality woollen fibre.  22% of the country’s wool production is here in Western Australia (source)

Hardly surprising then that all four of us have used wool as the majority component in our outfits.
My dress, bag, underwear and shoe tops are made from Western Australian merino fleece.  I made my wool felt fabric from the fleece as outlined in this post.  My dress is made from natural undyed merino fleece felt, and I hand-embroidered the fleece all over with locally handspun, undyed merino yarn.

Anigozanthos manglesii

The embroidery design is my own; a random arrangement of of kangaroo paw motif, for our Western Australian state floral emblem.

My underwear features the only “colour” in my entire outfit; I dyed the decorative yellow edging and ties using sour grass picked from my own garden, as posted here.
All the other fleece, yarn and wood in my outfit I left in its naturally coloured state.

My cardigan is alpaca yarn, from the Fibre of the Gods, a tiny mill operating on a farm in Toodyay.  This establishment produces alpaca yarn on their own property, from the fleece of their very own alpaca herd.  I bought some of their yarn directly from off the farm and knitted my cardigan, as posted here.

My wooden shoe soles are hand carved by me, using Western Australian pine.  The pine is grown by Bunnings on their own pine plantations down south and milled by Bunnings in Manjimup.  I made my shoes and my bag from my merino fleece as outlined here My bag and shoe tops are also merino fleece, with a grid pattern made of naturally black sheep yarn.

And that’s it, in a nutshell!
Well, typing it all out like this has kinda brought it home to me for the first time; I am wearing a pretty-close-to 100% homegrown outfit, top to toe, for maybe the first time in my life!  I’m kinda amazed, even at myself.  It’s a little mind-blowing to me.
Final thoughts: I’ve learnt a tonne doing this challenge.  Firstly, our local industries are precious and need our support.  That goes for everywhere, not just here in WA!  I personally am going to put more effort into supporting our local products regularly.  I mean, I’m definitely not giving up my more “regular” sewing, but I am going to do this challenge again.
Secondly, that if you really put your mind towards doing something, keep yourself focused on getting a project done, to overcoming obstacles, then you probably can do it.  Sometimes you need to sleep on it, think outside the box a bit.  I learnt a lot as I was going along, and several times had to improvise a solution to a problem.  There were moments when I questioned my sanity in doing this, when I wondered if my ideas were even going to work… a felt dress? unlined? felt underwear? sounds like the vision of a lunatic, or at least a recipe for disaster, for sure… well OK even I can admit that felt underwear is not really a practical nor a workable thing!  … do NOT recommend.  😉
Also, I had lots of fun!! I LOVE a challenge and this challenge really stretched my capabilities; which is the very best sort of challenge, in my opinion!   I thought hard and long about each aspect of my outfut and tried very hard to honour the materials, to minimise my waste and to make something truly Western Australian in feel and flavour as well as provenance.
There were also moments when I realised I had to accept a small defeat; in the case of this outfit; the glue holding pieces of wood together in my shoes (from NSW, Australia), the nails holding the felt to the soles of my shoes (China) and the cotton jersey liner for my undies (China).  They are very tiny elements so I’m not going to beat myself up over them too much.
I guess the important thing is that I gave everything careful consideration,  and really thought about provenance and the possibility of substituting local products in as many instances as I was able.  As well, I wanted to produce something stylish and lovely, that I knew I would love wearing and feel proud and happy in.  I genuinely love my outfit, and feel pretty pleased with my efforts!
Lastly; maybe I’m on a bit of a post-challenge high, but I’m quite excited about attempting this again next year… in fact I already have ideas and plans!
Mad? maybe, but quite happy to be so!

Details:
Cardigan; the Caramel cardigan, in Fibre of the Gods natural alpaca, grown, shorn, washed, carded and spun in Toodyay, Western Australia and hand-knitted by me, details here
Dress; my own design based upon Burda 8511, made from merino felt made by me and hand embroidered with locally handspun merino yarn from Bilby Yarns, details here
Shoes; my own design, pine soles from Bunnings hand carved by me, felt tops made by me from merino fleece bought at Bilby Yarns, details here
Bag; my own design, in felt made by me from merino fleece bought at Bilby Yarns, details here
Underwear; my own design, knickers derived from the Tried & True knickers pattern by the Makers Journal, in felt made from merino fleece bought at Bilby Yarns, details here

pinterestmail
Switch to mobile version
↓