Tag Archives: Top

top; wonky apricot stripes

So, I bought this piece of very nice, thin, cotton jersey from the Fabric Store in Melbourne, during Mum, Cassie’s and my trip there late last year.  It is elegantly drapey, feels deliciously soft, and the ivory, pale yellow and apricot stripes went perfectly with my apricot skirt fabric.  I bought them together, planning a nice little skirt/top set.  Which of course explains why I am not wearing them together right now! ha! the logic, I lack it; clearly.
Anywayz, I chose and bought the fabric, washed it, pegged it up and only then! noticed a horrific thing, the stripes were printed on the fabric terrifically off-grain, which in itself would not be too much of a disaster except that it had been cut in the store for me as though the stripes were on-grain.  I had only planned a little top, so had only asked for a little piece.  So I had this rather smallish and off rhombus with which to somehow wrangle a top.  Great.
So although my plan was for something very simple, it didn’t seem like it was going to be simple at all.  I agonised and pondered for a bit.  Finally I was just like, oh to heck with it! I’ve got to just make something.  Anything!  

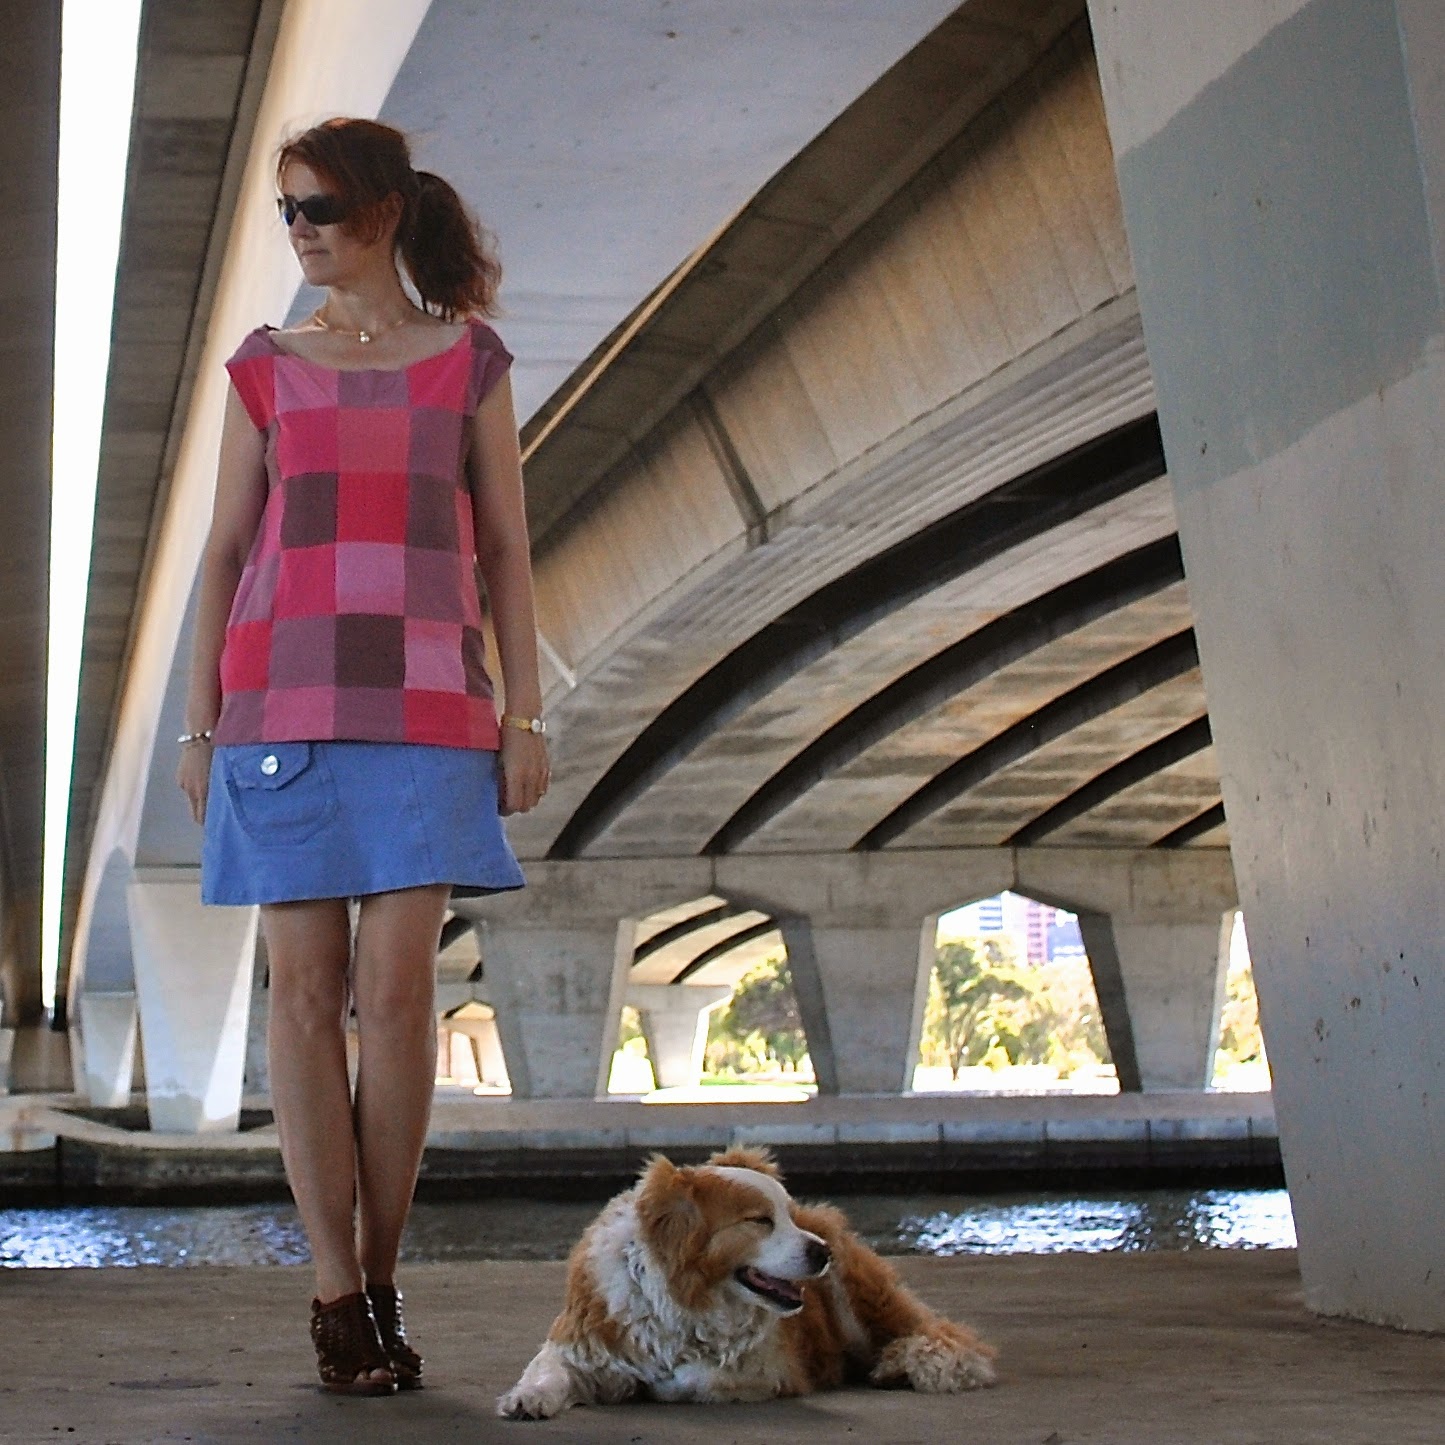
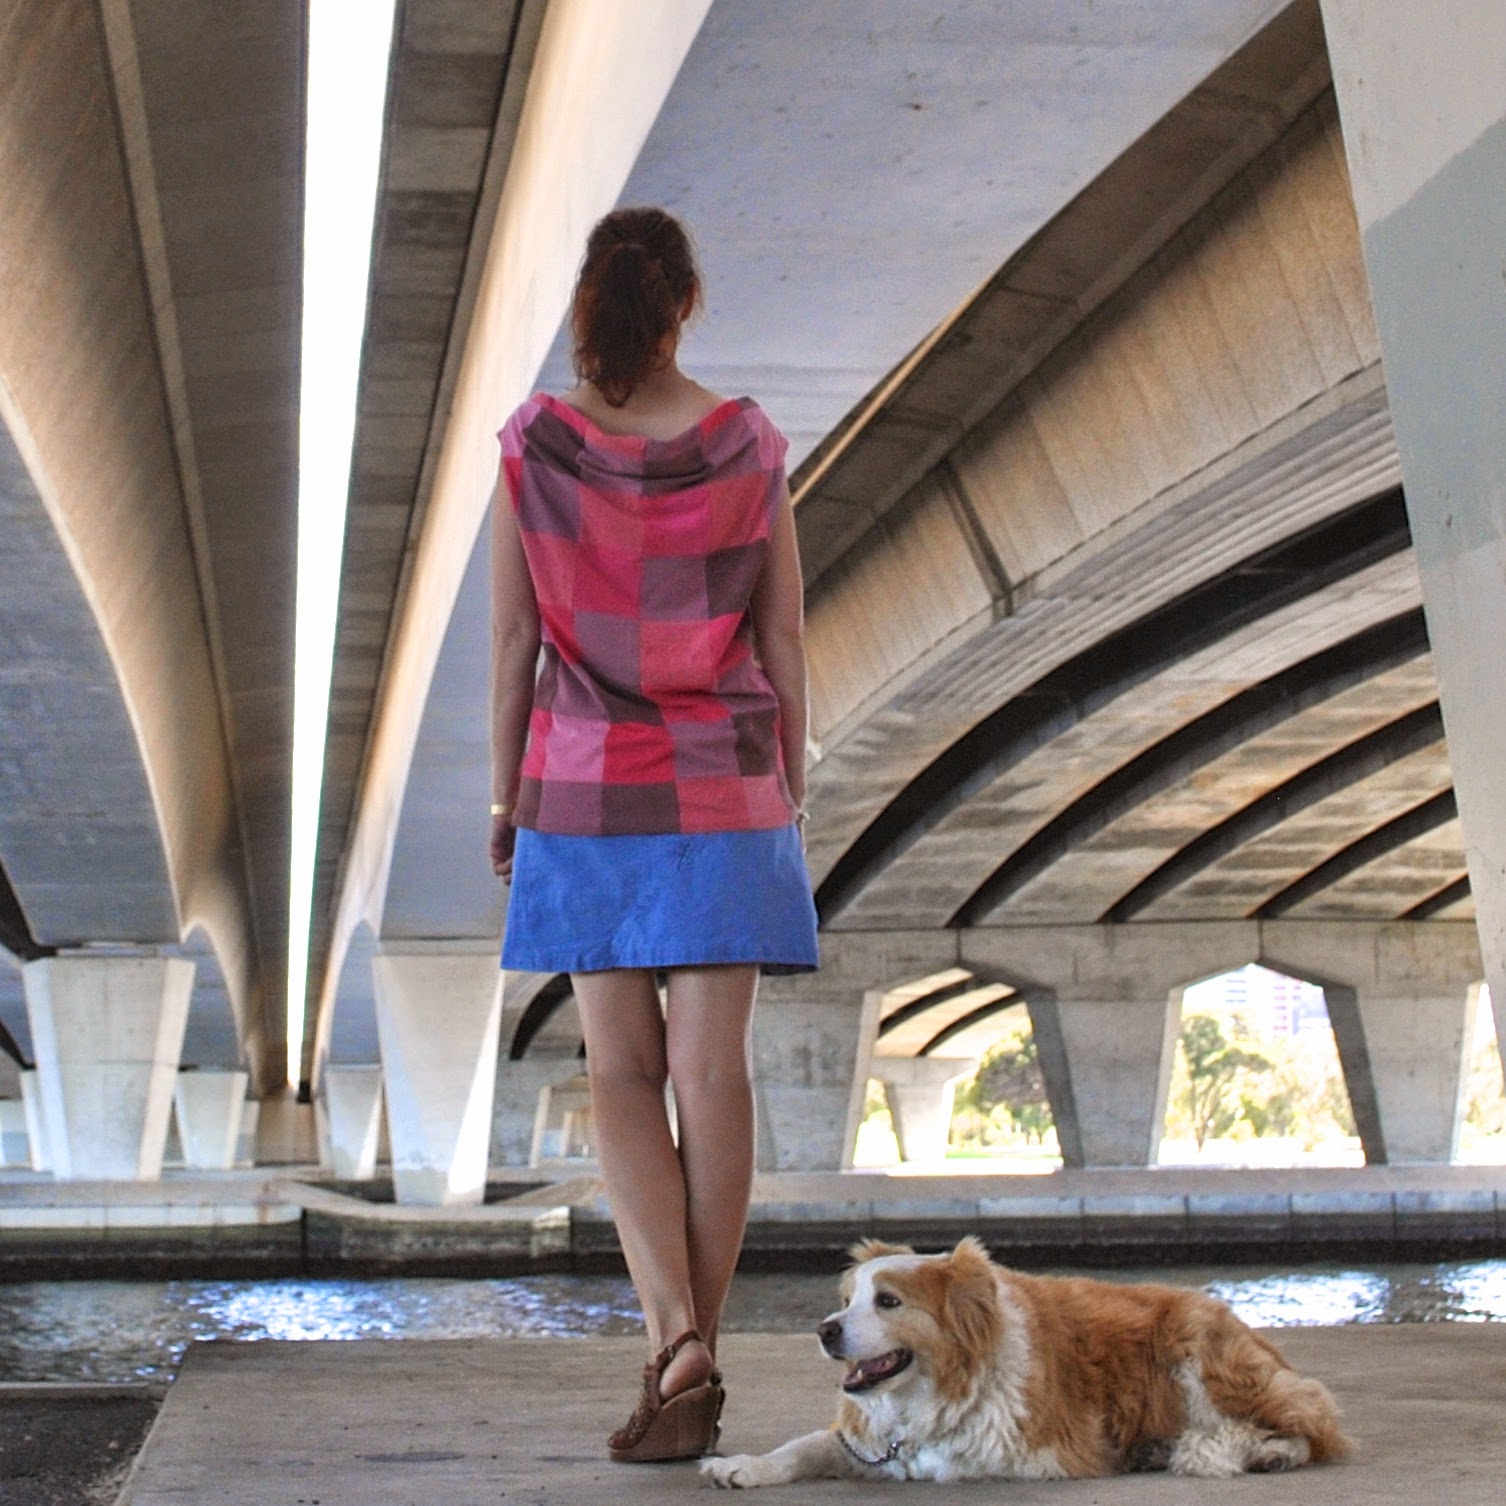
I decided to embrace the wonkiness, and make a wonky, off, little top from out of my wonky, off, little piece of fabric.   This is Burda 04-2014 111, and is the second version of this pattern that I have made; my first version is here.  
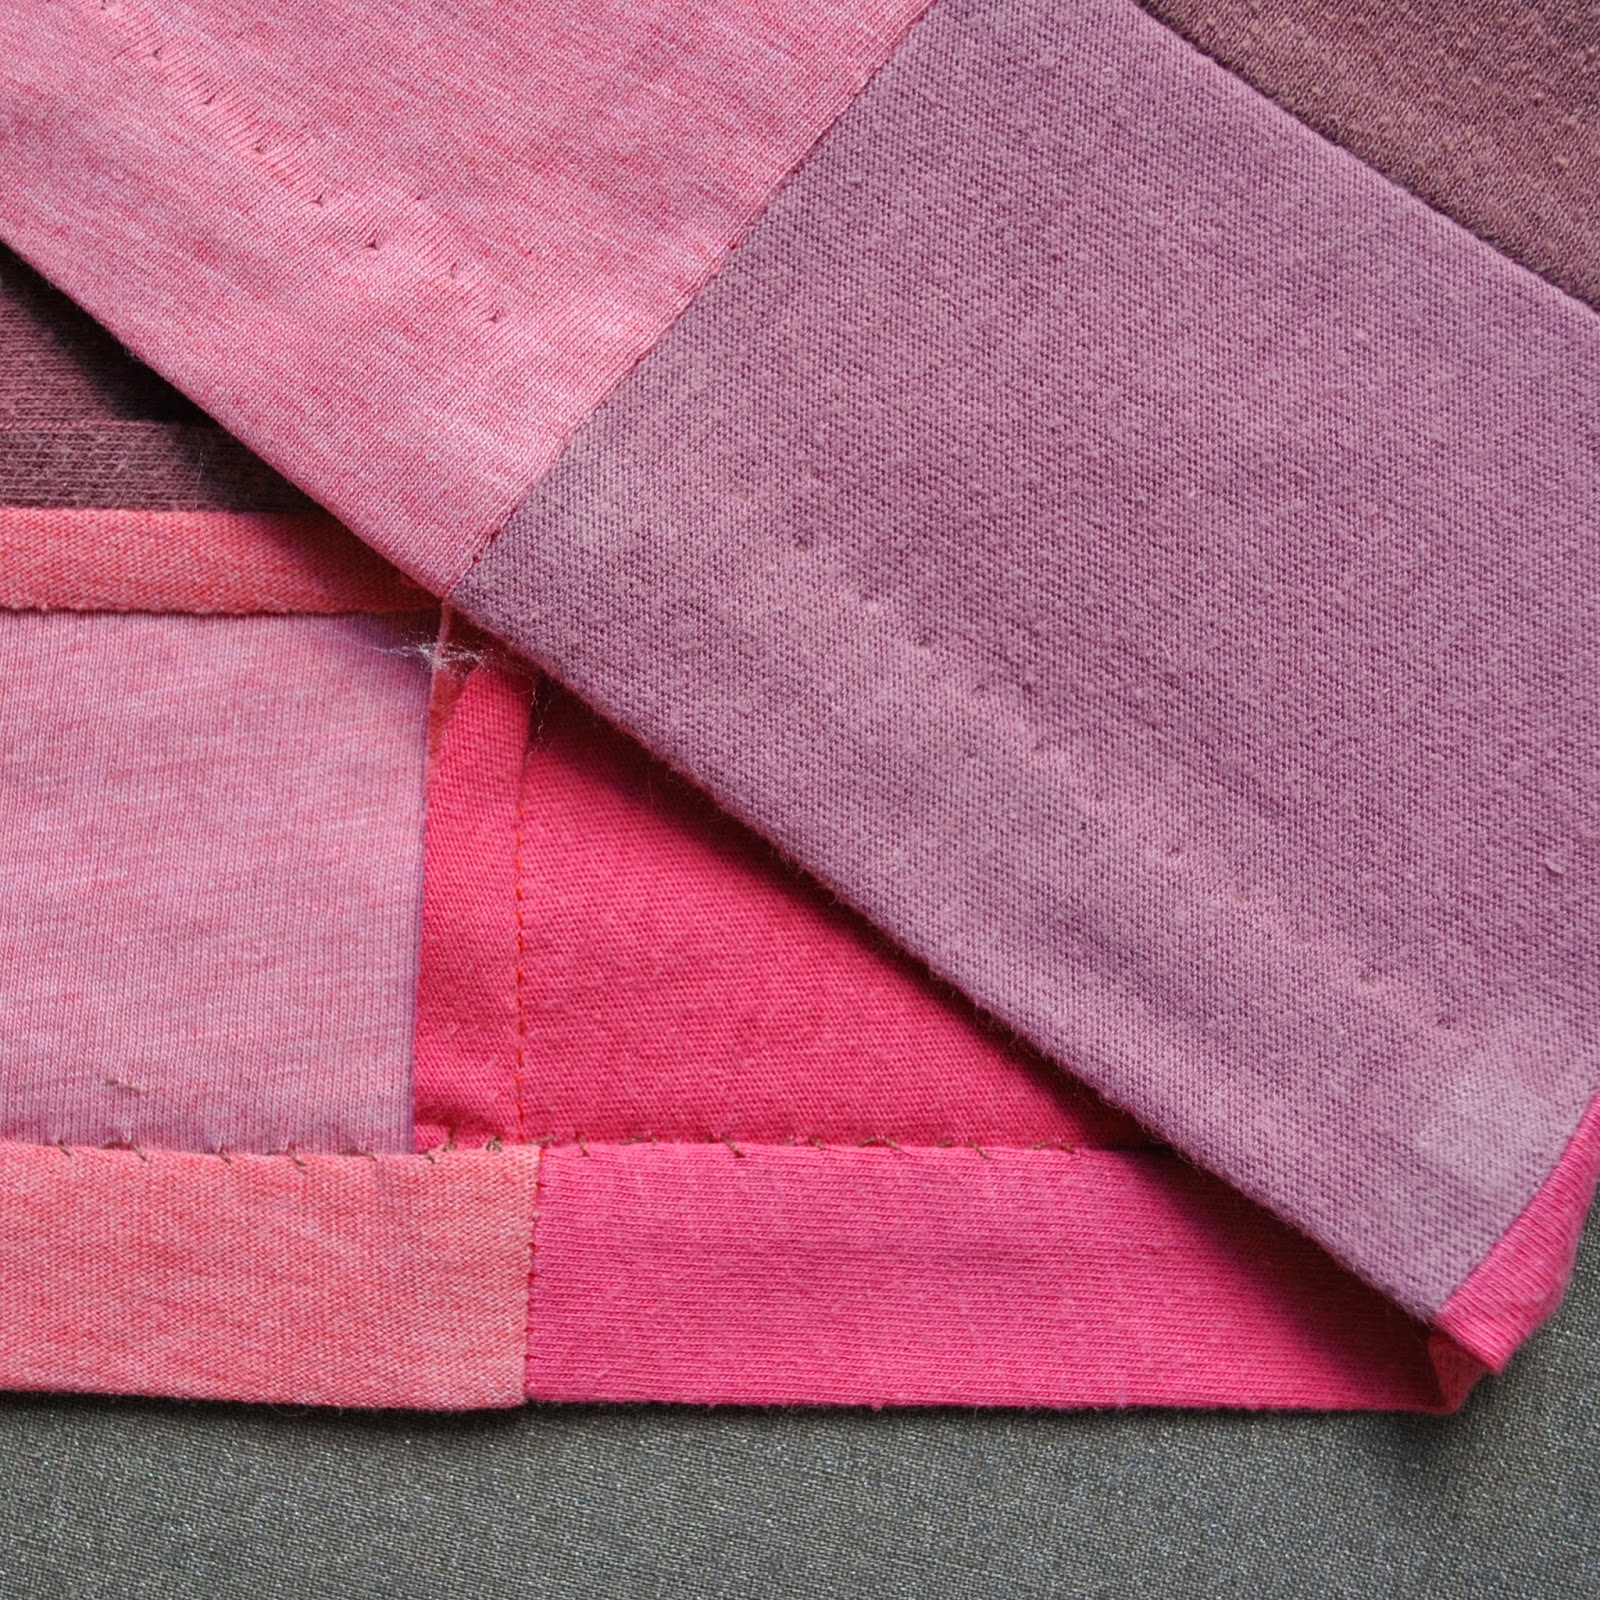
Because I am rather obsessive about corralling at least some sense of order to my wonkiness, I cut my top on-grain and very carefully measured, cut and sewed my body piece so that the stripes matched up as perfectly as I could get them at the one side seam.  So the stripes have become one stripe, rotating around and gently down my body like that on a barber shop pole, and because of the twist of the top are slightly more horizontal on the back.  

the side seam

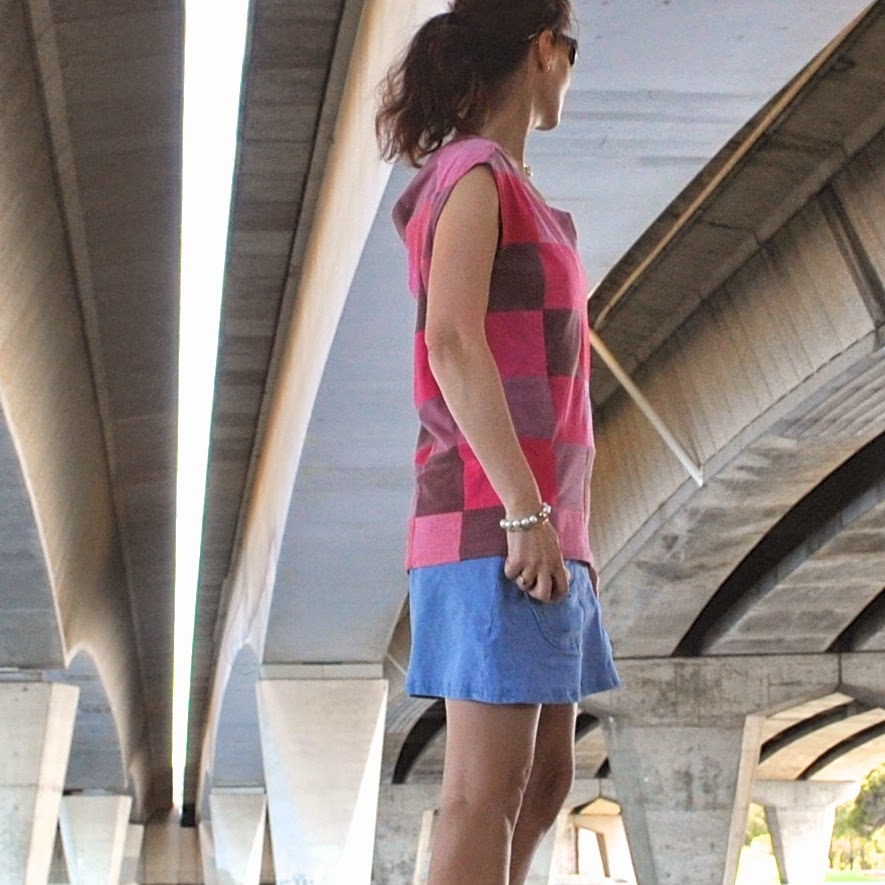
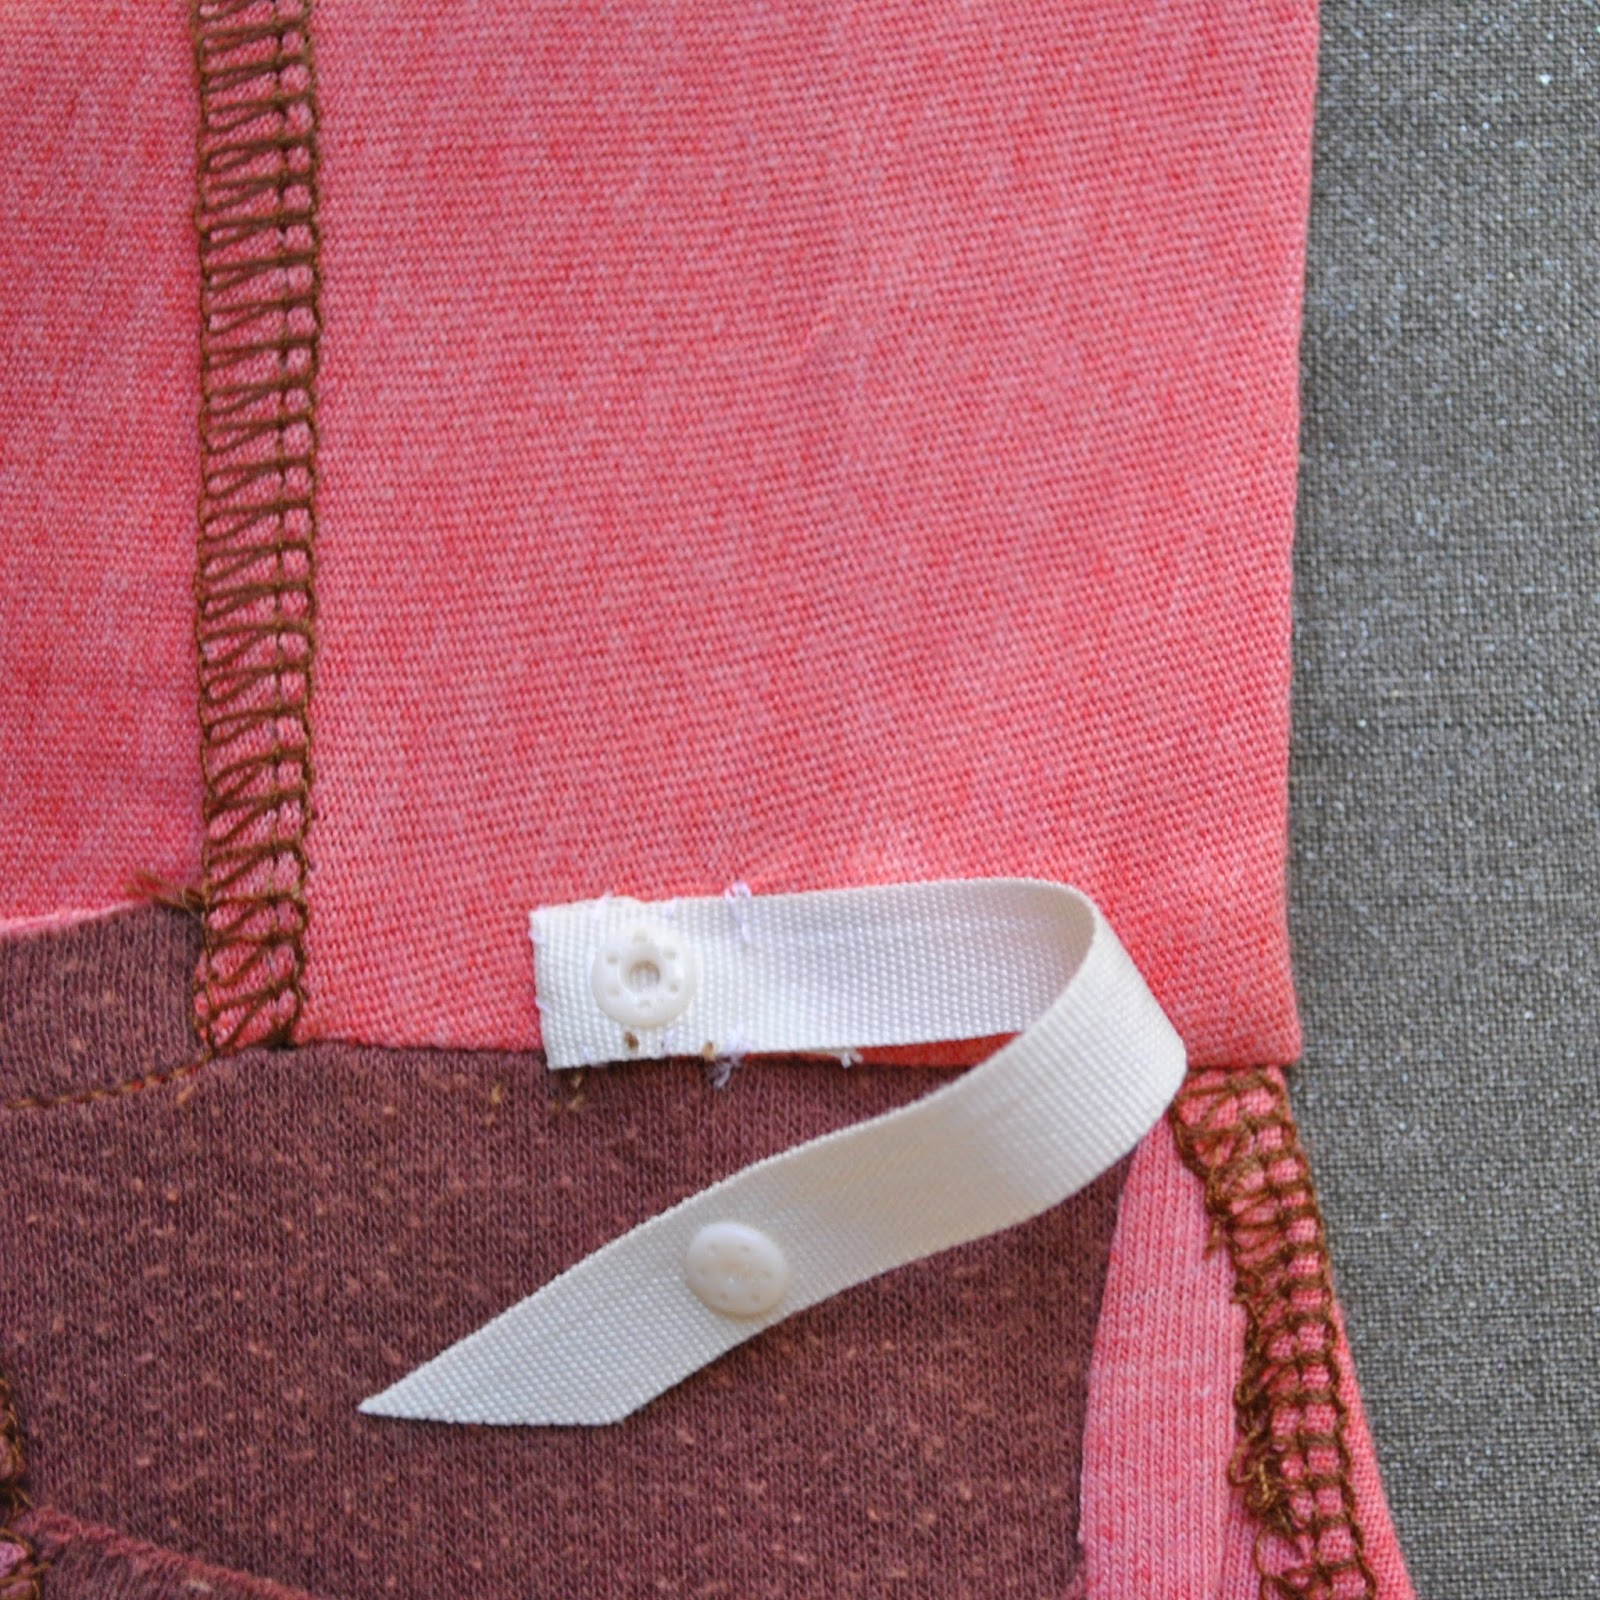
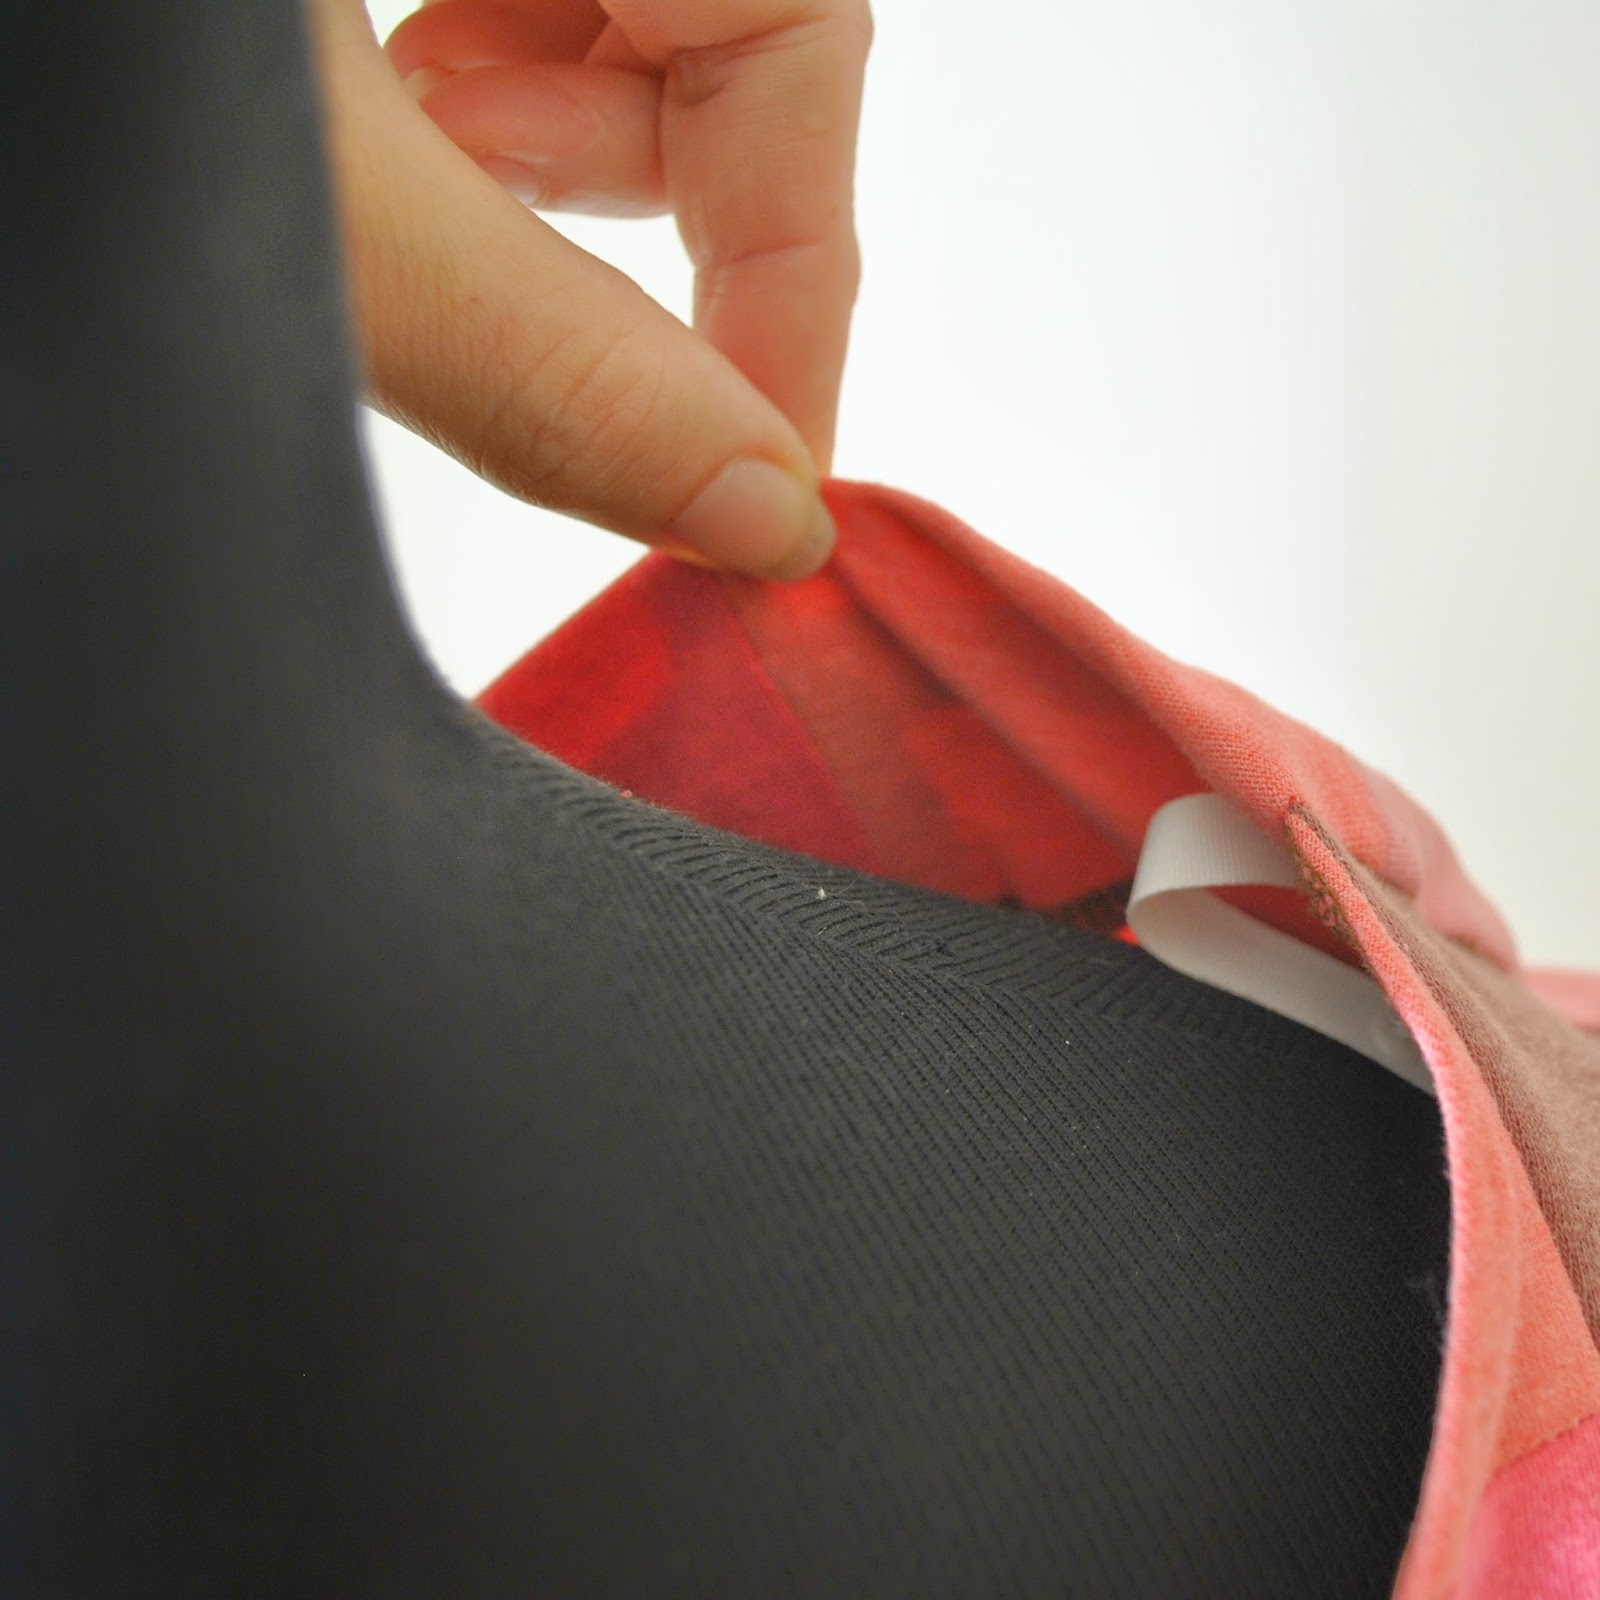
The inner seams are finished with the overlocker, but I didn’t want any overlocking “on show”.  So I flat-felled the seam in the cowl part of the neckline, so it looks nice and neat if you happen to catch sight of the inside.  In this design, a very probable occurrence.  The shoulder seams are also flat-felled for strength.

I left the raw edges of cowl and sleeves raw, because the jersey is very stable and does’t really need finishing. The edge naturally curls up quite nicely and I like how this looks  🙂

To get as much length to the top as I could I added a wedge of fabric onto part of the bottom edge.  The lower edge is simply overlocked, turned under once and stitched using a twin needle.  One thread is white, the other ivory, but I’m just fine with that.  Didn’t want to wind another bobbin for just one little hemline.  For what should have been a nothing-much top, I reckoned I’d expended enough thought on this thing already!

 Details:
Top; Burdastyle magazine 04/2014, 111, jersey stripe
Skirt; Vogue 1247 lined, ivory curtaining fabric, details here and my review of this pattern here
Sandals; 2 baia vista, from Zomp shoe boutique

stripe ever-so-slightly more horizontal on the back
pinterestmail

raspberry/navy Alabama Chanin tank top

I’ve finally finished my latest Alabama Chanin project…  
Below is how it appeared on this blog previously…? (shudder) well, that dress has undergone extensive renovation over the past five months and now at last, I am quite satisfied.

I received loads of fantastic suggestions, thank you so very much to everyone who gave me so much helpful and wonderfully thoughtful advice  🙂  I am very grateful  🙂 *mwah*
The pattern is the fitted top from Alabama Studio Sewing + Style, by Natalie Chanin, and I had modified it slightly by giving it a higher rise at the neckline at CB, which will help keep the straps firmly on my shoulders and not slip off, like they occasionally do in my previous, first version of this pattern.  The print is Abbie’s Flower design from the same book, enlarged by hand and printed as described here, and I employed the reverse appliqué method from the book, stitching running stitch around all motifs using crimson Gutermann upholstery thread, and then cutting the printed motifs away to reveal the base layer of fabric underneath.

I really liked Ann’s suggestion to bring some navy into the equation.  I bought some royal blue cotton jersey from KnitWit.  This was but a starting point; the original blue was a nice colour, but flat and not quite as edgy as I would have liked against the warmth and liveliness of the raspberry.  Some dyeing fun was called for.  I made haste for the lair and dragged out ye olde dye-pot, mwahahahaha
A short stint in a half-strength bath of iDye in Brown later and it was darkened and deepened up very nicely; transformed it into a very satisfactory shade of mottled dirty-navy.

Hehe, I just re-read that description and had to laugh at how the exact opposite of attractive that colour sounds!  well, I do love me some ugly colours, hehe.
The seams are all hand stitched in running stitch, with the occasional backstitch to “stop” the seam, something I learnt to do in hand- stitching quilts; and the seams then felled using running stitch, as per the Alabama Chanin way.  

I cut the binding strips for the armholes and neckline from the same dyed navy jersey and hand stitched them down in herringbone stitch using navy blue Gutermann upholstery thread.

A new tip; in my previous Alabama Chanin embroidery forays, I pinned the fabric layers together for the embroidery stage, this time I thought of a better solution.  I pinned and basted around all raw edges, then simply ran rough basting lines of long stitches, about 4-5cm apart, right across the pieces using my sewing machine.  Quick and dirty, nicely stable, and the long stitches are very easy to pull out as the embroidery progressed.  And far better than having to worry if my pins were going to fall out, only to get discovered on the sofa and produced as hard evidence in the Case against Sewing Taking Over the House.  Please, take a moment to consider the danger to one’s beloved husband whose bottom came to rest right beside that tiny little pearl-headed pin! not to mention one’s innocent offspring and cute fluffy pets!  
Hehe, no need to add further fuel to that particular flame  🙂

 My next Alabama Chanin project? already in the works!  Fortunately I made my original dress double layered and so I still have quite a good quantity of the raspberry fabric left after cutting this out; and I also dyed enough of the navy so that now a matching, though not identically patterned, skirt is awaiting in the wings to be made, as we speak.  Type?  Read?  One day, someone is going to come with a satisfactory verb for this kind of interaction  😉
Anyway, I am super pleased with my new Alabama Chanin top, and the good thing about that satisfaction is the renewed enthusiasm it brings for me to get on with that skirt quick sticks, to have something else to wear it with.  Ever onwards!

Details:
Top; the fitted top from the Alabama Studio Sewing + Style book, hand-dyed, -printed, -embroidered and -stitched in two different colour fabrics
Jeans; the Closet Case patterns Ginger jeans, navy stretch cotton denim, details here

pinterestmail

#hoodie

I love hoodies.  And I love dark browns, crinkly linen and loose relaxed-fit comfy loungewear.  Despite all those loves, it’s taken me a ridiculously long time to finish this hoodie.  I started it before I left for Melbourne last year! woops!
I used Burda 09/2014-115, a tunic/hoodie pattern; and this lovely deep, deep, burnt chocolate linen, that I bought from Tessuti’s in Melbourne on our previous, 2013 trip there… extra woops!  Sometimes I hoard lovely fabrics for forever and feel guilty about it, but really it’s only because I can’t think of the Perfect Project which it would like to become.  Some fabrics tell you straight away, whilst others sit there and taunt you with their loveliness while never giving any hint of what they want to be.

Anyway, finally I made something.
To be honest, this is version two.  
The pattern is actually for a tunic a good 6″ longer than this, and that is how I made it.  I had visions of those lovely chic European lagenlook-y ladies wearing long and loose flowing clothes in earthy neutral shades.  I started out with high hopes, made the hoodie/tunic.  Felt really good about it, all went together smoothly, happy with my decision, almost finished it; perfectly hand narrow-hemmed shirt-hem and all.  It was easily long enough to be a dress.
Tried it on, and was immediately struck by the fact that I had made myself a Friar Tuck robe.  Yes, in its long version I looked exactly like Friar Tuck. Do I want to look like Friar Tuck?  Emphatically, no.  Disastrous.  Dejectedly shoved it aside for, um; a few months.  Hmmm, how time flies!  
Anyway, I really did want it to work, and so just recently I drastically shortened that hem and rolled the sleeves up.  Massive improvement.  I left off the waist tie channel and tie.  I reckon that as a boxy, shorter tunic, with rolled up sleeves, it still had that relaxed, fairly oversized, comfy vibe that I was after… stylishly chic, I hope!
The dress has pockets and so I kept those, cutting and re-hemming it to just below that level.  The button placket is invisibly sewn closed, because all buttons just seemed either the wrong size or colour, or just plain wrong against the fabric.

For some reason that now escapes me, I felt allergic to the idea of self-fabric bands to hold up the rolled sleeves.  At the time I felt they would look unutterably boring and/or too match-y.  So I made some sleeve holder-up thingies from skinny metallic belts.  It felt like a good idea at the time, and luckily I’m still quite pleased with them, feel like they bring something interesting to the table, on what is otherwise a quite plain and featureless hoodie.  I’ve tried wearing the hoodie with a few other of my clothes and it’s interesting that that little bit of silver-y, pewter-y metallic on the sleeves really helps the hoodie to “go” with a lot of my other clothes far better than it would without.

The neckline/hood seam is hidden underneath a band, cut from the leftovers from this dress.  It felt quite fortuitous that the brown stripes were wide enough that I could do this, with barely a hint of cream pin-stripe to be seen!

Later edit: Inside the sleeve tabs, and thank you Jenna-Lynn for asking  🙂
I made the belt sleeve tabs by buckling the belts and cutting down to size keeping the buckle area intact.  Using a nail, I hand-drilled four little holes for stitching, two at each end. The outside holes are hidden underneath the belt overhang.  I put a little wad of folded fabric inside the sleeve between the belts to stabilise and strengthen the stitching area, and stitched through my drilled holes firmly and securely using thick upholstery cotton.

Details:
Hoodie; Burdastyle 09/2014, 115 shortened, of burnt chocolate-brown crinkly linen
Shorts; Burda 7723, grey/cream pinstripe linen, details here and my review of this pattern here

Disclaimer; this pattern was given to me by Burdastyle; however I chose it myself from the large range of patterns on offer because I liked it.  All opinions are most definitely my own.  There are no affiliate links on my blog and never will be…  I’m in it because I love sewing  🙂 

pinterestmail

Cassie’s Christmas ensemble

So, this year I asked Cassie what she would like for Christmas and she replied without hesitation, a long, white skirt.
Alrighty then!
I bought both fabrics at my local Spotlight; I considered buying Melbourne fabric like I did for the boys but reasoned that I could probably find nice enough white fabric at home.  So fortunate then that I did!  I was particularly thrilled with these finds.  The overlayer is a sheer cotton muslin and the lining/underlayer is a cotton voile; both light and airy and quite beautifully soft.  I really like how the layers of sheers and seams give a kind of “striped” effect to the outfit.
Honestly, Spotlight really can be such a hit or miss affair, so thank goodness for a hit.  A very palpable hit!  Random pop quiz; Can you name that quote…?
I used Butterick 3134; a very useful basic multi-gored skirt pattern and selected the six-gore option.  I cut it longer and flared out the lower edge a little more, for a nice swish.  I cut the lining/underlayer skirt using the spliced together pieces of Vogue 1247, lengthened, and put an invisible zip in the left side seam.  All French seams throughout, including that zip seam.  
Incidentally, I took a few pictures of doing the zip French seam in a sheer fabric, and can write a tut for anyone who is interested?  
I had enough fabric leftover to cut out a little blouse/top for her also, so she has a complete ensemble.  The little cropped blouse is a cut down version of NewLook 6483 with the sleeves lengthened.
Only the bodice of the top is lined and also French seams everywhere with only the armscye seams of the little top finished on the overlocker.  I’ve found that I’m really enjoying finishing my seams using more traditional methods lately and resorting to using the overlocker less and less.
Phew!  I have to confess I started making this outfit at the crack of dawn on Christmas Eve and finished it at about 6.30pm that evening.  It was a frantic race to the finish!  But it was worth it to see Cassie looking so lovely and summery and fresh and pretty in her outfit on Christmas Day.

Details:
Top; NewLook 6483 modified by cropping bodice and lengthening sleeves, white muslin and voile
Skirt; Butterick 3134, lengthened and lined with spliced-together Vogue 1247 lining, white muslin and voile
Sandals; 2 baia vista, from Zomp shoes

pinterestmail

nani IRO blouse

I’ve made a new top.  It is a plain little top, but to my eyes the lovely thing about it is the fabric; a beautifully soft cotton gauze, and the charming hand-painted look to its print.
A short story…
About
a month ago I was meeting with some friends, and one friend was a little late.  When she arrived, she explained that on the
way she had spotted a cute top in the window of a shop, and just had to screech to a stop and check it
out.  She tried it on and then bought it,
totally on the spur of the moment.  We
all duly admired the top and chatted about the pros and cons of spontaneous vs
carefully planned purchases.  Important, life
altering stuff, I know!
Anyway,
after our get-together, which happened to be in Glyde Street where Calico and
Ivy is situated, I popped in to check out the offerings.  Saw the range of nani IRO double gauze, fell hopelessly
in love all over again, as I always do when I go in and see it there.  It occurred to me that maybe I could buy
myself a little top too.  Except of
course that my version of buying a little top is buying a piece of fabric.  Inspired by my friend I just decided to
spontaneously go for it. 
And bammo, new top!   Woot!
I wanted the print to be the star so wanted for a very plain, simple and relaxed silhouette.  I used New Look 6483, one of my really old old old tried and trues that I’ve had for many years.  Not exciting, but a real goodie nonetheless.  There are probably tonnes of patterns identical to this one.
This
print is called Painting Check.  My very favourite
thing of all about it is the way the print fades away towards the selvedge and
I wanted to use this feature as a sort of “border print”,
although obviously it isn’t actually a border print but the complete opposite.  It’s a reverse border print!
But
I like ideas that are turned on their head so it’s definitely my kind of border
print.  To keep this feature firmly in
focus I left the selvedges unhemmed.  It’s an uncommon choice but I think it works really well for this particular fabric, and I really like how it looks!
The
two body pieces are cut from one selvedge edge and the two sleeves were cut
from the other.  The sleeves still have
the fabric ID on them, which I find quite charming.
There was only 1m left on the roll, which wasn’t quite enough for the hip width required for my pattern pieces.  So I cut them as wide as possible and just left the side seams open in a slit from the lower waist down.  
Side,
sleeve and shoulder seams are flat-felled, the armscye seam is overlocked and
the neckline is finished with a narrow strip of bias cut cotton voile,
stitched, understitched and then topstitched.
Details:
Top;
New Look 6483, nani IRO double gauze “painting check”
Shorts;
Burda 7723, white linen, details and my review of this pattern here
Thongs;
Havaianas
pinterestmail

patchwork Sandpoint top

I’ve made a new top.  Well, kinda new from old actually, since it’s made from 4 old Tshirts cut up and patched together.  My refashioning bag yielded; a light purply-brown from Craig, two pinks from Tim, and a chocolate-y one which is one of my old self-made Tshirts.  They were all old and a tad tatty here and there but still had some good bits left in them.  And I liked these yummy Cherry Ripe colours together.   mm-mmmmm  🙂

The pattern is the Sandpoint top designed by Helena of GreyDay patterns.  Mel of the curious kiwi contacted me to ask me to make up the pattern and review it and well, I love trying out new patterns; so ta da!

The Sandpoint is described as “a loose fitting T-shirt
with a surprise cowl in the back”.  It is a nice little top pattern suitable for a beginner, having separate front pattern pieces for the two neckline options, V-neck and round neck.  I think it’s biggest point of difference from other similar designs is a “shoulder band”, essentially a strip which is supposed to be worn behind the neck.  I think its purpose is probably to keep the top actually up on your shoulders and not fall off, which is pretty much a given with these necklines.  However I wasn’t keen on the shoulder band and decided to leave it off, and sewed lingerie holders inside on the shoulder seams.  I have previously used lingerie holders to keep up the shoulders of my other oversized cowl, drape-y tops, here and here, and have found them to work just fine for the job.  Fortunately they do for this one too  🙂

Because I wanted my rather bold patchworked fabric to speak for itself I decided that arm and neckline bands would be a visually distraction, fighting for attention.  So I left these off also and finished these edges by simply overlocking, turning under once and hand slip-stitching a hem in place.  My lower hem is likewise, invisibly hand stitched, and actually my top is 6.5cm longer than the pattern… for no real reason other than my patched-together fabric had the extra length, and who was I to ruthlessly cut it off? after all that careful cutting and patching it together!?  Plus, I just happen to like tops to be a little bit long.

Because I was leaving off the shoulder band, I put my top together quite differently from the instructions… namely: the instructions say to fold the back cowl allowance inside and then stitch the front and back together at the shoulders.  However this would result in a visible end-of-seam at the neck, which in the design is to be covered up by that shoulder band.  So, instead I pinned the front and the back together at the shoulders right sides together, then folded the back cowl facing allowance out to wrap around the front; then stitched the shoulder seam.  This way, when the shoulder seam is turned right side out the shoulder seam is nicely encased and hidden away within the facing, which gives a neat, more polished finish.

Details:
Top; Sandpoint by GreyDay patterns, made using 4 old cotton jersey Tshirts
Skirt; an adaption of Vogue 1247 and Vogue 8561, blue, slightly stretch denim, details here
Shoes; c/o Misano

pinterestmail

a creamy little double-fronted top

My new top will come as a very un-surprise to anyone who has been following me in the Sewvember instagram challenge, haha!…
This pattern is Burdastyle 04/2014-115, with modified sleeves  and my fabric is a silk hessian from Spotlight.  It has a very loose weave, a rather pleasing slightly rough and rustic texture.  The rich, almost buttery cream colour apparently suits me.
Now, I have received a handful of patterns of my choice from Burda… however this is NOT one of them.   I had bought this magazine myself already!  and I’ve already made the asymmetrical turtleneck top from the same collection in the mag.  Ok, honesty here; I actually totally love just about this entire collection.  It’s embarrassing to admit how easily I am swayed by colour choices.  Those peacefully harmonious shades of soothing cool non-colours; *sigh* heavenly!
So style-wise, this is a plain design.  And my choice of fabric; quite plain.  But that’s ok, a bit of plain is a good thing to have in the wardrobe to set off the more eye-catching elements within.  But as I was doing the sleeves, which are likewise as plain a style as could be, I worried that they were going to tip my blouse over into the territory of Irretrievably Bland.  So I added a little feature; a faced split that has a little button closure on the corners.  I’m very pleased with how this looks; quite primitive, like a vague sort of a nod towards a tailored shirtsleeve button placket.

Construction-wise, this is a nice, quick and simple little pattern and utterly foolproof… . oh, I put the wrong front lapping over.   Haha.  We’ll just pretend that I did that on purpose, ok?  Ahem.

Insider biz; the side and shoulder seams are flat-felled, the sleeve seams overlocked.  The neckline is faced with a bias-cut strip of pale yellow/cream cotton voile.

Finally, my usual criteria; if I saw this in a shop would I be tempted to buy?  Heck, yeah!  Plain is my middle name.  Along with all the other middle names I adopt when the mood strikes.  This is going to be worn a tonne  🙂


Details:
Top; Burdastyle 04/2014-115 with modified sleeves, cream silk hessian
Skirt; adaption of Vogue 1247, coffee lace with silk charmeuse lining, details here
Thongs; Mountain Designs
Sienna wears her own custom-fit coat

Later edit: 4 yrs later, and I gave this little top a rejuvenating dye-bath!  it’s now a pretty shade of cherry-blossom pink…
Other outfit details:
and then again, to an exciting new shade of hot pink!  I love it like this!
pinterestmail

a bobbly little top, and some others too

I’ve made a few new tops…
Top un; a cosy little pom-pommy top, using pattern 111 from Burdastyle magazine 04-2014 in a bobbly stretch fabric the colour of whipped cream from Fabulous Fabrics.  The design has quite an interesting and unusual shape already and I further toyed with the proportions, shortening by about 15cm at the lower hem and lengthening the sleeves by 3cm.  This was only like, the easiest thing in the world to run up and I think it’s rather cute too!  The oversized floppy neckline manages to be all of comfortable and even a little dramatically designer-y too.
The design, while a very easy project, still fits happily into the interesting category for those of us who like that sort of thing… The body is a one piece tube with one piecemeal seam down the right side.  The sleeves are have different shaped sleeve caps from each other and their positioning and individual insertion methods creates a slightly skewiff shape to the top when worn.  Cool!  Completed, it reminds me a little of my Pattern Magic twisted top, which is illogical since this one is both boxy and has the oversized cowl and is cut on-grain, and… well, technically speaking is different in just about every respect, really.   OK, forget I ever compared the two.  

And to pre-empt an inevitable concern; yes, the sleeves do feel different to each other but it is not uncomfortable.

Tops deux and trois are the Nettie pattern, by Closet Case Files, my now go-to tshirt pattern. I upsized to an 18 from my usual 12, because a slightly more relaxed fit is desirable in a summertime thing.  The fabric is a fine, off-white jersey knit from Fabulous Fabrics.  
One has short sleeves and a fun little pocket.  The pocket looks like a cute design decision but is actually covering a hole that I had accidentally snipped right in the middle of the fabric oooops!!  Thoughtless, overconfident me, snipping away wildly and with carefree abandon! It was in a REALLY awkward, unavoidable spot, so I sewed the hole shut and reinforced it underneath with a bit of scrap, but it still looked way too obvious and ugly.  Rats.   So when cutting out I cunningly managed to finagle it in breast pocket position, plonked the pocket on top, and then had to cut short sleeves for the tee.  Hmmf, but well, at least I managed to get the two tees out of my fabric piece, in spite of the snip.  No one will ever know!
The other is completely unremarkable, apart from that all the seams and hems sit on the outside and are simply overlocked with navy blue thread.   Why did I do this?  *shrug* dunno, something different from my gazillion other white tees.

 Oh, this old thing, tshirt quatre.  I’m taking the opportunity to finally blog this one I made about two years ago.  It’s annoying that I never blogged it, because when I’m wearing it in a daily outfit and linking to my blog posts it’s not there.  So here ’tis!  It’s beige and boring, and therefore incredibly useful.  Made using my own custom fit Tshirt pattern, which apparently I seem to have chucked out at some point.  Double rats.  Yes, I’ve been doing a lot of careless silly things lately.
So, while stuffing the new creations into my Tshirt drawer last weekend I spontaneously embarked, as you do, upon an epic wardrobe spring clean-out.  As in, I emptied every single one of my drawers and took everything out of my wardrobe.  And went through methodically trying on, sorting, assessing and sifting out only the things I really truly wanted to keep.  Discovering forgotten treasures!  New, cool, outfit combinations!  Tossing hideous things into big rubbish bags!  Purging!!!   It took a few hours but man, it was great.  Felt SO GOOD.
This house, is clean…
OK.  My first, same old conclusion; I have a LOT of clothes.  And I love most of them too. I have very few unloved things and those have been weeded out now.  A few undecided things are going to be worn on a trial basis and assessed over the next few weeks.
Second conclusion, and slightly surprising, to me at least; I do not need to make nor buy basic Tshirts for, like the rest of my life, probably.  Why is this surprising? because after my first and second me-made months four years ago, my biggest conclusion was that I severely lacked basic tops and tees.  Well, obedient little me has diligently been making basic tees ever since and has rectified that lack very adequately now.  Thank you, me!  This is good, because while I don’t mind making Tshirts, lets be real, they are bread-and-butter.  Without the butter.  Not the most inspiring things.  Obviously instantly gratifying projects can be fun and fulfilling in their own way.  But my last couple of more in-depth projects have been a hugely more satisfying to me, on every level.  So I’m pleased that a full complement of basics means that I can relax about Dutiful Wardrobe-Building, and just happily spend my time and energy on the kind of more complex, involved, longer term projects that are truly enjoyable.
So, yay!!
Now on to something more interesting…  🙂

pinterestmail
Switch to mobile version
↓