OK, I’ve done some pretty involved and intensive projects in my time, in fact more often than not, lately! and this one definitely ticks that box too.
Quite a few months ago, Cassie mentioned that she wanted us to go to ComicCon together this year, and furthermore, she had already chosen a good costume for me to make…

source
source
This is Queen Rutela, the queen and elder of the Zora; proud, elegant and graceful aquatic-people who reside in the Zora’s Domain in the Zelda universe. If you’ve never heard of Zora, it’s ok, that’s perfectly normal because this stuff is the very height of geekiness and so far from the mainstream it’s a little embarrassing … However! you have now! She is a rather tragic character; the story is as follows: Queen Rutela was the wife of the late King Zora and mother to Prince Ralis. During the events of Twilight Princess, Shadow Beasts invade the Zora village, so Queen immediately sent her son to Hyrule Castle for his own safety and to inform Princess Zelda of what was going on, prompting the invaders to make an example of Queen Rutela by executing her in front of her people.

I liked the idea of going as Queen Rutela for several reasons, partly because she’s a mother so I felt she was age appropriate for me, also her story moved me because it is so sad, she’s so protective of her son and so motherly, it tugged at my heartstrings a bit. But mostly, well, let’s be honest, because her attire and bearing is just so beautiful and I relished the challenge of giving a good go to making it! Also, the Zora have always been my favourite species in the Zelda universe 🙂
ANYWAY! here we go…

Firstly, the dress. More accurately it’s a 3-piece ensemble, I made an ankle length petticoat/underdress, a skirt, and a long tunic top; all using white polyester stretch stuff (some leftovers, some new, variously from Spotlight, Fabulous Fabrics). The plain, strapless, ankle-length petticoat is one I made many years ago, so long ago I’ve completely forgotten the pattern I used. I never thought I’d say that, because I tend to remember patterns FOREVER, but not this time! The skirt has the other “skirt-y” layers on an elastic waistband, and the tunic top is a drastically modified Nettie bodysuit, basically my go-to Tshirt pattern. The sleeves are in two parts, a close-fitting “under” sleeve that is wrist length, and the “over”sleeve has a very high sleeve cap and a bell-shaped bottom edge that is gathered and “pouffed” into the under sleeve, then point-stitched in place to get artistic-y folding. At the shoulder edge, the extra fabric in the sleeve caps is pulled in with three sharp darts; making a jutty-out sort of shoulder cap… that’s a technical term there, btw.

I stitched frilly “gills” to the side underbust area.
Oh! I’m getting ahead of myself… those frills were formed in the following way; I clean-cut the eyes using my rotary cutter, then holding the edge just slightly and evenly stretched out, passed it over a candle flame; which melted the edges just a little and set them in a naturally curly frill. I took a little bit of practise to get this just right, with the right degree of frill and with minimal scorching! Fortunately, those bits that looked a bit charred black just crumbled off when I rubbed them between my fingers.

Once I’d made the three parts of the dress, I shrouded Bessie in plastic and newspaper, dressed her, masked off the bits that I wanted to remain white, and sprayed the skirt, then the top utra-carefully and judiciously with poppy red enamel spray paint (Bunnings)

The colour is a little brighter than ideal, I really really wanted a warm, dusky coral pink, but with spray paint you’re unfortunately stuck with whatever is in the VERY limited pre-mixed range… 🙁 /

Spraying was pretty scary, my application isn’t perfect, and there is a blotch on the R shoulder that is a bit heavy and which was pretty devastating for a while, but I had no choice really but to accept what I’d done. As it turned out I shouldn’t have worried too much because you couldn’t even see the blob once my headpiece was on!


Next, the fin/wings… I cut four-layers in light grey polyester organza, and simply stitched all layers together by skinny zig-zagging around all edges, and slip-stitched it in places to the top of the sleeves.

Next, the jewellery; and this bit was lots of fun! It’s a long time since I’ve played about with jewellry-making and I really enjoyed it 🙂 I used Super Sculpey modelling clay, jewellery wire and gold metallic acrylic paint (Spotlight) and some really lovely turquoise glass jewels (Fabulous Fabrics), and baked my pendants in the oven before painting them, and stringing them together. It’s hard to see the exact details of the Queen’s jewels in the short footage of her that there is, and what’s more, the details seem to vary from picture to picture, so I took a little creative license and designed my own, closely inspired by what I knew of the Zora style, and the arrangement that I could see from the footage.

The body-lace fastens at the small of my back; the necklace is supposed to sit out very wide on her shoulders, and I managed to get this look by stitching rings halfway along my shoulder, and the necklace clips onto these, wide on each shoulder. I also made a “beaten gold” collar/choker from interfaced gold metallic jersey (Spotlight), hand stitched radiating lines over it, and stitched the last pendant to it, then stitched white vinyl “petals” (Clark Rubber) around the lower edge. This closes by press studs at the back.

Headpiece: it’s simply a long tail in the same polyester stretch, stuffed with Hobby Fill (Spotlight). I inserted fins of fabric-covered cereal-box cardboard into the side seams, and I took the precaution of spray-painting the cardboard ivory first because the polyester is kinda see-through, and stitched it to the rim of a red swimming cap, also catching into the stitching a white plastic face-mask (Spotlight)

Now for the hair! This took quite a bit of nutting out…. I’d stretched the bathing cap/head-tail/face mask contraption to Mr ‘Ed, my foam head, above.

For the hair I used skinny foam noodle (Clark Rubber) and stitched the top bit of the hair through all layers. This stuff is pretty bouncy with a mind of its own, but I damn well forced that sucker to be what I wanted it to be with firm and masterful stitching to get the folded part/hair at the centre top. Take that, foam noodle!! BOW TO MY WILL…

The blonde “coral” hair was easier and actually lots of fun, like being in kindergarten again… I snipped it into lengths, and painted the bits with various mixed shades of pale yellow, shaded with addition of lilac and metallic gold. I wanted the hair to be in shades because we all know a flat colour just looks fake and, well, flat, any painted thing always looks so much more vibrant and real and rich when it has several different shades in it. Going to this much effort sounds complicated and maybe even unnecessarily involved, but I whizzed through making the hair, loving every paint stroke. I strung them on yellow thread and stitched them to the cap through all layers, and painted part of the top layer of hair in the same way. There is 35m of noodle in this thing… I can hardly believe that myself but yes, really!
One “strand” came off while I was pulling the thing onto my head, aaaaagh NOOOOOO! which was a bit of a worry, obviously! but I had plenty of “hair” and luckily every other bit stayed put.

The final step was to spray-paint the top side of the head-tail with the same poppy-red spray paint. Scary!! but I was super SUPER careful… On another note, this picture below gave me a laugh! the head looks hideous, the stuff of nightmares!!! Zoe “looks” terrified but of course she wasn’t… she’s knows what’s real and what’s not. Even on Saturday morning when I emerged from the bedroom in full costume plus makeup, all the cats just looked at me, maybe a bit quizzically! but they still knew it was me.

Oh, wait… doing the make-up was the final step, of course! I painted white dots around her brow line, just like in my inspiration pic, and then trimmed away the mask. Cassie suggested a strip of Hollywood tape on my nose, which helped keep the nose piece firmly in place throughout the day. Also, with amazing luck, Priceline had a 40% off all makeup sale in the days beforehand so I got some white translucent face-powder and rather horrible bright red rouge-y stuff for the matching poppy-red circles under my eyes and lips.


The photo at the top is my first attempt to photoshop myself into a fake background! pretty good, huh?! this actually took me aaaaaaages… hehe, #photoshopnoob Well, I felt like Queen Rutela just HAD to appear in Zora’s Domain or it would be, well, you know, just like an unfinished and half-done effort, so I decided I just had to do it!
 I didn’t get any photos of me actually at ComicCon in Perth unfortunately; we were just having way too much fun! plus my gloves made it impossible for me to operate my phone! However about a million people asked to take my picture, which is not as weird as it sounds, it’s just the done thing at ComicCon when you dress up; everyone does it! Also it was highly gratifying when people recognised my character, totally made my day!!! Every now and then I would hear a call; “Queen Rutela!!!!!” which was really nice!


 Anyway! It’s finished now! This dress, I mean; not the costume. Although that is too, hip hip hooray. Slowly getting back to normal making. Well, normal for me, anyway 😉


 just felt vaguely frumpy in them and peeled them off straight away. I’m just not feeling this style any more, feel like it’s becoming a little bit dated. Is it just me, or are skinny jeans appearing decidedly passé right now? Anyway; OUT THEY GO!!! Well… maybe just to the time-out box for a while. I have this box you see, that I chuck doubtful clothes into, and in a few months or a year or so I’ll check them out to see if it’s easier to make a decision then. Honestly, sometimes I wonder why I even have that box since it’s a kind of hoarder-ish thing to have and really nine times out of ten the items within get the flick! but for the one item that gets a reprieve I’ve always been glad I kept it after all. Sometimes, you and your clothing just need a bit of a break from each other. A trial separation. A conscious uncoupling, with the door open to re-coupling. Yeah. *madly justifying hoarding tendencies to oneself*


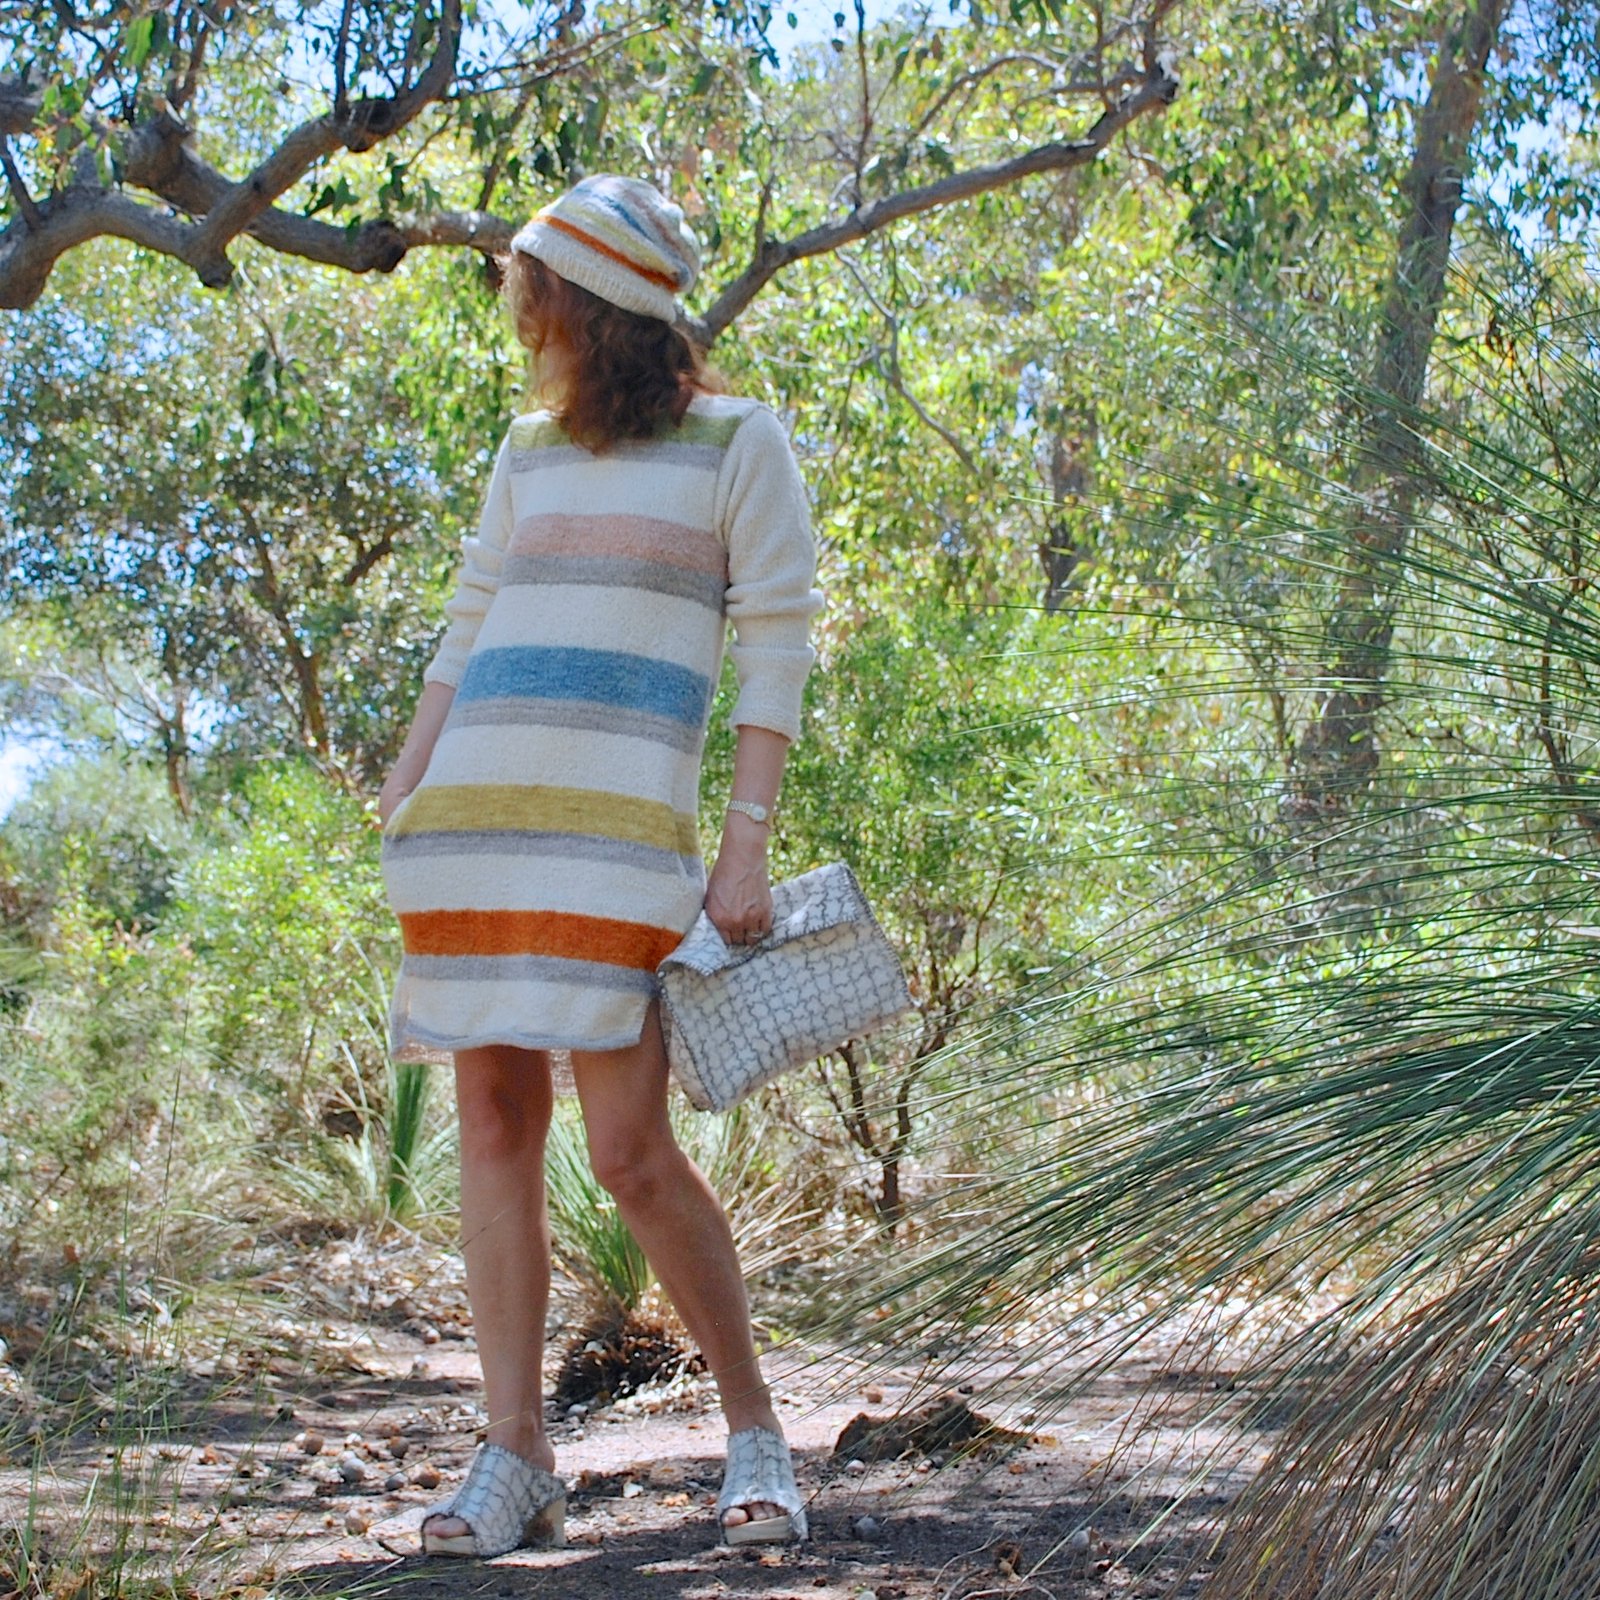
 Like most bloggers, when taking my pictures I usually try to pick some nice location as a backdrop to my creations, something that has the colours and the “feel” and/or just some general overall appropriateness in subject matter or whatever, that I think enhances whatever it is I’m showcasing.