box of socks; the October edition

I meant to post this yesterday, however I’m … ok I’m NOT going to complain about being busy.  The dreaded B word.  It’s annoying.  Sorry!

However, ta da!  I finished these socks during my holiday away in the US with Yoshimi.  Here is the incriminating evidence of me in the act of conversational knitting while in San Francisco with Shams and Yoshimi…  and I can assure you we’re actually sitting in our air bnb here and I’m NOT actually humiliating us all while out in public..

I took my bamboo needles away with me, because I knew airlines are ok with skinny little bamboo needles.  However I did not knit one single stitch while on the plane!!  Nope, upon getting on the plane I proceeded to watch movies, eat dinner, sip champagne, and sleep.  I did absolutely nothing constructive whatsoever.  Ha!

it’s a tough life but somebody’s gotta do it

I bought the sock yarn while I was in Japan in April… it’s Opal yarn in the Van Vincent Gogh “Vase of Sunflowers” colour way 5432; and the pattern is kinda my own, heavily adapted basic sockette pattern in a Patons pamphlet from the 60’s, no C11.  I completely adore the warm swampy mossy yellowy, browny greens.  So very moi.

#thePerilsofBeingaPetOwningKnittingBlogger

Before I drag out ye olde updated box of socks picture, I just want to put up this picture Tim sent through.. I’m rather thrilled he’s still wearing that outfit for Hallowe’en!!

Also I thought I’d share here my own Hallowe’en post for this year although you could not call this a costume, it’s just an outfit that I would wear on any other day.  Sophie makes the whole thing, imo… that darling little powder puff.

And now… finally.  Le box of socks is looking rather gorgeous, I reckon!!

pinterestmail

San Francisco and New York, USA; a travel wardrobe

above; this is me, shopping in Mood… eeeek!!! #dreamcometrue

So, during our April holiday in Japan, my lovely friend Yoshimi suggested an idea; that she and I meet in the US for a short holiday together; to go fabric shopping and to meet with sewing friends who we have both known for years but not actually “met” yet… I didn’t have to think for very long because I thought it sounded like lots of fun!

Time away:

14 days

Where to:

San Francisco and New York City, USA

Season:

early autumn, with expected daily temperatures of around mostly 21-24C  to one glorious day of 28C

Expected activities:

mostly visiting and hanging out with fellow sewing enthusiasts in the US! we  planned for exploring the city, fabric shopping, museum and art gallery visits, and also for one day of bike riding along the shoreline of San Francisco and across the Golden Gate bridge.

Colour scheme:

no particular colour scheme, just my regular palette of neutral/autumnal shades.  I picked things that I thought went nicely with my  new deep green canvas jacket, which turned out to be a good plan because I ended up wearing it every day.

What I packed:

(from left to right, top to bottom, the number in brackets after each item is the number of times it got worn… all items are linked to their original construction post. I made everything here except for the shoes, the ivory scarf and my gold handbag)

bottle green canvas jacket (14)
white cropped top and “autumnal” skirt  (1)
cockatoo print top and skirt (3)
floral dress (3)
mustard merino tee (2)
forest green twist top (2)
white shirt & purple top with leather sleeves (3) pictured together just because I always wore them together
ivory scarf (5)
blue-grey cardigan (3)
bookshelf skirt (3)
striped tee (1)
blue 3/4 trousers (4)
pink raincoat (0)
white sandshoes (8)
black booties (6)
green thongs (0)
black tights x2 (6)
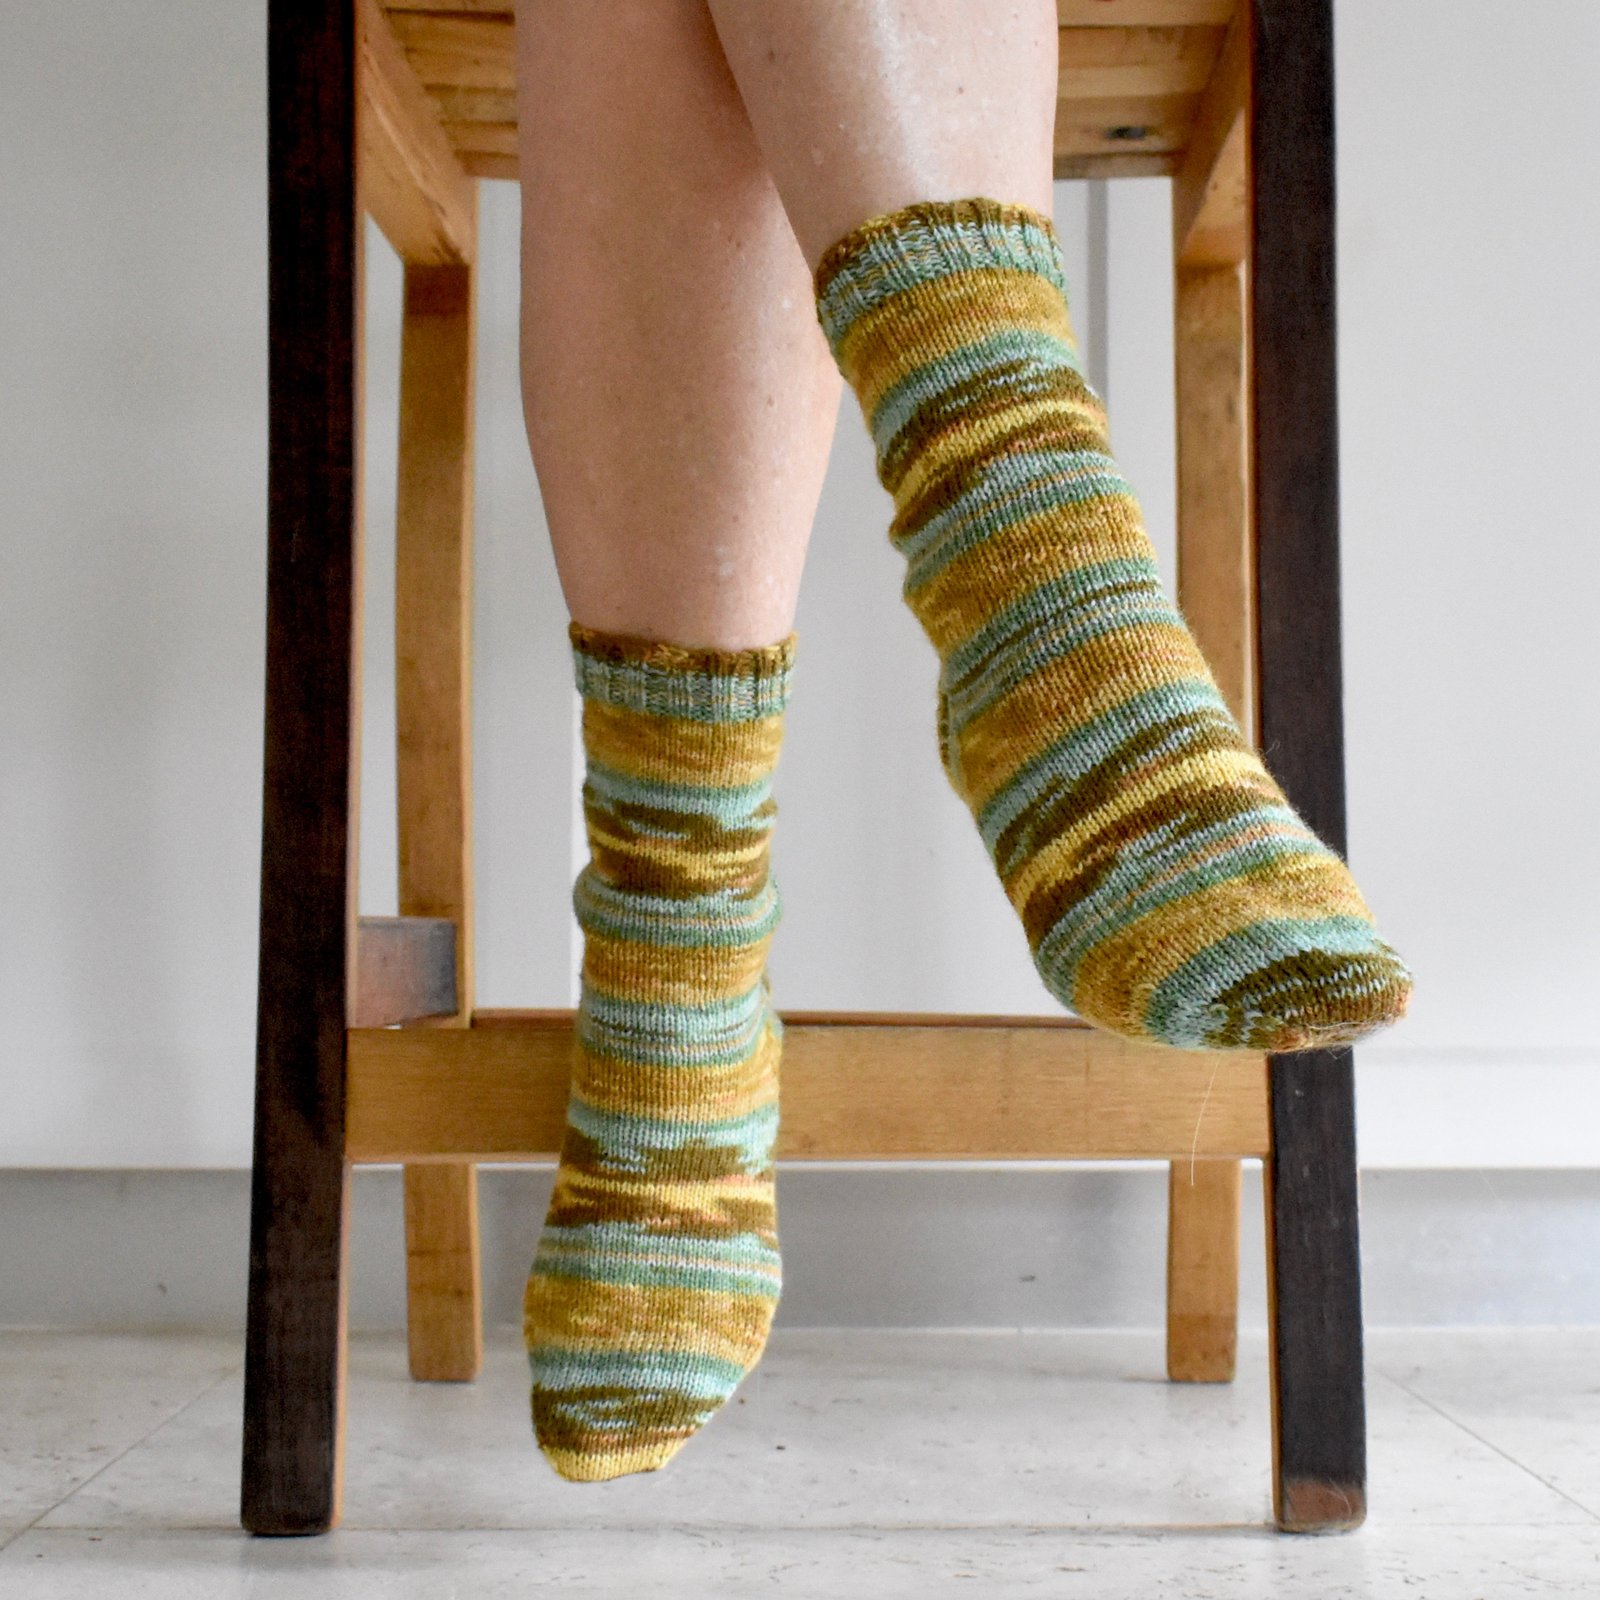
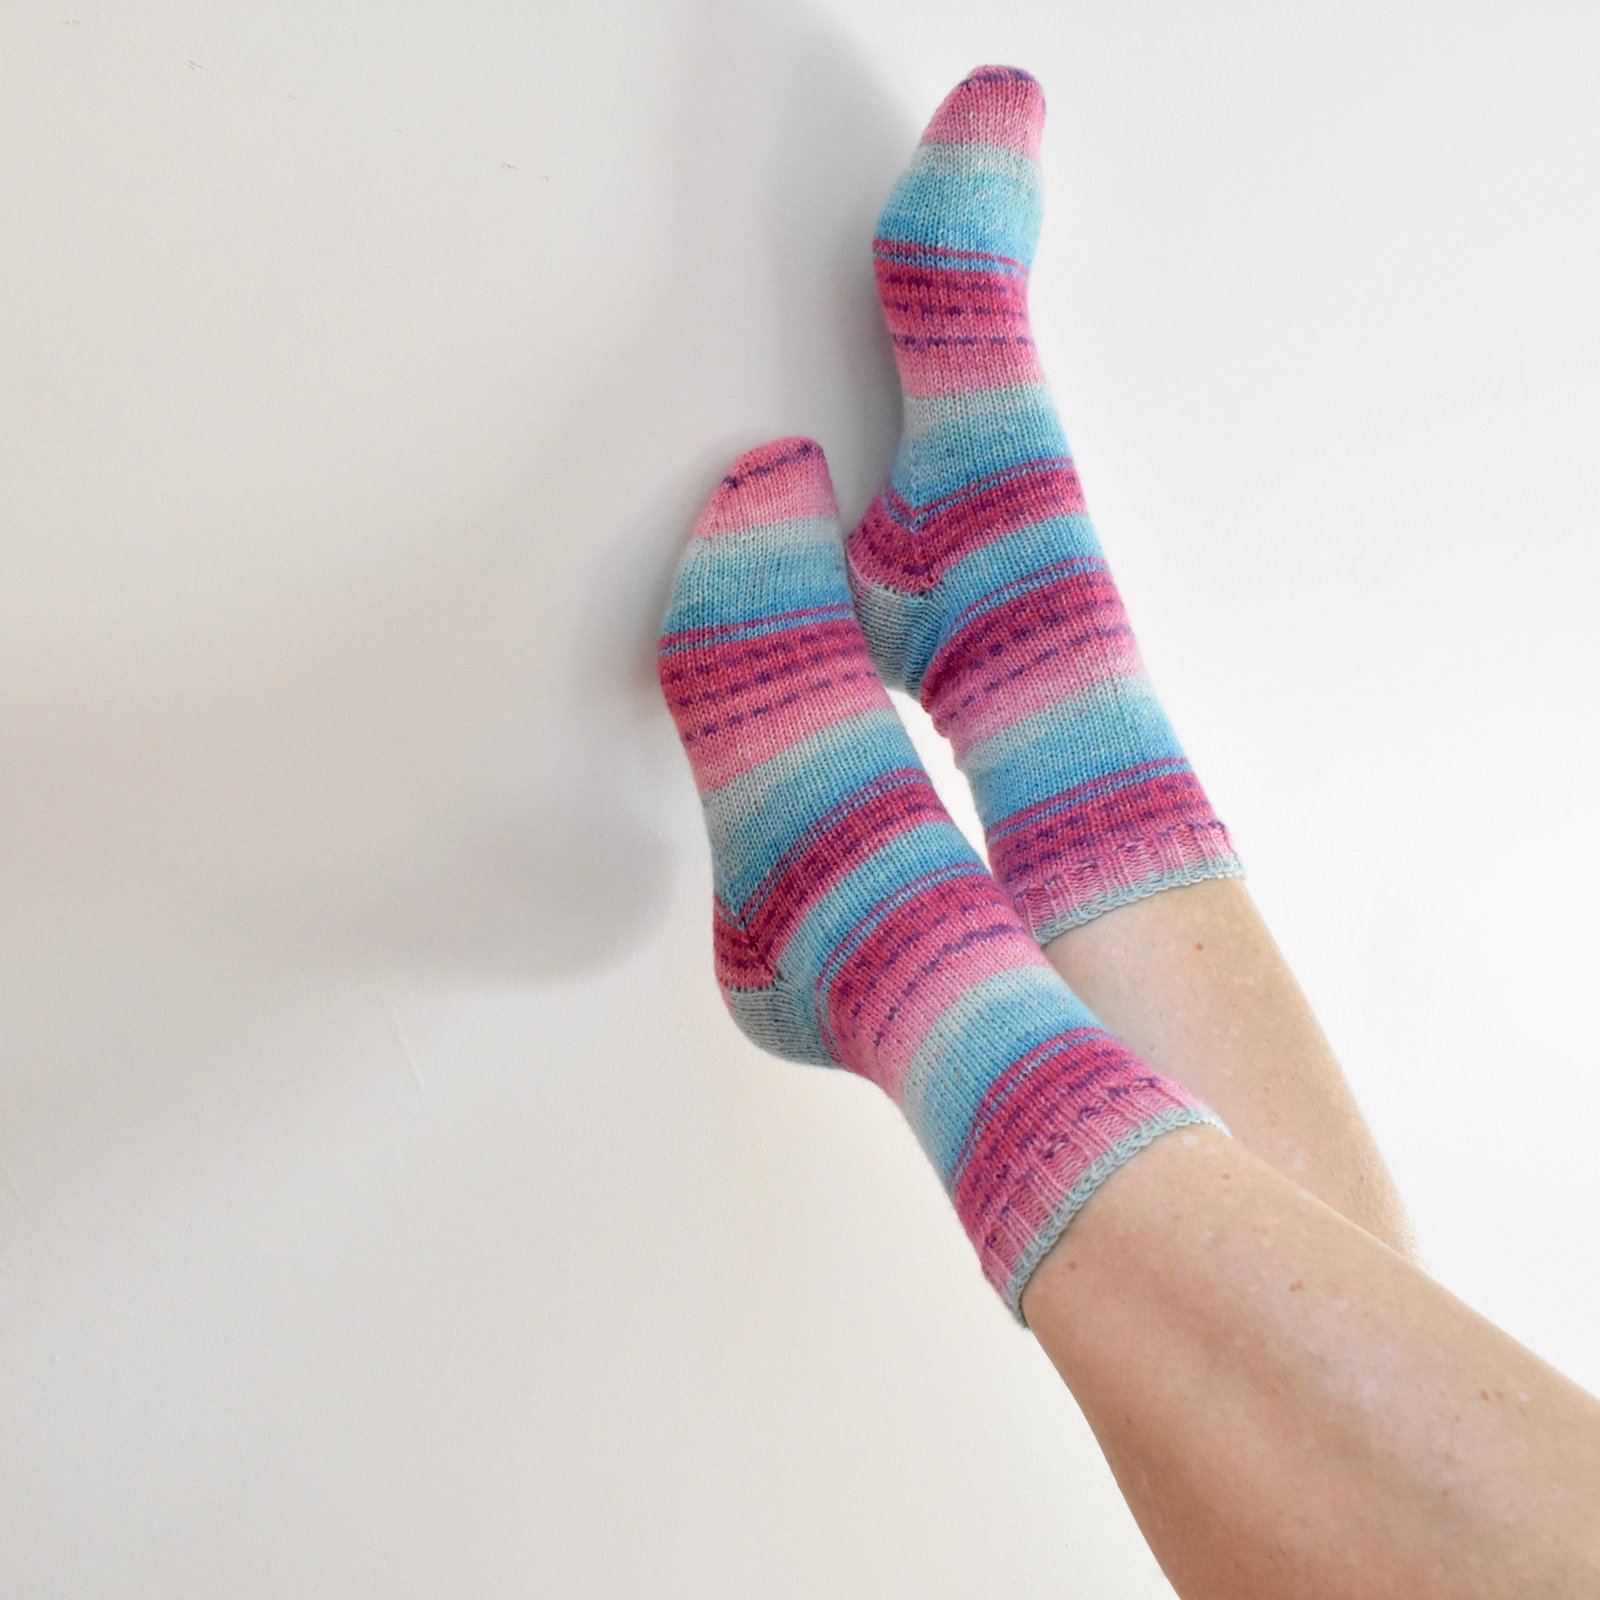
a selection of sockettes (8)
gold handbag
white sunhat (0)
yellow bathers (0)

not pictured; my underwear, pyjamas, toiletries bag, knitting bag

My daily outfits:

or; more messy-looking but definitely more “authentically”…

Thoughts:

Overall I was very happy with the clothing I took, I think I took just the right amount of stuff actually, and wore things pretty evenly.  I’ve already waxed poetic about my new Sienna jacket so will not repeat myself by raving afresh here… but, it was for sure the MVP!

The only time I miscalculated my outfit was the day we rode over the Golden Gate bridge… everyone warned us it would be cold and we’d need to rug up.  Well, it was actually pretty hot and I sweltered in my merino tee and trousers!  I had to go hide behind a tourist bus and sneakily strip my merino tee off from under my, thankfully rather loose and baggy striped tee because I thought I was going to legit DIE of heat exhaustion.  Overly dramatic?  MOI?!

I loved wearing my cockatoo outfit… it got quite a few compliments, and not just from sewing friends who “knew” it from my blog!  I always feel good wearing it anyway, it’s quite unique and interesting; and especially being overseas it felt like a little bit of Australiana too, which made me happy.

I’d made my new Nicola Finetti outfit too, and this was absolutely perfect for that one very warm day in San Francisco.  Oh! I was so glad of that one warm day!  It would have been perfect if we’d had another warm day for when I met with the New York sewing peeps too, but oh well, c’est la vie.  It was ok because I wore one of my favourite dresses that day, the floaty floral number pictured at top, so that was fine.  btw, I took that sneaky selfie in Mood fabrics… propped my phone up on a handy roll of fabric and set the timer.  It’s not a good photo at all; grainy, badly lit, off kilter and blurry, and I totally love it for all those reasons!

Was there anything I packed that was not the slightest bit useful?  Well, my bathers, hat, pair of thongs, and my raincoat; lay completely undisturbed in the suitcase and did not get worn, even once!  Four things!!  Now, normally I hate packing and taking things for nothing, because of the waste of suitcase space; however I’m not too devastated this time.  For one; it’s always a good idea to take bathers I reckon, just in case; they don’t take up much room.  There was no need for them but hey, no biggie.  And thongs, for the same reason.  My hat; well, I dunno, just being in a sophisticated city environment kinda disinclines me to wear something as touristy as a hat.  Yes of course I AM a tourist, true, but still I didn’t want to wear it.  And not needing my raincoat was a good thing!  We were so lucky with lovely fine weather the entire time!! …

Yoshimi, Claudine, Peter, moi , Carolyn ….. btw Claudine’s jumper is one she knitted herself, using wool she spun herself, from the raw fleece if you don’t mind! and then dyed herself too…  WHAT A WORK OF ART I ASK YOU!!!

So, I’ve already posted pictures of the ladies we met in California, and it gives me so much pleasure to post these pictures of the New York sewing peeps we met too!  As with the California girls, so many of these people I have admired and followed for about a decade and it was so amazing and fantastic fun to meet for real!  I’m so grateful to Carolyn, of Diary of a Sewing Fanatic for organising a fabulous fabric shopping day out together with Claudine, Peter, Caroline and Carol, and to Sonja and Yvette for coming out to meet us for dinner later at Carolyn’s favourite restaurant Brendan’s.  It was such a wonderful day!

with Carol and Yoshimi in Mood… hehe, that thing behind us made me laugh when I noticed it creepily photobombing our picture!

below: Caroline, Claudine, Yoshimi, Carolyn

Earlier in our NY sojourn, we met up with the fabulous and very funny Marcy in the beautiful Grand Central Terminal!  I wish we could have gone fabric shopping with her at her favourite wax print store too!

and we had the most delightful breakfast and visit to Lucy’s Grocery Store with Kyle and Tomasa.  It was such a joy to chat at length with these two lovely ladies!

Yoshimi, Kyle, Tomasa,

Honestly, meeting sewing friends was the purpose and happily also the highlight of my trip; and dare I say it? even eclipsed the fabric shopping at such a worldwide sewing mecca as Mood, if that is possible.  And the fabric shopping in the Garment District is indeed an amazing experience.  I have no words actually.  It’s truly overwhelming, and everything you’ve ever read about the stores, the size of places like Britex and Stonemountain and Daughters in San Francisco, and the spandex shop and Mood in NYC, the stuffed-full-ness; the sheer ungodly number of bolts of fabric which must surely number up in the tens of thousands if not hundreds of thousands… Pacific Trimming alone, oh my god.  What wouldn’t I give to have THAT haberdashery heaven in easy reach?!

OK, I said I had no words, and yet there ended up to be quite a few words after all…  Ha!

Finally, Yoshimi was the most delightful travel companion and I’m so happy and grateful that she suggested we take this lovely trip together.  I had so much fun and I sure hope she did too.  Thank you so much Yoshimi! for your friendship, and I hope we can take another trip together, some day!

randomly; another favourite ootd selfie … I sneakily took this one in the NewYork Met by propping my phone against my bag, on a handy seat… Sneaky!!


Now, seeking a random opinion…usually when photographing my travel wardrobe I lay everything out on the floor, as in the kind of “floor-drobe” that I used to have to steel myself to confront when entering my teenagers’ bedrooms… and this time I tried draping everything neatly over Jane, so it all looks nice and neat and clean and clear.  What do you think? Is this preferable to the usual floor-drobe? Or is it not as “real?

versus

yes, I did both…


Likewise, my daily outfit pictures… I think putting the outfits on Jane gives a clear and clean and well-detailed overview of the items and how they go together, and definitely looks quite “nice” compared to my real life pictures where you might not even be able to see details very well.  On the other hand, the “real” pictures are, well, REAL.

versus

It’s ok, there’s no “right answer, but still; which do you prefer?

pinterestmail

“Moroccan tile” skirt and a little white top

Something I really wanted to do before my trip to the United States was to make a new outfit for meeting with other seamsters… with two days to go; I did!  I made a skirt and a little white top ensemble… each piece was actually pretty simple and the whole process from go to whoa took about half a day each.  Bam! I really  love sewing projects that just whizz together super quick like that.

I used Vogue 1486; a Nicola Finetti design.  Nicola Finetti is an Australian designer, and when have I ever seen an Australian designer collaborate with Vogue??  I’m pretty sure, never.  I decided this was a collab I absolute needed to support by buying the pattern…

For the skirt; I’d ordered 3m of cotton from Minerva.  I thought the print looked quite divine on the website, when it turned up it was actually a bit of a surprise, to be honest!  The print was divine; however it was also far far smaller, I mean, on a smaller scale, than I had imagined.  I’d sort of pictured the squares being each about 10cm, sorta like real Moroccan tiles, actually they’re more like 1cm.  Hey ho though; I still had hopes it would work out ok…  The colours are quite luscious, and very very me!  Mustard, terracotta, burnt orange, turquoise, green, a tiny dash of coral pink… honestly could this possibly get any more my sort of palette!

The fabric is beautiful quality, as good as I could have hoped for; soft, and still crisp enough, densely woven and yet still with a very nice drape.  It was also very generous width, however I still didn’t manage to cut the skirt pattern pieces out from my 3m length!! I know, right?!  You’d hardly believe it to look at it, but it’s a HUGE fabric hog!!  I had to piece a smaller section onto the end in order to cutout the back lower skirt piece.  The join is not perfect, but pretty good; plus it’s positioned so it’s hidden inside a side pleat, so it’s really quite invisible.

For the little crop top I used some slubby white cotton I bought years ago, from Fabulous Fabrics, and a navy blue chunky metal zip from Spotlight.  The top was super easy and fun to make.  You had to shorten the zip; and the instructions showed how to do this with a pair of pliers.. however I just could not pry the metal teeth off of the zip tape.  I struggled and struggled with this, but eventually gave up, and in the end simply cut the zip off at the right point and stitched a good solid bar tack in the gap between teeth to keep the zip pull firmly trapped where it needed to stay.  And I lOVE how the zip looks at the back of the little top!

innards…for some reason this sight is enormously pleasing to me….

You were supposed to put an exposed zip into the skirt too; however I decided this might all be a bit too much; overpowering the delicate print.  I just used a dark green invisible zip here instead.

And just saying; the skirt has fabulous pockets.  Fab -U -Lous…!

So I’d mentioned I whacked this outfit together in a matter of days… of course I haven’t made this pattern previously and didn’t really bother to do a careful fitting on myself either.  I’d picked a size 12; my correct size according to the size chart.  Usually I pick a 10 for Vogue patterns.  And I don’t know why I decided upon a 12 because, of course, turns out I should have picked a 10 for this one too… I knew I usually go a 10 for a reason!  the waistband is a little bit baggy on me, and – is it my imagination? – but I feel the top looks quite big on me too.  Not that this is going to stop me from wearing it, but just; you know.  For next time.

The day we’d planned to meet with sewing girls in San Francisco was a lovely warm day of 28C… so I felt so lucky I could wear my new outfit!!  however we only had the one warm day during out entire visit and that was it!  I was happy that I could wear it for one sewing meet-up, but just a wee bit disappointed it didn’t get another outing.  Like, the days we met other sewing peeps in New York city it was just too cold for it (sob)  so I had to make do with other things I’d packed…

from left: Yoshimi is wearing Vogue 2900, Beth is wearing one of her favourite dresses, a Butterick pattern, and Shams is wearing her Style Arc Stevie jean jacket

Later on we headed over to a cafe where Shams had organised an afternoon tea..

from left: and I apologise I did not catch what everyone was wearing this time … I think Rose is wearing a Cashmerette top and Jilly is wearing a tessuti patterns Lily dress?? 🙁

Wendy, Shams, Yoshimi, me, Rose, Jilly, and Catherine is taking the picture… I knew I should have taken over the camera so she could be in the photo!

And that brown paper bag, clutched in my  pawsies??  Yup, you guessed it… it has a nice little stash of fabric tucked away…;)

Yoshimi took this picture on the train platform, after fabric shopping in the Bay Area with Shams and Beth.  I thought it was such a nice picture!  In fact the whole day was such a fun day!!  I wish I could hang out and gossip and chat and go fabric shopping with all these ladies more often!

pinterestmail

Sienna maker jacket

Ok, hopping straight to the crux of things; I absolutely J’FREAKINADORE this jacket!!  This is the new Sienna maker jacket pattern from Closet Case patterns, and I was lucky enough to be chosen to test the pattern.  This is view B, made using a deep bottle green cotton twill bought at Potters Textiles.  I actually found this in the remnant bin, believe it or not… yeah, Potters often does really BIG remnants.


We’re not supposed to reveal our tester versions of a pattern until it has been released, but I simply just could not resist sneakily wearing it! and have been (im)patiently waiting until I could chat openly about it… in fact, I took it on holiday with me recently when I visited the USA with Yoshimi on our sort of sewing-tour, because I really really wanted to include it in my travel wardrobe.  Also, I knew that Heather, with a bit of luck, was actually going to release it right about the timing of our trip.  And she did! yay!  so I was able to indulge my love of it in full.

photo taken in San Francisco by Yoshimi

And I wore it, literally Every Single Day.  This thing could most probably walk itself around San Francisco and New York by now!

The design is fabulously comfy; loose and stylishly slouchy, just slightly oversized in a good way, with two piece sleeves, notched collar, and a veritable tonne of pocket real estate.  A small but nice detail is a handy hanging loop included in the pattern pieces and instructions.

The belt from views A and B is pretty cool, snaking through a neatly faced slit opening, before wrapping around your waist and attaching itself to a little tab on the side.

Above can be seen the paler olive green poplin I used to finish the raw edges inside in a bias bound finish.  I kinda wish I’d hunted out  deeper bottle green that would match more closely the colour of the jacket, but both Yoshimi and Cassie reckoned the paler colour looked really good, so I guess it’s ok then.  I bow down to better, more stylish opinions than my own.

I flat-felled the side seams, centre back seams and both sleeve seams; I chose to do both sleeve seams because I knew I’d be wearing the sleeves rolled up most of the time, and wanted it all to look nice on the outside.

In fact, the only spot where I used the overlocker was the armscye; I figured these would remain pretty much totally hidden, most of the time, so meh…

I love how neat and almost … ?military? the jacket appears when firmly belted…

… and I enjoy wearing it open too, with the belt tucked into a side pocket.


OR, you can wrap the belt around your back only, just to pull in the back pouffiness a little, and tie it to the tab.  I often find with a jacket that I develop a strong preference for either open or closed, however with this one I tried wearing it all different ways on different days, and really liked it equally worn any which way.

As mentioned, the pocket situation is pretty fabulous.  There are enough pockets in this thing to satisfy the most fanatical and ardent of pocket-lovers, honestly.  View B has two ginormous patch pockets on the hips, a small breast pocket pictured above, and a large inner breast pocket picture below too, nicely big enough for your passport, phone, bus/train pass; well just lots and lots of stuff really.

But wait! there’s more!!  The jacket also has two quirky little pockets on your sleeves!!   ok, so you’re probably not going to use these ones super frequently, but they are there!  I guess you could store an electronic pass in there, for one thing, so you only have to brush your arm up against the detector without getting it out.  And they look pretty cute!

For my buttons, well, I was on a use-up-the-stash mission in the lead-up to my holiday, since I knew I was going to blow that one right out of the water during our holiday! anyway, I had some old wool-covered buttons in my stash, long ago cut off an old cardigan, and I coloured them in with a felt-tip pen to blend in nicely with my green drill.

To be honest, I had actually wanted to make the long version of the jacket, however my piece only allowed me to cut this shorter version.  I was initially a little sad about that, however I’m so in love with the finished version I couldn’t possibly remain sad for long.  And I am still keen to make the longer version!  I don’t very often want make the two views of things straight away like that, so if that’s not true love, I don’t know what is!

Interesting factoid, well to me anyway; my Stylebook app tells me I’ve worn it 17 times already and I’ve only just blogged about it.  Unbelievable!!!

    Details:

in holiday photos, I am wearing my cockatoo top and skirt, details here
White sandshoes by Trenery,
Black booties by nylon, bought at Zomp boutique
Prada gold hand bag

other photos:

Mustard tee; the Nettie pattern by Closet Case patterns, mustard merino, details here
Skirt; Vogue 1247, in outback wife barkcloth, details here
Tights; self drafted from my custom-fit pattern details on how to make your own here
Boots; Roberto del Carlo, bought at Zomp boutique

photo taken in New York by Yoshimi

pinterestmail

box of socks; the September edition

So I’m really trying to keep on top of the box of socks situbar, because I’m worried that I’m just not going to get made the twelve I promised myself I’d make.  I’ve just been so… oh dear, I find it very tiresome when people whine about how busy they’ve been lately, but well, I have! during the last month Cassie announced her engagement to her long-term boyf Daniel, and then fulfilled my dream ever since basically the day I gave birth to her by asking me to make her wedding dress.  I’m so very thrilled for this!  Of course the whole family is over the moon and excited for another family wedding so soon!  Our days are becoming very very full.  And this will be my second wedding dress within a year!

I’ve even got started on the dress already… Cassie and I went shopping together at Fabulous Fabrics for a pattern and fabric, and bought a gorgeous pile of laces and the most beautiful heavy silk taffeta.  I’m so excited to cut into it!  And this is muslin number one.  It’s ok, however the fit is not quite right and there will definitely be a second before cutting into the precious taffeta.

Vogue 8470…

Aaaad anyway, just quickly getting back to just about the biggest anticlimax possible, my new pair of socks.  Pretty, huh?  I bought the ball of yarn in Japan.  Of course.  Everything in Japan is cool.

This is Opal yarn, colour KFS 128 “Ice cream”.  I absolutely love the soft pretty pinks and the frozen iceberg blues, however there was a short section in there of a sort of dirty white, with purple and green splotches; which I did not like.  So I removed these parts of the yarn while knitting, and I think the colour way is just so much the better for it.

The box of socks is looking pretty stuffed but mahty fahn all the same!

pinterestmail

claremont shopping tote

There’s a new pattern in Le Shop!!

So, last Christmas I made a few shopping totes, one for Kelly and one for Sam’s lady L, and they were quite nice if I say so myself!  Kelly in particular carried hers around a tonne, bringing it around practically every week, packed full of her stuff.  She reckoned it was an incredibly useful size… 🙂  Shortly afterwards I received several requests from lovely readers who were interested in the pattern which made me feel, yeah we can do this, and; well, wedding sewing did put pattern-making on the back burner for quite a while but ta da! finally we made it happen… and it’s now live in our shop!

I asked Cassie to name this one, and she decided upon Claremont, after our favourite shopping centre.  Well, I should qualify; our actual favourite places to shop are like; Fabulous Fabrics, and Potters, and Spotlight, but well, you know  😉

Specifics; the Claremont is an unlined, shopping tote with box-base and cut-on handles, with two options for internal pockets . The base measures 30cm x 20cm (12” x 8”); the height of bag not including handles is 33cm (13”). The length of the shoulder straps enables a person to sling the tote easily on the shoulder and to still be able comfortably access inside the tote while you’re wearing it.  The cut-on handles makes for a very strong bag that can withstand a quite heavy load of shopping.

The totes I made for Kelly and L were quite simple with no pockets, however for the pattern itself we added pattern pieces and instructions for two internal pockets; an open pocket for your phone, and a zipped pocket for your keys.  I ran up a pocketed version for a birthday gift for a friend, using a really lovely Spindle and Ink canvas; this is called Flowering Gum in Bluestone and Stream.  Isn’t that a gorgeous name?!  It’s designed by Lara Cameron.

The pattern is available to purchase in digital pdf format; and also; in consideration of the fact that I understand that lots of people prefer paper sewing patterns, and/or do not easily have access to printing it out at home, or just don’t want to; we are also making available an actual paper pattern too.  

This is unavoidably a more expensive option, sorry! so sweeten the paper pattern deal; with the first five paper patterns sold I’m throwing in one of our pattern company labels.  These are produced by the Dutch Label company, and I currently only have the five.  Anyone who has  bought from them knows and no doubt loves the very high quality of their work!  I’m thinking of ordering more!


pinterestmail

khaki suede top; 6 different ways

Last week, on a whim; I randomly decided to mini-wardrobe-challenge myself to wear this khaki/olive suede tee  for one whole week, styling it differently each day … I’d made it five years ago! back in 2014 and it’s been such a great versatile piece!  It’s mostly a winter-y sort of a thing to wear, though it’s quite nice to pop on for a half-warm but not hot day.  A transitional piece, is what the cool kids of fashion would say, yeah.  Although, what am I talking about??  I’m the cool kid, well I can dub myself so here in the realm of my own funny little blog at least, anyway!   #imtheONLYkid

So yeah, I made this 5 yrs ago, using Burda 10/2009;121 and a very realistic dark olive green suedette that I bought in Tokyo during a holiday there; original post is here.  I remember Yoshimi bought the same stuff in pale pink at the same time, and made herself a top too.  I’ve worn my own top lots over the past five years, ‘cos it pretty much went with everything I own, though I still did develop favourite ensembles with it.  One of those I included in my previous 6-different ways post, with my terracotta skirt! but I decided it would be sorta cheating to include that outfit in with this six too.  Although it totally should be here too really, because it still ranks amongst my favourites for this year.

Anyway! without further chitchat!  I made every item of clothing I’m wearing in the following pictures, with the exception of my shoes.  All items are linked to their original construction post.

Below left: worn with my over-dyed Nettie tee, sage green wool tweed skirt, and my self-designed chenille scarf and black tights; and my old black booties.  I love love LOVE the olive green and raspberry colour combination together…  Need to establish more opportunities for such in Ye Olde Wardrobe….

Below right; worn with an ivory wool Nettie tee, my purple Jade miniskirt, ivory hand knit möbius scarf, black tights, and my beloved motorcycle boots.  I guess purple is basically a variation on raspberry, because the olive/purple colour combo similarly speaks to my soul too!  Sadly this little skirt bit the dust last year too…

Below left; proving that chambray goes with everything.  I wore this outfit on a warmish day during my recent Week of the Olive Suede Top.  My blue chambray shirt is an oldie but a goodie, and the little blue denim skirt is another staple.  Also wearing unseen sockettes made by moi.

Below right; with my over-dyed Nettie tee, my once yellow, over-dyed corduroy skirt, a scarf knitted by Mum – oh, ok, there is one item of clothing not made by me! –  my over-dyed khaki leggings, and hand knit socks.  And my favourite desert boots.

Below left; This is my outfit from just yesterday, an unexpectedly very wintery day.  Worn with my mustard merino Nettie, my outback wife barkcloth skirt, hand knit mustard cowl, black tights, and my mustard raincoat. Did I mention that olive green and mustard is another favourite colour combination?!  Maybe I should amend that to say, olive green and anything?

Below right; I paired the olive green top pretty frequently with white, black to black-and-white combinations; all of which it looked pretty good with, I thought, lending warmth and life to the general colourless-ness, however chic said colourless-ness may be!  I picked this outfit for this post though, because it was one of the few times I tried belting the tunic.  I actually like it a lot belted; slightly 80s-inspired in a look that makes me nostalgic, in a good way.  I think I should have done this more often I think!

Worn with my Eve dress, black tights. and the lovely suede booties Craig bought for my last birthday…

So!  Sadly, the tunic has pretty much done its dash now… while the fabric seemed reasonably sturdy it actually was not; and over years of use it eventually developed a few holes from rubbing and little tears, particular around the side splits and the underarm area.  I haven’t actually tossed it out, but I may think about repurposing the fabric for something else sometime.  Because I still really really love the fabric!

pinterestmail

mustard pietra shorts

Hack attack!

Despite initial appearances, my new shorts are actually based upon the Pietra shorts/pants pattern by Closet Case patterns… I loved this pattern immediately, loved the high waisted flat front with no waistband, and those cool side panels with pockets.  However, I was not quite so much in love with the elasticated back … or perhaps I should specify I was not quite so much in love with my own rear view in the aforementioned elastic waist version of the pattern?!

Yes, I did make up a test version with the elastic waist first … for version number one, I cut up an old linen dress given to me by Mum.  Unfortunately I decided I’m tragically allergic to elastic waistbands, with the one and only exception of pyjama bottoms.  Although looking at these pictures now my rear view is not as offensive to me as it was when I first looked at them!  at the same time, I am still much happier with the rear view of my second, non-elasticated and more streamlined version.

side view…

I was pretty sure I would be able to alter, modify, wrangle a de-elasticised waist with a bit of finagling… putting an invisible zip in the centre back seam and removing a whole lot of real estate from the back waist area, retaining that lovely flat front and pockets completely.

the front view looks exactly the same as the original, unsurprisingly since this is basically unaltered…

I shall now proceed to explain my butchery… and please note that these measurements laid out here are tailored to my own personal waist measurements and will obviously be different for other people.  Specific measurements for each of these modifications can best be determined from your own waist and hip measurements.

I removed 6cm from the waist of the back piece; and actually swung the side edge out towards the hem edge at the same time, adding a bit of flare to the back view of the shorts…

I also removed 2cm from the top/back edge of the side pieces, tapering off to nothing at the top edge of the pocket.  This wedge was also removed “mirror-image” from the front facing, shown already stitched on at the left…

I put a dart in the back piece… while my picture illustrates it to be 10.5cm, I actually stitched it a bit longer, closer to 11.5cm at its end point

… the dart is situated 10cm in from the centre back raw edge and is 3cm in width at its top edge

… I used the existing back waistband piece to cut my two new back waistbands to fit the new size…

… inserted an invisible zip into the centre back seam.  Note, the centre back seam is essentially unaltered, except that the back waistband now has a vertical centre back seam too.

Because I whimsically fancied something a bit different for the back of my waistband, specifically a V-shaped cut-out effect at the centre back … I put in the zip a bit lower and stitched the top edge in an angle like so…  Yes, I’m very much oversimplifying here, because making my two sides exactly identical actually took aaaaages and some super precise measuring.  I even unpicked one side completely and re-did it because it’s amazing how even 1 or 2mm difference will show up as a glaring inconsistency.  Hint; making a little paper template made it a lot easier to get everything perfectly mirror image; which yes, seems super obvious in retrospect!

corners trimmed and turned out…

I hand stitched the waistband self-facing down with tiny fell-stitches…

To finish; the side seams were pinned, and the already-understitched front facing was wrapped around over the top and over the back waistband piece.

Side seams were then stitched, corners trimmed and seam allowances finished etc. before pulling the whole thing right sides out.  And that’s it!


Oh! of course, the ever important fabric notes… this is actually just a super cheap cotton drill from Spotlight… I LOVE the orange-y mustard colour of course, SO MEEEEE! and the random vertical dashes.  The pattern sorta reminds me a lot of this felted wall hanging I made, many moons ago; my vision was of a sort of poem carved by an artistic cave man, in a language or alphabet wrought in colours and strokes of differing lengths and groupings.  This is still hanging up in our front room! and you can read more about it here

Details:

Shorts; both the Pietra shorts/pants pattern by Closet Case patterns
Drapey white top; based on the loose drape top no.1 in the Japanese pattern book “drape drape”, by Hisako Sato
Hat; Vogue 8844, in khaki drill
Plain white tee; Nettie tee by Closet Case patterns, white jersey

pinterestmail
Switch to mobile version
↓