So, Le Stash has for a long time been a quiet and secretive thing, its perceived size diminished by distribution into far-flung corners of the house. It lurked furtively and unobtrusively in my laundry cupboard, the cupboard under the stairs, hidden away in various innocent spots like a guilty thing, a sort of fabric-y portrait of Dorian Grey, or something…
Then Tim and Cassie moved out. I blame them actually. Really, it’s entirely their fault and they know it. Having empty rooms suddenly attracts STUUUFFF, everybody knows that. First, it was simply Cassie; her tiny little unit just wasn’t going to fit a lot of her stash and things so of course I offered to keep it for her. Then it was Mum, wanting to clean out fabrics and yarn from her own craft room to make guest sleeping space, and of course some dumb bunny again offered to keep it safely. Then, when we cleaned out Grandpa’s unit, I ended up with my grandmother’s stash and old sewing supplies and all the sheets for muslins, since I’m the only one in the family who sews AND has the space for all that stuff. An obviously, my stash stretched its own wings too and ventured out of the dark a little bit …
Brace yourself…

Haha! yes it looks pretty bad, but actually there is a lot more than just fabric in there, although one could argue that it is still “fabric”, just not fabric fabric, if you know what I mean.
Basically, the room had become a sort of useful junk room, if that makes sense. There’s my fabric stash in there, as well as the aforementioned inherited bits and bobs, and then there’s the family’s ski and snow gear, winter hand knits, blankets, spare mattresses and bedding, our fancy dress box and the children’s old school uniforms, and a few boxes of paperwork. I’m also guardian to a lot of the family’s precious stuff that can never be thrown out, like all of Mum’s handwoven fabrics and hand-knits, the family kilts, and all the embroidered and hand-crocheted tablecloths, doilies, tea towels and various household bits and bobs that my very crafty family has produced over the last hundred years or so. I’m also looking after Mum’s weaving loom and spinning wheel. See?? empty rooms!! They attract stuff! It’s like cat hair to your best woollen coat! I’m telling you!
.Just before Christmas, we happened to be in IKEA on the hunt for a playpen for the Chrismas tree, since darling Clara would devour that precious thing in about five seconds flat…. and as we were browsing I came across these square pigeonhole, units thingies. And had a vision. I was quietly excited. I picked up a brochure, took it home, and made a few measurements. A few calculations. And just decided then and there to treat myself. A Christmas present to myself!

So, a few days later, I popped back to IKEA on my own, and bought two 4×4 and one 2×4 Kallax units. They cost $265 in total. $265! For all that storage space!! I can’t believe I waited this long! The 2×4 came in one box, the other two units were 2 boxes each, two of which were super heavy. I got the guys at IKEA to help me load the two heavy ones into my car, but all the others I got in myself. In fact; I was determined to make this project my baby, and mine alone.
so pumped!!!
 I managed to walk the boxes from the car and into the hallway on my own, but there had to admit defeat. The boxes were pretty heavy after all…
…that little face watching me!

Fortunately I have a strong son…

After that I couldn’t do another thing with them until Boxing Day. But once I got stuck into it, it was great fun! Craig wanted to help, but I stubbornly rejected any and all offers of help. I just wanted it to be all mine… and I got those lovely things together, pretty much all by myself! I did need a bit of help pulling the 4×4’s up to standing position, those units are heavy! so the husband came in handy after all 😉 but apart from that I managed it all on my own.

using a fabric scrap for hammer protection .. see they do come in handy! for so many things! Thank goodness I kept it!!

ONE unit finished….

my helpful little assistant…

TWO units finished….!

stopping for a healthy snack…

AND FINISHED…!

When it came to organising everything… I wanted the cubby holes to look nicely full, no empty cubbies, so ended up putting everything in there! I’d put a lot of thought about how I wanted to sort it, but mainly I want it to look pretty and to give me lots of visual satisfaction when I walk into the room, so the contents are organised mostly by colour, with a few special category cubbies.
I love this colour section…
For example; the middle cubby below has just some of the fabrics handwoven by Mum on her loom… she has given them to me but I may never make anything with any of this, the thought of cutting into this super precious stuff is pretty daunting. Maybe one day…

The cubby at bottom right has all the family’s old jeans and some denim cushion covers, which I’ve kept for refashioning one day, the cubby above that has some of Craig’s old shirts, and the bottom middle cubby has other old clothes, kept for the same reason. Middle left is the fabric inherited from my grandmother. Bottom left is the little stash of beautiful linens that I bought at Tessuti’s in Melbourne during our last visit in late October…
There is also a cubby hole for plaid men’s old shirts, and about four more cubbies have old Tshirts, dresses, and a few have old sheets, curtains and tablecloths; all of which I’ve been keeping for muslining and/or refashioning purposes, or just because the fabric is awesomely good quality.
Three cubbies are stuffed with interfacing and white/cream/ivory lining fabrics! both cotton voile and polyacetate… another whole cubby is devoted to black lining fabric… I found so much of those basics! in fact I’ve decided we NEVER need to buy either of those things for the rest of our lives! and that goes for beige lining fabric as well.
The rest of it is all “real” stash! including all my scraps too – yes, I do keep most of my good-quality scraps for mending purposes as well as if the pieces big enough to make bindings and pocket linings for example. And also old clothes of a really nice quality, like mens’ shirting cotton or something. Not many are big enough pieces for a garment on their own, but I keep them in case they can be worked into a garment with other fabrics in some way; I know it seems crazy and hoarder-y, but I’ve been thankful for my scraps of good-quality fabric on so many occasions, I know it’s always well worth having them.

So, now you can see why I’m planning to buy minimal fabric this year! I’m on a mission… to shop my stash, but not too much. I mean, yes it could definitely go down by a bit, but I just love how it looks right now!!! I love how pretty it is, how it’s all on view, how I can see everything at a glance. I love how I’m going to be able to lay a hand on things a lot more efficiently. I refolded each and every bit, so I’m pretty up on exactly what I have. No more rushing out to buy a little bit or bob of something that I think I might have but can’t find.
Thank you, me! for my great Christmas present! I absolutely love it!!


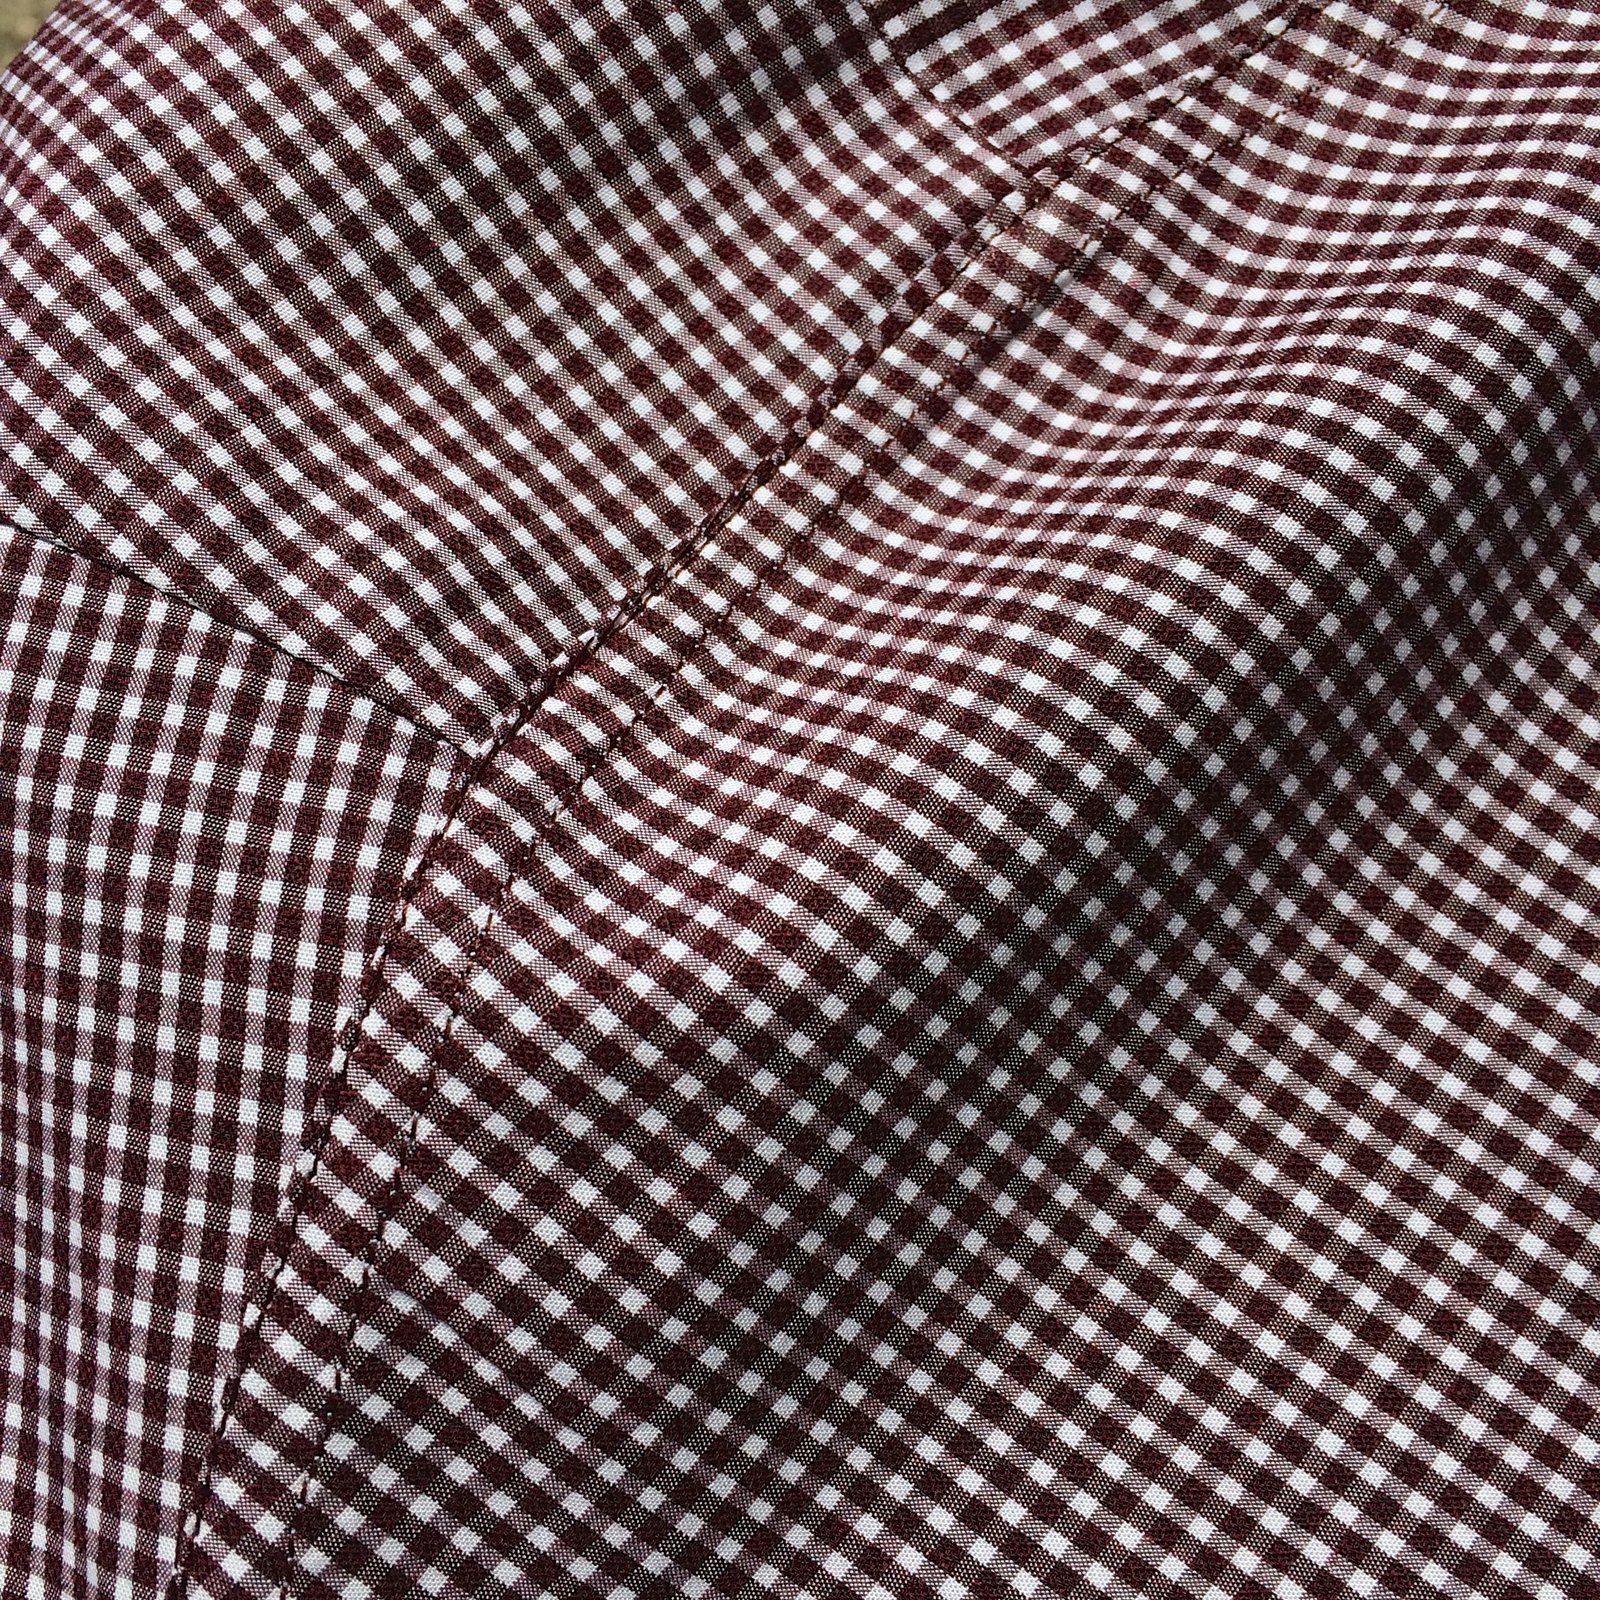
 First thing to get made was a shirt for Tim… He has a job now where he has to look smart, so I decided to make a business shirt… I bought the really lovely deep maroon, mini-scale gingham cotton shirting from Tessuti’s in Melbourne, and used Burda 6874, my kinda go-to shirt pattern since I semi-retired Burda 7767. d’you know


 For Kelly’s top, I’d chosen the asymmetrical cowl top from Pattern Magic 2; the shape of the cowl is dictated by the shape of the facing. It’s always a bit of a challenge to draft your own patterns, but well I love a challenge! and I knew the shape of this top would be super flattering for Kelly and suit her beautifully… I cut the pieces on the bias and inserted a maroon invisible zip in the left side seam, so it zips down undone… however Kelly says she can squeeze into it without having to undo the zip which is cool. I think the bias-cut is what gives it that little bit of stretch.


 Next up! a pullover/sweatshirt for Craig! truth now… I was running out of time, and steam! and this fair near killed me!


 With the bias binding facing up, and following the previous stitching as a stitching guide, topstitch the pressed edge of the bias binding down. Since you’re using the previous stitching as a guide, the width of your double-topstitching will be nice and even from the outside.


 And, last but not least! I also made a few more little hardback notebooks… just fun little things, however I do know that the recipients do actually use notebooks regularly so I know they will be useful too! I used mostly a mixture of leftover and old papers; from old scrapbooks, some with the children’s scribbles still on them! I’m sentimental that way 😉 , various papers, musical paper, some pale coloured wrapping paper, writing stationery; just lots of different stuff.


 I made these bathers and took these photos over a month ago… hehe I just checked; 19th November! What with the pre-Christmas social whirl and pressie-making craziness, I completely forgot about putting them up here, although I’ve been wearing them almost every day and actually happen to adore them too. Oops!


 So, Mum was coming up to stay recently and we were going to be doing some sewing together… for a variety of reasons I didn’t want to be doing my Christmas sewing, the biggie being that I needed a little break from all that #exhausted #needsomeselfishnessSTAT


 Confession time: I actually started recording YouTube videos to document the process of making these shoes, and basically gave up on that halfway because I truly lost heart a few times and felt like my shoes were never going to happen. Likewise, I didn’t take many actual photos during the making of them either! the ones in this post here are basically all of them… But I’m so glad I persisted in the end (minus the stress of filming myself) and have finally limped in to the finish line. I’ll make another YouTube video, some other time, on some other shoes.