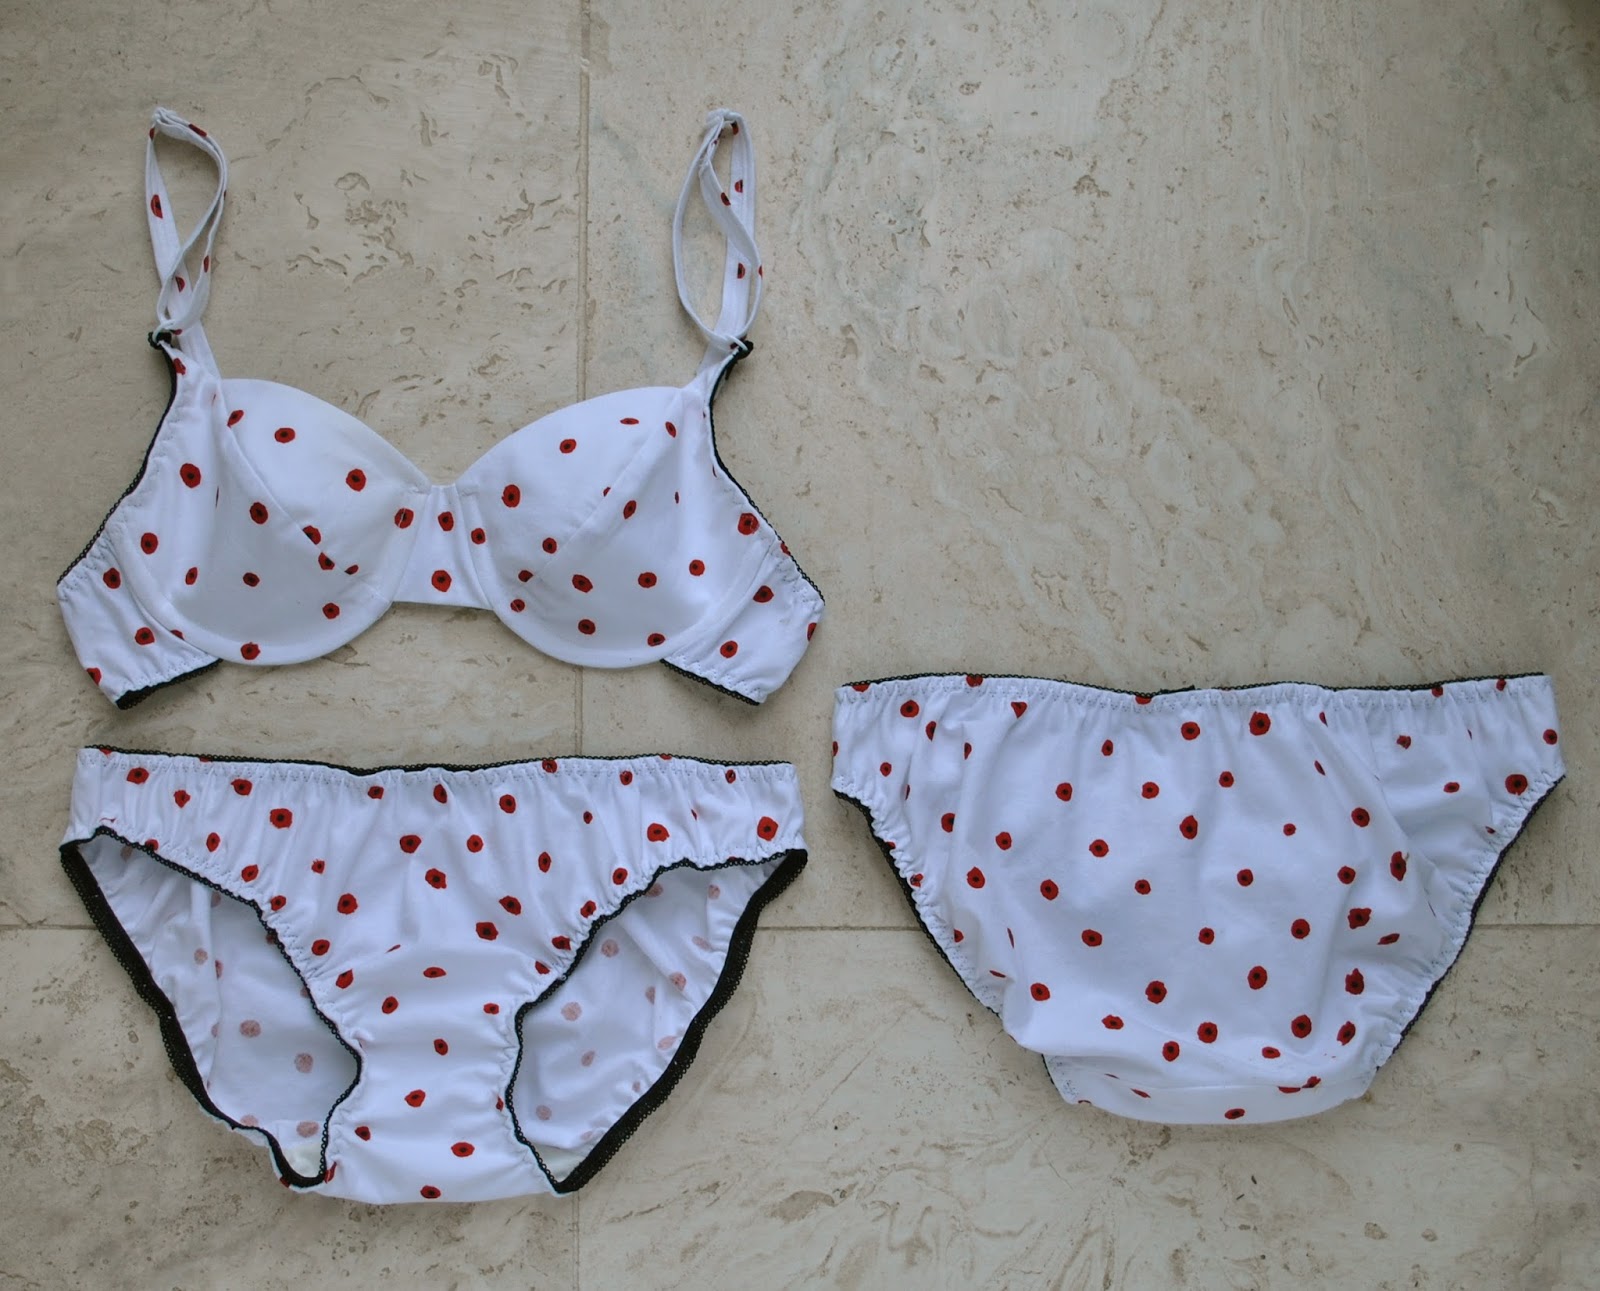
Poppies lingerie set

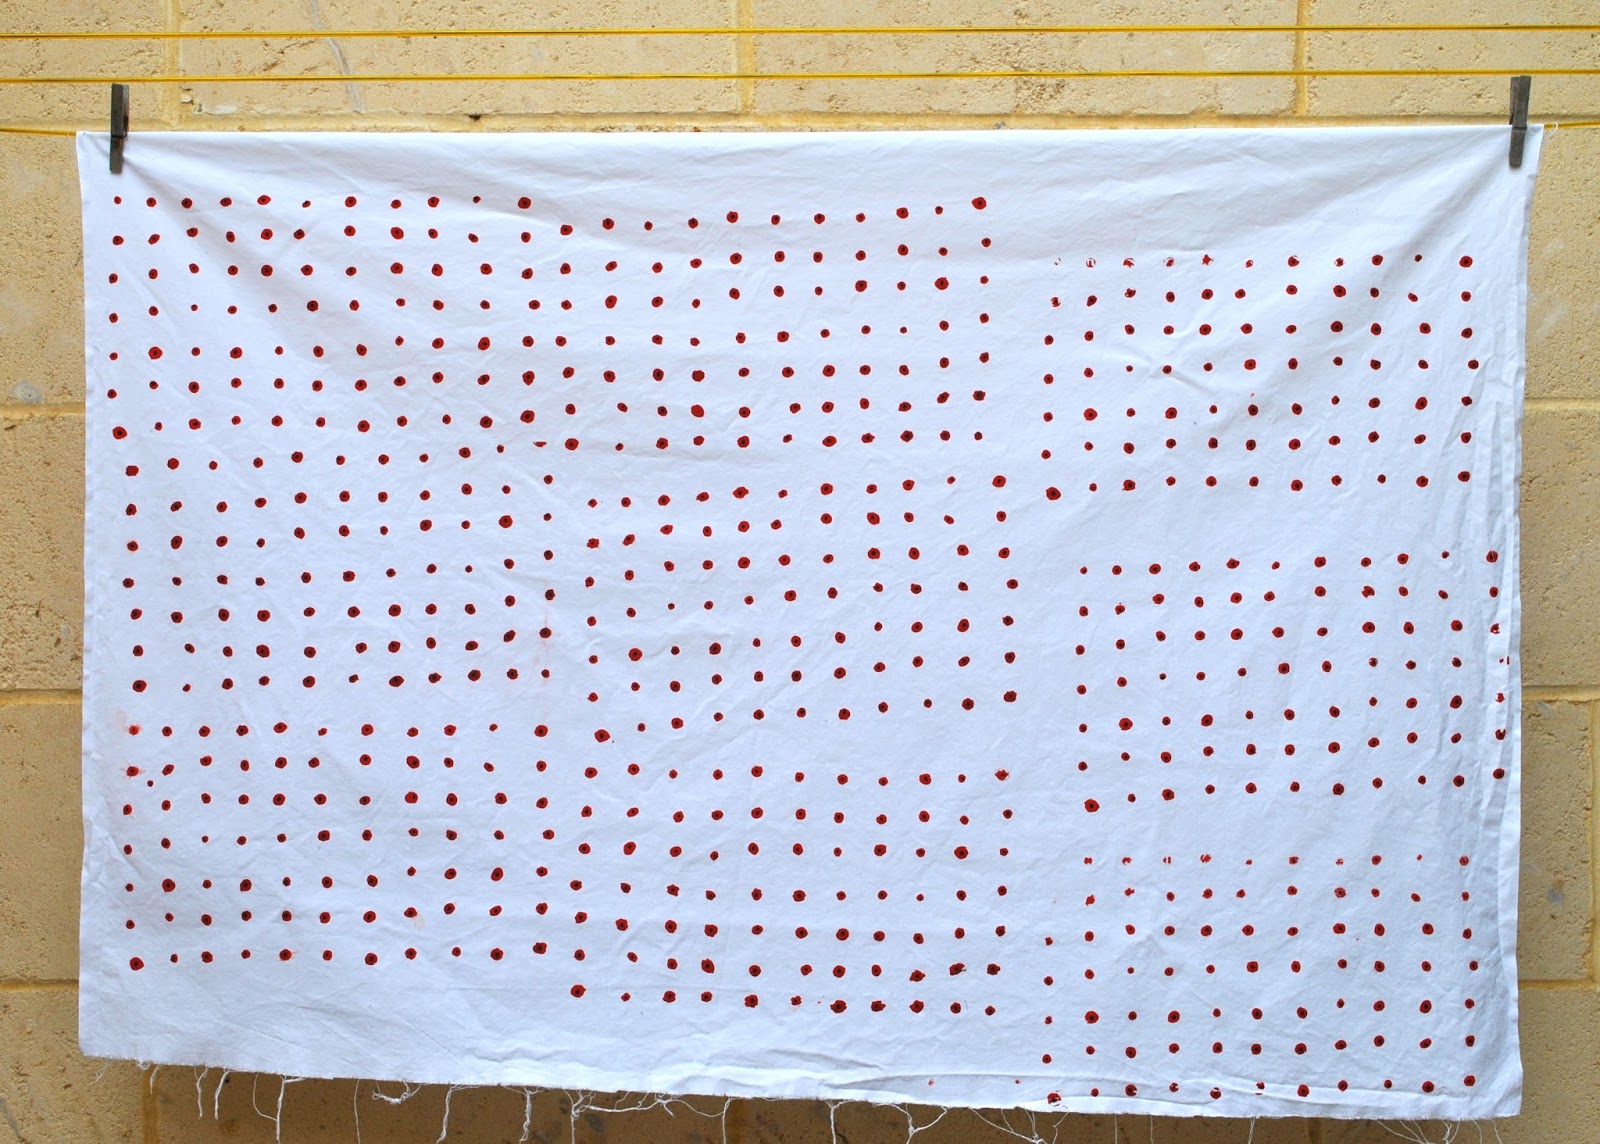
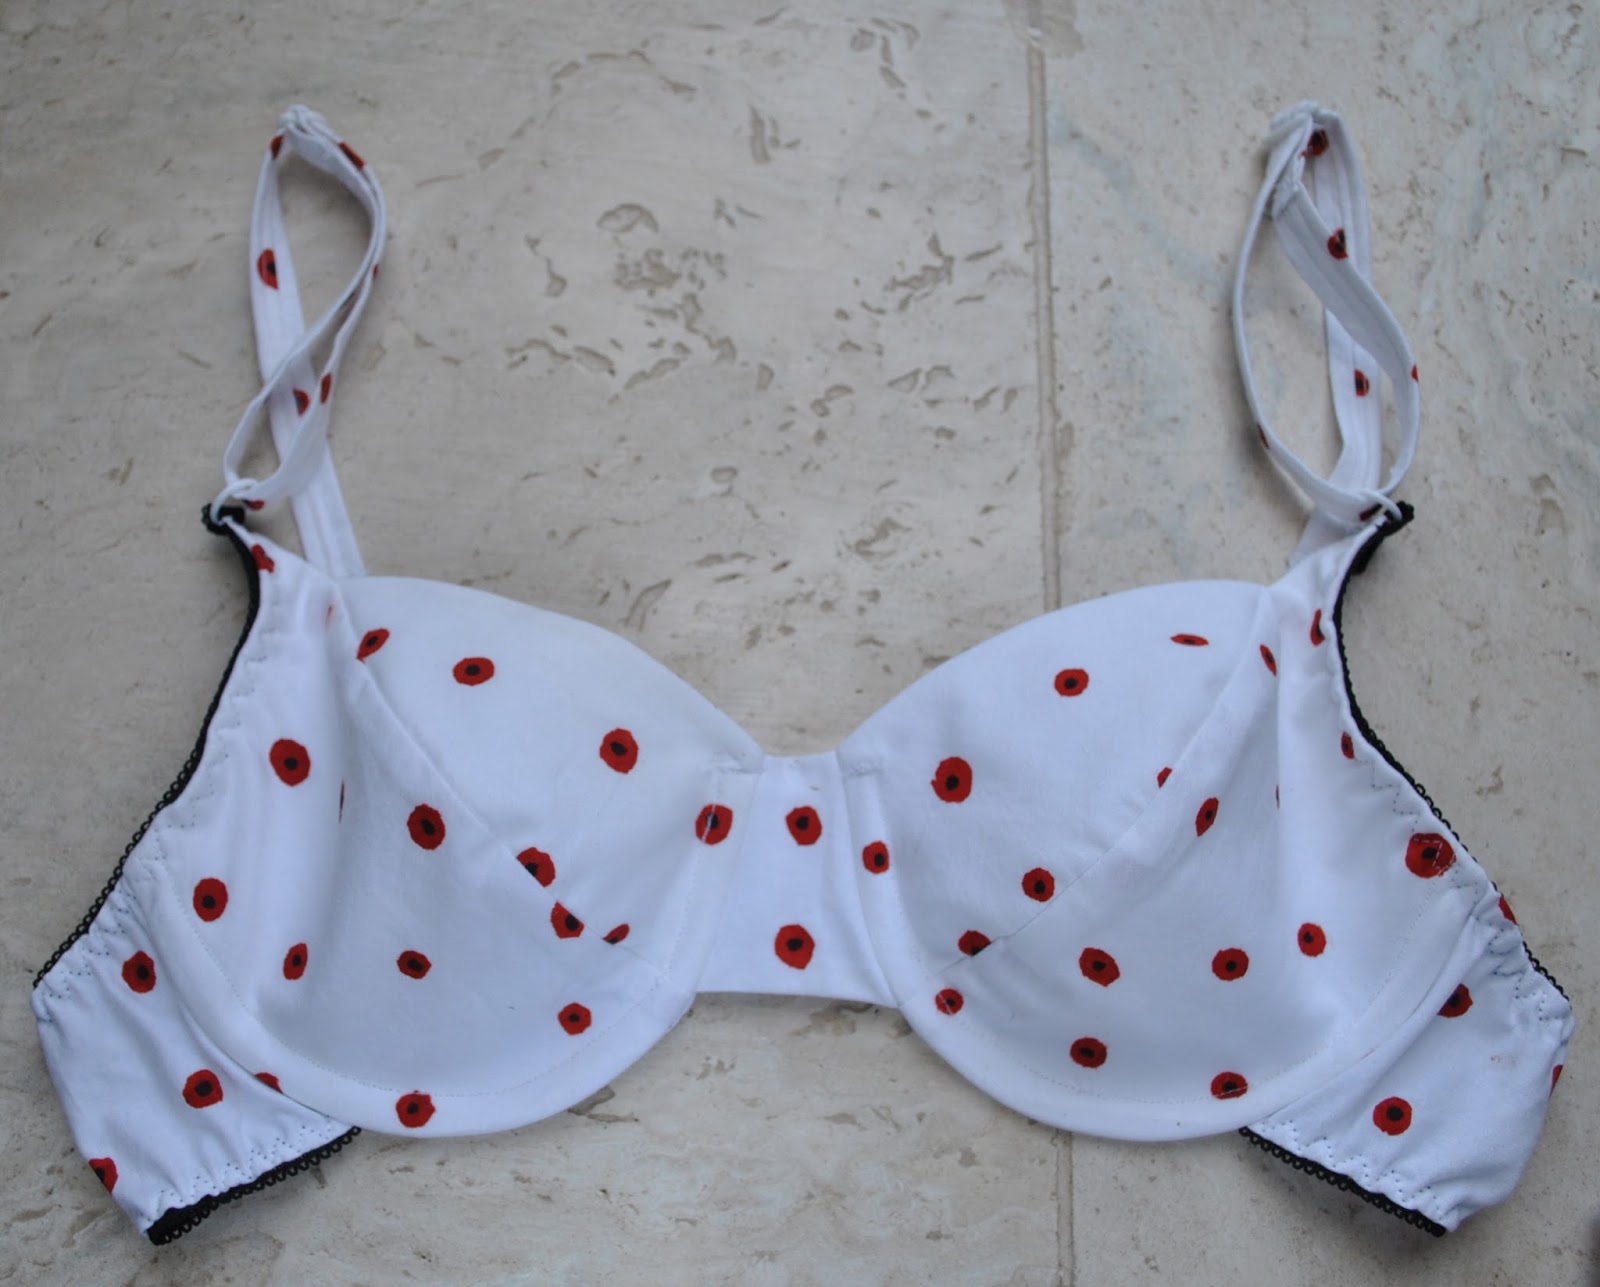
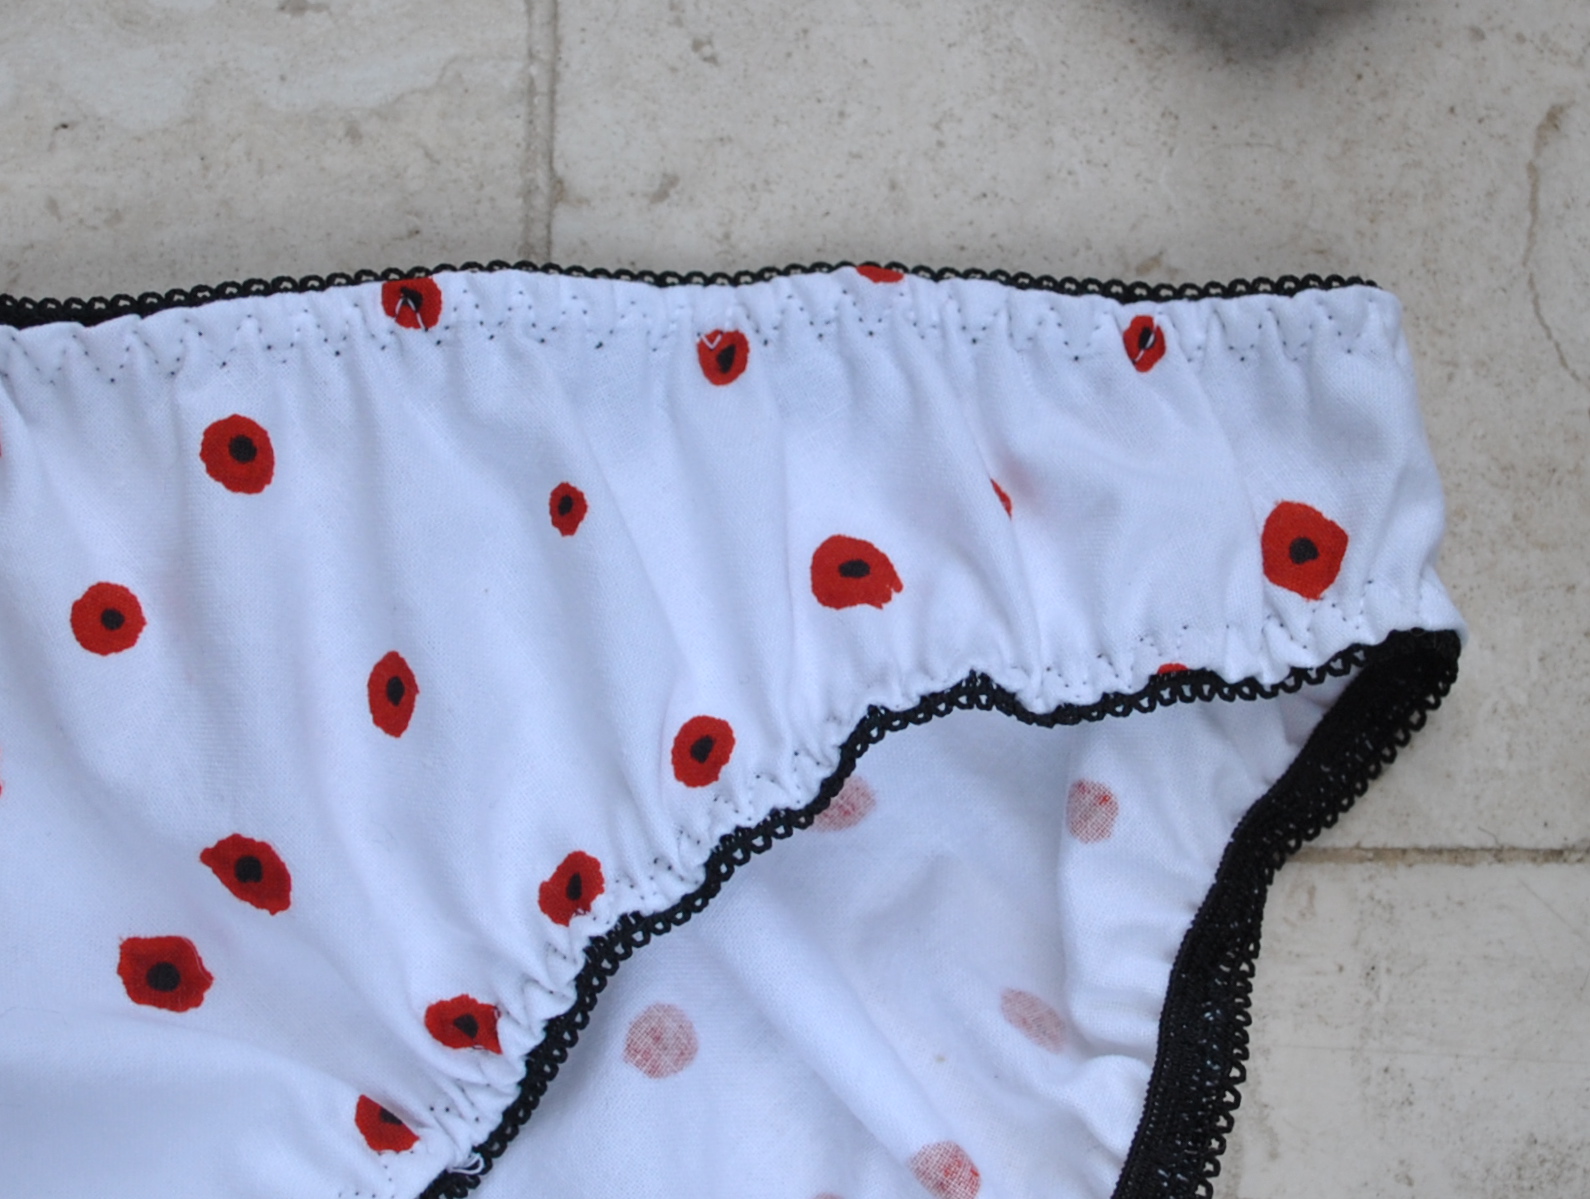
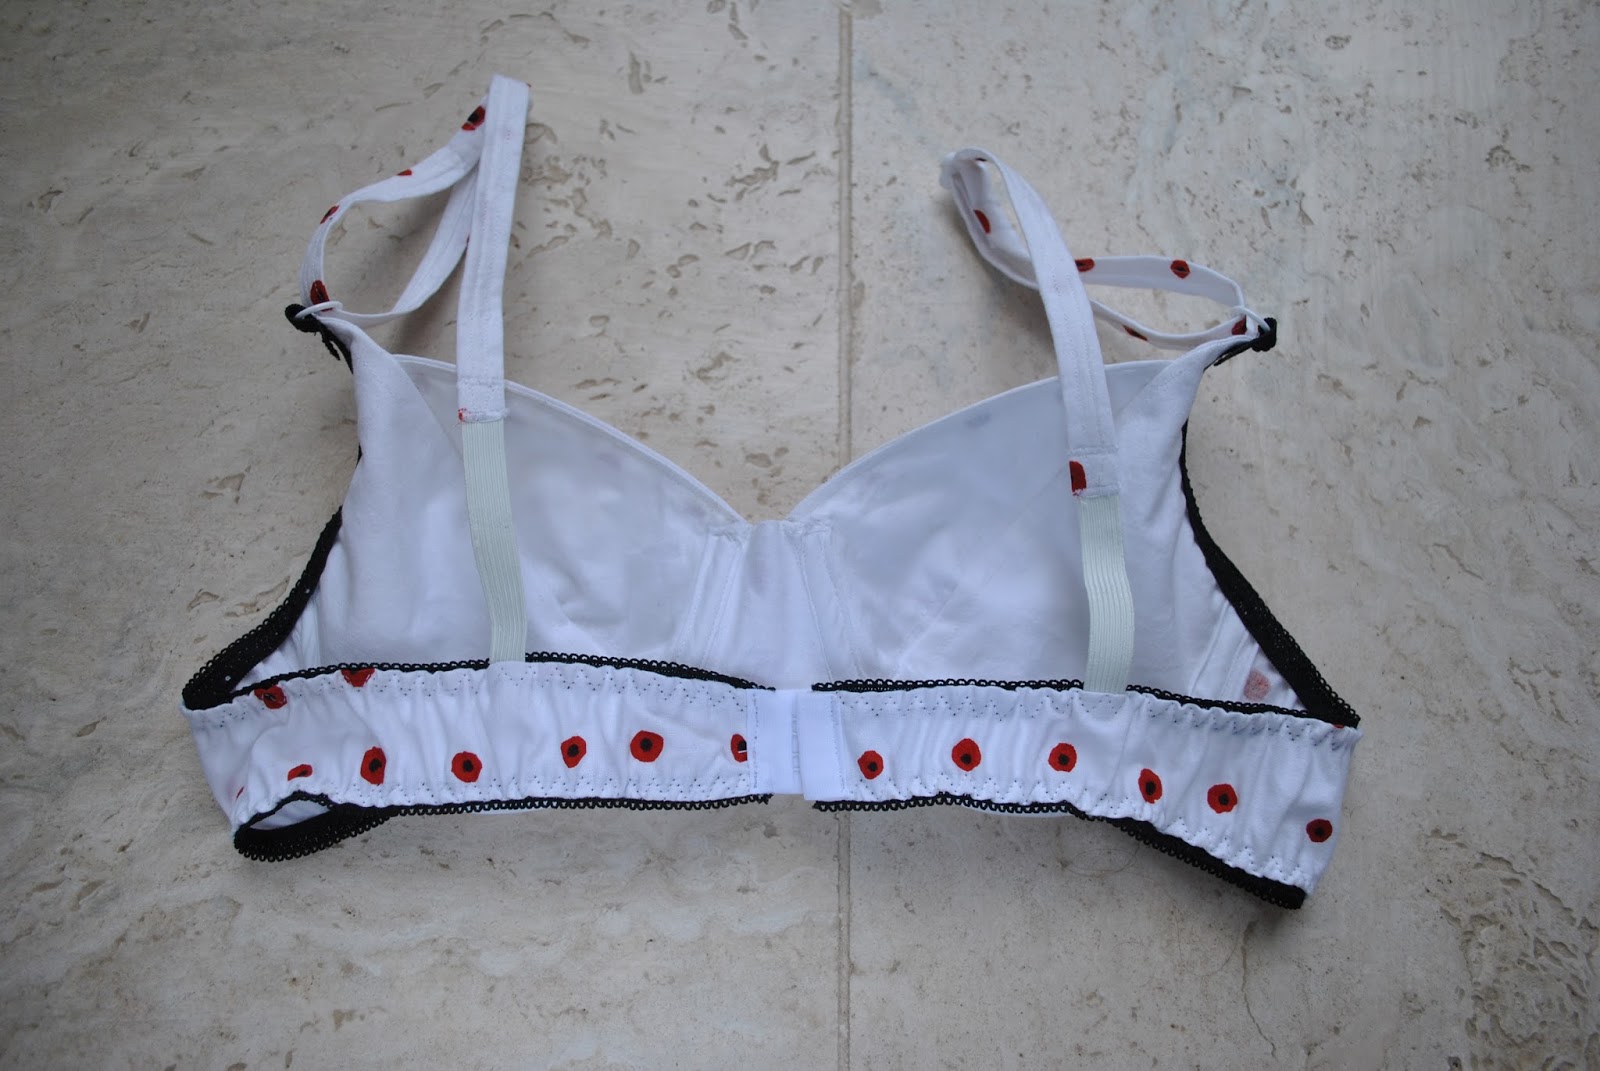
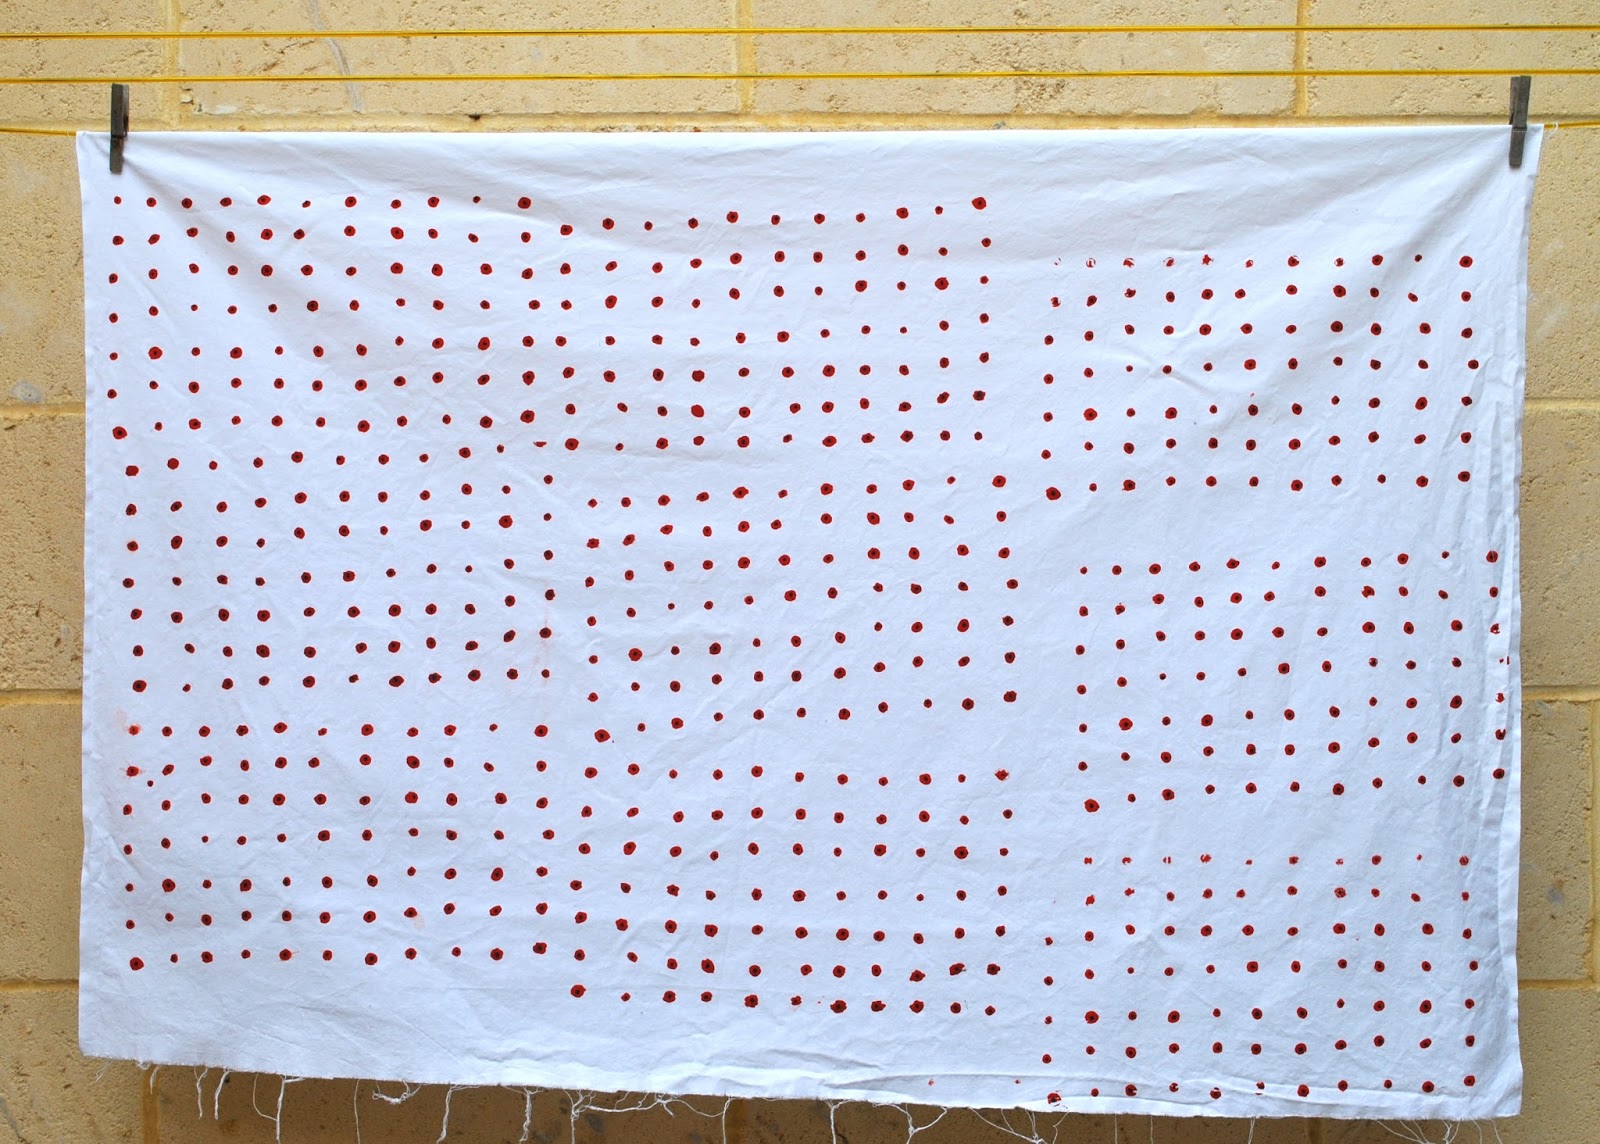
My first screen-printing effort obviously lent itself best to something comprised of smaller pieces that could be cut to avoid the more glaring imperfections in the print, ahem!  A set of lingerie sounded like a plan  ðŸ™‚  My poppies print was pretty bad really, but it still felt precious to me just because I’m a silly sentimental thing.  There was extensive contemplation of, and moving around, the pattern pieces on the fabric before I braved snipping!  And bias placement is such a fabric hog.  I considered disobeying and naughtily cutting the undies on the grain but didn’t want to court disaster.  I cut the bigger undies pieces from my later, more successful print placements (at upper left of my fabric length) and cut the smaller bra pieces from the in between scraps and from my first, badly placed prints (at lower right) and mirror-matched as much as possible the print placement on front pieces and back pieces of the bra.

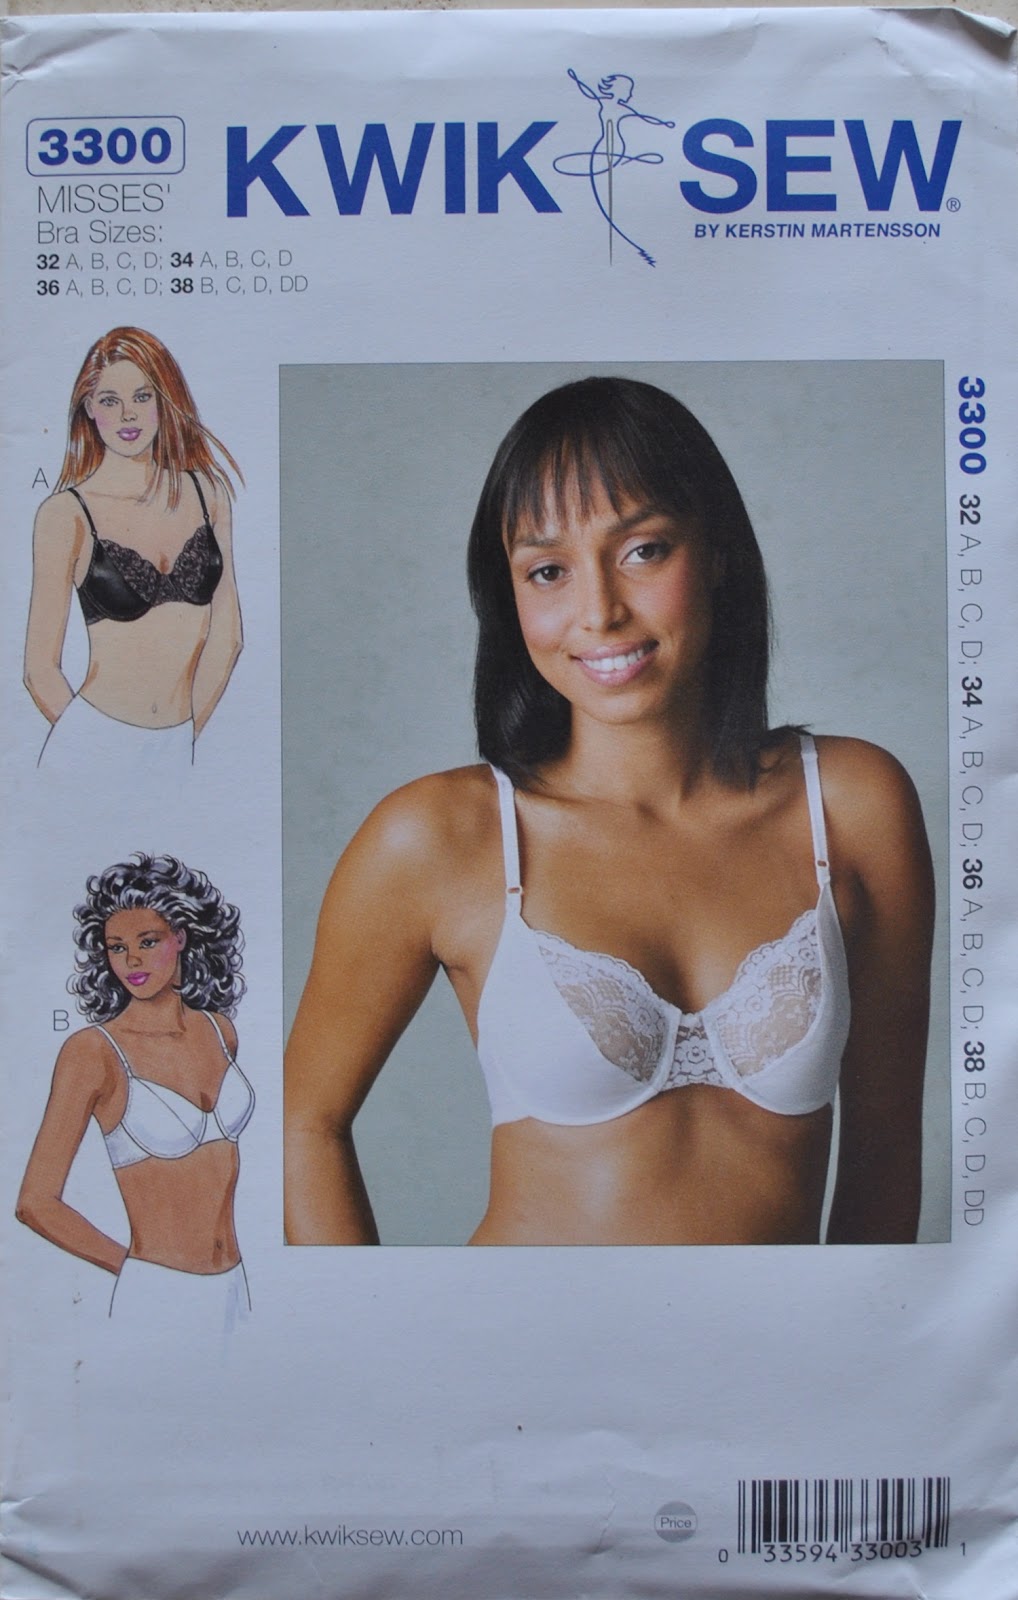
The bra pattern is KwikSew 3300 with modifications to account for using a woven fabric as opposed to a stretch knit (as described here)  This time I cut the back pieces to be 6cm longer at centre back, and narrower to fit the purchased hook and eye clasp.  This is my eighth time making this bra pattern up so obviously I love it!  It is one of the original designs of the late Kerstin Martensson, Swedish founder of KwikSew and a talented pattern maker.  The style is very much to my taste, which is why I chose it of course! and over time I’ve fine-tuned the fit by shaving off a little bit here and there,: so it fits me really well.

The bra lining pieces were cut from the white unprinted bits around the edge, and the bra underlining and undies liners from ivory jersey knit.  I chose black lingerie elastic to match the black centres of the poppies, and fortunately my Spotlight currently has lingerie rings andsliders both in white, so they match each other.  Woot!  I stocked up!!

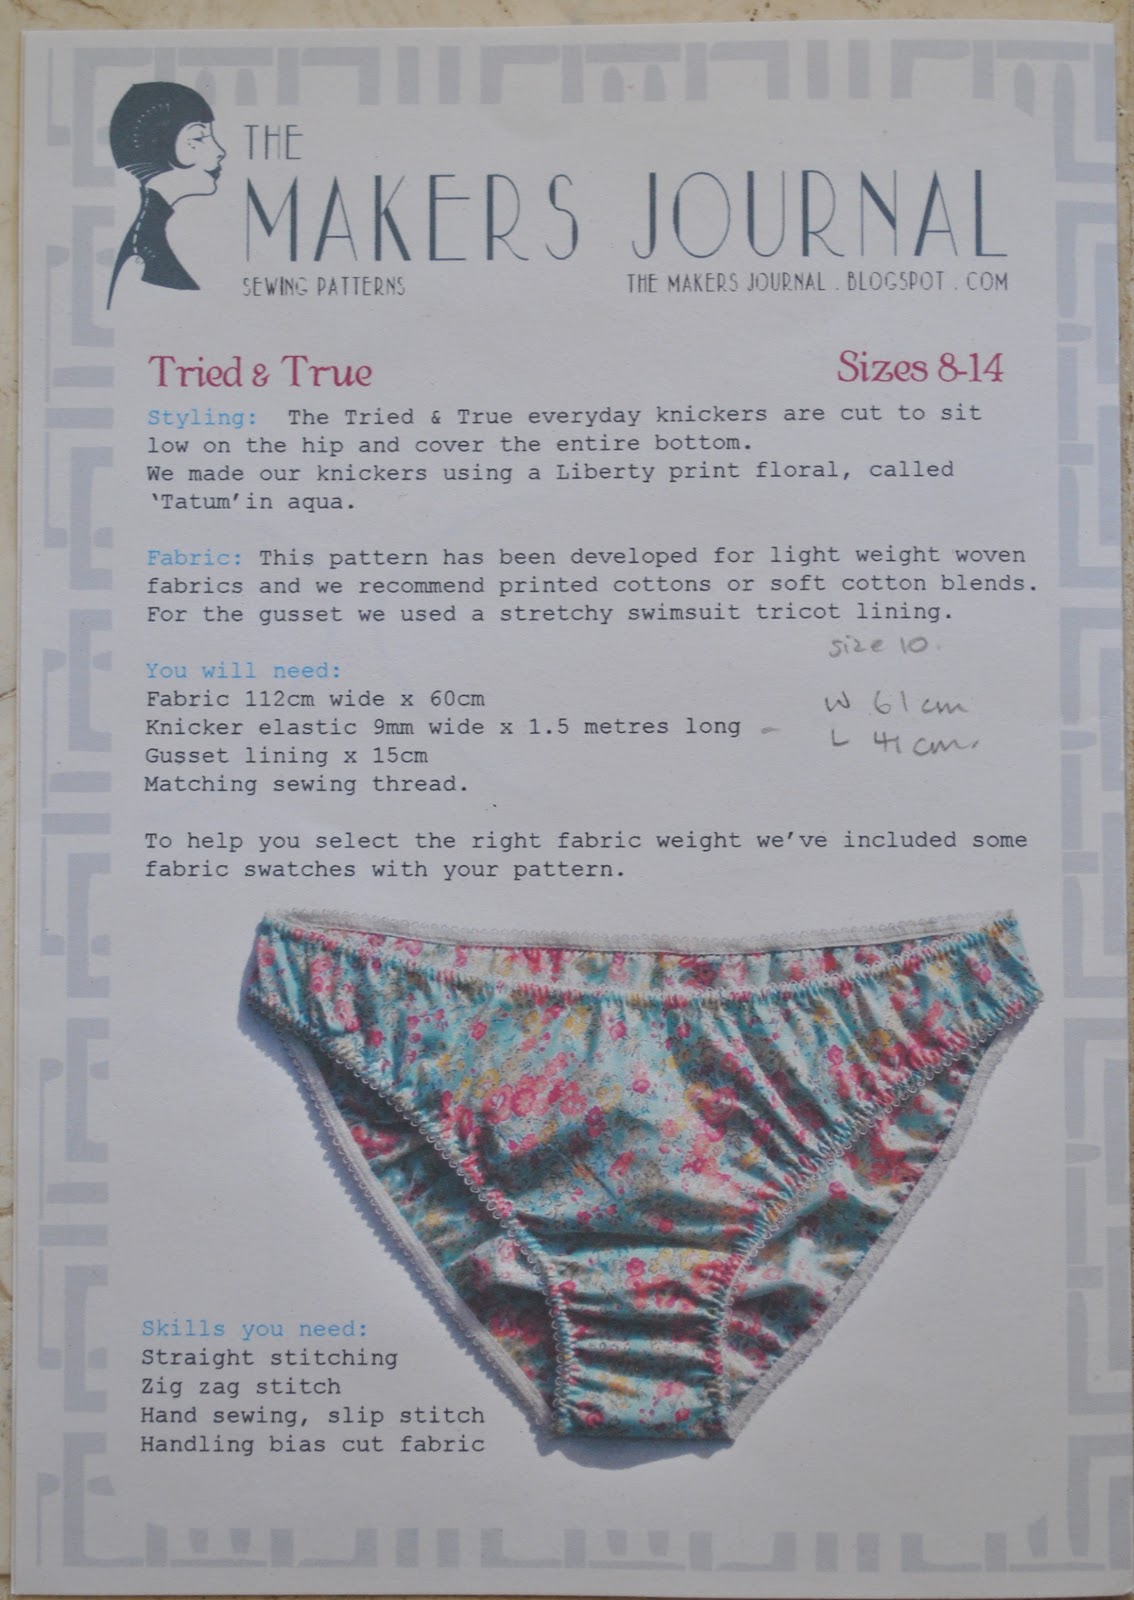
The two pairs of matching knickers are based onThe Makers Journal Tried & True, the third and fourth times I’ve used it, and I’ve altered this pattern too to suit my personal tastes.  The first time I made it pretty much to pattern, the second and subsequent times I have made it to have a more substantial liner (as illustrated here), to be less high-rise, to scoop in at the front leg more, and to scoop out at the back leg more to give more bottom coverage.  These are small alterations but even 1cm makes quite a difference when you’re wearing them.  The closest I have made to the original pattern is the pair pictured on the far right in this post here.

Details:
Bra; KwikSew 3300 modified for woven fabric as specified here, screen-printed white cotton, my review of this pattern here
Matching undies; The Makers Journal Tried & True, modified, my review of this pattern here

pinterestmail

Screen-printing; a field of poppies

Hello!
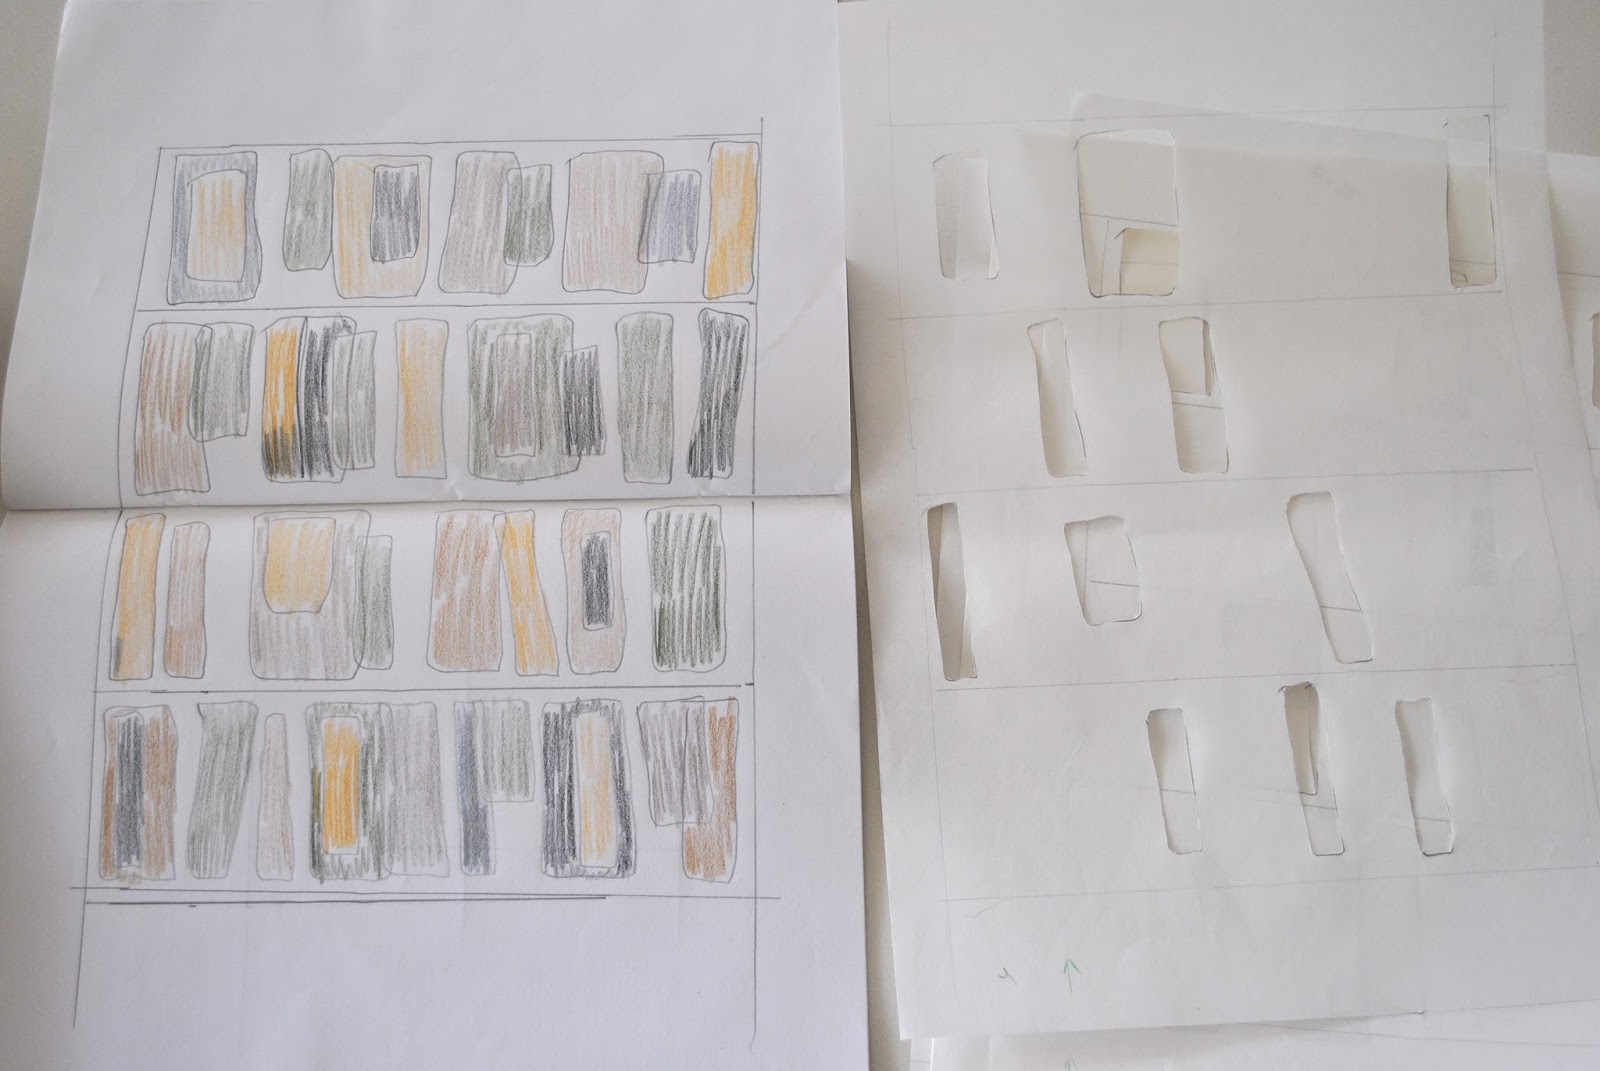
I am doing a screen printing course!  I have tonnes of pretty patterns gleaned from Pinterest that I would loooove to print onto my own fabric, but I think my aspirations might be a tad more ambitious than my abilities, hehe.  Whatevs, it should be fun and I am finally making use of my screen, bought using a Jacksons gift voucher that was on the point of expiration.  Confession time; this purchase actually took place about seven years ago (eep!) and up until now the screen has been utterly and perfectly pristine and unsullied by anything so messy as actual fabric paint …  perish the thought!  Well, it has at last had its initiation ceremony  ðŸ™‚
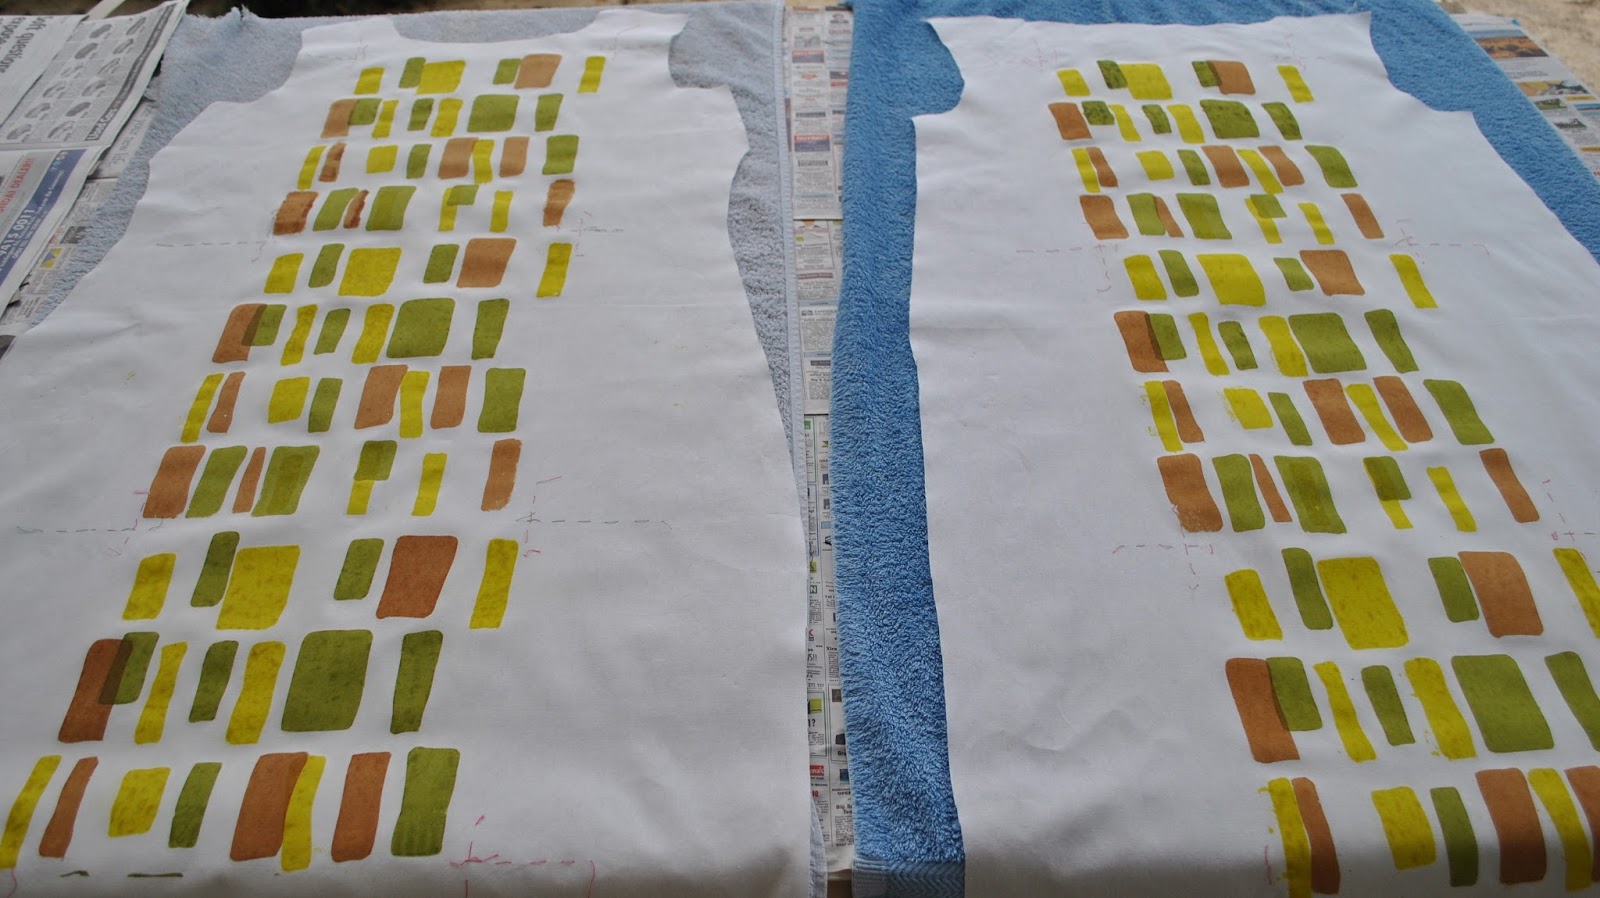
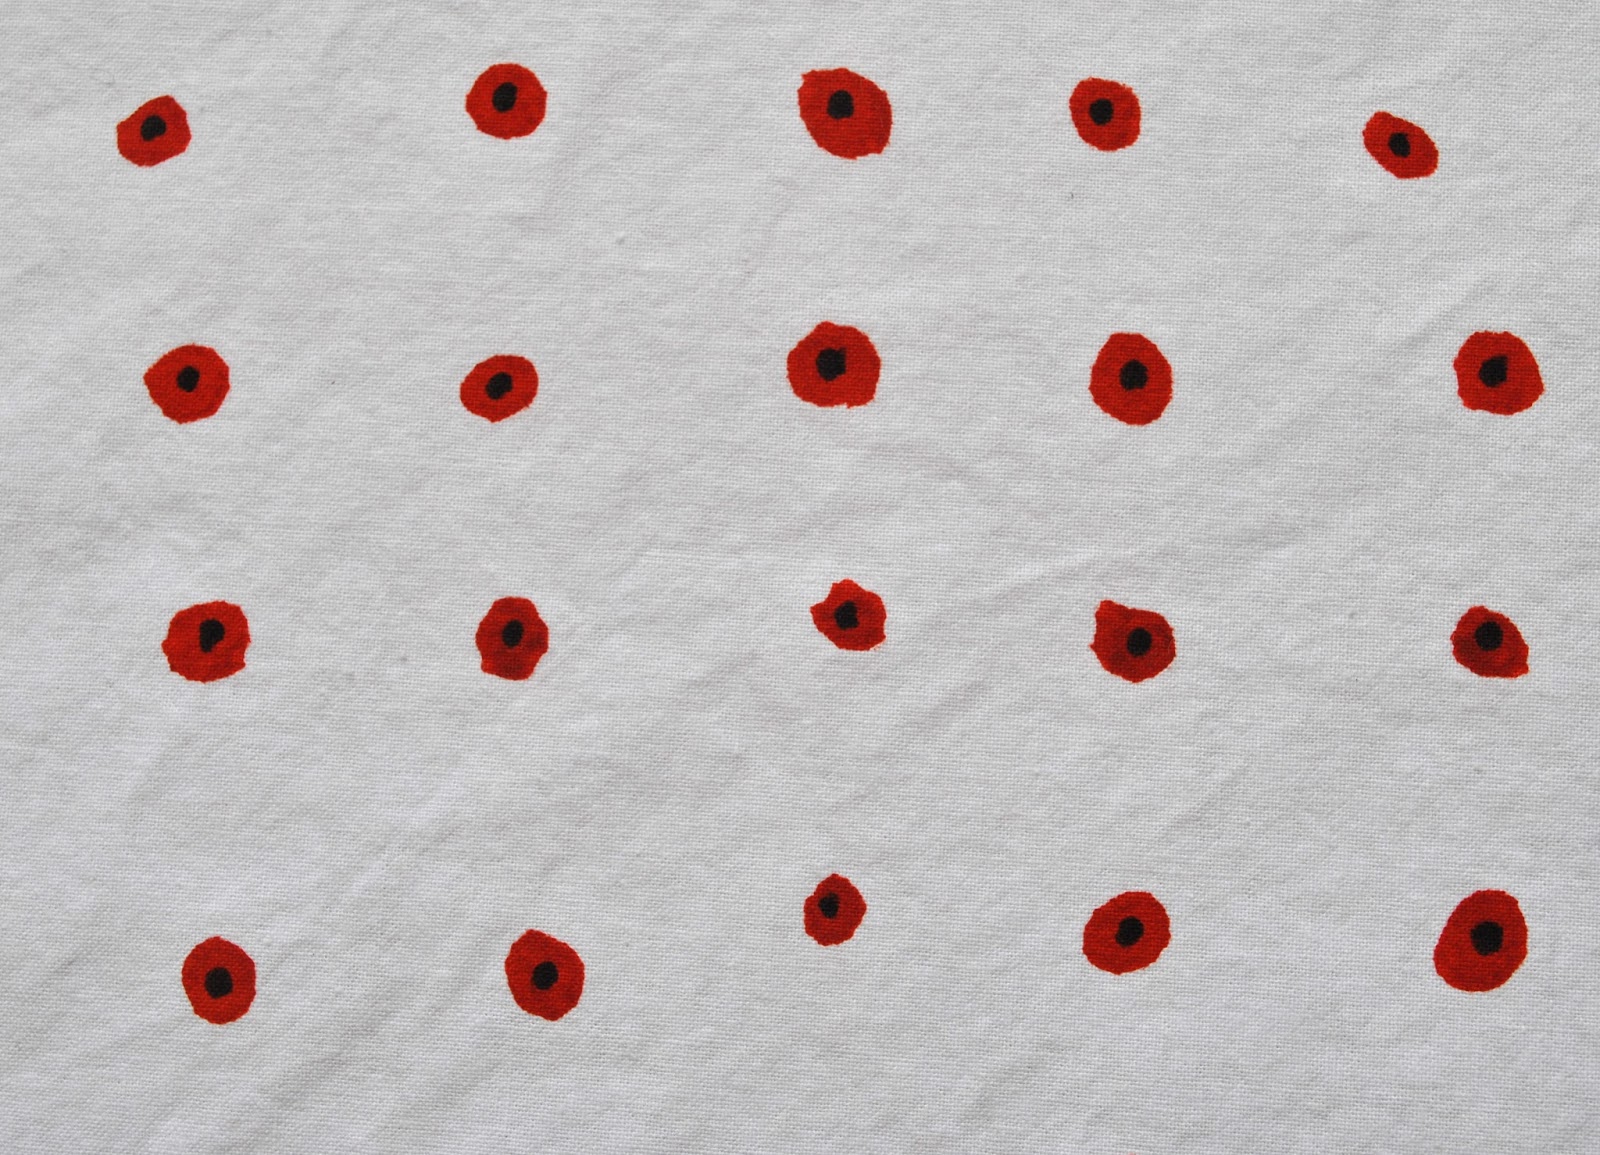
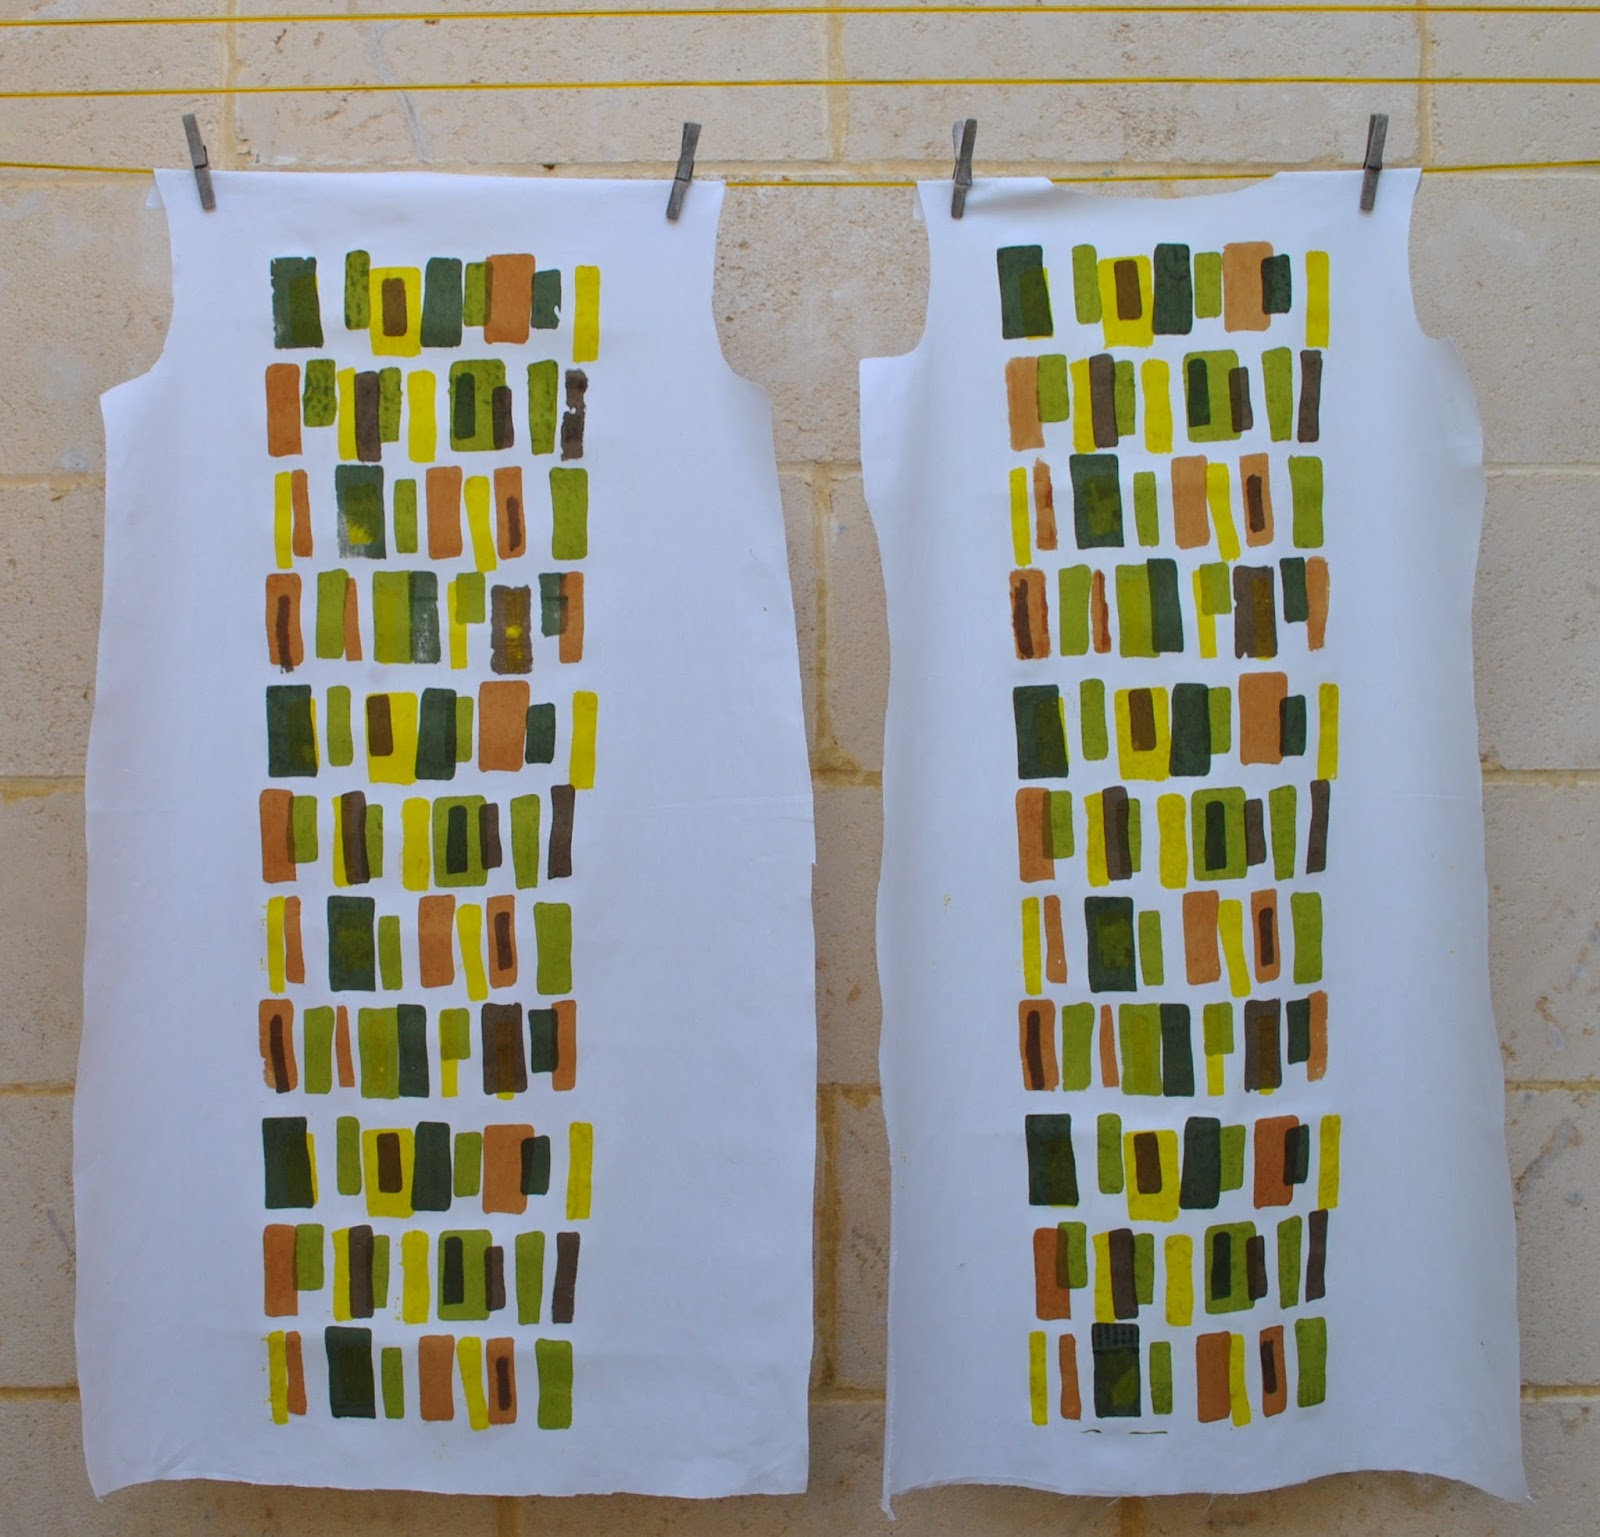
I decided to start with something simple; my first effort is a stylised field of poppies.  The screen print component is a imperfect grid of wonky red dots, like a really lovely Nano Iro pocho dots pattern that I saw for $50/m in a local shop which shall remain nameless.  Ah, the joys of living in Perth…. hey, I’m all for supporting local businesses and have got nothing against someone making a living, but a line has to be drawn somewhere.  $50/m is overstepping somewhat, no?!
I used a lightweight white cotton from Spotlight, and mixed a deepish but still quite intense red/orange, like the colour of a, well the colour of a poppy!  The break-down is about two thirds mid orange (which I would describe as garishly, in-your-face, “life jacket” orange), a third new mid red (which I would describe as “crimson”) and the tiniest touch of black.  I added about 10% transparency medium but I don’t think this quantity was enough to make any difference.  After it had dried I went over and manually added a black dot in the middle of each orange dot using a Sharpie laundry marker.
“Registering the print”, which is printer’s speak for lining up the screen so that repeat designs sit seamlessly alongside each other and you are not supposed to be able to tell where one stops and the next starts; is a heck of a lot harder than it appears… my nine prints are laughably misaligned.  I think though that since my design is random and intentionally wonky it can almost get away with having a less than perfect line-up.
This fabric to appear in sewn-together garment form very soon… stay tuned!

pinterestmail

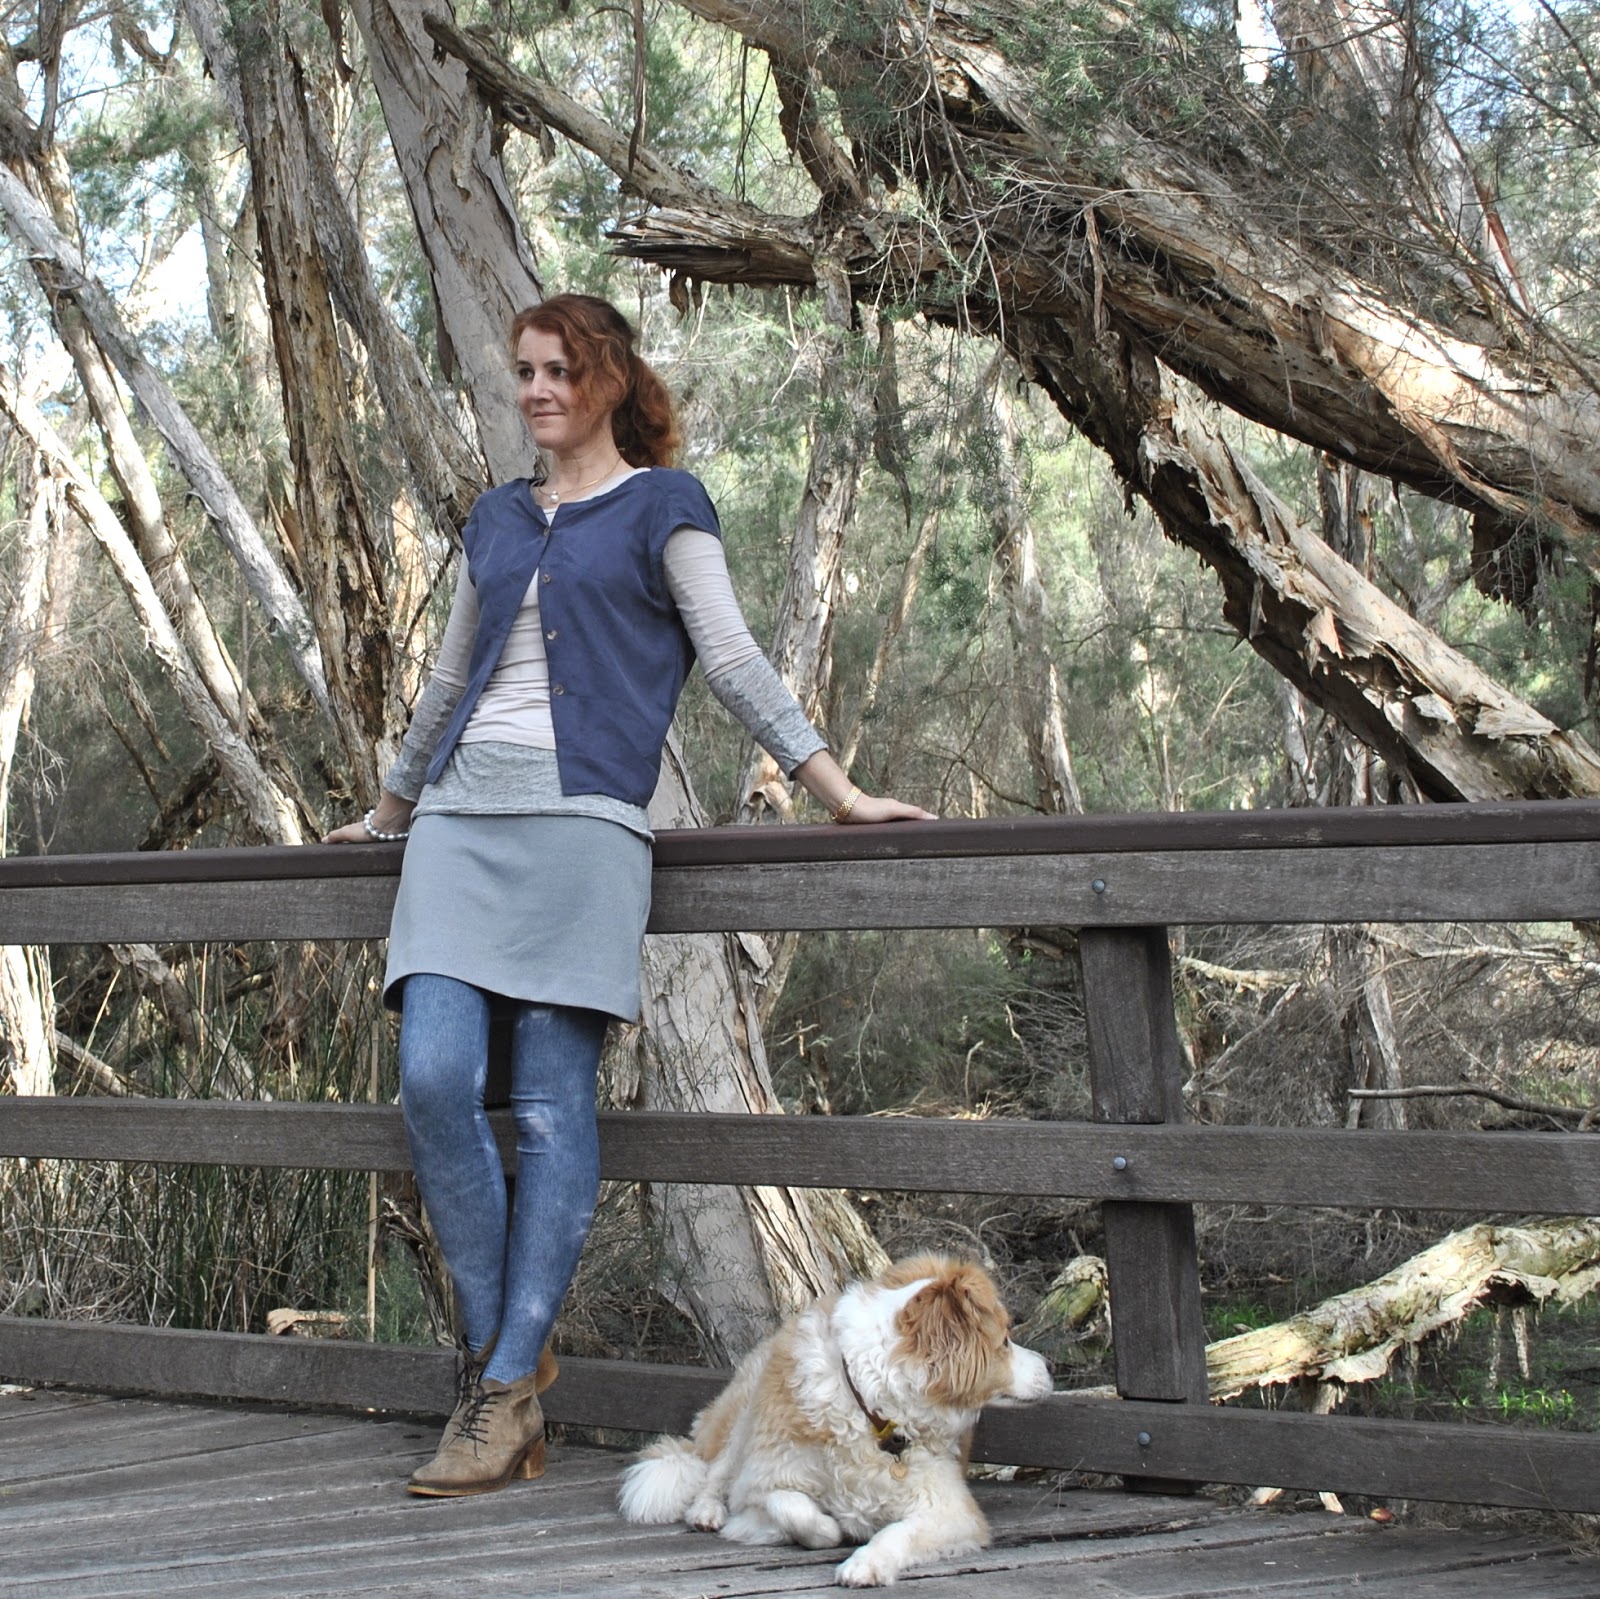
Bruised blue top thingie

Hello  ðŸ™‚
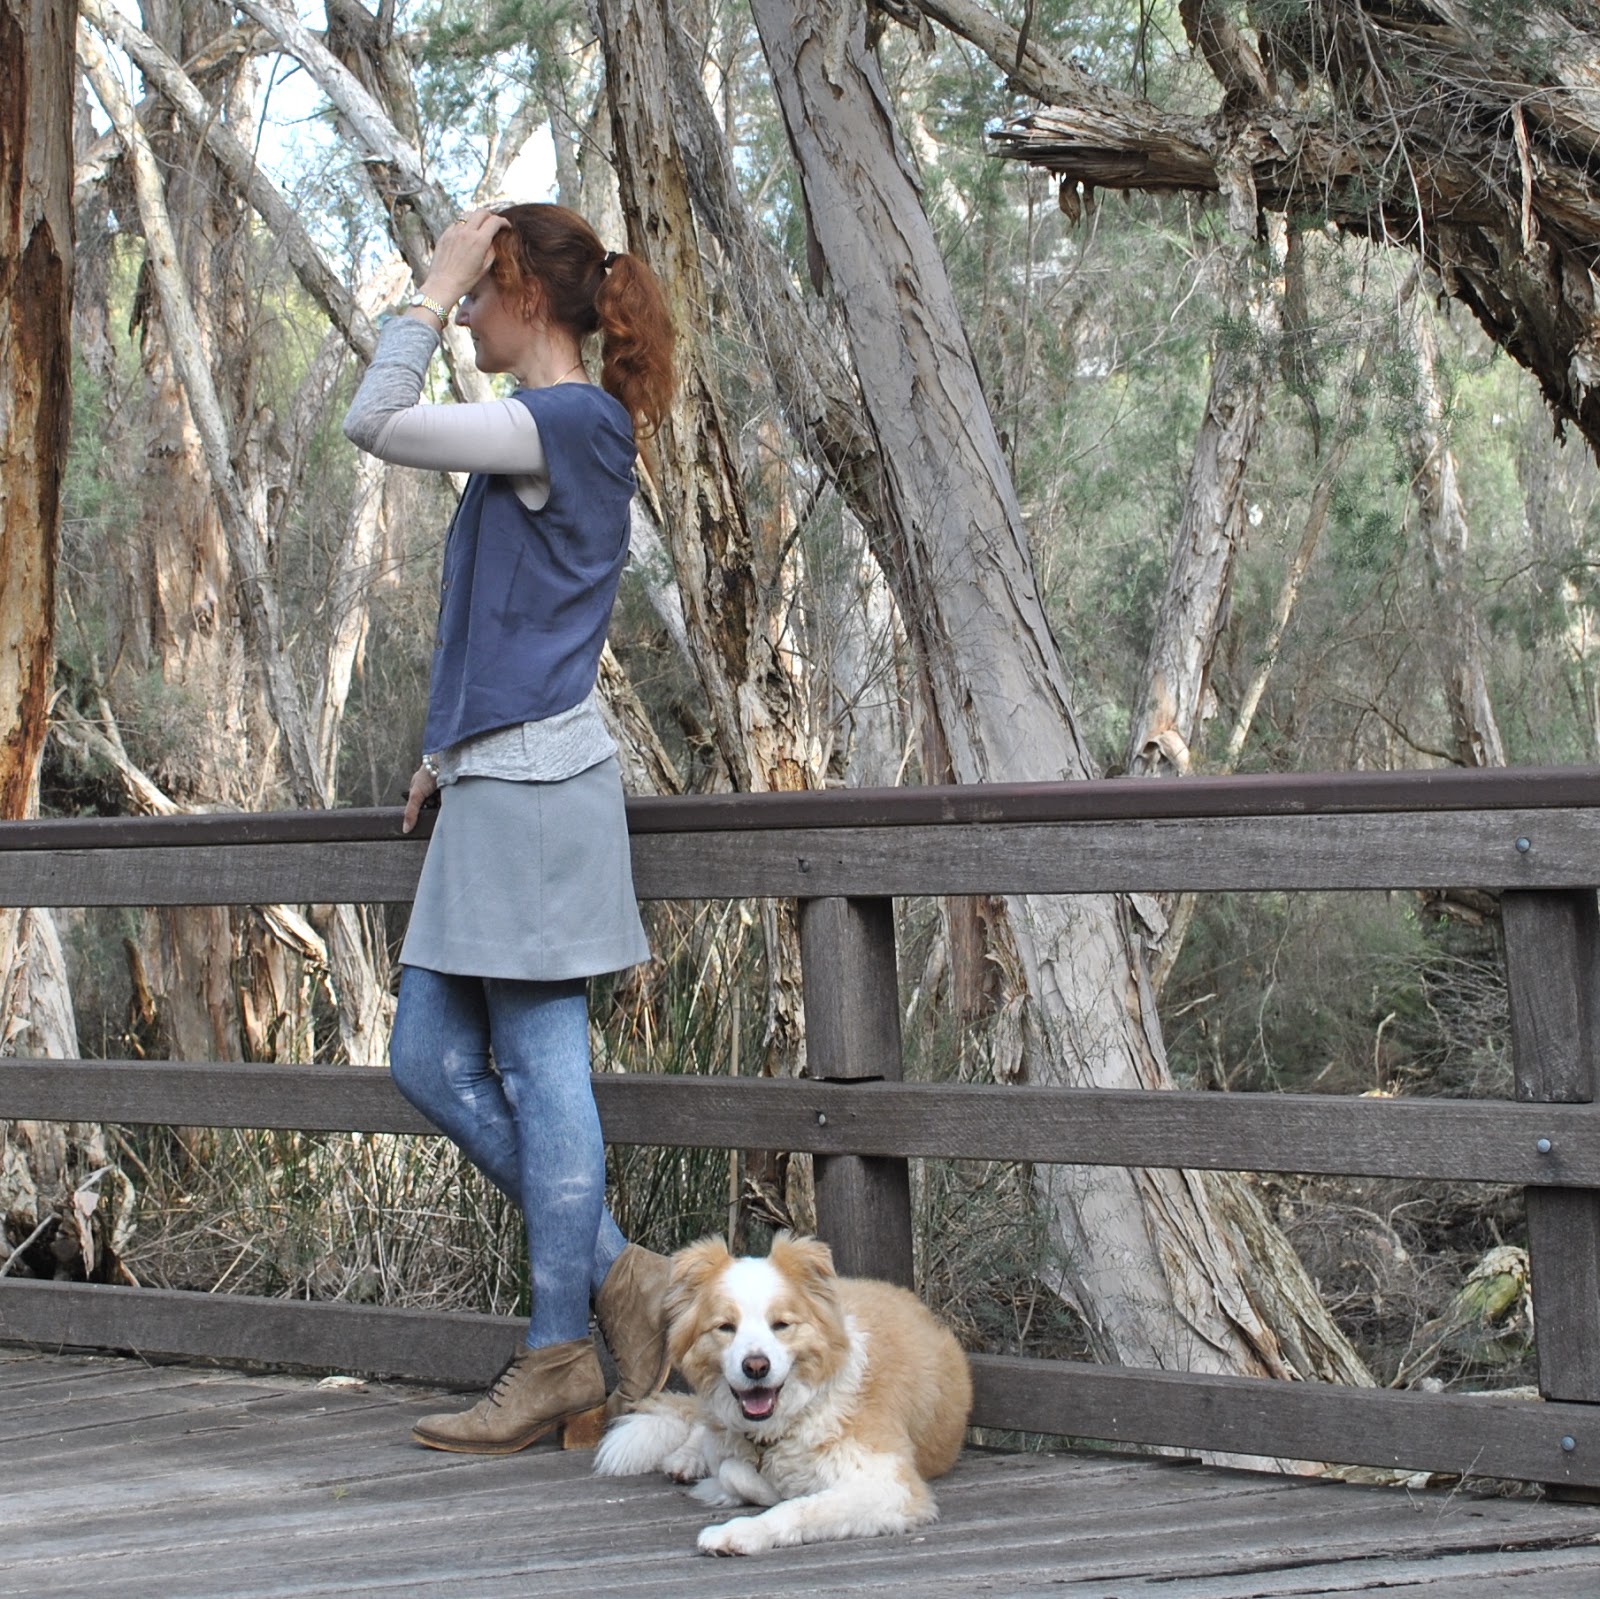
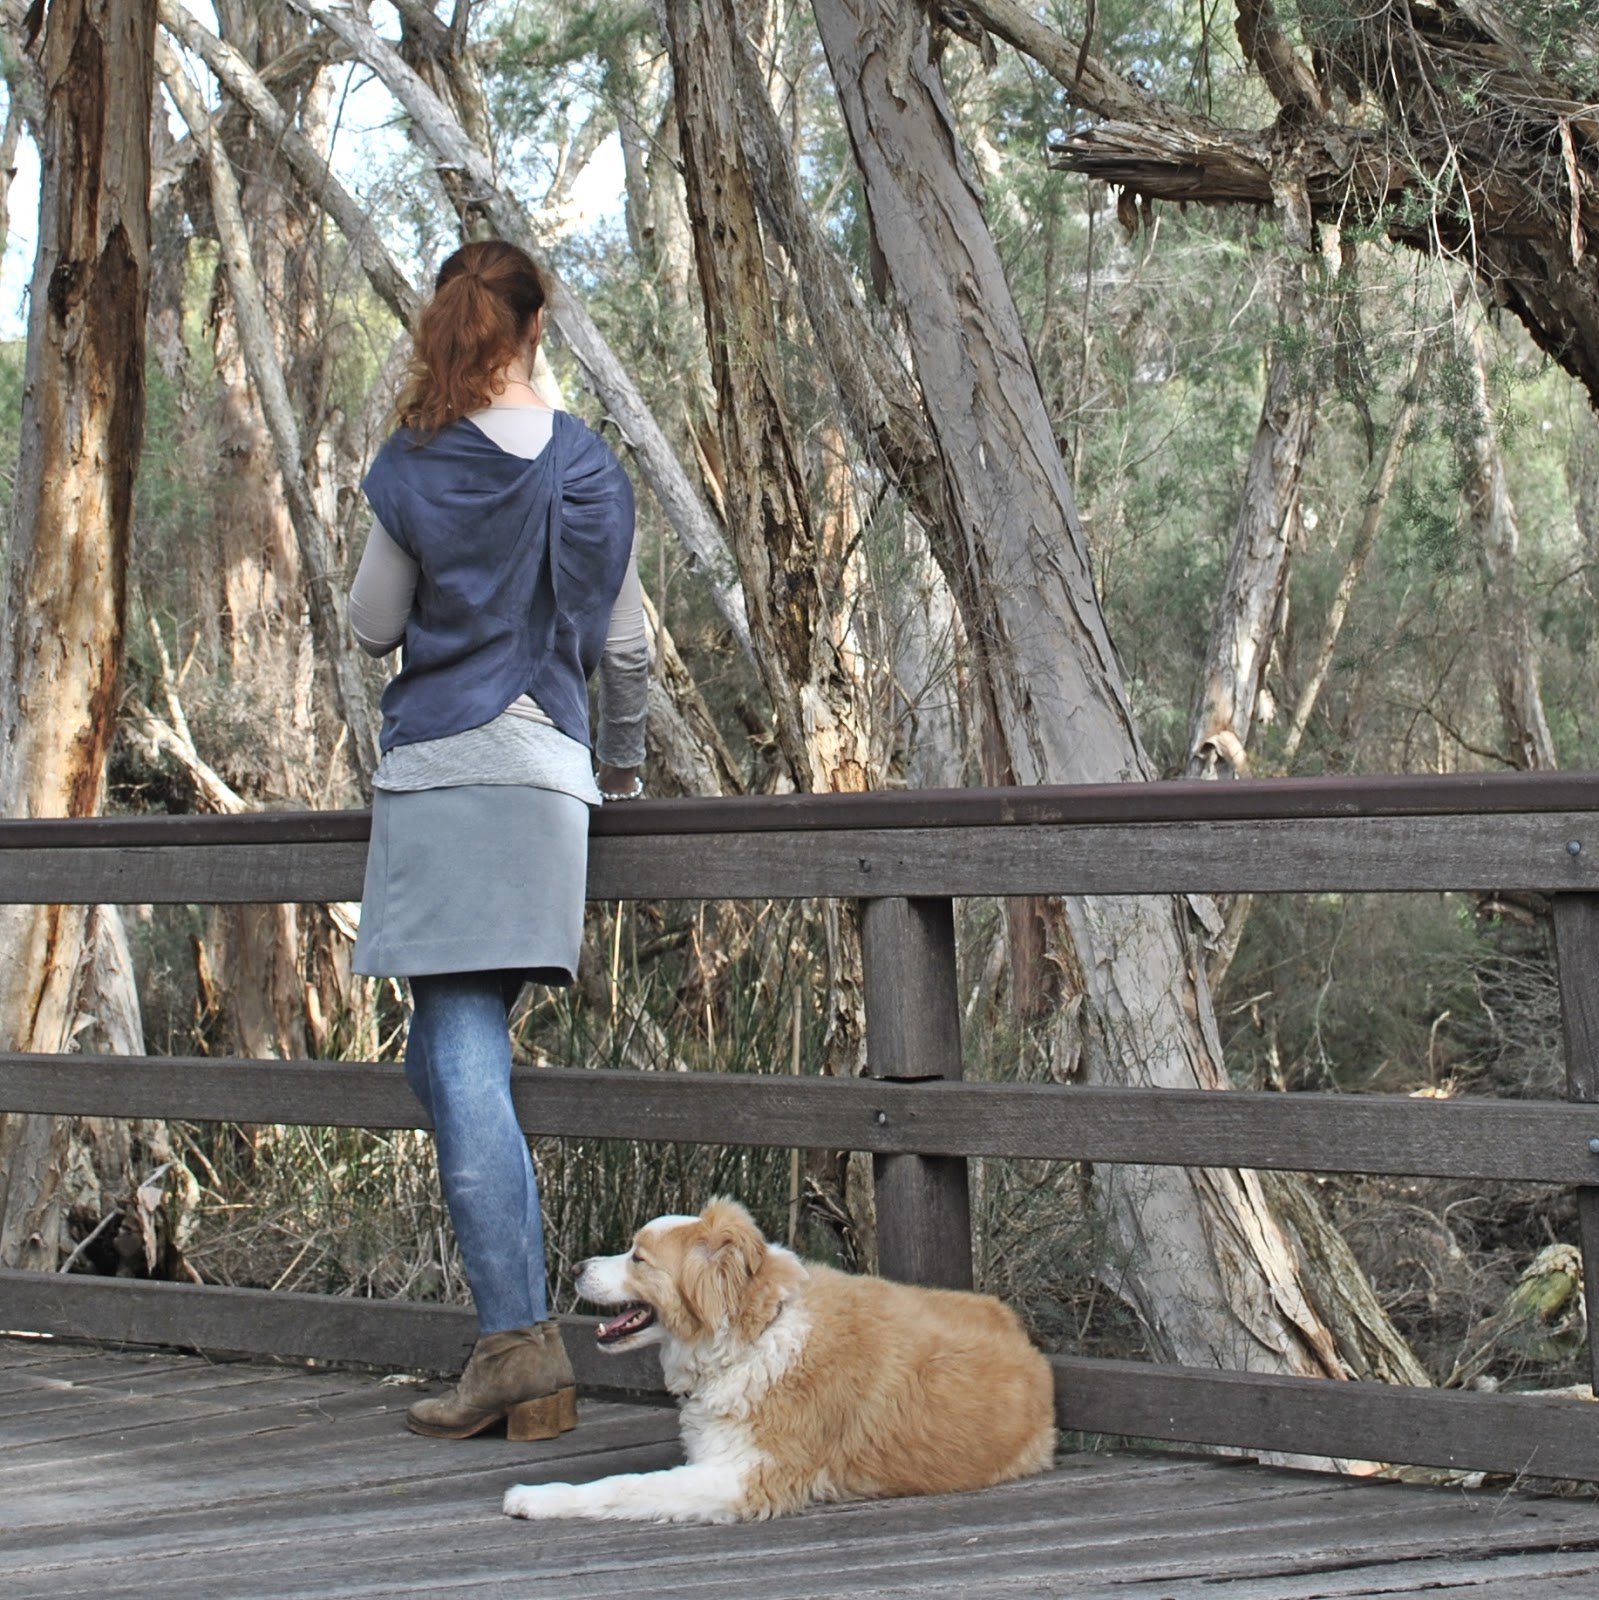
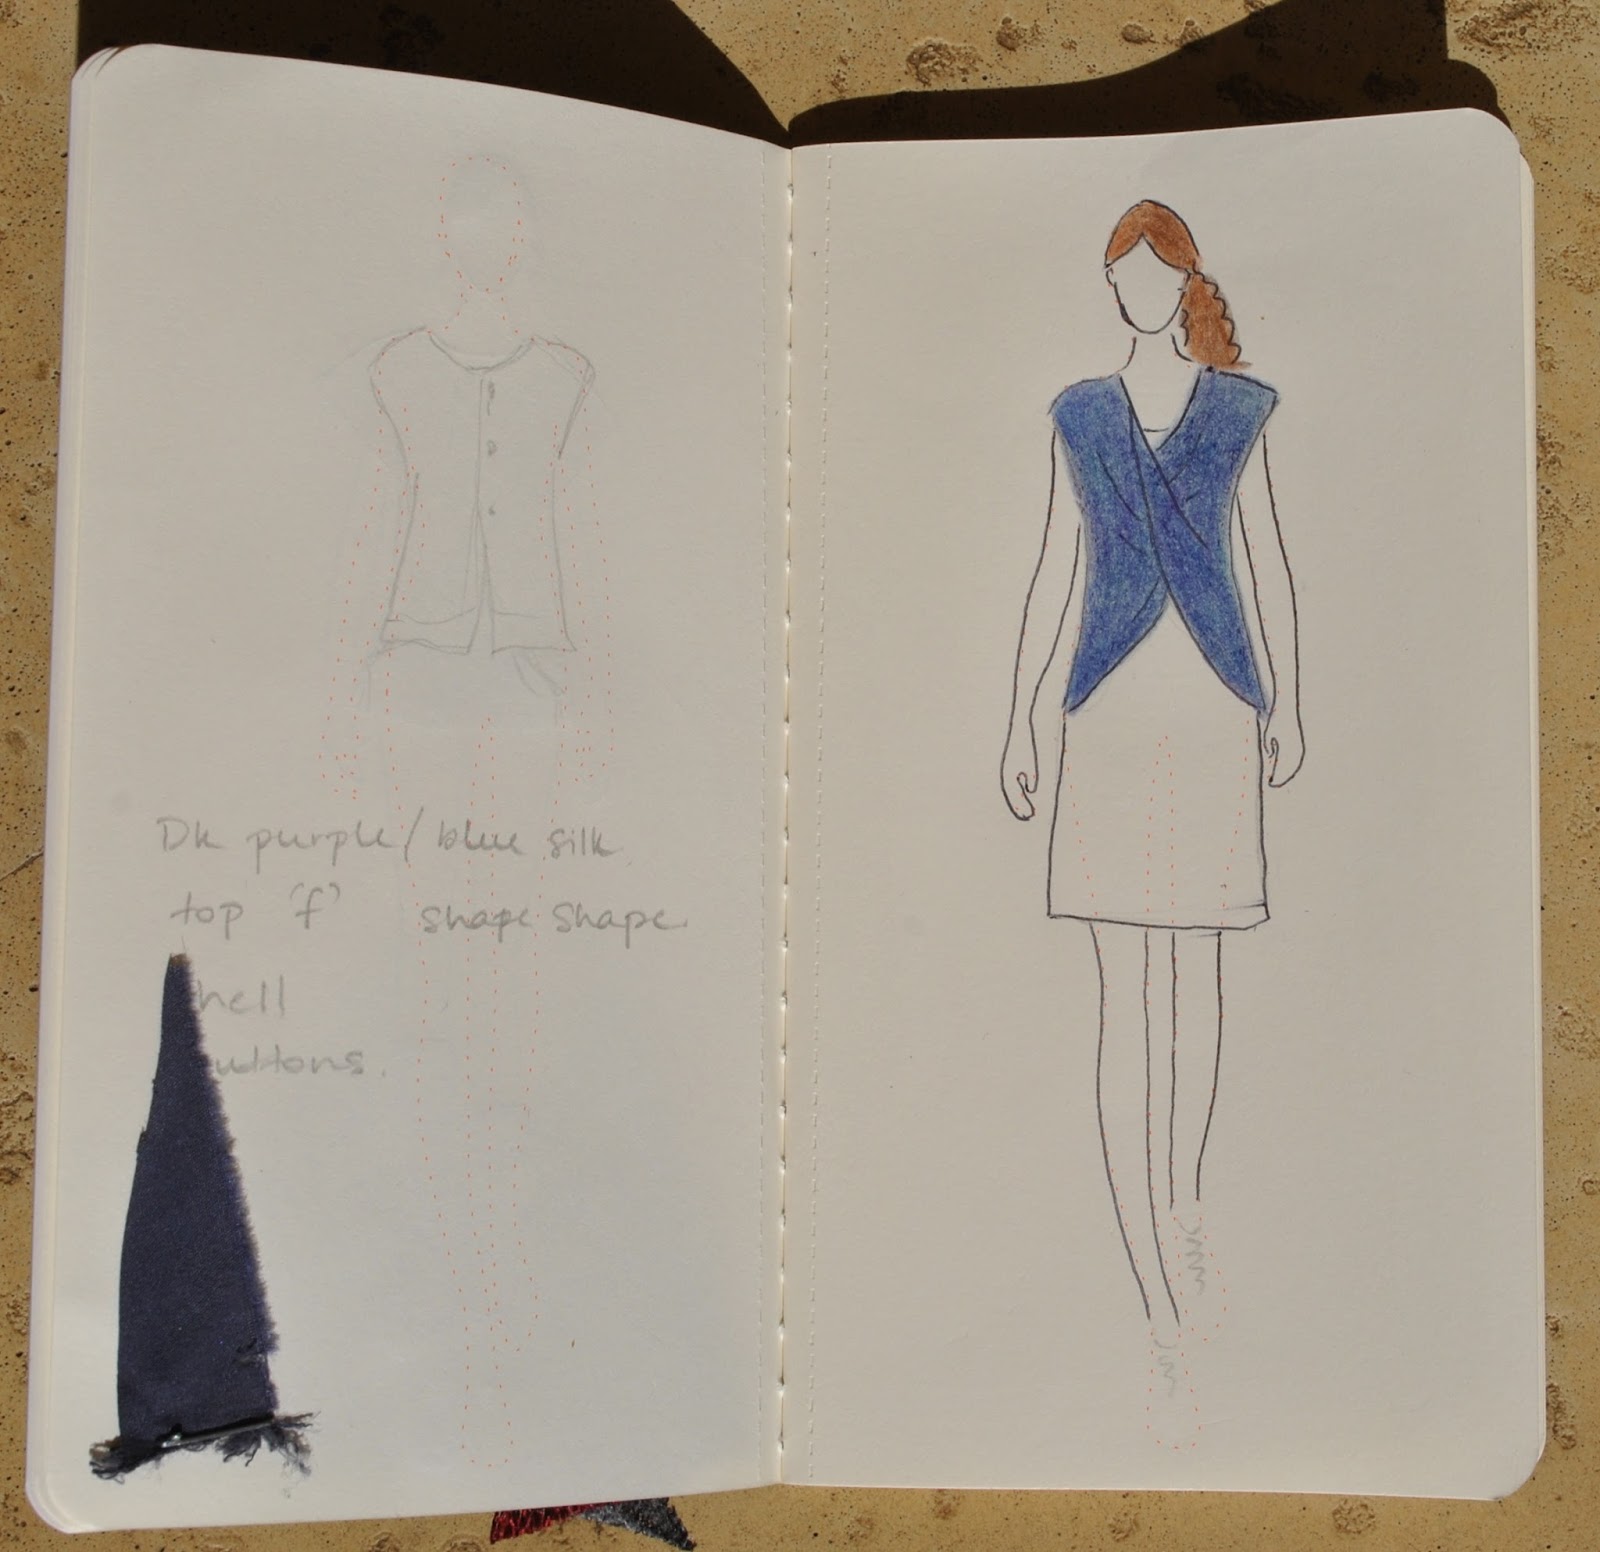
I have made this once before… this is top “p” from Shape Shape, (previously referred to on my blog as Unique Clothes Any Way You Like) by Natsuno Hiraiwa.  It’s a clever little design, like a cross between a little blouse and a draped wrap.
I really liked my first version, in a particularly delectable shade of creamy milk chocolate.  I had hammered snaps on for the front closure, which turned out to be a ginormously dumb choice since sometime last year I ripped a hole in the front placket when pulling the snaps apart…. (moment of stunned disbelief at own stupidity) Note to self: strong metal snaps plus delicate fabrics, equals a bad idea!

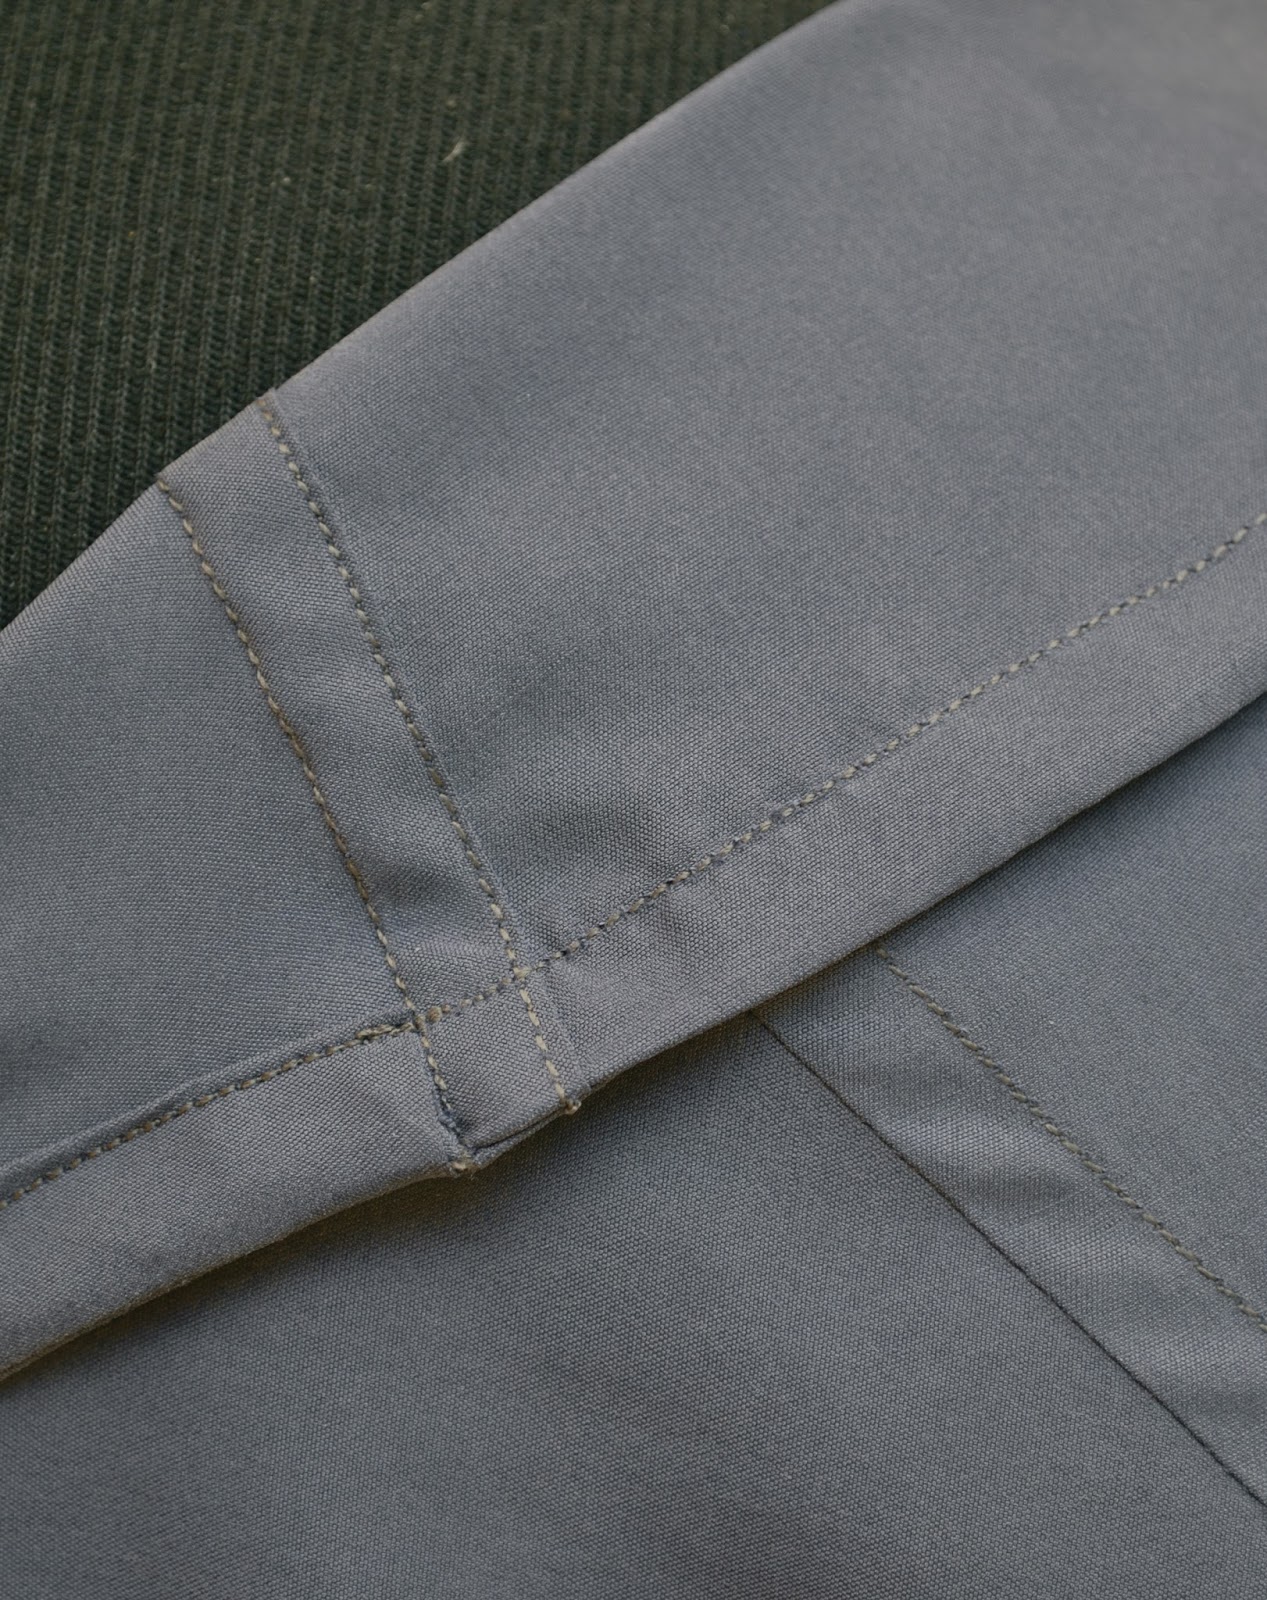
Version number two has much more sensible buttonholes and shell buttons, and is made in a lightweight drape-y silk with a suede-y, rather grabby texture to it, bought from the Fabric Store in Melbourne during my girly trip away with Mum and Cassie last year.  All the seams are flat-felled and the bias hemline swaps over from folding one way to folding the other way halfway along each top/bottom.  This is probably the only thing you have to think about making this otherwise very simple thing.  Oh, and the fact that the fabric you choose has to look the same both sides.

It’s not the kind of top you would wear every day, just an unusual and arty little thing to pop on over a plain ensemble to jazz it up.  Well that’s what I’m hoping, anyway!

Details:
Top; top “p” from shape shape by Natsuno Hiraiwa, dk blue silk
Skirt and two Tshirts; all self-drafted, skirt heregrey long-sleeved here, beige half-sleeved unblogged? I think?
Tights; self-drafted, of denim-look knit, details here
Boots; Francesco Morichetti, from Zomp shoes

pinterestmail

the paper doll project

(I’ve pledged to wear only clothes handmade by me this year and to sketch my daily outfits in my Fashionary.  I’m calling this the paper doll project)

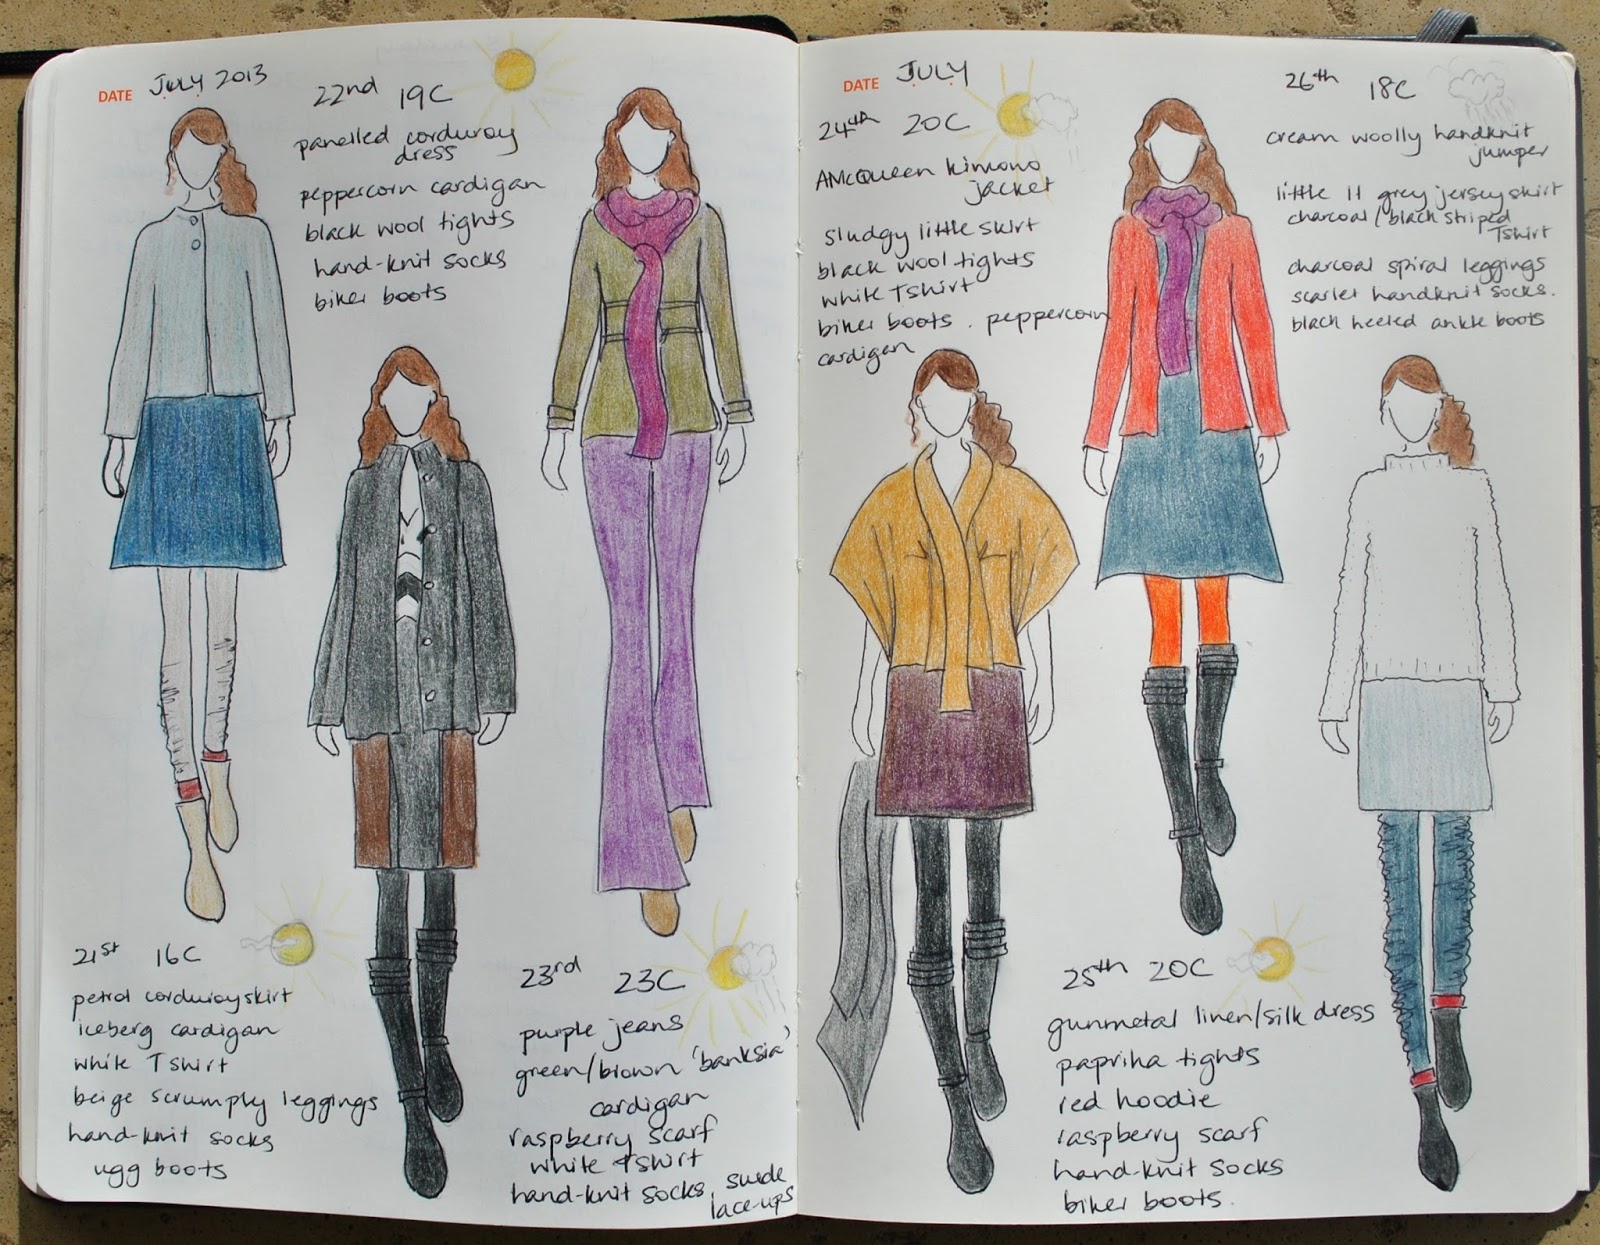
21st-26th July
from left:
petrol corduroy skirt, iceberg knitted cardigan, white Tshirt, beige scrumpled leggings hand-knit socks
panelled corduroy dress, peppercorn knitted cardigan, black wool tights, hand-knit socks
purple jeans, dyed green/brown banksia cardigan, raspberry scarf, white Tshirt, hand-knit socks
A McQueen kimono jacket, sludge-y little skirt, black wool tights, white Tshirt, peppercorn cardigan
gunmetal linen/silk dress, paprika tights, red hoodie, raspberry scarf, hand-knit socks
cream hand-knit jumper, little lt grey skirt, charcoal spiral leggings, hand-knit socks, charcoal/black striped Tshirt

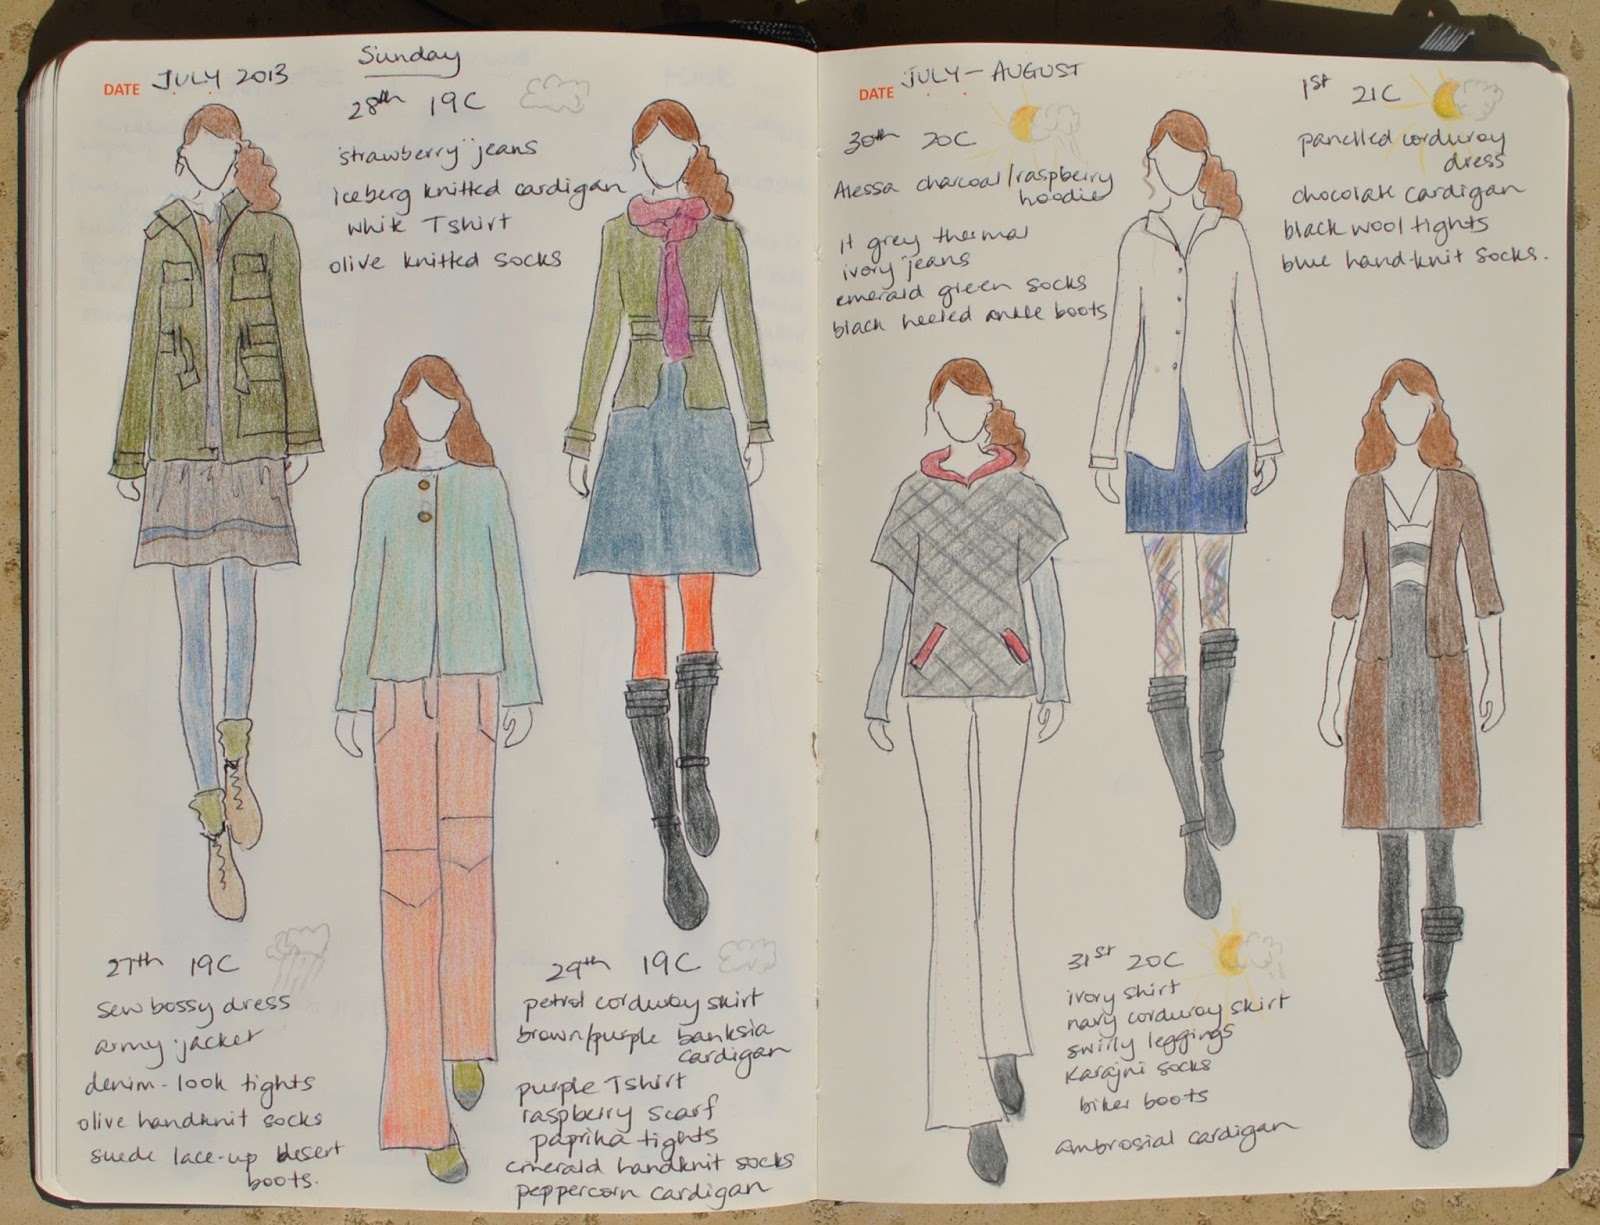
27th July-1st August
from left:
army jacket, sew bossy dress, denim look tights, olive hand-knit socks
strawberry jeans, iceberg knitted cardigan, white Tshirt, olive hand-knit socks
petrol corduroy skirt, brown/purple banksia cardigan, purple Tshirt, raspberry scarf, paprika tights, emerald hand-knit socks, peppercorn cardigan
alessa hoodie, lt grey thermal, ivory jeans, emerald hand-knit socks
ivory blouse, navy corduroy skirt, swirly leggings, karajini socks, ambrosial cardigan
panelled corduroy dress, chocolate cardigan, black wool tights, blue hand-knit socks

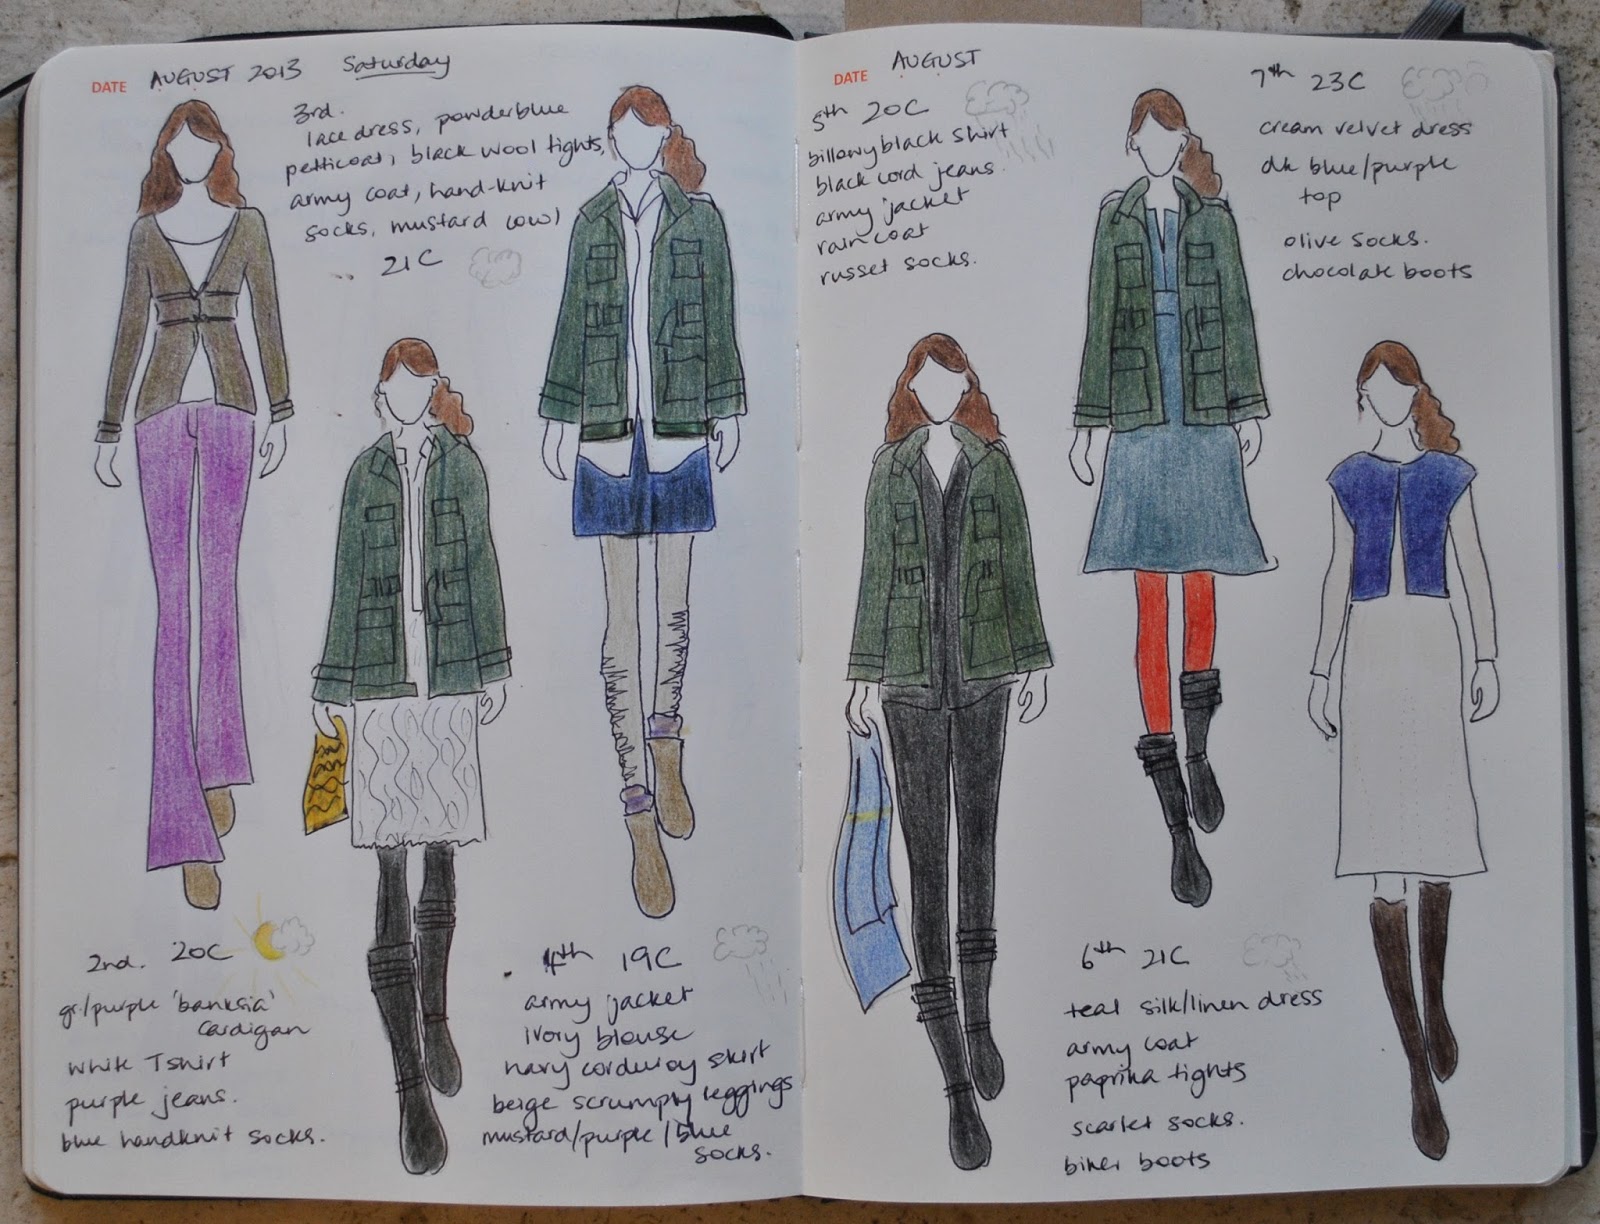
2nd-7th August
from left:
green/purple banksia cardigan, white Tshirt, purple jeans, blue hand-knit socks
lace dress, powder blue petticoat, black wool tights, army jacket, colourful hand-knit socks, mustard cowl
army jacket, ivory blouse, navy corduroy skirt, beige scrumply leggings, mustard/purple hand-knit socks
billowy black shirt, black jeans, army jacket, raincoat, russet hand-knit socks
teal/grey silk dress, army coat, paprika tights, scarlet hand-knit socks
cream velvet dress, bruised blue top, olive hand-knit socks

pinterestmail

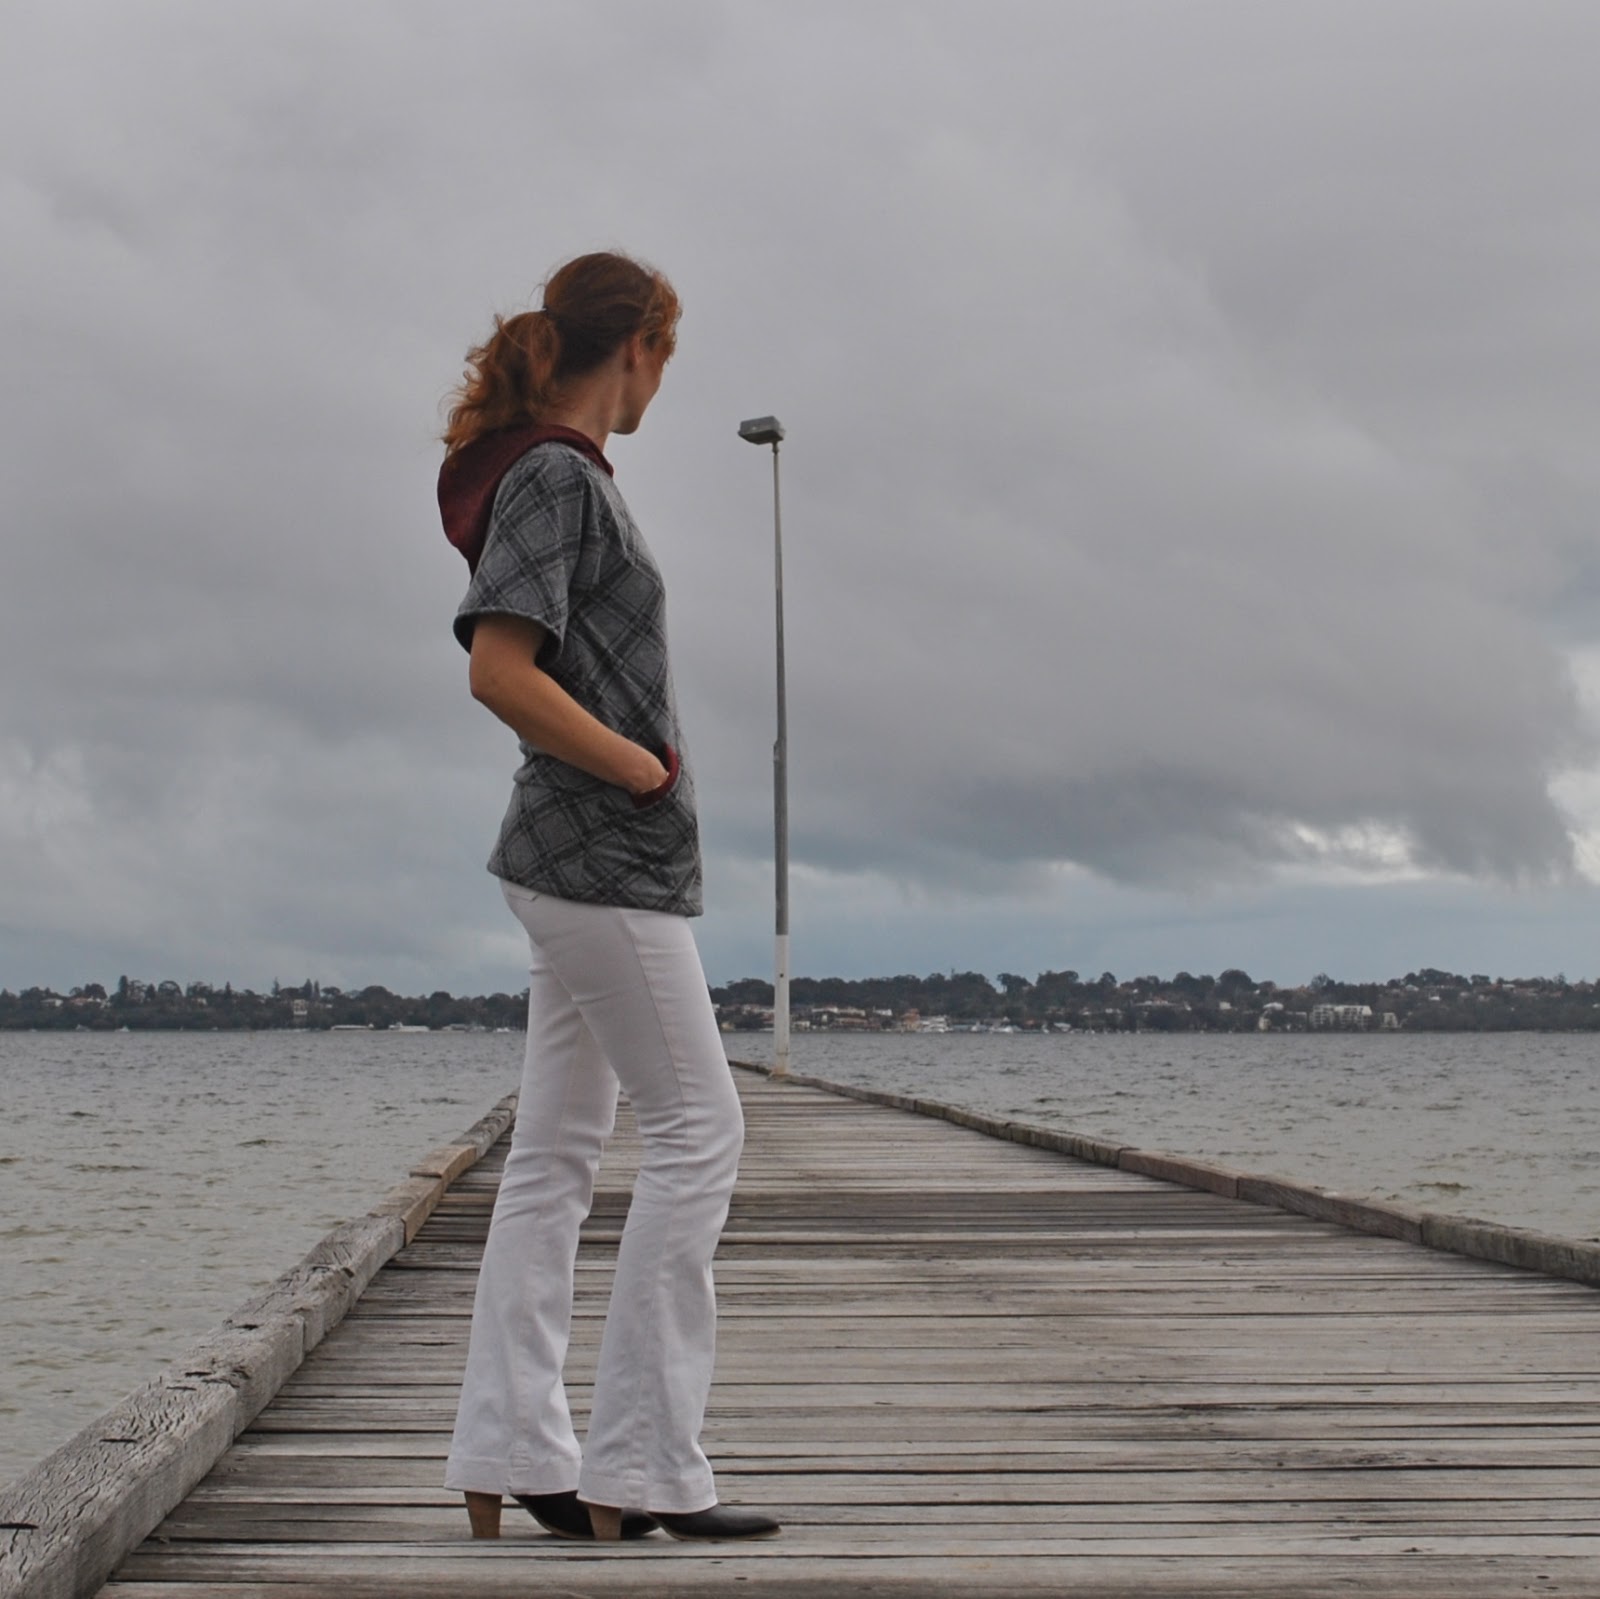
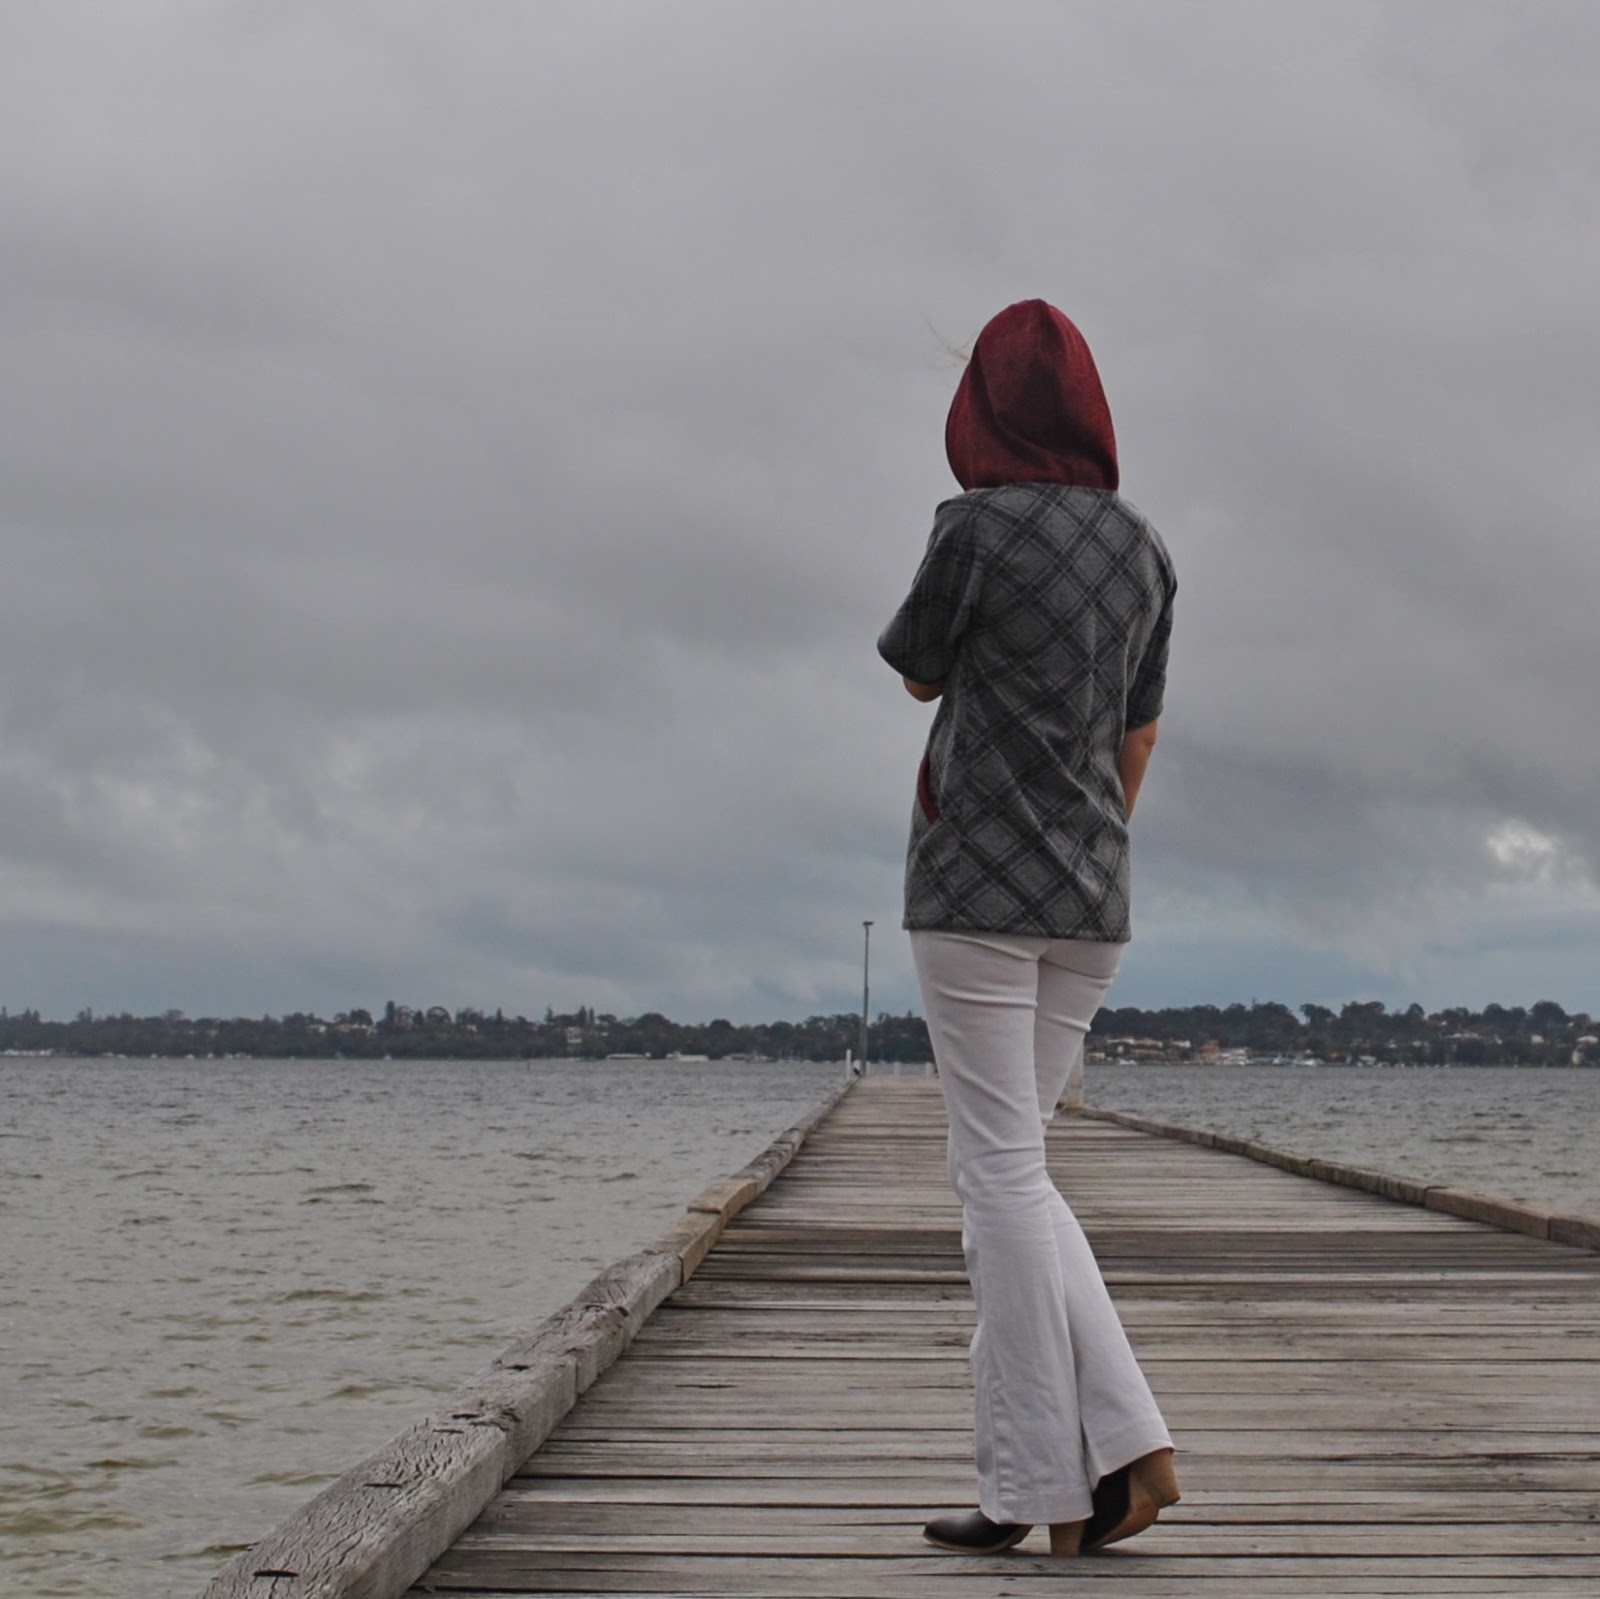
The Alessa hoodie

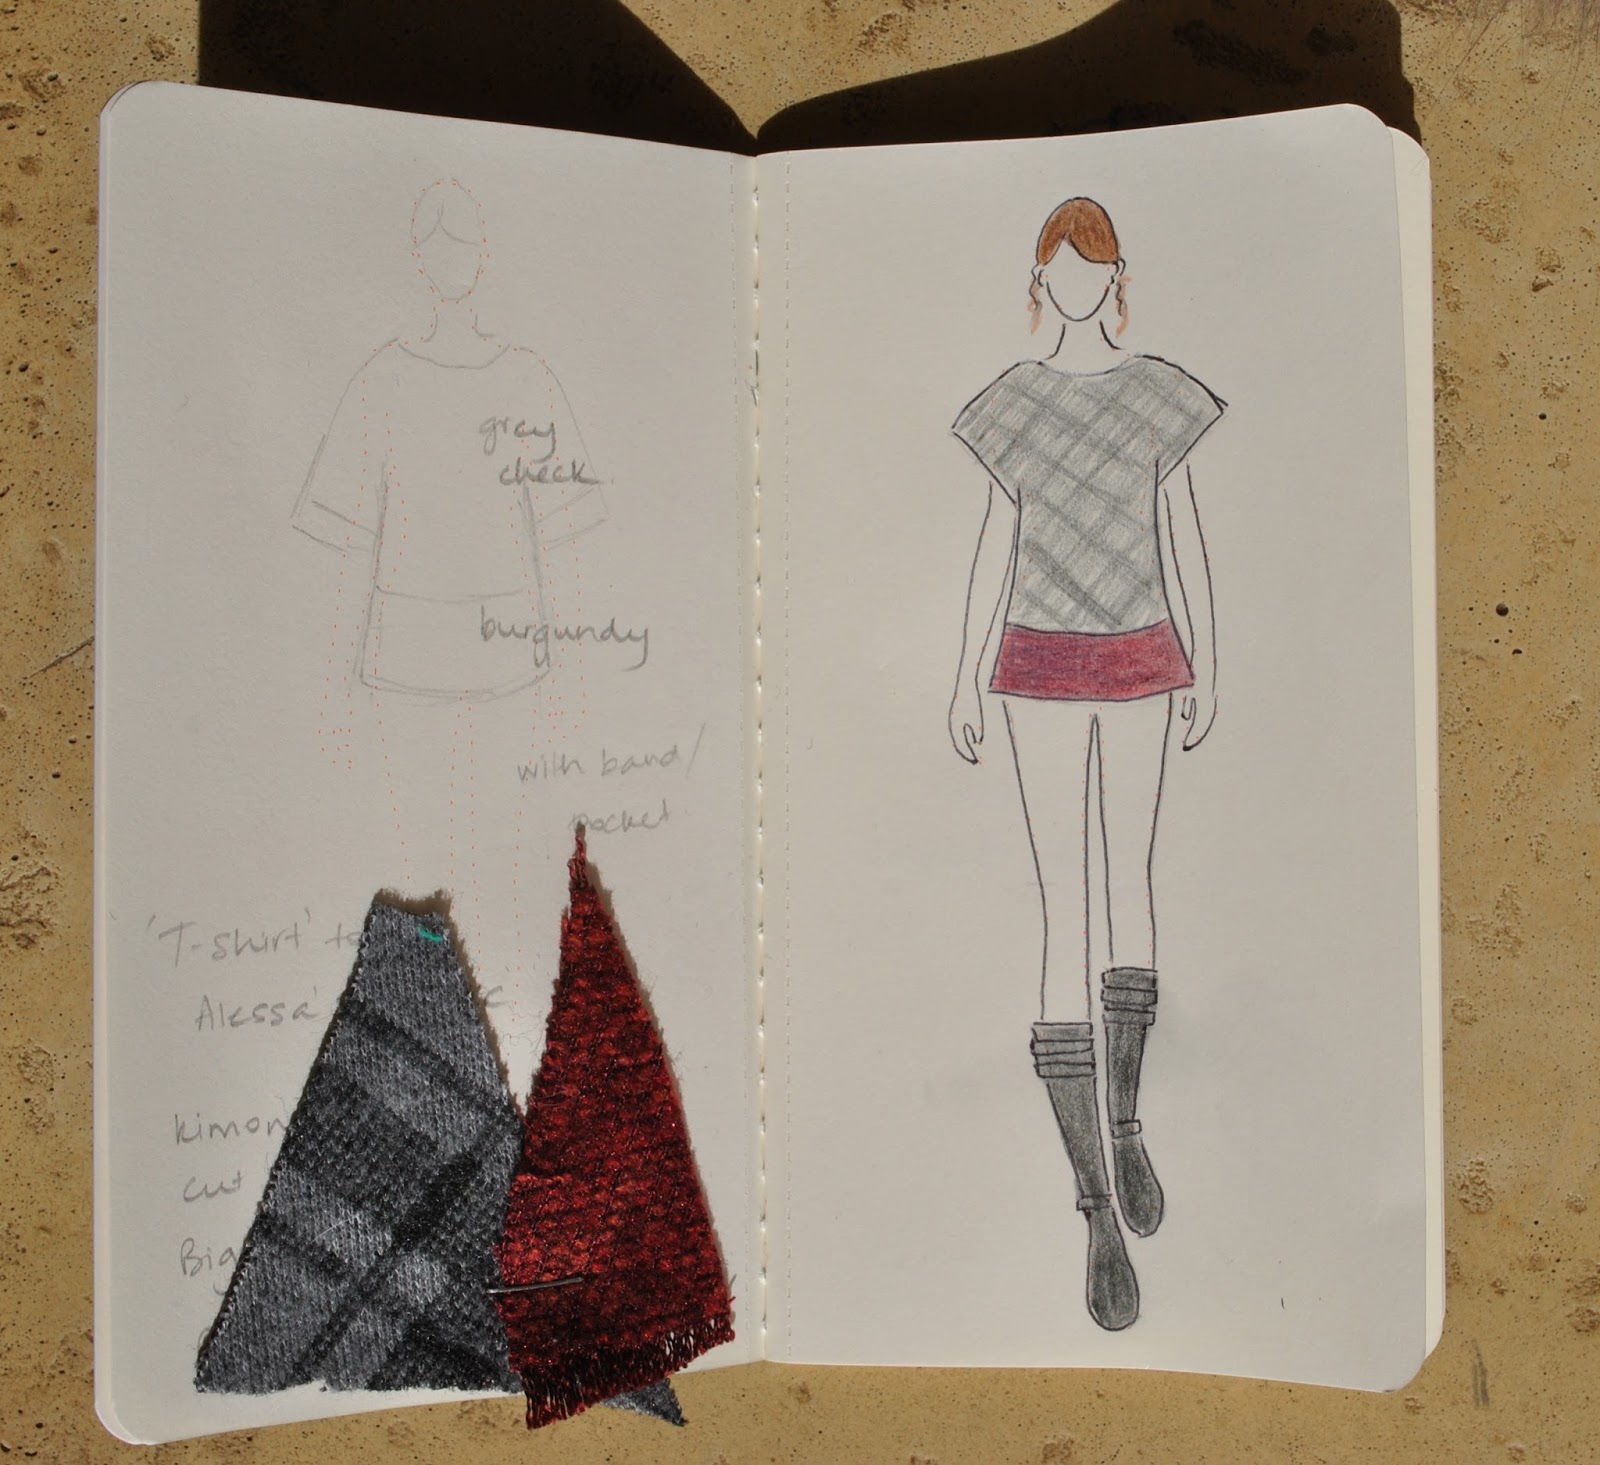
… so called because Alessa of Farbenfreude gave this fabric to me in a recent giveaway… thank you so much Alessa!
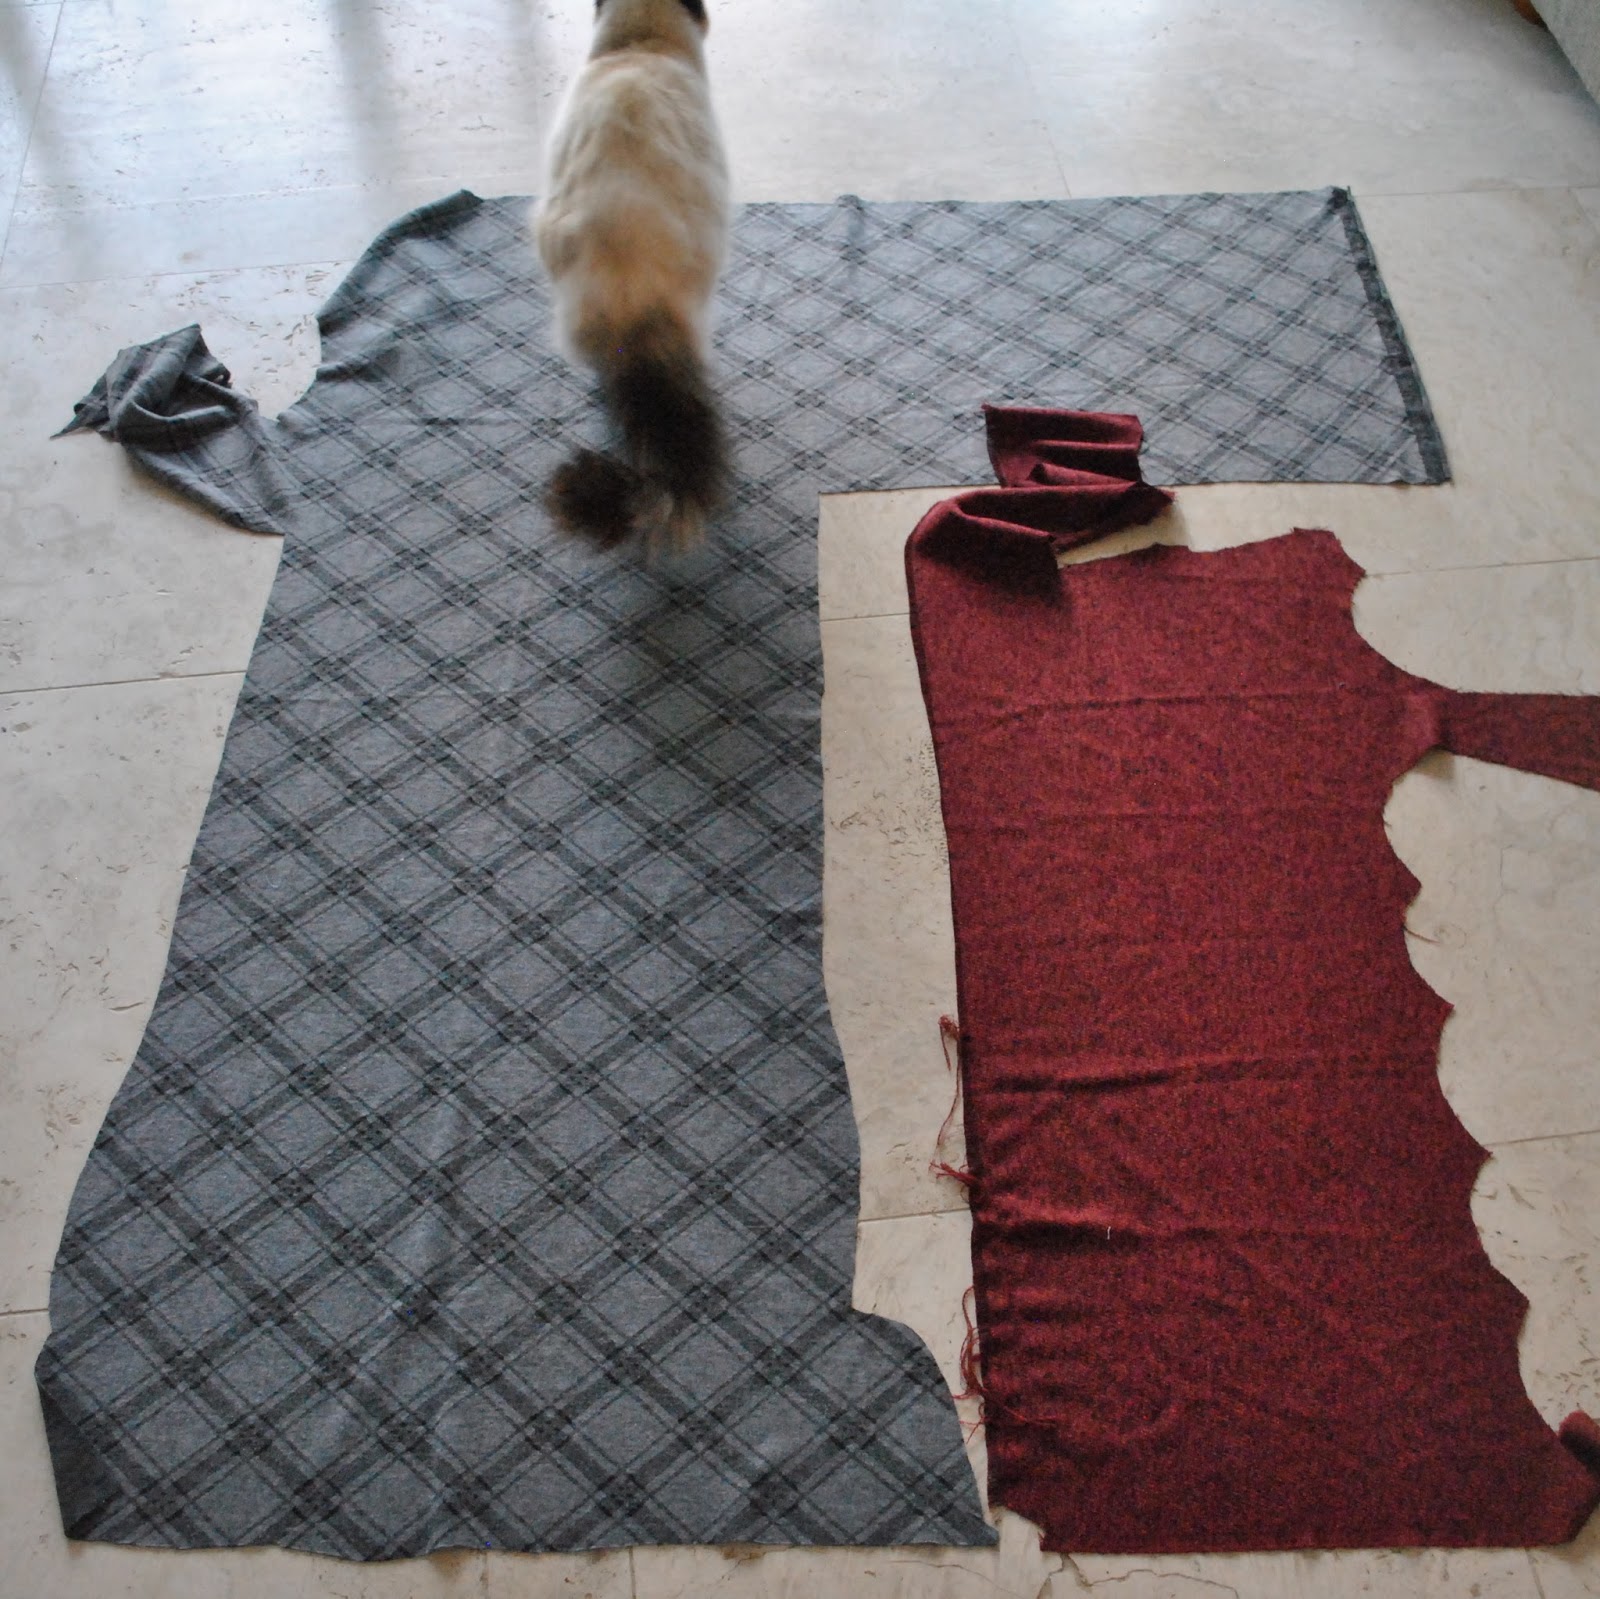
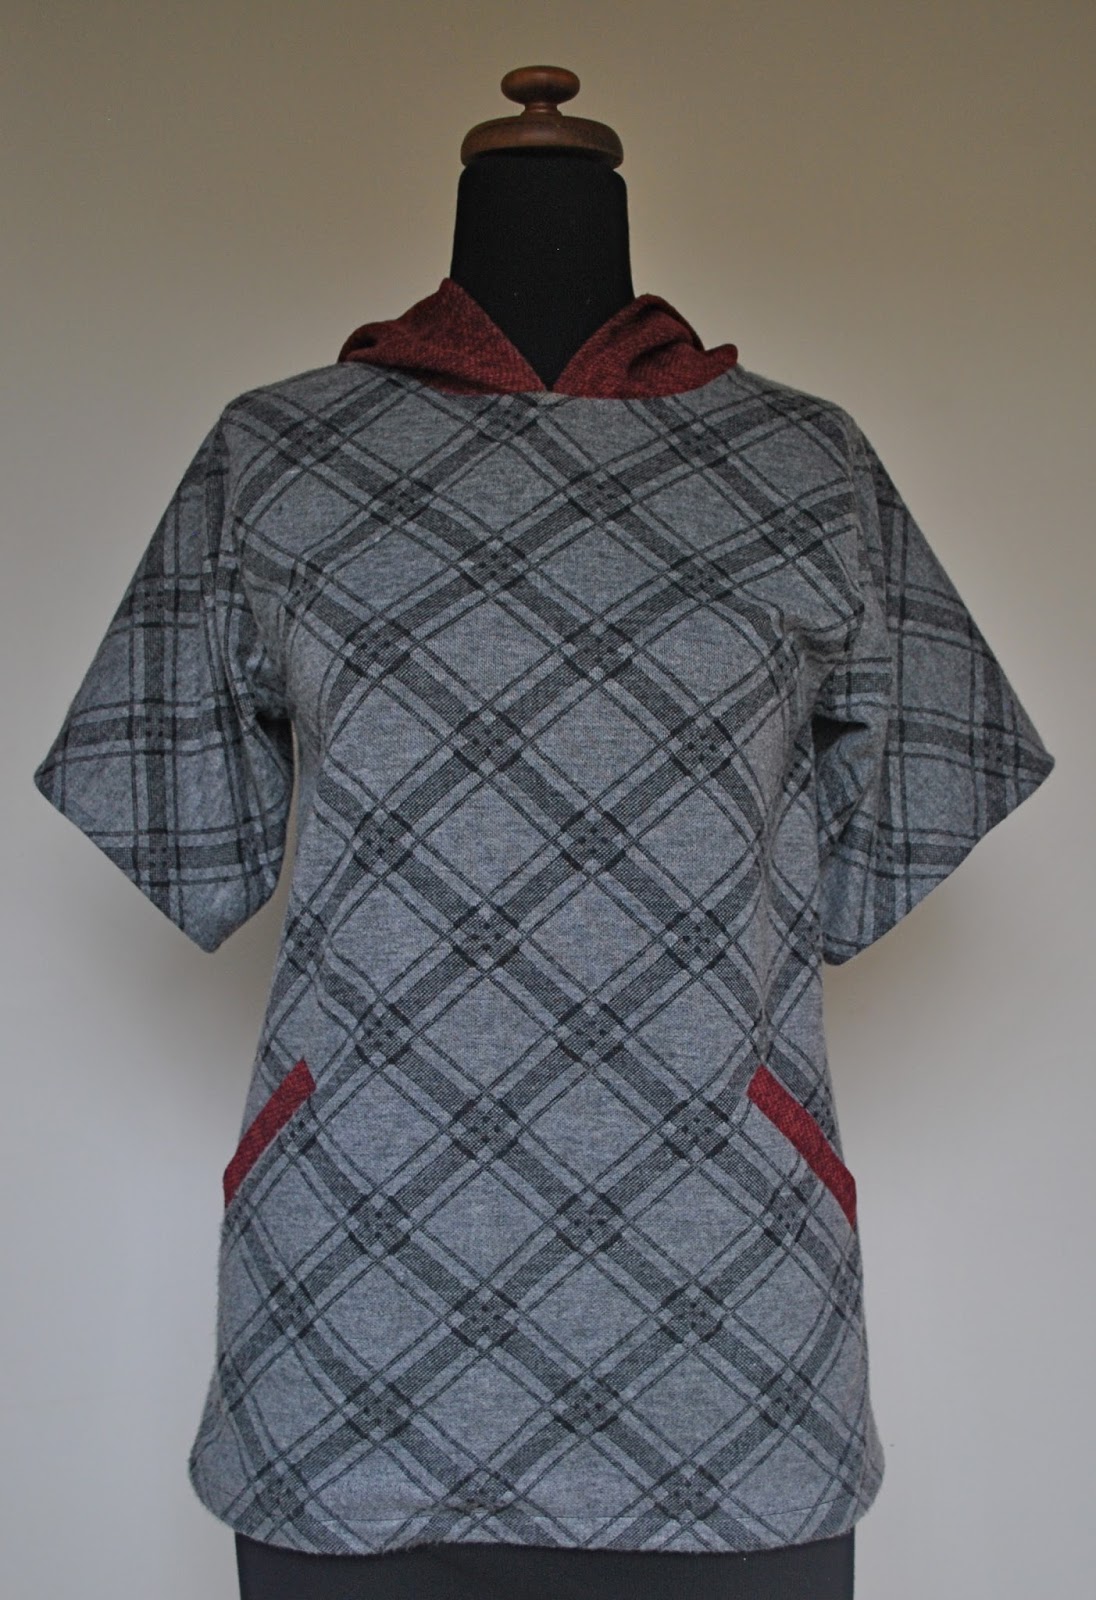
It is very nice fabric, a largish piece of soft fluffy charcoal grey non-stretchy knit stuff with a diagonally printed black check pattern, and a smaller piece of raspberry red woven fabric with an almost chenille-y quality to it.  They went so nicely together so I decided to combine the two in one garment.

The cat should give an idea of the scale here; there was not much fabric and I had to get creative to make the most of the small pieces.  And just to clarify; that is not a whinge… I LOVE sewing challenges like this!
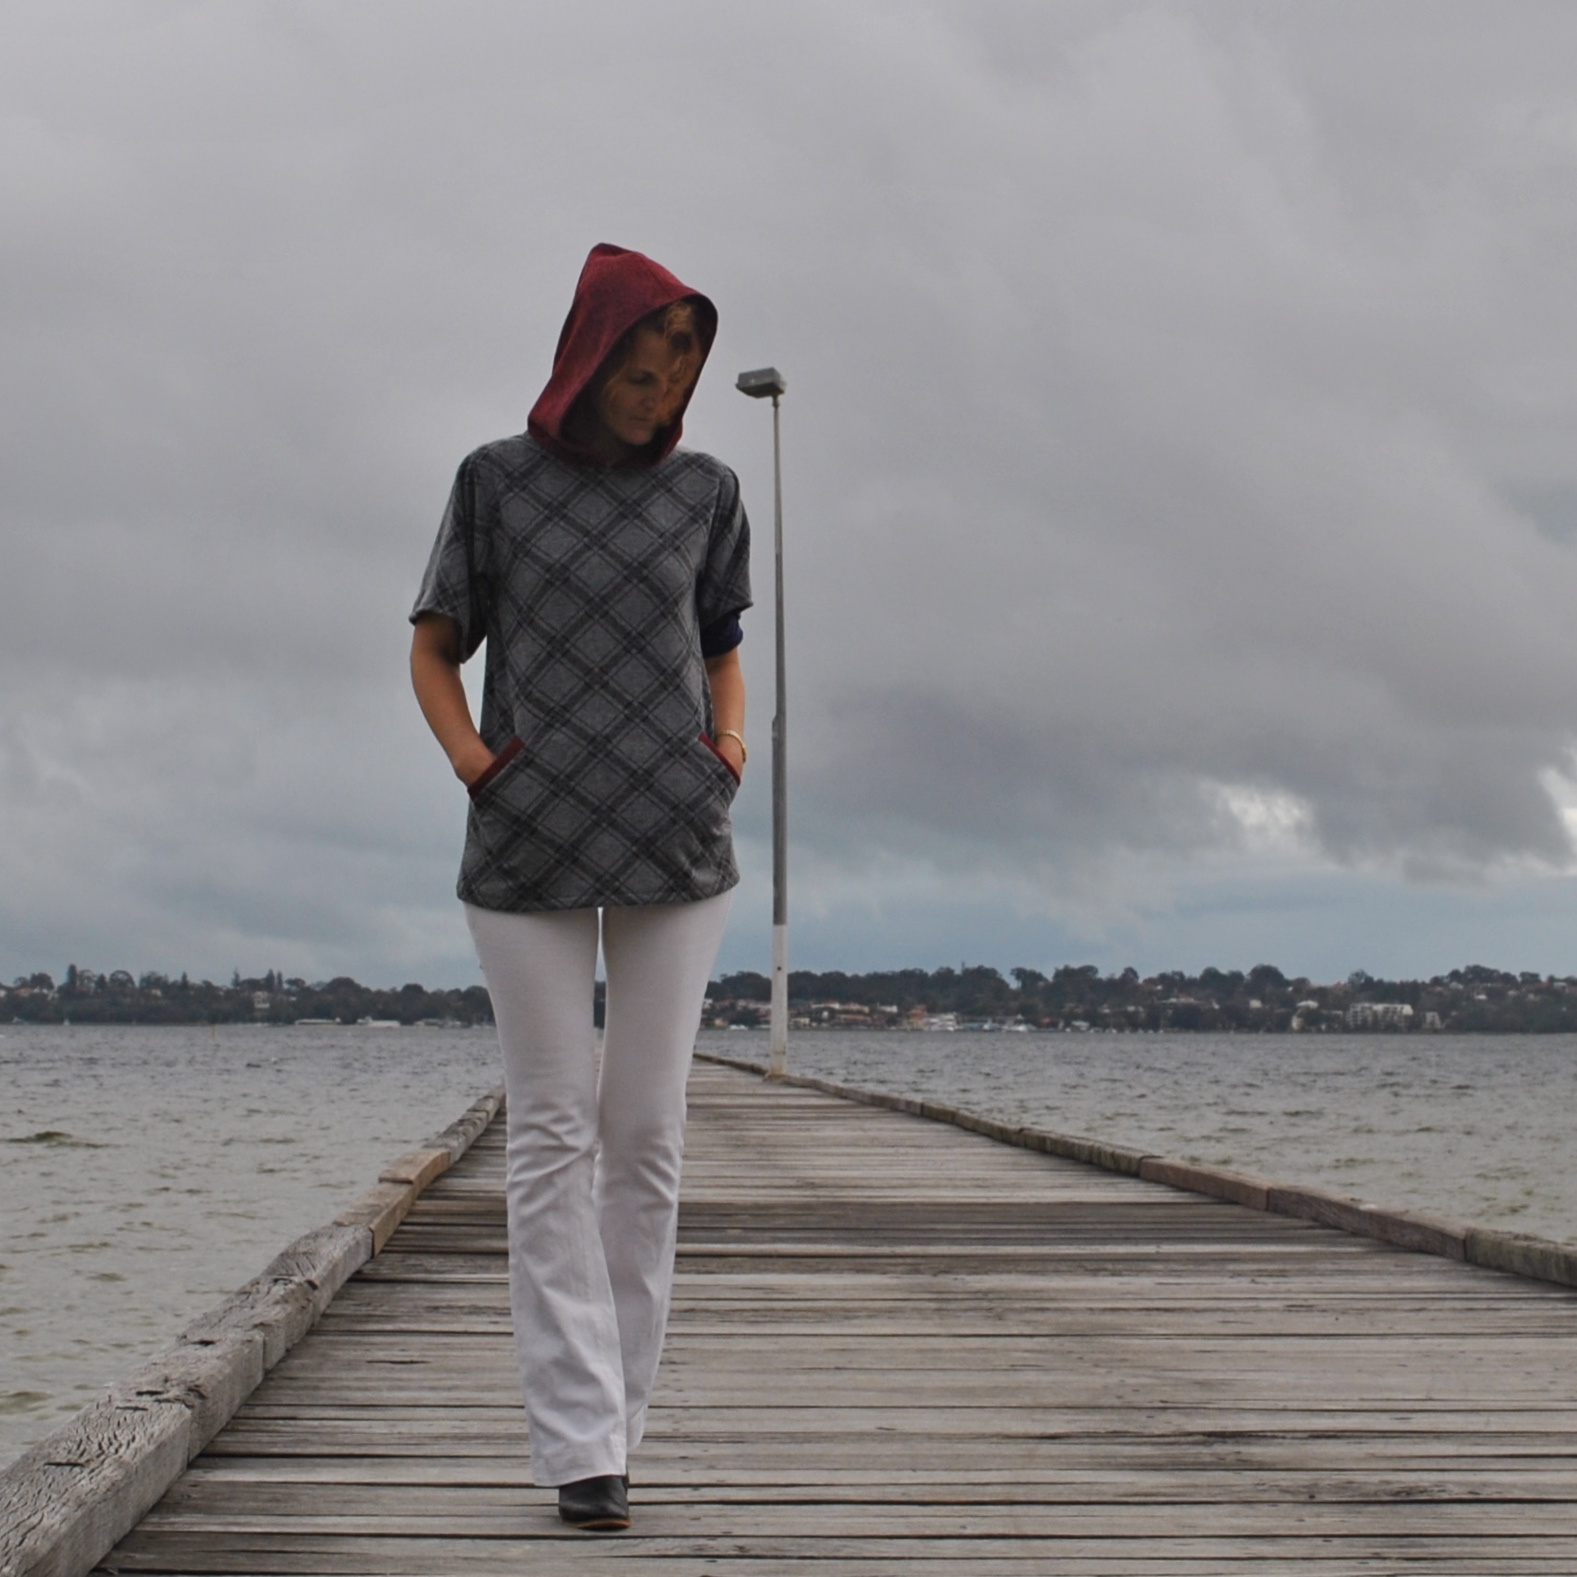
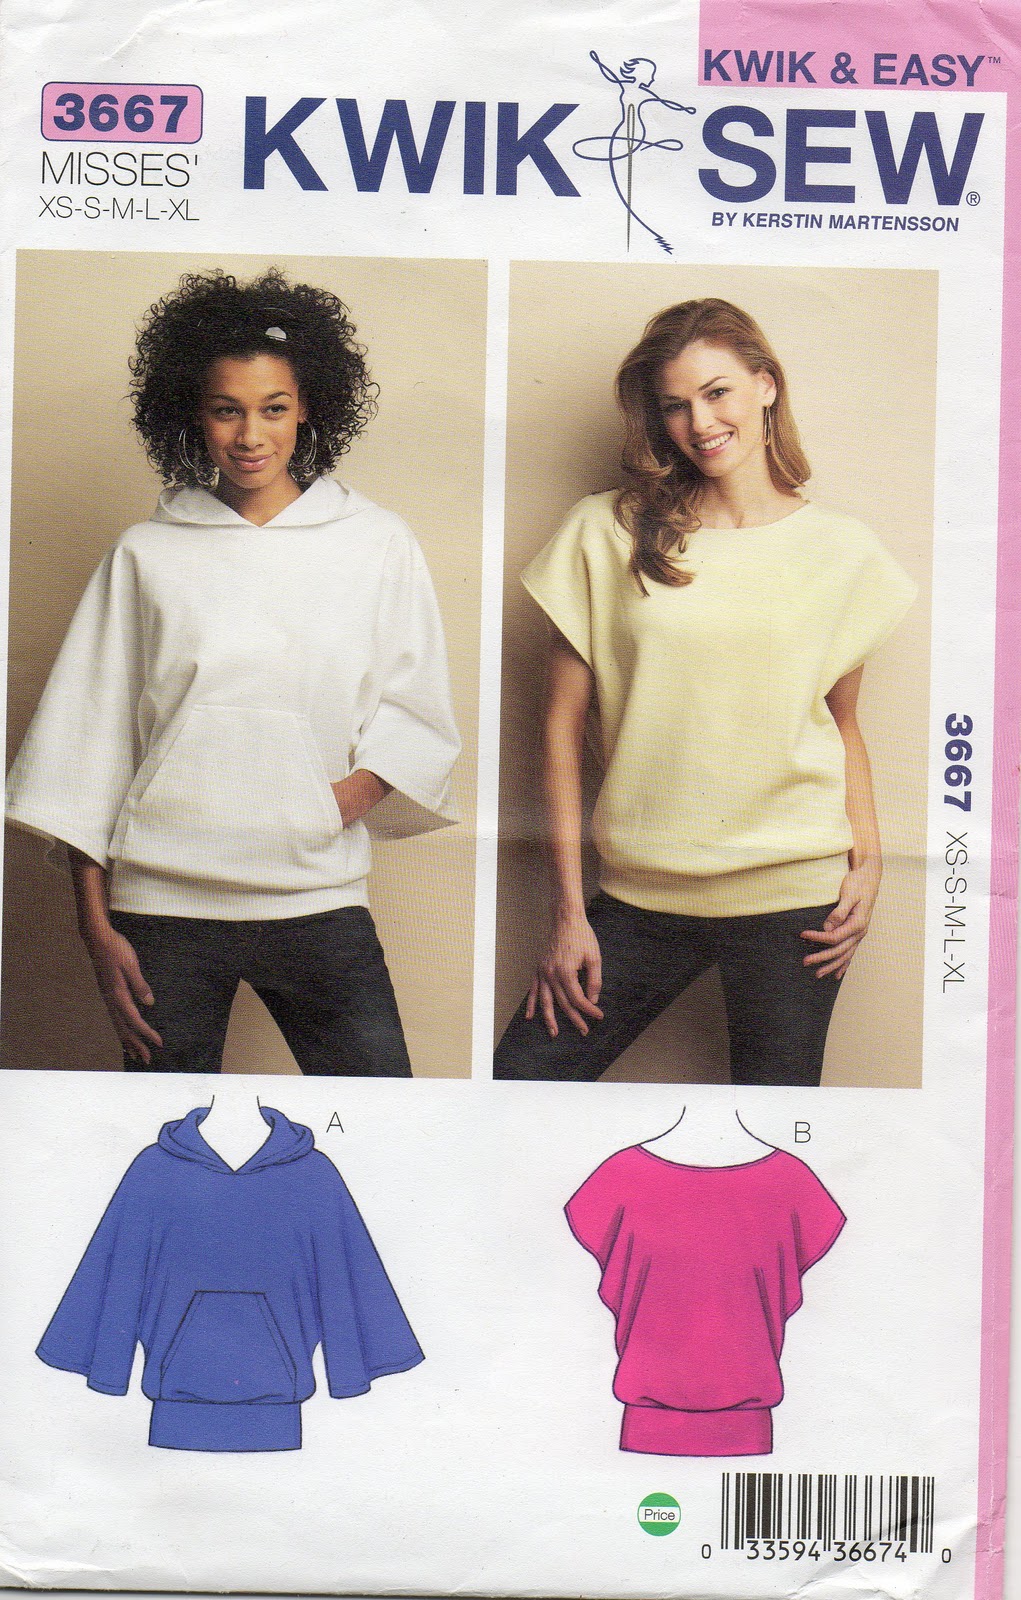
I made a slightly A-line tunic with plain set-in sleeves, and I cut the neckline and hoodie piece using KwikSew 3667.  I’ve used this hood piece in several garments now, and this pattern was also given to me, by Mary of biblioblog a few years ago.  I am so lucky to have such nice blogging friends!

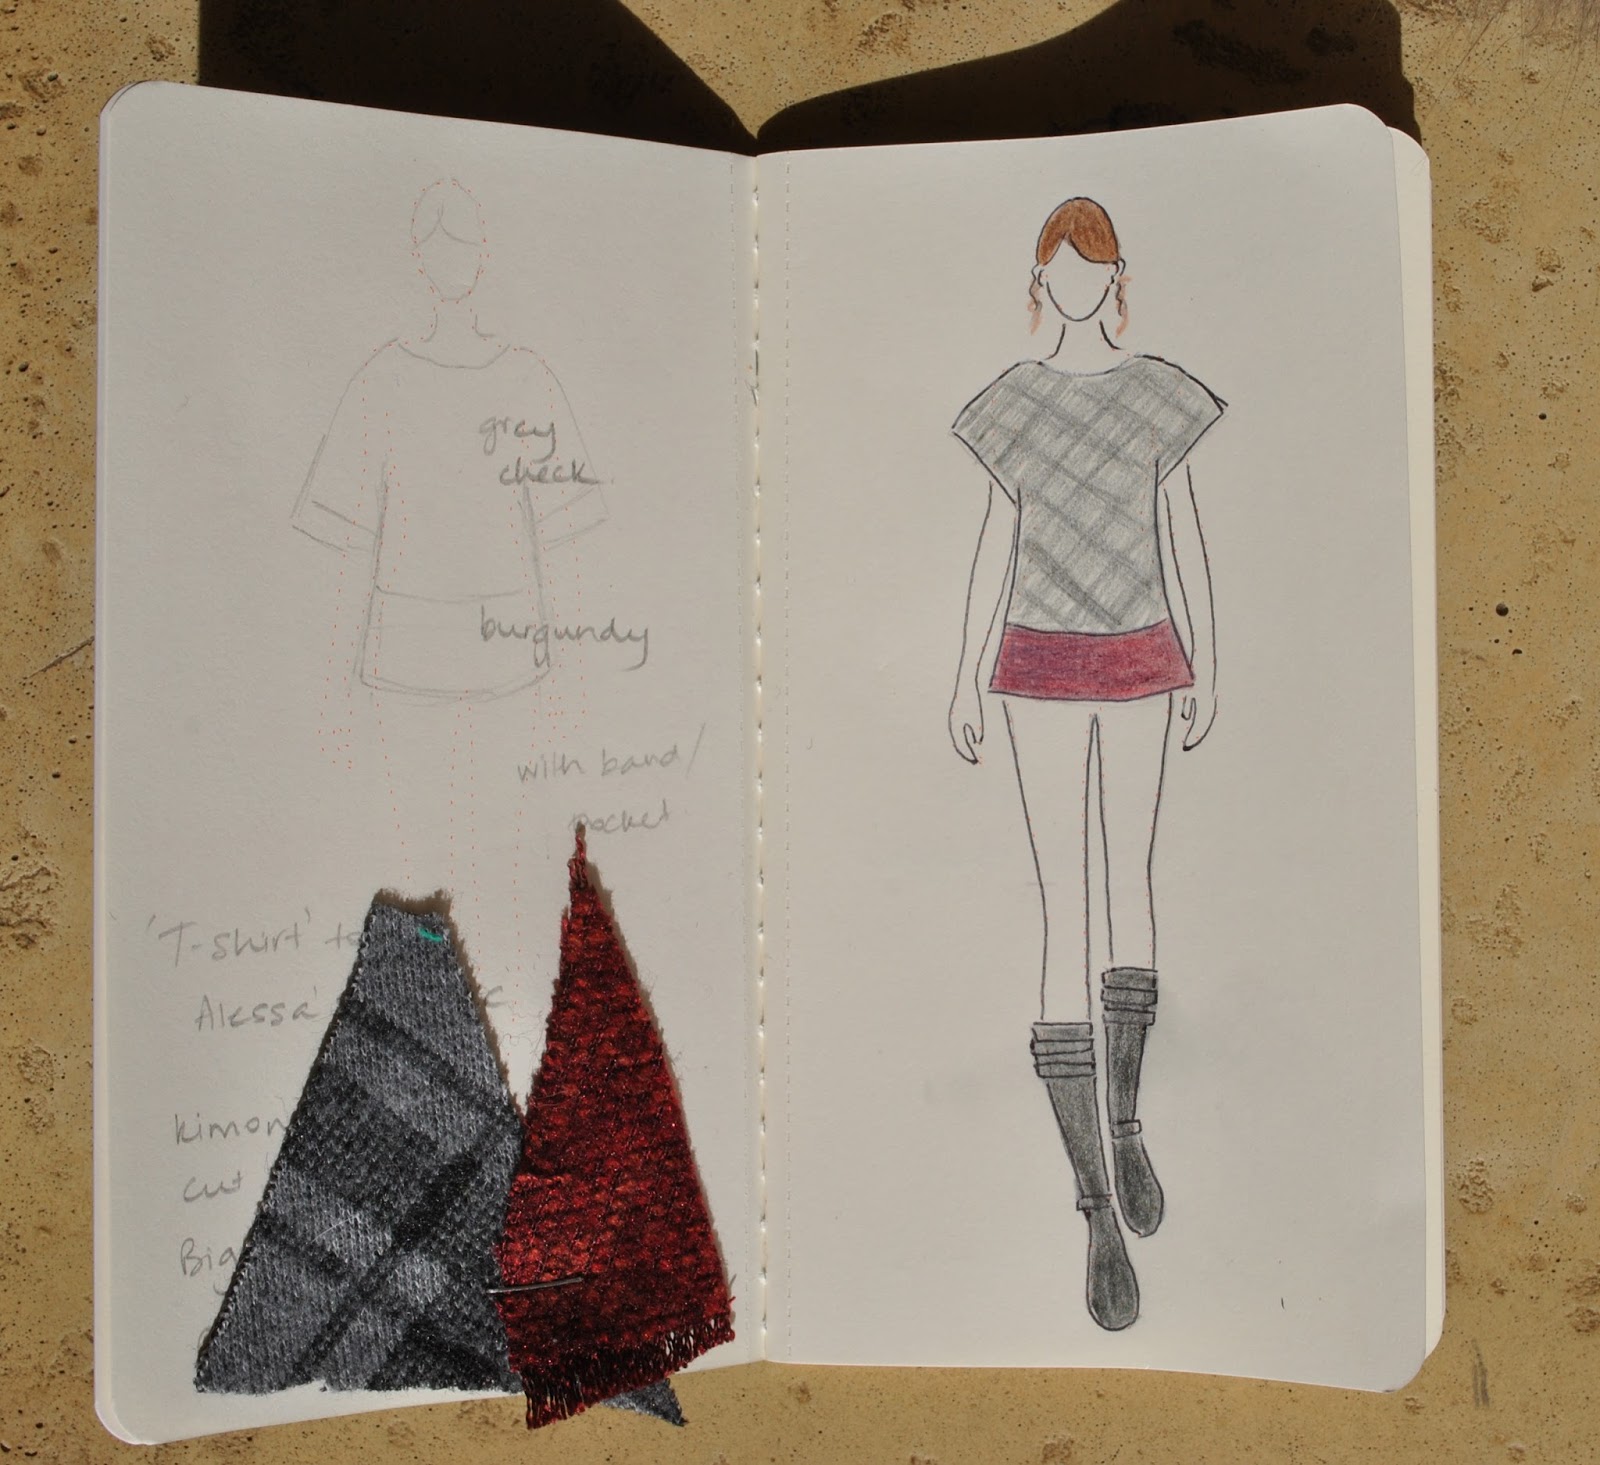
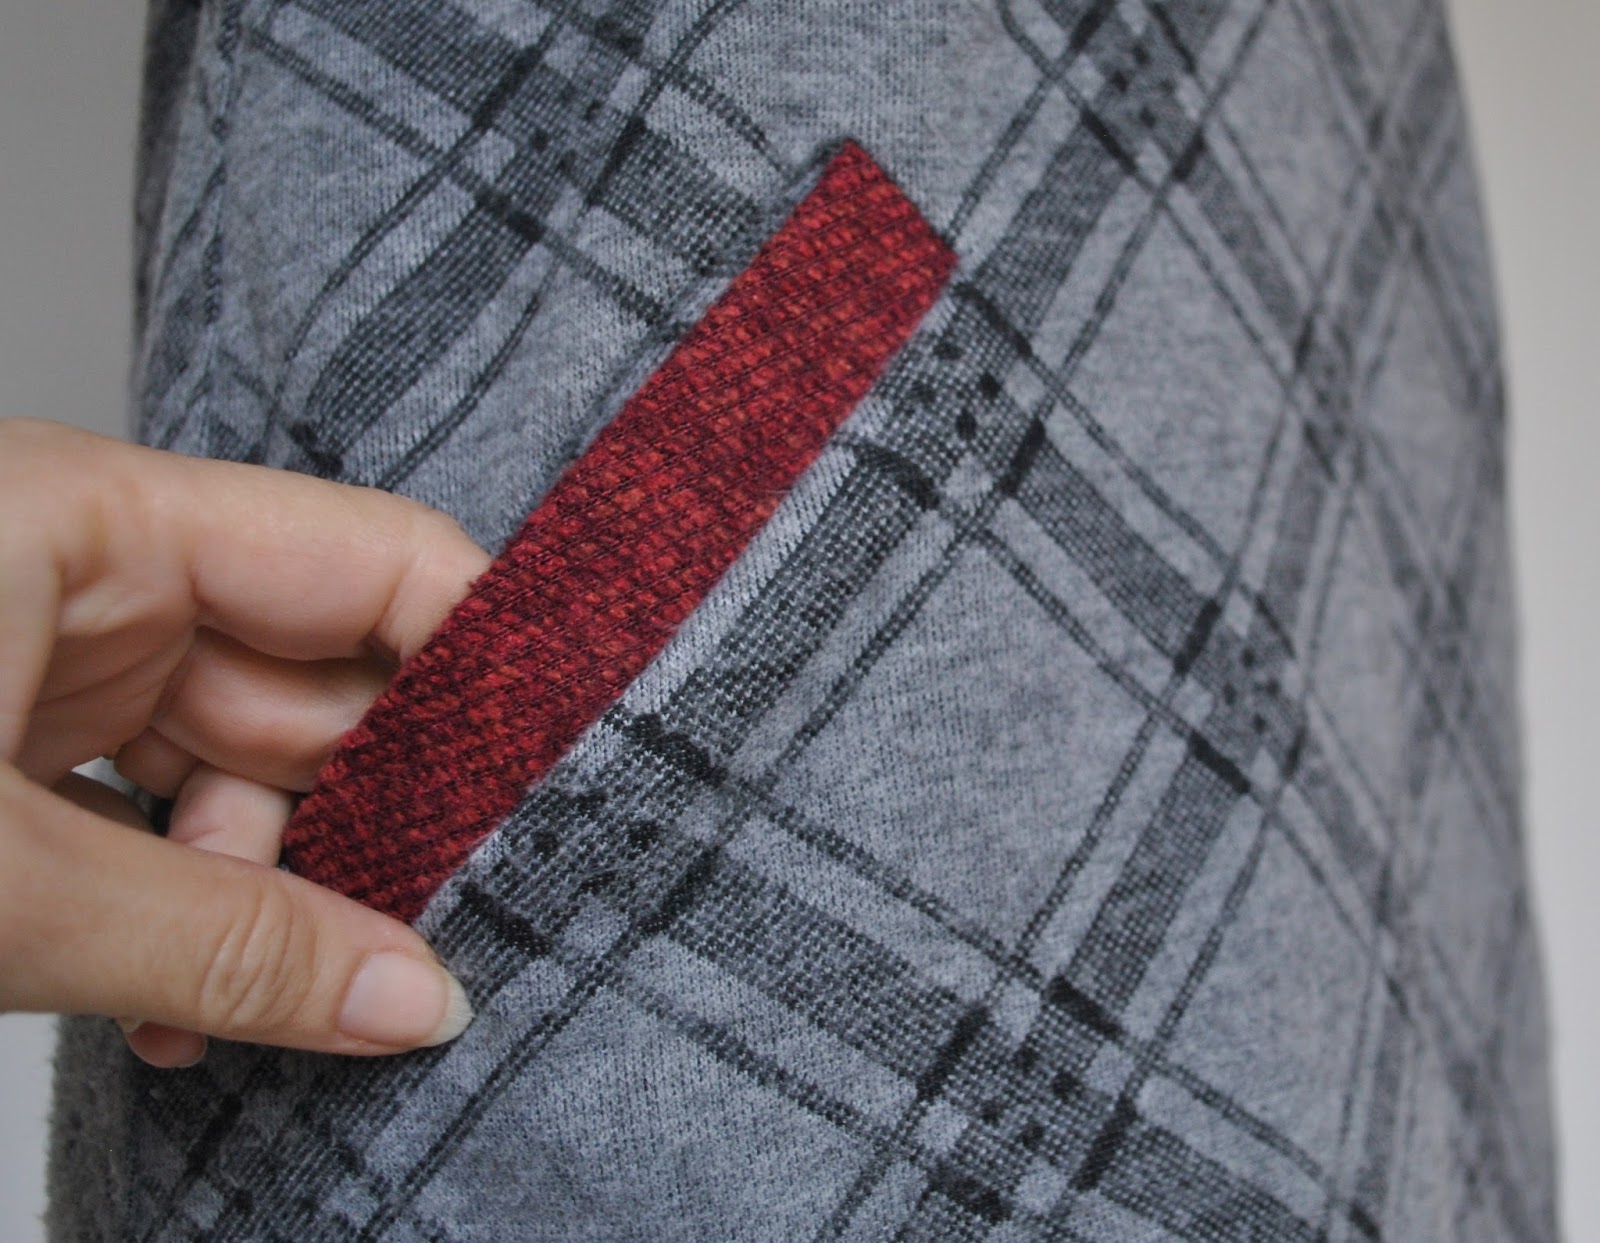
Um, the hoodie looks quite different from my initial plan, which wasn’t a hoodie at all.  This is a recurring phenomenon, I make plans but frequently change my mind once I get cutting.  Indecisive? maybe! … but at least something will get made.  And I’m very pleased with the contrasting hood and welt pockets.
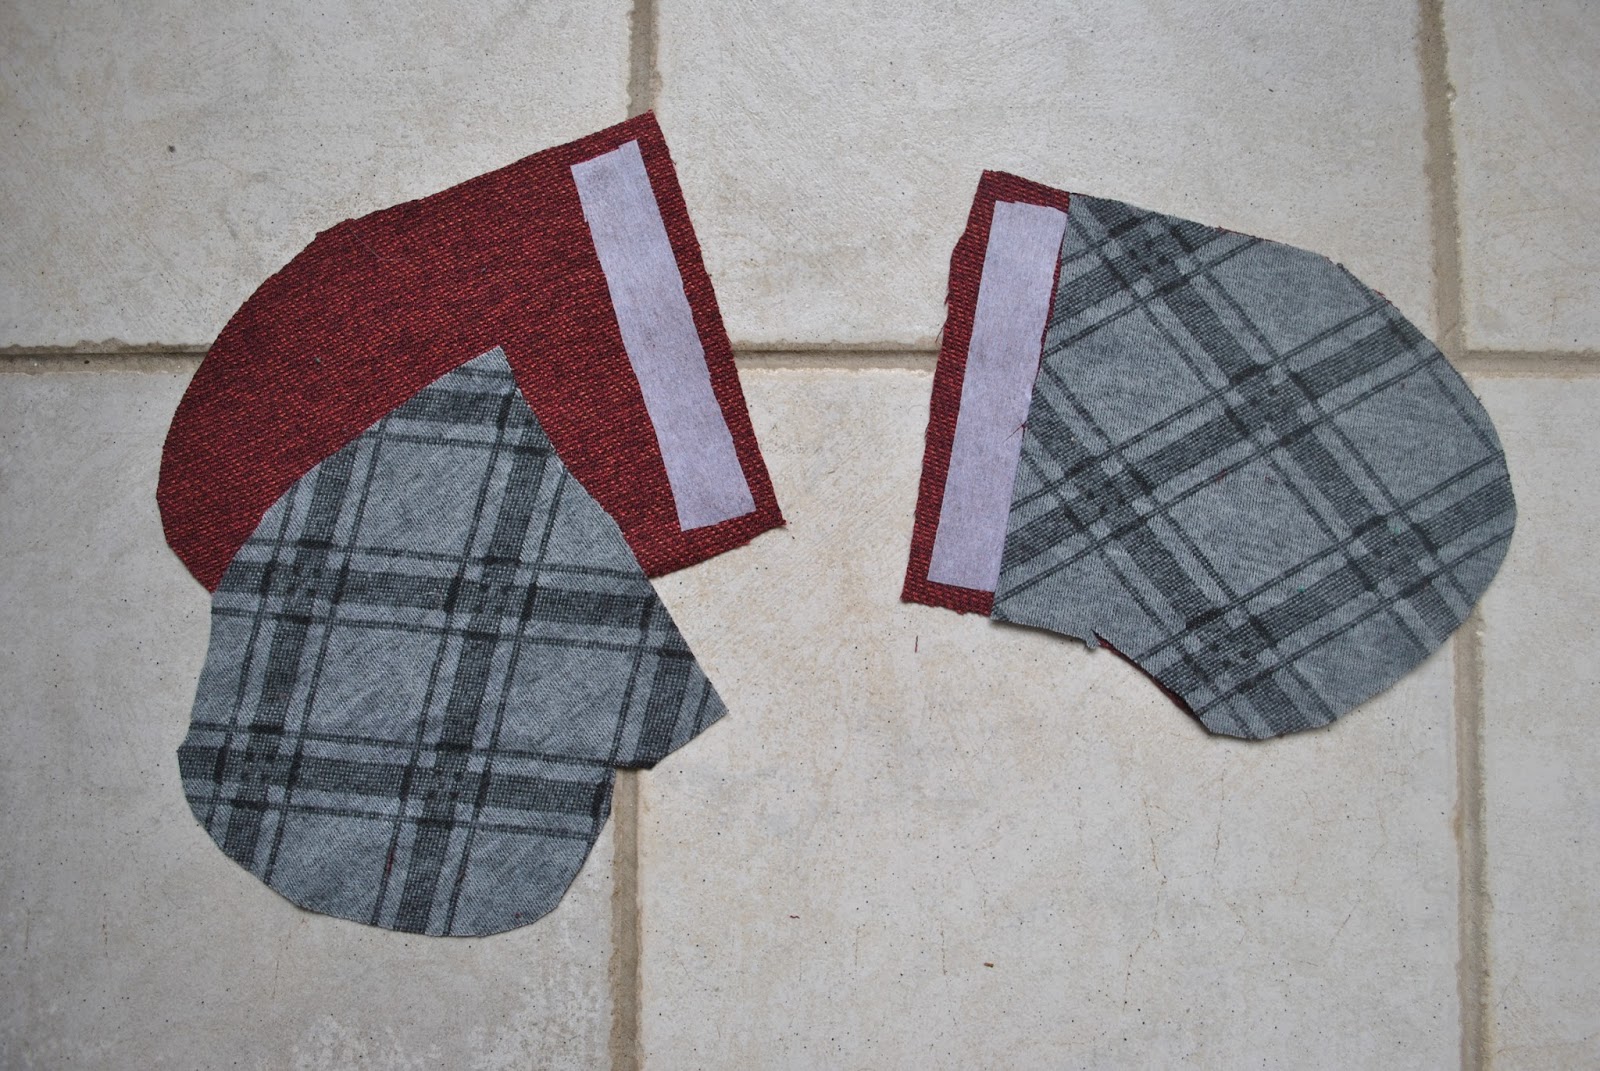
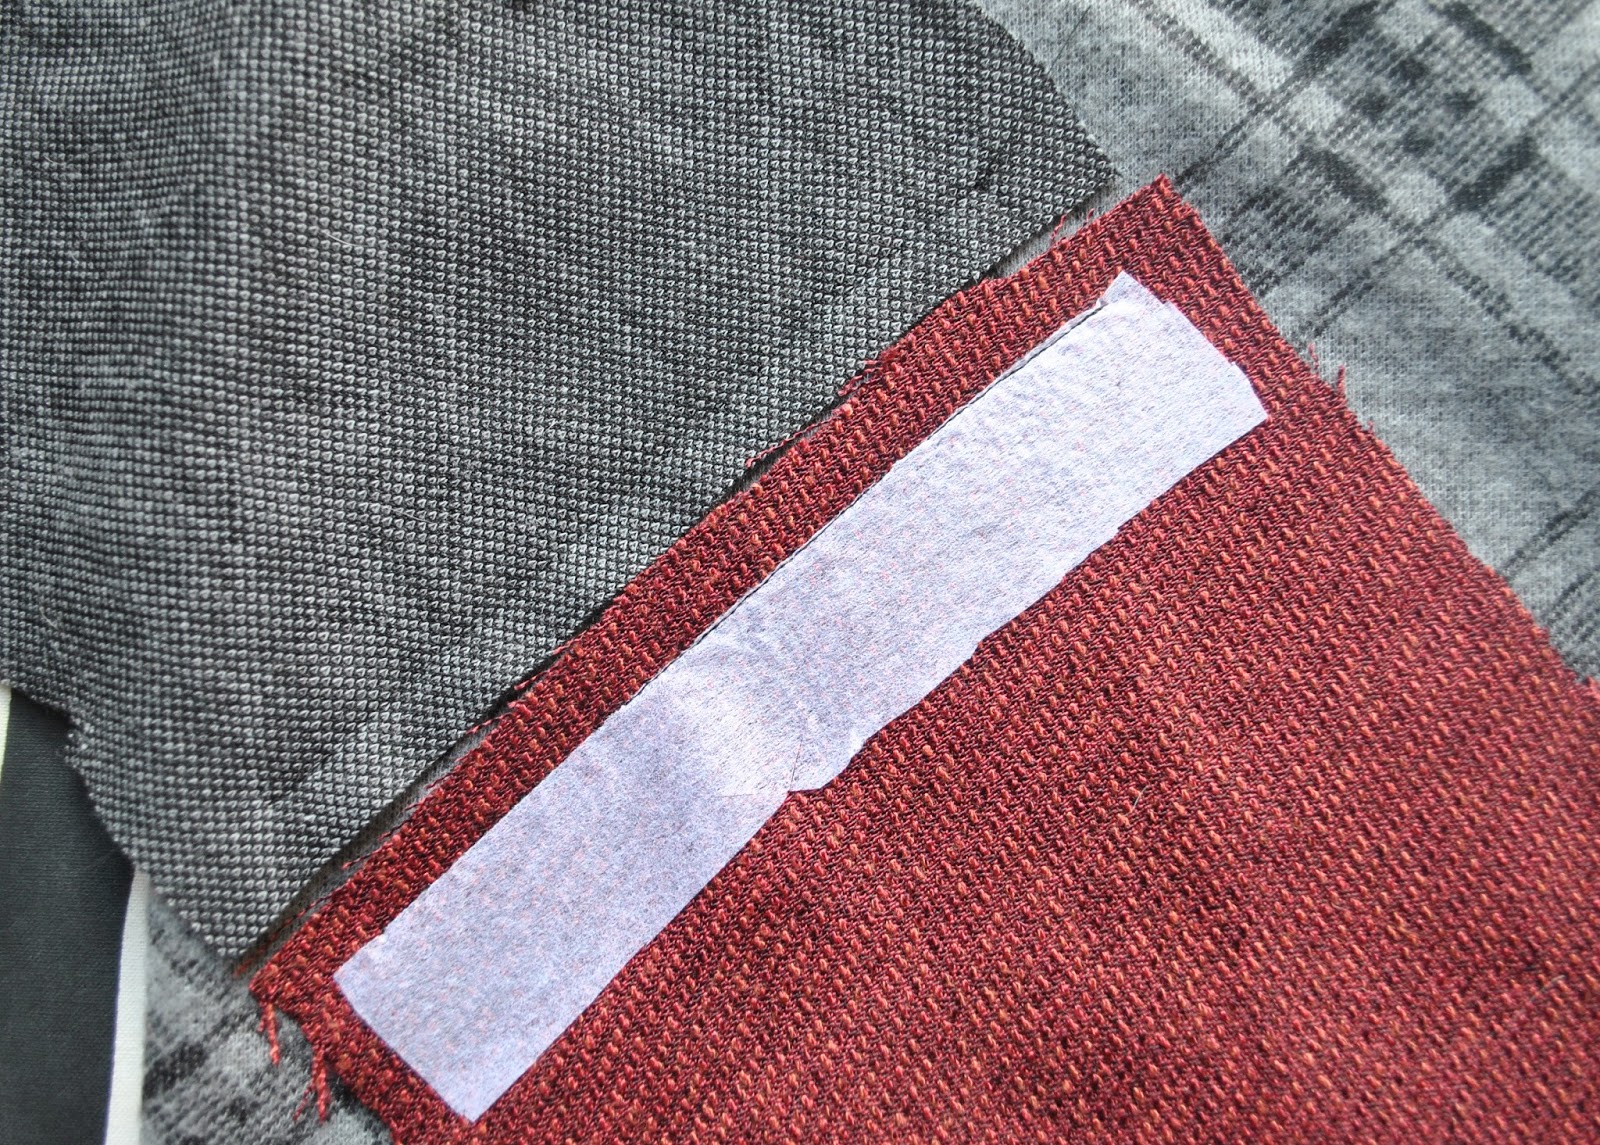
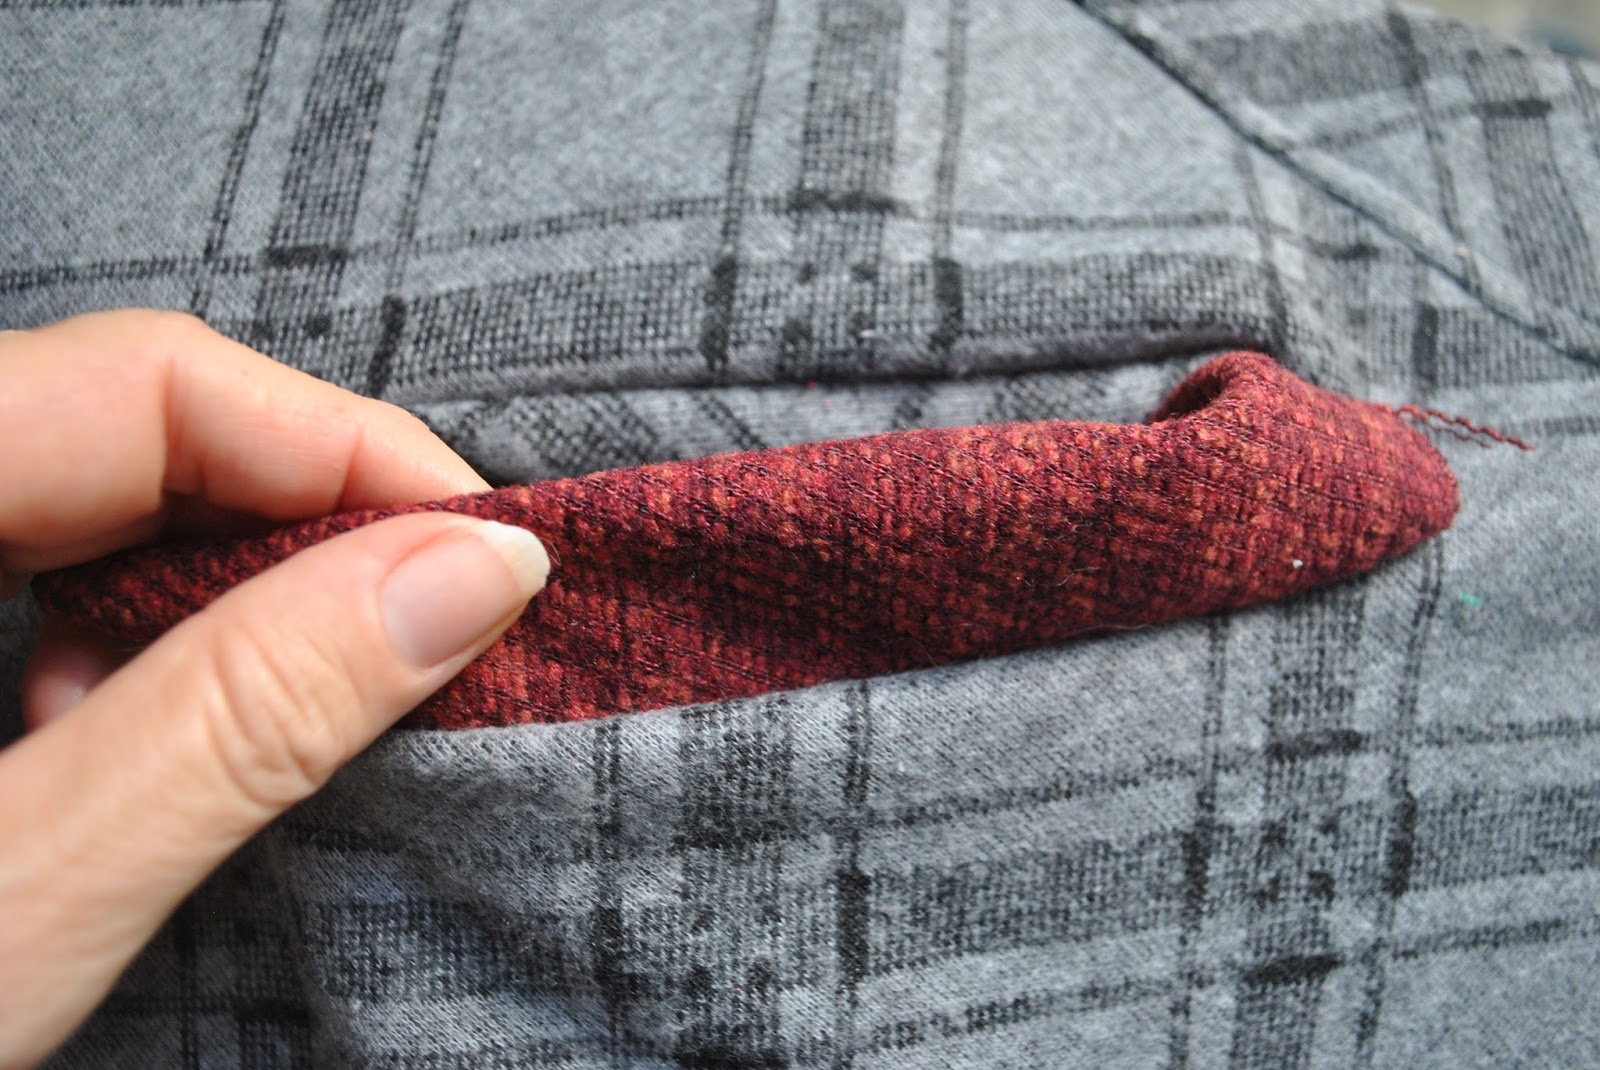
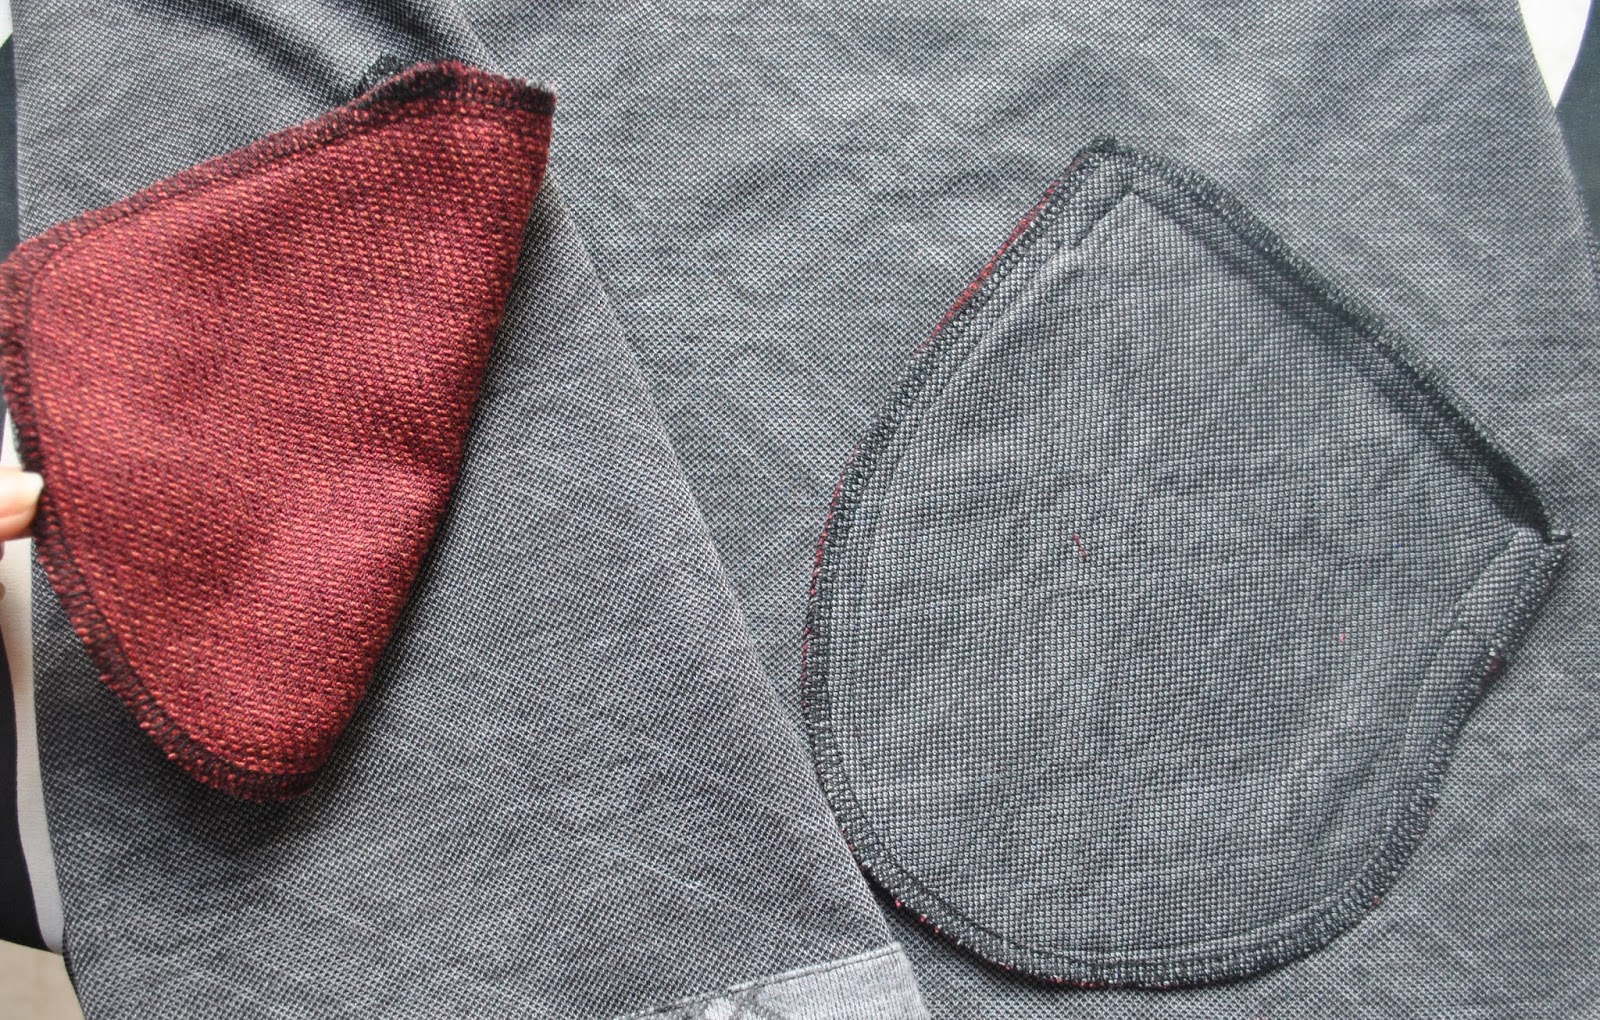
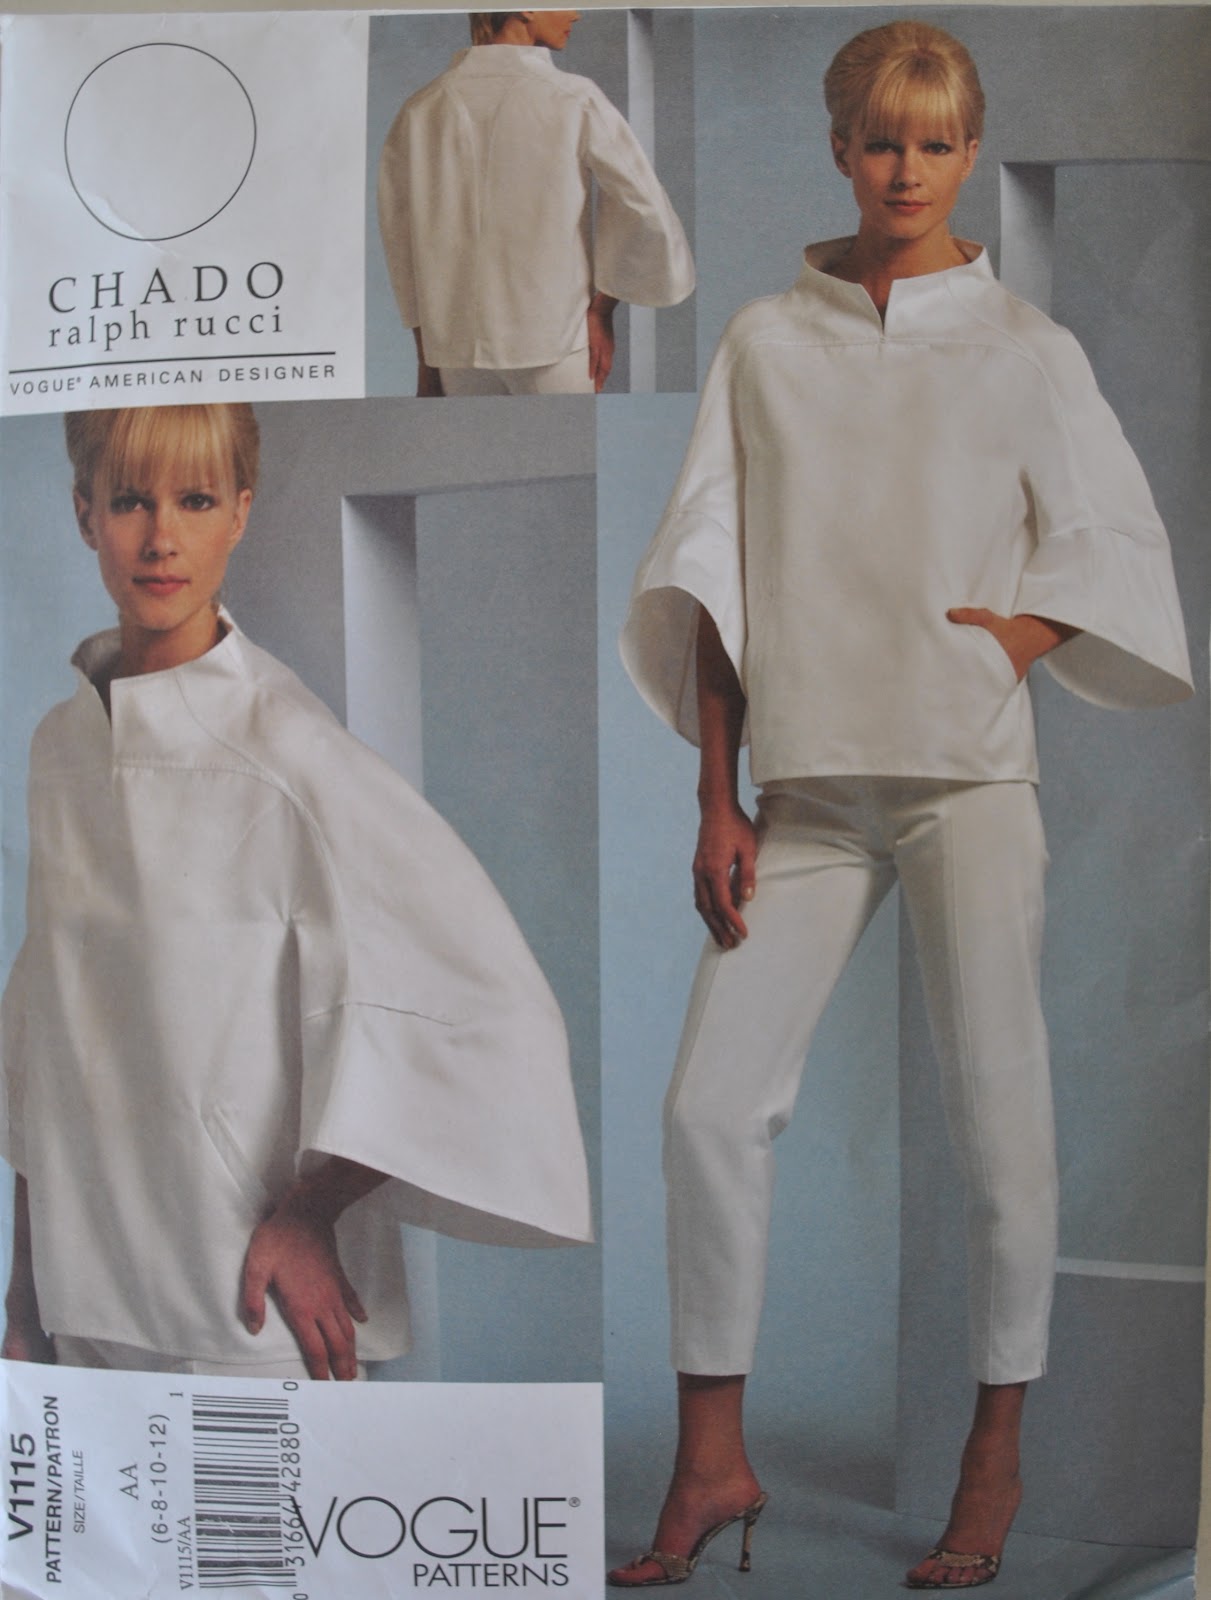
Welted pockets … woot!  I had just barely enough fabric for these!  I used the pocket piece from Vogue 1115, and the contrasting welt is not a separate piece; to save fabric I cut the upper pocket piece with an interfaced extension at the opening, which folds back on itself to the inside becoming an integrated welt…  doing this skips a seam underneath, resulting in a little less fabric bulk.  I might just stick to this method from here on out!

All the raw seam allowance edges are overlocked together, and then I applied a cheat’s version of flat-felling because the fabric is quite “bouncy” and the seams didn’t press flat very satisfactorily.  This involved just laying the overlocked seam allowance down to one side and top-stitching them to the garment.

Details:
Hoodie; self-drafted, with the hood piece from KwikSew 3667
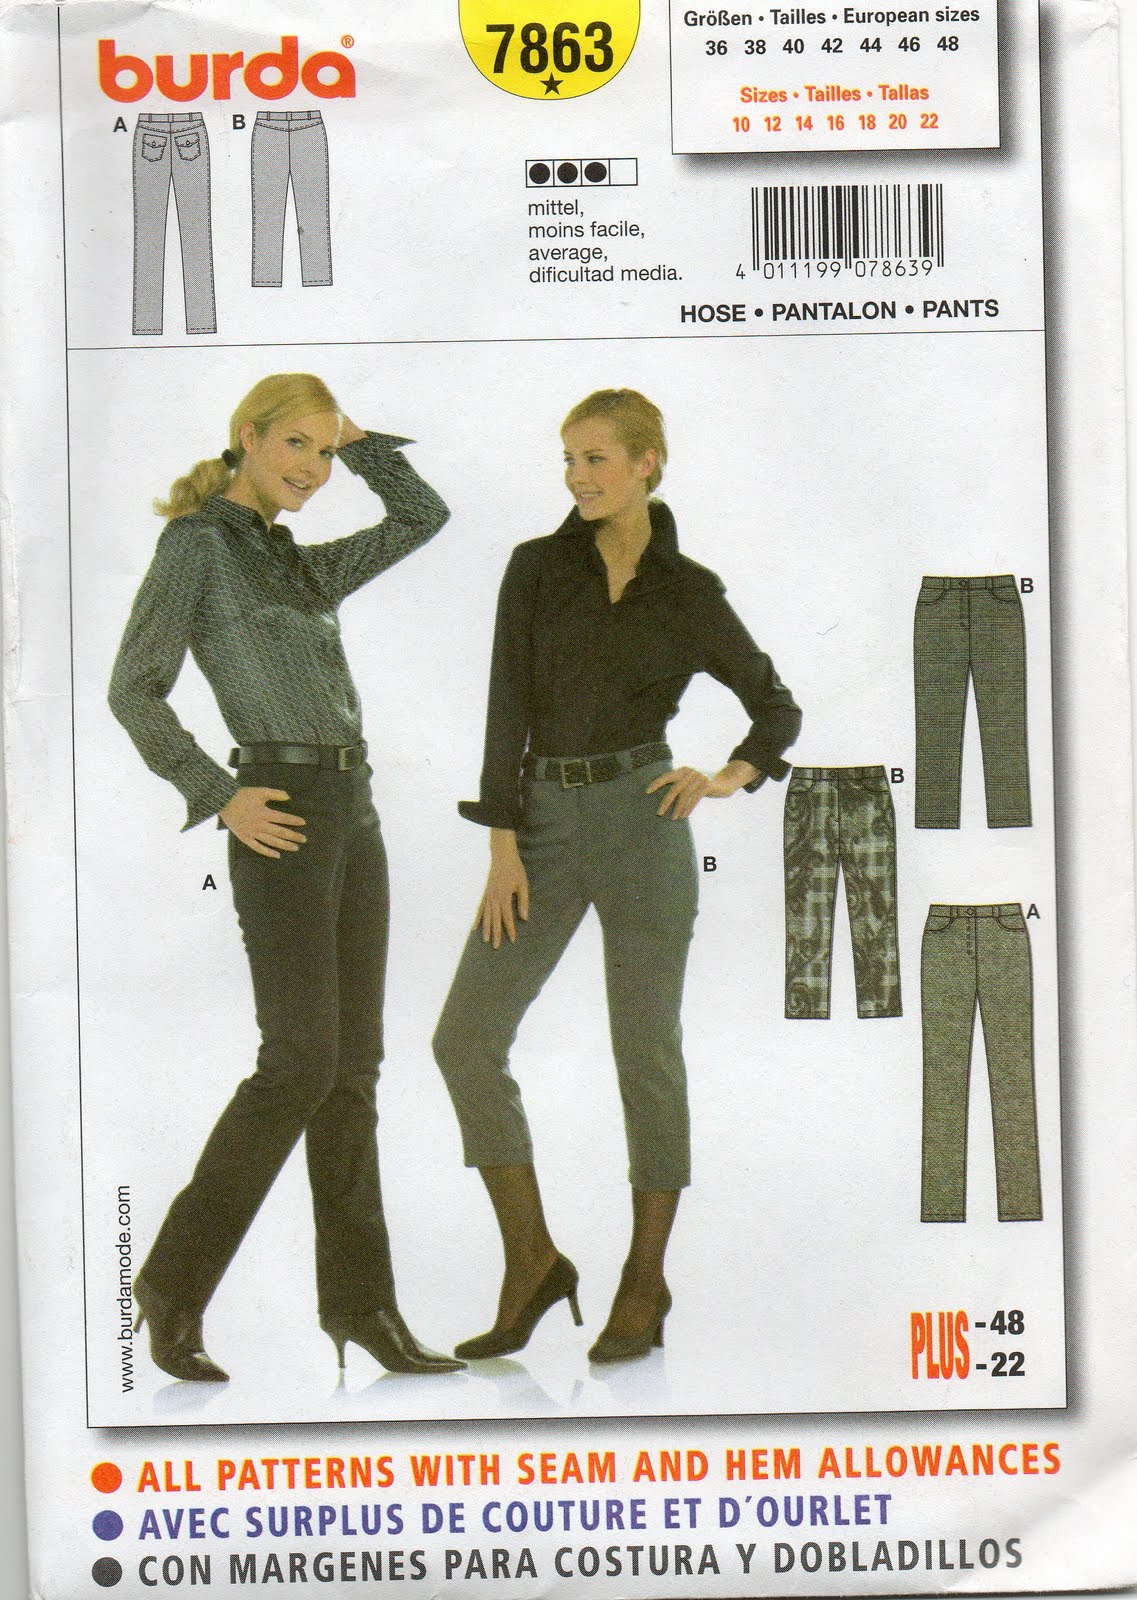
Jeans; Burda 7863 modified, ivory stretch denim, details here
Boots; nylon, from Zomp shoes

pinterestmail

Fashionary! a review

The briefest of glances at my blog would be enough to inform that I LOVE my Fashionary sketch book; I bought my first back in late 2009 and now enjoy using it every day as my personal style diary…  so I was pretty thrilled when Vikki from the Fashionary team contacted me to review some of their latest products.
Yes, please!
Fashionary has been around since mid 2009, and is the brainchild of Penter Yip and Vikki Yau.  It was developed as a handy tool for fashion designers, to facilitate quick sketching of artistic fashion ideas without having to worry about focusing on getting the proportion of the figures consistently right each and every time.
If you are like me and can’t draw, this is an absolutely brilliant idea!

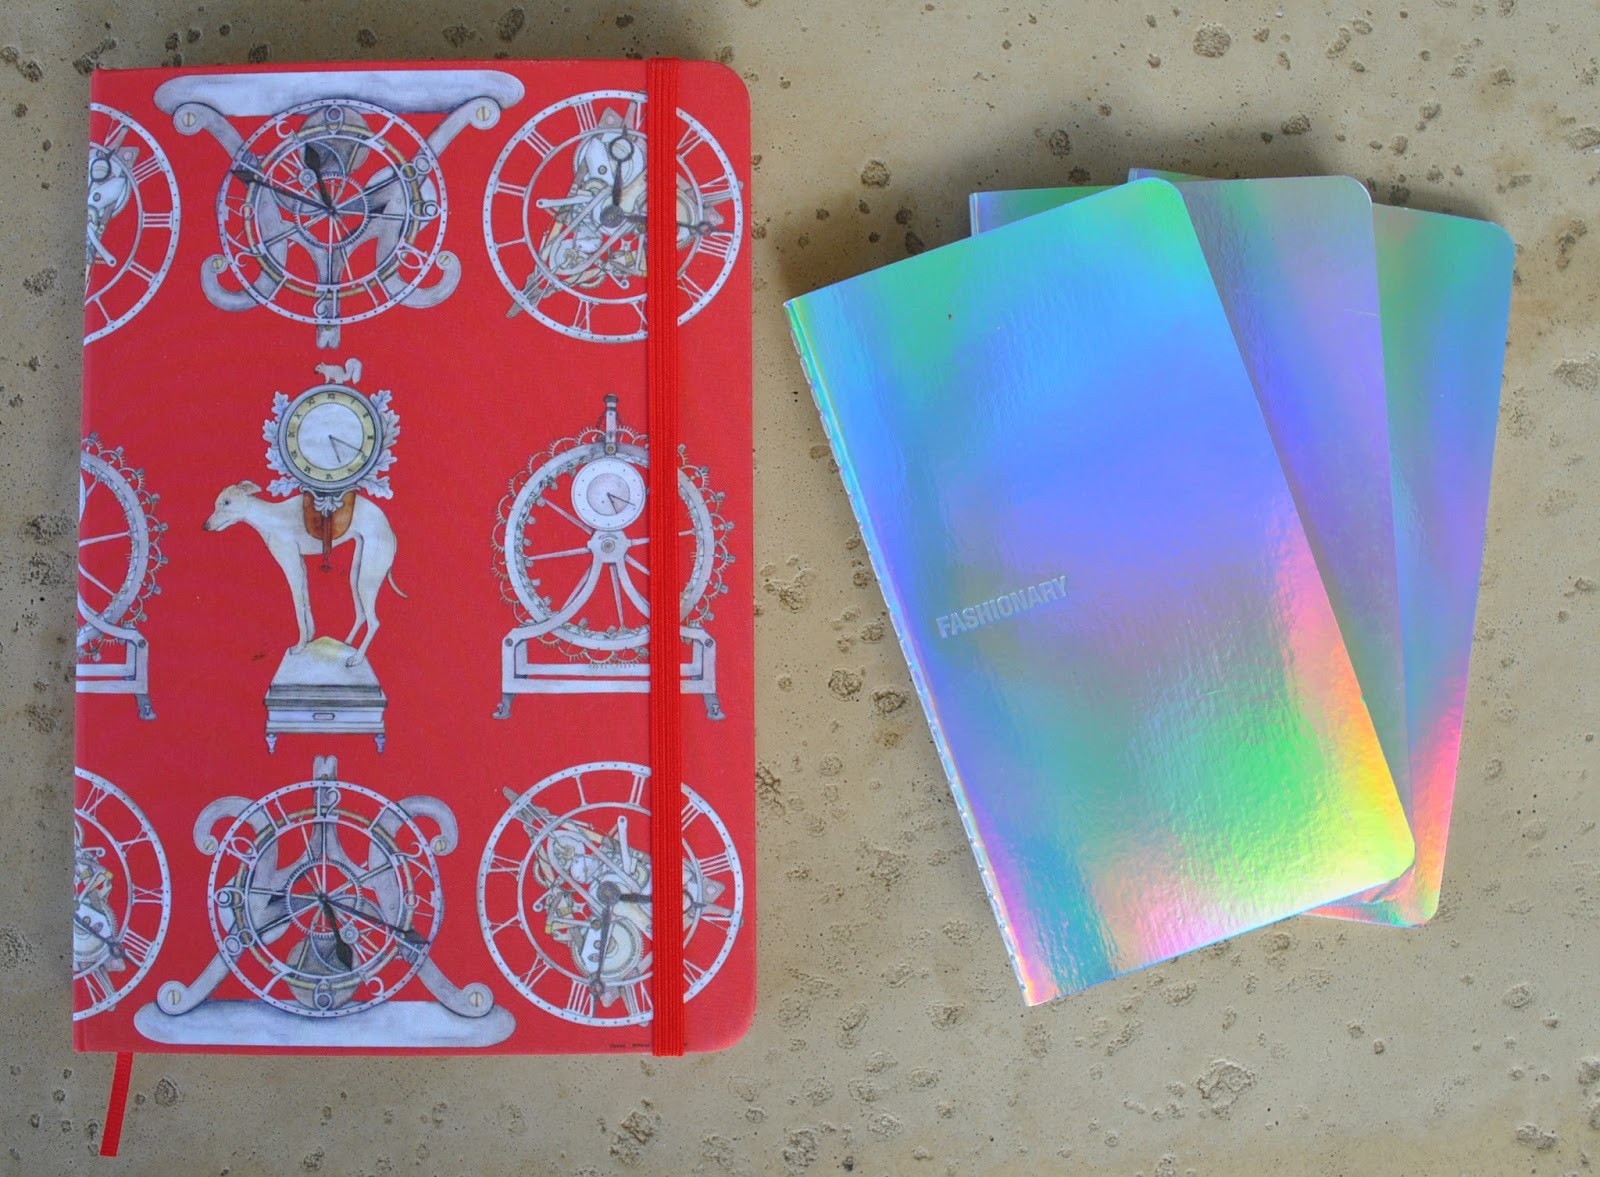
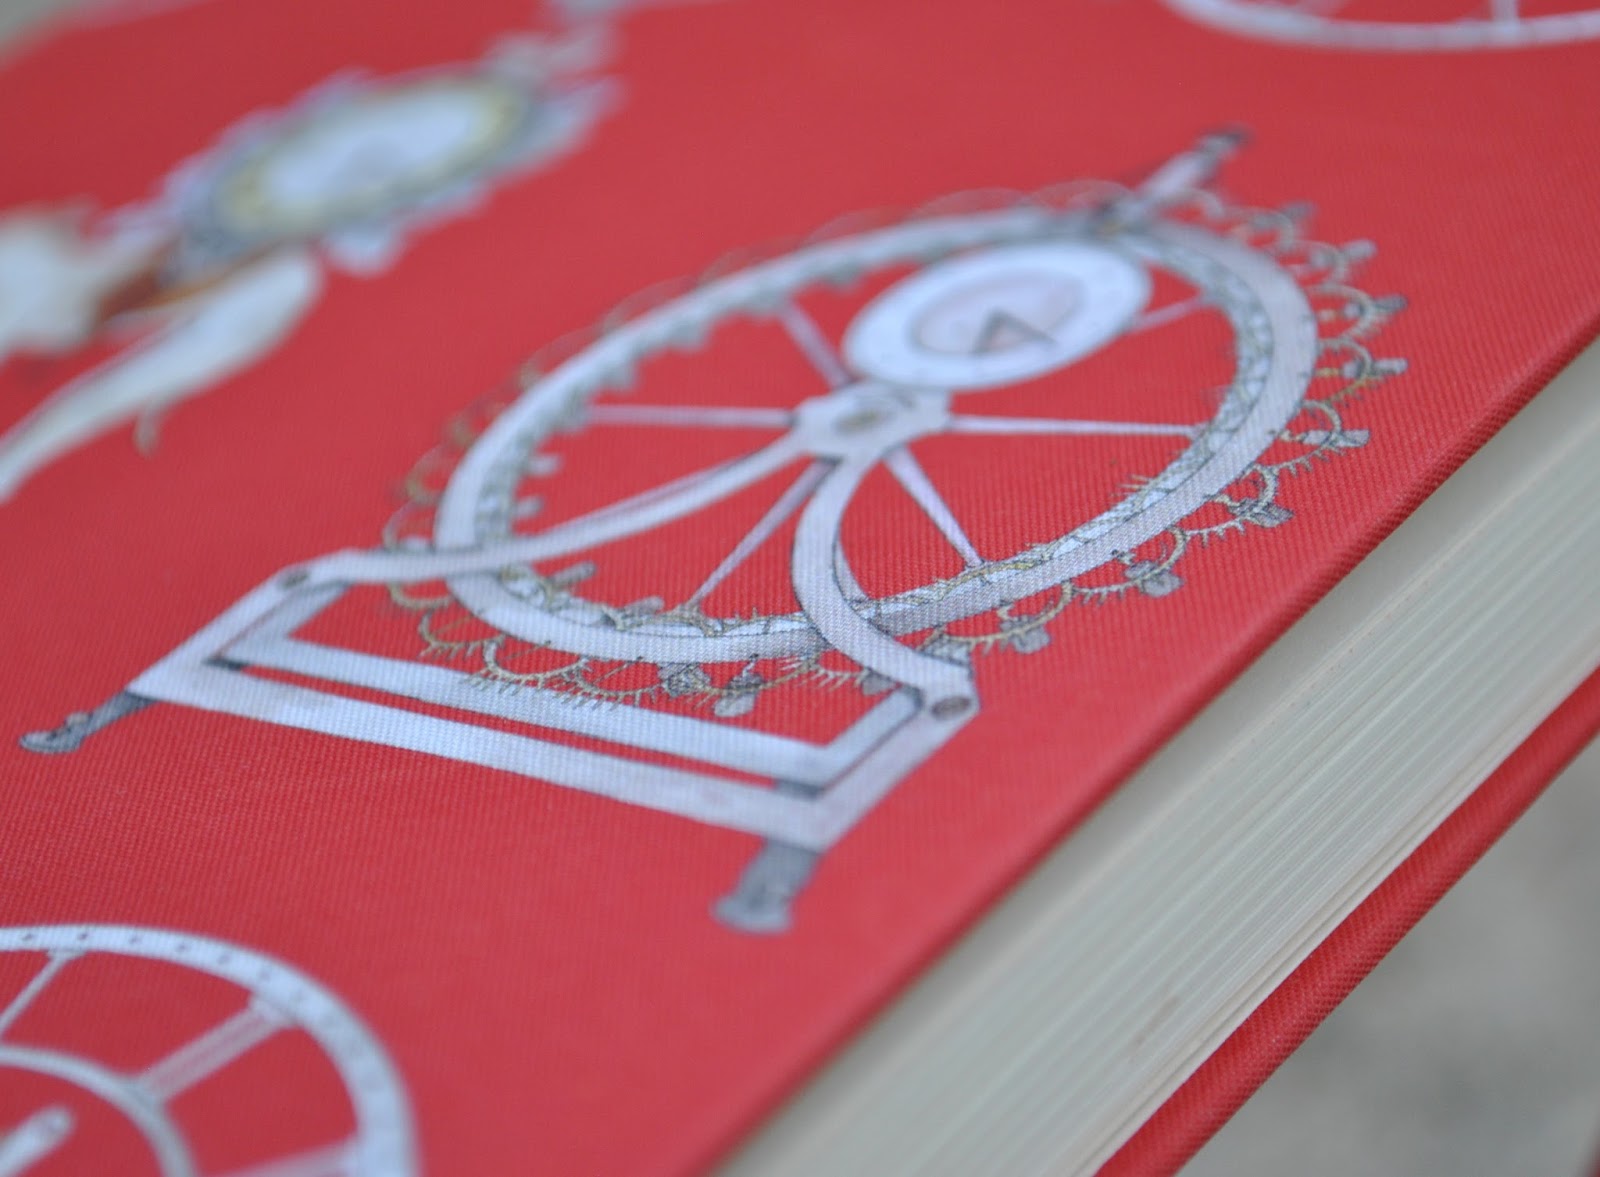
A new limited edition Fashionary sketch book comes in a range of three new designs featuring the delicate hand-drawn and painted designs by SWASH London.  Mine is a cheerful and classy St George’s scarlet, with intricately detailed and tinted, vaguely steam-punk-y designs.  It’s a thing of beauty, like a work of art in itself.
It has a very sturdy hard cover with a pleasingly soft, almost suede-like fabric-y texture to it, and comes with a matching elastic closure and ribbon bookmark.  The pages are of 100gsm paper, smooth and creamy in colour, and not at all flimsy so drawing and colouring don’t show through to the other side.  
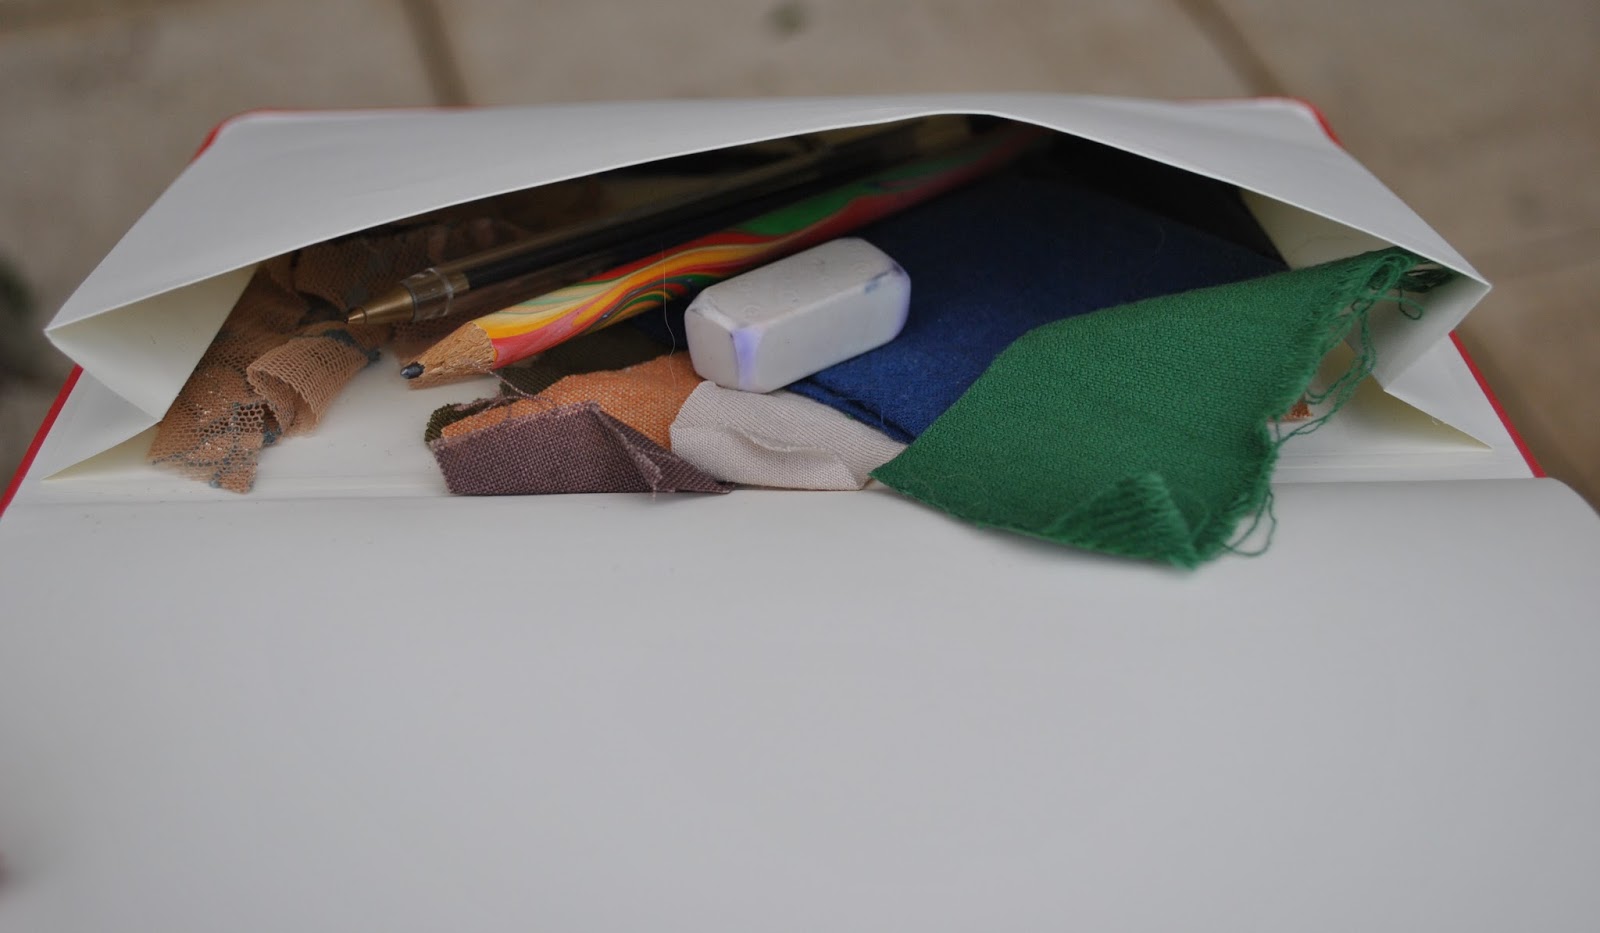
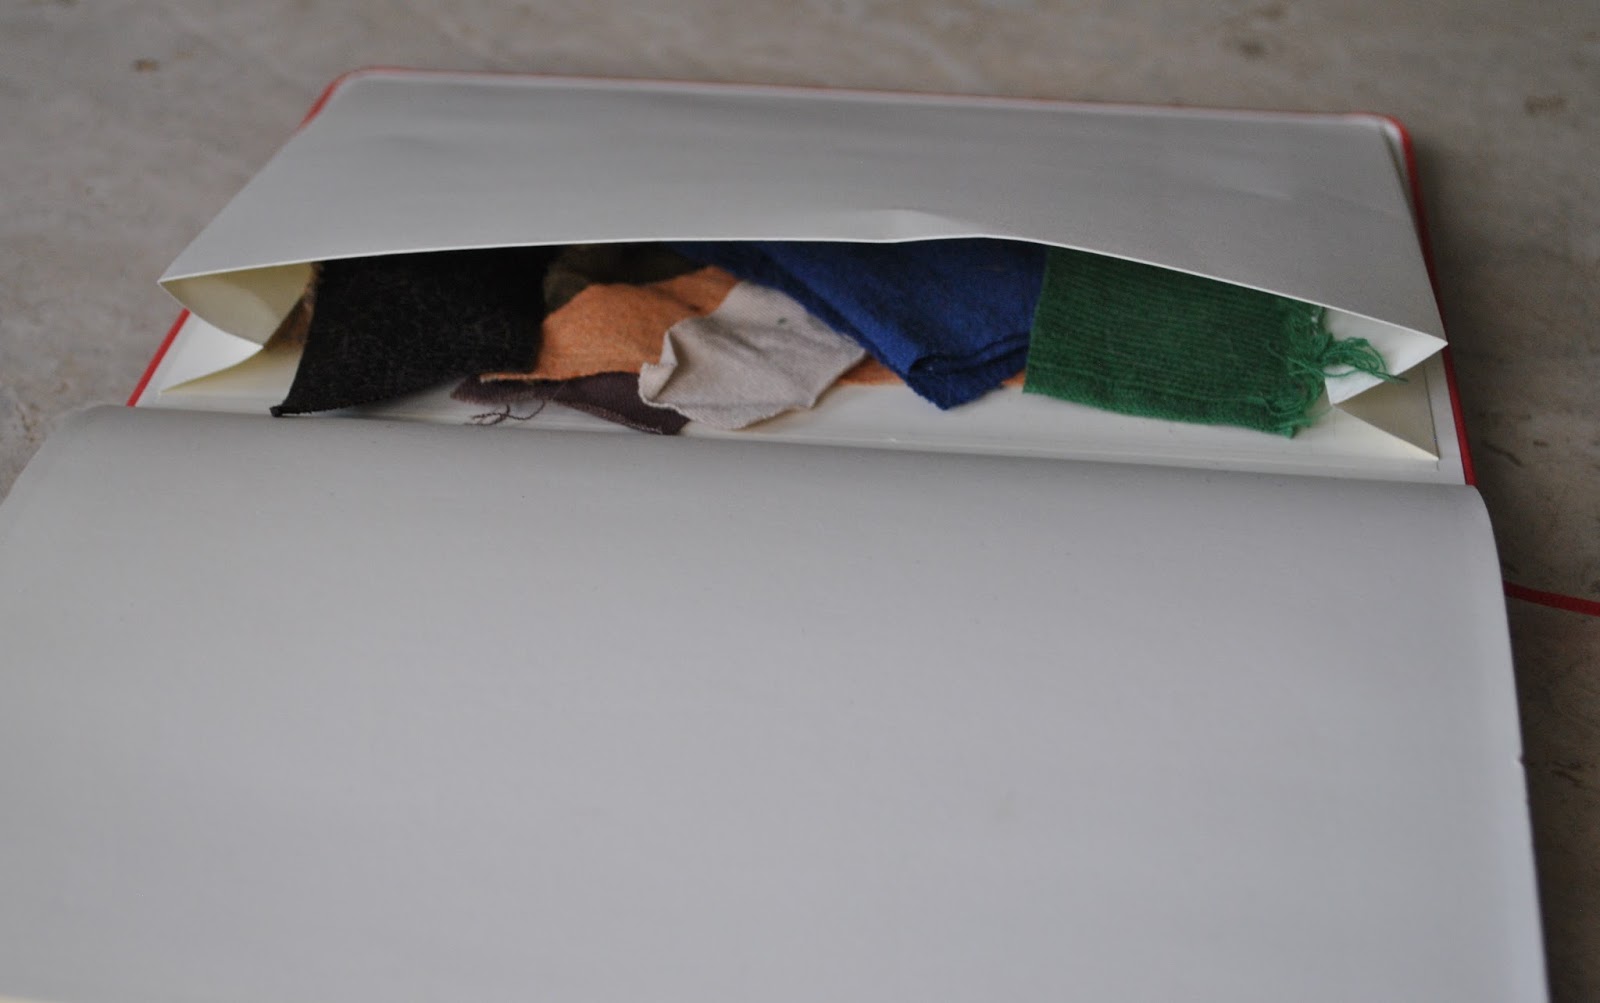
Inside the back cover is a handy envelope in which you can store fabric samples, pen, pencils, pencil sharpener and eraser.

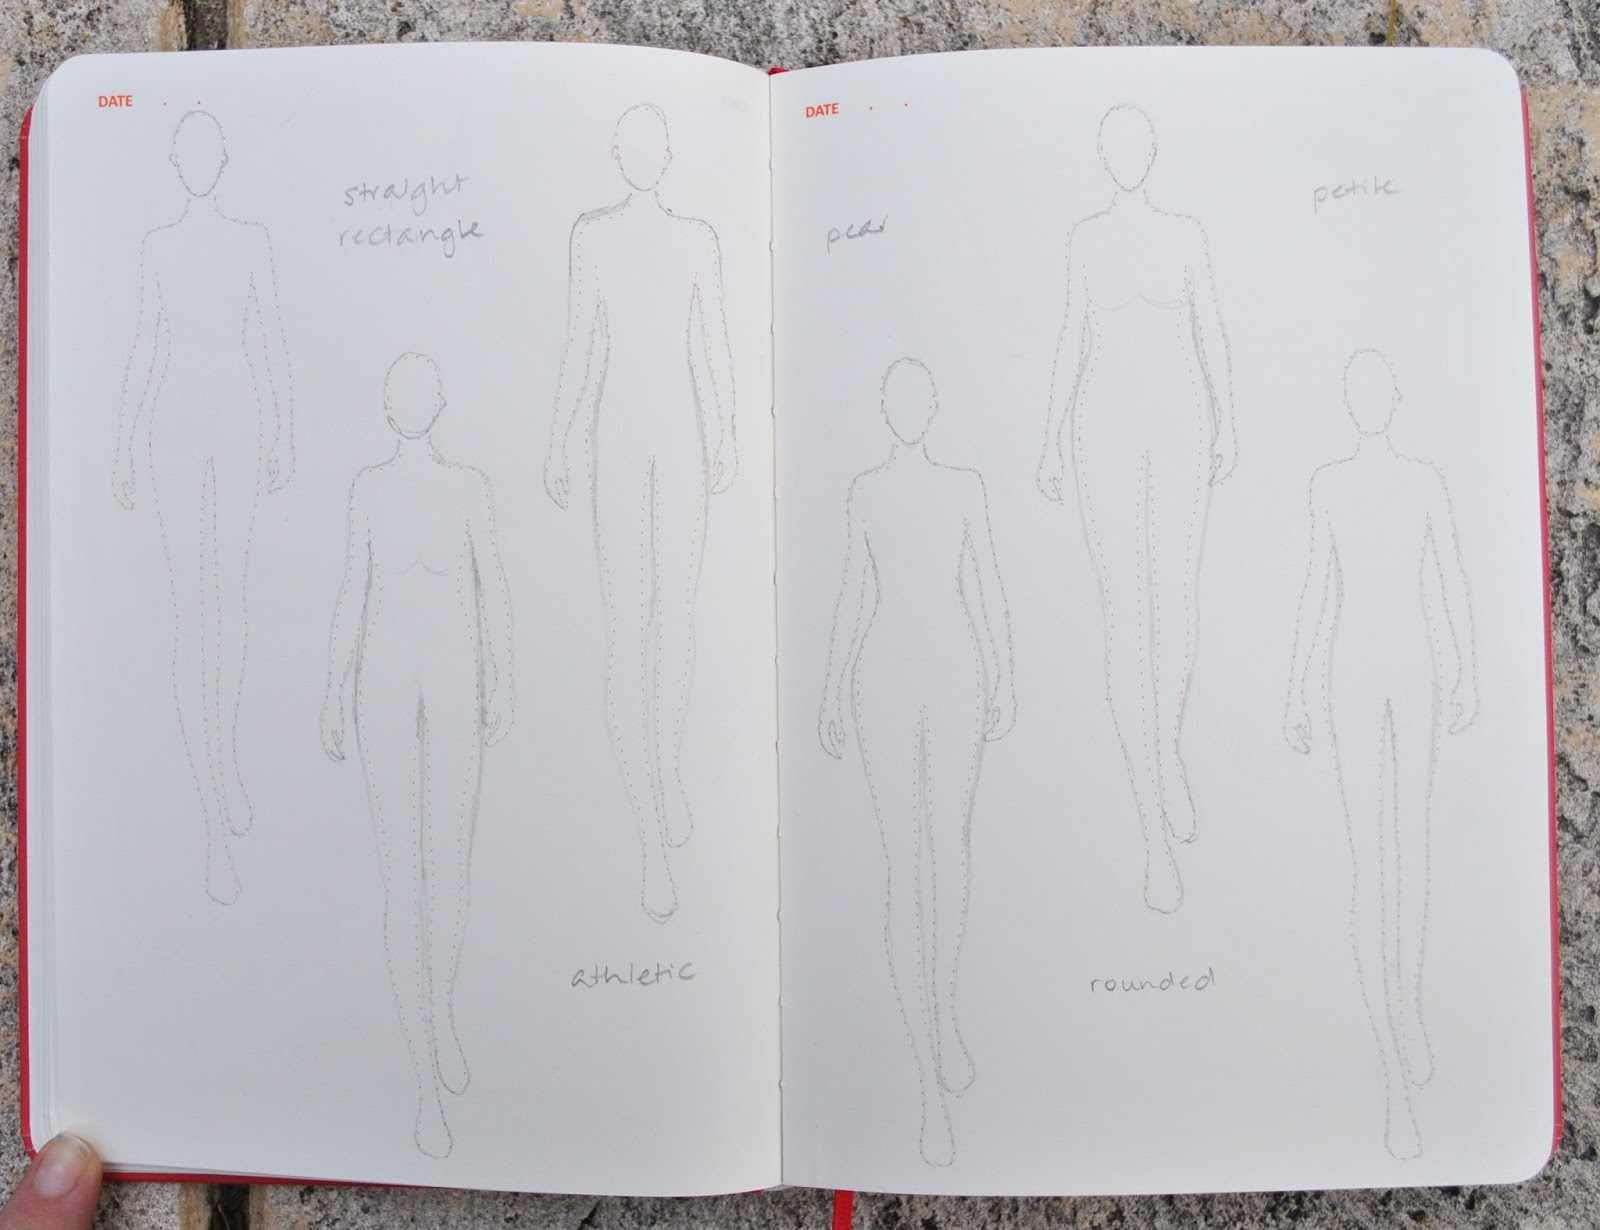
 Like the standard Fashionary sketch book it has 128 pages with six semi-transparent body templates on each, which are barely-there enough so that they can be used, or not; if the space is needed to write notes or attach fabric samples the figures are pale enough to not interfere with writing or drawing something else on the page instead.  
All the Fashionary’s come in both male and female versions.
Mary commented that she would consider altering the curves of the figure when sketching, which is a great idea! and is very easy thing to do with these very faintly drawn figures.  You only have to draw just inside or outside of the suggested lines to more closely mimic different figure types if you wanted to… just a few examples are as follows, from left: 
1, the Fashionary figure drawn just as is; 
2, a straight, more rectangular figure can be drawn by going straight down to the hips and not curving in at the hips so much; 
3, an inverted triangle “athletic” figure can be drawn by going just outside the lines at the shoulders and upper torso and drawing just inside the lines at the hips; 
4, a pear shaped figure is drawn by going just outside the lines at the hip and thigh level;
5; a more rounded figure is achieved by just drawing outside the lines all over;
and 6, a petite, or very slim figure can be drawn by going just inside the lines all over;
… additionally a Monroe-esque hourglass figure could be drawn by drawing outside the lines at bust and hip level and just coming in more sharply at the waist.
Personally when I’m doodling in my Fashionary I’m not so concerned about matching my own figure accurately … if I was then I would be drawing mine more like number four, the pear shaped one! but yeah, I’m not  ðŸ™‚
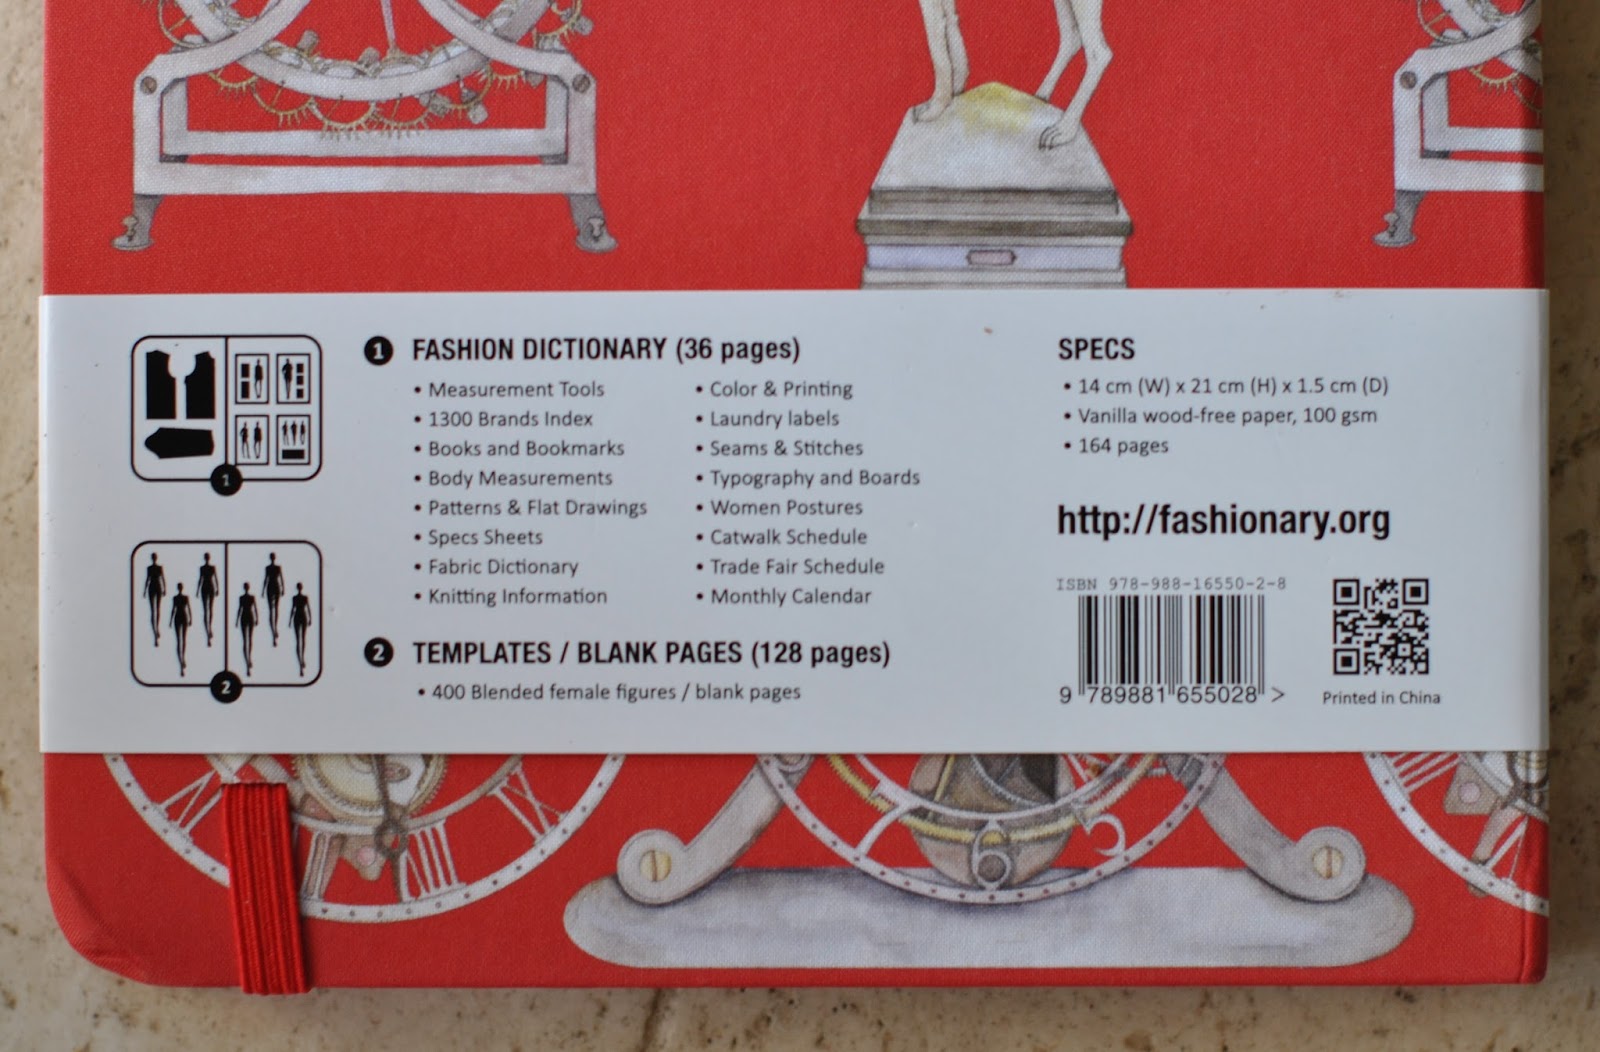
The first 36 pages have lots of information for sewing types; such as laundry symbols, a seams and stitches guide, measurement tools, body measurements, fabric dictionary and knitting information; as well as more fashion-student oriented information such as a brand index and the catwalk and trade schedules.  I didn’t think I would use these very much, but I’ve found the little drawings of garment types helpful when it comes to drawing my own outfits and also learnt a few things by reading the fabric descriptions, and consulted the laundry and knitting guides, so you never know. 
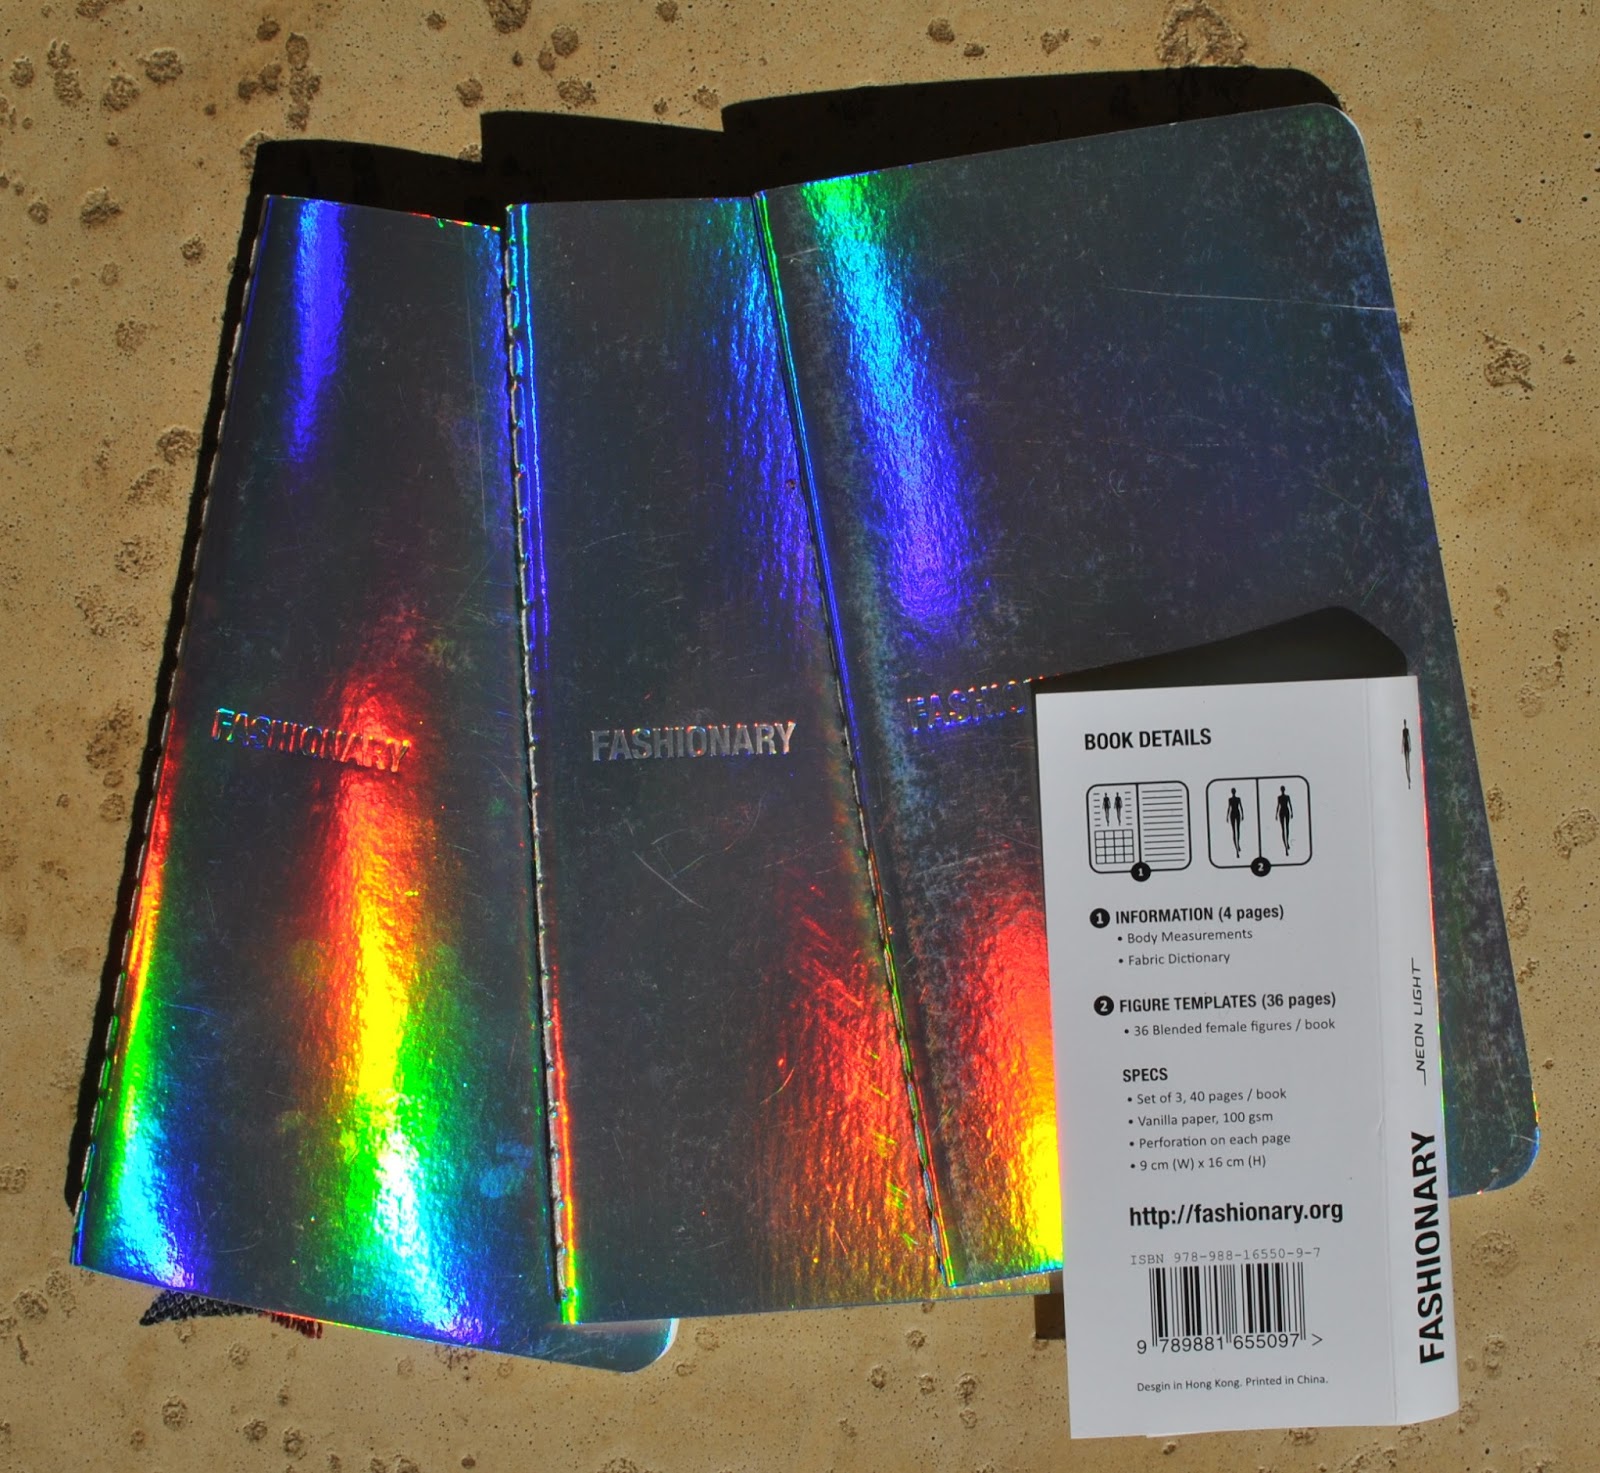
Another new product is also a set of mini Fashionary sketch books which are really cute and small enough to live permanently in your handbag.  These soft-cover booklets are terrific for jotting fashion notes and ideas when you’re maybe visiting a couture exhibition in a gallery in which photography is not allowed, or you’re browsing through a magazine in the hair salon or out and about window shopping, and you see some inspirational detail in RTW that you want to keep in mind for some time down the track.  Tell me I’m not the only one who does this!
The pages are perforated so if you want to you can extract them to pin to a corkboard in your sewing room, to jog the old memory and keep motivation up.  Personally I like to keep everything nice and intact in the one book, because I’m the nostalgic sort who likes to riffle through my old notebooks from years gone by… but that’s just me  ðŸ™‚  The point is, you can pull pages out neatly and tidily without ripping or worrying about the other half of the page falling out of the book.
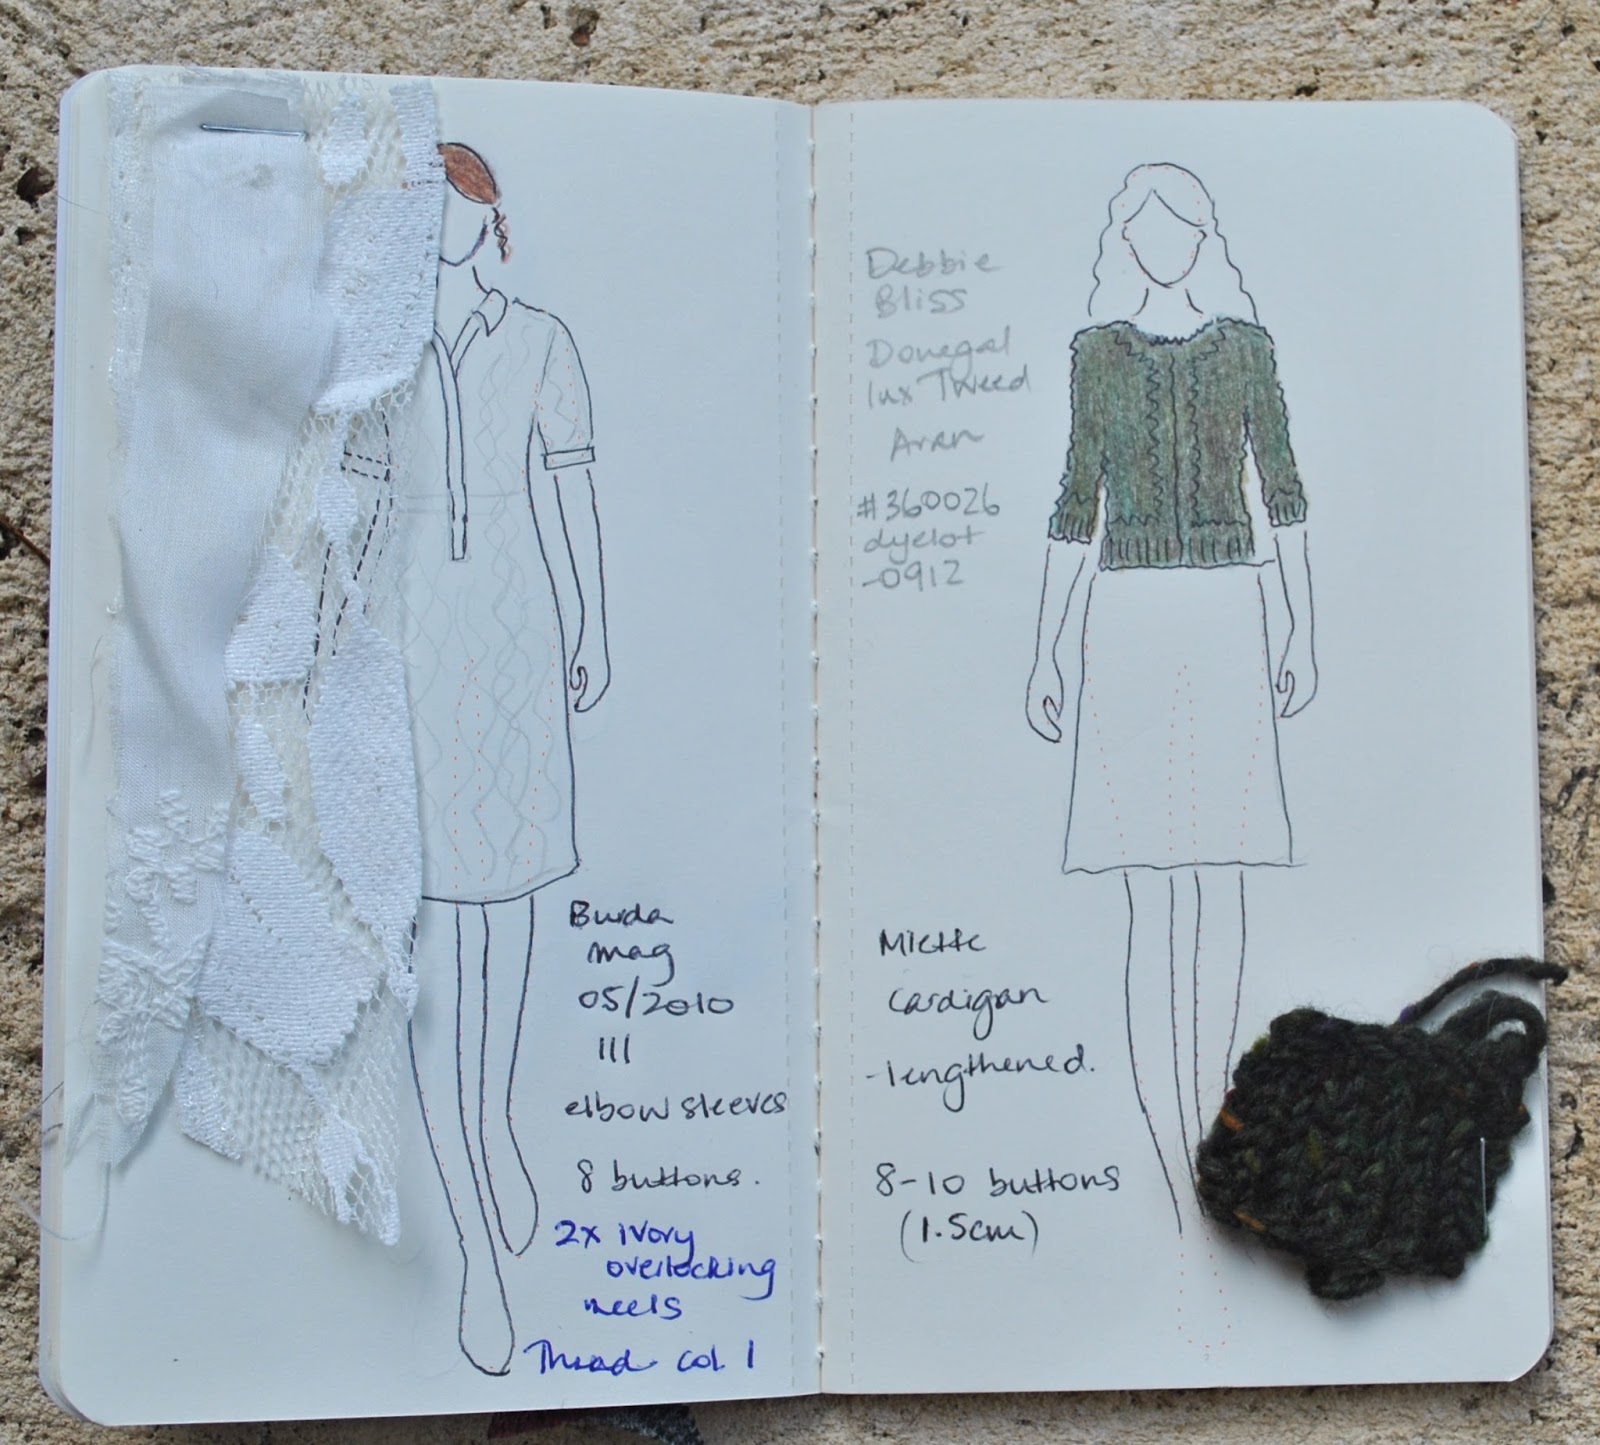
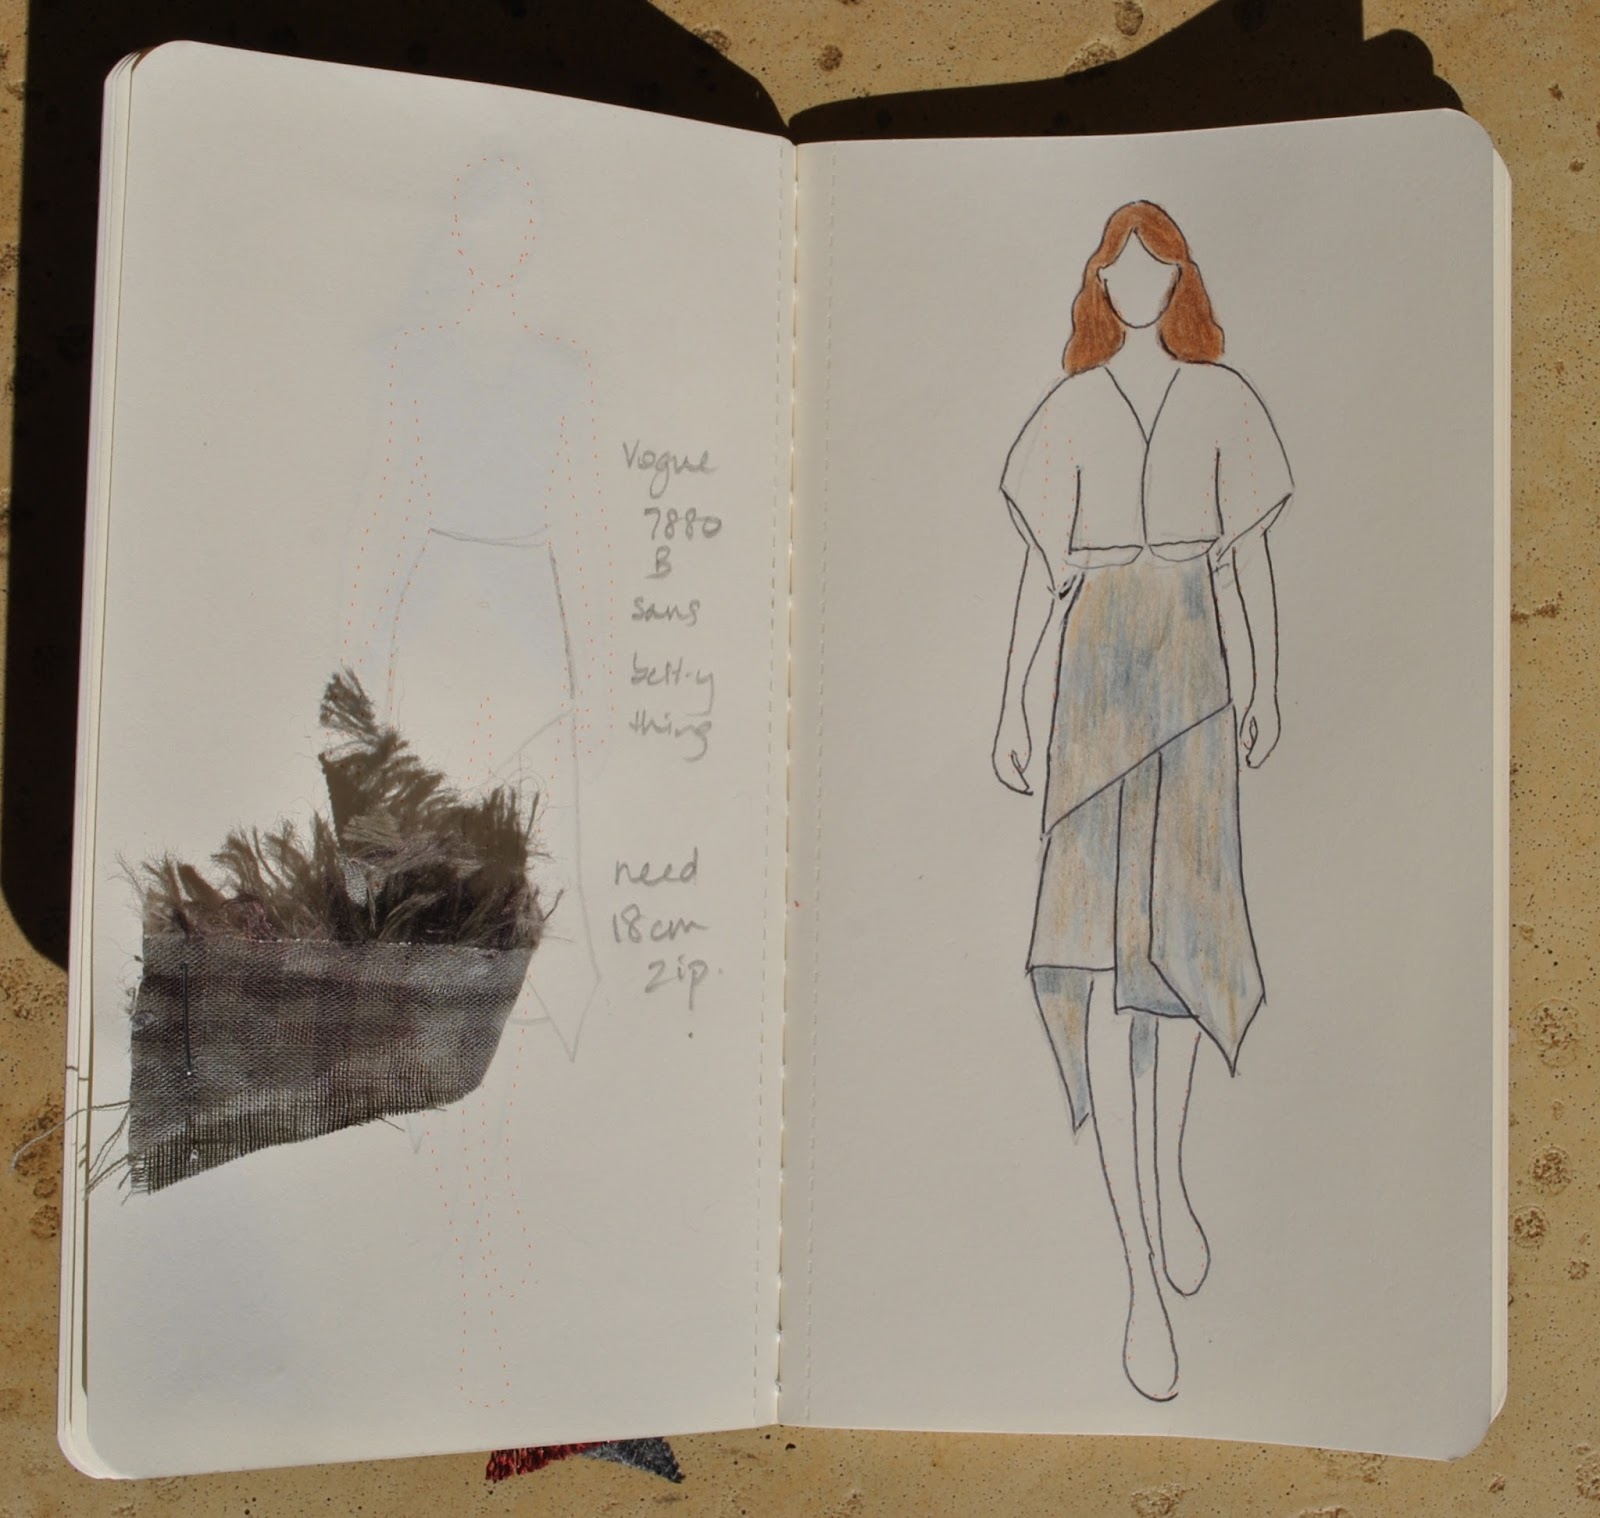
An abbreviated info section is inside the front and back covers; body measurements and some metric/imperial conversions which might be quite useful, and a list of fabrics descriptions.  The rest is 102 figures for sketching, one to a page and each the same size as the figures in the standard size Fashionary.  The set includes 3 separate little booklets, and I have already started using one for my sewing planning; my sewing promises to myself if you like.  It lives in my handbag… and along with a sketch of my idea and jotting pattern and fabric specifics, I’m stapling fabric samples (if I have it already) and making note of haberdashery requirements I’ll need to finish the project.  How many times have I come home from the fabric store and as soon as I walked in the front door suddenly remembered that dang! I needed elastic?! … or a beige 20cm zip?!  which of course I had forgotten the minute I entered the shop.  If this doesn’t keep me organised, nothing will!
pinterestmail

Leo

… the lion., and the latest in my horoscope series.  
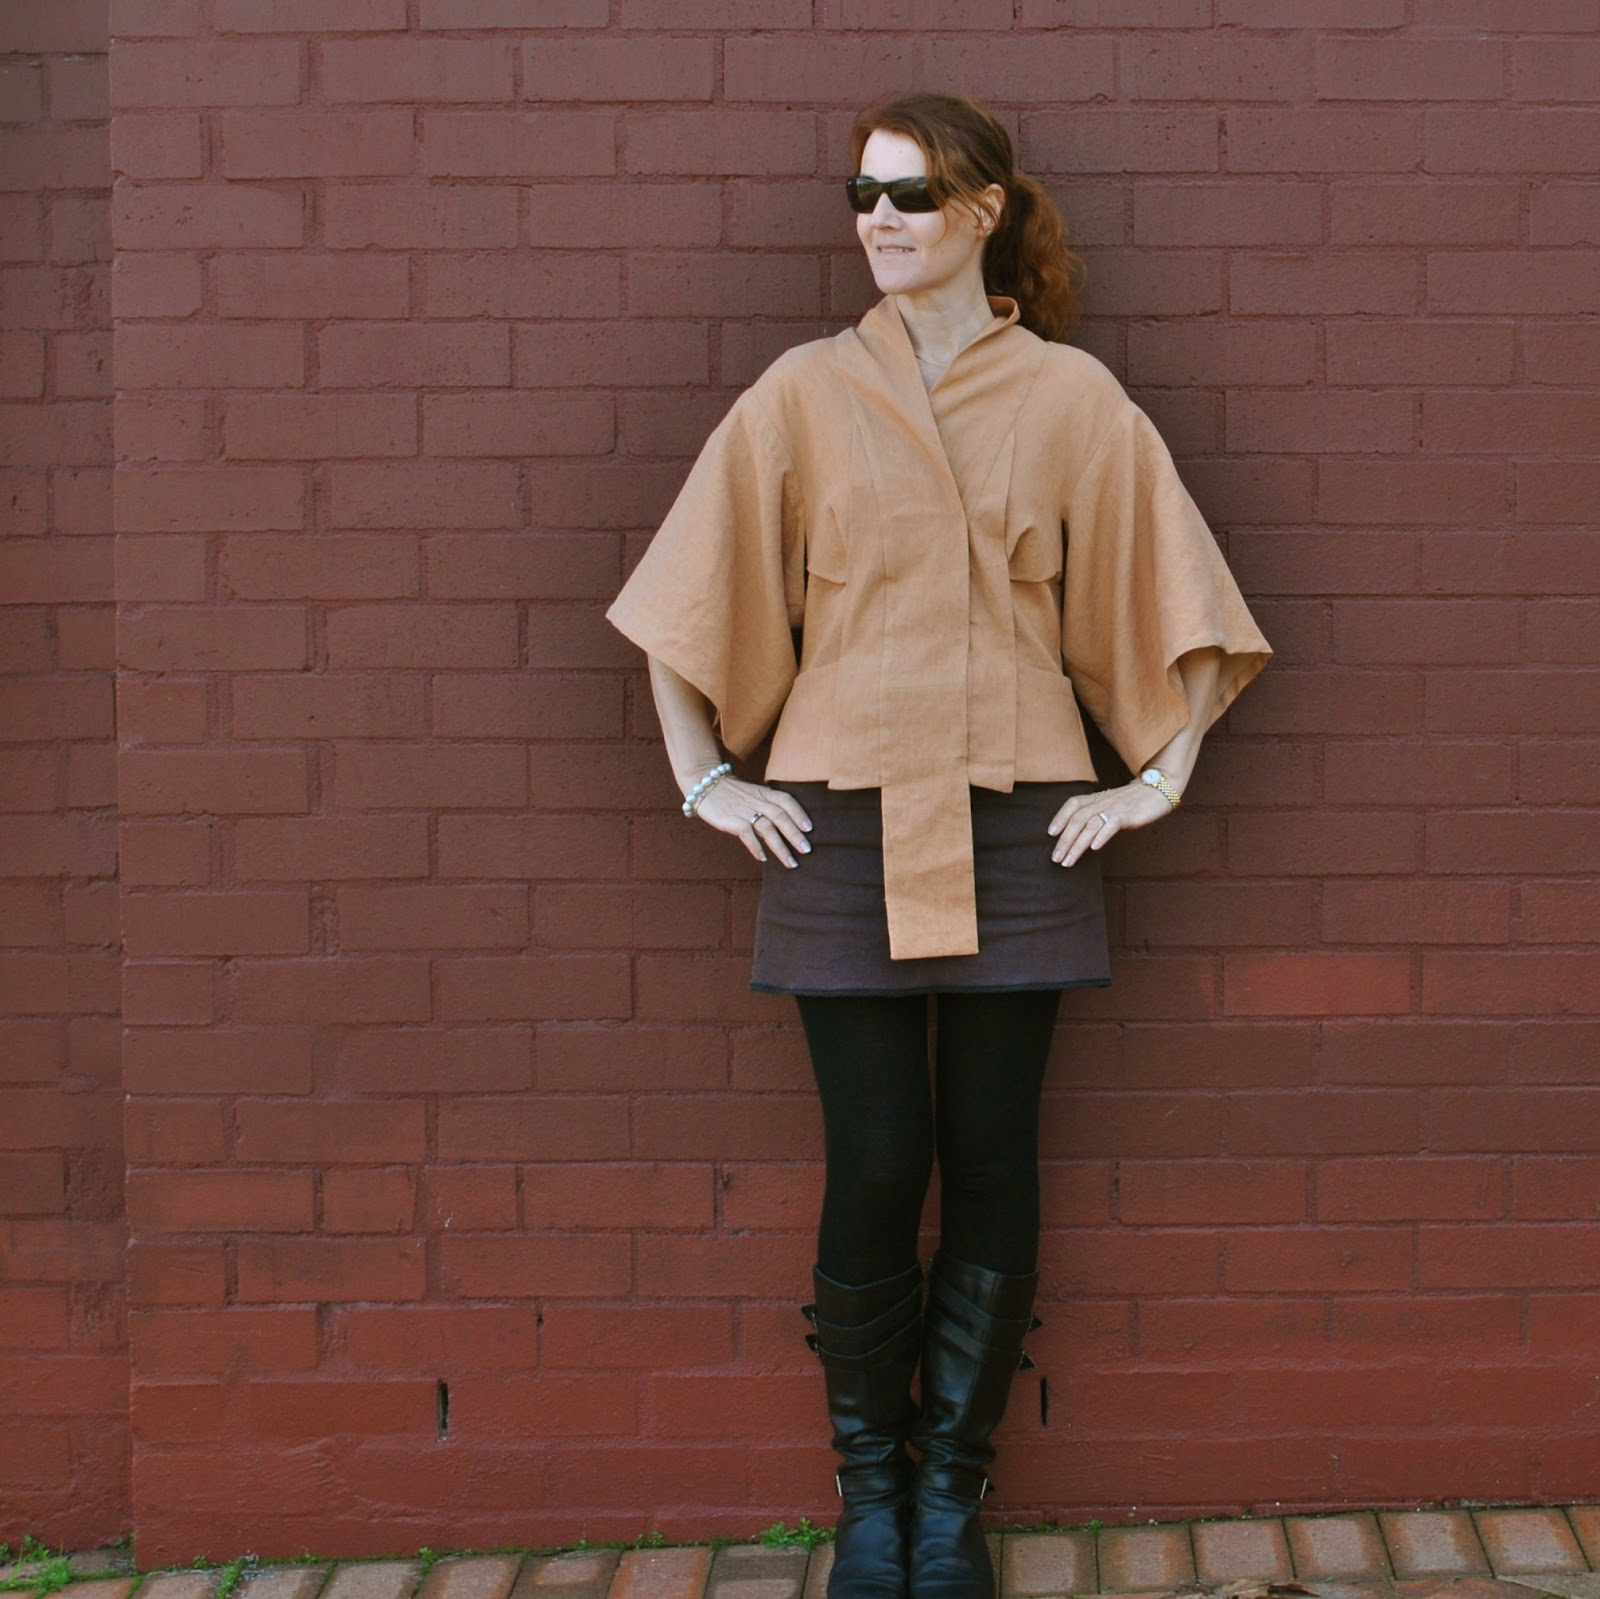
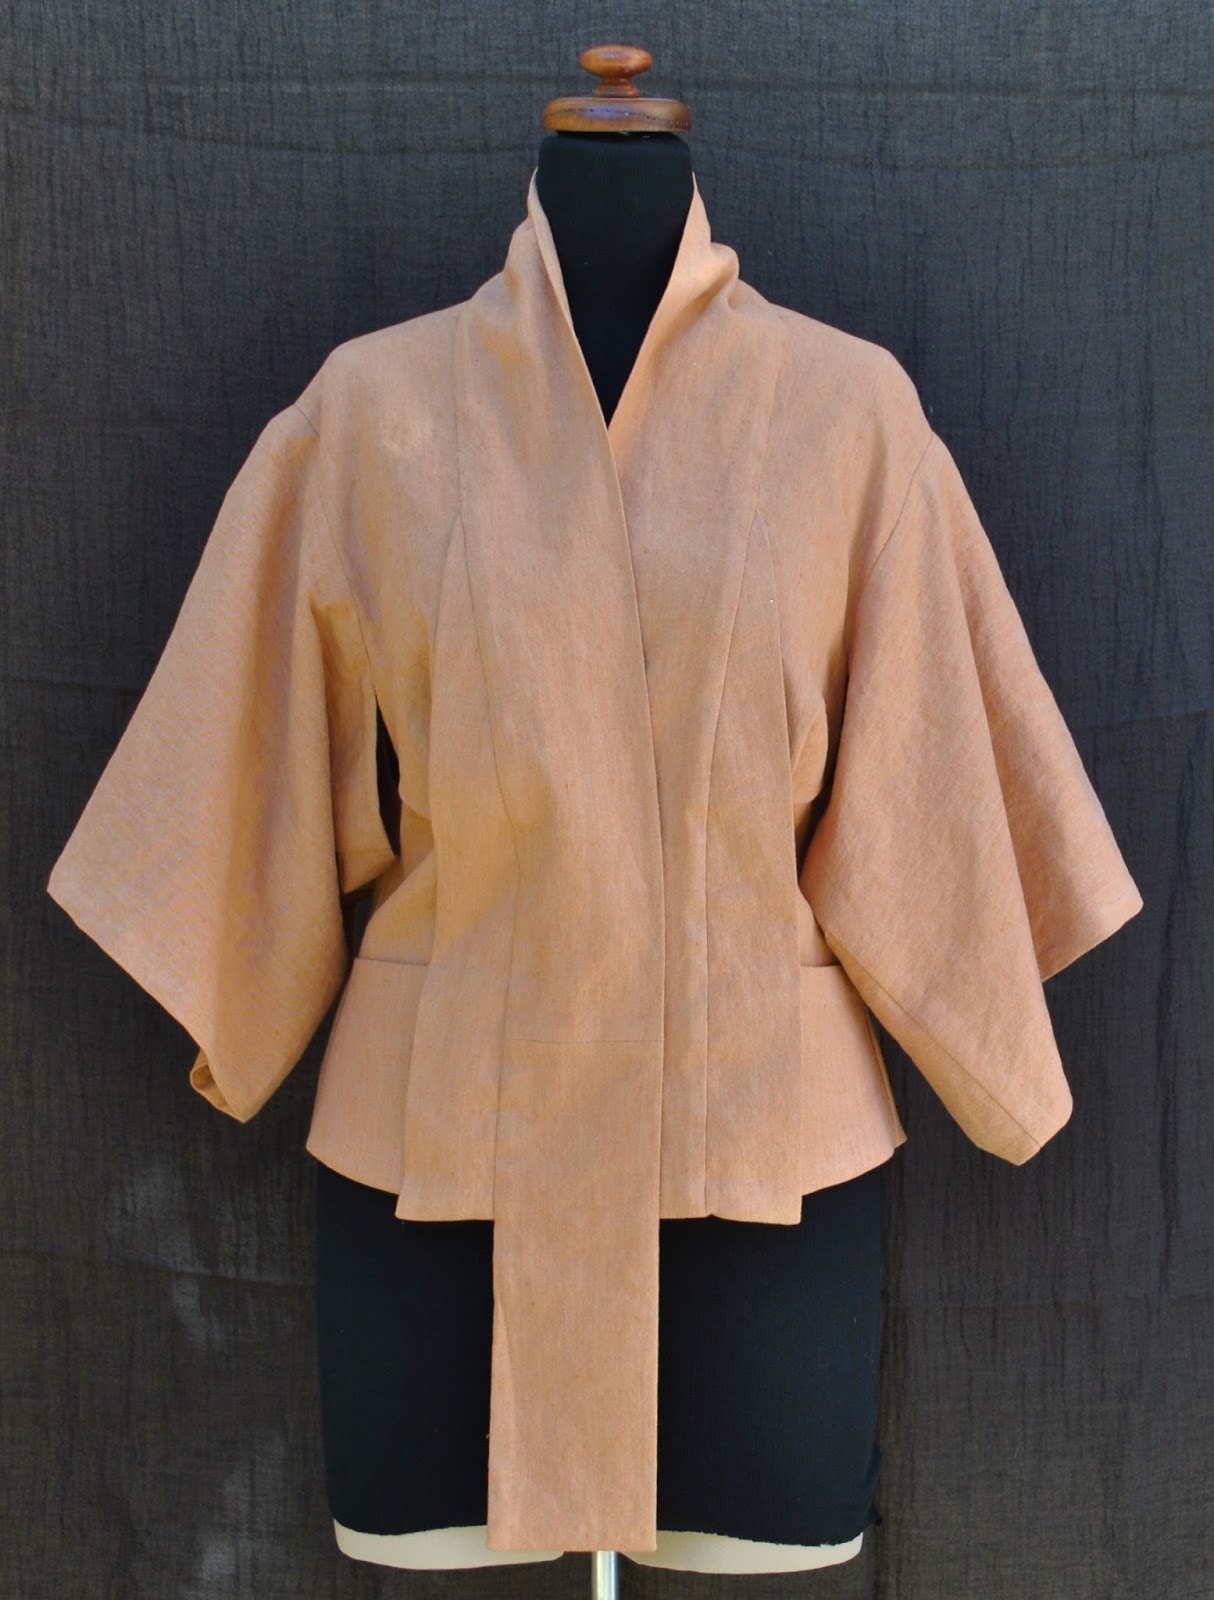
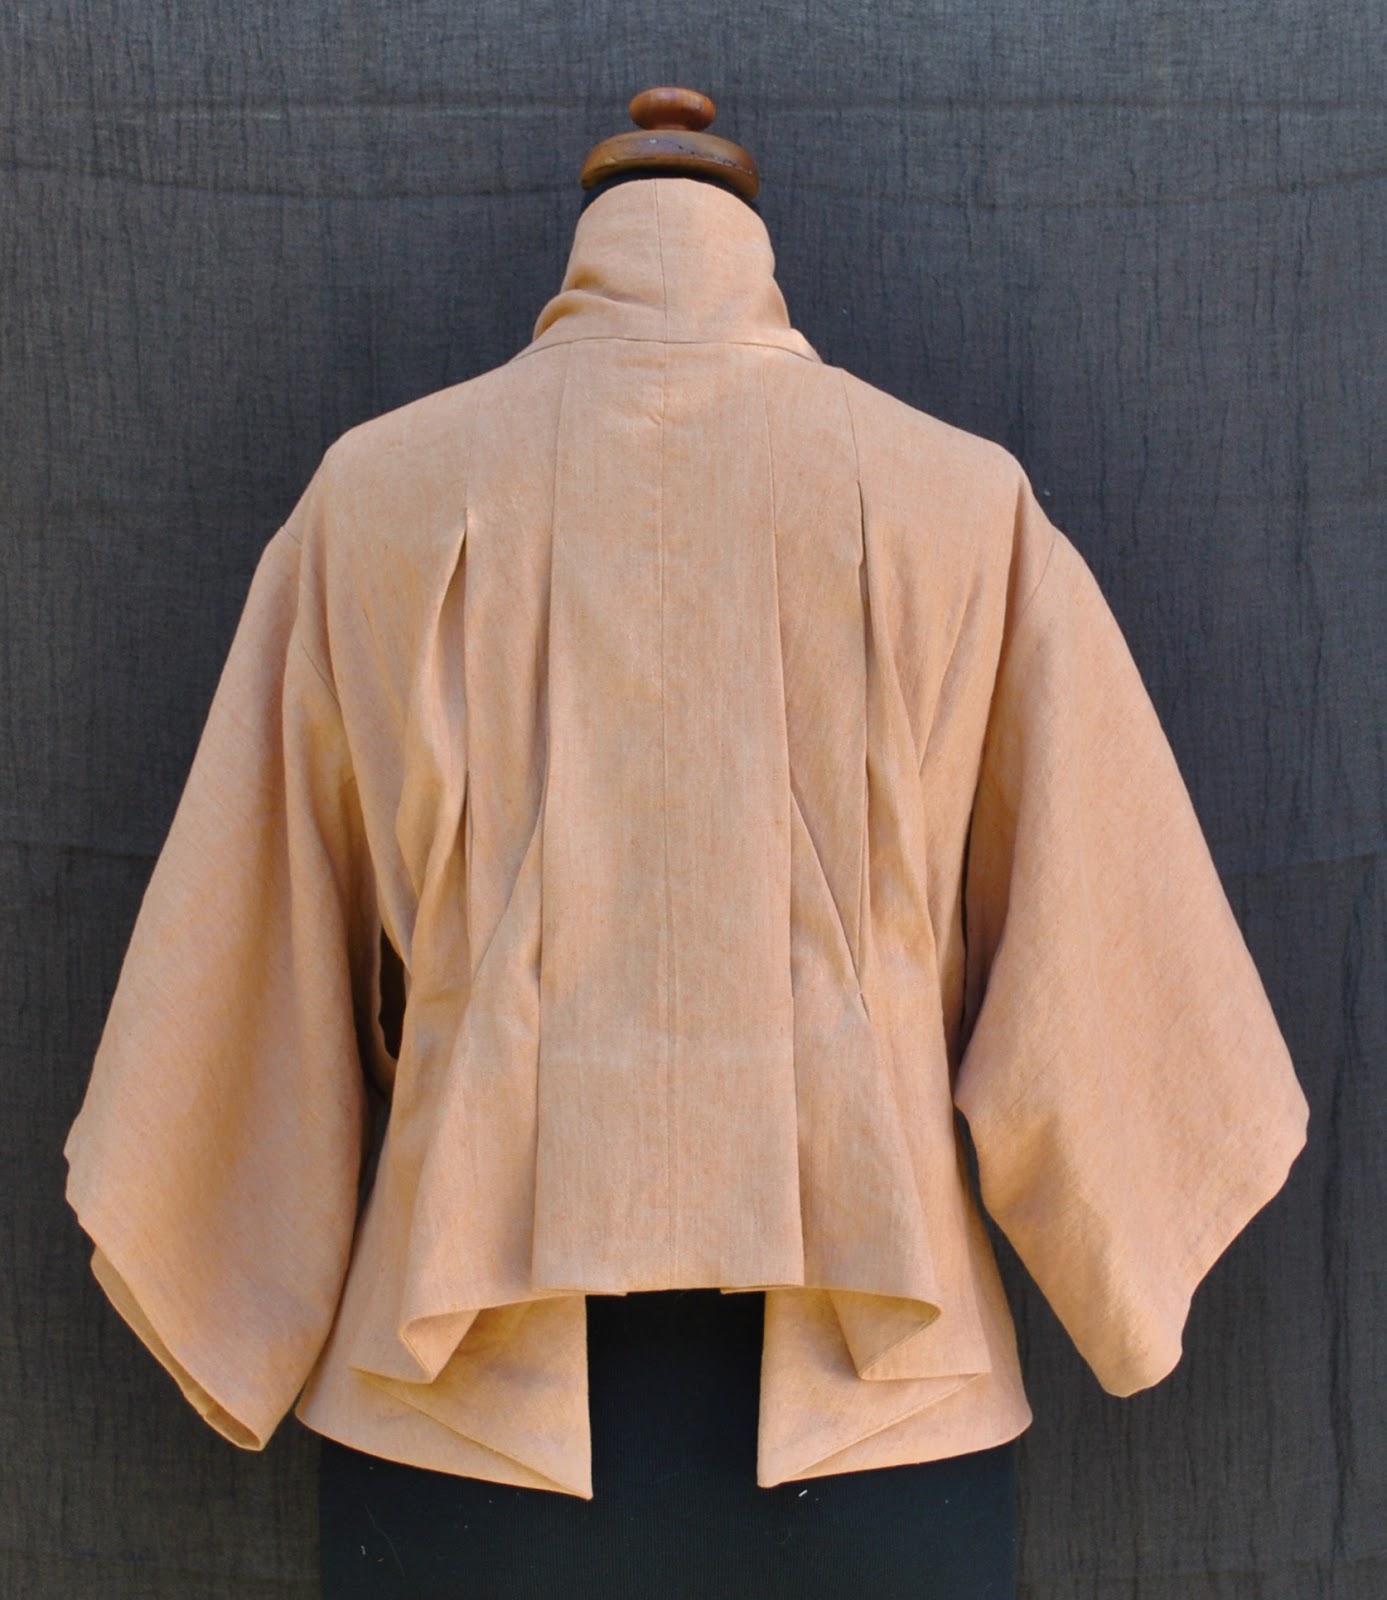
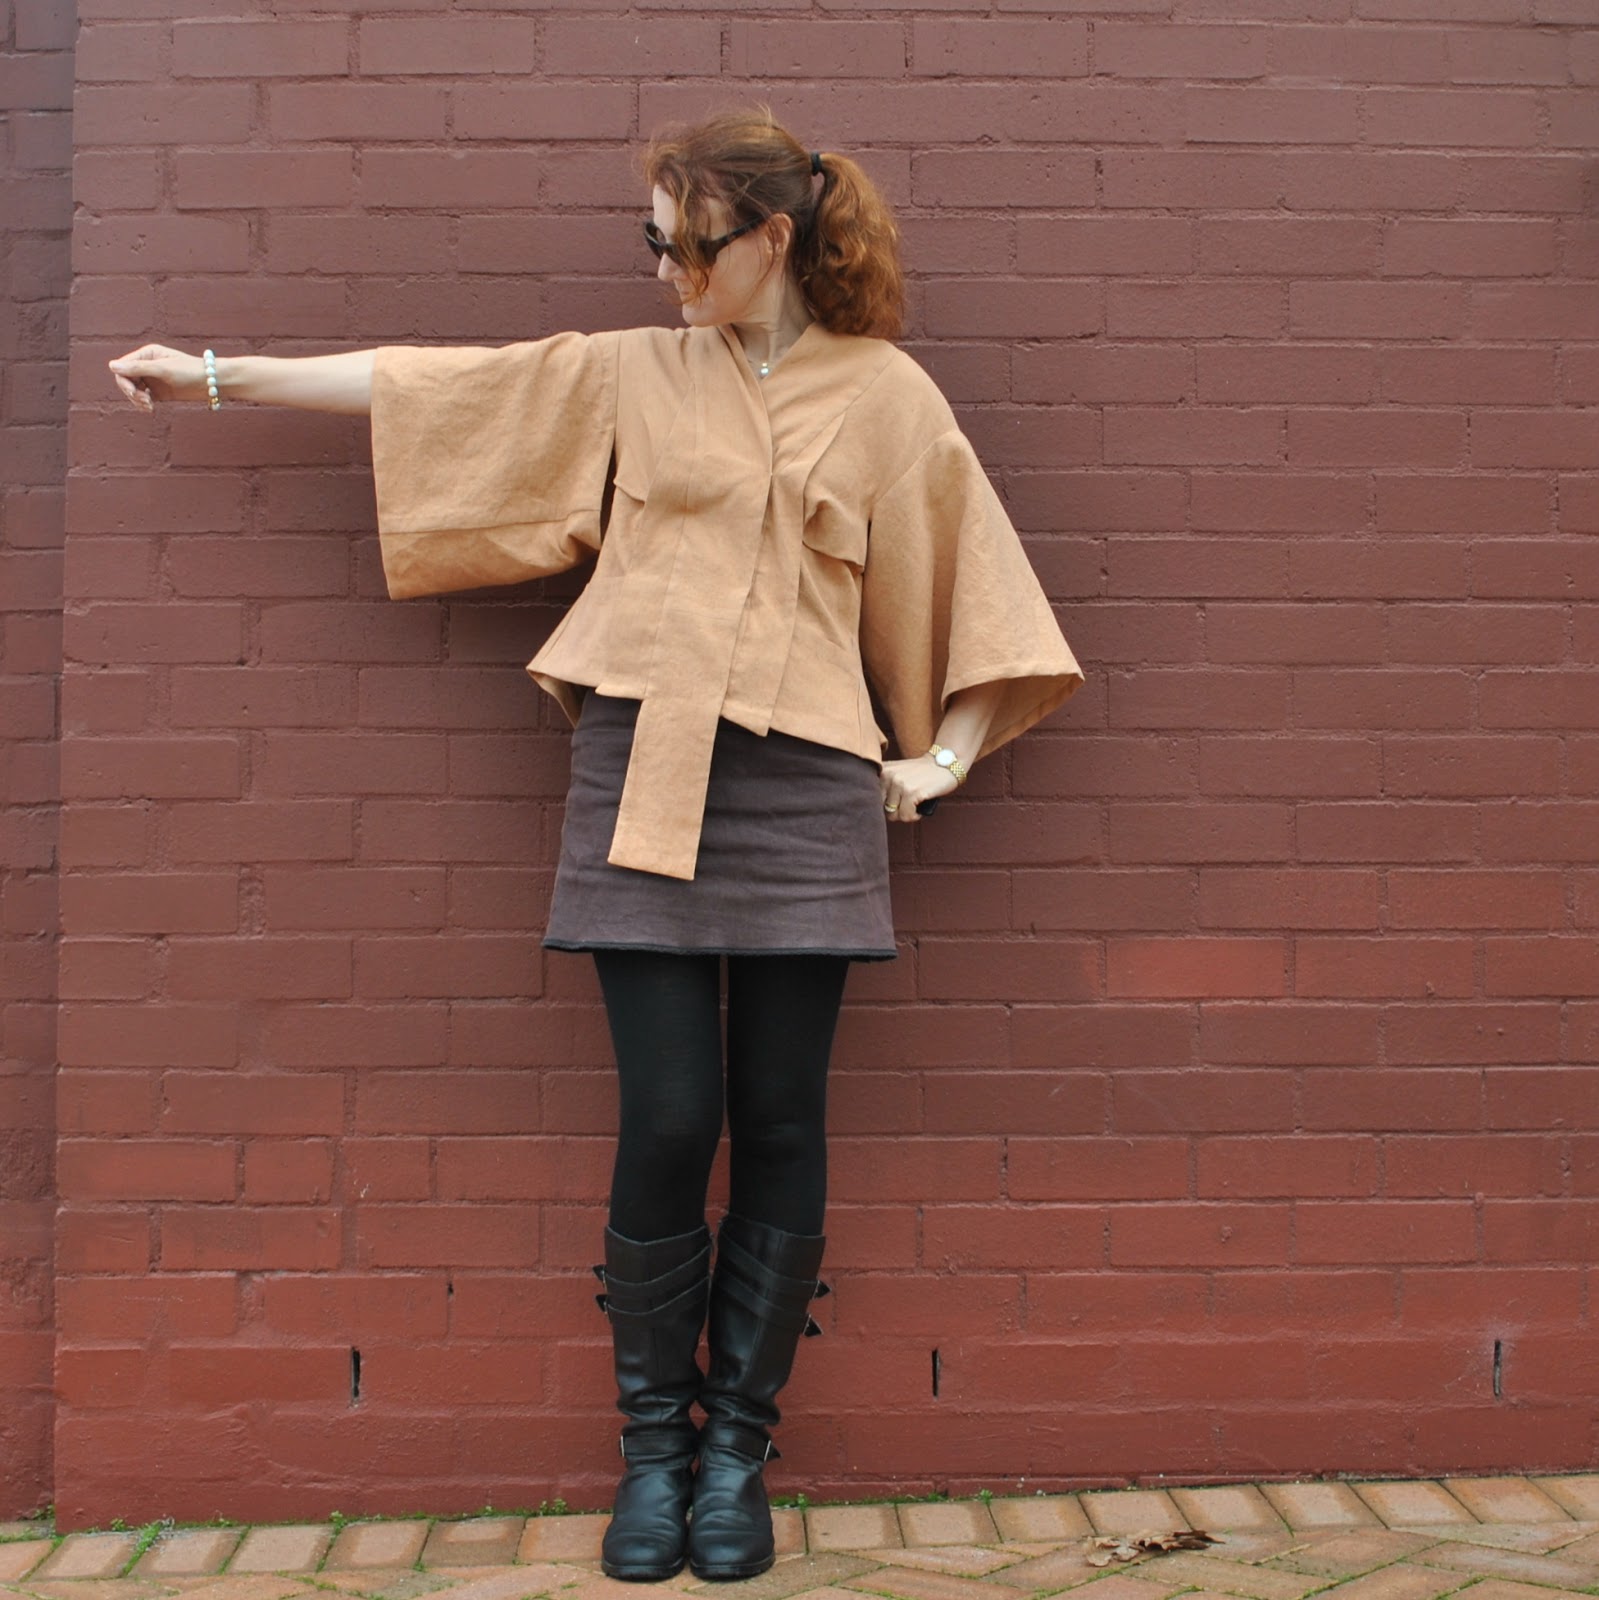
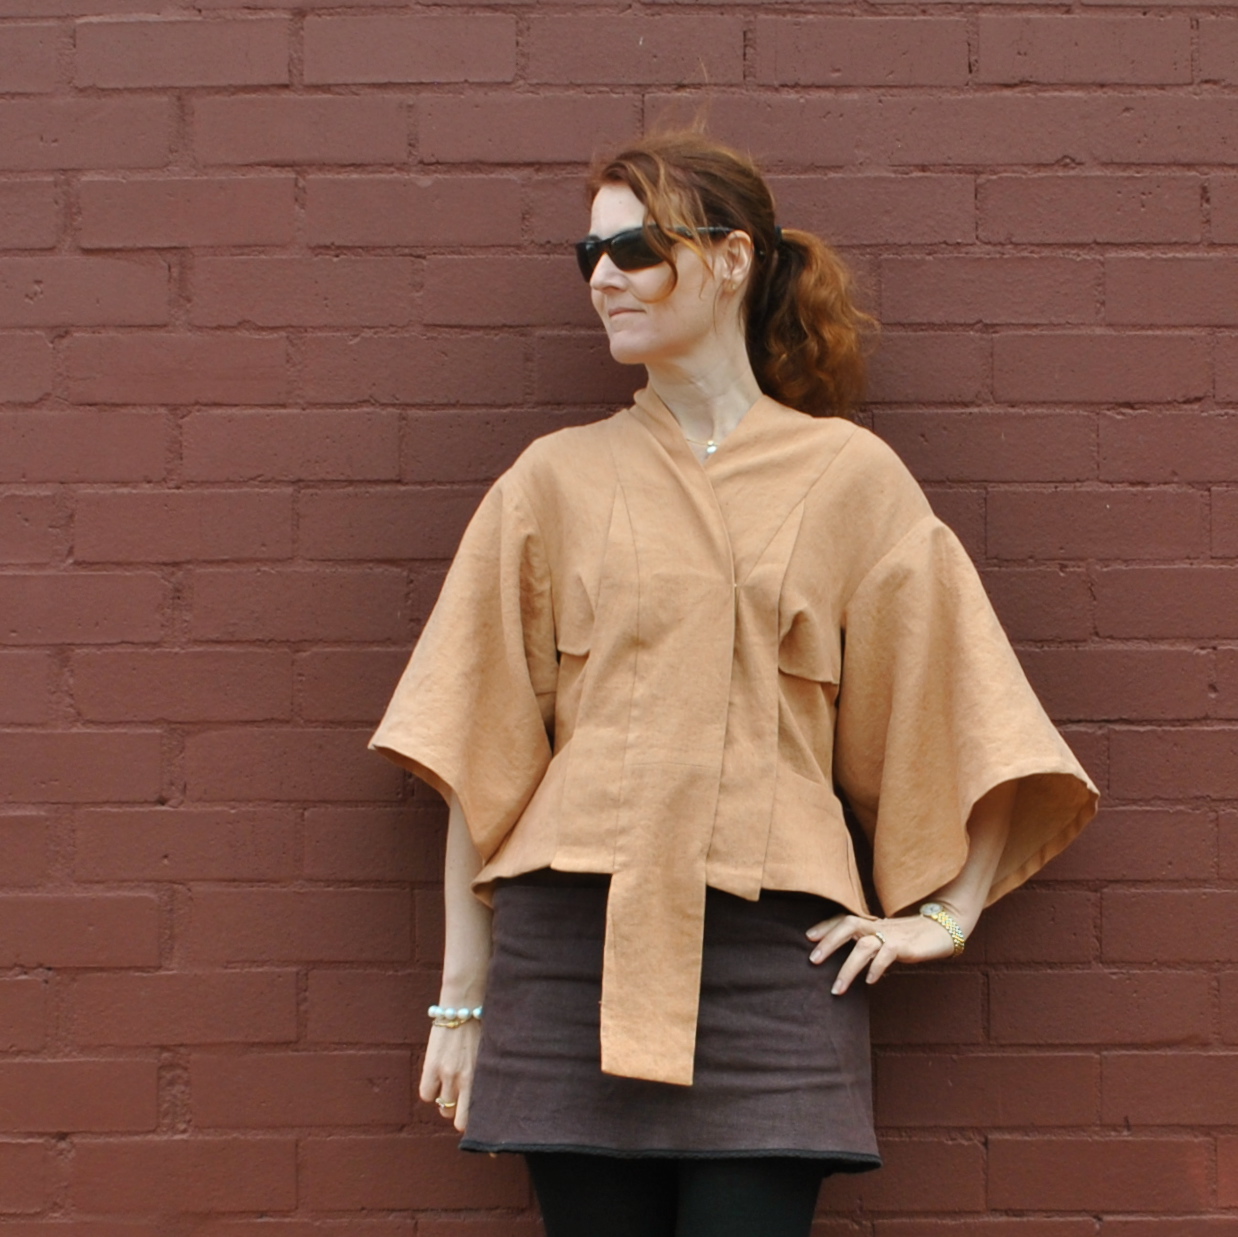
I am wearing my new Alexander McQueen designed jacket.  And did you know that Alexander McQueen’s first name was actually… oh ok then, his name was Lee not Leo.  But… pretty close.  And this jacket has been taking up the, um, lion’s share of my time lately… ?!

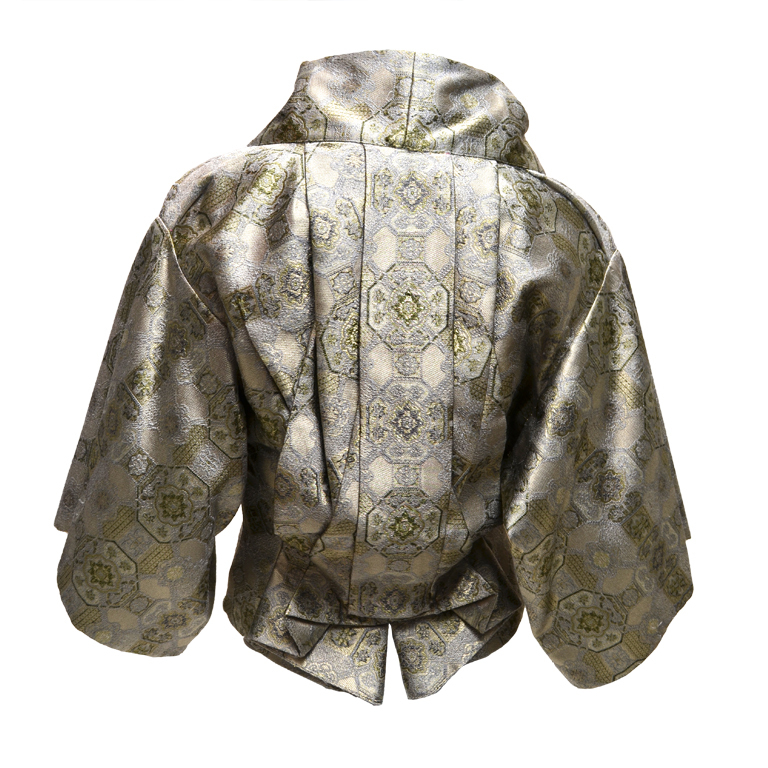
above; Alexander McQueen brocade kimono jacket, 2003

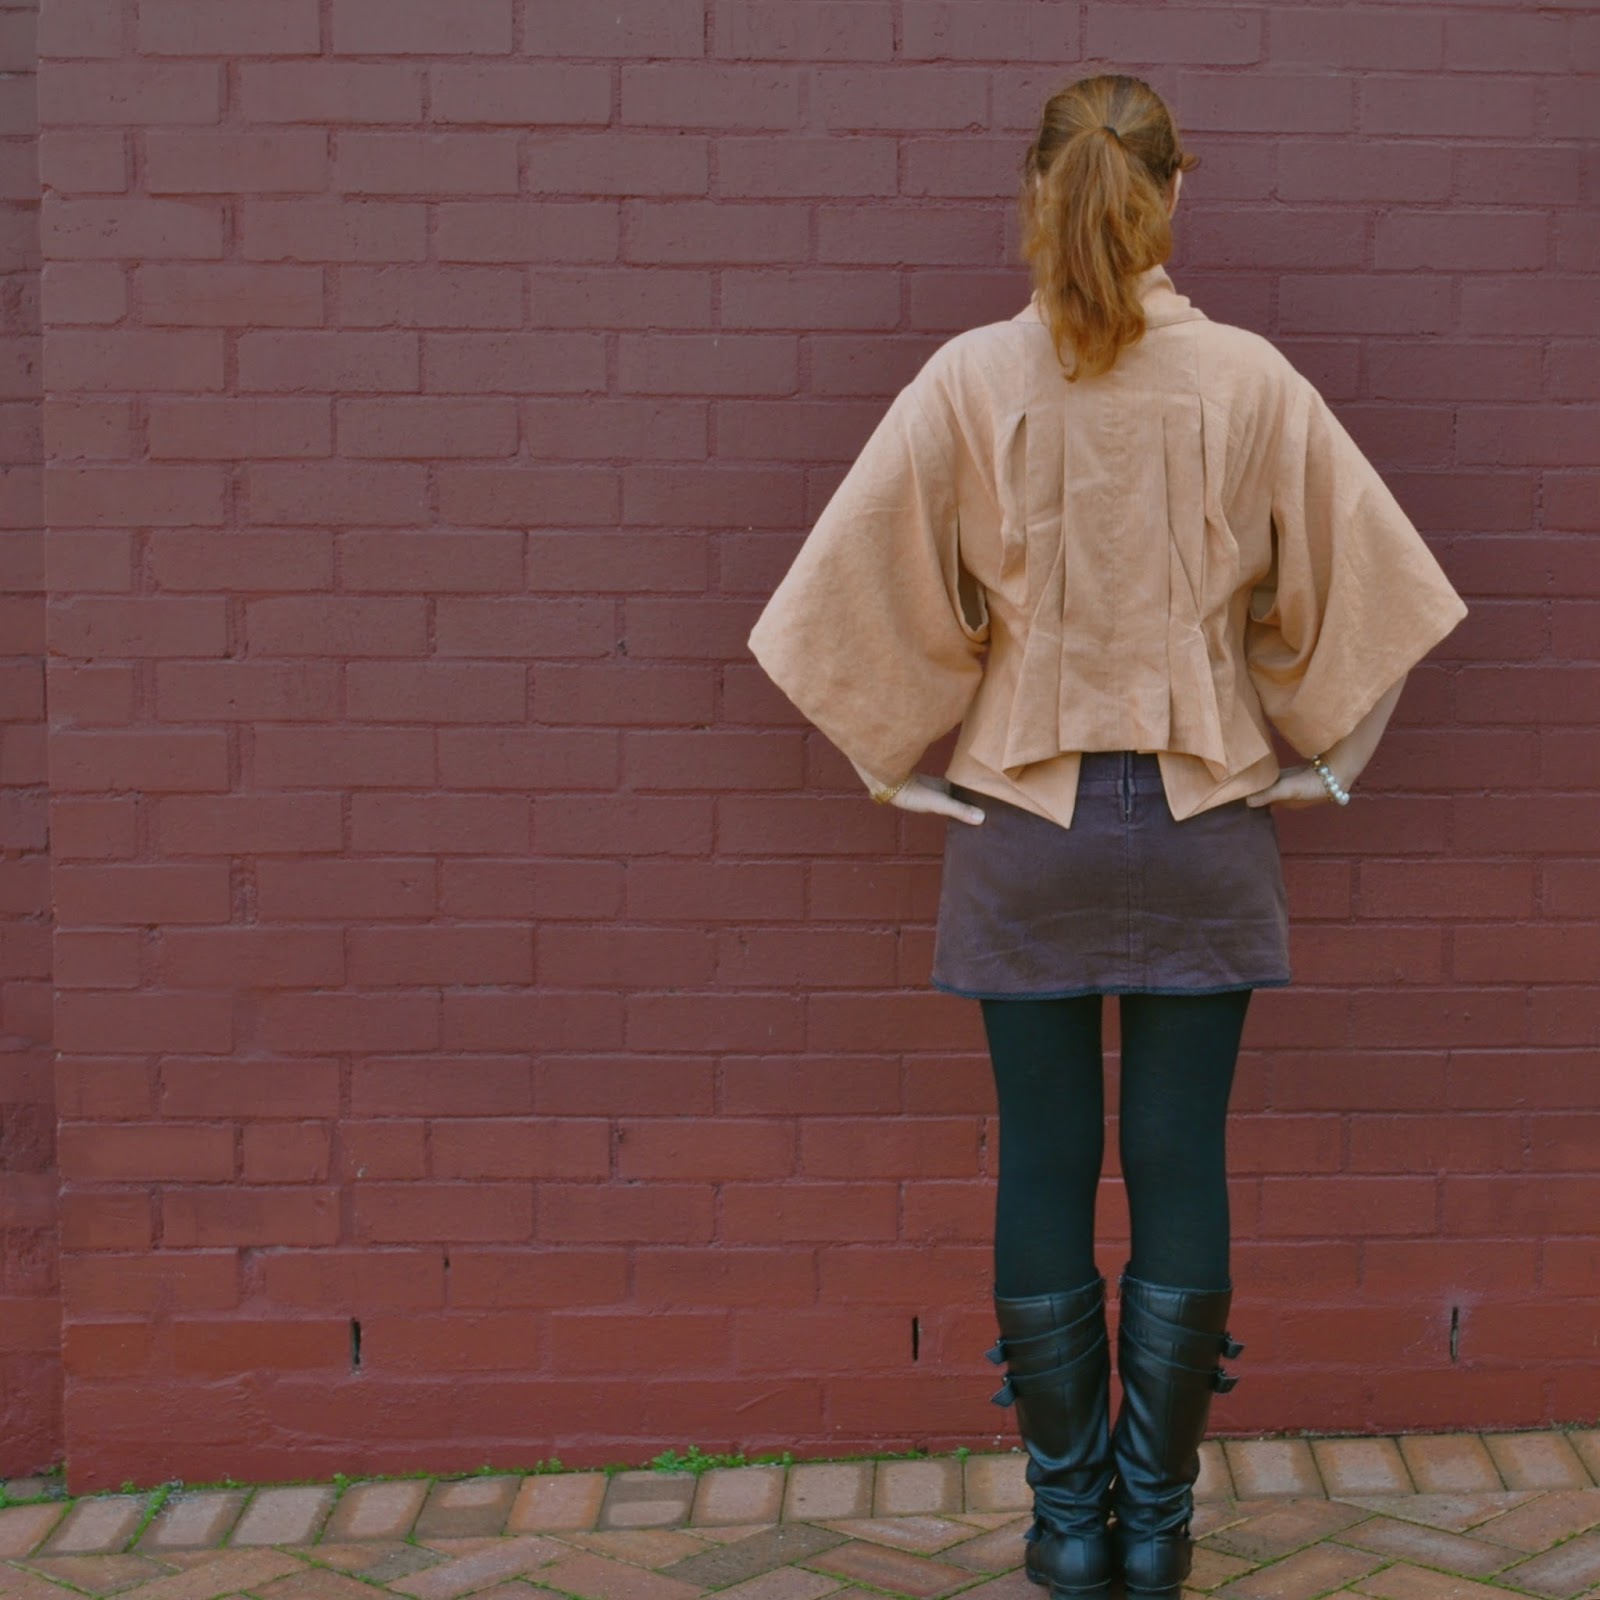
The pattern is a free download from showStudio and when I saw Catherine’s fantastic version of this edgy design I just had to give it another go.  Confession, this is my second time making this up; my first attempt back in 2010 was pretty disastrous and I gave up halfway through. 

Attempt number two… and at least I finished it this time!  Thank you Catherine for sending me the instructions  ðŸ™‚
This is a very difficult make but I’m fairly happy with the end result and there was not as much angst involved as in my maiden voyage.  Though once again there were times I wondered whether the late Mr McQueen had been having a bit of a lend of us…. !  but it does actually make sense and comes together successfully in the end.
The fabric I used for this new version is a very soft cotton denim in a shade of dusky apricot, and was part of my precious Japanese-bought stash, posted here.  I just barely got the pattern pieces cut out of my 2.5m… barely! so I recommend that if you decide to make this yourself get at least 3m unless you really fancy an extra little challenge to go with this already challenging design.
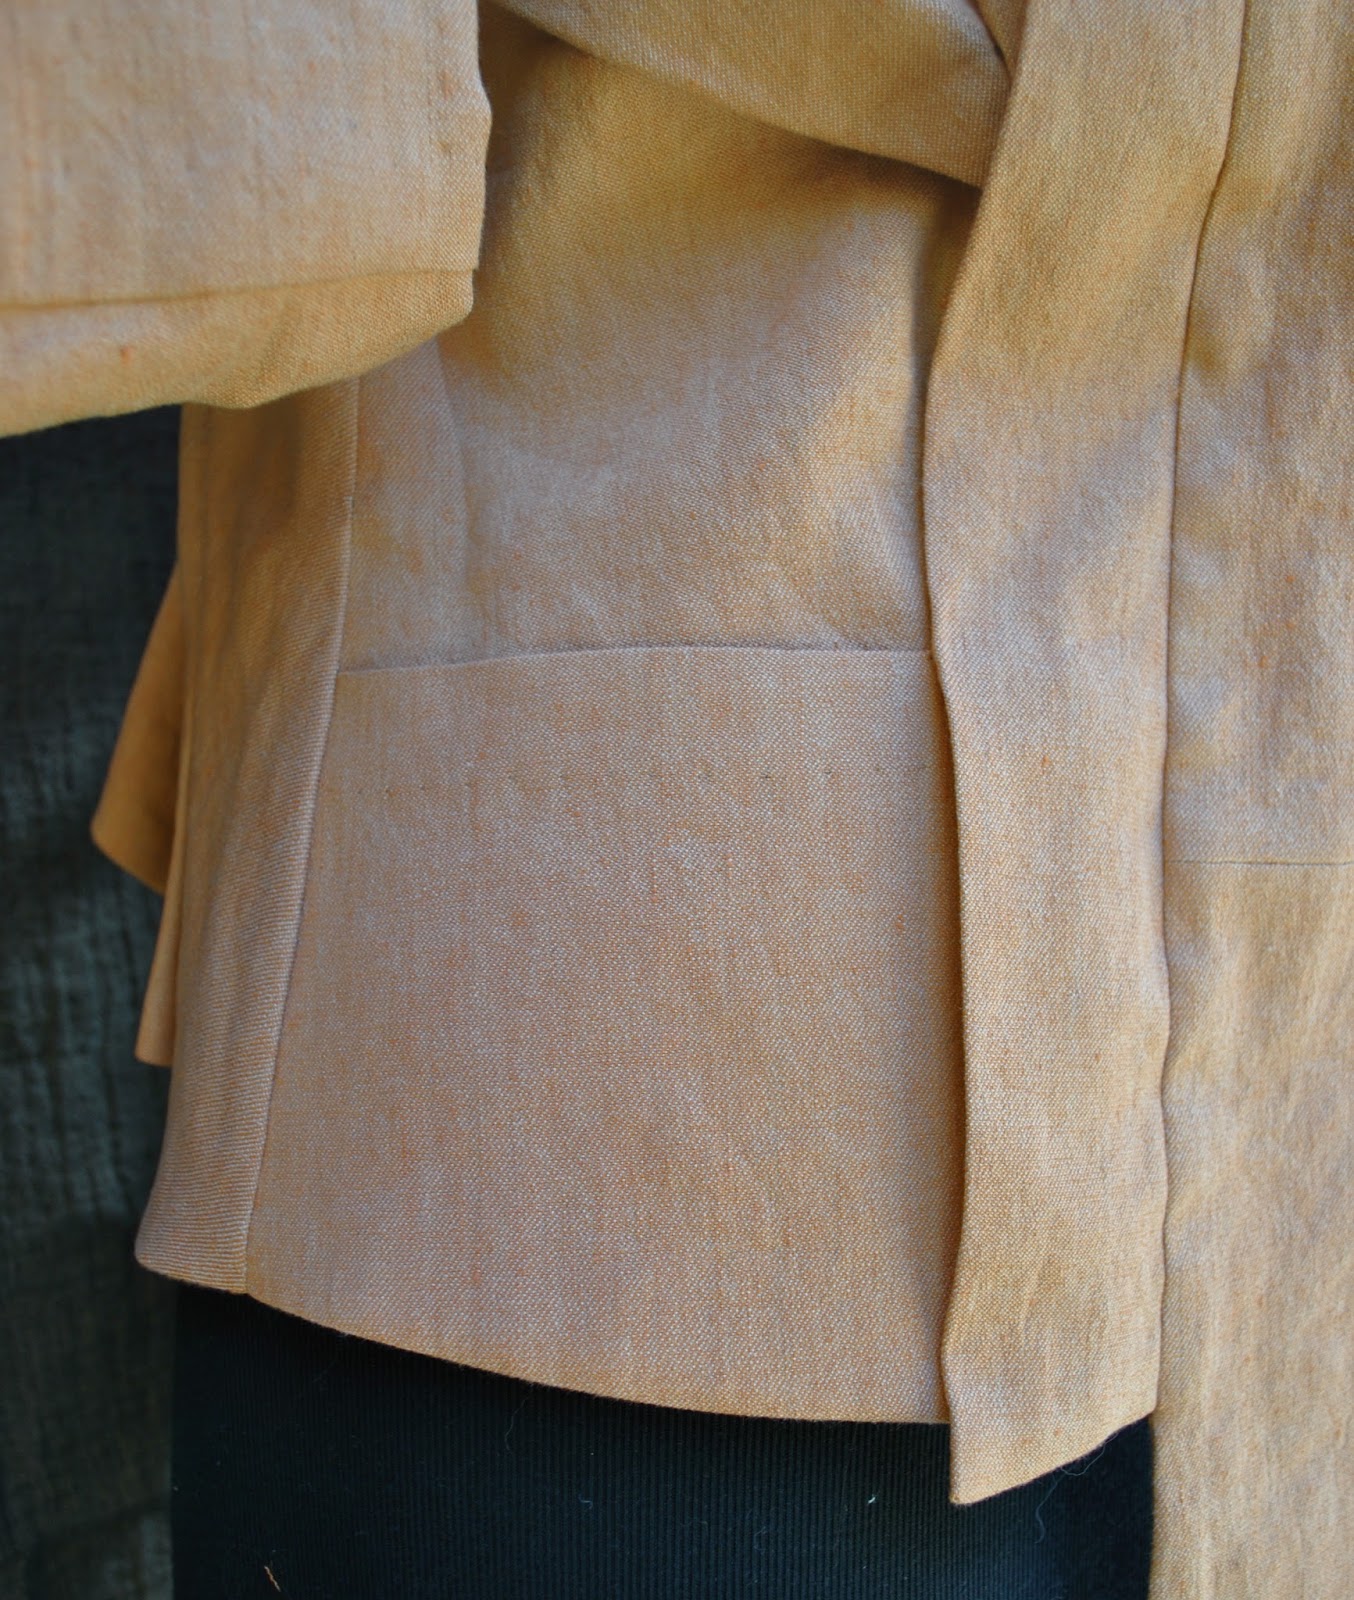
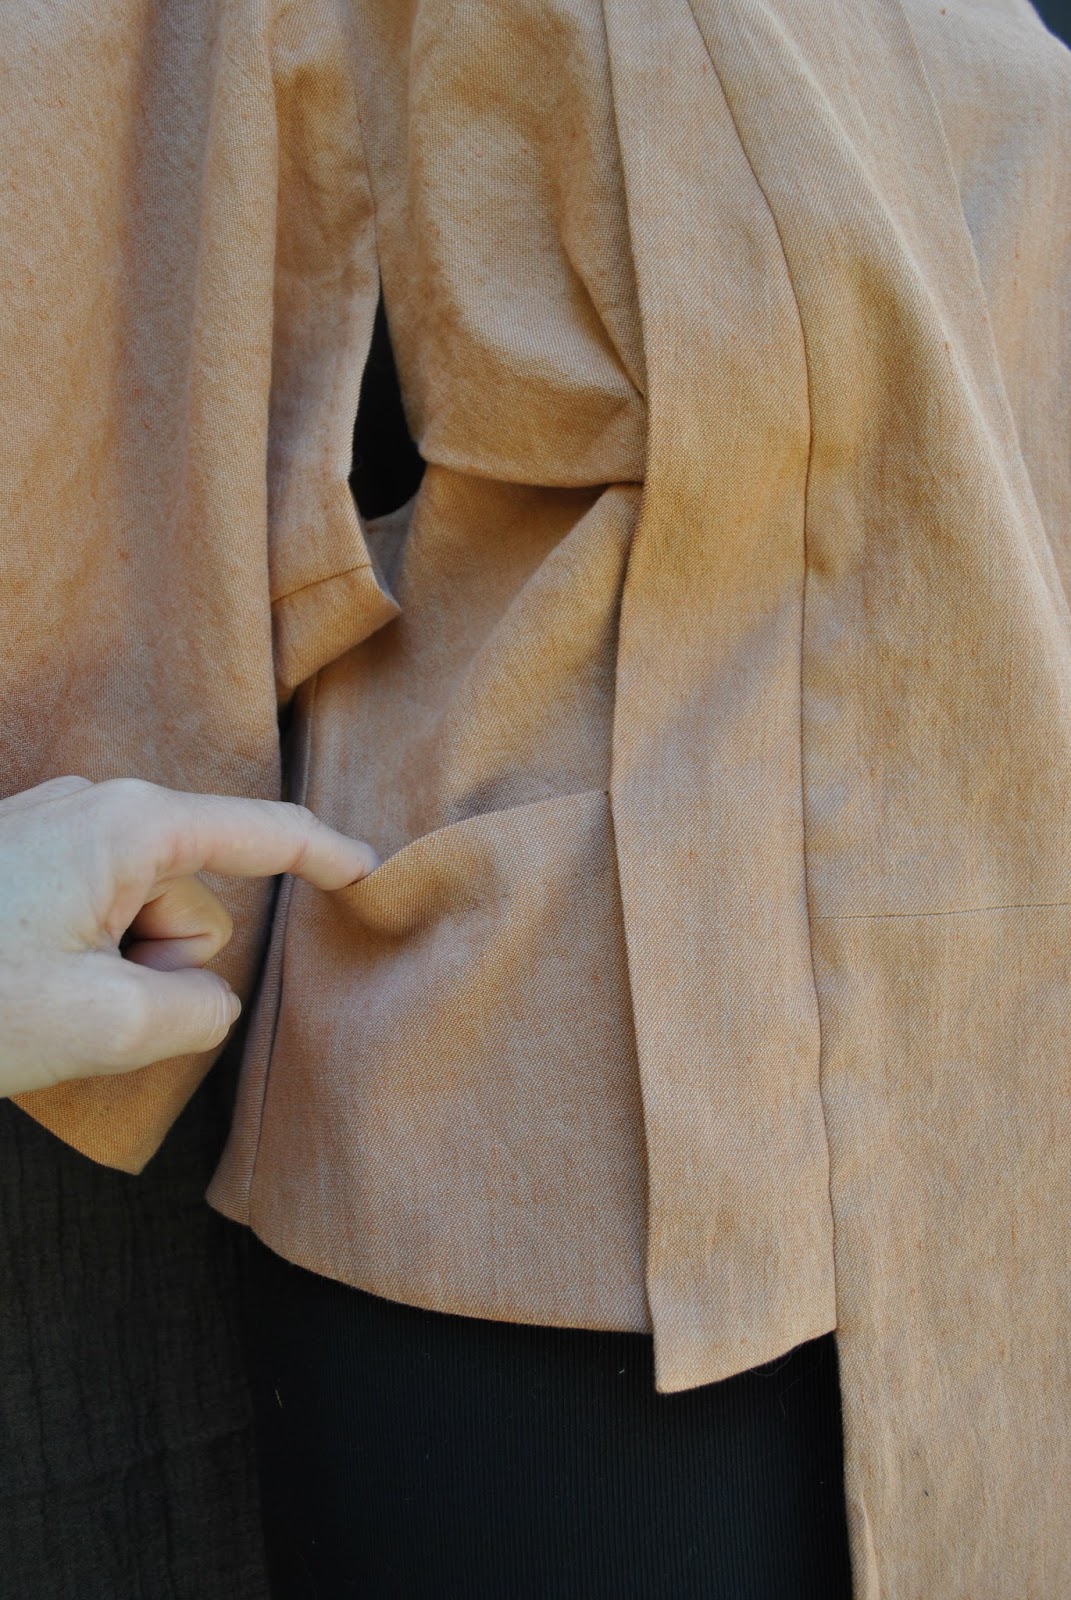
I added discreet and fairly useless little pockets, just because why not.  There is no pocket pattern piece and none are mentioned in the rather sparse reader-contributed instructions, however there are markings on the pattern not relating to anything else but that appear to indicate where a pocket could go  (dot B)  I wanted for my pockets to be as invisible as possible, so the sides disappear into the side seams and underneath the front flaps, and the lower edge is sewn flush against the lower edge of the jacket.  Meaning the only visible edge is the top edge.
Actually there is no visible stitching on the outside of my jacket at all.  I really like the apparent minimalism of the finishes, a contrast to, and a showcase for the complexity of those pleats and darts at the back.
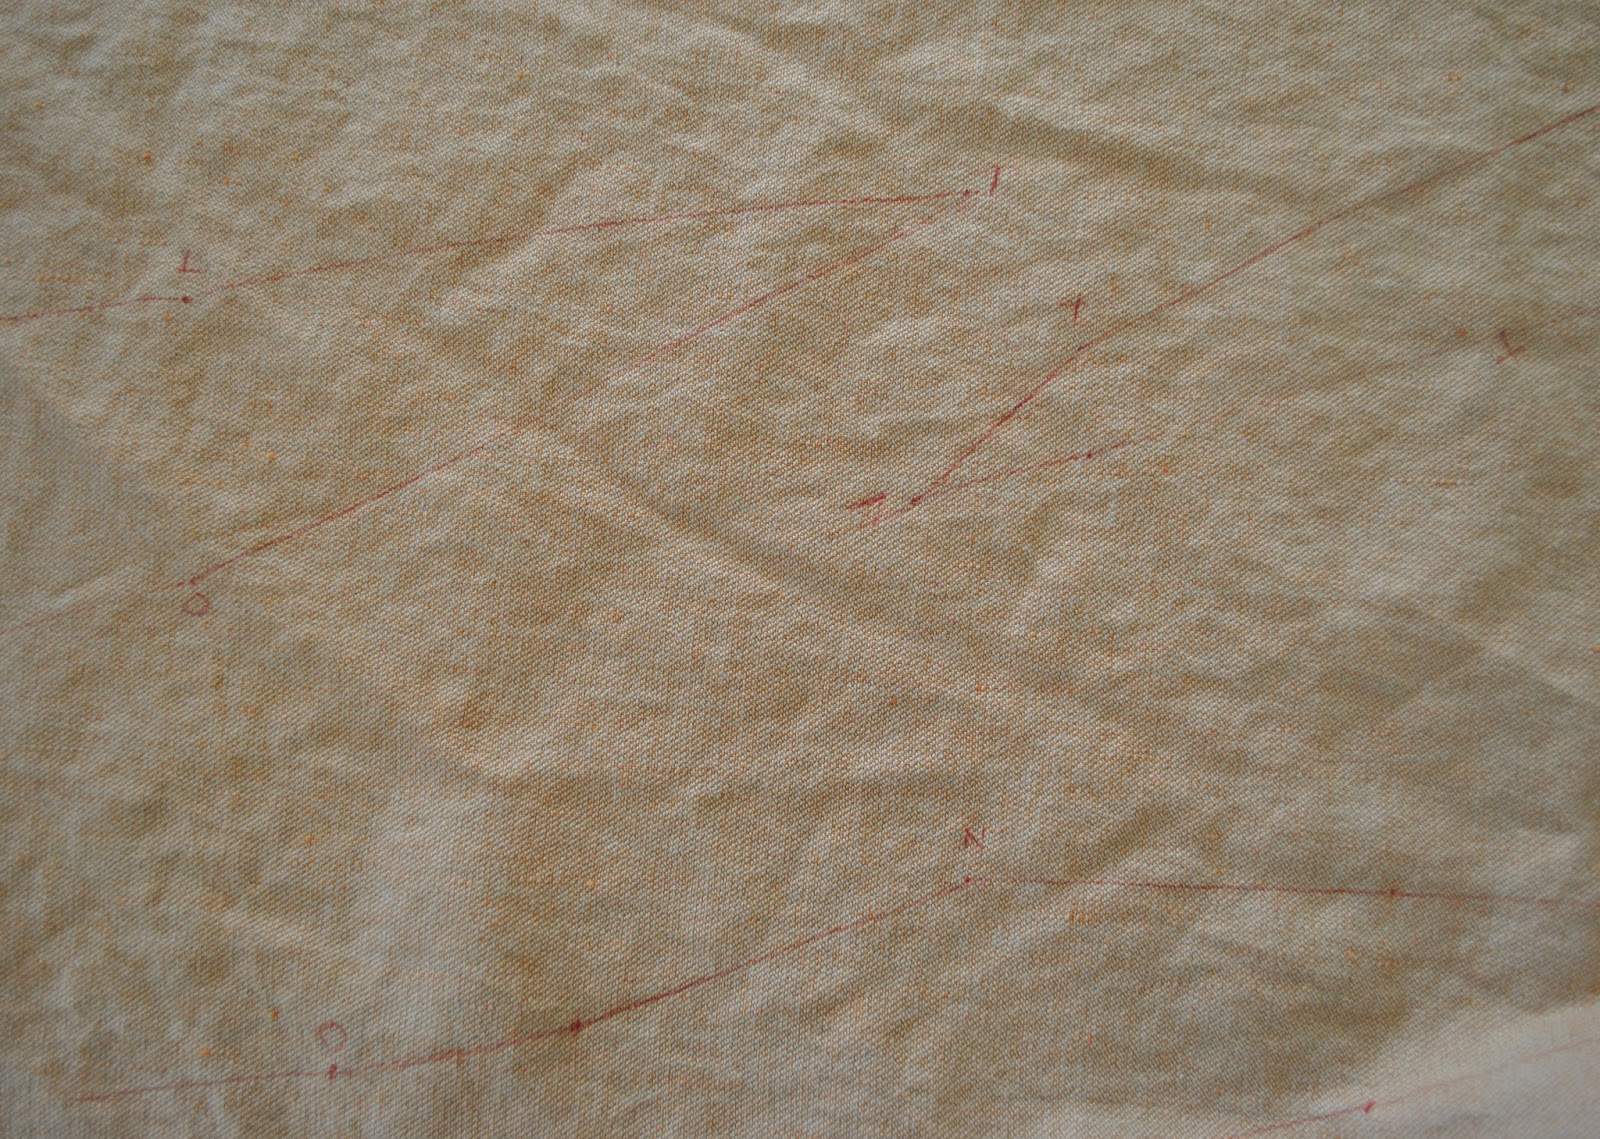
 The instructions did help but they are not fabulous.  I transferred all markings onto the wrong side of my fabric with red pen which washes out with the first wash, and this helped enormously.  As well as dot B, dots X and L are also not mentioned anywhere in the instructions and dot L  is all by its lonesome with no other dot L anywhere.  I joined up points X a little way along their joining lines, and freehanded the last pleats to guarantee symmetry.

(Later edit: in a lightbulb moment I’ve suddenly realised you are supposed to join dot L from one back to dot L on the other back!  Doing this would “look” about the same as what I did so I might leave mine the way it is!)

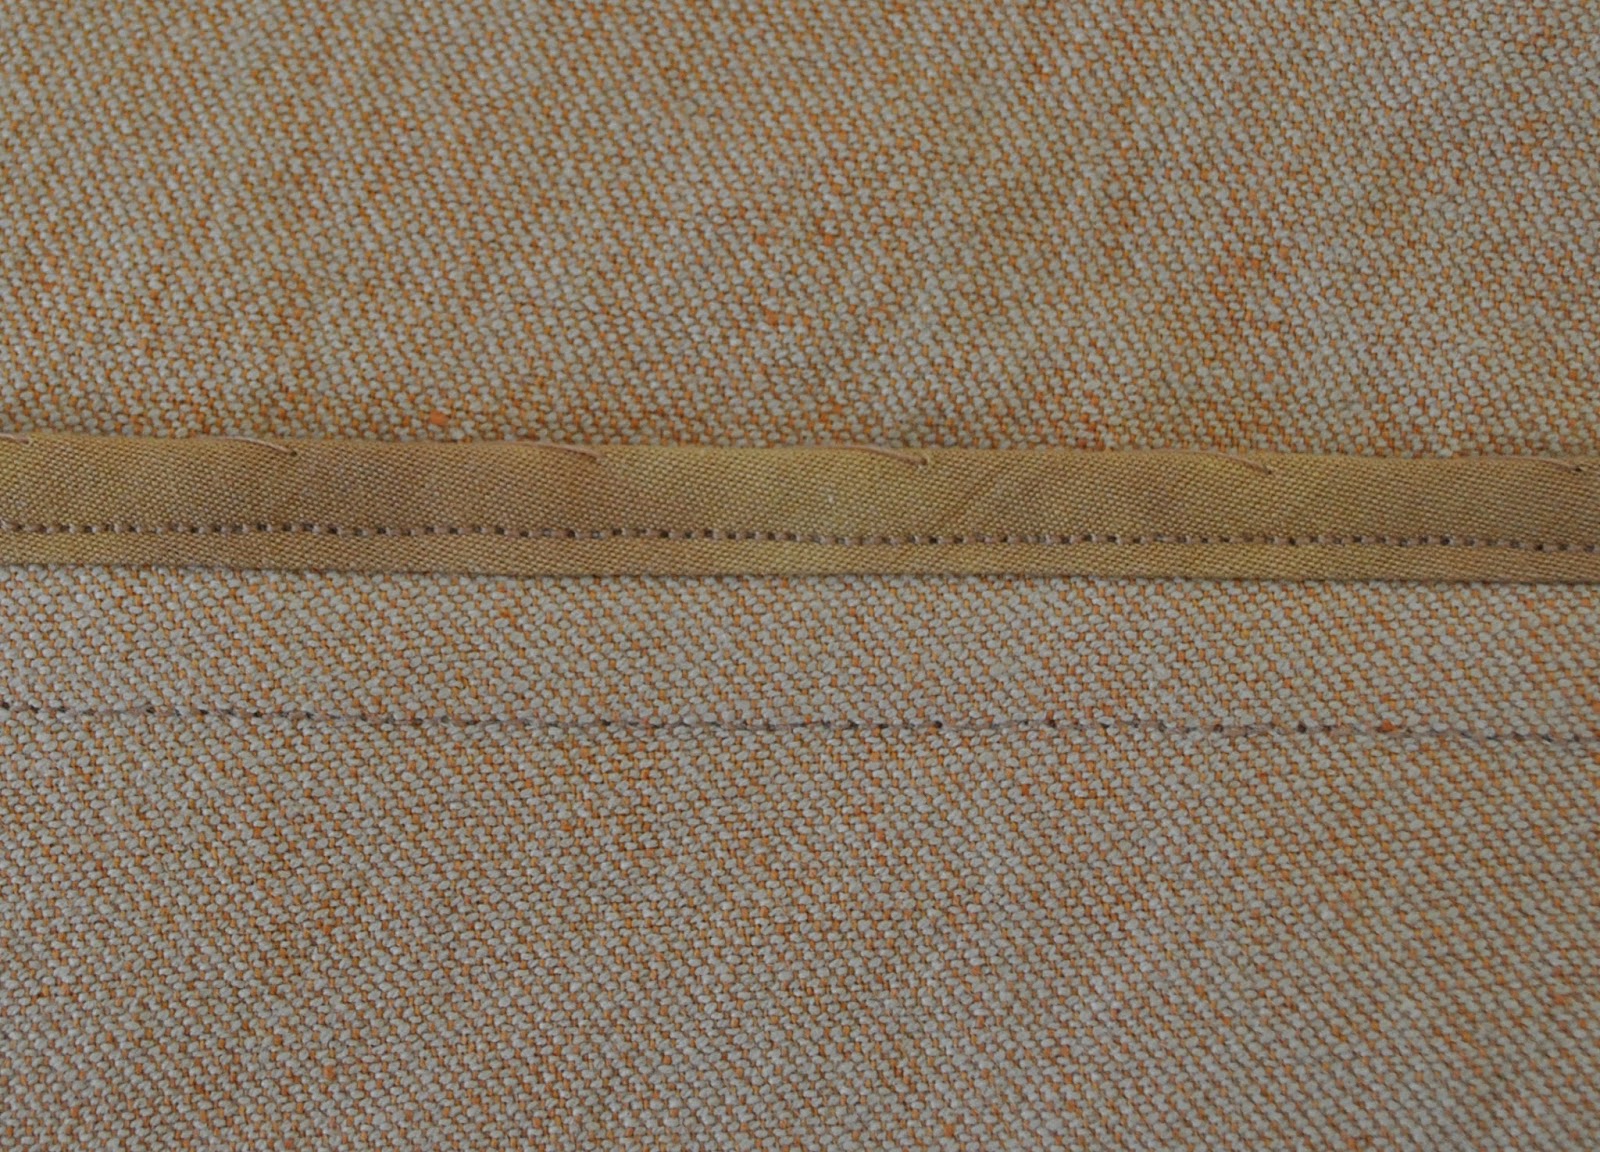
Visible hidden inside edges I finished with HongKong seaming which was then invisibly slip-stitched down to the garment.  A few invisible inside edges were finished on the overlocker.  The centre back piece was cut on the side edge and I left those raw selvedges unfinished on the inside too.  I interfaced the lower facing then later decided this made the lower edge far too stiff for my taste, so ripped it off.  There is no interfacing in the jacket now, and I like this softness.
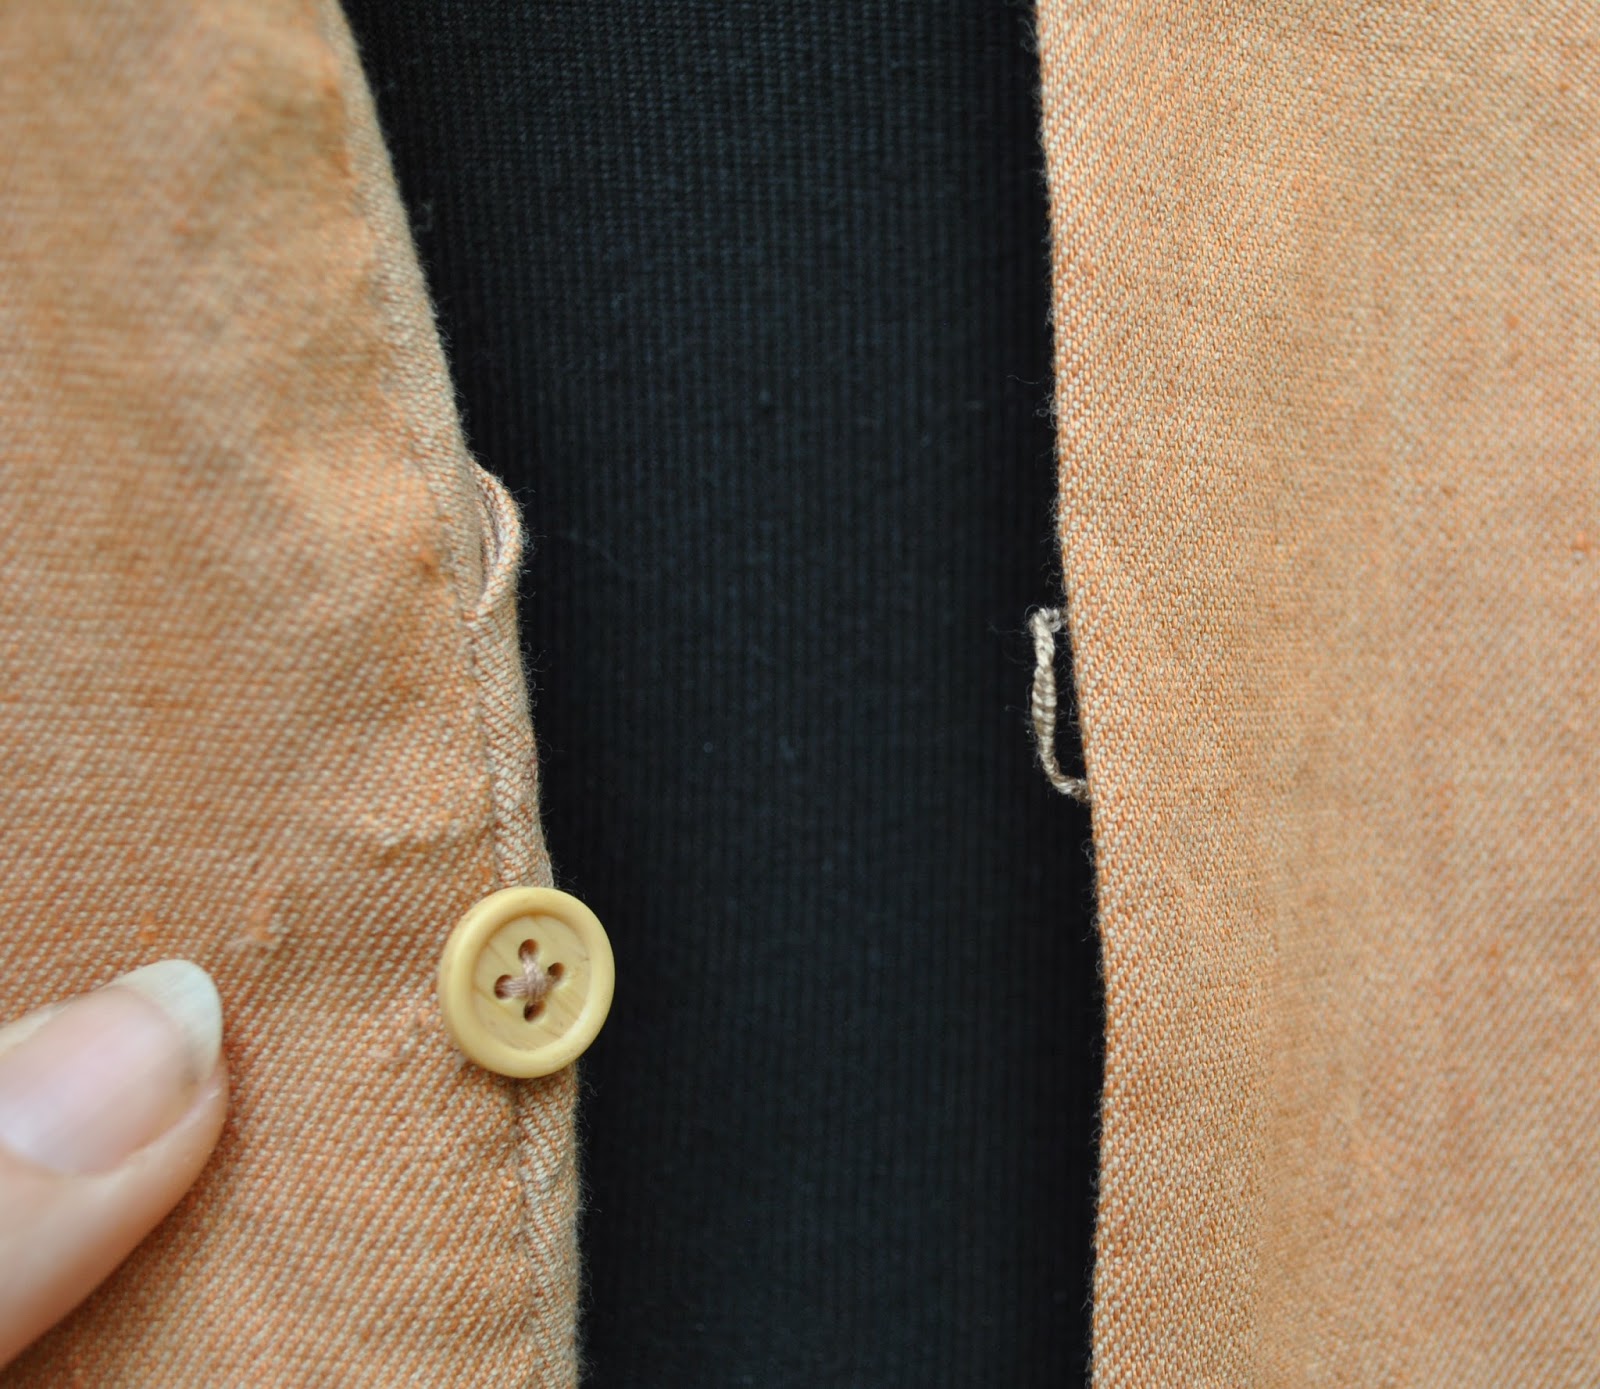
Closure is by a single button and a loop covered with tightly spaced blanket stitching, made from embroidery thread, plus three small brass press-studs.

Details:
Jacket; Alexander McQueen via showStudio, lightweight apricot cotton denim
Tshirt (not seen); self-drafted, white cotton, details here
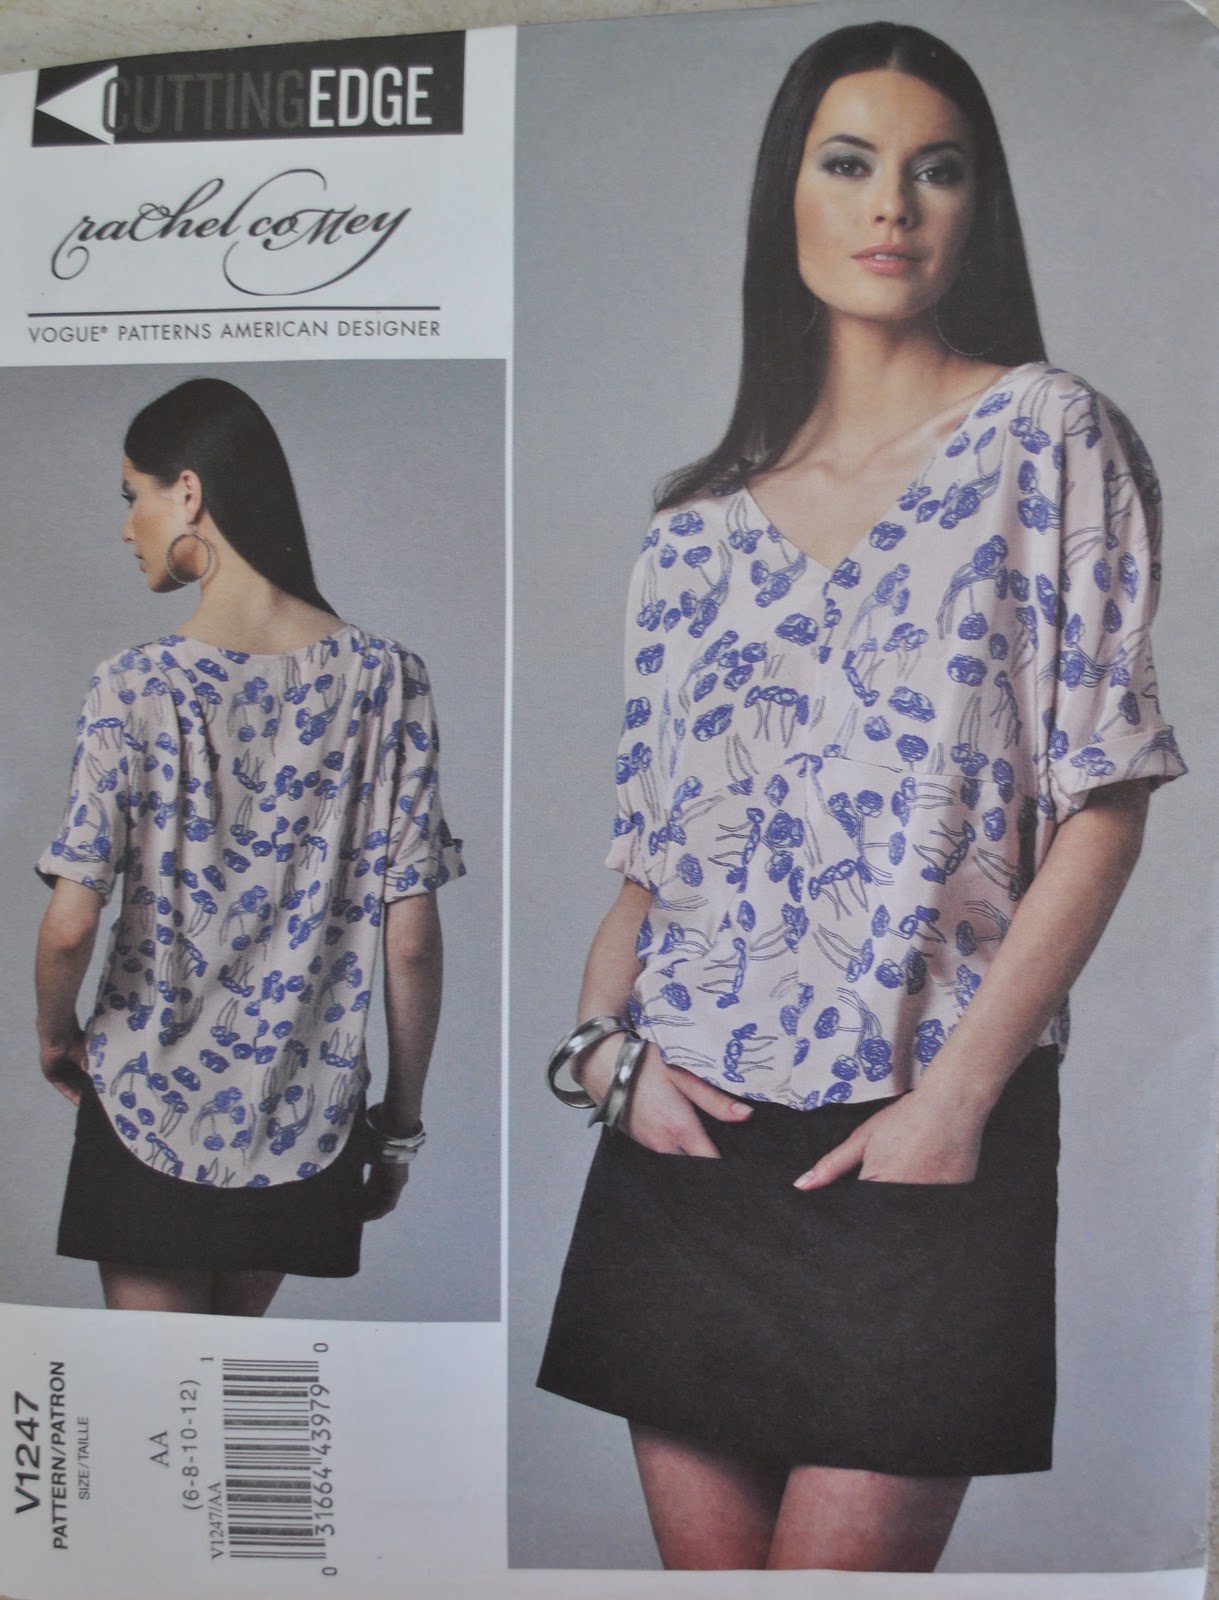
Skirt; Vogue 1247, purple denim dyed brown, details and my review of this pattern here, and see this skirt styled in 6 different ways here
Tights; self-drafted, wool merino, details here
Boots; Andrea and Joen, from the now re-branded Uggies in Dunsborough

pinterestmail

the paper doll project

(I’ve pledged to wear only clothes handmade by me this year and to sketch my daily outfits in my Fashionary.  I’m calling this the paper doll project)

4th-9th July
from left:
mustard dress, f-leather jacket, black tights, hand-knit socks
mossy green top, ivory curtaining skirt, paprika tights, cream hand-knitted scarf, hand-knit socks
strawberry jeans, white Tshirt, lt grey hoodie, hand-knit socks
leopard print Tshirt, little grey skirt, spiral leggings, hand-knit socks, army jacket
army jacket, grey thermal, black Tshirt, navy corduroy skirt, beige scrumpled leggings, hand-knit socks
white Tshirt, black corduroy jeans, peppercorn cardigan, hand-knit socks

10th-15th July
from left:
panelled corduroy dress, black wool tights, grey wool coat
leopard print top, Pattern Magic gathered hole dress, paprika tights, hand-knit socks, army jacket
black Tshirt, chocolate cardigan, sludgy little skirt, swirly leggings, hand-knit socks
emerald corduroy skirt, grey top, grey wool coat, black wool tights
white shirt, little lt grey skirt, peppercorn cardigan, beige scrumply leggings, hand-knit socks
sew bossy dress, chocolate cardigan, denim-look tights

16th-20th July
from left:
raincoat!, navy corduroy skirt, white Tshirt, red hoodie, paprika tights, hand-knit socks
crochet Granny squares skirtarmy jacketblack wool Tshirt, black wool tights, hand-knit socks
grey LS thermal, grey/black Tshirt, purple jeans, army jacket, hand-knit socks
emerald corduroy skirt, calico cardigan, green PM top, grey/black striped Tshirt, hand-knit socks
petrol corduroy skirt, paprika tights, red hoodie, raspberry scarf, black Tshirt, hand-knit socks
Servalan dress, grey wool coat

Brrr! it has been so cold lately!! and I have gleefully re-discovered my army jacket and been wearing it a whole bunch of times…  O how I love that thing!  It’s fabulous how I can slip it on over a little Tshirt or short-sleeved dress and it instantly renders any little summery thing winter-appropriate.  Big love for thick winter parkas.  And it has even been cold enough to get out that Granny squares skirt again, saving it from white elephant-dom ðŸ˜‰
We went to our sci fi do on Saturday night, and Servalan got out and about again and had intergalactic geeky fun… her first outing was to Supanova with future grrrl a few weeks ago.  This time Servalan let her hair down and boogied like a boss.  You know a party is running hot when the smoke detectors go off and the fire engine shows up!  Chewbacca hanging off of a fire truck is not a sight you see every day.

A few asked about Craig’s outfit… well I was all set and quite keen to make him something and then he decided to go as Neo.  Well do you know how much it costs to make a full-length leather coat, even a fake leather coat.  No? well twice as much as to hire it, that’s how much, and yup! I checked out the offerings and did the sums to find that out, and was just like, oh man, really?!?

 Neo; source

Plus it’s important to be able to admit when a sewing project is going to be masochistically difficult and have a very small fun factor, yes?  
So he hired one.   And looked tres cool…

pinterestmail
Switch to mobile version
↓