
 Hello!
For ages I’ve wanted to replace my old beloved khaki ripstop army-style jacket… I LOVED that thing and even did a 6 different ways post on it once. At some point I decided I’d made the sleeves just a smidgeon too short so with some sadness passed it on to Cassie. Who loves it equally, and wears it often… and I found myself pining for it all over again whenever I saw her wearing it!
Finally I’ve got around to making another one for ME!
 I just adore jackets with tonnes of hardware and detailing, like zips and lots of different bits and bobs and interesting pockets. So set about planning for this one to be chockablock with loads of that sort of thing. I considered using the same Burda pattern I used for the previous one, but I had to make lots of additions/adjustments to that in order to make it the complex, feature-laden army-style jacket that I wanted, which is fine! but since making that one, lots of great patterns have popped up with all those features already incorporated into the pattern. Eventually I settled upon the Tosti utility coat pattern by Yuki of Waffle Patterns, it had the detachable hood, the belt, tabs, the front zip placket for a separating zip, multitudes of pockets, in fact: everything I wanted. I was really attracted to the variety of different pockets it had and was pretty determined to use each and every one of them in my jacket. There are six different types of pockets! an inner breast pocket, a sleeve pocket, two options for breast pockets and two options for hip pockets, and I used ’em all. Cassie thought I was loopy putting four different pockets on the front of the jacket, but I stubbornly ploughed ahead because I love that mishmash look… I know you’re not supposed to do ALL of them with the pattern, but I just wanted it!
Beware; pocket overload approaching…
Breast pockets:(L) inner welt pocket with flap; and (R) inner pocket with exposed zip closure


Hip pockets; (L) bellows pocket with patch flap; and (R) patch pocket with exposed zip closure


(left) patched sleeve pocket with exposed zip closure; and (right) inner breast pocket with double welt


The fabrics: the khaki cotton ripstop was from some online fabric store in the US; and I can’t remember its name, sorry! My neighbour Meggipeg and I went in together with a joint order. The fabric was priced reasonably, but postage was horrendously and shockingly expensive… the trap!!… but at least I got the ripstop so that’s ok. One of the saddest things ever is when Spotlight ceased stocking this stuff *sob*
The plaid cotton flannelette I used for lining and all zips were from Spotlight, and I had to visit two stores to find them all! and the copper press studs were from both KnitWit and Spotlight Yes, I had to visit a coupla stores to get enough of those too! The belt buckle was harvested from an old belt. Originally, I had decided I would put thin black fleece interlining in my jacket for some warmth, but once I had the lining made up I realised I wouldn’t need it. The jacket is pretty warm enough already, and truthfully, if it was any warmer it actually wouldn’t be all that useful in our climate.

 There is tonnes of topstitching all over, so satisfied that part of me that adores precision sewing. I’m that weirdo that LOVES topstitching! and am pretty much totally and blissfully happy when I’m hunched over the machine, chugging along; churning out lines upon lines of precise, neatly and evenly spaced, stitching. The wonderful thing about this ripstop is that the little squares in the weave of the fabric make precision stitching and lining up pieces to be perfectly square very very easy.
(L) belt loop; (R) shoulder tab. Press studs from kits bought in KnitWit and Spotlight


(L) collar with press studs for hood, (R) wrist tabs


No one will ever see or notice this but me, but the plaid lining matches up all the way around #patternmatchingfreak
The lining appears a bit “blowsy” in this picture, due extra ease in the lining… many of the lining/shell seams have you make folds/pleats in the lining when stitching the lining to the shell, to account for the extra length.

I’d cut a plaid lining for the hood too but decided upon a self-lined hood. Less jarring in appearance when the hood is worn down. Which, let’s face it, it most usually is!
Opening zip, and placket with press studs; (below) self-lined hood


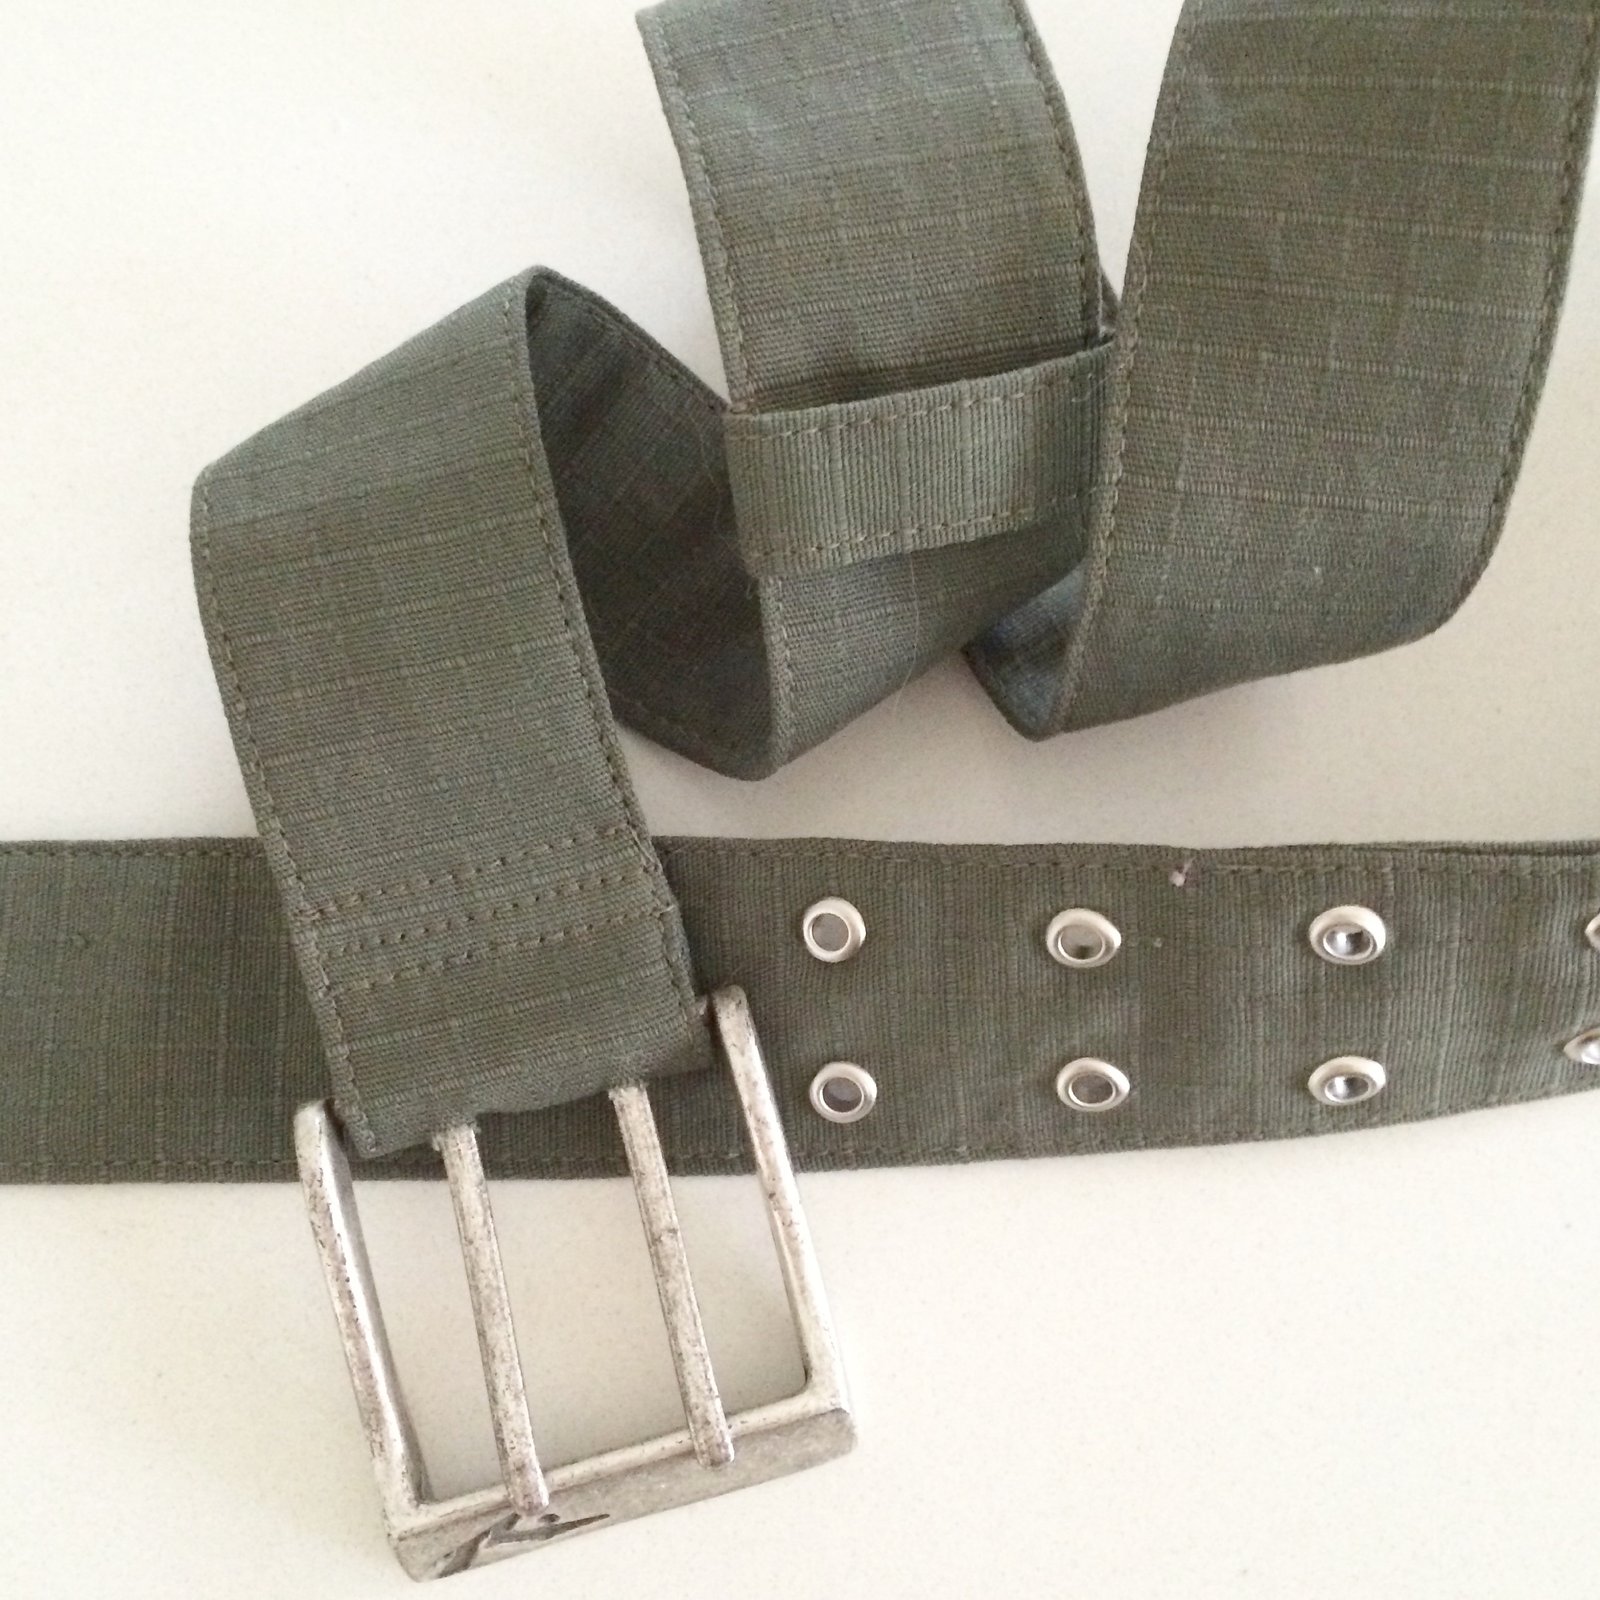
I also made the belt, using a buckle harvested from off an old belt of Tim’s, and eyelets from a kit from Spotlight
I posted lots of these progress pictures on instagram also, so I’m sorry for the doubling up. But; you know instagram; it’s fabulous and I love it, but stuff gets “lost” in no time there since it’s not that easy going back to see things you posted a year ago…so I’m reproducing all those pictures here. I know a lot of us seamsters have migrated pretty solidly to instagram now; in fact it seems fewer and fewer people are reading blogs and it could be that blogging like this is dead or at least heading towards comatose. I mean, let’s be honest, how many people actually click over when you see the words “on the blog now, link in profile”? Precious few… and that’s just the way of things, times change, people now are of the moment and often are only interested in one quick visual; and that’s all absolutely fine and ok and completely understandable. I think though that I will still keep on with writing this blog anyway, just for my own benefit. I want to keep going for the same reasons I started it; as a record of all my sewing projects, because I can search for and look up older things up here, and you can’t really do that over on instagram all that easily.
Hmmm, well that was a bit of a diversion there, sorry! I’m writing a review of this pattern, but no point in reading it really. It’s pretty glowing, because I absolutely LOVE this pattern; I thoroughly enjoyed making my jacket, and am totally enamoured of the final product. Fair dinkum; I’m going to wear this to rags.

Fun fact; after a week of FREEZING cold weather.. today, the day after I finished this jacket and wanted to wear it for the first time; of course today was then an unseasonably warm day. Naturally!! But you know what? I wore it anyway, mwahahaha. Unco-operative weather! pfffft! see what I care! I wore it, and I roasted. And I loved every minute of it!!
Details:
Jacket; the Tosti utility jacket by Waffle patterns, khaki cotton ripstop with plaid, brushed cotton lining
striped Tshirt; self drafted, details here
Skirt; Vogue 1247, cotton corduroy, originally yellow and dyed brown, details here
Tights, self-drafted, black stretch, details here
Shoes; made by me, details here


 make another one!! Doh!! Clearly there’s something terribly wrong with me… #madvogue1247addict

 aaaaaand, my week of exclusively wearing Vogue 1247 skirts, in a nutshell…!


 Firstly, two sage green/pale coffee, checked tweed skirts. I inherited this beautiful quality piece of wool tweed from my grandmother’s stash after she passed away. Although I earmarked it straight away as two skirts for Cassie and myself I just hadn’t got around to it and have sat on it all this time. It was one of those fabrics I couldn’t bring myself to cut into… you know, inherited from Granny, plus exceptionally good quality, equals inevitable thoughts of sewing tragedy followed by eternal self-damnation…. but I’m making myself get over that nonsense nowadays. Make it! Enjoy it! Live dangerously! So, finally… it helps too that I think Cassie has now grown into fabric of this calibre 😉 not that she didn’t deserve high quality fabrics before, but you know what I mean! it’s very much a grown-up fabric and makes a very smart little work skirt for her now that she has a serious and professional career. The fabric really is beautiful stuff… fine and evenly woven, and there are flecks of all sorts of colours in with the sage green/coffee check… blue, red and gold, caramel brown, forest green, and a hint of purple and black. It has no identifier on it but it wouldn’t surprise me if it was a fully English tweed. My grandmother was very much into that sort of thing 🙂


 sie moved out of home she left this fabric behind and I almost started to factor it into my own plans mwahahahahaha… but of course she hadn’t forgotten it, o no! The reason she had deviously left it behind was so that I could make something for her with it! HA! She chose
 Details:
 what’s with the ballet pose? I have no idea. Anyway… I have a

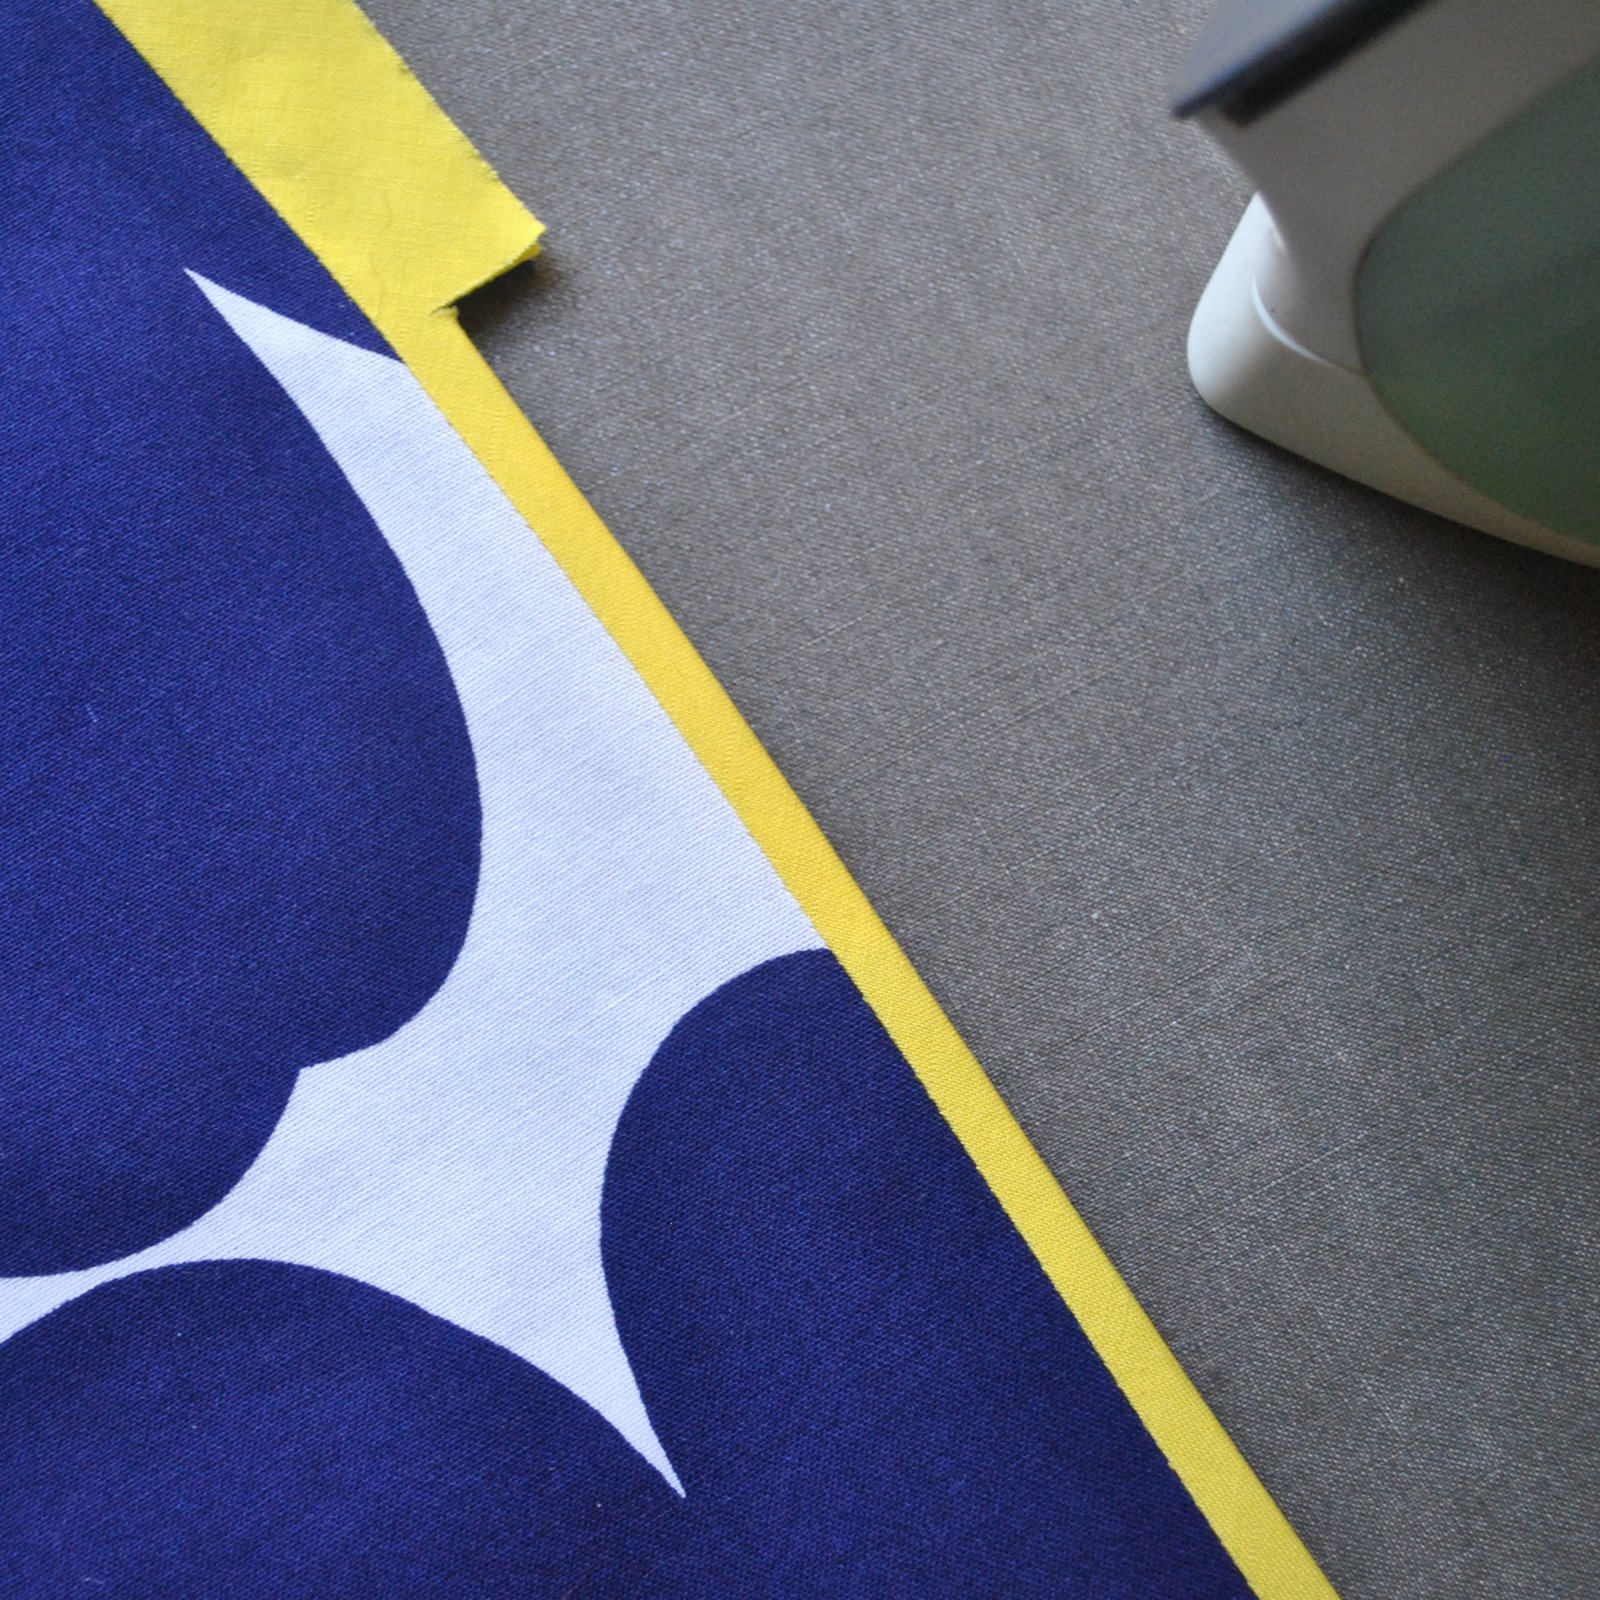
 I’ve kept the selvedge from off the fabric, and have sewn these inside one of the pockets! just because I love information like this… namely: this design is by prominent Finnish designer Maija Isola, and was created in 1964! out by a year but definitely still of my era, haha. “Pieni unikko” translates literally to “little poppy” I’m not sure what KI 2009 means yet, but I’m investigating…. Also, how cool is it that the laundering info is printed on the selvedge?! so classy and very considerate really, it’s been along long time since I’ve seen such consideration in a fabric. That information’s the kind of thing I usually forget the very minute I swan out of the shop with my new fabric tucked under my wing.


 The loose front pieces also allows you to have these big loose comfortable pockets that you can shove your hands in, while still maintaing quite a slimline dress overall. As a result, the pattern uses very little fabric. I managed to squeeze my pattern pieces out of 1.5m, which is not too bad, not too bad at all, I think *preens oneself on an exceptionally economic layout* I had the merest of scraps left after cutting out my pieces, scraps, I tell you! The pattern has you line the dress, and after a bit of um-ing and aah-ing, I decided to not. Reason? summers here are very hot and I think the breeziness of this lovely cotton fabric is going to be perfect just as it is.


 Press the pocket lining out, then turn it under the front piece and press, forming the 1/4″ (6mm) wide bound edge of the pocket.


 from the right side (with some irrelevant (white) basting along the side edge… not really necessary for this method)


 I’ve made a new dress using a bunch of my kids’ old jeans that I have
  been saving for this very purpose… and please note; yes, I am wearing
 Materials; obviously, all blue denim jeans. I used three pairs of children’s jeans, one pair of child’s long shorts and one pair of adult jeans. The adult jeans turned out to be necessary when I realised that the full-length panels at the back would look pretty terrible if pieced at the waist; it’s a very much piecemeal kind of a design anyway, and to have that nice long smooth length of fabric at the back is just a nice visual anchor in amongst all that busy patchworking, in my opinion. I decided it would be best to retain it; fortunately I had one pair of Craig’s old jeans in my refashioning bag and could cut the long back pieces from those.
 My vision for this dress has always been to have lots of the existing jeans’ details retained in it, like the pockets with their decorative top-stitching, the coin pockets and belt loops and so forth; HOWEVER when it came down to it I retained very little of all that! The design was just so… busy; I ended up removing a lot of the little details I was going to put in. There’s still plenty of the jeans bits and pieces left in, I reckon just the right amount to keep that definite “jeans flavour” to it. There are a few original topstitched seams here and there, and the portion of a pocket left on the bodice. I also added tonnes of new topstitching in terracotta upholstery thread, in fact every seam is topstitched down in some cases doubly so.
 Something I’ve managed to forget to blog about each time I’ve written about this dress… like all Vogue patterns, for a fitted design it’s a little blouse-y in the boob-al region for my figure; however the princess seamed bodice makes this a very easy fix. I simply pin and stitch to shave a bit off the inner curve of the central bodice piece (above), and this solves the problem for me. A very very easy small bust adjustment, and one I usually end up using for pretty much every fitted Vogue bodice with princess-seaming. I don’t have the same issues with Burda, but always with Vogue. I guess their “blocks” are a little different.

 One pair of jeans, the very pale blue pair, was practically threadbare in places, but I still really wanted to have that pale blue as part of the lovely indigo-y mix… these pieces I reinforced with lightweight iron-on interfacing to the back to stabilise and strengthen these areas (below). Don’t want my new dress ripping in its first wear now, do I?!


 Hello! just a few quick items for today… I’ve actually been sewing a few things for other people! Scary stuff, huh. I mean, it’s one thing that I can see all my own flaws in things I make for myself, and on a daily basis! but that’s kinda the rough with the smooth, you accept that because it’s all your own doing, all your own fault and you can tell yourself you’re “learning” and going to do better next time haha…. but to subject another person to those flaws … well that’s really exposing yourself. ok, you know what I mean…
 Sure, they’re all near identical, but still. What’s not to love about that.
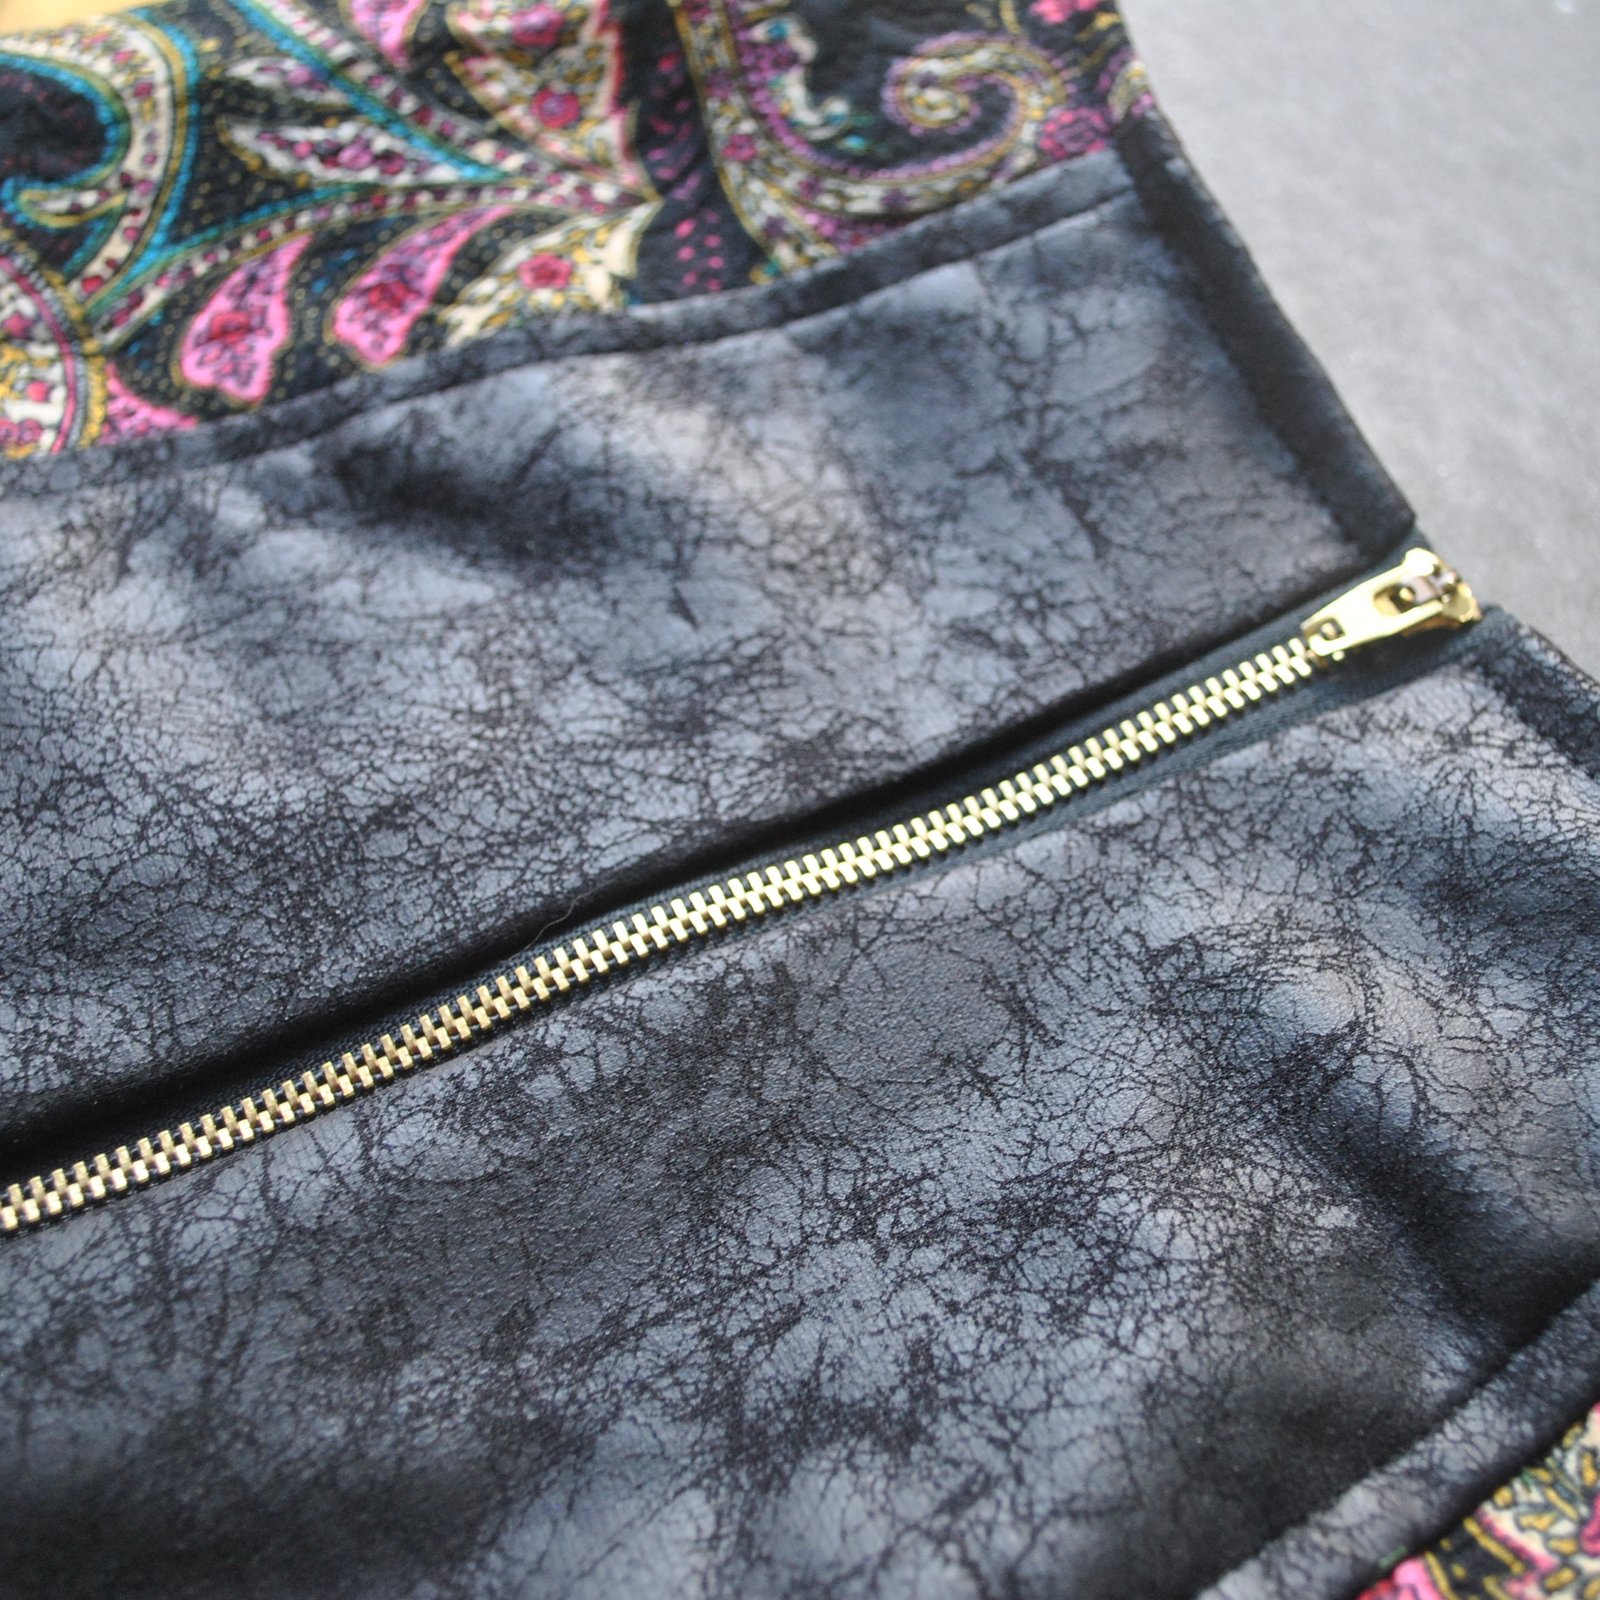 This is the first time I’ve put an exposed zip in a skirt with lining, and wasn’t totally sure how to do it; I put the zip in similarly to how you’d do a welt pocket, and then hand-stitched the lining to the zip tape on the inside. I cut the bottom edge of the pleather clean and straight with my rotary cutter and left it unhemmed; and hemmed the paisley portions in a deep 4cm hem by hand. The skirt is fully lined with raspberry polyacetate, itself a leftover from

 Item number two; a hoodie for my son’s girlfriend. I had made

 So; like, we were going to this 80’s themed party, and, like, EVERYONE in this particular group always dresses up to the max! Not dressing the part would be heinous! and of course I had to be fully self-made, ‘cos of my challenge. Also, like, I had to be warm. It’s like the middle of flipping’ winter! Like, duh!


