
 So, a new year, a new Refashioners challenge…last year we did jeans, this time the thing to be updated is A SUIT.
Most disappointingly, I could find no one in my family or circle of friends to donate a suit to the cause. 😉 Well of course not… let’s see; these things are a) expensive and b) made to last a lifetime. It takes a lot for a man to give up his suit. And let’s not forget to mention the biggie; c) suits are usually beautifully tailored things and the very thought of giving one to somebody who is just going to take the scissors to it is a pretty big ask. I know I wouldn’t give one up either!!
before…

So I went along to the the opshop and bought one. It was $22. Even then, I still felt pretty bad about chopping it up, and found myself mentally apologising to the unknown tailor the whole time. My suit is a Sax Altman: Sax Altman has been making high quality, traditionally tailored suits in Australia using fine Australian wool since 1977.


Just so you know, this is a pretty good innings by Australian standards… It’s actually pretty difficult to find suits in opshops here, men hang onto them forever. Lots of orphaned sports jackets and some suit pants, but not many matching sets. I initially honed in on this suit just because it wasn’t black! it is a deep charcoal-y/chocolate brown with subtle blue and grey pinstripes.
the fabric is pretty beautiful…

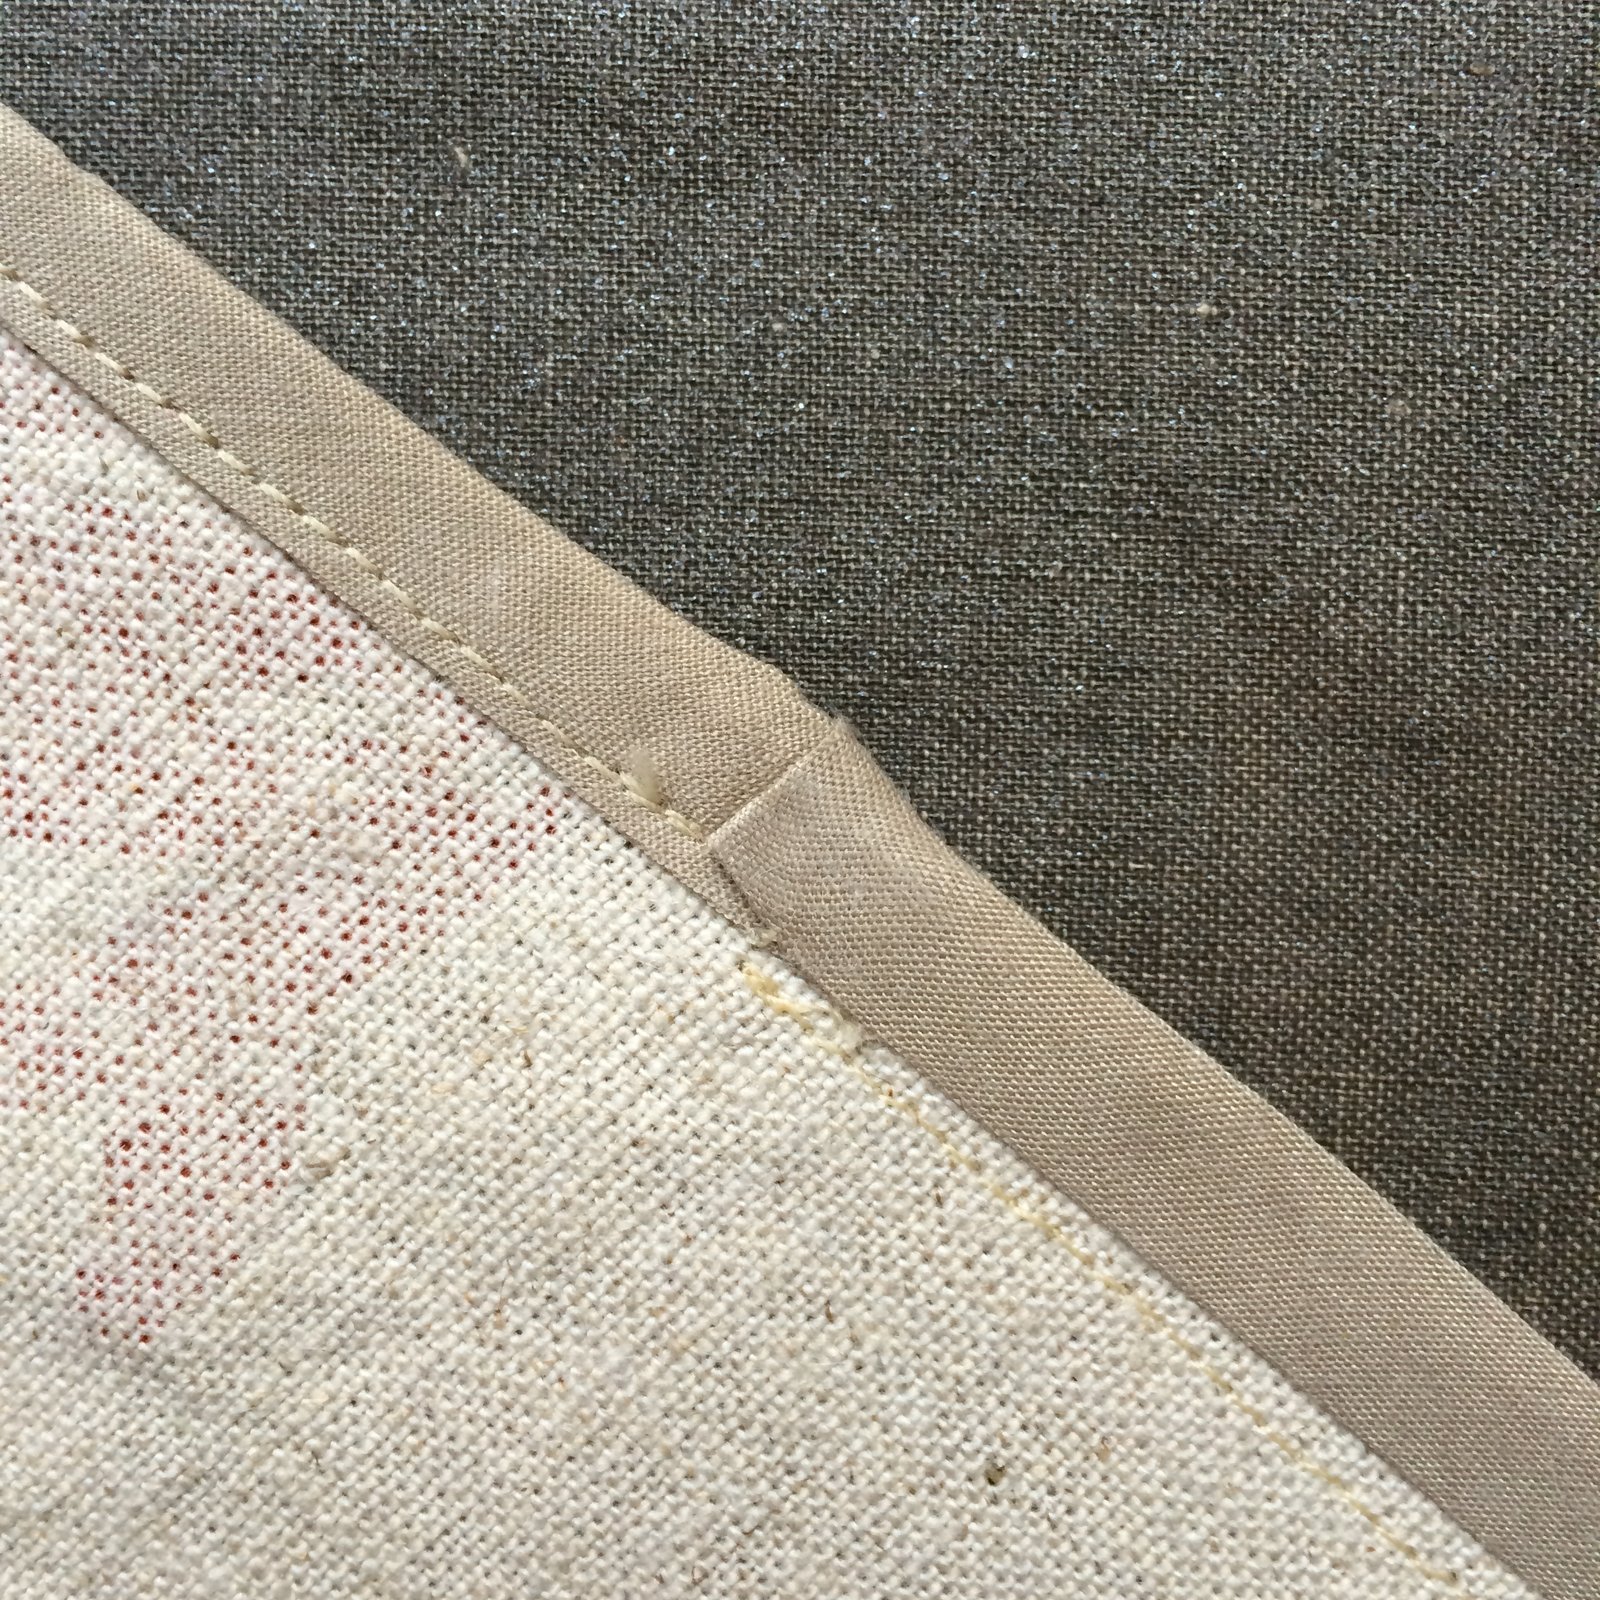
Once I got it home and had got a good look at it I could appreciate its quality; it’s beautifully made and let me tell you it was pretty darn hard to make that first snip… I’d decided already that I would make something that would honour the original tailoring, and keep as much of the important bits as I could, this one had it all; the interlined padded fronts with hand-padstitching, horsehair interlining, bias cut strips of organza everywhere on the inside to stabilise various areas, taped fronts, and tonnes of inner tape everywhere; sometimes bias cut organza, sometimes a sturdy cotton, sometimes strips cut from the selvedge… these were variously used as stay tape in different spots, hidden inside. It was all pretty heavily and exquisitely engineered and one thing’s for sure; I could never produce something like this myself!!

What I did: I wanted for the jacket to be quite close-fitted to my shape, so I opened up the lining at the lower back hem and took in the suit jacket through ALL the seams here… the centre back seam, the back princess seams and the side seams, at the same time, I took in the jacket lining through the seams inside too.. I didn’t touch the front darted seams because they ran into the front pockets and altering them would have ruined the integrity of the pockets. Oh, I’m pretty pleased that I managed to keep EVERY SINGLE POCKET of the original suit… I really didn’t want to sacrifice any, I thought if I absolutely had to I would… but I managed to keep them all. THE SANCTITY OF THE ALMIGHTY POCKET MUST BE UPHELD!!! (kidding)

I removed the sleeves and trimmed several inches off the shoulders, and cut off the lower half of the legs to use for new kimono sleeves, binding the lower armhole with bias-cut wool harvested from a sleeve.

The leg hemline had a really nicely turned up cuff, which I liked, and kept for the new sleeve hem. I love the new bracelet-length sleeves! if I did have to nit-pick, in an ideal world I think I would have preferred a wider sleeve but you know refashioning, sometimes you just gotta make it work with what you have!

I turned in and stitched a new front opening line for the jacket, making it a long, diagonal straight front coming to a point with a single button closure (above). I cut so as to remove the lower two buttonholes, keeping the original upper button hole and repositioning the upper button over a bit to give the front more of a “wrapped” kimono-inspired look.
 That’s the jacket!!
The new skirt nearly drove me mad…. men and women are not built the same (duh); we women want width for our hips and hemline, and a narrow waistline… men’s clothes are made to be the total opposite. And also, the CUT! because of course the legs and the fly of men’s suit pants are cut differently against the grainline to how a skirt is cut, this makes it extremely difficult to transform them into a skirt! Fortunately the trousers were big enough I had a bit of extra width to play with here…. first of all, I took off the waistband and unpicked nearly everything except for the side seams where the side hip pockets were attached.

I removed the old zip which had gotten a little rickety over the years, and installed a new black dress zip. This entailed truing up the grain lines at centre front and creating a completely new fly and fly shield.
you can just see at the top; a strip of organza that was used to stabilise the waistline… I kept as much of these superb “hidden” structural details as I could, too

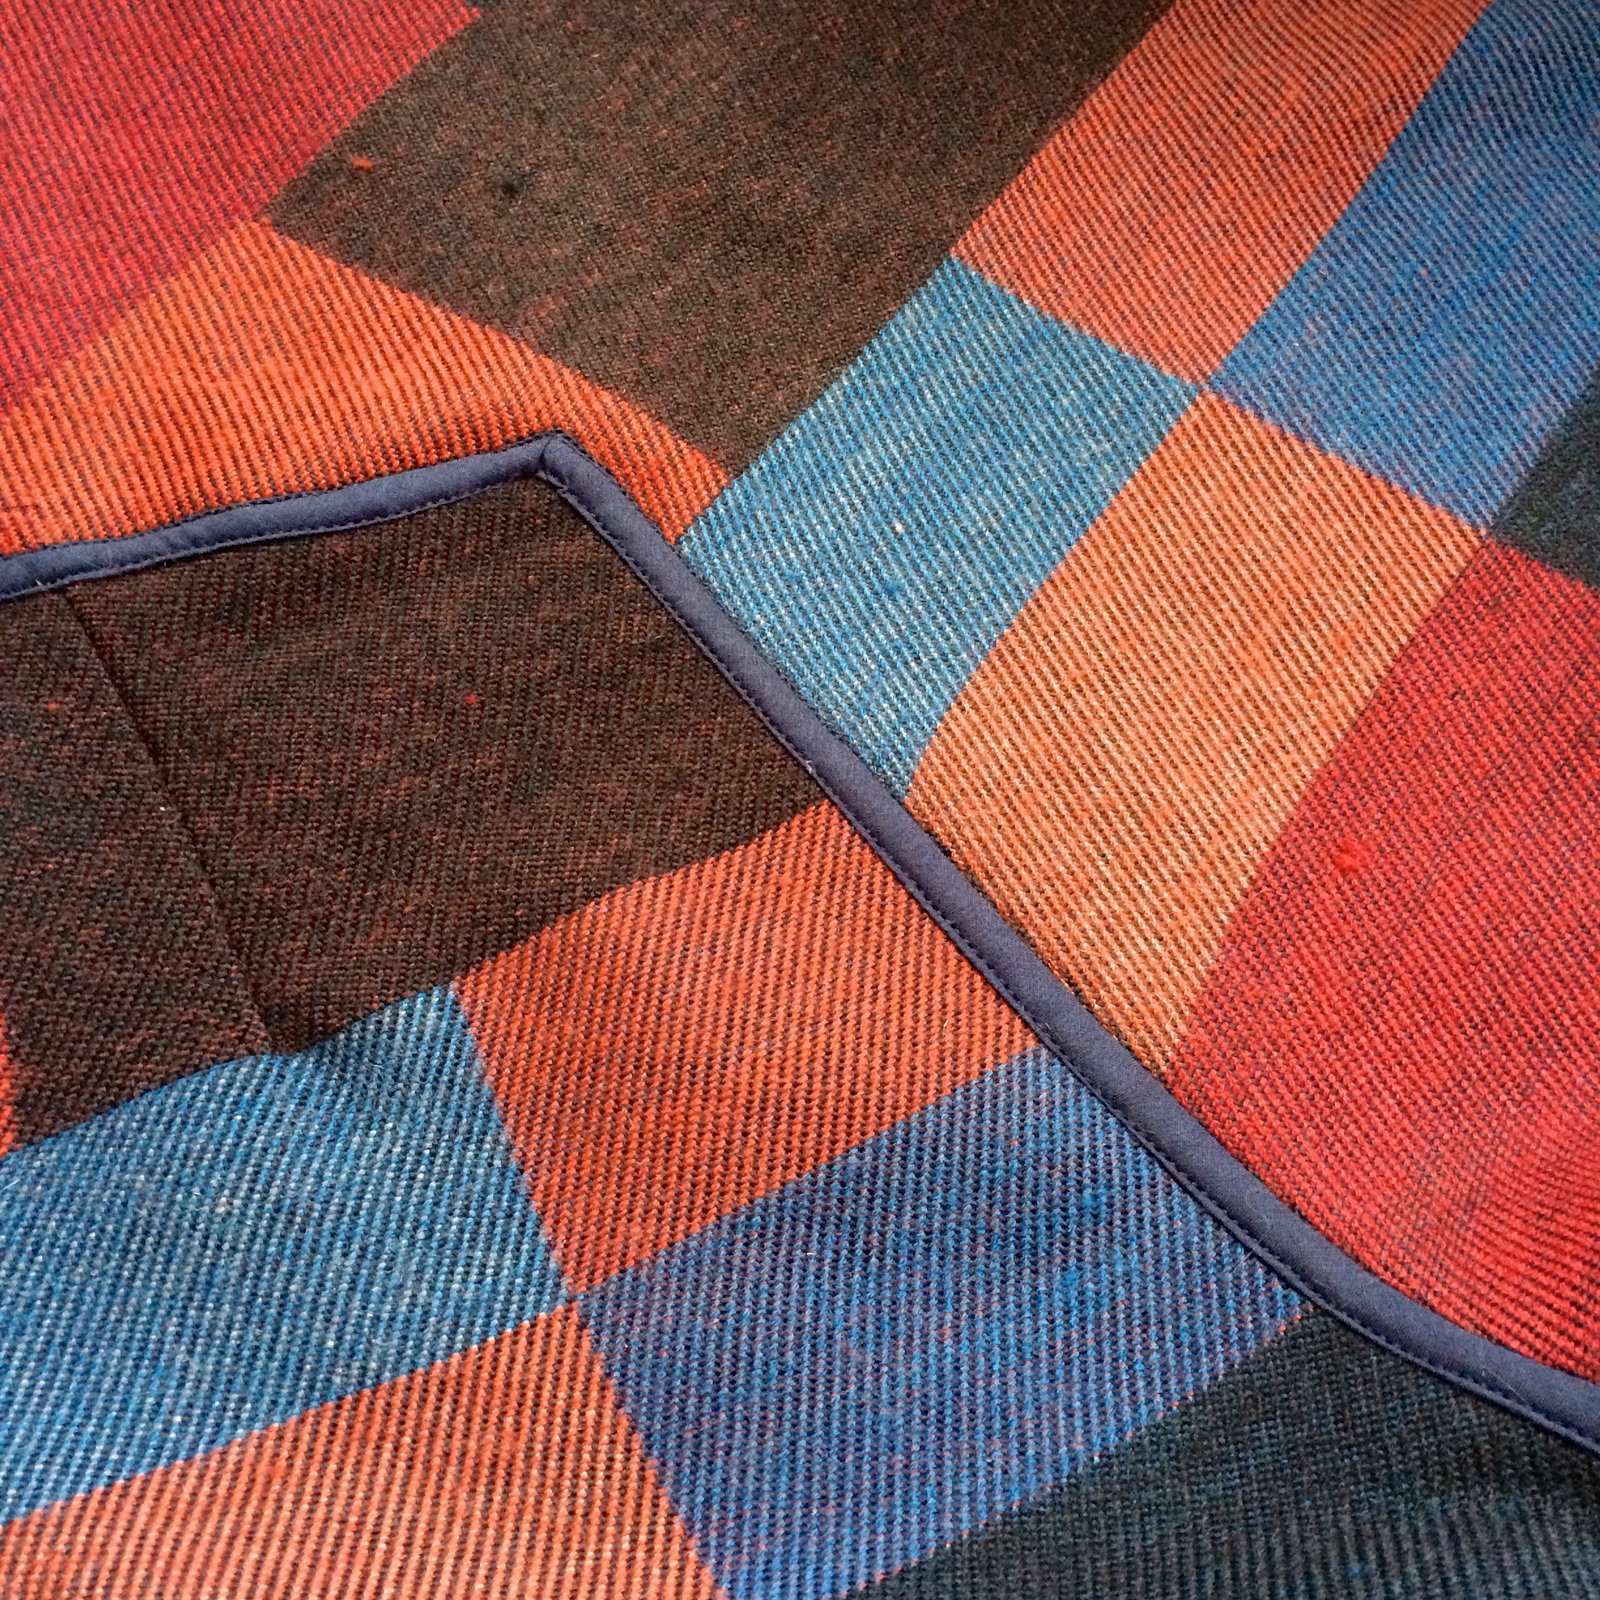
I wanted a flat-fronted look to the skirt, so made wide long darts at the front waistline to pull in the extra width there, these I topstitched down on the outside, continuing the topstitching down seamlessly to become stitched pin-tucks down the full length of the skirt front. This is exactly where the pressed line was for the trousers.

The skirt front is straight, but those back trouser legs are cut so as to curve IN, just where you don’t want them to when cutting a skirt, so I’d cut a triangular godet from the jacket sleeves, taking in the sleeve cuff buttons/buttonholes and the original sleeve hem. I was a little disappointed that these were fake button-cuffs and can’t be opened… but they still look pretty nice you know, you can’t win ’em all 😉

I inserted the godets in the lower skirt side seams along with a long inverted pleat so the skirt back kicks out over the godet. I actually love this little detail.

I don’t even want to say how many pinnings and bastings it took me to get this silhouette that I wanted; a flatt-ish skirt front and a slightly flippy skirt back. LOTS

Finishing up… shortened the waistband, reinstalled it stitched the belt tabs down again… oh and still managed to maintain that little coin pocket that sits right beneath the waistband… pretty proud of myself that I finagled that, hehe: and BAM! finally done!! A fresh new womanly suit made from an old discarded men’s suit, albeit a rather nice one. I’m very happy with the long-line jacket with slightly kimono-y vibes and a short, structured-yet-flirty skirt. I feel like it’s very very me 🙂

And I still had a few leftovers from a sleeve… so I made a bandanna for Clara, and a new little zipped pouch to hold her poo-bags. *


*it’s the law in Australia that if you are walking a dog, you MUST be carrying little placky bags so you can pick up after your dog, there’s a hefty fine if you’re caught without them! I just used to tie them on to Sienna’s lead and then for blog pictures would try to hide them because they’re so ugly… or take her off her lead for a bit… you can see them in an earlier picture here… anyway I don’t know why I didn’t make a little bag like this aaaages ago!

I used an old zip and attached a jump ring and a little swivel clip so it can clip onto her lead. The swivel clip was a leftover from when I made my winter boots… they’re not terribly robust so I plan to replace it with a mini carabina when I can get hold of one.

The only new things I used for this refashion were: thread, the zip in the skirt, and the zip, jump ring and swivel clip in Clara’s bag. Not too bad!
Details:
Jacket and skirt; my own design, finagled from an old mens’ trouser suit
Bodysuit; the Nettie by Closet Case patterns, from paprika stretchy stuff, details here
Shoes: Misano, from Labels boutique

SaveSaveSaveSave
SaveSave
SaveSave
SaveSave
SaveSave
SaveSave
SaveSave
SaveSave
SaveSave


 Hello!


 Details:

 Originally I bought this lovely magnolia print fabric to make something else… but ended up making this random frock instead. Spring was coming…and I really wanted something romantic and floral. I sorta couldn’t picture anything properly, there were false starts… then Mum, Cassie and I had planned another trip to Melbourne this year, to go to the Dior exhibition at the NGV and I became enamoured of something old-fashioned, feminine, of an easy-wearing, pfouffy skirt. So this is me, realising that. I feel a bit like an old-fashioned housemaid, like Cinders before the pumpkin, or an Arthur Rackham-illustrated Alice.


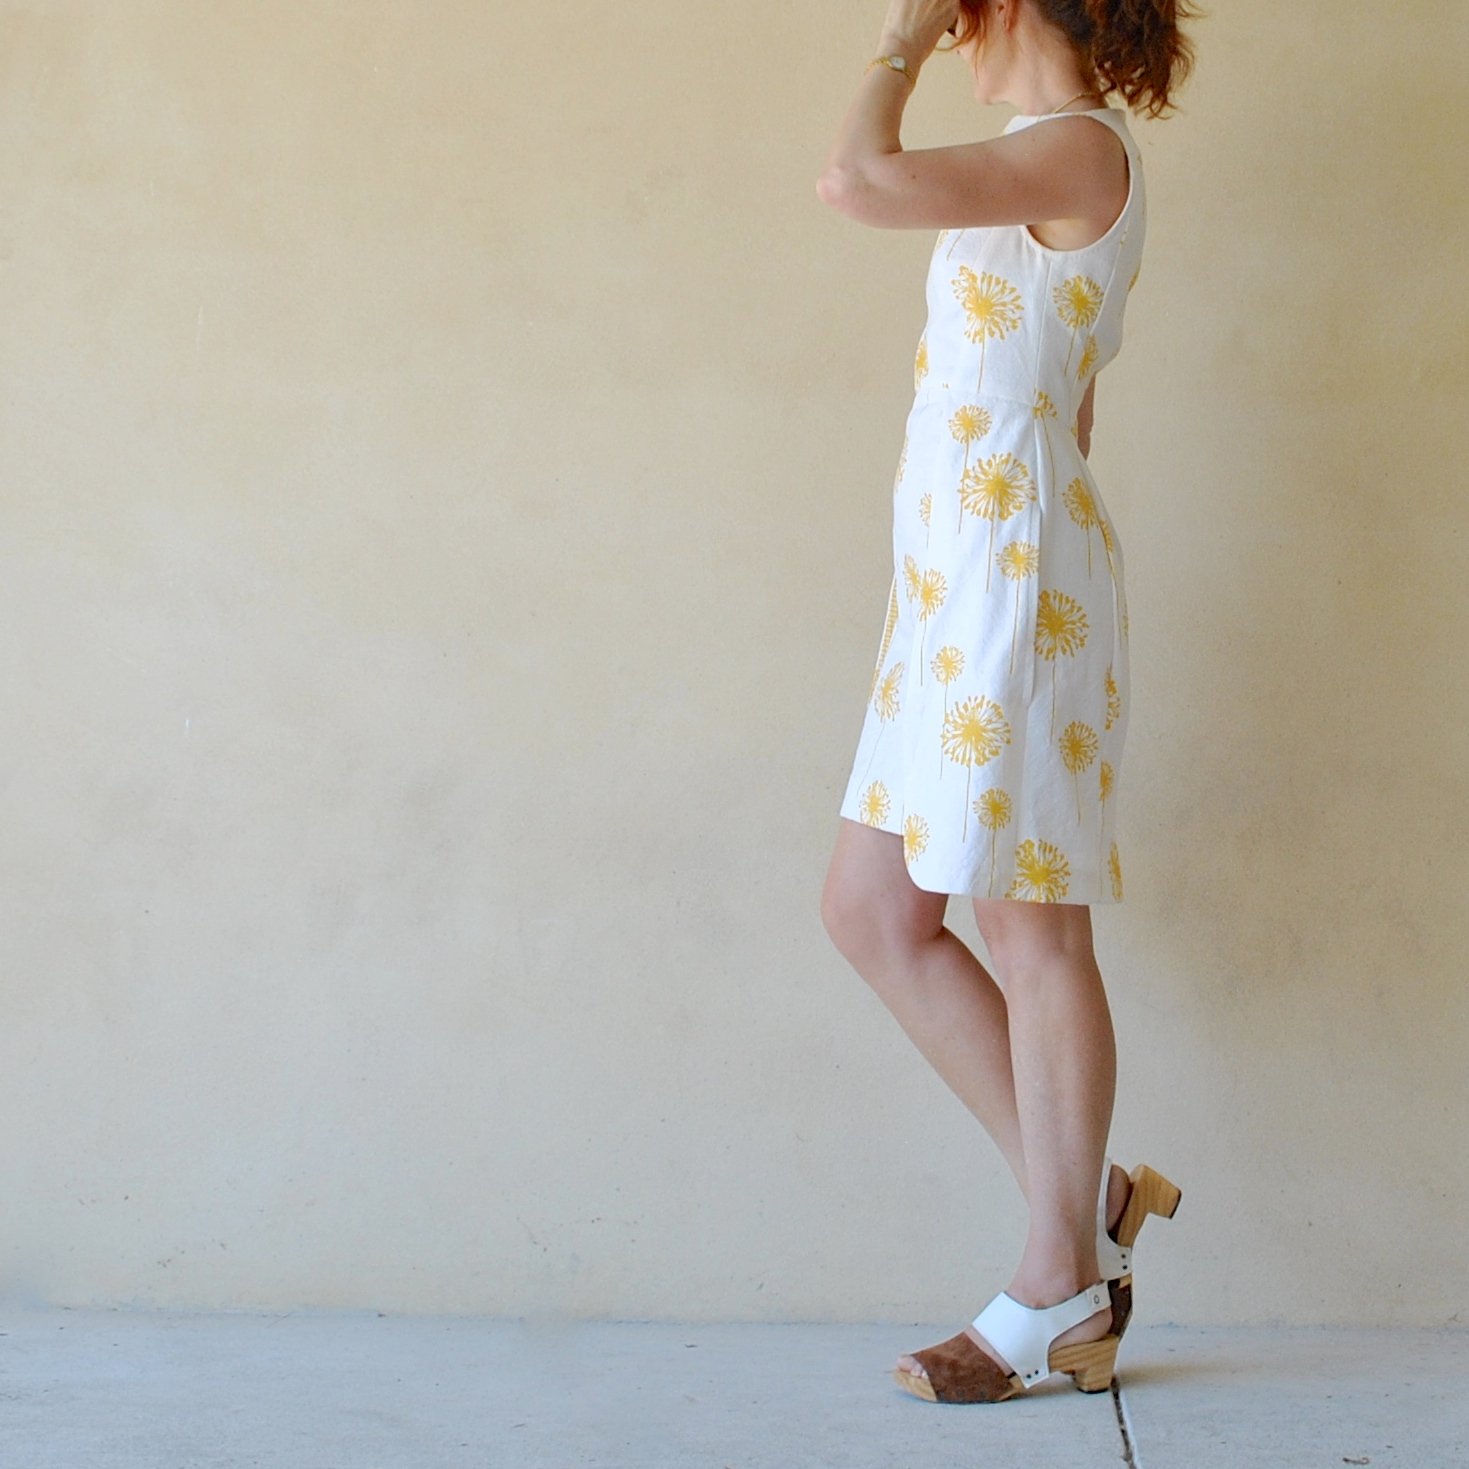
 I made a new skirt using a pretty special piece of fabric… there’s a little story behind it. It’s a handprinted organic cotton/hemp from


 New Inari tee, sort of.


 Bet you can’t guess where I am here… Yeah, I know, it’s a tough one. Some locations are just so obscure and far off the beaten track, but I do like to seek out these especially quiet and sleepy, tucked-away little spots to highlight here on ye olde blog… GO me.


 Voila! Jacket made the same way you’re supposed to, and using the forbidden fabric to boot! Ha!


