Tag Archives: Daily Outfit

cha-cha pink stooff

Hello!

Our recent holiday was a pretty multi-locationed one, covering a lot of ground and involving buses, trains, ferries, sea planes, also including a few long loooong waits in airports thanks to flights getting annoyingly delayed by fog, and two long looong ferry trips of a WHOLE day each.  And because I am the eternal optimist about Getting Stuff Done, even whilst away, I had tossed into my luggage some sock wool and needles, just in case.  And thank goodness I did ‘cos consequently I finished two new projects. As they say in Canada, O yaaa! #AirFistPunch

Item ONE! … or should that be items one and two?

A pair of sockeroonies… photographed against the majetic forests of Hanson Island in beautiful British Columbia, Canada…   I’m poking my feet outside the tent we camped in, on our absolutely wonderful canoeing trip…

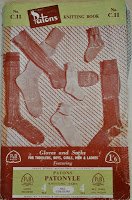
Yarn; Morris Empire Merino 4ply in col 449, delightfully called Cha-Cha Pink; and the small bit of Sheen Green colour way is leftover from my hand warmers.  I used my go to sock pattern, from a 1960’s Patons pamphlet that I’ve inherited from my grandmother.

also here in the stunningly beautiful houseboat we stayed in, on the Khutzamateen River.  I think I’d juuuust finished them here and popped them on for a photo opp immediately!

Item TWO! or should that be… items three and four?!

A pair of adorbs little hand warmers…  photographed against the majestic back alleyways of Vancouver in beautiful British Columbia, Canada.  Pose is thanks to a grapefruit mimosa and the influence of a group of hilarious Vancouver ladies with whom I spent an awesomely fun few hours… thanks so much to MelanieSueSveta, Barbara and Louisa for a fabulous morning!

from left: Sue, some random tourist, Louisa, Barbara, Sveta, and Melanie  and yes, those ARE indeed the aforementioned grapefruit mimosas, ahem…

this pic and the one below both courtesy of Melanie… thanks so much Melanie!!

me with my loupe sister, Melanie… we’re both wearing our magnifying glass “loupes” made by Melanie’s talented husband Osamu Kobayashi… I’m proud to say I was Osamu’s very first customer!  I wear my loupe every day and it’s absolutely brilliant for reading menus, labels in Spotlight or in the supermarket when I can’t be bothered hauling my spectacles out of my bag….BRILLIANT, I SAY

and I’m wearing my cha cha pink glovelets, natch! Right here they’re hot off the needles by about maybe an hour, tops !

Anyway… the deets, I’d taken two balls of the cha-cha pink and of course there was plenty of leftovers, and I thought there’s sure to be enough to do something… And fortunately there was plenty!

I just made them up as I went along, pretty simple; and I’ve written a little pattern which I am happy to share.  Please feel free to use, I just ask as always that if you do then please do credit me and link back to me here  🙂

Simple hand warmers:

Note: one size, fits most ladies

Materials:

approx  120m (135 yd) of 4ply (fingering weight) yarn… I used Morris Empire superwash merino 4ply wool  … this pattern uses only about two thirds of a 50g ball

set of 4-5 double pointed needles 2.5mm (US 1) or whatever gives the correct tension as stated below.

Tension (gauge): 31 st and 45 rows to 10cm

Cast on 60 st and distribute stitches evenly onto 3 needles, continue working in the round…
K2 P2, repeat for 10 rows/rounds
Switch to K stitch,continue knitting for a further 22 rows/rounds, turn
sl 1, P59 st… turn.
sl 1, K59 turn
Rep previous 2 rows for a following 20 rows, turn
sl 1, K59 then join work again in the round and continue knitting for a further 12 rows/rounds
Commence K2 P2 rib, continue for 35 rows/rounds.
Cast off loosely

Repeat second hand warmer the same way.

And I’m wearing them today too… wanna see how I “styled” them?  I know what you’re thinking… those things don’t go with her outfit AT ALL.  No, they don’t.  They really really don’t.  But I’m wearing them anyway, hehe. #SayNoToGoodTaste #GoodTasteIsEvil

Details, above:

Blouse; Sudley by Megan Nielsen patterns, in mustard silk crepe, details here
Skirt; Axel by Megan Nielsen paterns, in terracotta pleather, details here
Cardigan; Miette by Andi Satterlund, in Debbie Bliss Donegal luxury tweed in colour Gold, details here
Leggings; self-drafted, in over dyed cotton jersey, details here
Socks (not seen): knitted by me, details here
Boots; Roberto del Carlo, from Zomp shoes

Details, at top:

Tee; self-drafted in striped jersey knit
Skirt; Jade by Paprika patterns, in charcoal cotton jersey
Tights; self-drafted, in black stretch, details here
Shoes; Merrell

SaveSave

SaveSaveSaveSave

SaveSave

SaveSave

SaveSave

SaveSave

SaveSave

SaveSaveSaveSaveSaveSave

SaveSave

pinterestmail

boatin’, campin’, bikin’ and hikin’ stoof

We’ve just come back from a holiday in Alaska, USA and British Columbia, Canada; had the most AWESOME-est time of course! but more about that later…  I made a few bits and pieces to fill in some gaps in the “mucking about in the great, but wet n’dirty, outdoors” areas of my wardrobe.  Specifically, I needed some things that were both quick-drying and warm… which means, and I apologise right now to any strict natural-fibrarians reading this  … polyester.   #ohtheshame

Hehe, just kidding, of course polyester has appeared here on my blog before and no doubt will again.  When you are roughing it out camping, and particularly in extreme climates, then unnatural fibres are definitely the go.

I made five new things prior to going on our holiday; a zip up fleece hoodie, a fleece sweater, some shorts for kayaking, a fleece neck warmer and a new sunhat.  I made some other new things too, while we were actually ON our holiday, but I’ll save those for another post!

In the order that I made them…

White fleece sweater

wearing beanie, sweater, hiking pants
location: Talkeetna Mountains, Alaska, USA

Pattern is Burda 09/2010; 121, fabric is 100% polyester fleece from Spotlight.

I’d bought my polyester fleece back in the height of hot hot February during their 40% off all fabrics sale, made it straight away and actually posted it to instagram way back then too, although it didn’t get truly worn until our holiday…

wearing sweater, skirt

Mods; made the sleeves a little longer, and I pinned the side seams out to fit it directly on me so it’s shaped and fitted to my taste.  After the first few days of wearing it I found the turtleneck to be extremely strangliferous.  This is not necessarily a criticism of the pattern, since I’ve always felt strangled by turtlenecks, ever since I was a child; I really should have known this one would be the same too, doh! Fortunately it’s an easy fix.  I simply borrowed a pair of scissors from the owner of the lodge and snip snip!! just chopped the turtleneck-y bit right off!  No hems or seams, well, I was desperate! but hey, fleece doesn’t really need edging anyway and now it’s a funnel neck, and only about a thousand times more comfortable.

I really really LOVE this.

Pink zip-up hoodie

wearing hoodie, white tee, grey tee, black jeans
location: the Khutzeymateen Wilderness Lodge on the Khutzeymateen River, British Columbia, Canada

Pattern is Burda 8042, the same 100% polyester fleece from Spotlight

Mods; in lieu of the patch pockets, I added welt pockets which were absolutely great for shoving my cold hands into… however I thought they gave a rather lumpy and thick look to my stomach region, even when said hands were not shoved into said pockets, and like most women I am not very partial to a lumpy thick look to my stomach region!  But it was awesome to have the pockets?  I dunno.

wearing hoodie, sweater, skirt

I wore this thing so much, like practically every day even though it’s not in all my pictures… and I pretty much hate it now.  It’s not really my colour, I only chose it because I actually had the perfectly coloured open-end zip in my stash already, inherited at some point from one of Mum’s periodic sewing-room clean outs, and I rationalised that the colour would be cheerful and fun.  But now I cannot stand the thought of ever wearing it again.  Can’t quite put my finger on the problem… as well as not suiting me, the colour feels somehow wrong for my personality, and then there was the lumpy stomach pockets thing.  It was a good thing to have though, perfect for camping, beautifully warm and it dried off very quickly.  Maybe I’m just sick of it.  I’m giving it a bit of time out at the top of the wardrobe, and maybe another wet and freezing cold camping trip will crop up again, some time in the future…

Black poly kayaking shorts

wearing hat, tee, shorts, raincoat

Please excuse the lack of an exotic location here … I didn’t realise until we got home that I neglected to get even one photo during our holiday that showed my new shorts !  thus a re-enactment of a holiday outfit and yes I am absolutely freezing  😉

My new shorts are refashioned from out of an old pair of Tim’s work pants, rescued from the refashioning bag… I knew from many years of washing these things how quickly they dry, so thought they would be perfect for the kayaking camp.  And they were absolutely brilliant…!

before, the observant will notice straight away that these have been nibbled at previously; that’s a pocket lining for something or another cut out of the bottom there…

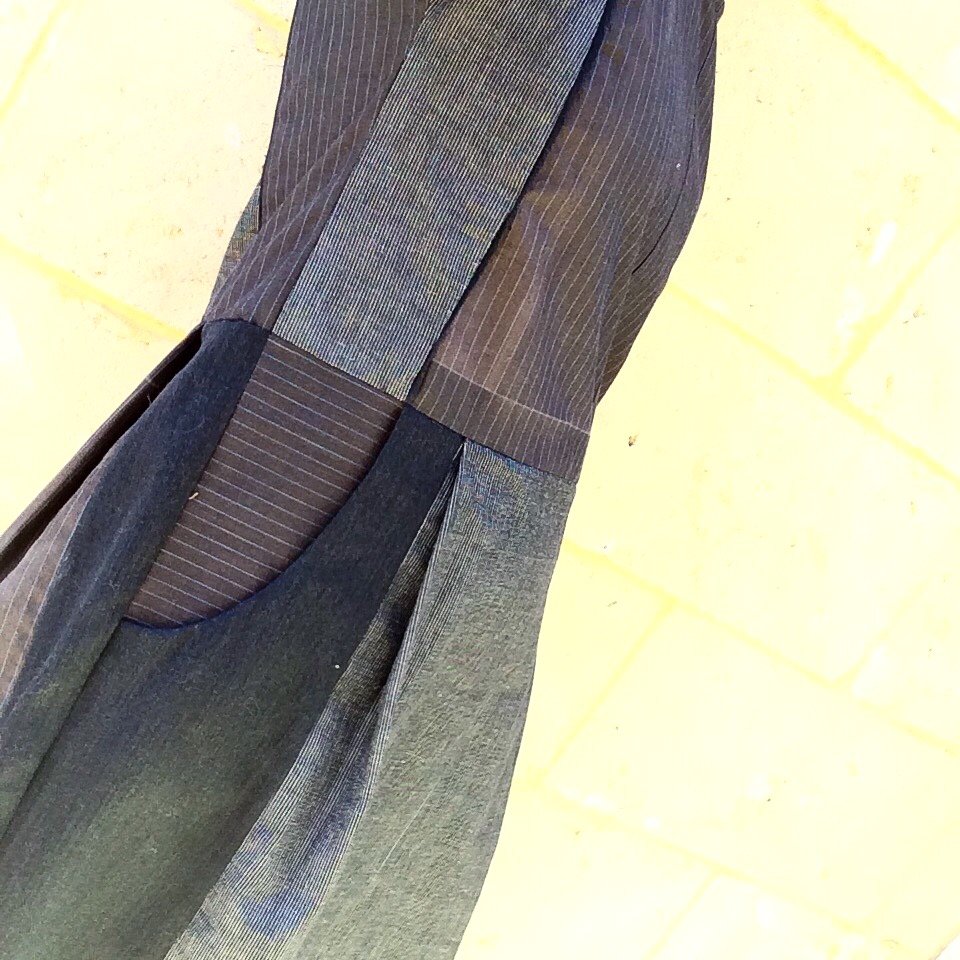
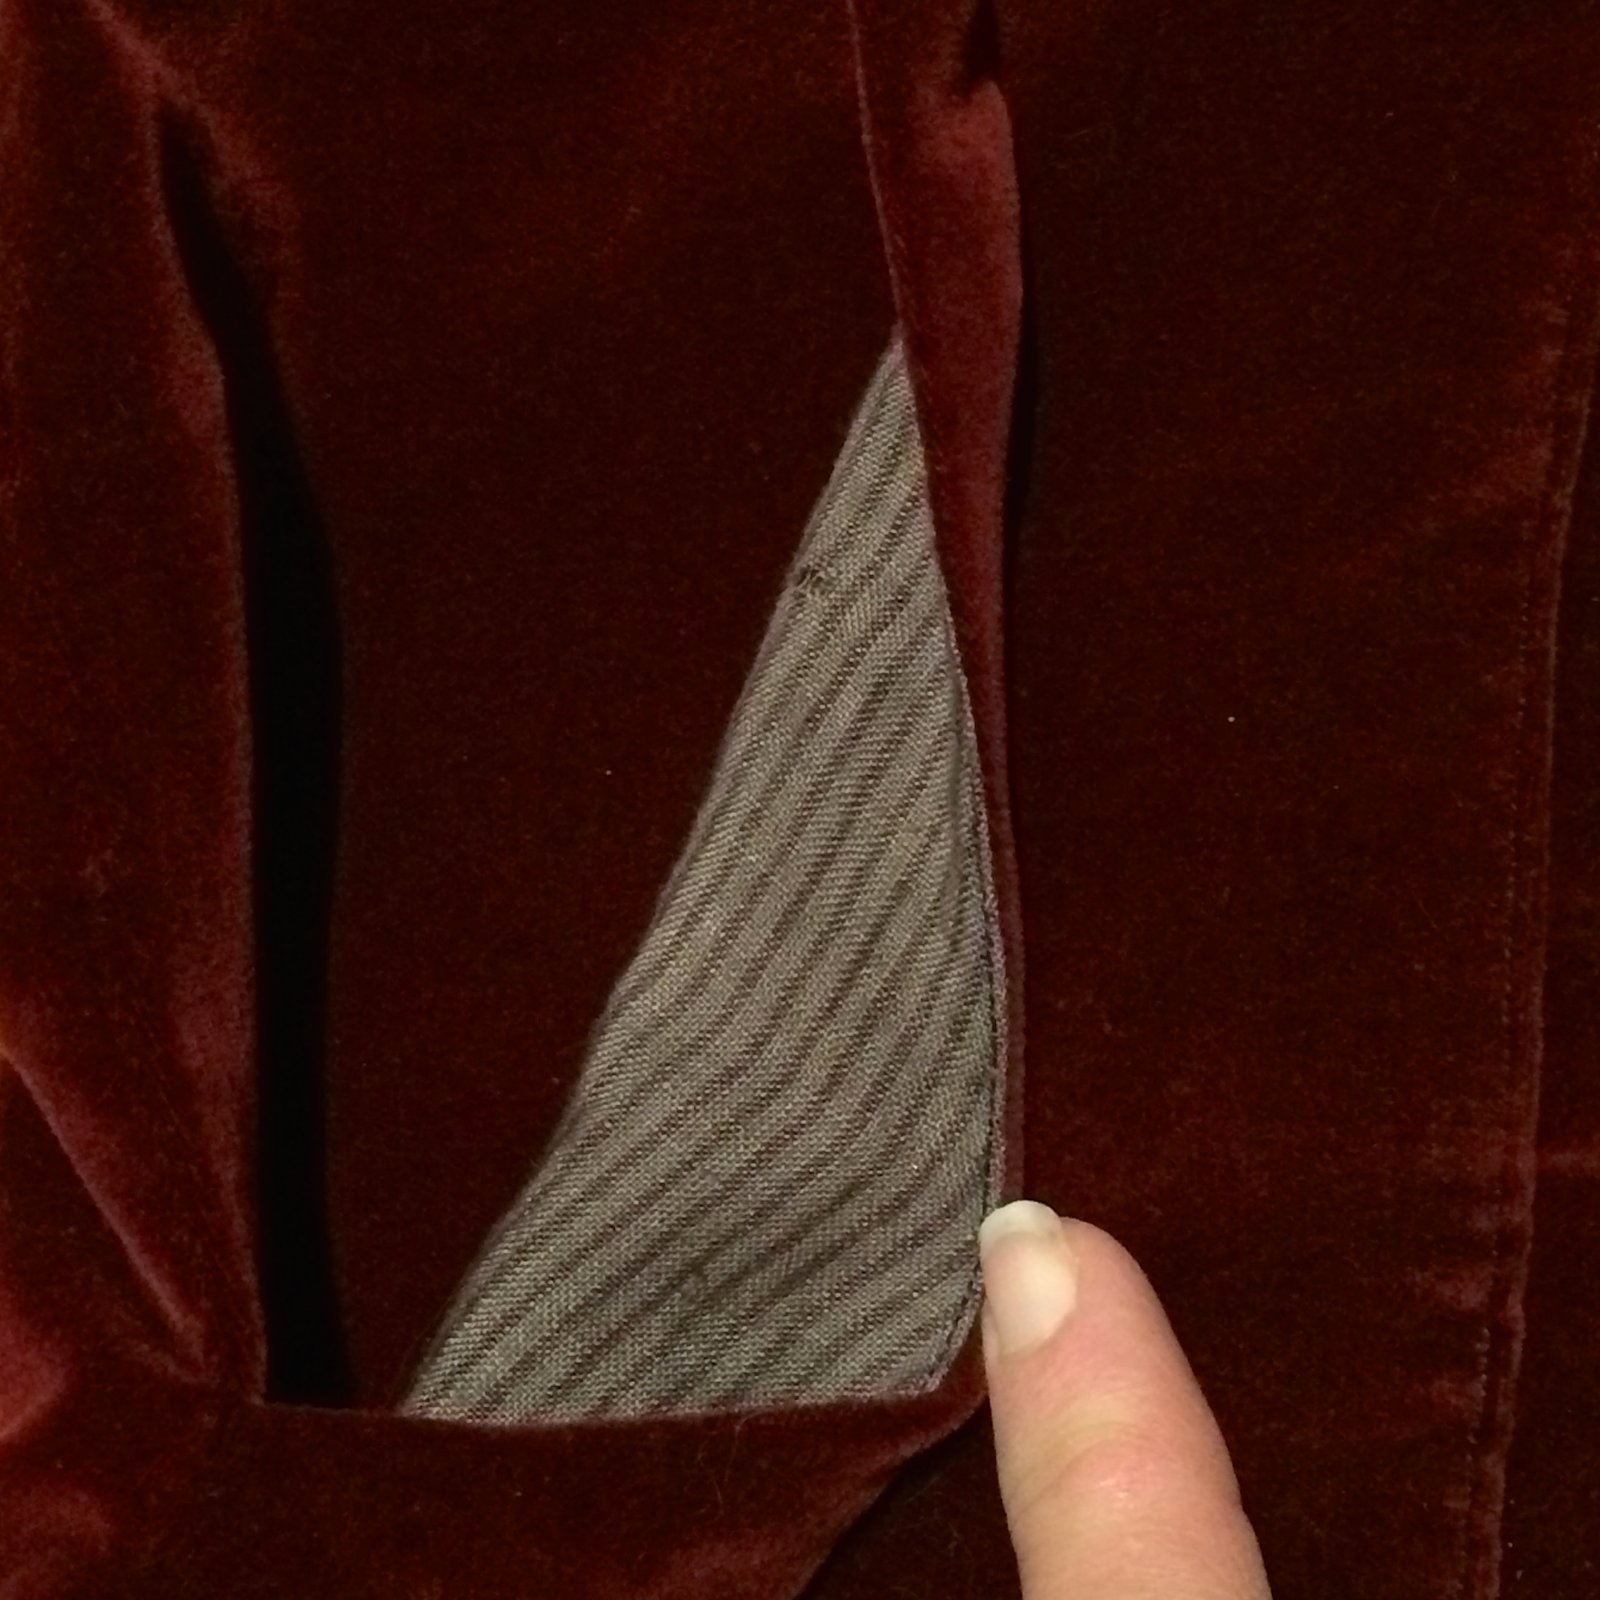
To make them: I kept only the fly front and the button closure intact; unpicked most of the waistband and sliced off basically every single other seam! taking it in at both side seams, the centre back seam, and altering the crotch curve super drastically to fit.  Approximately 7″ is taken out of the waistband overall tapering out to almost no width from the legs so they are nicely flared, just the way I like them.  This also means that the hip pockets have a pretty tiny opening now! but I figured that’s a small price to pay for free new shorts and funnily enough I don’t really find occasion to put  my hands in my pockets while kayaking  😉

I cut down and reattached the waistband, re-positioned the belt loops and created a cuff for the bottom hem of the shorts.  I think they turned out quite cute!  I’d planned to wear these with black leggings for kayaking, but as it turned out the days we kayaked were warm enough so that the leggings were not necessary.

Love these, they were perfectamondo for paddling, and I expect they will be my go-to paddling uniform from now on…

Cherry red neckwarmer

wearing neck warmer, raincoat, skirt, tights
location; the dock in Haines, Alaska, USA

The most basic thing ever, literally a lined cylinder.  The outer is the same 100% fleece from Spotlight, the lining was cut from an old Tshirt from my refashioning bag.  Yes, that thing is still like a bottomless pit of fabric!  It’s a monster, but a pretty fabulous one for someone like me who is always sewing  😉

For my own future reference, the dimensions are:

fleece; 65cm x 29cm

cotton jersey lining; 64cm x 27cm

I made it by stitching the fleece rectangle and lining rectangle together at top and bottom, pinned the seam edges and the fleece edges together, and stitched the side seam leaving a 10cm or so gap in the side edge of the inner lining.  Turned the whole thing right side out through this 10cm gap, then slip-stitched the gap closed to finish.

Like the pink hoodie this simple thing got worn most days, but unlike the pink hoodie I actually still like it!  Just goes to show, ignore “your” colours at your peril!  And it went with EVERYTHING!

wearing neck warmer, striped tee, green tee, skirt, tights, raincoat
location: Haines, Alaska, USA

Olive sunhat

wearing hat, grey tee, shorts, raincoat
location; Hanson Island, British Columbia, Canada

Pattern is Vogue 8844, fabric is olive cotton rip-stop from an online store whose name I have absolutely no memory of whatsoever.  It’s leftover from the fabric I used for my khaki army-style jacket… I bought it in a joint order with my friend and neighbour Megan, and all I can remember is that the postage fee was so horrendously high that maybe I’ve deliberately blocked the store’s name from my memory in post-purchase shock, haha.

I lined the hat with floral rayon, leftovers from my French Navy Forsythe dress, I thought they went quite nicely together! and the crown is stayed with a coffee-coloured cotton braid that is a VERY long term resident in my stash.  Since I would be wearing the hat kayaking, I decided it would be a good idea to add a chin strap; this is an old, orphaned bootlace, snipped in half and stitched in each side underneath the crown stay.  For some reason, I decided to go with an additional method of tightening the hat to my head, and laced a piece of white cotton cord through the crown stay.  Probably not necessary and now it’s a rather over-engineered hat but oh well.  Got it now!

Technically, I didn’t really neeeeed a new sunhat, since I do have my perfectly lovely ivory corduroy sunhat, made a few years ago…. but still I decided a new one was in order.  Partly because I didn’t want my ivory one to get irrevocably dirty while camping, a khaki one would be more colour suitable for out in the dirt of the wilderness.  As it turned out, the weather wasn’t actually warm enough for it until well into our holiday! laugh! the first few weeks or our holiday were mostly wet and very cold and the sunhat languished unworn… squashed sadly and disconsolately in my suitcase *sob*  Then finally the weather turned warmer and we even got a bit of sun and I was like, hurrah, I CAN WEAR MY HAT!!!  and was pretty glad I’d gone to the effort of making it after all.

wearing hat, raincoat
location: Vancouver Island, BC, Canada

SaveSave

SaveSave

SaveSaveSaveSaveSaveSave

SaveSave

SaveSave

SaveSave

SaveSave

SaveSave

pinterestmail

french navy forsythe dress x2 and some tights

hello!  I’ve made a couple of new dresses lately… followers of my ootd blog may have seen these pop up over there already.  Remember back in January I made up the free Orla dress pattern designed by Sarah May of French Navy? well Sarah very kindly invited me to be a part of her tester group for her new dress pattern, the Forsythe dress.  That little Orla has been an excellent wardrobe mainstay… my little counter tells me I’ve worn it ten times already since I made it in January, which is pretty good for me!  so I happily accepted.

The Forsythe is a relaxed fit dress with short, cuffed kimono sleeves, a slightly dropped waistline and a gathered skirt with hip yoke pockets, and a back button closure.  However, I have found that that button-back closure is pretty much decorative… the wide neckline and relaxed fit is sufficient enough that I can pull the dress easily over my head without having to undo any buttons.  Win!

I’ve actually made two Forsythes… the floral at top is my second and “real” version of the pattern, and that is me dressed to wear it out out to our recent anniversary dinner, at Cape Lodge in Yallingup.  We’ve been married 29 years! and little chic little floral rayon number paired with black tights, black booties and my chocolate leather jacket was the perfect thing for a special and romantic dinner out.

But maybe I should talk about this one, my first “muslin” version first… I made this one using three pairs of my husband’s old dress trousers, respectively a charcoal wool, charcoal and white cotton/linen pinstripe, and a chocolate/blue cotton pinstripe…  these have been in my refashioning bag so long there was actually an old spider’s nest on one of them!  eeeek! I gave them all a quick brush over the garden and then into the washing machine they went… then it was out with the scissors… snip snip!

This dress was really just a quick run-up of the pattern to test for fit and to see that it worked.  Of course it did! but the trousers fabric was really too stiff for the gathered skirt as in the pattern, so I instead folded the excess fabric into wide pleats in the front.  I quite like this effect because it also suits the formal “dress pants” vibe of the fabric too.

The relaxed fit in crisp fabric gave a rather boxy result for my taste, so I later unpicked and took in the bodice through those handy princess seams in the bodice.  I think the more shaped and fitted streamlined look suits the crisp, stiff fabric better.

I also put  inset strips of the plain charcoal into the princess seams to highlight the seaming… I LOVE how this looks, and the play of different stripes, blocks, lines and crisp angular intersections

I really like this little “trousers” Forsythe dress, however I felt a bit bad though that I had used cruddy old fabric to make up my dress, and hadn’t even done the recommended gathered skirt either, like I hadn’t done a “proper” job. so I quickly nipped out to Spotlight to get some nicer fabric and make my “real” Forsythe.  I thought the gathered skirt was more suited to a very thin and slinky drapey fabric like rayon.  Sarah May is from Cape Town in South Africa, and so as soon as I saw the selvedge of this lovely rayon floral print I knew it was totally perfect!

Plus it’s sooooo pretty!  I actually like this one a lot more than the “trousers” one, hardly surprising really!  I took care when laying out the pattern pieces in order to get a really nice and hopefully, a visually pleasing print placement on the dress.

This version is made up exactly to the pattern, with the proper gathered skirt and all, the only exception is that I put seven buttons on the button band at the back instead of the recommended five.  The only reason for this is that the little packet of perfect brown tortoiseshell buttons I picked up in Spotlight had seven buttons in it and I didn’t want leftovers.

In other news; some other things I’ve made recently.   Four more pairs of black tights, in polyester stretchy stuff from Spotlight.

I made these using my own custom-fit pattern, devised as described here.

I wear black tights a LOT; I wore last years’ well over one hundred times, the heels on some have worn out and so I chopped off the feet and converted them to leggings now.  So I reckon making a few new pairs each year is very worthy use of my time.  And, for everyday wear, my own handmade tights really are so much better than rtw, for two simple reasons.

  1. FIT!   Take a gander at the side-by-side comparison of my own handmade tights to a pair of extra-tall rtw tights on the right.  Yes, those are extra-talls!!  It’s easy to see why I have to nip into the ladies room several times a day to hoink the tights back up…  SO ANNOYING!  After wearing my own tights for a year I’d forgotten that that was even a thing…  I love the sophistication of beautifully sheer seamless legs that you can only get with rtw, and I don’t mind putting up with the disadvantage of the crotch migrating inexorably southwards for the advantage of that on special occasions, but on an ordinary, everyday, day? Nope.

My custom fit tights have fitted feet, and are shaped all the way up my legs.  They might look a little funny, but they were made to fit exclusively ME!

2) and secondly WARMTH.  I make my own handmade tights from opaque black polyester stretch, and they are super warm and comfy compared to even the thickest of thick rtw tights.  Again, for special occasions, being a bit cold is a small price to pay for the beauty of sleek sheer legs, but not for everyday.

Four pairs of handmade tights can feel like a bit of an unexciting production line to make, but ultimately they are the most hardworking and practical things in my wardrobe.

high-tech method for telling the front from the back in the pre-dawn light that usually illuminates my dressing…

Details:

Floral at top and below;
Dress; the Forsythe dress by French Navy, printed rayon
Jacket; Burda 08/2010;113, chocolate pleather, details and my review of this pattern here
Tights; made by me, my tutorial on how to make your own custom fit tights pattern is here
Booties; nylon, from Zomp shoes

Charcoal/chocolate striped version:
Dress; slightly altered French Navy Forsythe dress, made using three pairs of old business trousers
Tights; made by me, my tutorial on how to make your own custom fit tights pattern is here
Shoes; made by me, details here

location: out to dinner l’anniversaire; Yallingup in the south west of Western Australia

SaveSave

SaveSave

SaveSave

SaveSave

SaveSave

SaveSaveSaveSave

SaveSave

pinterestmail

a red wine pinafore

I’m wearing a new … thing. Is it a dress? Dungarees? An overall…?  we used to call these pinafores. Or a pinny.  I think it’s pretty cute anyway 🙂

I used to dress my children in corduroy dungarees when they were little, and LOVED seeing them toddle around in them, how sweet they used to look!  So maybe I’m a little nostalgic.  And maybe it could be argued that pinnies are a funny choice for a woman of my age, that they’re more suited to a younger set; but whatever… I’m just just inexplicably into them right now; I don’t always follow a trend but this one I really liked and I just wanted one.  Nowadays I’m just into wearing what I want to, and am caring less and less if it’s what I’m supposed to be wearing.  It’s kinda freeing, to be honest.

I’m trying to remember when the pinafore first crept sneakily into my head and buried itself comfortably there … was it in Japan? or Melbourne?  just the general collective subconscious?  most likely the last one…  can’t remember, but the idea got wedged in somewhere and at some point I started to fantasise about my perfect pinnie.  I could picture it exactly; velvet or velveteen, and deep purple-y/burgundy/red wine colour.  The only problem was that Spotlight had a wine-coloured corduroy, but not velveteen, and I had my heart set on velveteen… not to worry!  I bought the cherry-red velveteen with plans to dye it.  I also bought my copper-coloured buckles and jean buttons from Spotlight.

the original colour, before dyeing…

Now patterns, patterns…  There re actually precious few pinafore patterns out there.  I ended up using the pauline alice turia dungarees pattern,  I’d seen and liked Sue’s turia dungarees, especially the cute trapezoid pocket with flap on the bib, and thought I could alter the pattern to be a dress pretty easily, although I ended up altering every single pattern piece! with one exception; that front bib pocket, that attracted me in the first place!


For inspiration; I really liked this pink pinny, and this denim one too… though I preferred the pink one. .  I printed out and taped the bodice bits to the shorts bits, and cut them as one piece, like in the following picture…  you can see in the picture I’ve allowed plenty of room around the pattern pieces for custom-fitting, and I basically draped and pinned it directly on myself to get the final version!  It doesn’t even fit either of my dummies!

The front is cut on the fold as one piece, with a wider bodice and a straightish A-line skirt.  The expanse of fabric on the front is nicely cut up by those three patch pockets.  The back I cut with a similarly shaped A-line skirt, and to have a centre back seam, which I overlocked and then felled to one side; it would have been easy to cut the back on the fold as one piece too, but because I was not having any pockets on the back, I thought it needed the centre seam for some visual interest.

I cut my hip pockets to be about 2cm deeper and wider than the pattern pieces, because I wanted them to be more visually weighty than they appeared on the pattern illustration… and positioned them on the dress in an optimum position for me, which is lower than on the patten.

I also ended up cutting my shoulder straps narrower than the pattern, so as to fit into the buckles that I’d bought from Spotlight. The pattern is not intended to be lined, however because I knew I’d be wearing it with tights all winter I decided to fully line it… the bodice, shoulder straps, and all the pockets are all lined with white/purple striped linen from Tessutis in Melbourne, leftover from a shirt I made for Craig a few years ago.  For the skirt part I unearthed a navy blue polyacetate lining fabric from my stash.  I only had a very small piece of this, and by complete sheer luck it was exactly the right size and depth for my lining.

lining; the bodice and skirt are attached together at waist level and cut in the same A-line shape as the pinafore.

pocket lining

I used black thread throughout, and deep chocolate overlocking thread…  resulting in a mishmash of cherry red velveteen, white/purple lining, blue skirt lining, and black and chocolate threads .. sounds like a bizarro dog’s breakfast of a dress, yes?  Yep!

before dyeing

BUT I knew it’d be alright once it was dyed.  And you know what? I’M SO THRILLED WITH IT!  I used both iDye in Brown and some Blue, and TOOK THE PLUNGE!  eeeeek!!! Dyeing is always a little terrifying, but yeah, I couldn’t be happier with the result, the colour is perfect and EXACTLY what I wanted.  I’ve already worn this two days in the week since I finished it!

Details:

Pinafore; some wild ad-libbing upon the pauline alice Turia dungaree pattern
Tshirt; Closet Case patterns Nettie bodysuit, paprika stretch, details here
Scarf; raspberry cotton jersey, detail here
Navy cardigan; the Miette, a free pattern by Andi Satterlund, all yarn details here
Orange arm warmers; made from an old moth-eaten jumper, details here

location; Eagle Bay, in south western Australia


above is how I wore it – in the rain! – on the weekend, and below is how I’m wearing it today… it looks a little more vibrant in the blazing sun!

with self-drafted striped Tshirt, details here, and
my scarlet Miette cardigan, all yarn details here

SaveSaveSaveSaveSaveSaveSaveSave

pinterestmail

white Charlie caftan

Seems like aaaages since I was at the beach for these photos! and I can remember it was a glorious 30C that day.  Right now it’s still sunny but getting pretty nippy here in Perth; and joyously frolicking in the surf in a tiny little dress is kinda out of the question.  SO GLAD I was super-organised and pre-did my little photo shoot!  Anyway, here is this cute and very summery little dress I made a few months ago.

Pattern; the Charlie caftan, designed by Heather of Closet Case patterns, and named after the ultra-cool Charlie, of Noble & Daughter.  It comes in a shortie-short length like this, or you can make it as a glamorous maxi with a titillating thigh slit, so you can flash a little bit of leg in a breezily sexy way while shimmering along poolside in your wide-brimmed hat, oversized sunnies and of course an umbrella-ed cocktail in hand.  Me not being the least bit glamorous, I opted for the mini version and scampering in the surf, no cocktail (sob)  You probably can’t even tell, but I’m wearing it over my black Sophie bikini too.  Closet Case patterns, head to toe!

I must say, it’s an extremely cute little design and also a super quick and easy pattern to whip up.  And it has super deep, therefore by definition awesome, pockets…  easily deep enough to hold your sunnies, car keys and phone while you’re at the beach.  I made view A with the front pleats, and I put in the tie as well since I fancied being able to tie it up and give it a bit of a waist.  I’m still undecided as to whether I prefer it tied or with no tie!  tying it up does make the pleats “pop out” a bit over your tummy, but on the other hand I like it with a defined waist as well… the verdict is still out on that one…  probably I should have made the gathered version!  In the meantime, I took some pictures both tied up, and untied.

Fabric; a gooooorgeous linen/cotton mix from Spotlight.  I bought quite a lot of this when I spotted it, hehehe.  I mentioned it previously when I used it to make the lining for my lace “Brazilian” top too…   I’m actually thinking of doing a spot of appliqué/embroidery on my caftan, snazzy-ing it up a bit.  Still undecided about that one too.  AAAGH I’m so indecisive!

Details:

Dress; Closet Case patterns Charlie caftan, white cotton/linen
Bikini (under); Closet Case patterns Sophie swimsuit, black swimsuit fabric

location; Bunker Bay, Western Australia

SaveSave

SaveSave

SaveSave

pinterestmail

little floral dress; donna karan for vogue

I’ve made this new dress! every year my dear friends give me a Fabulous Fabrics voucher for my birthday… it’s taken me a little while but I finally got around to spending it and making my birthday dress!

Pattern; Vogue 1351, this is my third version of this pattern, my first one is here and my second here.  This time I cut the skirt a bit more flared and actually it was going to be a lot longer to start with too, it was going to be a midi-ankle length dress, but when I tried it on for hemming I decided this particular small-scale floral was not right for a midi-length.  It felt like a big walking cliche, to be honest, as if it was the “before” dress in an op-shop refashion challenge, and I was about to lop a foot off the bottom and go “TA DA!!” LOOK HOW AMAZING IS THIS REFASHION GUYS!!! FRUMP TO FAB IN JUST FIVE MINUTES!!!

Actually, I think the longer the length of a dress, the bigger the scale and more overblown the print needs to be… and a smaller scale print really looks best in a shorter dress.  Also Craig gave a big thumbs up to the shorter length, although that is pretty much ALWAYS his response, so much so that I don’t know why I bother asking…  Anyway, I preferred the shorter length too, which I should say is of course the “right” length!

Fabric; floral chiffon, lined with a warm, peachy/pale-pink crepe, both from Fabulous Fabrics.  I’d tried a few different colours underneath the floral – because it is completely sheer the colour of the lining made a huge difference; white, ivory, and even cream were all too “cold”… I almost went for pale yellow which was quite warm and nice but in the end I settled on this lovely pale peachy-pink.  Pink gave an rosy warm glowing light to it;  just exactly what I want for winter  🙂  I know a chiffon dress seems a strange thing to make for winter, but this dark rich floral just seemed to my mind to be very right for the season, and is what I want to wear right now.

I stitched French seams on all areas of the chiffon, and the seam allowances of the pink crepe lining are overlocked to finish…

 triple-stitched baby-hems for both the shell and the lining…  as described in my tutorial here

… the only difficult bit I had was putting the pale pink invisible zip into the chiffon.  It is tissue thin, and so wouldn’t be able to provide any support for the zip, so I applied thin strips of iron-on interfacing along the stitching lines of the zip, extending it by about an inch either end and was super careful when stitching.

I thought I’d show my lining slip-stitched to the zip tape inside… I always stay-stitch a three-sided “box” at the lower edge of the seam where it will be sewn to the lower edge of the zip, snip into the corners, press the seam allowances under, and stitch along the stitches… this is something the patterns NEVER tell you, but I think they really should, because it’s so much better.  The lining sits a lot flatter and smoother, the stay-stitching gives a little bit of reinforcement to the area, and the squared-off slit really does make a visible difference to how invisibly the zip seam appears in the finished garment, especially in a very thin fabric like this.  Haha, I know that “visible difference to how invisibly etc” sounds like an oxymoron, but you know what I mean!

I wore it for the first time today!   along with my scarlet Miette cardigan, to show it to my lovely girlfriends who had given me the voucher… 🙂

Details:

Dress; Vogue 1351, floral chiffon, crepe lining
Cardigan; the free Miette pattern by Andi Satterlund, all details on my yarn and alterations to the pattern here
Tights; voodoo
Shoes; Vitullimoda, bought in Melbourne during my holiday over there with Mum and Cassie 🙂

location; Kings Park, Perth, Western Australia

SaveSave

SaveSave

pinterestmail

chilli-red paprika jade skirt

Oh hello, fellow needle-wielders!

Recently I decided I wanted, nay needed, a new colourful Jade mini-skirt; since my purple one was tragically taken too soon… *a minute’s silence, please*

Well, ta da!

I’d gone back to Knitwit in search of the same purple knit… why the same colour? perhaps because I’m a boring unoriginal creature of habit? but unfortunately they had sold out of the purple.  So I chose this chilli-red instead.  Rather nice, hmmm?

Every time I try to take any pictures in the full-on blasting sun, I regret it… however this does show off the lovely vibrant fiery-ness of this intense red rather well

For the lining, I cutup an old black Tshirt, one of Sam’s toss-outs, it’s quite a nice, sturdy, not-very stretchy and robust 100% cotton black knit, so should work really well as a lining. .  I’d given some thought into the lining this time, since the tragedy of too-much stretchiness of the purple one… that was a 100% polyester whereas my other stretch mini skirt, my self-lined charcoal one is a cotton jersey, quite stiffish with only a one-way stretch and that is holding up very nicely.  The black Tshirt fabric I used for this is very like that…

obligatory lining picture is pretty boring, sorry

With this version, I fitted and reinforced the waistband with stretch interfacing so it is quite firm and minimally flexible…

… AND put in an exposed black/brass jeans zip into this skirt.. I’m hoping these two factors will help keep that waistband firm and strong, so it suffers minimal stretching out and extend the life of the skirt…  Just for looksie’s alone, I just love the brassy glint of the zip, I think it looks really cool.

Going from my past jade skirt AND my past red skirt experiences, I KNOW I’m going to wear this a metric tonne.  Can’t wait to mix and match this  one to bits!

Details:

Skirt; Paprika patterns Jade skirt, red silk/linen knit from KnitWit
Top; the twist top from Pattern Magic, in ivory ponte also from KnitWit, details here
Tights; my own design, black polyester stretch from Spotlight, details here and my tutorial on how to make your own custom tights pattern here
Boots; made by me and my own design, all details here

location; the bush in south western Western Australia

SaveSave

SaveSave

pinterestmail

named maisa denim jean jacket

O hey!

What am I doing? not much, just hanging around in my new jean jacket that until very recently was actually a few pairs of ancient old jeans!!!  OHYEAH!

A jeans-to-jean-jacket project has been a long-term “thing” in my little bucket list of refashions that I have in my head. and one of the reasons I’ve been collecting my children’s old jeans for only like, forever… recently I was asked to speak at the 20th anniversary celebrations of Australian Sewing Guild, a huge honour! and in the general chit-chat heard mention of their Castaway to Couture competition… where you take some cruddy cast-off clothing and transform it into something new and spectacular of course; obviously my ears pricked up … I LOVE wardrobe refashioning!!  I really the challenge and the FUN of repurposing old unwanted fabrics into something new, and I love the good self-backpatty feeling you get from being economical and not wasteful, in both the money sense as well as in the planetary resources sense as well.  I’ve done quite a lot of it in my time but not for a while… I mentioned my intention to participate in the comp on IG back on the 2nd May, and knew straight away I would finally get on with my “bucket list” jeans-to-jacket. The only things I bought for this were the buttons!

before…

after…

I used the Named patterns Maisa denim jacket pattern, and three pairs of my children’s old jeans, above.  Actually, technically I used only two and a half pairs of jeans, which I feel pretty good about!  I picked out the most similarly coloured ones, for a cohesive look, and the widest legged one in my stash; pretty sure these were all Tim’s, he used to rock the wide legged style A LOT!  I needed the wide legs so I could cut out the widest pattern pieces such as those upper sleeves.  A few pieces, like the hem bands, the collar, and the back yoke were too wide, so I had to cut these laying up and down the leg.. i.e. cutting across the grain, rather than on grain.

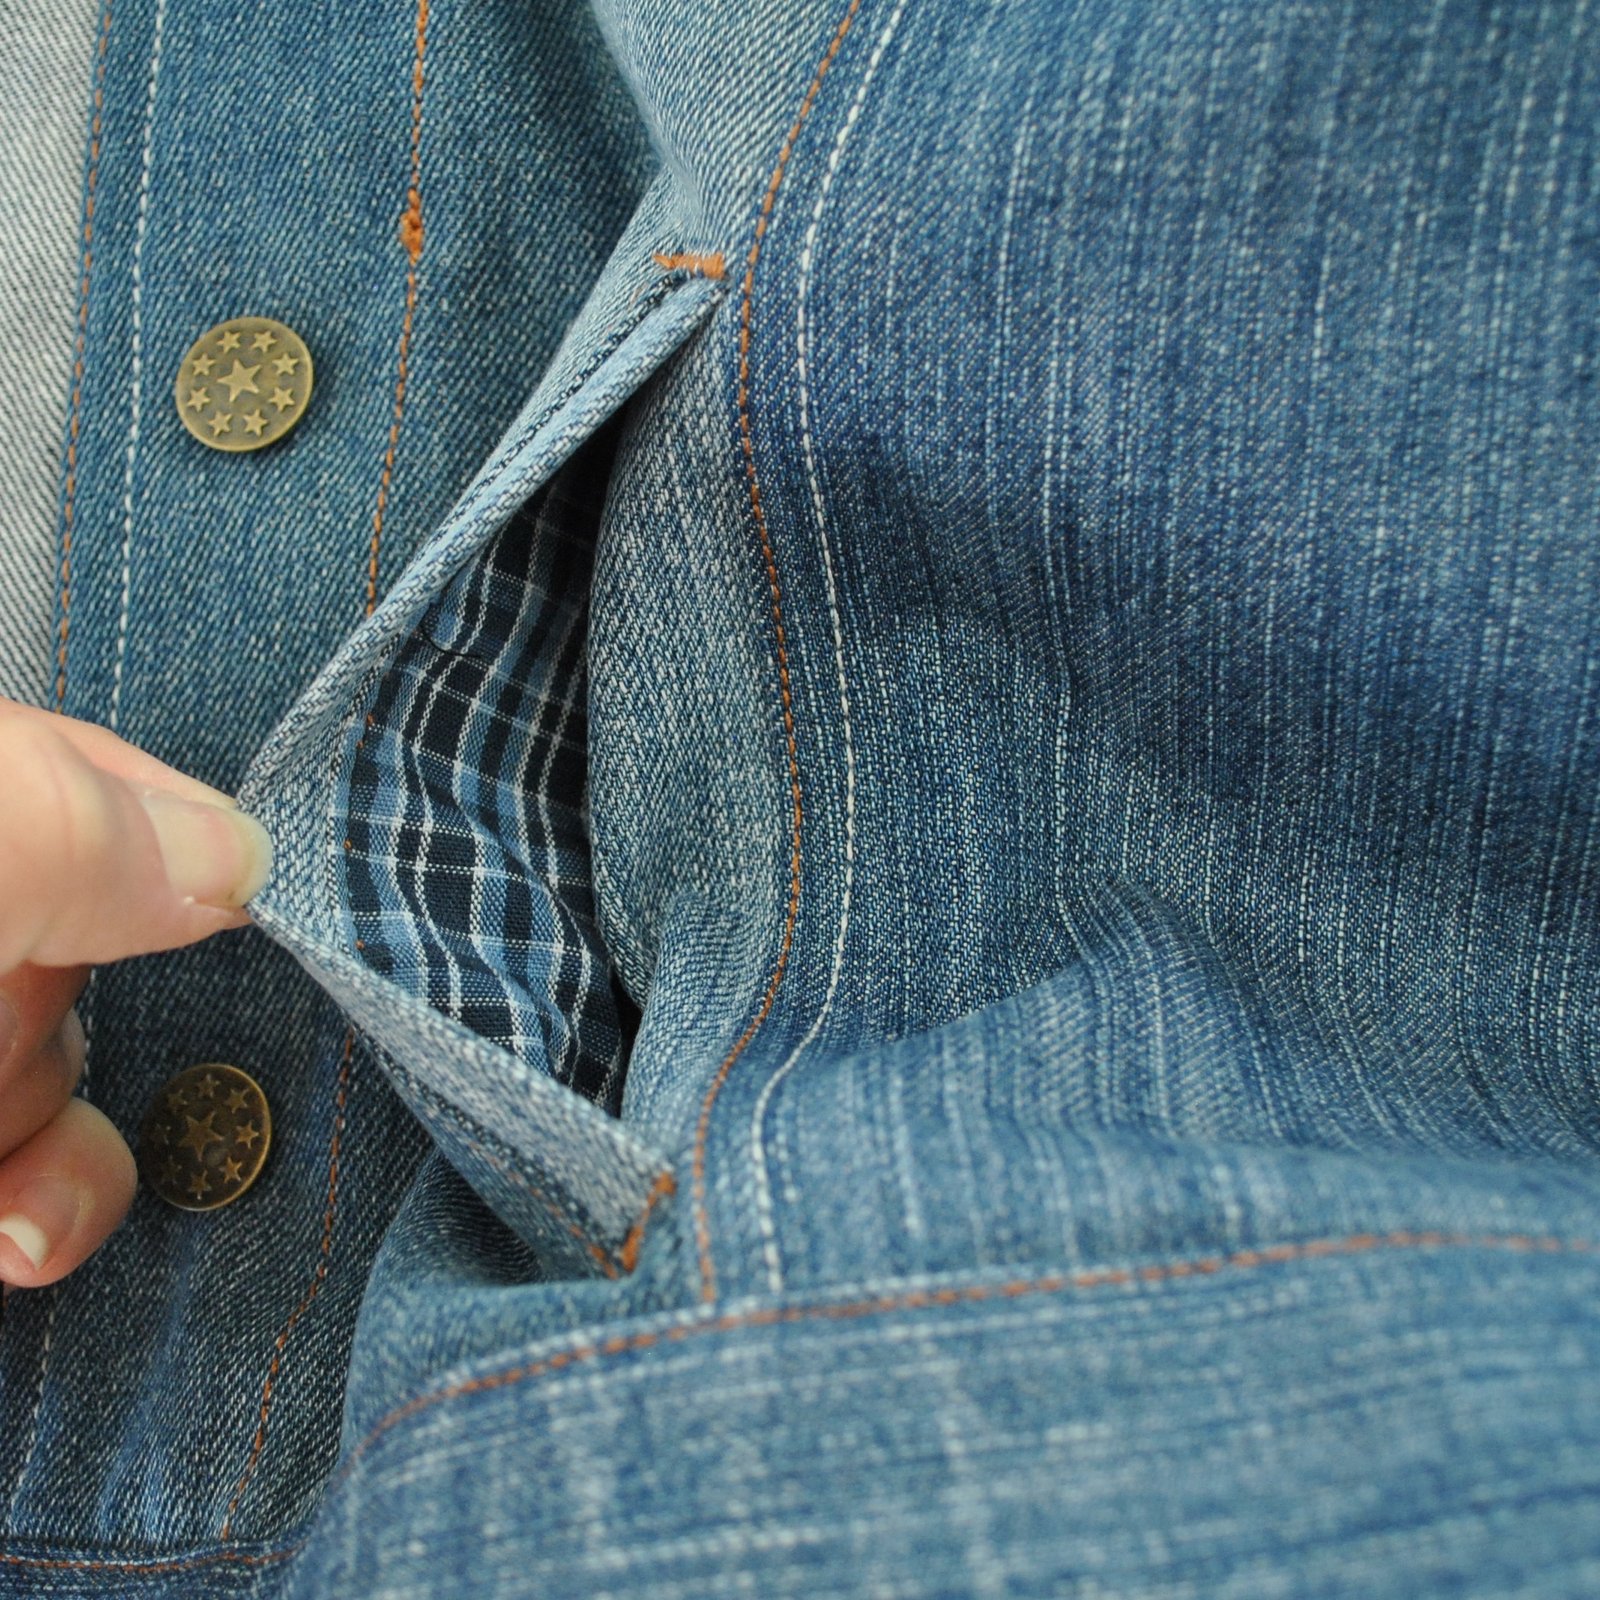
While I lurve a patchy aesthetic to my clothing, and of course the beauty of a thing like a jean jacket is that it’s supposed to look a bit beat up and NOT a work of beautifully tailored perfection…  I still wanted it to look at least a little bit intentional and not too bunged together.  There was plenty of colour variation even within each single pair of jeans as well as fashionable distressing effects everywhere too, so I carefully cut so as to make sure the colour variations were matched symmetrically all over the jacket, for example; the upper arms are cut from the same area of one pair, the side fronts also both from the same area of another pair, ditto the two side backs, etc etc, so as much as I possibly could the lighter blue areas are balanced out nicely and symmetrically with the darker blue areas on the jacket.

I think this resulted in a fairly cohesive look, one that hopefully doesn’t scream “MADE FROM CRUDDY OLD JEANS” anyway.

I only kept ONE thing that even vaguely hints that this is a recycled product;  for one of the cuff facings I unpicked a rear pocket from one pair of jeans and cut the facing for a cuff from this area…  it’s just facing, so it’s on the inside and can’t be seen unless I roll up the cuffs.  But I like that it’s secretly tucked away in there  🙂

For near total re-cycling, I even re-used the pocket lining of one of the pair of jeans for the new pocket lining of my jacket! well, it was a rather nice blue plaid and after unpicking the coin pocket there was just enough for my own new pockets.

Oh, yes, pockets!  The Maisa doesn’t come with pockets like this; it does have two breast pockets but funnily enough I really prefer pockets that you can actually put things in and also take them out easily… so I decided to see if I could wrangle some hip pockets in there somehow.  And I did!

I made two little welt pockets situated in the front/side front seams.  On the inside, the bottoms of the pockets are sandwiched inside the button bands, for a neat look on the inside.  They do work… however they’re not perfect by any means! because they do happen to have a button and a buttonhole respectively at the bottom edge of each one! hmmm, yes well… that was unavoidable.  Maybe, just maybe a bit of a hacking fail, however I’m really really glad still that I’ve got them.  I knew it was a risk since the cutting lines in the front of the jacket are very close to the centre front, and a pocket like this would work better if the seams were situated further out towards the side seams OR if the front closed with an open ended zip instead.  Both criteria would have given a better result…  BUT well, we live and learn…  at the very least I can put a little bit of stuff in them, so not a complete and utter fail! I’m ok with them, and they do work!  🙂

Thoughts on the pattern: description says a classic, unlined, button-down denim jacket with collar; short and loose-fitting design with flap pockets at the front; sleeve vents and wide button cuffs, wide band at the hem.  Well, hmmm, I’m not going to start ranting about my pet hate; the incorrect use of the term “button-down”.  Noooo, I’m not.  Apart from that! everything else about the pattern is pretty awesome.  A slight negative; it is a bit more loose-fitting than I anticipated.  Not 80’s loose, but still pretty loose.  I’m ok with it really… I will certainly wear it anyway! it’s so comfy and feels absolutely fantastic on! plus I’m only wearing it over a thin little Tshirt here and of course a bit of oversizedness is a good thing when I’ll want to wear it over cardigans or long-sleeved woolly tops in the winter.  I think when I get a little time I might have a go at re-jigging the pattern to be a little more form-fitting, for the future.  I still have plenty of pairs of jeans that need refashioning, so a second, differently styled jean jacket might even happen.  One which even has bigger and better functioning hip pockets!

Design decisions:  all the raw edges are finished with overlocking in dark blue thread, and I double top-stitched all seam allowances down with two different colours of thread; a coppery brown, and a creamy ivory.  These are both Gutermann upholstery thread, I actually prefer this to topstitching thread because A) it is tougher and B) it is less prone to fraying, so is easier to thread a needle with it.  I’ve used it for all my previous jeans, as well as for all my Alabama Chanin projects too, of course.  I decided to go with the two different colours, because it’s a detail I’ve noticed in some rtw jeans that I like a lot.

For the breast pockets: I originally double topstitched these in the two differently coloured threads too, however it just didn’t look very nice.  To be honest, something about the curved edge; cup-shaped pocket shapes topstitched onto the front just suggested “topstitched boobs”, to me.  Maybe that’s just me being weird… but I couldn’t stand it and unpicked the ivory and restitched the second line in the same copper brown as the first, as above.  It’s less obtrusive now and I think looks better.  Sorry, if that all sounds super weird, but just saying….

Some purely gratuitous details shots…

cuff topstitching and bar tack…

collar …

topstitching …

breast pocket…

waistband…

Details:

Jacket; Named patterns Maisa jacket, made from old pairs of jeans
Skirt; Vogue 1247, details here
Tshirt; Closet Case patterns Nettie bodysuit, white jersey, details here
Shoes; made by me and my own design, details here


location: the sundial at Cottesloe beach, Western Australia

pinterestmail
Switch to mobile version
↓