Tag Archives: Skirt

jungle baby mobile

Yesterday we attended a very special event, and I made a very special gift for the occasion! … Kelly’s bridesmaid and Tim’s groomsman, now a newly-wed couple themselves, hosted a baby shower for who else but our newest little not-quite-here-yet bub…  The new nursery is to be jungle-themed, so I thought I’d make an animal mobile.

I bought acrylic felt sheets, wooden beads and a bamboo hoop from the craft section at Spotlight, and everything else from my stash… embroidery thread for the embroidery, upholstery thread for stringing everything all together, and all-purpose glue… the blue/green wool that I used to wrap the hoop was from a large bag full of wool that a neighbour put out on their verge as rubbish.  When I spotted it I was like… whaaa??? well yes please and thank you! #wastenotwantnot

The designs are all my own:

toucan;

sort of a generic monkey… I kinda wish now I’d made him a specific type but oh well…

gorilla.  btw, most of them have a definite front and back so I’ve pictured both of his here…  He was one of my early favourites so I can’t believe I forgot to take his special close-up photo!  we’ll have to make do with a couple of zoom-ins …

tiger.   I’m pretty pleased with my tiger, it was easily the most labour intensive and fiddly of them all!  This is actually version three; I was dissatisfied with two earlier versions but kept going until I had one I was happy with.  He also has a definite back and front.

panther

blue and red macaw

blue and gold macaw.  Until I was making this mobile and made a point of looking it up, I wouldn’t have noticed that these macaws have black beaks while the red and blue ones have white beaks!

python.  this was a last minute inclusion and I really love him!  My python has a lovely diamond pattern along his length, and it should be noted btw that this is not a very common marking for this particular colouring but I’m claiming artistic license!

There are three different leaf sizes, and I went to a careful effort to balance everything out; the ground dwellers are at the bottom, then there’s the mid-range dwellers, with the birds flying up in the canopy.  Except for the toucan, he’s not flying but I imagined him perched on a branch.

I like the way the blue/green yarn I used to wrap the hoop is sort of “planet earth” colouring, as well as sky/leaf canopy colouring.  Seems sort of fitting.  And the dark wooden beans that are really there to weigh down the motifs, also sorta represent nuts in the trees and on the ground,  and the wooden trunks of the trees.

Lastly, here it is in motion.. thanks Cassie! for holding it up for me to film it!

Kelly sent me a picture this morning showing it hanging up already, which is so cool! and I sure hope baby enjoys watching it from his cot!

Before anyone points it out; yes I know these animals do not necessarily live in the same jungles as each other, but hey; at least they’re all actual bonafide jungle animals and I didn’t pop a cheetah or a zebra in there!

Now before I forget… I said I only had two more things to blog about before the end of the year, but I was forgetting the following!  for Kelly’s birthday she mentioned how she needed maternity clothes, so I offered to take her shopping for fabric and I’d run up a few things…  I’ve shown some of them here but not all of them for some reason, anyway, here are the rest…


a Closet Case patterns Ebony dress with set-in sleeves; in cotton jersey bought from Spotlight for this project

A raglan-sleeved Ebony tee, and a skirt made using Burda 7023.  Apart from the navy blue merino for the sleeves which is leftover from my Nettie tee, these fabrics are all long term residents from my stash, some give to me by Mum.  It’s not a glamorous outfit, but one I thought she could wearing hanging around the house or on the weekend for housework or something… hey, we all need those clothes too!

another raglan-sleeved Ebony tee, and Burda 7023 skirt combo… striped jersey a long term resident from my stash, originally leftovers from this dress; and black jersey from Spotlight, not a leftover but bought specifically for this project.  For my previous notes on adaptions to this skirt pattern, see here.


So; NOW I’m pretty sure I have only one thing left in this year to blog and it’s a lovely one if I say so myself …. stay tuned!

pinterestmail

Forget-me-not Sabrina skirt

In spite of being a Forget-me-not pattern I almost forgot to post this!! Except I didn’t, because here I am posting it.  But I had forgotten? for a little while anyway; that forgetful state of being ending as soon as I remembered.  I guess it’s technically not possible to “almost” forget something.  You’ve either forgotten something, or you haven’t; either one, or the other.  Like, maybe you DID forget something, but then all of a sudden, you DID NOT forget that something.  Ahem.  Yes, my brain does indeed love to devolve into such ridiculous semantics, arguing to and fro with myself.  Ultimately I did not forget, which is the main thing…

So, the skirt!  I made it a few months ago, as a tester for the pattern; it’s the Sabrina skirt pattern by Johanna of Forget-Me-Not patterns.  This is a really nice pencil skirt design of a deceptively simple appearance, I say “deceptively” because it has so many options for custom-shaping it to hug your own individual curves exactly, you really have no choice but to find that perfect fit… To start with, it has shaped gores; three in the front and four in the back; plus waist darts as well.  Additionally;  this very comprehensive pattern also contains separate pattern pieces for three different fit versions;  a straight fit, a mid fit, and a curvy fit.  You select which version you’re going to make based upon your own personal hip-to-waist body measurements.  It’s an amazingly detail-driven pattern!

The pattern also includes separate pattern pieces for the optional lining, and instructions for installing it in two different ways; the easy way or the more advanced way.  No prizes for guessing which one I chose to try out!

The advanced way results in a beautifully installed lining, with all seams and edges neatly and perfectly enclosed inside..  I’m over the moon with how my lining turned out! all steps are meticulously and carefully explained, and I found it very easy and straightforward to follow along.  In fact, the instructions are absolutely excellent; and I can highly recommend!

Fabricwise; I used a piece of rather lovely rusty-orange wool tweed, a leftover scrap inherited from my paternal grandmother, and a not quite matching deep raspberry lining fabric from my stash.  I had just enough of each to cut out the skirt, with zero leftovers.  It always makes me feel like celebrating when this happens!  It didn’t even feel like too much of a risk; entrusting my precious fabric to an untested pattern, because I knew with all those fitting seams and darts I’d be able to fudge fine-tune a really good fit.  I’d chosen my size based mostly upon my child-bearing hip measurements, and didn’t have to do much in the way of special fitting alterations, just nipped it in just a little towards the waist.

So, I finished this just as the winter was ending, and I’ve had to tuck it away to wait for next winter. I am really looking forward to wearing it though.  Not only is the fabric kinda special to me, knowing it was from Marnie, but a sleek, perfectly fitting pencil skirt is a no-brainer, yeah?  very much my style.

I’m happy!

Later edit: this skirt now has pockets!  see my how-to here:

and another edit! this skirt has been shortened!


Details:

Cowl; hand knitted by me, details and my pattern here
Merino tee; Nettie tee pattern by Closet Case patterns, details here
Skirt; Forget-me-not Patterns Sabrina skirt
Tights; made by me using my own custom-fit pattern, details here
Boots; Roberto del Carlo, from Zomp boutique

pinterestmail

how to make a tulle petticoat

… so, I mentioned Cassie’s engagement? and of course I’m completely thrilled to be asked to make her wedding dress!  Thrilled, maybe tempered with a little nervousness, shall we say? but still nonetheless thrilled.  I might even have been anticipating this very thing every since she was born!

Anyway, I’ve made a start… with a coupla petticoats.   Yes, petticoats, plural.  I shall now proceed to explain…

First of all; a stiff, tulle petticoat, to give plenty of volume and oomph to her bridal ensemble.

I’d read a blog post YEARS ago about making a petticoat but couldn’t find it, and so I just plowed ahead and made the above petticoat with what I could remember.  But I do hate not giving credit, so after hunting and following links for what seemed like ages I finally found it!! this post here by Sugardale.  I remember being very impressed with Sugardale’s post when I first read it, but I still somehow neglected to bookmark it or save any useful details that would enable me to find it again upon the occasion that I would need to use it.  But eventually I did find it.  And straight away realised that I had failed dismally to follow any of her instructions when making my own petticoat, so hmmm, there’s that! For example; Sugardale recommended an odd number of tiers, I made mine with an even number; Sugardale recommended working from the bottom up, I, in fact, worked from the top down.  Honestly? I don’t think these issues are a big deal, I think either, or even any way is probably going to work out just fine…

After making a muslin for Cassie’s dress – two actually – we determined the length of the skirt would be 87 cm.  I decided upon 4 tiers, with the following finished heights:  from top down; 20cm, 21cm, 22cm, 24cm… staggered heights just because I believe it looks better and more balanced to have the lower tiers wider than the upper tiers.

I did remember enough of Sugardale’s instructions to know that the tiers started at 2yds from and top and needed to double in circumference with with each tier down; and the tulle I scoped out in Spotlight had a width of 126cm (49.6inches)  So I calculated the following dimensions for my pieces:

Please note:  tier 4 only has 1 single 1cm seam allowance added to the height, since the bottom edge is the lower edge of the petticoat and doesn’t need a seam allowance.

You can see by my calculations and measurements of the tulle I bought, that one and a half cut lengths measures 189cm which I decided didn’t need trimming down.  Yes, my tiers were going to end up with a wider circumference overall than recommended, but I decided that a bit of extra volume was definitely not a bad thing.  It is in fact a very good thing!

How much tulle to buy?

So, according to my calculations; I was going to need:

(2 x 22cm) + (3 x 23cm) + (6 x 24cm) + (12 x 25cm) = 6.6m of tulle  Allowing for errors, I bought 8m of ivory tulle.

I used my rotary cutter and mat to cut the pieces as cleanly and as neatly as possible, and I cut and finished all gathering and stitching of each tier completely at a time before proceeding to the next tier, so as to not mix up the pieces.  I can tell you, by the time  you get to the bottom tier of 12 pieces, you do NOT want to get them mixed up!!

For the top tier, (circumference 189cm); I stitched it not fully closed, but leaving an opening of about 15cm from the top edge, so that Cassie can step into the petticoat.   The seam allowance either side of the split opening I simply folded down and topstitched it down on either side of the split.  I then ran a gathering stitch around the entire top edge and pulled it up to roughly fit Cassie’s waist measurement.  I cut a bias-cut strip of white cotton poplin, measured off Cassie’s waist measurement of 63cm and pinned to mark, and gathered the top tier (189cm) into this length.

After stitching each tier, I topstitched the upper seam allowance of each tier to the skirt above, approx 7mm from the stitching line.  I think this gives it a bit of strength, and lends a bit of pretty visual structure to this ethereal thing too.  Not that it’s meant to be seen, but well, you know…

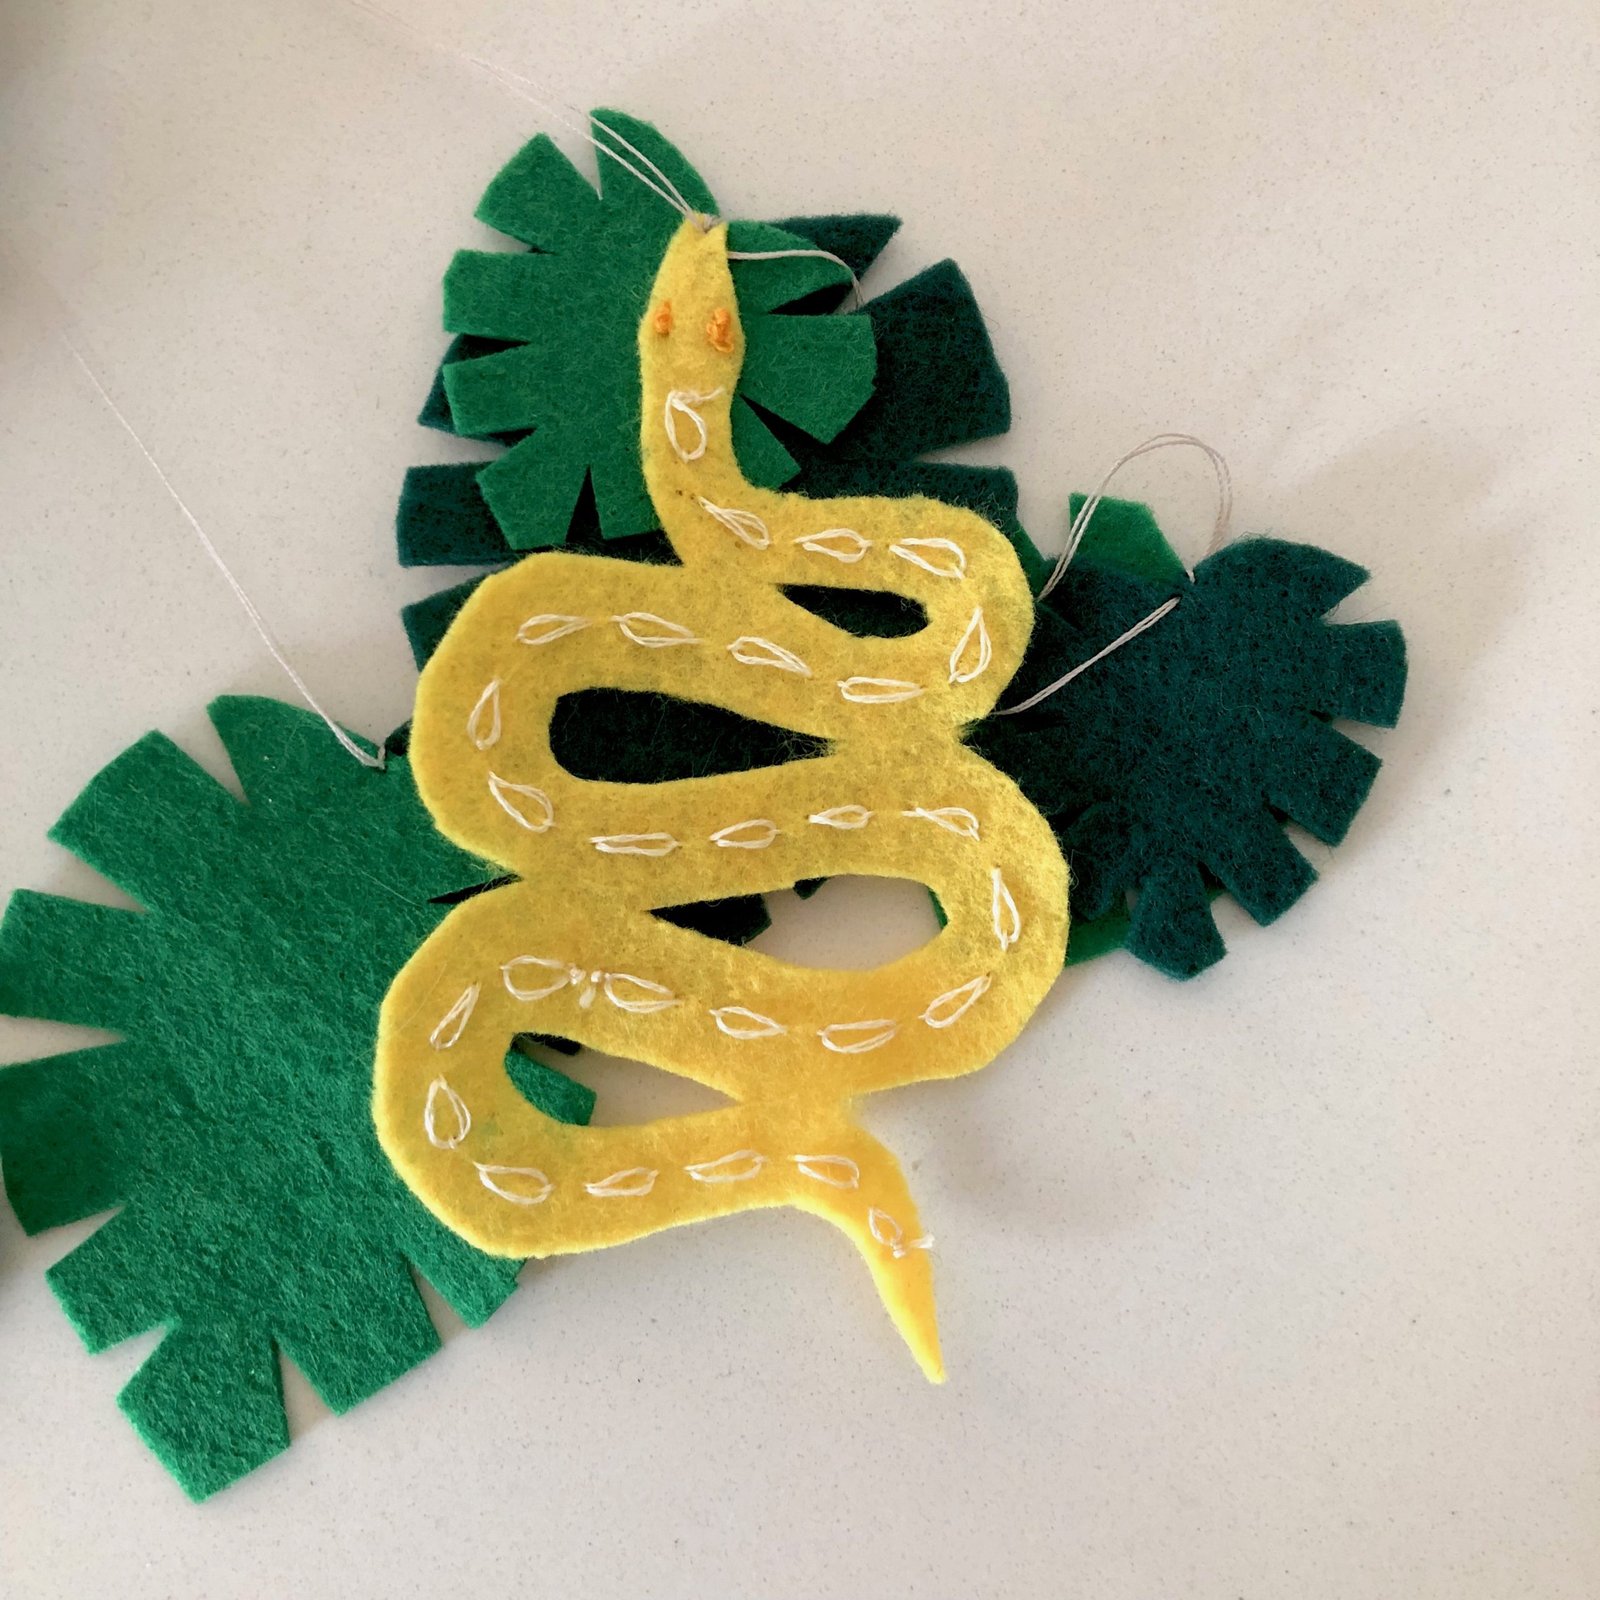
Sophie checks out a weird THING

To finish the waist tie, I pressed the raw edges of the waistband strip into the centreline, then pressed the strip in half, and topstitched in place, about 2mm from the opening edge.

When putting the petticoat on, Cassie steps into the skirt, then the long ends of the waistband are pulled across from each other, wrapped around her waist and tied in a simple knot or bow.


It stands up by itself!

I stuck it up on the kitchen bench for a while, while I had to do something else, and I dunno, the sight of it gave me such a laugh!  Like a little tulle volcano, or something.  Mt Petticoat!!


Because bare legs against a scratchy tulle petticoat will probably become very uncomfortable very quickly, I also made a simple full circle petticoat to be worn underneath, using ivory cotton voile from Spotlight.


This is also 87cm in length, and for this I bought 4m and used every single bit!  I cut this length in half, and then cut the half circles for the two halves the skirt by the “fold into halves, then quarters, then eighths, then again” and cut across the lower edge to get a rough, but good enough curve; method.

The waist opening is made by cutting off the top, just 8cm from the tip.  When stitching together the two half circles of the skirt, I again made sure to leave an opening of at least 15cm so she can step into the skirt!!  and same as for the tulle petticoat, to finish the slit edges I simply pressed down the seam allowances either side of this slit and topstitched them into place.

To finish the waistband and for closure, I again made a bias cut strip of the same fabric, and stitched it to the waistline, leaving long tails either side, pressed the raw edges to the middle of the strip and stitched it closed, same as for the tulle petticoat.  By the way; I usually stitch this; right side of strip, to wrong side of skirt; this means when you fold the raw edges of the strip over you’re actually topstitching from the right side of the skirt, which of course ends up looking much neater from the right side. Which is just what you want.

For the lower edge of the fabric petticoat, I overlocked the raw edge to provide a stable and even width guide for hemming; then folded the overlocked edge under twice and topstitched it down.

The two petticoats!  I think they look so pretty together!

LATER EDIT:

I made a second, voile petticoat!  It’s exactly the same as the first cream coloured one, except it’s white; because I think I cleaned Spotlight right out of the cream, whoops!  This will be worn over the tulle petticoat and be like the lining to the dress.  So the layers Cassie will be wearing, from the inside out are:  voile petticoat, tulle petticoat, voile petticoat, DRESS!

petticoat… junction…

pinterestmail

“Moroccan tile” skirt and a little white top

Something I really wanted to do before my trip to the United States was to make a new outfit for meeting with other seamsters… with two days to go; I did!  I made a skirt and a little white top ensemble… each piece was actually pretty simple and the whole process from go to whoa took about half a day each.  Bam! I really  love sewing projects that just whizz together super quick like that.

I used Vogue 1486; a Nicola Finetti design.  Nicola Finetti is an Australian designer, and when have I ever seen an Australian designer collaborate with Vogue??  I’m pretty sure, never.  I decided this was a collab I absolute needed to support by buying the pattern…

For the skirt; I’d ordered 3m of cotton from Minerva.  I thought the print looked quite divine on the website, when it turned up it was actually a bit of a surprise, to be honest!  The print was divine; however it was also far far smaller, I mean, on a smaller scale, than I had imagined.  I’d sort of pictured the squares being each about 10cm, sorta like real Moroccan tiles, actually they’re more like 1cm.  Hey ho though; I still had hopes it would work out ok…  The colours are quite luscious, and very very me!  Mustard, terracotta, burnt orange, turquoise, green, a tiny dash of coral pink… honestly could this possibly get any more my sort of palette!

The fabric is beautiful quality, as good as I could have hoped for; soft, and still crisp enough, densely woven and yet still with a very nice drape.  It was also very generous width, however I still didn’t manage to cut the skirt pattern pieces out from my 3m length!! I know, right?!  You’d hardly believe it to look at it, but it’s a HUGE fabric hog!!  I had to piece a smaller section onto the end in order to cutout the back lower skirt piece.  The join is not perfect, but pretty good; plus it’s positioned so it’s hidden inside a side pleat, so it’s really quite invisible.

For the little crop top I used some slubby white cotton I bought years ago, from Fabulous Fabrics, and a navy blue chunky metal zip from Spotlight.  The top was super easy and fun to make.  You had to shorten the zip; and the instructions showed how to do this with a pair of pliers.. however I just could not pry the metal teeth off of the zip tape.  I struggled and struggled with this, but eventually gave up, and in the end simply cut the zip off at the right point and stitched a good solid bar tack in the gap between teeth to keep the zip pull firmly trapped where it needed to stay.  And I lOVE how the zip looks at the back of the little top!

innards…for some reason this sight is enormously pleasing to me….

You were supposed to put an exposed zip into the skirt too; however I decided this might all be a bit too much; overpowering the delicate print.  I just used a dark green invisible zip here instead.

And just saying; the skirt has fabulous pockets.  Fab -U -Lous…!

So I’d mentioned I whacked this outfit together in a matter of days… of course I haven’t made this pattern previously and didn’t really bother to do a careful fitting on myself either.  I’d picked a size 12; my correct size according to the size chart.  Usually I pick a 10 for Vogue patterns.  And I don’t know why I decided upon a 12 because, of course, turns out I should have picked a 10 for this one too… I knew I usually go a 10 for a reason!  the waistband is a little bit baggy on me, and – is it my imagination? – but I feel the top looks quite big on me too.  Not that this is going to stop me from wearing it, but just; you know.  For next time.

The day we’d planned to meet with sewing girls in San Francisco was a lovely warm day of 28C… so I felt so lucky I could wear my new outfit!!  however we only had the one warm day during out entire visit and that was it!  I was happy that I could wear it for one sewing meet-up, but just a wee bit disappointed it didn’t get another outing.  Like, the days we met other sewing peeps in New York city it was just too cold for it (sob)  so I had to make do with other things I’d packed…

from left: Yoshimi is wearing Vogue 2900, Beth is wearing one of her favourite dresses, a Butterick pattern, and Shams is wearing her Style Arc Stevie jean jacket

Later on we headed over to a cafe where Shams had organised an afternoon tea..

from left: and I apologise I did not catch what everyone was wearing this time … I think Rose is wearing a Cashmerette top and Jilly is wearing a tessuti patterns Lily dress?? 🙁

Wendy, Shams, Yoshimi, me, Rose, Jilly, and Catherine is taking the picture… I knew I should have taken over the camera so she could be in the photo!

And that brown paper bag, clutched in my  pawsies??  Yup, you guessed it… it has a nice little stash of fabric tucked away…;)

Yoshimi took this picture on the train platform, after fabric shopping in the Bay Area with Shams and Beth.  I thought it was such a nice picture!  In fact the whole day was such a fun day!!  I wish I could hang out and gossip and chat and go fabric shopping with all these ladies more often!

pinterestmail

some naice new clothes

I’ve been whipping up (k-chaaaaa!) some maternity clothes for Kelly… I’ve been making a lot “for others” lately, all this year in fact, or at least it feels like it! but I’m ok with that; for one thing; it gives me a chance to get that aspirational 30 wears out of my own wardrobe, and for another… well that’s reason enough, I think?  I have lots of nice clothes and I’m enjoying getting the most out of what I have lately  🙂  But I still want to sew! so it’s both fun and enjoyable for me to make clothing for my loved ones instead.  Kelly needs new clothes to fit her fast-changing body and is keen for me to make them, and I am more than happy to make them for her, so it’s a win-win situation for both of us. She recently had a birthday, and we headed out to Homecraft Textiles and Spotlight together and did a bit of shopping; my birthday present to her.

A lovely reader of my blog, Graca sent to me this maternity skirt pattern, Burda 7023, thank you so much Graca!.  First of all, I ran up a little test number, using a soft, grey and white cotton jersey sweat shirting, leftover from this hoodie I made for Sam a few years ago.  The leftover scrap I had was the perfect size for the skirt!  The sizing chart of the Burda pattern was a little weird; Kelly’s hip size put her between a size 20 and 22, the very top of Burda’s size range which seemed quite quite bizarre!  I eyeballed the pattern pieces and decided to size down to 18-20 for Kelly, and of course it fits pretty well so sizing down was a pretty good decision.  Also, of course the skirt is currently huge on her, not surprising given that she is in the very early stages of her pregnancy.  But we both feel it will be a good thing for her to have in the later stages of the pregnancy.

On our shopping trip for the real version we picked up a few very nice fabrics; including a truly gorgeous, creamy/ivory/grey cotton jersey – I bought enough for me to have something too! – and this absolutely drool-worthy rose printed stretch velvet.  I used the Burda 7023 skirt pattern to make the skirt, and “early-maternitised” it a little bit, so it’s more suitable for her to wear during this wintery, early stage of her pregnancy.  I did this by reducing the amount of gathered rise in that front portion of the skirt.  I also installed a drawstring in the front band, so she can pull in some of the extra width now, and let it out gradually as she expands over the coming months.

How?  Firstly; I ironed a square of iron-on interfacing in the centre of the skirt front facing section, and stitched a sort of double buttonhole/figure 8 stitching using a narrow width, short-stitch zig-zag stitching.  I used small shape scissors to cut X-shapes int he square centres of this stitching.  Next, I cut long strips from the ivory jersey I used for the little T-shirt top; these left unheeded naturally roll up in to nice little rolls of fabric.  These I stitched into the side seam stitching of the front/back waistband/facing/casing so the strips are hidden inside, and threaded the ends through my makeshift eyelets.

So, they emerge inside the front waistband of the skirt, and Kelly can pull the waistband in to fit now, and let it out as she grows.  I think this is quite an improvement on the original, which is left to stay big and loose and floppy no matter which stage of the pregnancy you are!

I also made the little top, using the Ebony top pattern I’d bought recently, totally for maternity purposes only of course.  Though I did get an extra one printed out for myself too! ahem…  Kelly has been wearing the striped, raglan-sleeved test version I’d made up, and requested it be streamlined just a little bit, so I brought in the “swing” of the side seams by about 2 inches at each side seam, keeping the side seams straight.  And it still has plenty of swing!  The next request was to bring it in even more next time! though I’m pretty sure the bit of extra room will come in very handy come breastfeeding time.

When making a T-shirt; I like to stitch the shoulder seams down towards the back, and also to stitch the neckline seam allowances down onto the shirt at the back only, like so…. I believe it stabilises this part of a T-shirt which is often subject to the most strain.

This is the regular, set-in sleeve version of the pattern …

btw, when it comes to stitching a hem or an elastic casing in velvet; its pile causes it to become the most annoyingly migratory stuff that slides over itself under the sewing needle, even even when you’re being super vigilant and slow, it just happens!  I found the best way to keep it firmly in place was to pin regularly, like at least every inch! and perpendicular to the seam, with the needle passing through exactly where you’re going to be stitching, and not removing the needle until you’re right upon it.  This seemed to keep everything in place nicely enough…

I already have some other versions in the pipeline, as well as a few as yet unblogged things awaiting in the wings; I need to get cracking and catch up!

pinterestmail

terracotta skirt; 6 different ways

I’ve loved this skirt so much! but it’s been worn and worn and worn and the placky-dack fabric got so crazed and brittle in places towards the end there, I’ve finally been forced, forced I say! to bid it adieu; because my husband was like, that skirt is AWFUL.   And I had to sadly admit; dear, thou speaketh the truth.

I made it two years ago, using a plastic-fantastic polyacetate/vinyl stuff from Spotlight, and the Megan Nielsen Axel skirt pattern.   It most definitely got its magic number of 30 wears… just.  It was fairly shredded towards the end of its life, but it got there!   I’m giving this awesome little terracotta workhorse a little salutary send-off by reminiscing about some of my favourite outfits in which it featured…  Six outfits, to be precise… and everything else I’ve made in the outfits here is linked to its original construction post.

Above; at left; ok, being real here; this is not the most awesome “outfit”, per se; but this OOTD pictures holds a special place in my heart because it was Clara’s first feature on my OOTD blog… LOOK AT THAT LITTLE SCRAP OF PURE CUTENESS!!  SO TINYYYYYYY!! sigh.  If only they could stay so little and cute like that.  But without the puppy-insanity, thanks….  I’m wearing the skirt here with my leather sleeved/wool/silk top, my trusty homemade tights (as always) and my heeled black booties…

At right; I really love this outfit, and wore my caramel suede cardigan with the skirt quite frequently… also with my pink Pattern Magic twist top, ye olde homemade black tights, and my favourite motorcycle boots that I wear practically all winter long…

Both these outfits above were from my spring 10×10 challenge from two years ago, during which the skirt proved its workhorse-ness to me most satisfactorily!  At left; worn with my mustard silk crepe blouse, itself another of my creations using a Megan Nielsen pattern, the Sudley…. and also my own handmade white oxford shoes.

At right; worn with my blue-check hoodie from a Burda pattern, my navy edged white Nettie tee, my black tights and, yet again, the favourite boots….

Above, at left; I love the colour combination of this outfit, so much!! wearing the skirt with my teal-blue Nettie tee, my paprika tie-front cardigan, my mustard raincoat, the homemade black tights and my KronKron shoes that I bought during our holiday in Iceland…

At right; I discovered this outfit combo quite late in the skirt’s life, sadly, because I absolutely love it so much I definitely would have worn it over and over again if the skirt had lived a bit longer!  My wonky apricot striped T-shirt from a Burda pattern, and my olive suede tunic-tee, from another Burda pattern.  Same old black tights, and the little suede booties Craig gave me for my last birthday.  Love these !!

Sooooo, this skirt has been pretty great, so I’m a little sad it died, but you know what? Time to cultivate a new favourite.  What will take its place in my little skirt-loving heart, I wonder?  I can hardly wait to find out  🙂

pinterestmail

unicorn

So I’m knee deep in wedding-dress biz, which I LOVE, of course! but I took a little time out just to make something fripperous and frivolous and quick and easy, just for me.  Think of this as like a tiny serve of sorbet in the middle of a lengthy degustation…

Cassie bought this adorable rainbow unicorn printed cotton canvas from Spotlight for me for my birthday last year, and there was just just enough to squeak out a cute and totally age-appropriate little skirt, yay!!

I adapted Vogue 8363, an old favourite that comes with great pockets…  I didn’t have enough fabric for the pockets so I cut those pieces from a small piece of white cotton canvas from le stash.  Basically the pockets are this pattern’s saving grace for me since I rarely make use of any other of its features.  In fact, now I’m wondering, have I ever used any of the views in the pattern in the purest sense even once?? and I think maybe NO!  I’ve always tended to make a sort of cobbled together version that incorporates various bits of several views.  I like for mine to have; a) those fab deep pockets, b) a one piece front, and c) to open with an invisible zip along a centre back seam… and this skirt pattern allows for all of these things, with a bit of swift and sneaky pattern piece finagling.

Lining; normally I probably wouldn’t line a summer skirt, but in this case while I was trying it on in the process of making it I discovered the wrong side of the fabric had an almost indiscernible rough texture that somehow caused the skirt to stick to my undies and ride up slightly … yes! very VERY weird!  So I decided to line, and super-luckily I had the perfectly sized piece of mint-green lining in my stash already, inherited from my grandmother’s stash  …  my tips on making a lining for a skirt here

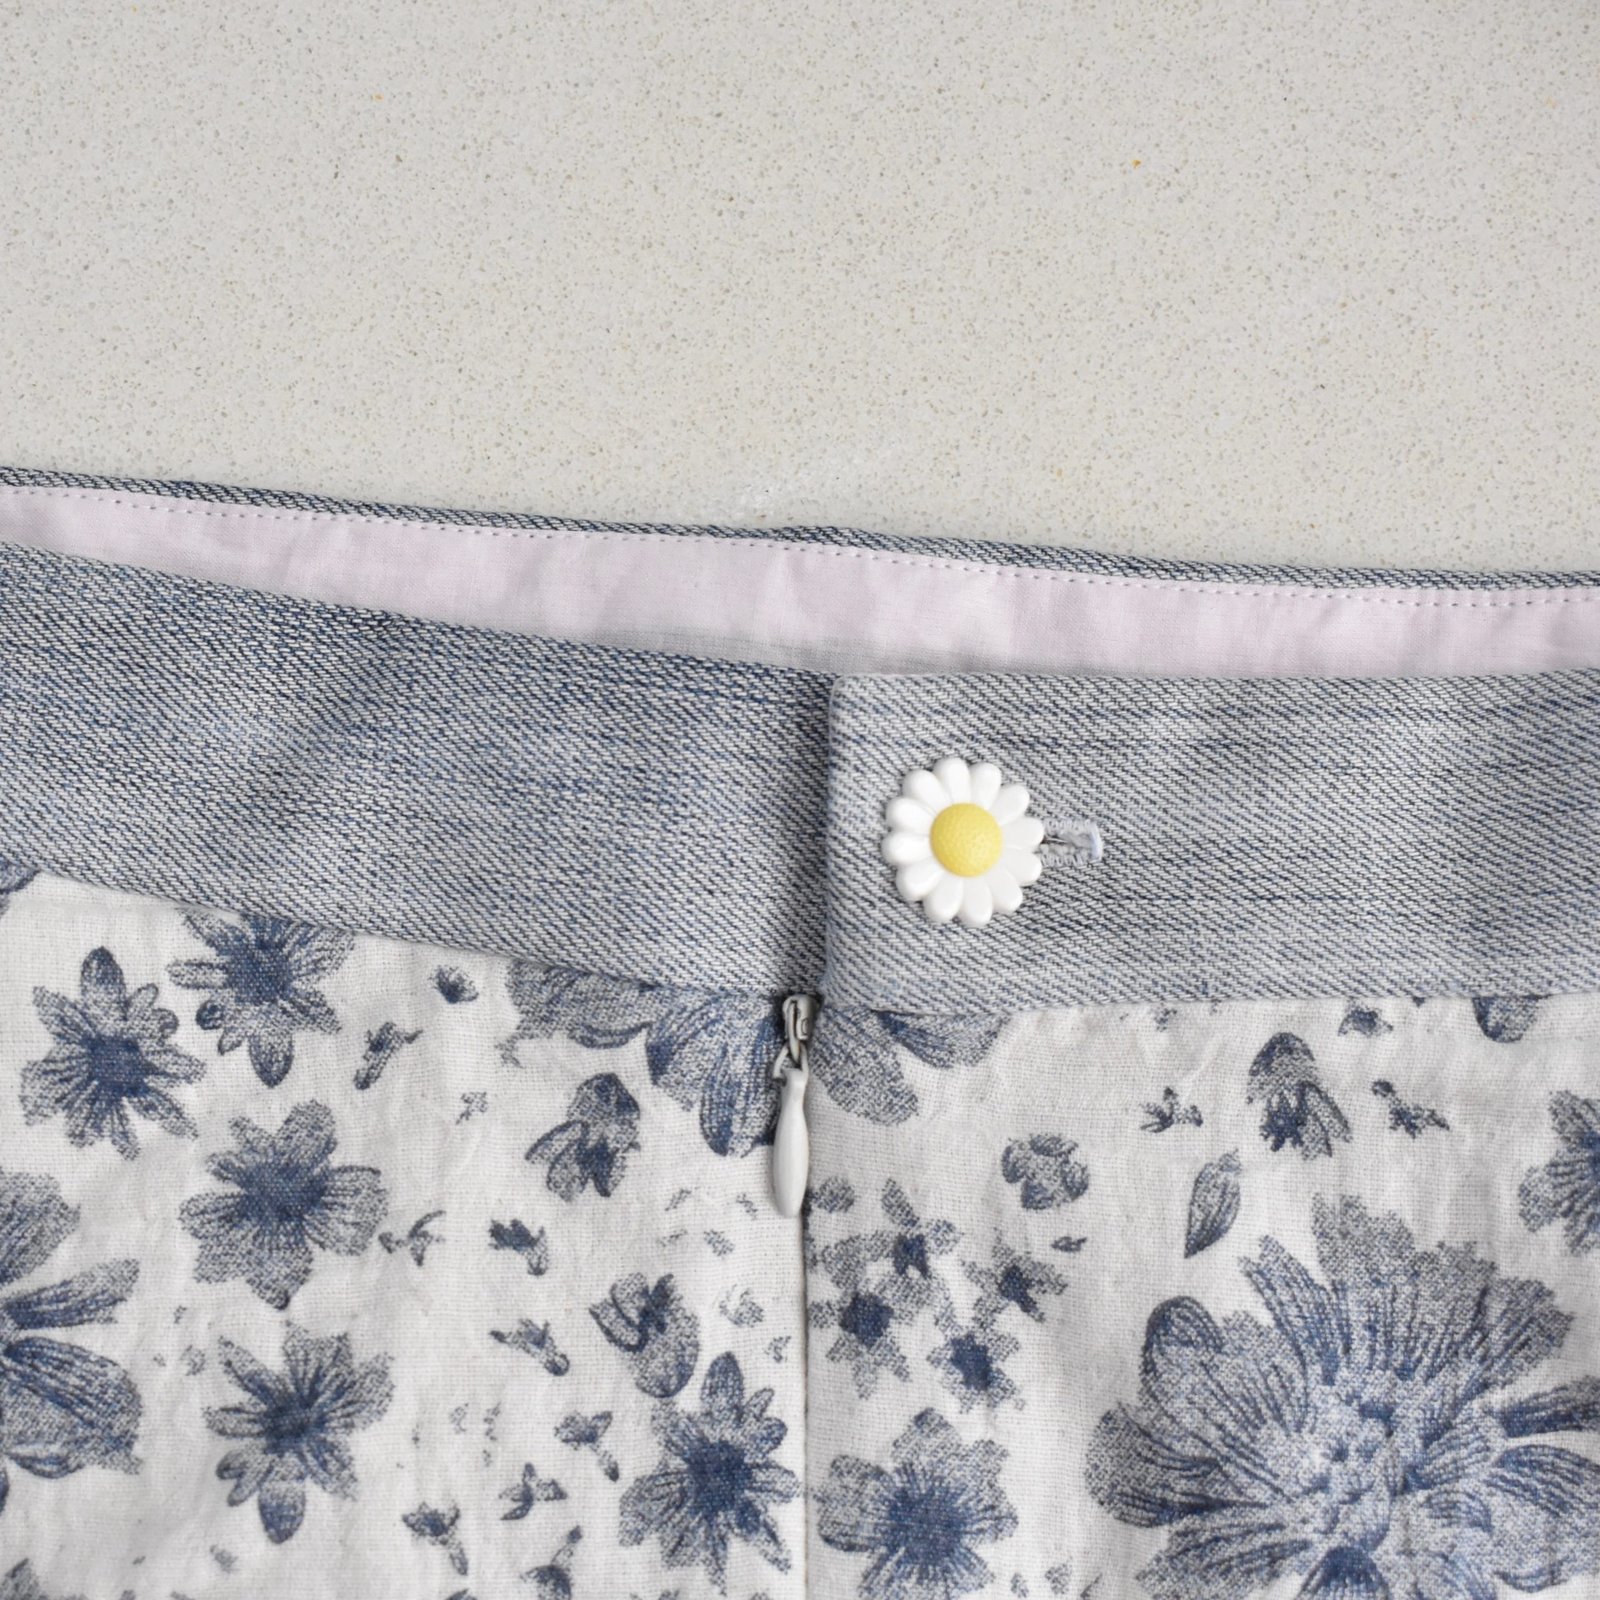
  I agonised over what button to use! this one seemed cheerful and not twee

Oh, and I made a new little T-shirt too.  I’d seen this rather gorgeous apricot-y pink, slubby cotton jersey in Spotlight too, seen it on several occasions actually and staunchly resisted it because… well because I have a rather, shall we say, substantial stash already?!  But it was soooo pretty!  and well one day they happened to have a cheap remnant sitting there, cut for another customer who changed her mind…  so in a weak-willed moment I snaffled it up!  Ooo so naughty.  But it was just such a pretty colour!  I assuaged the guilt by cutting and making it up immediately.

The pattern; my own, if you can give such a grand title as “pattern” to cutting out a few vaguely T-shirt-shaped pieces and bunging them together. I very much like the high boxy collar and the slightly curved hemline.


Now it’s back to the wedding dress!!  I’m posting progress shots in my stories on instagram, if anyone would like to follow along… 🙂

Details:

T-shirt; self-drafted, pink cotton jersey
Skirt; adapted from Vogue 8363, cotton drill
Sandals (above); ariel, from an op shop years ago
Thongs (below); fipper, bought in Bali on our holiday

When one wears one’s sparkly rainbow unicorn skirt, then obviously one must go for an elegant and graceful unicornly leap over some puffy cottonball clouds… 😉

So, if I am taking my own picture using my remote control and the timer I can time my jumps to the shutter click perfectly! I’ve got the whole process down to a fine art!  However, when I ask Craig to take the picture, this happens…

faaaaaail!!

pinterestmail

outback wife

My dear sister-in-law S gave to me a length of precious “Outback Wife” barkcloth for my birthday… soooo thrilling to finally get a piece of this gorgeousness for myself!  I’ve bought other designs of this once or twice before as gifts for others but never for myself for some strange reason, I know not why … Because, oh my gosh this stuff is just so lovely, sews up like an absolute DREAM!!  I’m in love!  I’m seriously thinking about sneaking out to Calico and Ivy and buying more!  For meeeee!

I turned to my ol’ reliable, tried and true,Vogue 1247 for the skirt… my copy of this is now a little bit tattered, not surprisingly since this latest is version number 23, ahem.  I just counted, and wow, that’s a shock, even to me!  Yes, I really do need to move onto a new pattern…  A lot of my V1247’s have been straight, sans pockets, because to be honest, although the pockets in this design are really cool I actually don’t really use them all that much.  Very occasionally for my phone and keys and it’s very rare I shove my actual hands in them..  I worry about distorting the lines of the skirt and contributing to premature pocket sag.  And if there’s one thing NO ONE needs in their life, it’s premature pocket sag, am I right?   Quelle horreur!

But for old times’ sake, I put the pockets in this version.

I über-carefully cut my pieces so the print matches up practically everywhere, along both horizontal skirt seams, and as well the centre back seam, and even the waistband seams matches as well as it is able.  This took only a little bit of frowning and sighing, and moving my pattern pieces around more times than the most diligent of sleight-of-hand operatives, but it’s always a worthwhile thing to do, I reckon.  Otherwise, the not-matching pattern would probably bother me forever.

At the same time as I was making my skirt, I happened to notice in my stash two lengths of very thin jersey knit that I’d bought at the Fabric Store in Melbourne during one of my trips over there with Mum and Cassie, one a bottle green and the other in deep teal blue; both an absolute perfect match for the skirt!  It was meant to be!!  I quickly whipped up (k-tchaaaaah!) two long sleeved modified Nettie tees.  These are practically identical to each other, narrow neckline bands and wide sleeve and bottom bands.

It’s so funny to me, looking at these pictures.  See, S actually gave this fabric to me back in early June, yes, it was a very early birthday present!  and I made the skirt and two tees up straight away, like within a week.  And took the pictures of the tees on Bessie, though it was too cold to actually wear them at the time… then a few months later, early September to be exact, I took the wearing-with-black tights-and-boots pictures.  And did precisely nothing with those pictures, either.  As it happens, I’ve been in a bit of a funk over the past few months, feeling a little intimidated, like I’m just not capable or good enough, almost on the point of giving it up entirely.  Generally speaking, it’s been taking me a looooong time to write a blog post lately, like almost as long as to make a little dress for myself.   And so I’ve just been feeling… less inclined, and oh so lazy about it, to be honest; even though I want to write.

Anyway; yesterday, it was a perfectly beautiful day and we went out walking at the beach, and I wore the whole lot of them, the skirt and both the tops too.  Meaning, in my funny weird little world, a blog post must transpire.   Eeeek!  Quick sticks!!  so I gave myself a bit of a pep talk.  Just lay it out there.  With minimal fiddling.  Just spill, organically.   I mean apart from spelling.  I am as it happens, the biggest spelling nazi imaginable.  I roll my eyes on the regular, at the newspaper, at advertisements on instagram; at all the offending “your”s instead of “you’re”s and so on.  I’m sooo judgemental, the absolute worst, in fact!  But, I’m getting off track…  where was I?  Ah yes, writing without pause.  Letting the words flow, flying from my fingertips, of their own volition.  That’s what this is.  Stream of consciousness blogging, for better or worse.  Well, that’s what blogging is supposed to be, right?   It’s supposed to be a personal journey?  Just me, being me?  SO!  I hereby free myself of further worrying, right now.  Begone, thy treacherous feelings of inadequacy!!  Vamoose!  Whooooosh!!! And; this house, is clean *… I hope!

* … name that movie 🙂


Details:

both tees; loosely based on Closet Case patterns Nettie, thin cotton jersey
Skirt; Vogue 1247, in Outback Wife barkcloth
Tights; made by me, details here
Boots; Roberto del Carlo, from Zomp boutique

pinterestmail
Switch to mobile version
↓