Tag Archives: Wardrobe Refashion

Patched pockets

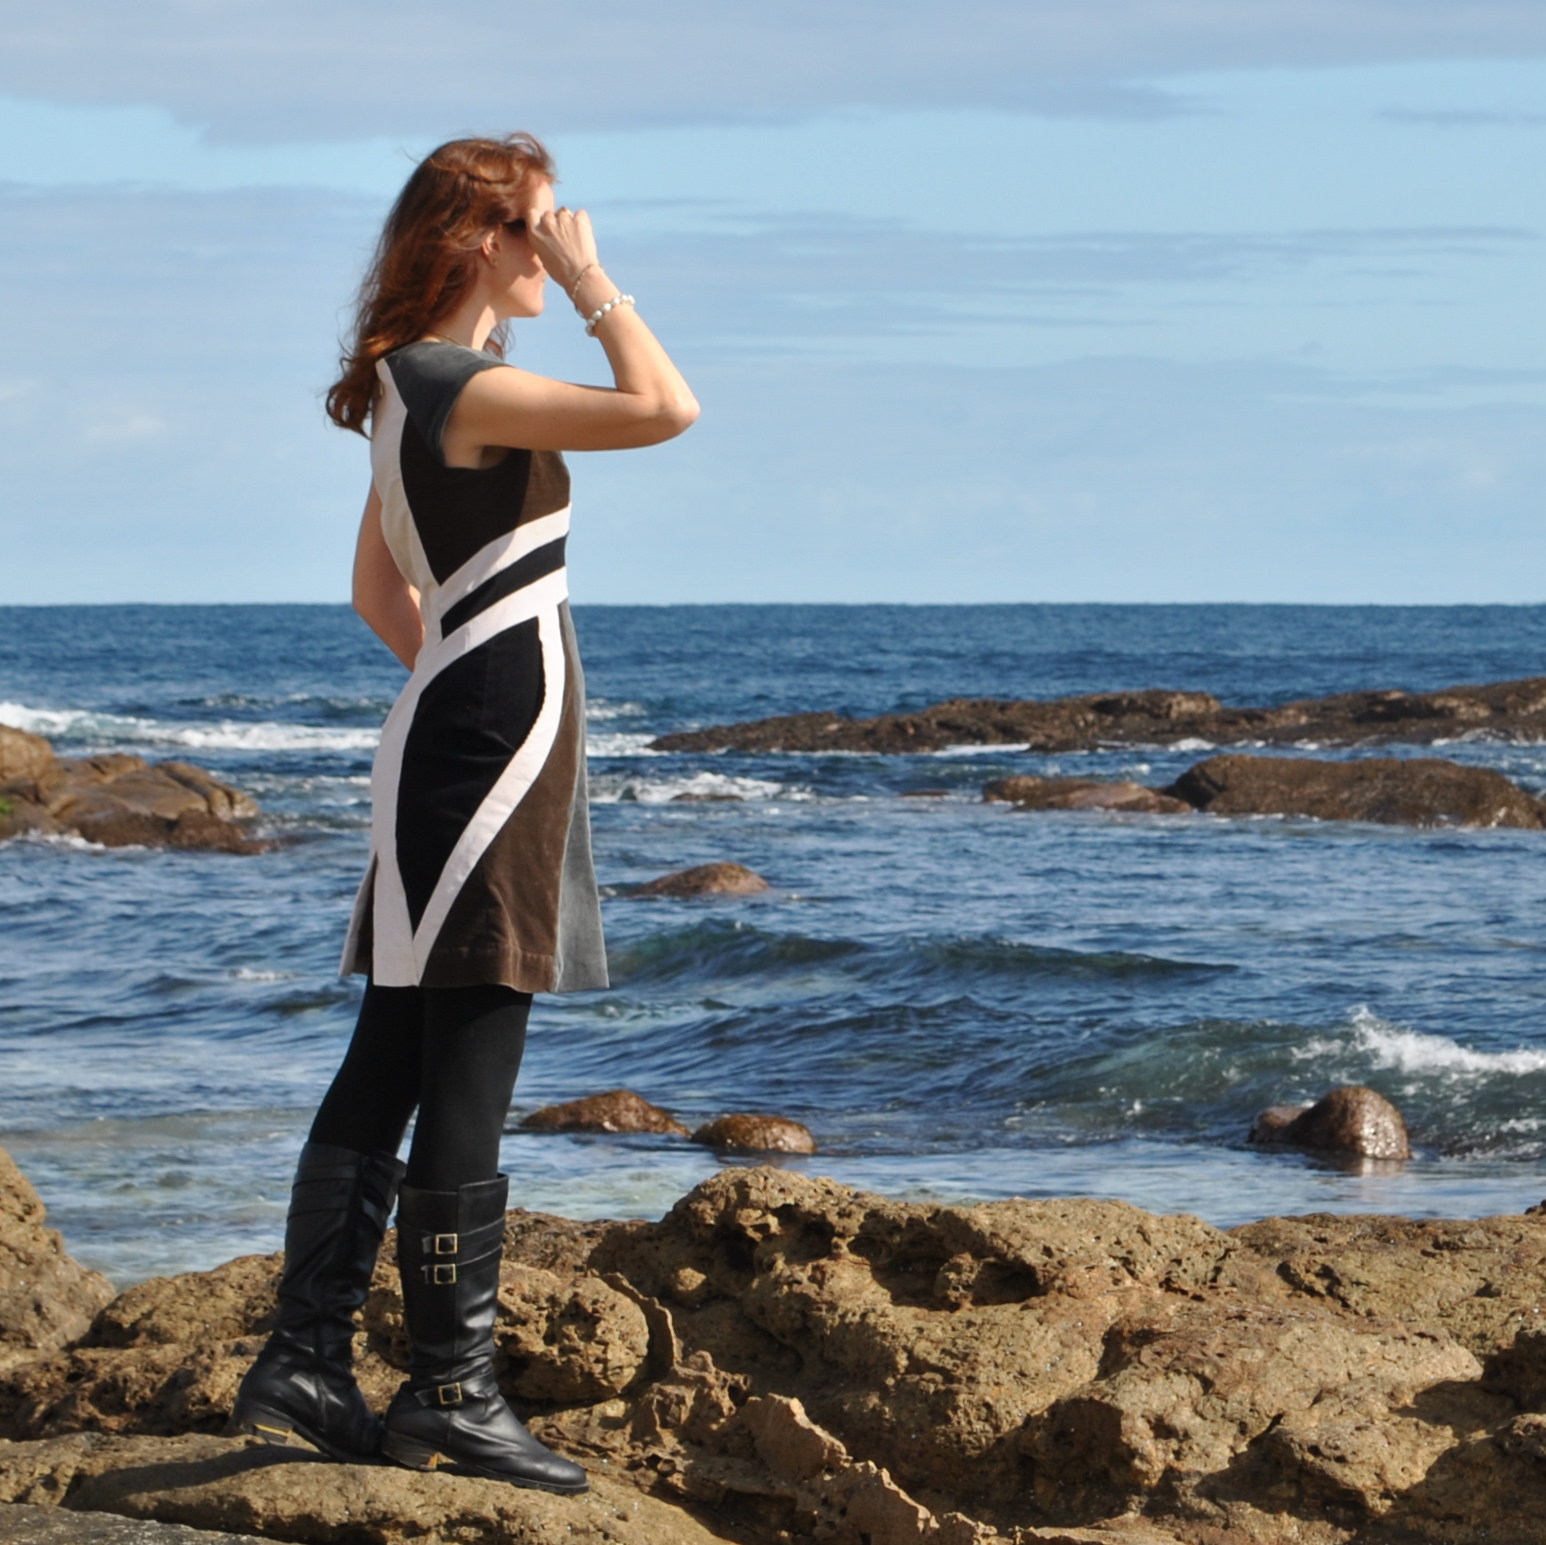
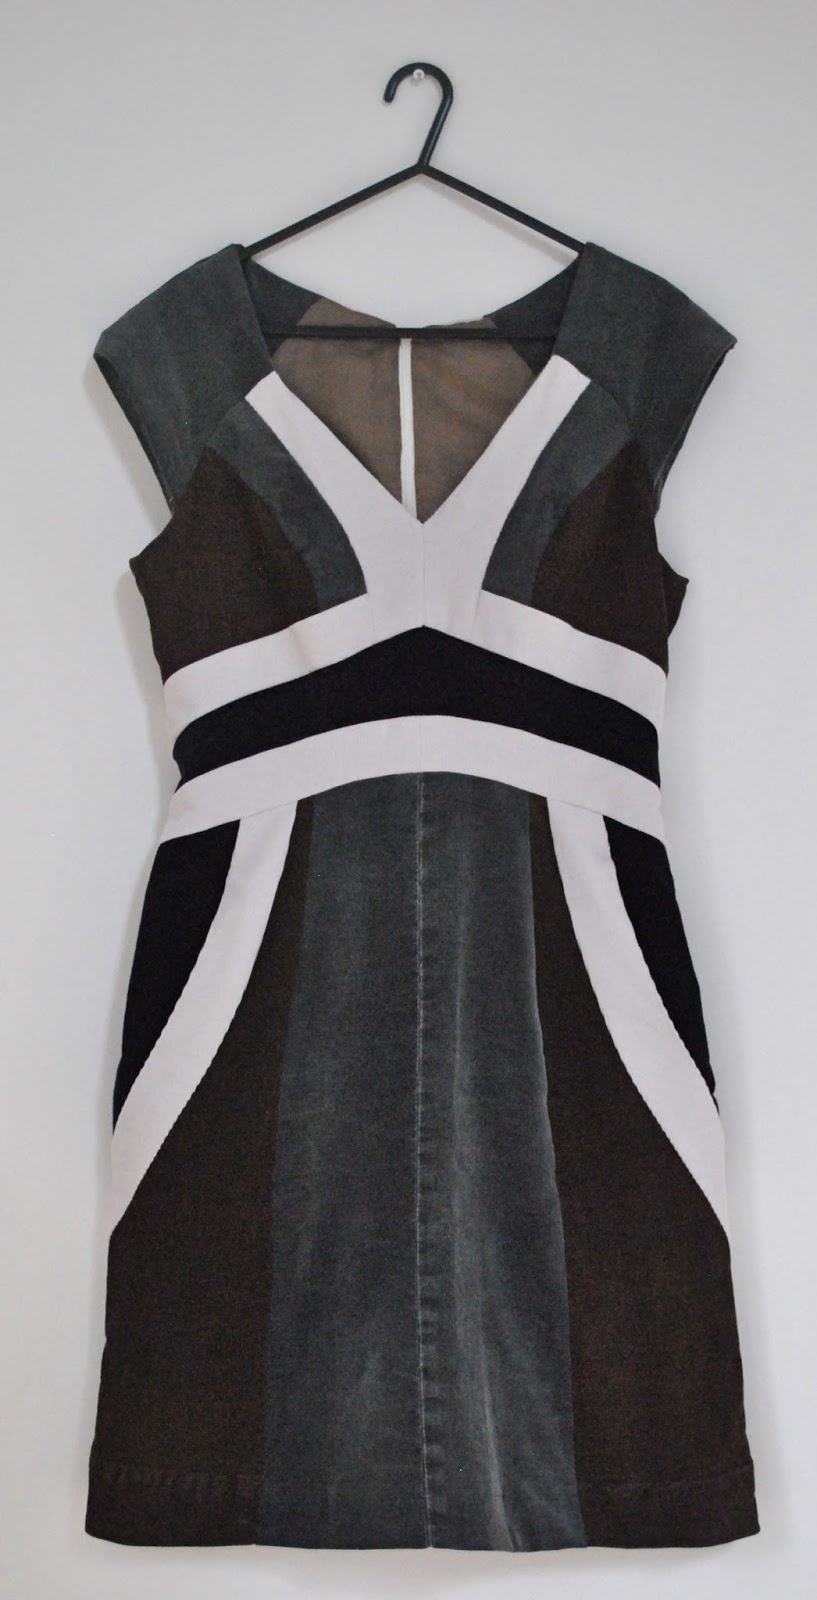
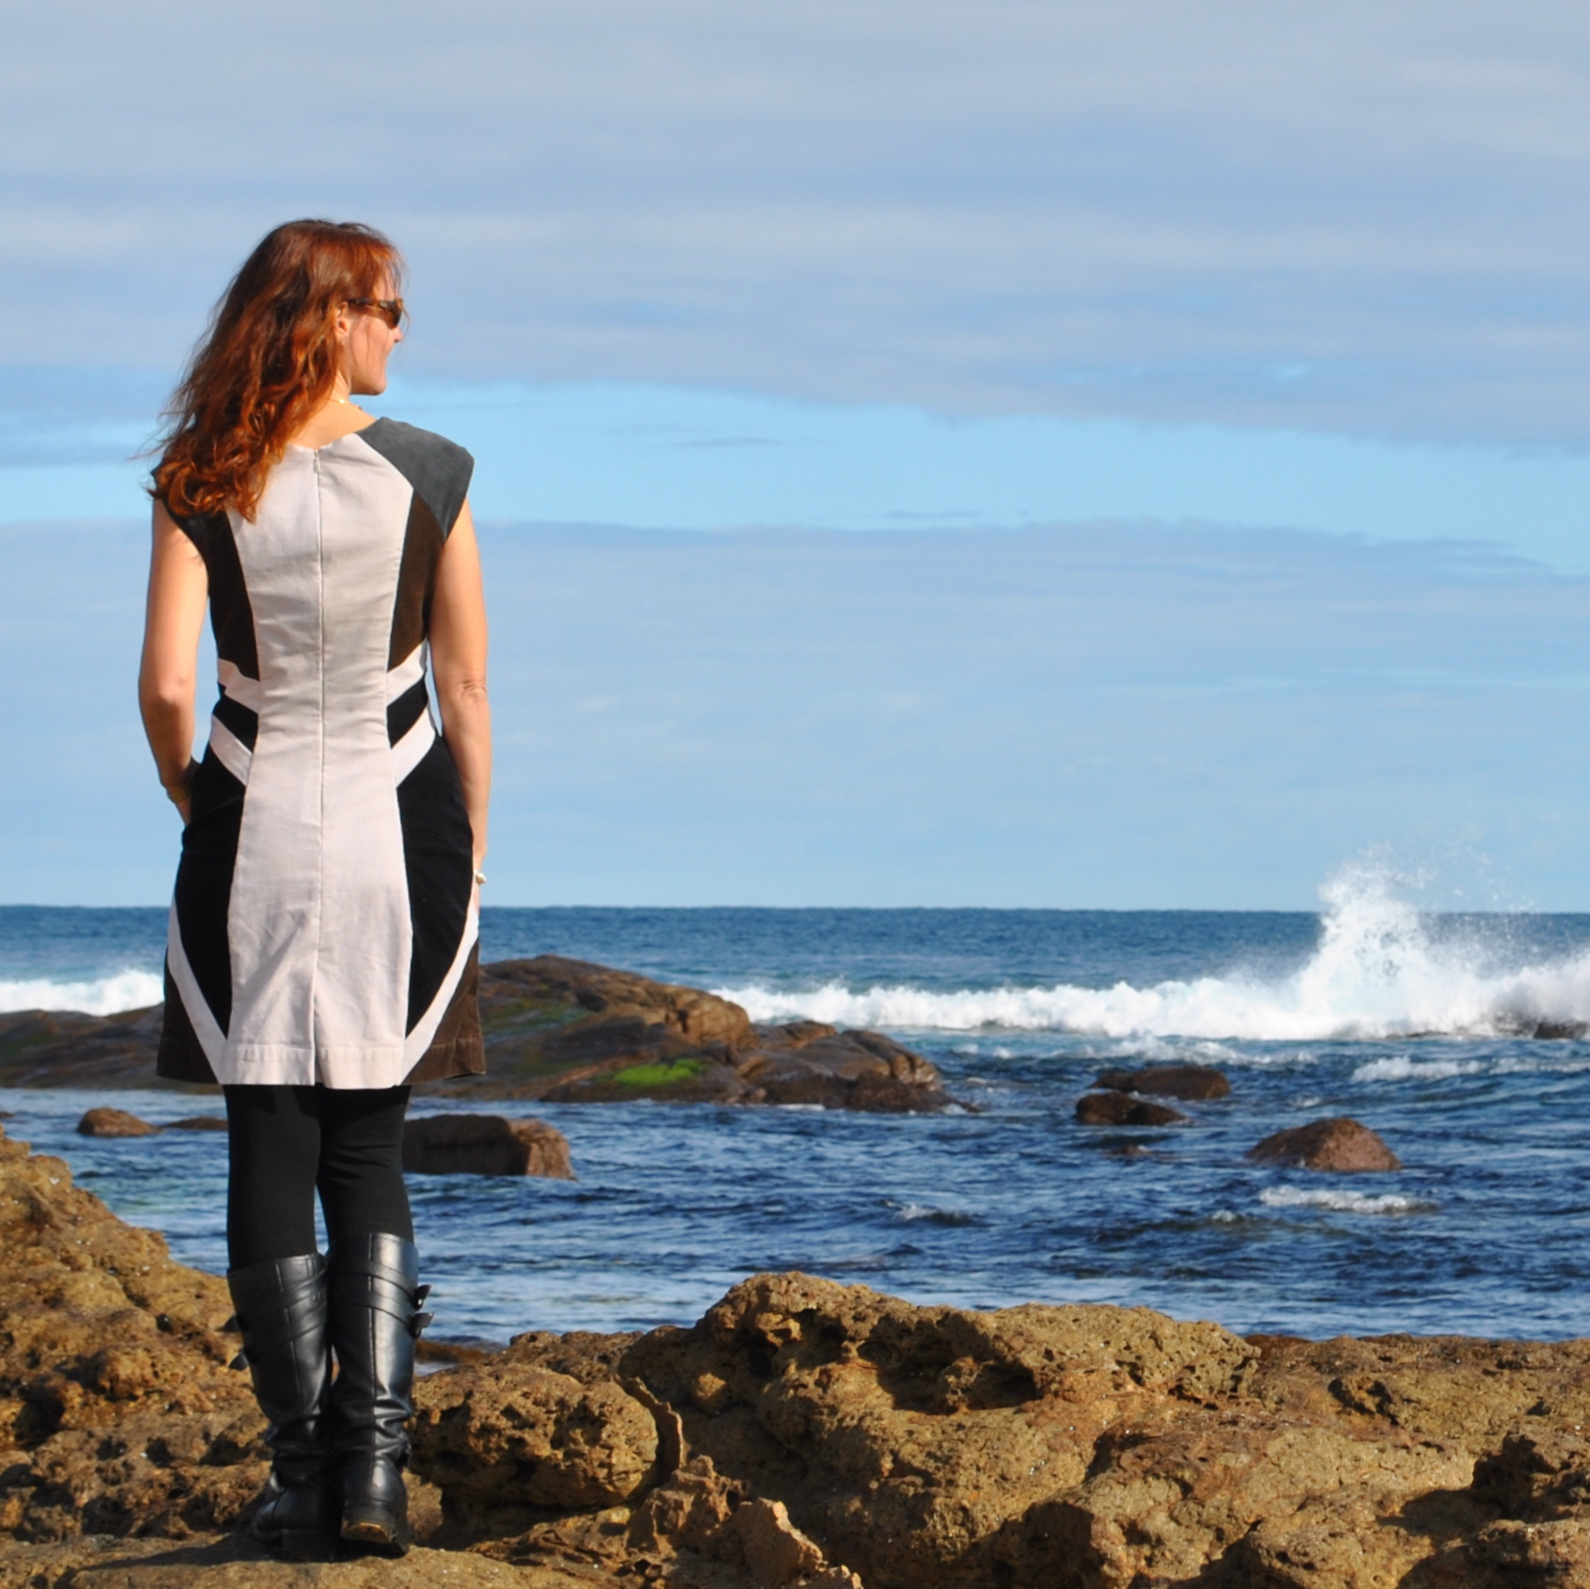
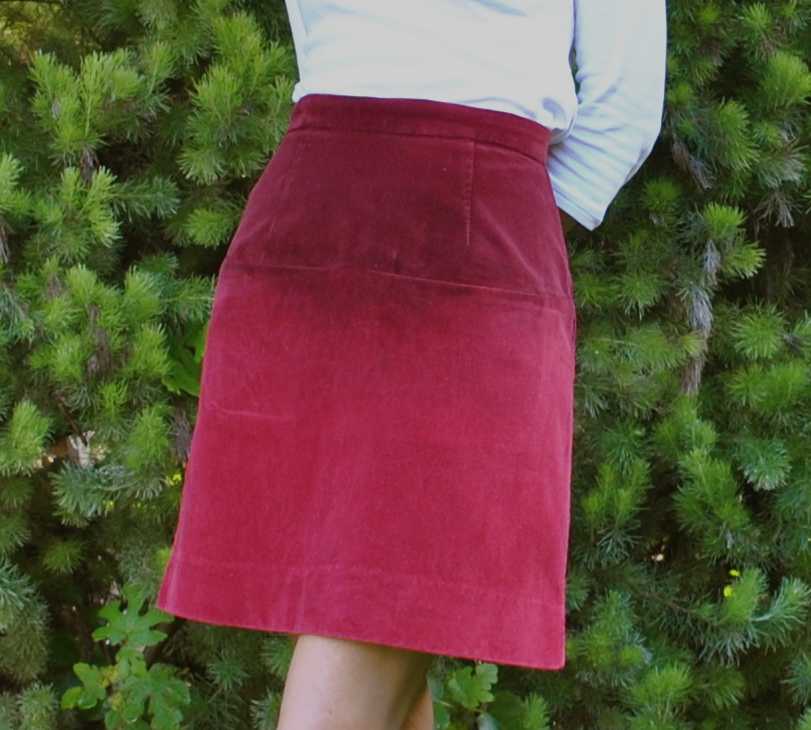
Just to provide further proof of my predilection for unusual clothing … please allow me to present my new skirt.
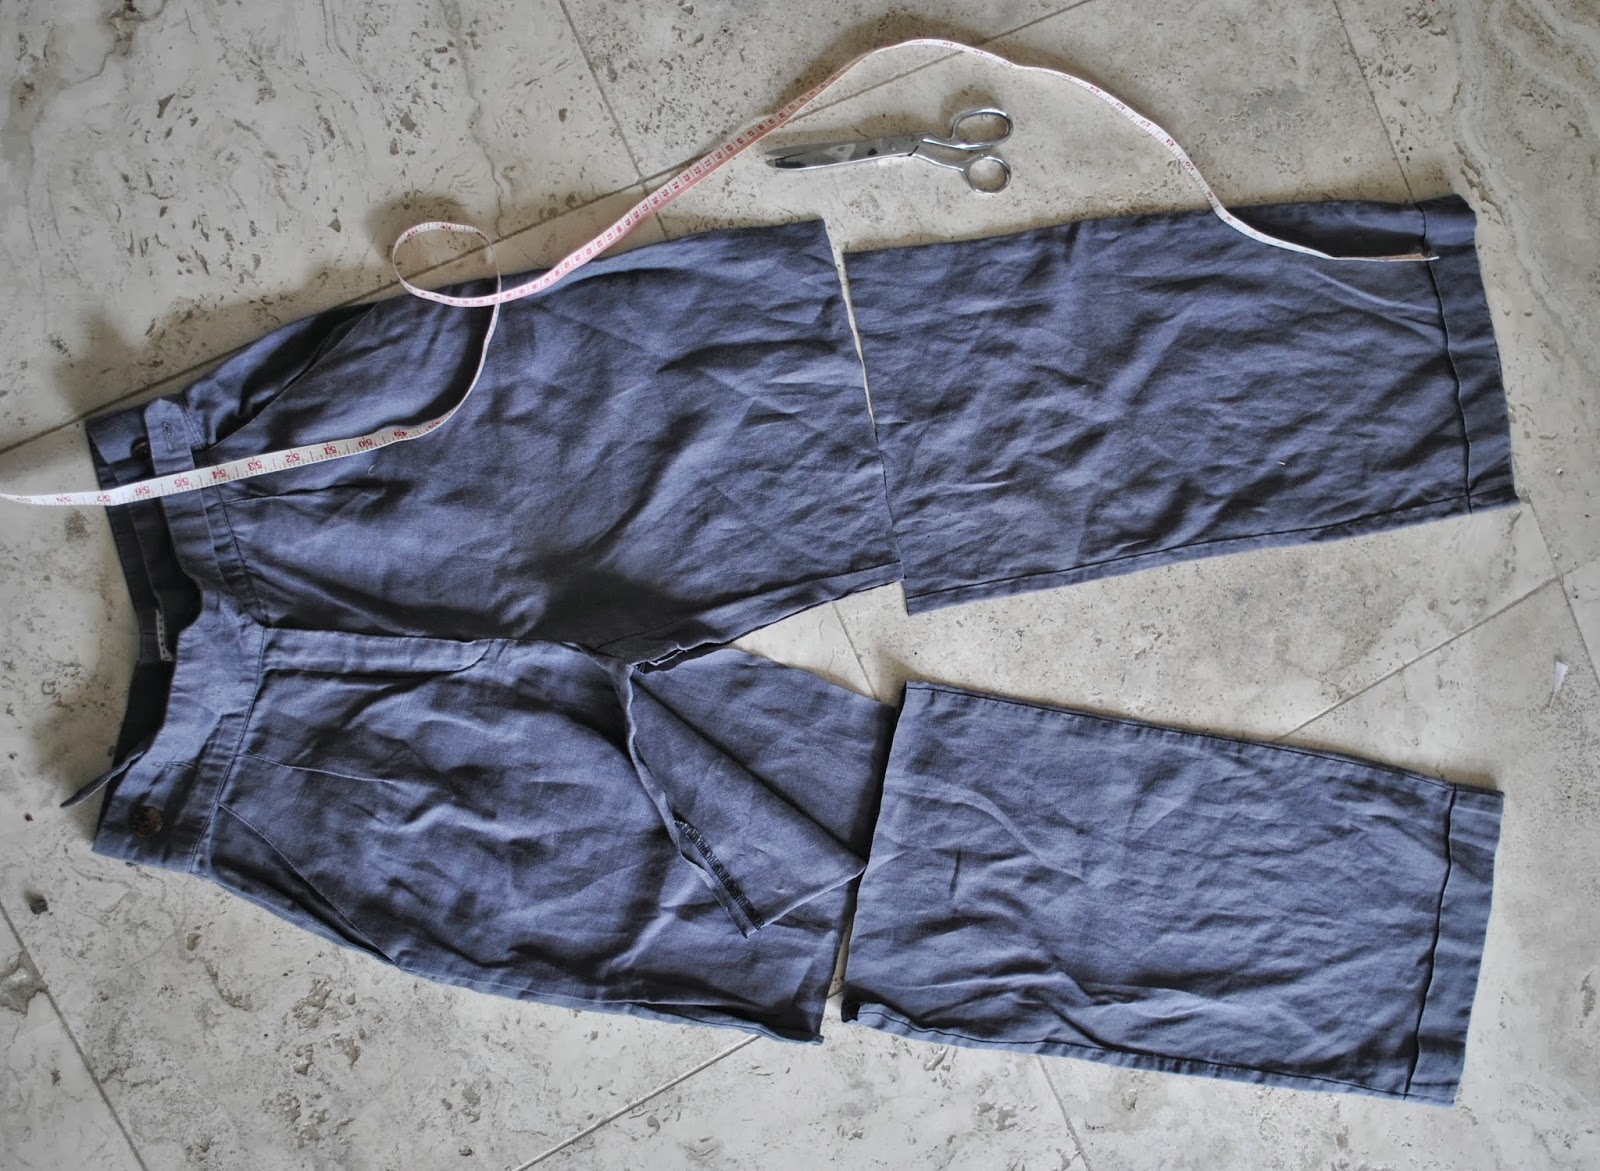
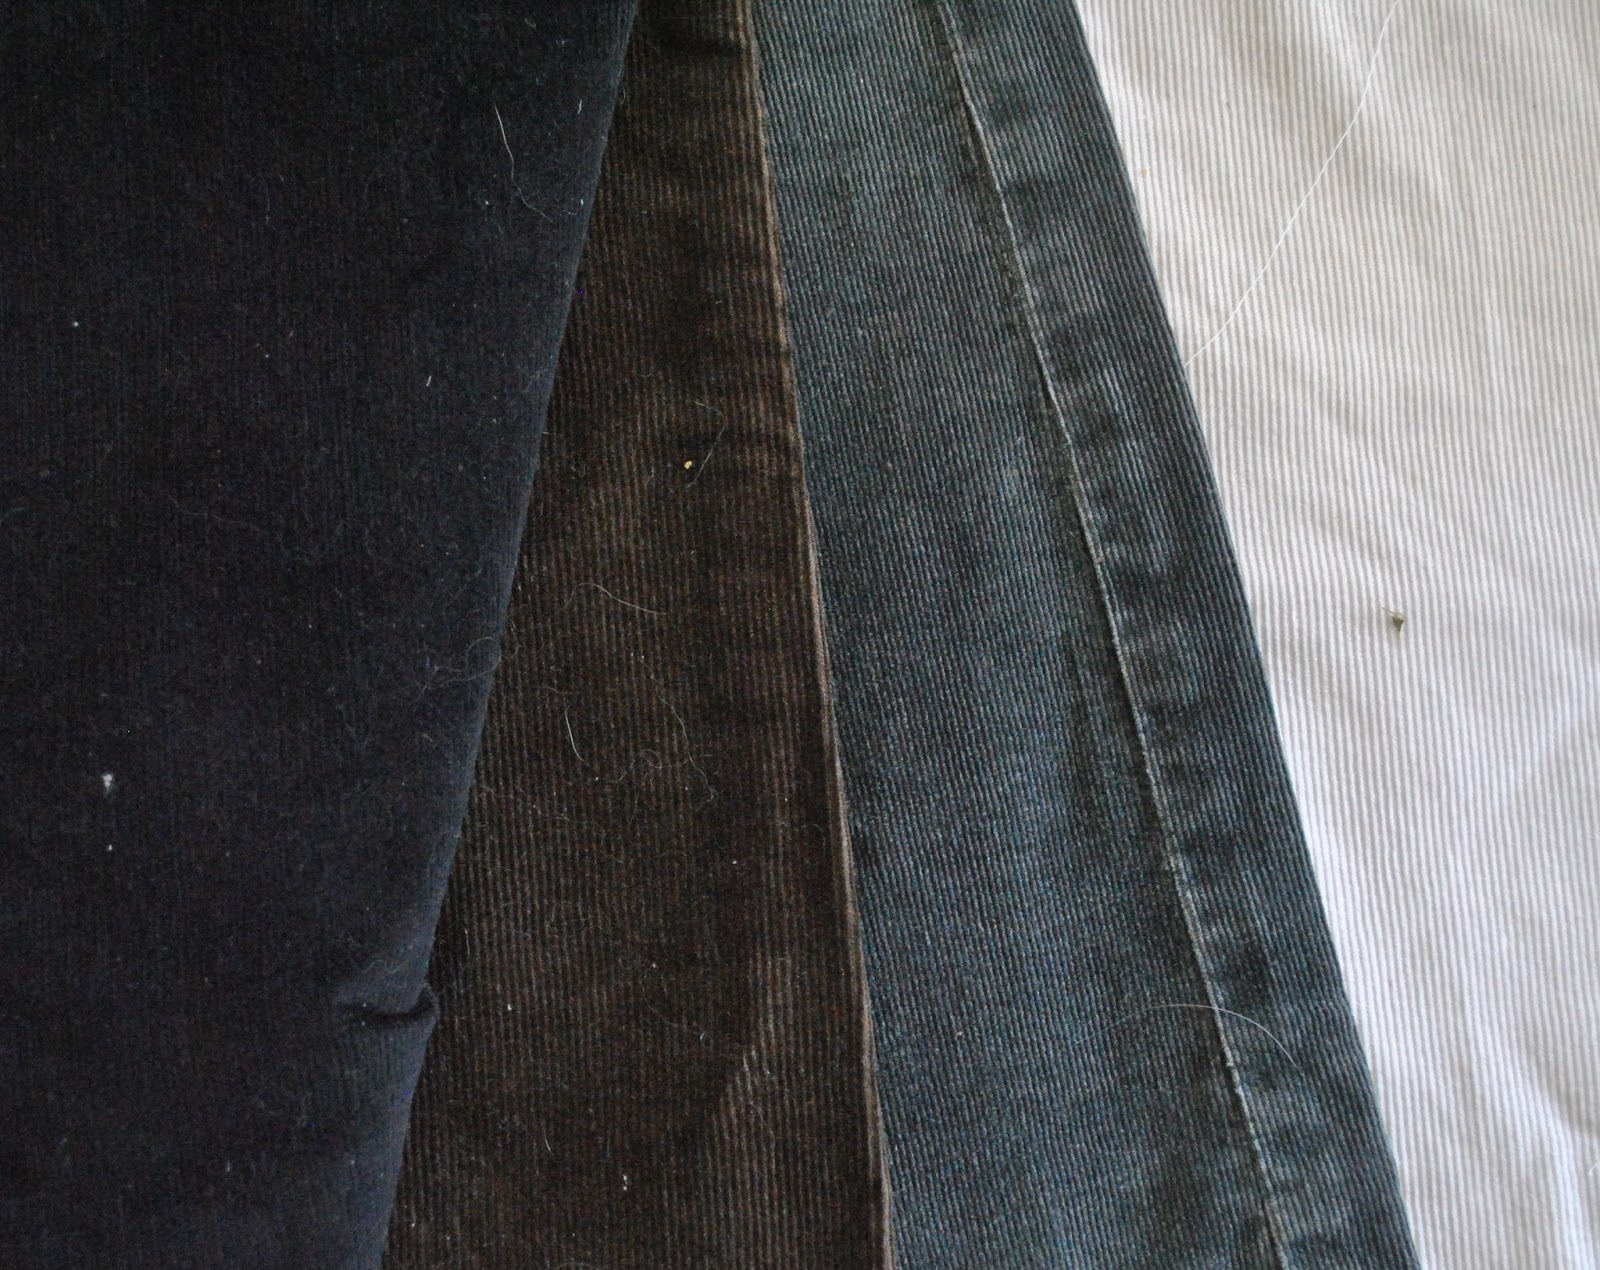
This skirt is the love-child of four old pairs of jeans.   They were a bit battered but in favourite colours, and had fabric in some areas still in pretty good knick.  Charcoal denim (Cassie’s), olive green corduroy, olive green moleskin and chocolate moleskin (Craig’s).  The chocolate moleskins had previously been nibbled away at to produce the Brown parliament.

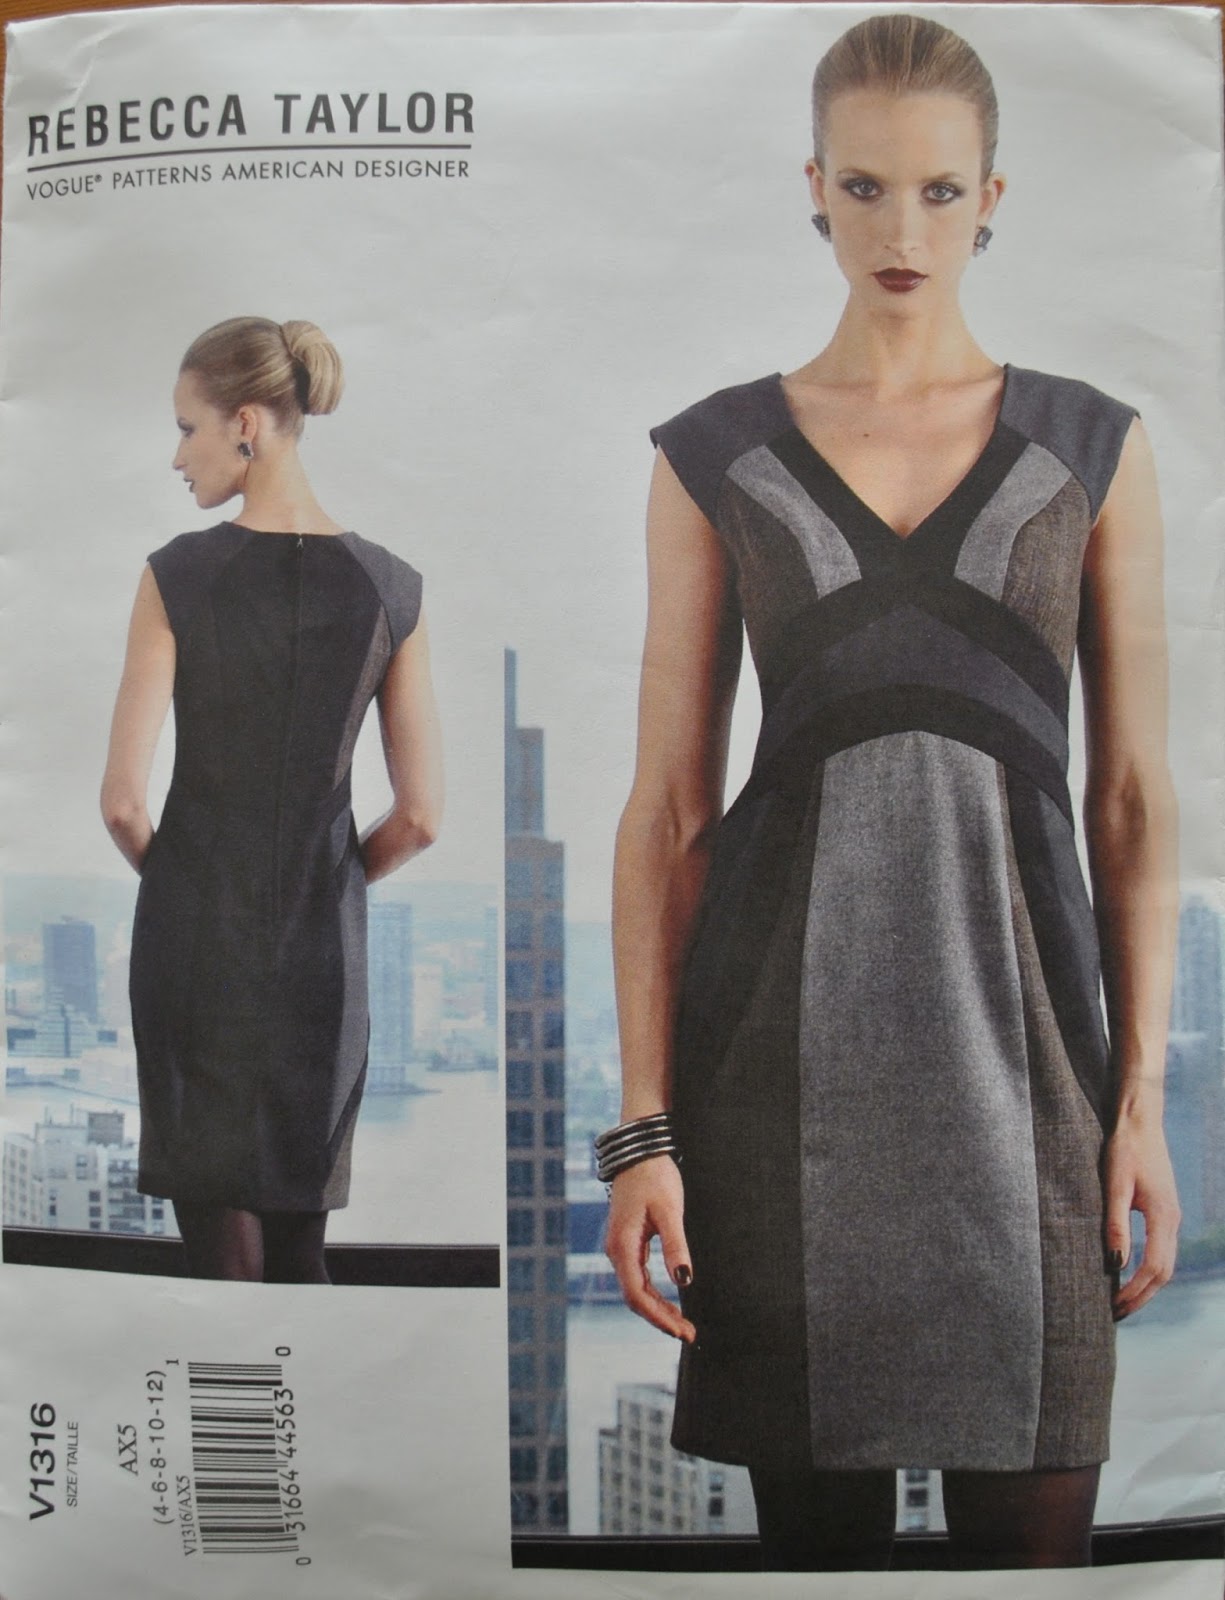
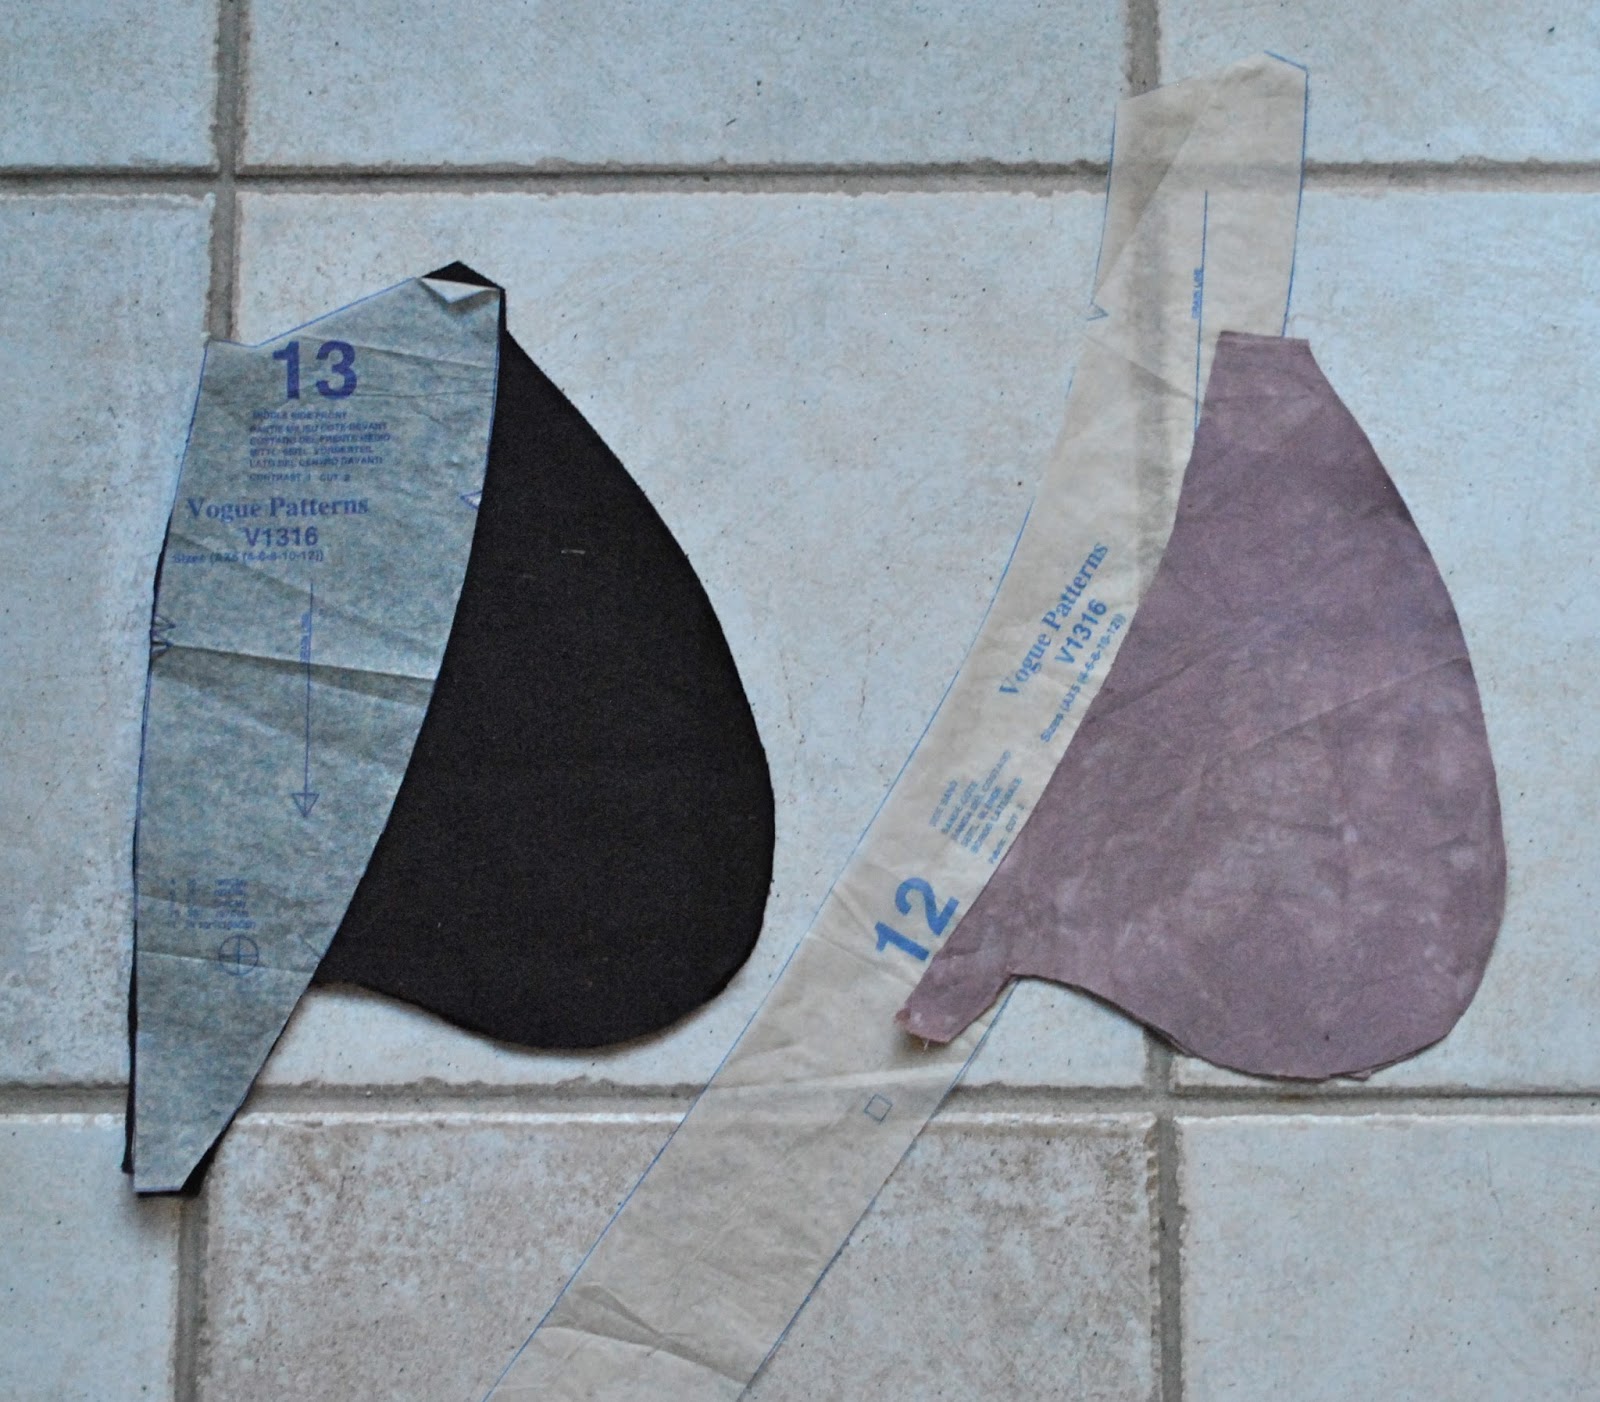
The skirt pattern is another offspring of Vogue 8363; yes, the very same as my previous big baggy pockets skirtQuite different, yes?!  That’s the beauty of a well-drafted good basic pattern like this one, you aren’t limited to the plain unadorned versions, which obviously have their place in any well-rounded wardrobe too! but my point is that you are only limited by your imagination  šŸ™‚
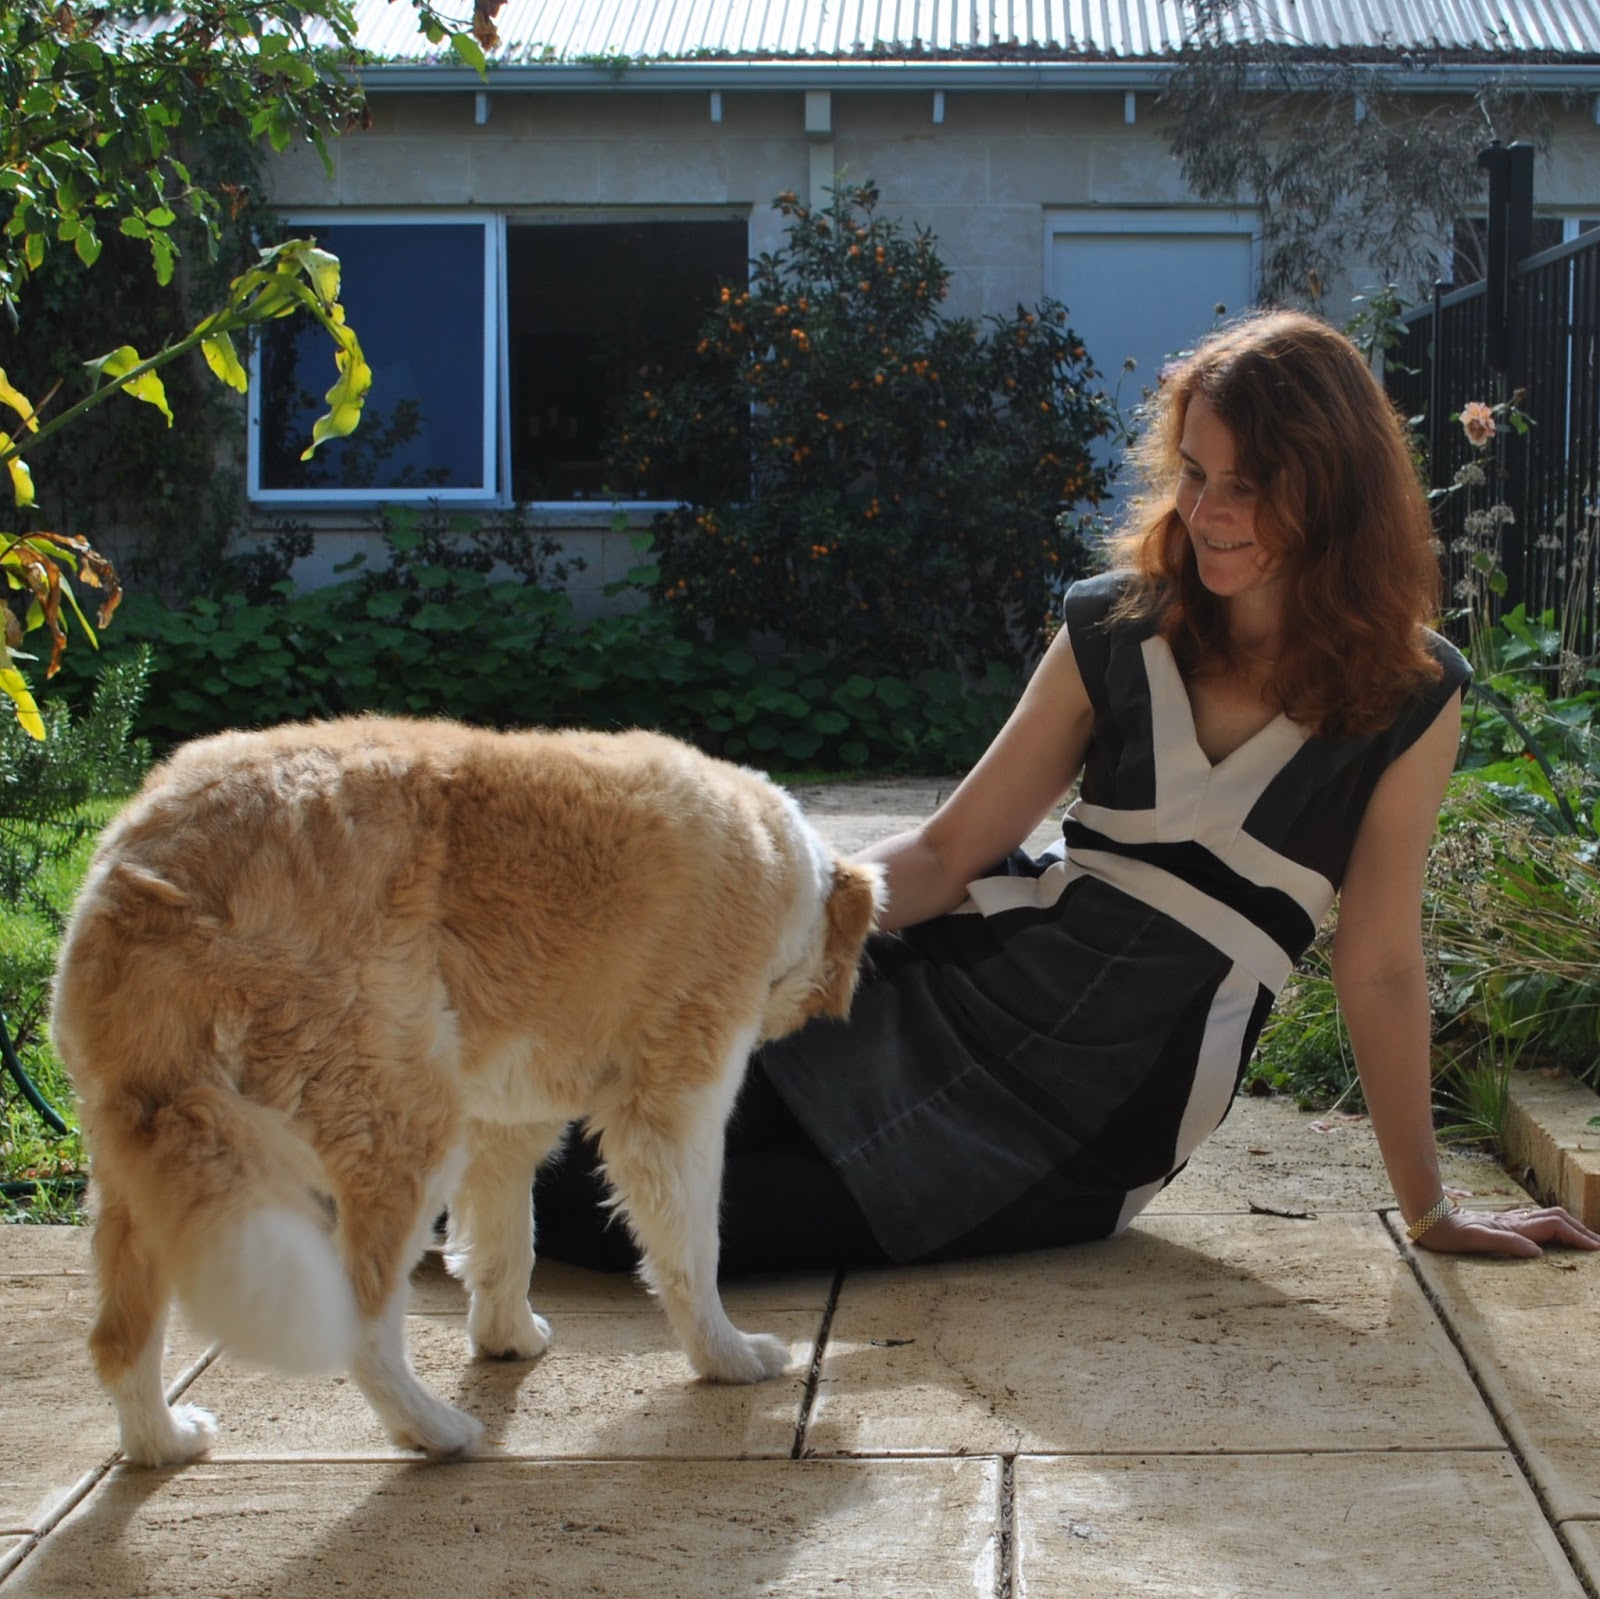
I thoroughly enjoyed making this.  For a start it’s re-using old unwanted textiles, always an activity dear to my heart.  I am in the fortunate position that when my family is tossing out cruddy old clothes they tend to lob them my way first.
And I love puzzles, and making this skirt was a fun puzzle.  This was a joyful and totally engrossing project where I happily zoomed along, cutting out on the laundry floor, up and down, rushing to the sewing machine, the iron; slicing and piecing away without any thought to time passing.  Bliss…

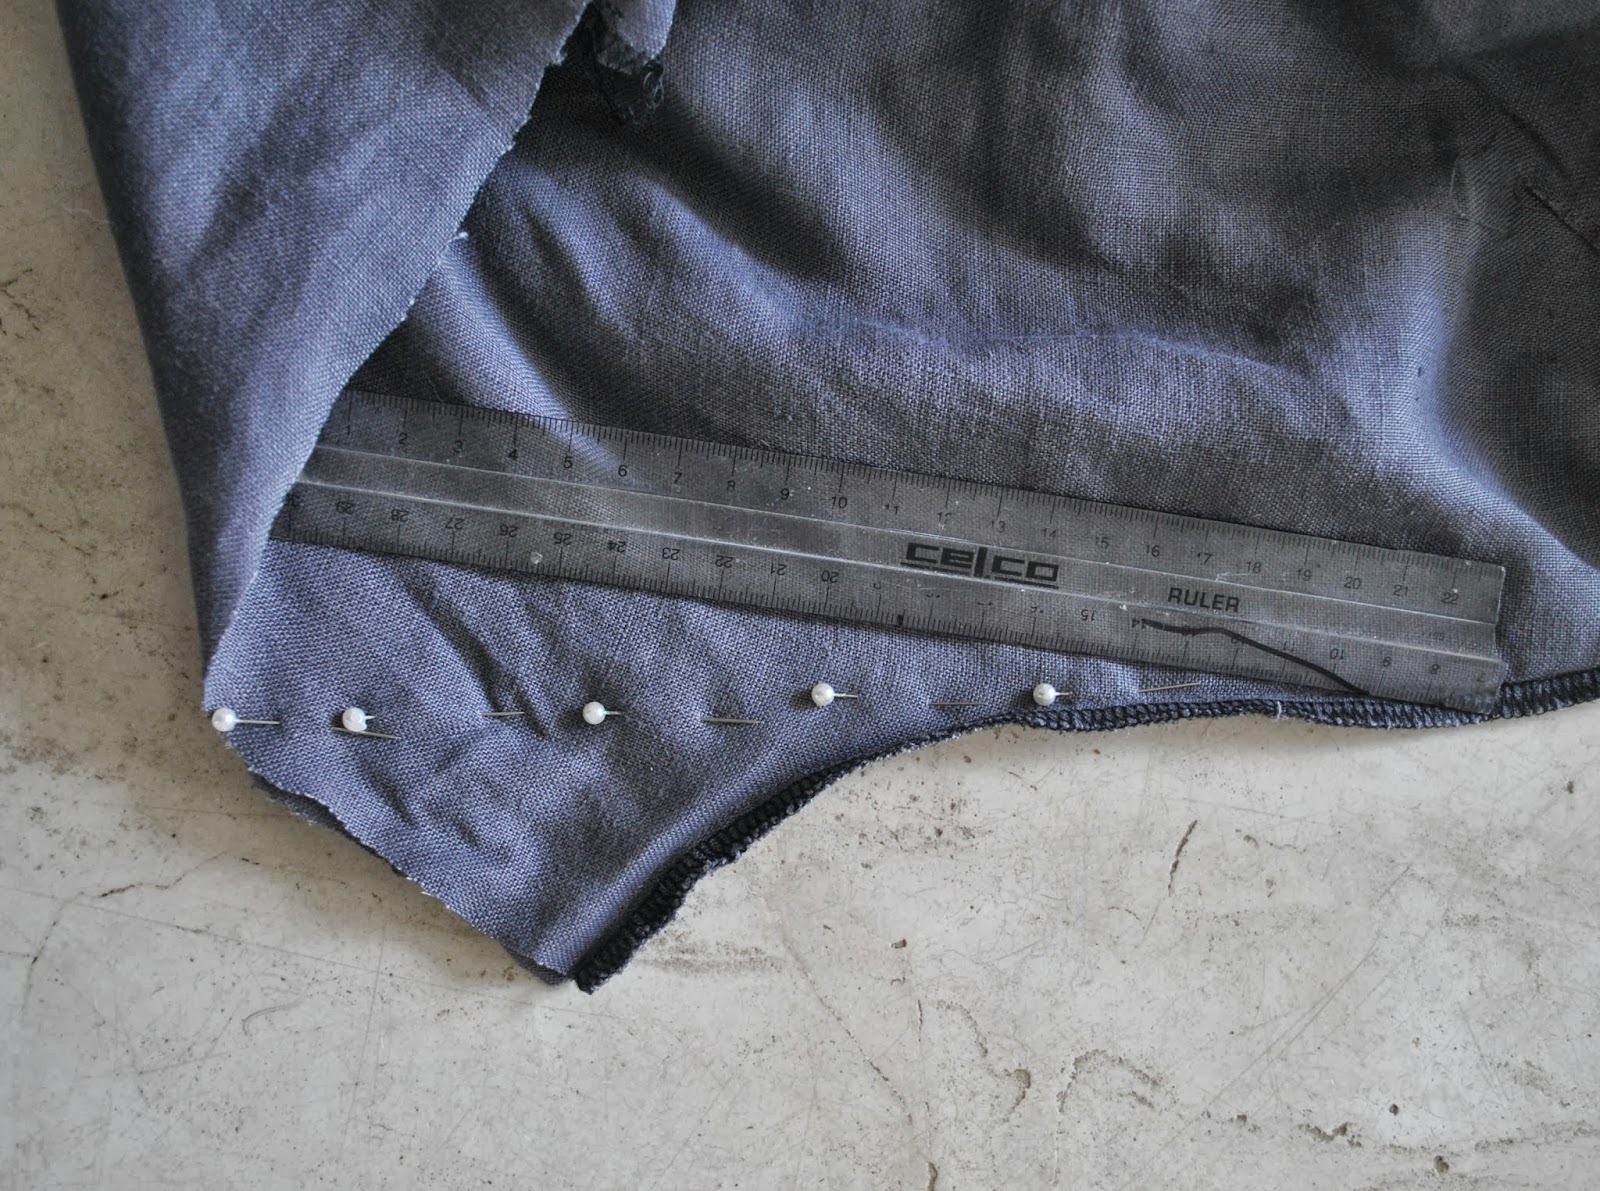
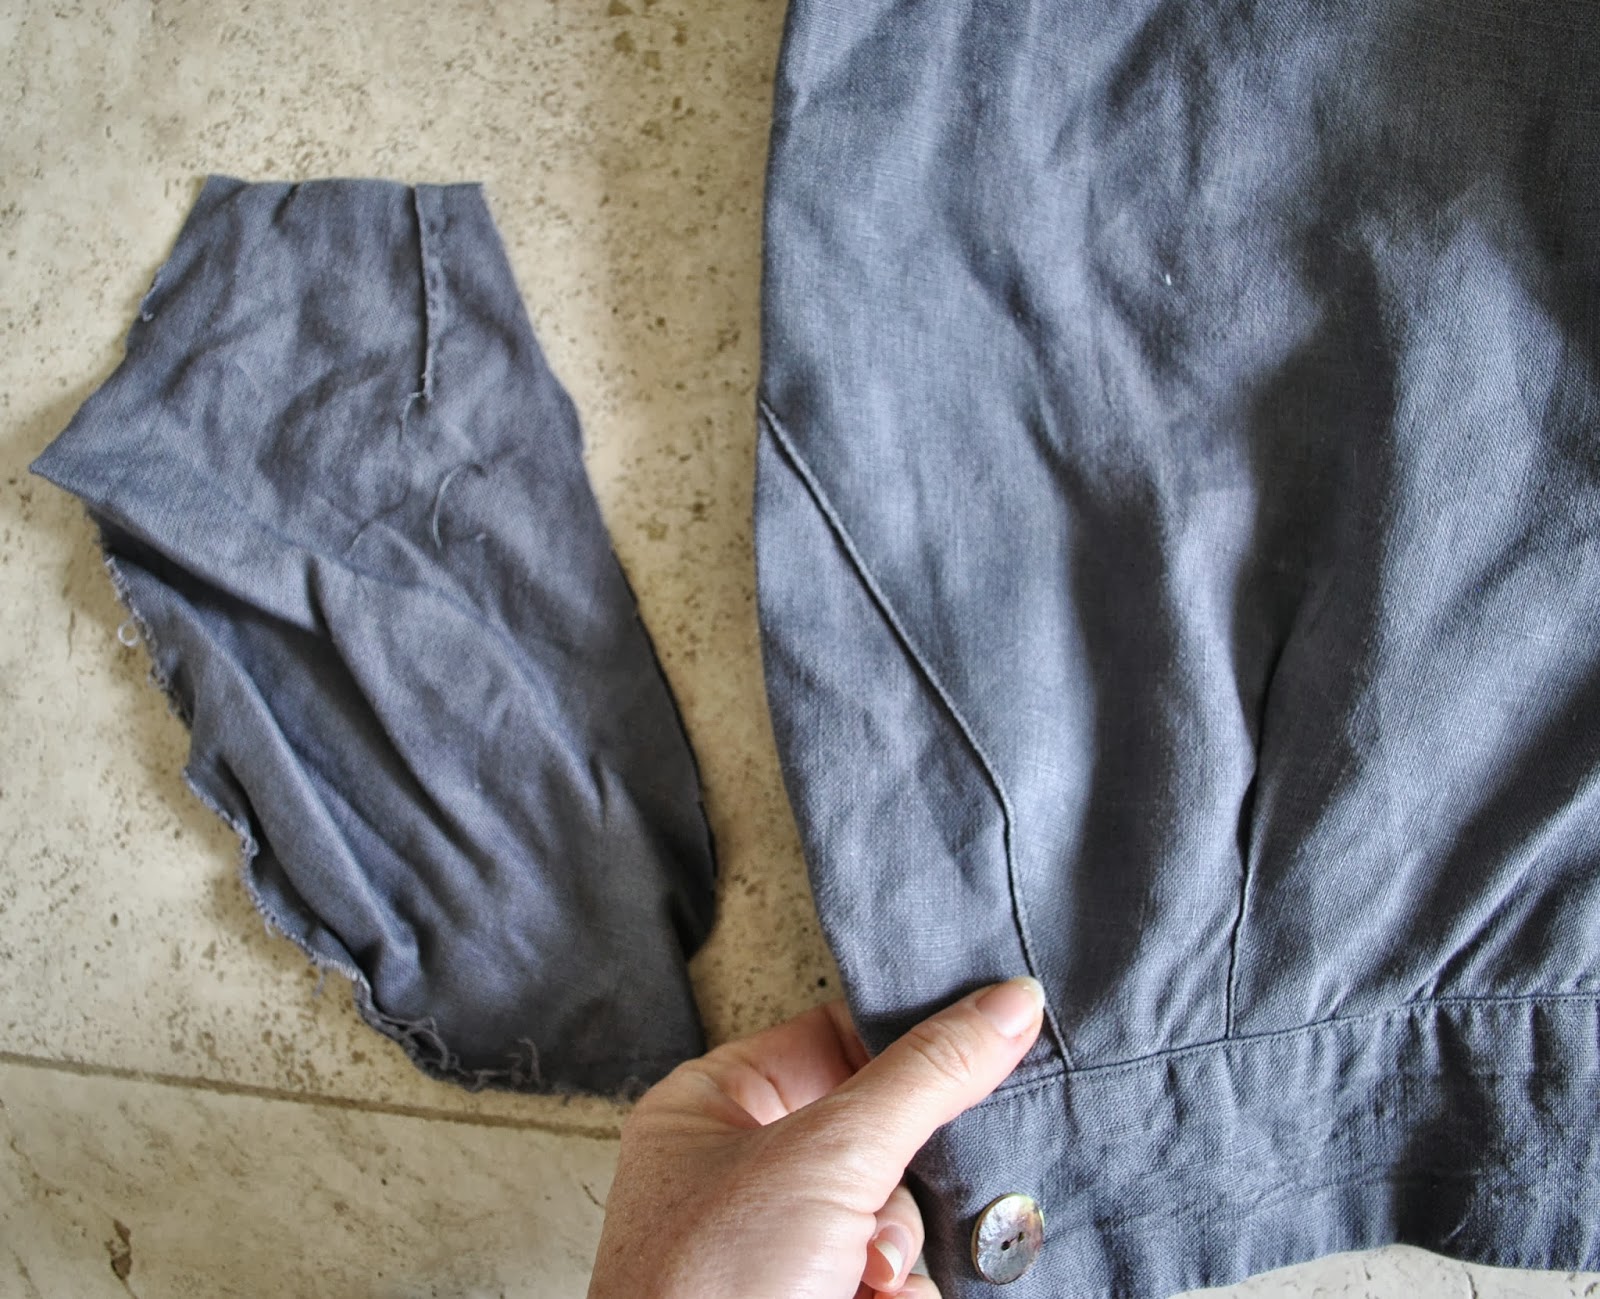
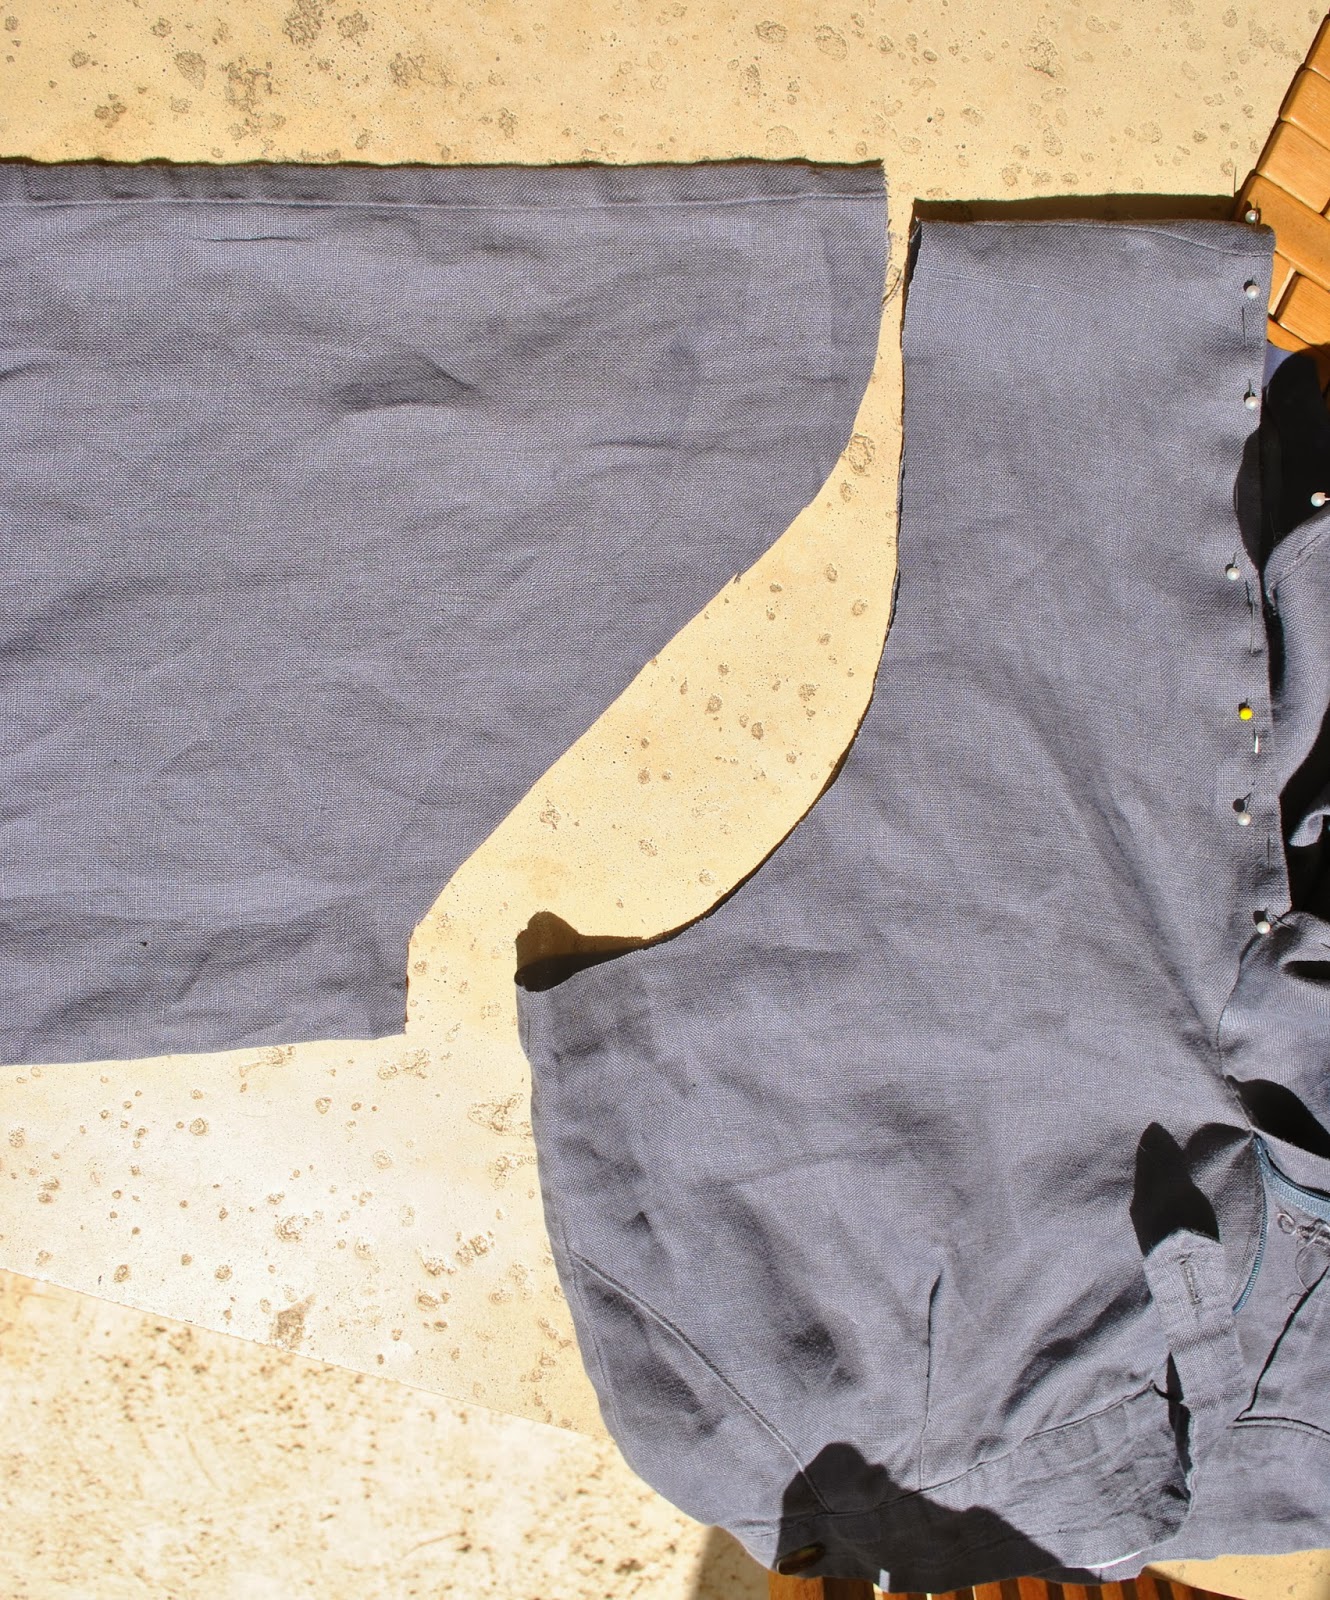
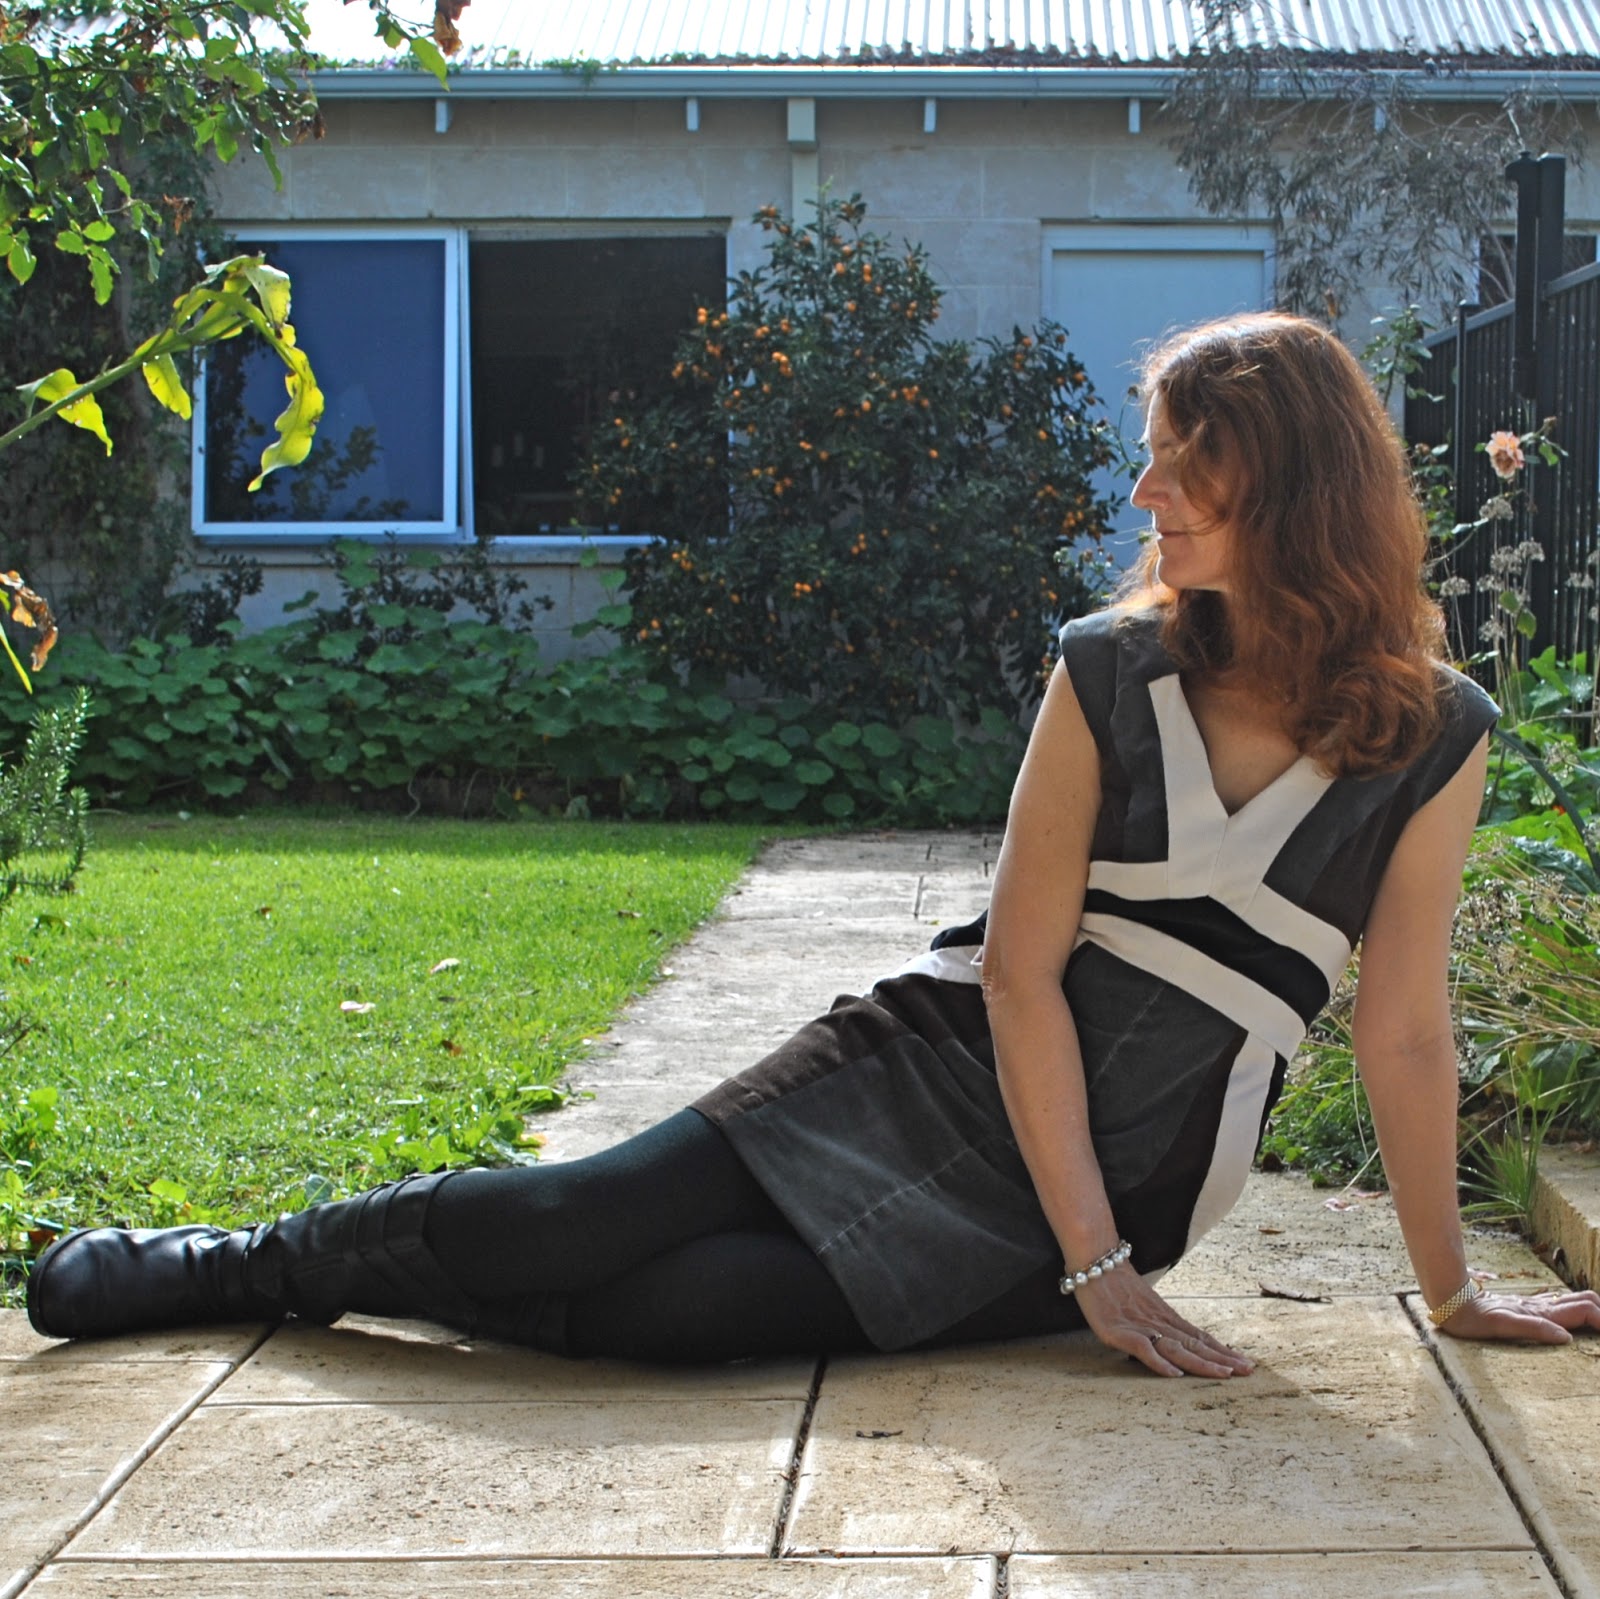
I used the pattern variation that allowed for front slanted pockets, and made whole skirt front and whole skirt back pattern pieces from newspaper, re-drawing the side seams on both front and back to be just slightly more flared and A-line than the pencil lines of the pattern although not quite as pronounced as for my big baggy pockets skirt.  

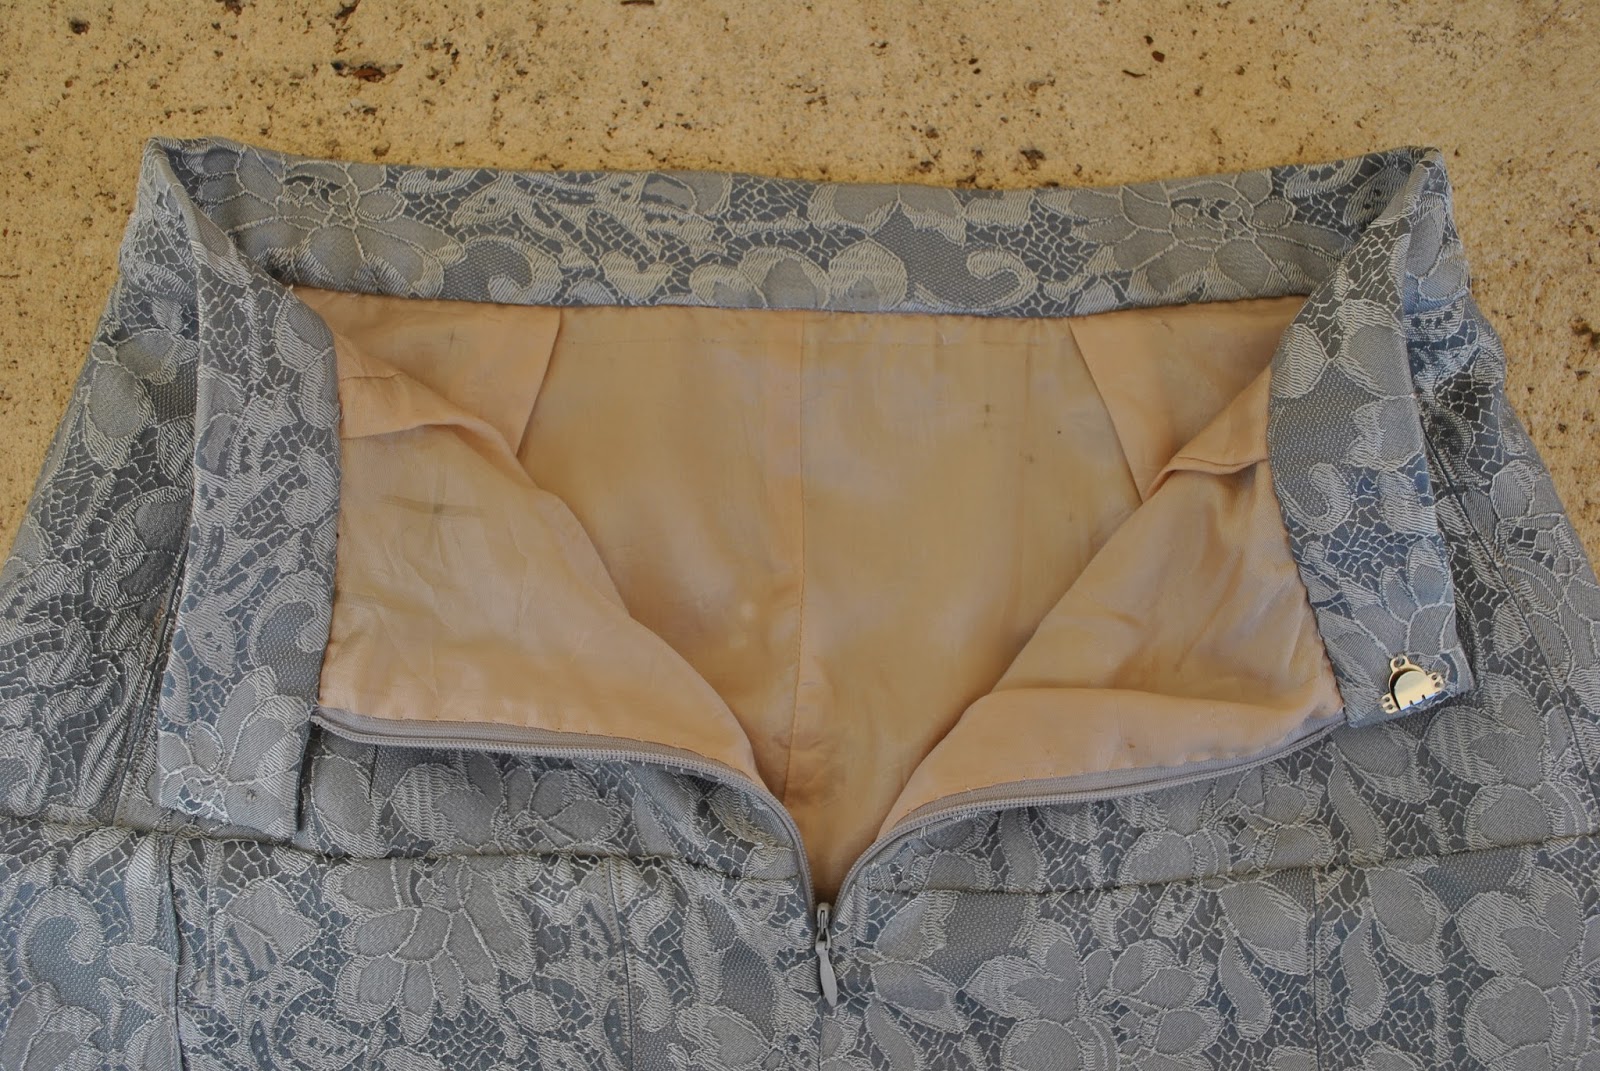
I unpicked and re-used the waistband from the charcoal jeans and made use of its resident buttonhole although I sewed on a new flat button that won’t dig into the small of my back when I’m sitting back in a chair.  I also re-used the waistband of the chocolate jeans to finish the lower hem, putting its button and buttonhole at the front.  It wasn’t long enough to do the full hemline of the skirt, so I made a filler piece and a few extra belt loops and repositioned all the belt loops to distribute them evenly and hide the joining seams.   I also saved the fly front off the olive green moleskins and re-used it for the skirt closure at the centre back, although retrospectively I’m not in love with this.  It’s quite a bulky fly with a heavy duty jeans zip, but I guess the look of it is in keeping with the whole cobbled together, rough-and-ready look of the skirt.

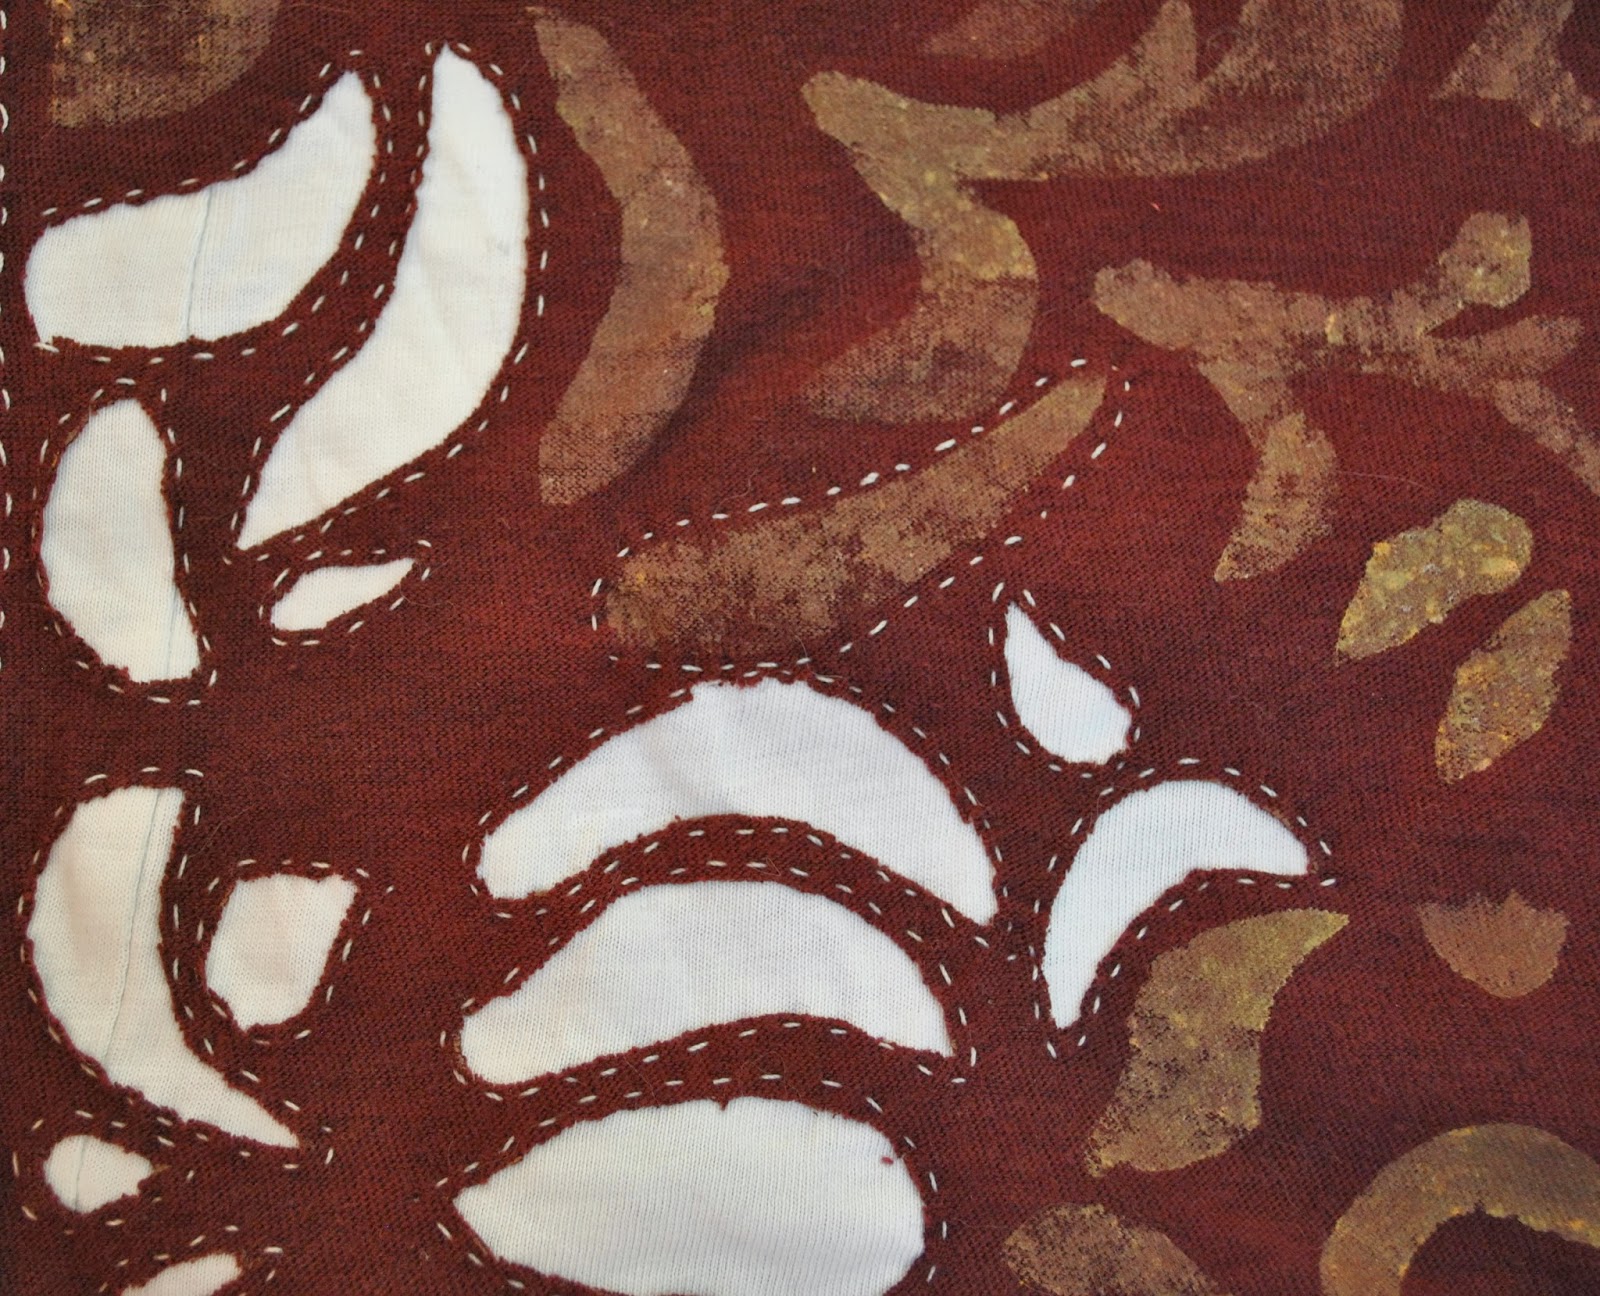
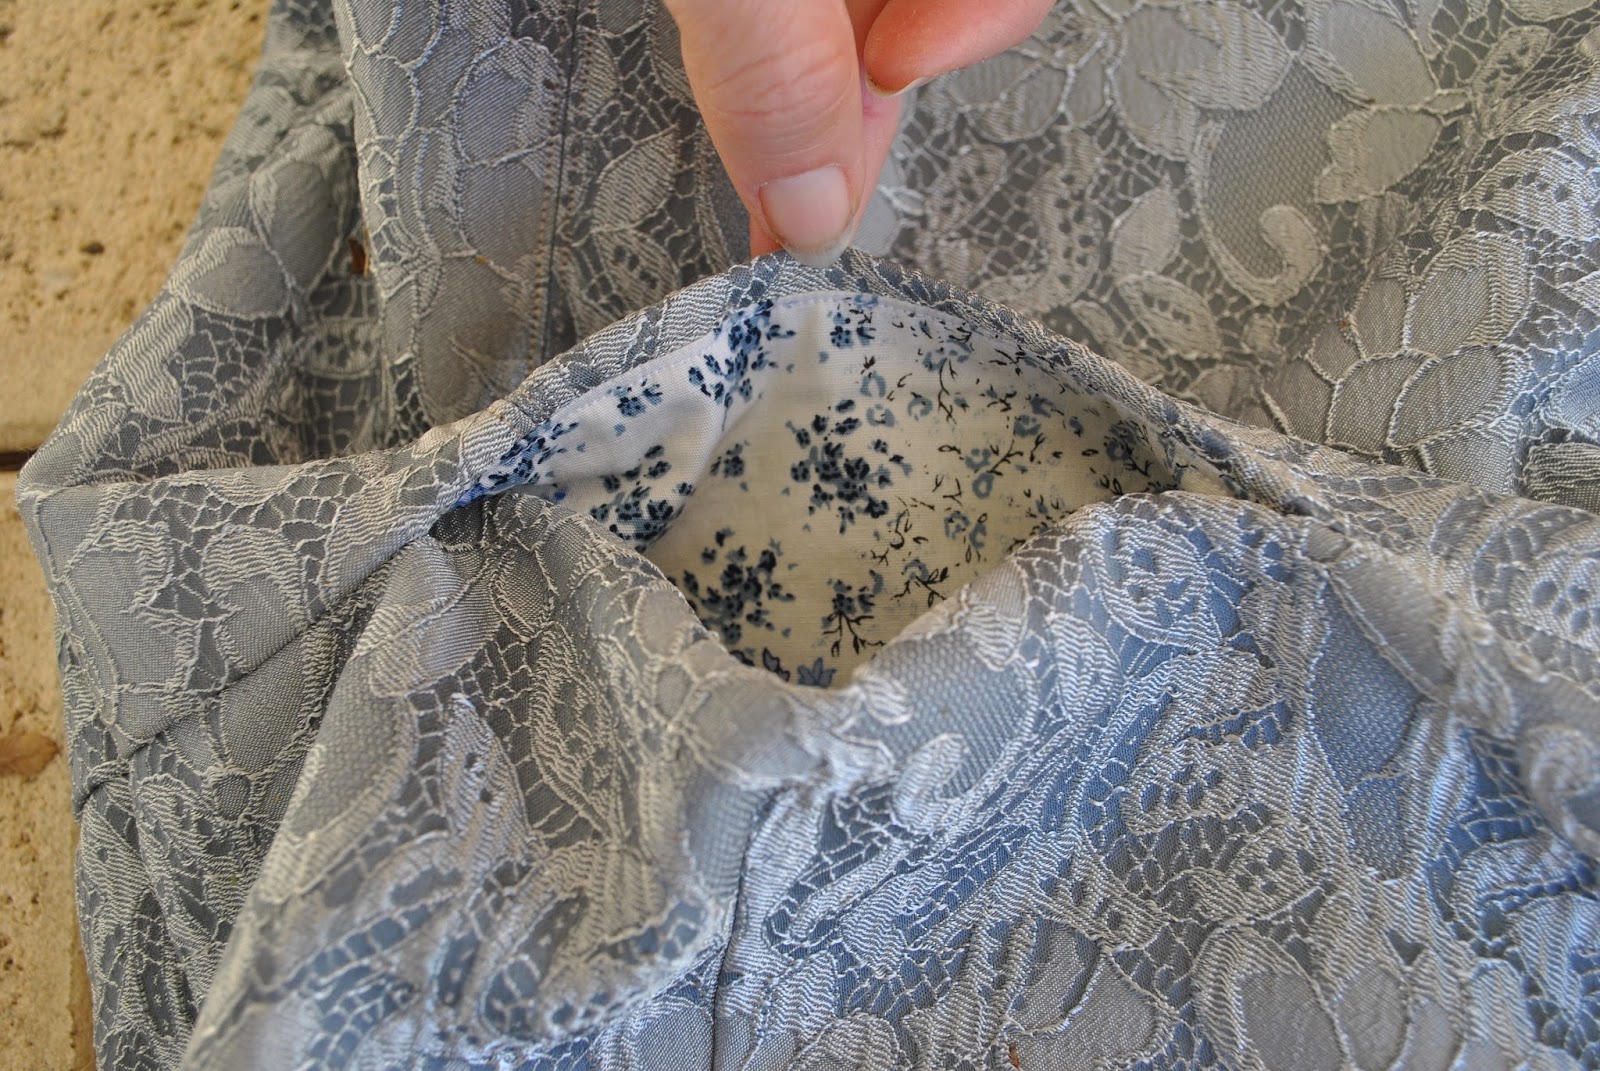
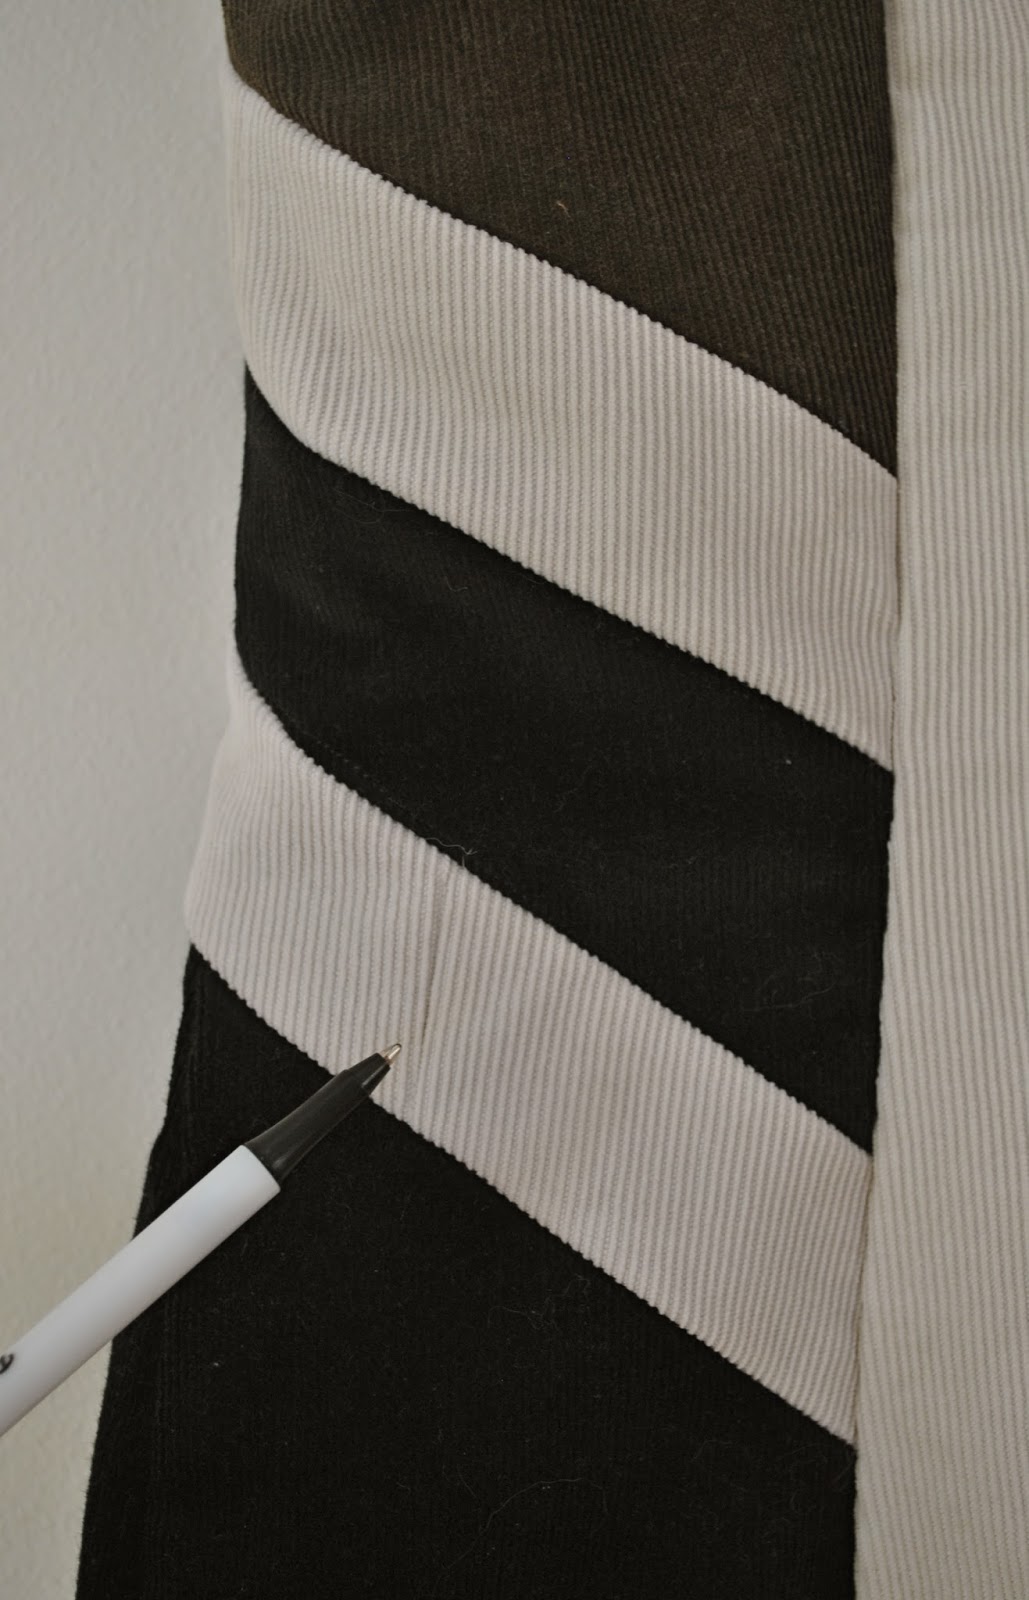
I cut the patches so as to keep lots of pockets from the various jeans.  The skirt actually has eight pockets in total!… in addition to the two regular slanted front hip pockets that I sewed as part of the pattern; there are two patch pockets, three welt pockets and one curved side pocket in it.  I only did this for fun, for the aesthetics of them, but they are all still functional.

It’s just a bit of silliness really, but I like off-beat random patchwork-y stuff like this  šŸ™‚
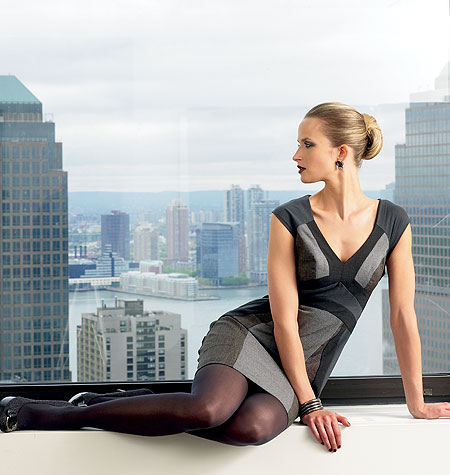
Inspiration?  Well, I’ve pinned like a tonne of this sort of thing…  this Isabel Marant dress, this mystery jacket, and also Yoshimi’s jeans from a few years ago.  Also, while I was busy laying down patches and switching around different shapes and sizes, this cottage kept popping into my head.   Now a cottage probably seems like an off-the-wall (ha!) inspiration for a skirt, but let me explain; superficially, the re-cycled nature of the materials is an obvious commonality between the cottage and my skirt, as well as artistically, in the random and irregular grid of their design.  And in purpose, pockets in clothing have a correlation to windows in architecture.   Pockets and windows are a visual feature of a thing, but also a functional component of that thing; specifically as an opening to/in their respective objects but not the entry point to that object.  
So in that vein; can one consider a pocketless garment to be like a window-less building; and are zips and button-bands akin to the doors/gates of a building?  
Discuss in one thousand words or less and submit by the end of class.  
(only joking)
Sometimes I think it would be lots of fun to have a group to discuss and dissect clothing and fashion theory; like a book club, only far more frivolous.
(sigh) A pipe dream…
This skirt is another swap item.
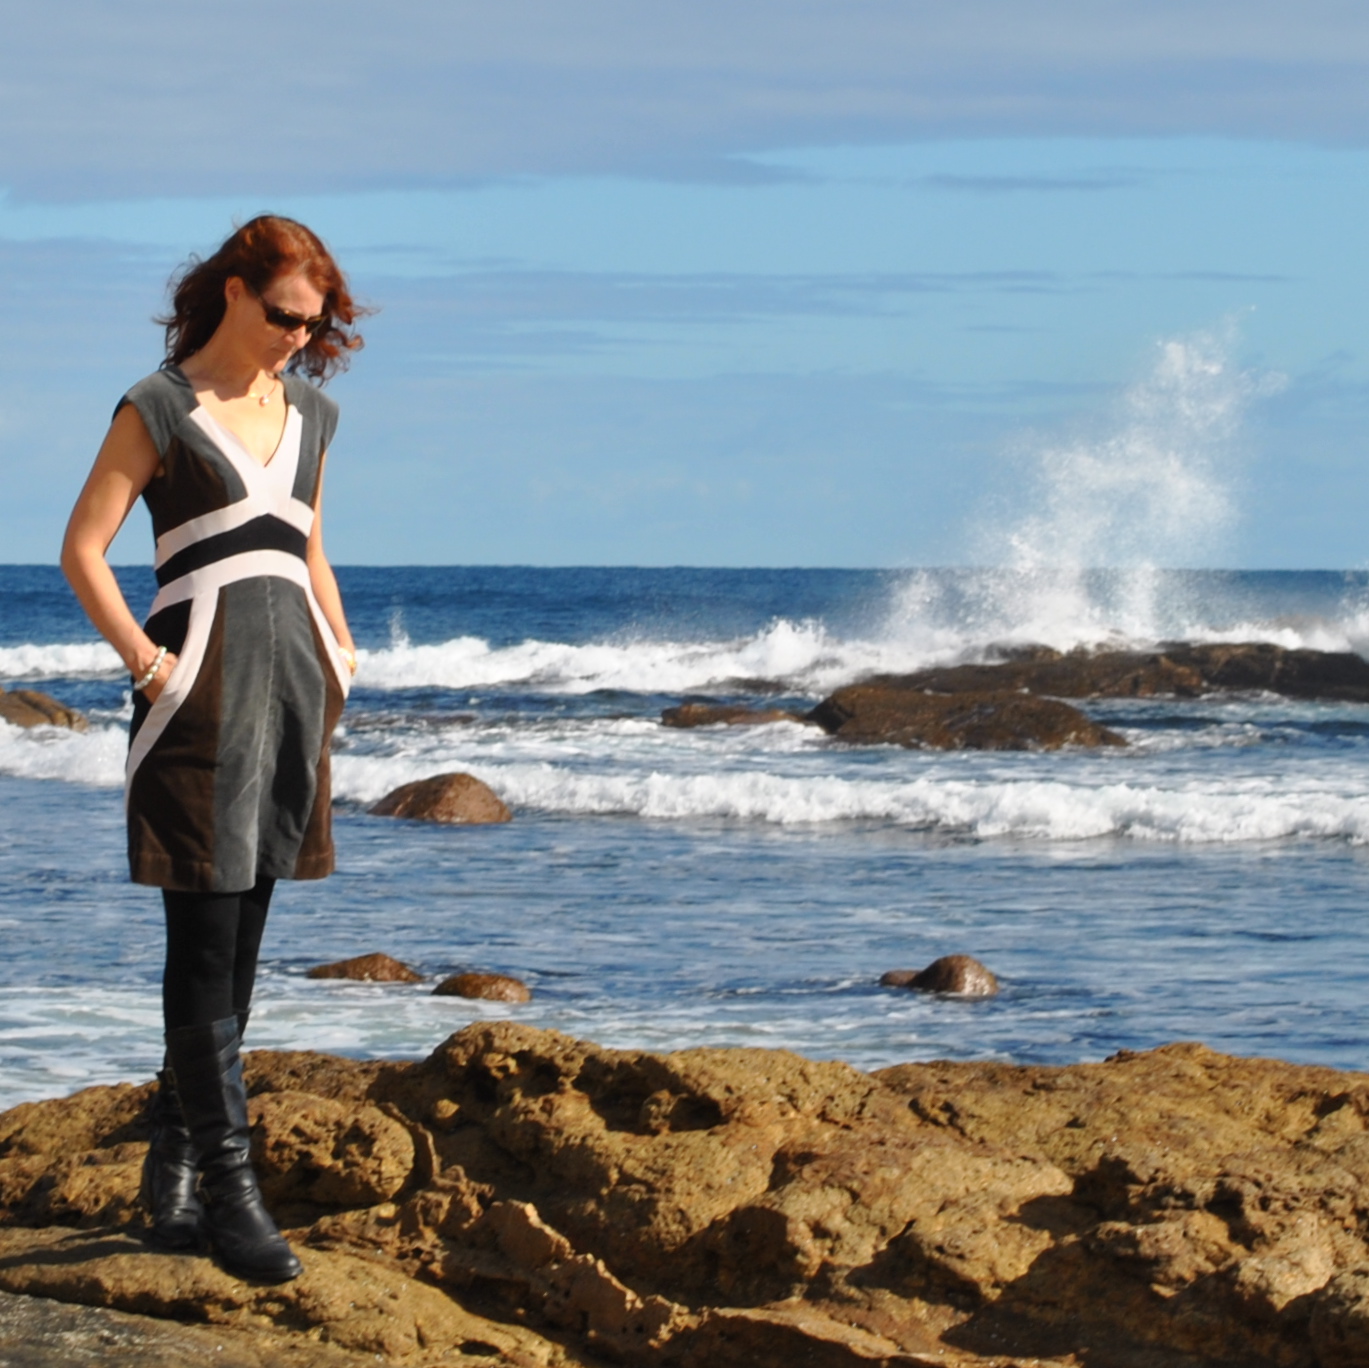
Details:
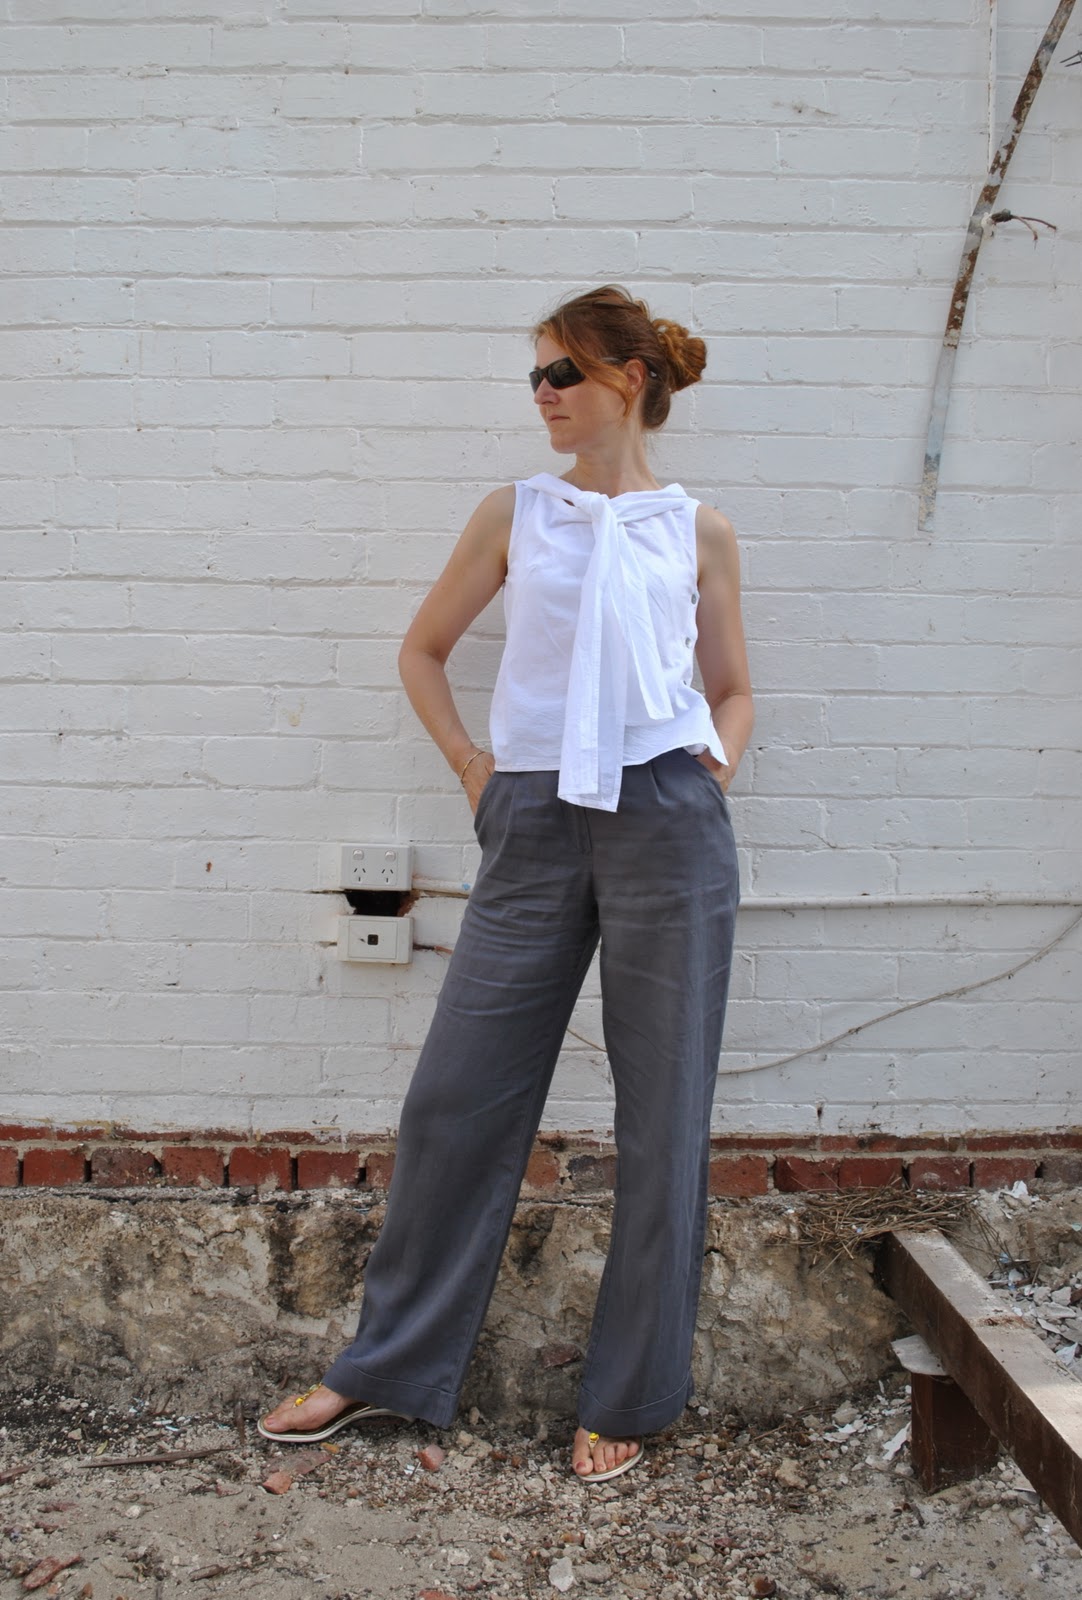
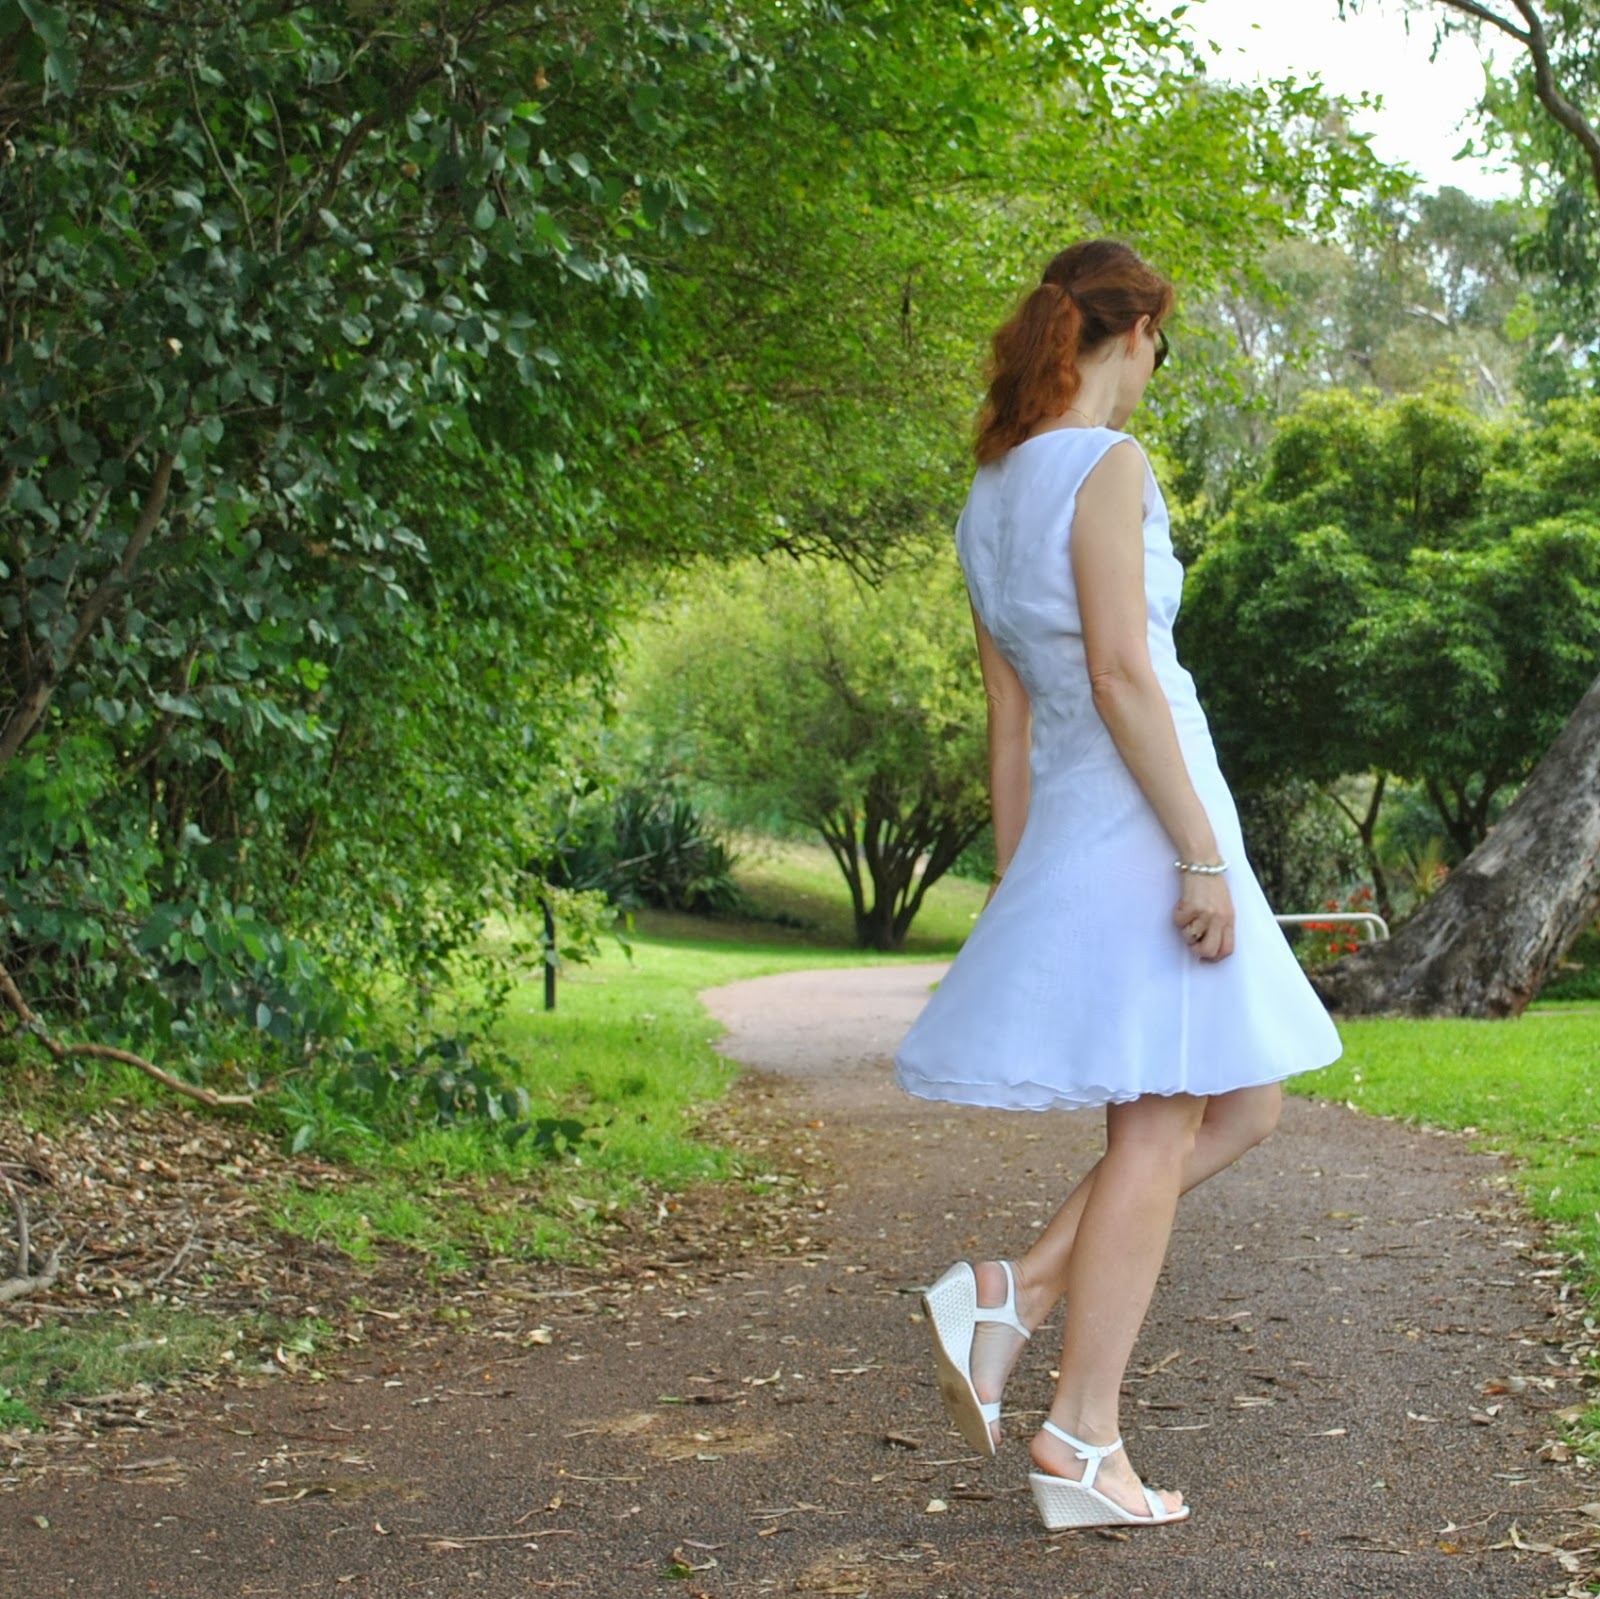
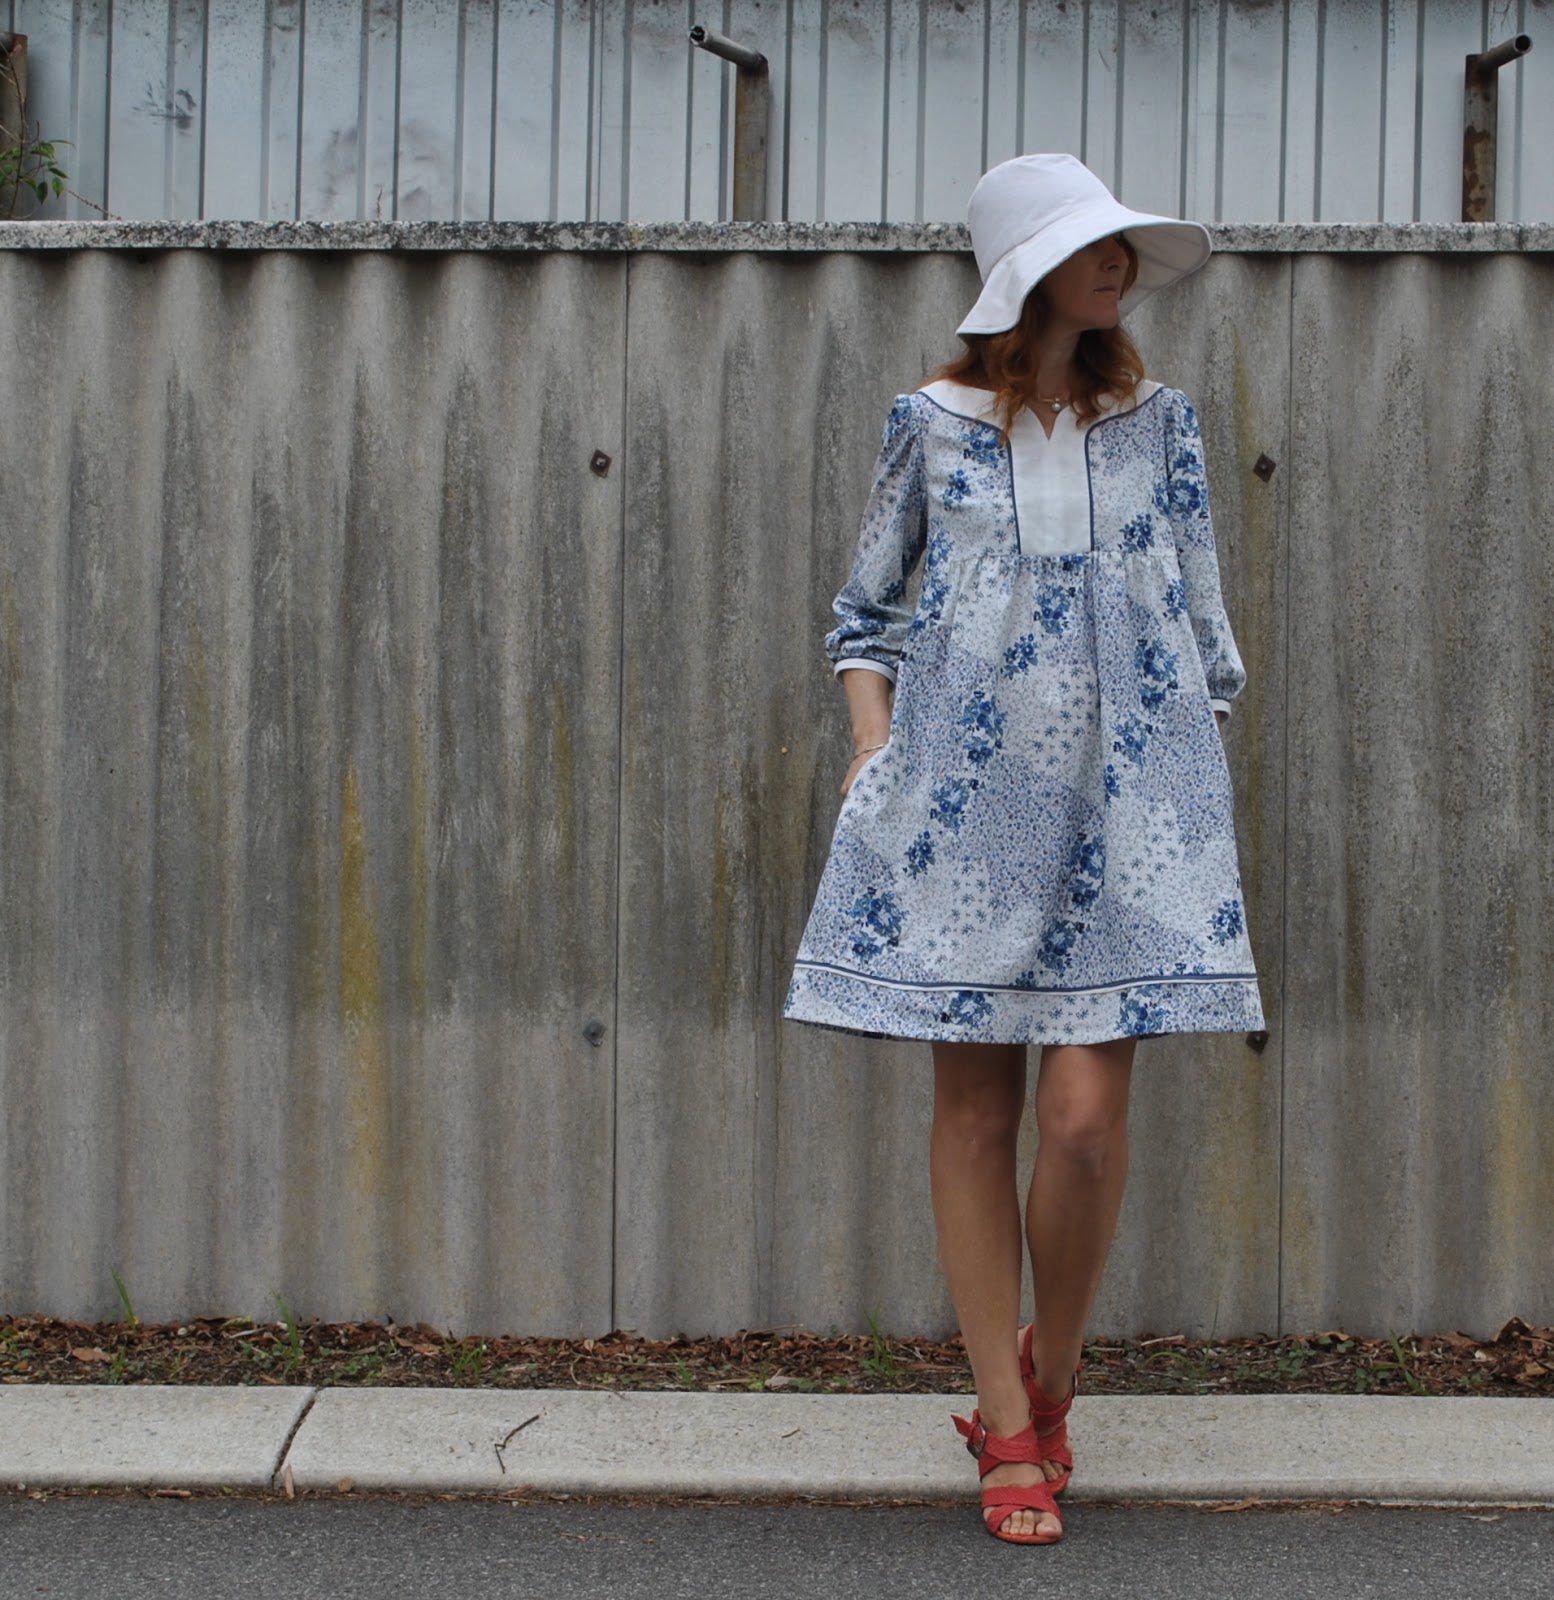
Top; top “a” from shape shape by Natsuno Hiraiwa, white cotton, details here
Skirt; Vogue 8363 modified, made from 4 old pairs of jeans, my review of this pattern here

pinterestmail

some tops

I’ve made a couple of new tops lately  šŸ™‚

I’ve made this design once before  so I knew I’d like this new one too. It is a modified version of the
loose draped top from drape drape, by Hisako Sato.  Modified in that A; I removing a
wedge of the width in the neckline drape both front and back, so I could fit both pattern pieces
onto my small-ish piece of fabric, and B; this time I made it as a double layered top, since my fabric is so thin it’s thisclose to sheer.  This was a rayon/linen remnant bought from the
Morrison’s fabric sale, a grey-ish ivory/bone colour with a very subtle, paler, knitted-in stripe which barely shows up at all in the pictures!
It’s a basic; but I think it will be quite good with all three of the busy, feature-laden skirts I have made for my autumn/winter swap.  The thing I’m most pleased with is that I got all the seams of the top enclosed inside the two layers; and only had to hand-stitch one short bit of the hemline closed after turning it all through, right
side out.
I’d made Cassie’s Christmas dress the same way only a few months ago, but I still had to stop and
think step by step, how to do the double-layering! so I took pictures and am writing a little how-to on my method so I don’t forget for next time.  Appearing here soon  šŸ™‚

 lingerie straps; essential in this design

The next top above: I’m very meh about this one.   It’s amazingly boring and unprepossessing  given that making it has been a freakin’ saga and a half.  This is version two; I first made it as a very big and very loose tunic-y style top.  Valuable time and energy and a piece of fabric was dedicated to making a rather hideous top.  So I fixed it.  And re-made it into a marginally less hideous top.  Yay!
this is the least revolting “before” picture … 

I think it’s that the fabric, a knit remnant from Potter’s Textiles was just not suited to an oversized silhouette, being both heavy and weirdly clingy at the same time.  The combination as a whole was instantly frumpifying, like a hospital gown; or looking like you had to borrow your man’s ratty Tshirt from his gym bag in the car because you’ve ruined your dress, or something.  The exact opposite of chic.   

In anticipation that some kind people might express approval of the “before” version, please know that these are the very least offensive pictures, and let me point out that any vestiges of appeal are probably due to the fact that my hand is in a pocket/on my waist, giving it an appearance of shape that it did not have.  Other photos where it’s hanging straight and loose had the hospital gown/grotty man’s gym Tshirt vibe.  
So I cut out of it my much more fitted, regular tried-and-true custom fit Tshirt.  It’s still pretty blah but least I don’t unequivocally hate it now.
I’m thinking it will be ok for warmth or whatever during winter.  Heck, another layer’s another layer.  We’ll see how it goes!


Details:
Ivory top; the loose drape top, from the Japanese pattern book drape drape by Hisako Sato, ivory rayon/linen
Chocolate top; ultimately, my custom fit Tshirt pattern, chocolate jersey knit
Shorts; Burda 7723, charcoal stretch gabardine, details here and my review of this pattern here

pinterestmail

Experiments in Alabama Chanin

There has been progress; I’ve been mucking about with Alabama Chanin stooff, partially making a little fitted tank top to test for size and to allow me to get a feel for the techniques.  It’s only half finished, and I’ve set it aside now to concentrate on my second and “real” Alabama Chanin project  šŸ™‚
I have outlined some of my thoughts in the hope that they may be useful to others starting out with Alabama Chanin too.  Particularly for Australians: the thing is;
the AC book is not written with us in mind; which is fair enough of
course but we can’t always get hold of the listed materials here.  I am trying to use only materials that are readily available
here in Australia.

Fabric: a couple of the boys’ old Tshirts from the toss-out bag.  I harvested the fabric for the neck and armhole bands from the sleeves.

yes, the same fabric as above, and no the colour is not off.   it got dyed after this photo was taken

Thread:
button craft thread is specified. 
This is more correctly known as button and craft thread, and Natalie
Chanin describes it as ā€œone of the strongest threads (the Alabama Chanin team
has) foundā€.  Unfortunately I
couldn’t find anything of this name in Perth so I’m using Gutermann’s upholstery
thread from Spotlight.  It is the strongest in the Gutermann range and is typically available in about a dozen shades.

all-purpose thread at top, the upholstery thread below

I
traced the full front and back pieces of the Short/Long fitted dress, fitted top and fitted tunic pattern as
one piece each and will just folded back the excess portions when tracing each thing.  I’m generally a bit of a slacker when it comes to checking for fit but since there is a
heckuva lot of hand-stitching in these garments, I think a careful check for fit
is pretty important! And I am sooo glad I did since I found it necessary to
make a substantial sway-back adjustment. 

Stitching:
So, to machine stitch or hand-stitch? 
I totally cheated and stay-stitched and basted by machine!  I’m undecided about
whether or not I will hand-stitch all the seams in my final garment… part of me
thinks it would be better to save that effort for the decorative stitching
on the motifs.  In some cases I
allowed the knots to fall on the outside or right side, a
sometimes feature of AC work.  I
decided this is not a finish that appeals to me, so I will probably be concealing them
on the inside from now on.
The
stencil
; I bought the plastic sheet for the stencil from Jacksons Drawing Supplies and enlarged the Anna’s Garden stencil from my copy of the AC book.  The whole process is very time-consuming, so the design should be one you’re absolutely sure that you will like.  I totally wanted to design
my own stencil but decided to play it safe with one that I know from looking at the beautiful projects in the book looks really
amazing.  Using a proven design is good practice for getting a feel for how proportions and size of the motifs
work for the embroidery and appliquĆ© techniques.  I think once I have a few projects under my belt then I might branch out and try my own ideas.
Printing: y’know, I’ve got a feeling this is going to be the most difficult part to get right out of the whole exercise…!  I haven’t found any sprayable textile paints as recommended, so I experimented with a watered
down solution of the Permaset textile paint from Jacksons Drawing Supplies, that I use for screen-printing, mixed in a regular spray
bottle.  Results: disastrous!
It bled underneath the stencil and the edges were
unclear and blurry.  NO pictures because it looked so awful  šŸ™
Attempt
number two;  tried stippling
undiluted textile paint with a stiff and bristly paintbrush.  This is effective, but took forever!  This may be worth it for small areas of
stenciling, and when I want to use just a small amount of the textile paint.

Permaset textile paint, stippled on with a dry brush
Permaset textile paint (Jackson’s Drawing Supplies), sample pot of Dulux household acrylic paint (Bunnings)

Attempt number 3; since textile paints are actually quite expensive, and since for some
techniques the painted sections are just cut away and discarded anyway, I
tried using a cheaper paint.  I
bought a sample pot of Dulux acrylic household paint and a small foam roller from Bunnings.  This worked beautifully!  Because the motifs are ultimately to be cut away I applied it lightly
and roughly here, without giving too much attention to getting perfect coverage but it would be pretty easy to get completely even coverage using the roller, if you were aiming to
keep the painted sections partially intact in the final design.

Obviously, household paint is only a good choice if the motifs in the final design are going to be completely cut away because it is stiff and inflexible and not comfortable to wear.  In the case that motifs are to be left partially or completely intact then proper textile paints would be necessary.

the Dulux acrylic paint, rollered onto my “real” project  šŸ™‚

Something I noticed when comparing my sample with the ones in the book: my stitches are teeny tiny compared to theirs!  Hmmm, might have something to do with why this has taken me sooooo long!  but very small stitches have always been my thing.  In my “real” project I am making an effort to do larger stitches… the project will go along a lot faster and will look more “Alabama Chanin-y” although that’s not so important to me as authenticity to my own personal style.  

…the size of those stitches!!!!

I didn’t get very far along with this little sample top, but I do quite like it and may actually finish it…  one of these days… once I’ve finished my swap items, that is šŸ™‚

pinterestmail

Gunmetal linen trousers to jacket-y thing

So new top…  well, new? not really, this funky little jacket was until recently a pair of menswear-inspired, wide-legged, linen trousers, that have been sitting in my re-fashioning bag for a coupla years now.  True!  I took them out to wear as fancy dress last year, but they went straight back into the bag afterwards!
I originally made these trousers back in 2009 using Burda 7944, and they have been good trousers.  I wore them a lot and even featured them in a 6 different ways post forever ago. 

 But eventually they got to the stage where they looked like a dishrag practically as soon as they went on and got “knees” in them instantly.  That’s linen for ya; I love it to bits but if it’s not a quality weave it does tend to lose its integrity quickly.  This linen was not particularly fine-grade in the first place.  Some linen trousers can get away with the dish-raggy look but not a tailored design like this one. 
I’ve re-made them into a loose-sleeved jacket thingy.  I’ve done this very same re-fashion once before, making a boxy little jacket out of a pair of Mum’s old cast-off three-quarter pants, but these trousers started out with quite a different shape to those pants so have ended up as quite a different shaped jacket.  The waistband is close-fitted, not loose, and those long wide legs with a satisfyingly deep cuff have resulted in long wide sleeves, still with that satisfyingly deep cuff on the ends.  You put it on with unzipped fly, and then zip it up down! and do up the buttons, just like when it was trousers but upside down.  Cool huh?  I really like it in it’s new identity.  Making something like this is deeply satisfying to me.  Taking something old, unwanted and un-chic and making it into something different; and I use the term different as in the kind of thing you rarely see a pattern for.  It’s hardly mainstream, is it?  This is why I sew; to make things for myself that are individual and unusual.

A quick run-down on the procedure…
Firstly, you cut off the legs to give a “body” section, and cut open the inner leg seam from one inner leg to the other.

as my son says; ironing is for the weak!!!

Re-stitch both the front and back crotch seams to be straight lines from the waistband(back)/bottom of zip(front) to the old-crotch/new-neckline opening,  Cut off excess fabric (the old-crotch curves).

My trousers had pockets; stitch the opening closed and trim off the pocket bags inside.  I know I know, it’s slightly painful to remove pockets, even useless ones, but they just do not work in this design.  I also switched the old plastic, colour-matched buttons I had used previously for nacre buttons sewn on upside down with the mottley-brown underneath showing, just because.

Stitch up the shoulder seams and cut armhole curve on the body section, and a sleevecap curve at the top of the cut-off legs, now sleeves.  If you have a great fitting shirt pattern then use this as a guide.  I just tried it on a few times, pinned it and winged it, being sure to keep both sides symmetrical.
Set the sleeves into the body section.

Fold in a hem around the neckline and stitch it down however you choose, I used a short bias cut strip of silk, leftovers from this top, invisibly fell-stitched.

Don’t know if it’s obvious or not, but it was crazy windy while I was taking these photos.  My tripod actually blew over once!  Goodness knows why I pick the absolute blasting-est days to get out and photograph my makes.  I must be some kind of freaking masochist.  Hair; styled by gale-force winds.  Lovely, not.  But, seize the moment, and all that.  After all, this is what I actually look like here.  Keeping it real.  Man, I’m a loon.
This one gave me a laugh when I saw it!

Details:
Jacket; refashioned from a pair of Burda 7944 trousers, gunmetal linen
Shorts; Burda 7723, themselves refashioned from an old skirt, details here, and see my review of this shorts pattern here
Tshirt (underneath); self-drafted, white cotton jersey, details here
Sandals; c/o Misano

pinterestmail

Snowy-white Nougat

The clever AnaJan of Stepalica is designing patterns now!  and I was honoured when she very kindly sent to me her debut design, the Nougat dress to try out.  Thank you so much Ana!
The Nougat is a classic, waisted, sleeveless A-line dress with a pretty swirly-skirted silhouette and closure by invisible zip in the left side seam.  Where the pattern is extremely clever however, is that it includes three variations of various degrees of difficulty, meaning there is a something for all skill levels.  If you want a challenge then version A with its multiple curved seams will give you a good one; if you want a pretty, A-line dress then version C delivers this too.  I went for the trickiest version A for my first go, but the one pattern includes all pattern pieces and instructions for the two progressively more simplified versions B and C, and there are comprehensive instructions to walk you through constructing the more fiddly bits of the more advanced version A.  I was a bit late for the Nougat sewalong, but I consulted Ana’s posts when I did get around to making my own version, and I found all her sewalong instructions to be detailed, thorough and very helpful.

Ana suggested for the bodice and skirt yoke pieces to be cut from different colours of fabric, to enhance and showcase the swirl effect of the piecing.  The seaming can be seen far better on Ana’s very impressive blue version of the dress here with absolutely perfect seam joining!  However, I really just wanted a lovely fresh plain white dress to ring in summer, so used a small portion of an embarrassingly ginormous quantity of white fabric that I have stuffed in bags in the cupboard under the stairs  (mwahaha)  This fabric originally spent a few years as pictured below.  Until I decided that big white swags of fabric decoratively framing a bedhead were a haven for spiders as well as pretty passe.  I took it down many years ago, but obviously I kept all that wonderful fabric!  It is actually very nice fabric; a mixture of synthetic organza and chiffon which means of course that the dress can be just tossed in the washing machine, will drip dry, and will never ever need ironing.  Yeesssss!

before…

 The bodice and skirt yokes are made of double layered organza, with the inner/lining layer a plainer version of the pattern, relatively un-pieced apart from a few basic shaping seams and darts.  Because all my fabrics are pretty fray-tastic plus see-through, I put quite lot of thought into how I could stabilise all those raw edges.  There are so many of them in this multi-pieced design!  I didn’t want to overlock because the stitching would show through and be super obvious on the outside of the dress.  So for the organza bodice and skirt yokes I sewed the seams, pressed open, trimmed the seam allowances quite narrow with my cutting wheel, and then double top-stitched each side of each seamline.  I posted a close-up picture of the seam detail on photo maisonette last week. 
The skirt is actually three separate identical chiffon skirts, layered.  One is attached to the shell of the dress, the other two sandwich the lower edge of the lining.  Each side seam is sewn in French seams, and I finished the lower edges of each skirt using the rolled hem stitch on my overlocker.  I do really love the romantic ripply look of the layered skirts.  The design is a very lovely shape.  Very twirl-tastic, yes?  I did a twirl photo, just because.  Hehe, one of my pictures revealed that I am a fairly grim-faced twirler.  I am so impressed by people that can twirl and have a happy, carefree facial expression at the same time.  Me, I need to concentrate on not falling over!

I am wearing my new ivory summer sandals too.  Aren’t they lovely? Obviously ivory is one of my favourite colours anyway, no matter what the season, and I really like the woven wedge heel too.  These will be appearing in lots more summer piccies to come!
Making my dress was not all plain sailing.  There are boo-boos.  I didn’t notice at first that the two halves of the back bodice were different to each other and so mistakenly constructed it as a mirror image of one side; therefore three of my seam lines on the right side of the dress do not join up.  One on the shoulder, one on the bodice and one on the skirt/bodice seam.  Rats.  But since I did use just one colour you can’t really tell without super up-close inspection, hehe.  My other seams all mostly join up  šŸ˜‰

Details:
Dress; the Nougat dress by Stepalica patterns, white organza and chiffon
Sandals; c/o Misano shoes
it’s hard to know what to do with your arms when taking side view piccies… 

Pattern
Description:
The Nougat is a classic, waisted, sleeveless A-line dress with a pretty swirly-skirted silhouette and closure by invisible zip in the left side seam.  The pattern includes three variations of various degrees of difficulty, the most advanced option has a complex swirled twisted diamond motif in the front bodice, with sunburst seamlines radiating out and then back in again to join together at the left hip. 
Pattern
Sizing:
European size
32-44. I cut a size 34 in the bodice, grading out from the waist to a size 38 at the hip level.  Because of these personal sizing changes I also cut the skirt pieces to be a bit more flared going down to the hemline than the pattern to give a better look proportionally.
Did
it look like the photo/drawing on the pattern envelope once you had finished
sewing it?
Yes.
Were
the instructions easy to follow?
The instructions are very clear and well written, and very helpful.  I definitely needed them for that complex diamond motif! but I did use some of my own preferred sewing construction techniques for some of the basics.
What
did you particularly like or dislike about the pattern?
The silhouette is not one I would normally go for, and I quite thrilled with how much I like it.  I really love the line of the skirt.
I really enjoyed the challenge of sewing the diamond motif and in spite of a few boo-boos I am pleased with how it all came together.
Fabric
Used:
Synthetic organza for the bodice and skirt yoke and chiffon for the skirt 
Pattern
alterations or any design changes you made:
I stuck pretty closely with the original design, and just cut the skirt a bit more flared for my version.  I sewed double rows of topstitching flanking each seamline on the bodice and skirt yokes, both to visually define them better and to anchor and stabilise the seam allowances and guard against fraying.
Would
you sew it again? Would you recommend it to others?

I think I only need one of version A in my wardrobe since it is quite a distinctive design, but I would definitely sew either of versions B or C again.  I recommend version A to the advanced seamster looking for a challenge.
Conclusion:
I am very pleased with it!  I really wanted a white dress for summer which is why I went for a solid colour version of the pattern, and now it reminds me of an old-fashioned tennis dress.  There is something quaint and ladylike and yet still sporty about the silhouette that I really like.  The seaming is really interesting, and I am in love with the swishiness of the skirt.
pinterestmail

Wedgwood blue damask, reworked

With the fingers of spring tickling at the edges of our days, I’ve been renovating my wardrobe.  And came across this dress

Although the dress had a sorta sporty feel to it and I think my style is vaguely sorta sporty? maybe? whatever the heck is my style anyway…. seriously I have no idea!  anyhow, somehow the dress felt wrong on me.  I wore it a few times, gave it a shot, but no.
But you know I’m not one to let lovely fabric go to waste and this fabric had been a gift from Sam.  So I unpicked the panels, saving all those zips.  And managed to patch together enough fabric for a new little skirt.  Which is great because a few skirts were jettisoned in the clean-out so it is only fitting that some new skirts could come in, yes?  Just keeping the balance!  šŸ™‚
I used Vogue 1247 and lengthened it… surprise!  I know I have a few of these in my wardrobe already but what can I say? it’s just an absolute winner.  It’s so quick and easy to make, is exactly to my style tastes and you cn put it together with small bitsy pieces of fabric.  How many times have I made this pattern already?  I’m not sure, but lots.

Ok I’ve just counted.  Eight times I have made this pattern.  Eight.  That’s not even counting the two times I’ve spliced the pieces and made it up plain, without those distinctive waitress-y pockets.
Some of the beige double topstitched seaming of the original dress is still intact in the skirt, which is fine by me.  I like weird little quirks in my clothes, didn’t you know?

The pockets are lined with blue sprigged cotton, leftovers from my sew bossy dress in its pre-dyed colour, and the lining is the original pale latte coloured acetate lining of the dress, simply cut to the right length from the bottom and keeping the hemline intact.  Instead of sewing the darts in the lining I folded them in pleats instead, as is my wont.  This is not laziness, honest! the idea is that there is some wearing ease in pleats whereas as there is no wearing ease in sewn down darts.

Does this happen to you when snapping a picture of your sewing details?

I know you can’t see them in the photo… but I am totally wearing matching socks too.  Ha!  I love matching details, even those you can’t see!

Details:
Skirt; Vogue 1247 lined, blue damask, my review of this pattern here
Blouse; a mixture of different patterns, powder blue silk, details here
Socks; hand-knit by me to a 60’s pattern, details here
Boots; Enrico Antinori, from Zomp shoes

pinterestmail

the Panellist

I’ve made a new dress! a dress comprised of panels and bands.  This is Vogue 1316  and I made it using three pairs of old corduroy jeans, ivory, chocolate and a faded black; plus a piece of new black corduroy, itself a leftover from my black corduroy flares-now-bootlegs.  Ha! hanging on to those old jeans and leftover scraps payed off… eventually.  It can be seen by the mangled leg of the jeans on the left that these have been partially harvested previously, when I made the Black parliament…

I managed to get the pieces for the dress, following the grain AND the nap (no small feat) from these jeans, with only a few piecings necessary.  The original hem has been retained and incorporated into the lower hem of the skirt in each of the ivory and chocolate brown lower skirt panels.  The widest panels I cut from the leftover piece of black corduroy, because that piece was the widest… the bonus is that this is the hip area and the darkest fabric situated here gives a slimming effect.
The lower band of the dress is a very wiiide piece, and since jeans legs are not wide, this required joining three pieces together.  But hey, I don’t think the joins scream “hey lookee here, seam!” very much, so I think I get away with it.

Also the lower front is cut over the side seam from a jeans leg, with the old side seam in the new centre front.

So, it can be seen above that my dress has luvverly deep pockets.  The pattern does not provide for pockets.  When I first saw the picture on the pattern envelope I thought that it did.  That side band curving down from the waist and around to the back was situated in perfect hip pocket position, so it was a reasonable assumption to make.  Perusal of the fine print revealed that I was sadly mistaken.    Early elation (and it has pockets!) turned to disappointment (oh it doesn’t have pockets), turned to a dawning realisation (hey, it could so easily have pockets) turned to a firm resolve put those missing pockets back into the design where they were so inexplicably lacking (dammit, that dress really should have pockets!)

Adding them was not very difficult.  I cut the skirt pieces to be bigger, grading from my usual waist size out to between one and two sizes bigger than my usual choice at the hips to accommodate having hands in the pockets.  Then drew a rough, my-hand shaped piece onto paper, added this to the inner edge of pattern piece 13, the middle side front, and cut this composite new piece from the fashion fabric for the pocket.  I cut the hand-piece from woven cotton for the pocket lining.  I interfaced the corresponding section of the full-sized fashion fabric side band piece with iron-on interfacing, as this was to be the pocket opening and so needed stabilising, and joined all the pieces in the normal pocket way, the pocket lining to side band with a narrow seam allowance so the fashion fabric continues over and into the pocket within the fold.  Additionally the pocket opening is under-stitched, to prevent the lining from rolling out.  

I am unreservedly thrilled with how the pockets turned out, they really are in the perfect position, and I cannot understand why they were not there in the first place.  Vogue would do well to include pockets, or at least the possibility of pockets, in all their casual designs imo , since they are clearly high on the list of Most Desirable Features in a Design, wouldn’t you agree?  It’s certainly something I always look for in a casual pattern, or at the very least, the potential for finagling pockets if at all possible.  I reckon this dress is only, like, a hundred times better for having pockets?  Rough guesstimate, there.

The dress is fully lined; and even in a casual, toss-it-on-for-whatever, day dress like this I prefer the clean and streamlined minimalism of an invisible zip, so used one.
The fit… there were minor issues.  For a “fitted” pattern I reckon it runs quite big and boxy throughout.  But this was easily fixed, mostly through that handy back/side section seam, pictured below.
I am super happy with the dress, it was an enjoyable puzzle to put together and is very comfy and easy to wear.  I love washed and worn corduroy, such a beautifully soft and warm texture in a winter dress.  And it always makes me feel good to re-use old textiles constructively like this.  šŸ™‚

More inane drivel thoughts about this pattern can be found in my pattern review below if anyone is interested.

Details:
Dress; Vogue 1316, fashioned from 3 old pairs of cotton corduroy jeans plus another piece of cotton corduroy in another colour.
Tights; self-drafted, black merino, details here and my tutorial for drafting your own custom-fit tights pattern here
Boots; Andrea and Joen, bought from the now re-branded Uggies in Dunsborough

and merely because I find these pretty amusing… the Vogue pose

Pattern
Description:
Fitted
lined dress has several shaping bands and multiple panels, a central back zip
and walking vent
Pattern
Sizing:
Size
4-12. I cut my usual size 10 in the bodice tapering out to between a 12-14 at
the hips.  This hip is larger than
my usual size, but I wanted to incorporate pockets into the design, which
requires a bit more room in the skirt. 
In my opinion the pattern runs a little big, since I had to take in the
bodice quite a bit, and might go down to a size 8 in the bodice next
time.
Did
it look like the photo/drawing on the pattern envelope once you had finished
sewing it?
Yes.
Were
the instructions easy to follow?
Yes
What
did you particularly like or dislike about the pattern?
I was
attracted to the complex banding and panels design, lending themselves to
pattern through the use of tonal solid colours.
I was
disappointed that it did not have pockets, considering that the side
band is perfectly positioned to have a pocket tucked under it. But I knew the
design would be very easy to adapt so that I could have my beloved
pockets.  And it was, and so I have them  šŸ™‚
The
lining is not done in the best way, in my opinion.  I don’t really love lining being sewed straight to the shell
of the dress like this.  It is
under-stitched to help keep it all inside; but if I was going to make this
again I would instead make self-fabric facings for the neckline and underarm
and attach these to accordingly modified lining pieces.
For the lining, the pattern stipulates 1.8m. In my size, I found 1m is sufficient.
Fabric
Used:
Cotton corduroy in four different colours 
Pattern
alterations or any design changes you made:
Pockets!  I was
determined to incorporate pockets into the dress, so modified pattern piece 13
to be a pocket piece, and also drafted another piece to be a partial facing for
piece 12 with an integrated pocket lining.  To accommodate hands-in-pockets wearing
ease, I drafted the skirt pieces to taper from my usual size 10 at the waist, out
to between 12-14 at the hips.
I
raised the height of the centre front by about 1cm, and am glad I did.  Next time I might raise it even higher!
Step
19-23: I prefer an invisible zip in my dresses, and I always install an
invisible zip before stitching the remainder of the seam below.  I reckon this gives you a much better
and smoother finish.
Sizing;  I find the bust of Vogue fitted patterns to be drafted too big for
me generally, so I pre-emptively shaved about 1cm width off the bust curve of both pattern pieces 3.  Even so, at Step 24: sewing the back to side section seam; I found the fit still quite boxy and not
close-fitting enough for my tastes around the waist, so took out several inches in
width from the underbust and waist, graduating out again to the bust and hips.
Ultimately these alterations left me with a distinctly more A-line skirt than the pattern intended, and I am happy with that.
Would
you sew it again? Would you recommend it to others?
Oh my
gosh, I always say yes I will sew it again, and then I’m immediately distracted
by new patterns like a toddler with a shiny new toy!  But I certainly would not rule out sewing this one again.  This one is just going to be casual, everyday, winter’s dress.  I’ve been thinking about the idea of using several bright clear colours demarcated by black bands, like a licorice
allsort.  Wouldn’t that look cool? 
And
yes  šŸ™‚
Conclusion:
I
really love how it turned out! The interesting and unusual seaming pits the chosen colours against each other to dramatic effect.  I can picture a multitude of
possibilities for colour-blocking here. 
I am especially pleased with how my pocket alteration turned out, to be honest I
probably would not enjoy wearing a dress without pockets so much as one with,
so to be able to incorporate them so easily into the design was a very happy
bonus.
Without
any fitting modifications I would not describe this as a fitted dress.  I had to take
my usual size in quite a bit. 
However it is quite easy to do a lot of final fitting through the back
to side section seams.

….photo-bomb!…

pinterestmail

Browning a couple of things

Remember my Sew Bossy dress, below?  It was very… sweet, wasn’t it?
 I mean, I wish I could wear really pretty things like that, but I think I cannot!  But
I thought it had promise, it just needed de-twee-ing.

before
I lopped off
the sleeves, so now they are plain little cap sleeves; and then dyed the whole thing
brown, using iDye, colour Brown. 
So, I didn’t do very much, but it’s definitely made a ginormous
difference to my resolve to actually wear it!  I kinda love its new look, still with an old-fashioned charm, but in a less cute and more prosaic way, reminiscent of peeling sepia-d wallpaper in a decaying old farmhouse, or something.
Since I had used ivory
coloured polyester thread to sew the entire dress, after dyeing the hem
stitching really stood out and looked awful.  I unpicked all the visible ivory top-stitching and re-stitched
using coffee coloured thread.
The little quirk of
dyeing is that you cannot always predict exactly what your results are going to
be.  I found it interesting that
the ivory based print has come out a slightly purple-y shade of brown, while the
white cotton I used for the neckband and hemline piping has come out more of a
yellow-y, coffee colour.  Aaah, the lucky
dip that is dyeing!
And while I had the dye pot and
dye out I also re-ombred the top of my red velveteen skirt, which had lost a bit of its intensity
since I first dyed it a year ago. 
 I’m a big believer in the transformative powers of brown dye.  Such wonderful stuff.

Details:
Dress; dress ā€œT’ from the
Stylish dress book by Yoshiko Tsukiori, original post here; with short sleeves, blue sprigged cotton dyed brown.  My tutorial for basic one colour dyeing is here.
Tights; self-drafted, of
denim look jersey knit, details and my tutorial for making your own custom fit tights here
Shoes; Francesco
Morichetti, from Zomp shoes

Skirt; Vogue 1247, red
cotton velveteen dip-dyed with iDye in Brown, details here.  My tutorial for dip-dyeing is here.
pinterestmail
Switch to mobile version
↓