Category Archives: Sewing

a cosy new dress and a backpack

hello!  long time no see!  I’ve been very busy lately, being a diligent little jet setter and living out of one suitcase for an entire month …  I do have a travel wardrobe post planned but it will take me little while!

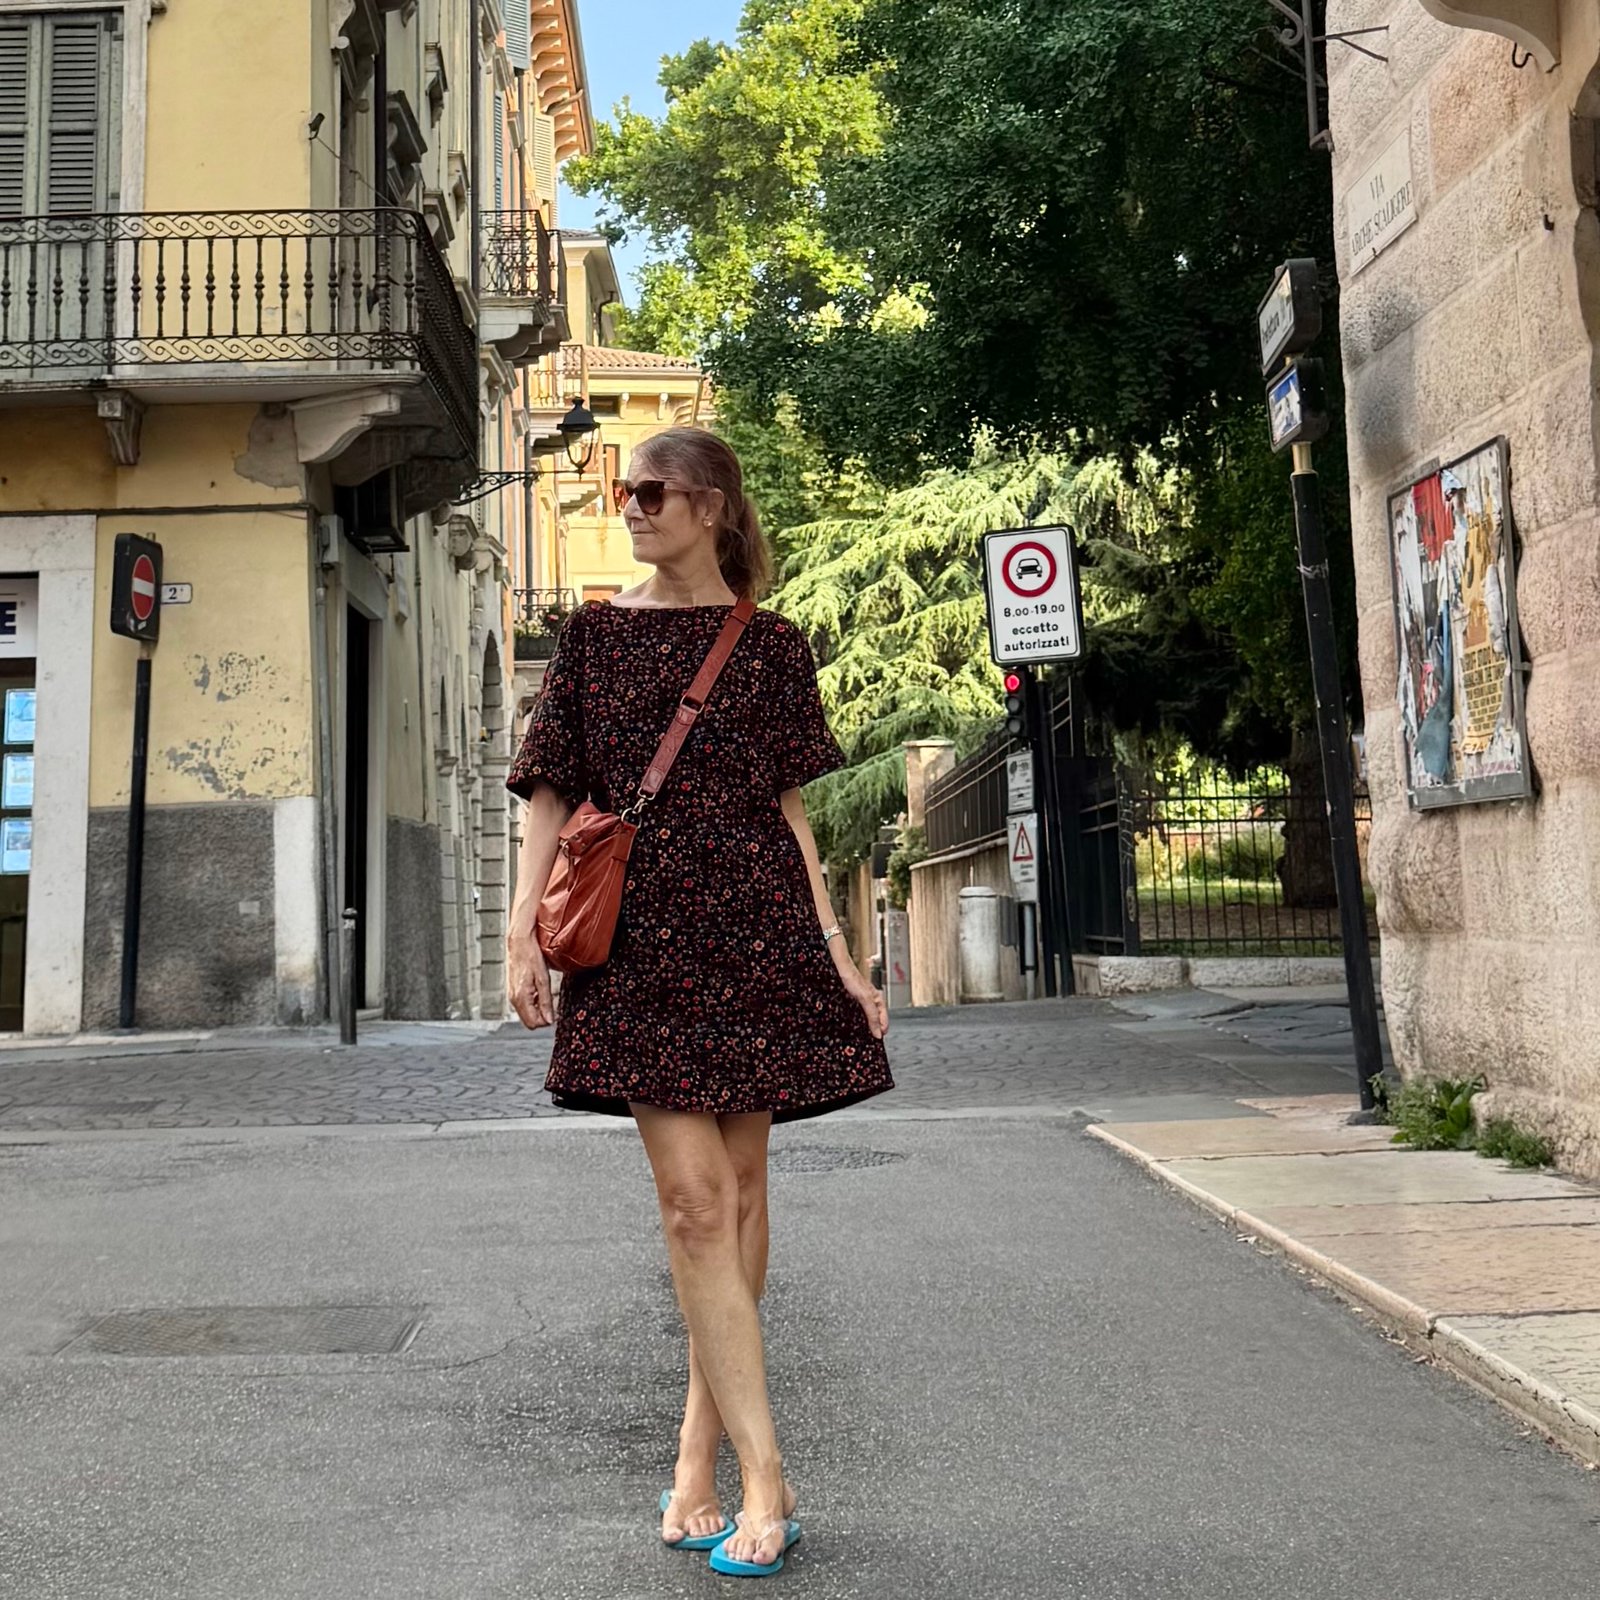
Anyway, I made a new dress before I left and took it away with me. I’ve worn it quite a lot already! and managed to take a few photos out in the wild.  Not that top photo though.  The other ones  🙂

babysitting my littlest grandson G.. I knitted his beanie early last year (posted here)

The pattern is the new Mirri pattern by Fibremood, a delightfully quick and easy thing to make; and I used a lightweight cotton corduroy bought from Spotlight just before covid lockdown if I remember correctly.  I loved the pretty bright florals on black background, and luckily had “just” enough for this pattern.

feels pretty good even in 36C heat!

Surprisingly, it reads as kinda “brown” from a distance, probably because of the large-ish amount of orange and black merging together.  Honestly I did not expect that effect!

The Mirri is supposed to be a summer pattern, of course; since the new European summer patterns are all released during our, southern hemisphere, winter… however I can still usually manage to wrangle something together that’s suitable for me, somehow, anyhow.  As it happens, I’ve found this dress has been that rare happy and successful marriage between summer pattern/winter fabric… it’s loose enough to be breezy and therefore cool in hot weather, but then can be worn over tights and a warm merino top to keep you cosy in cold wintery weather too.  Versatile!

It’s such an easy to make design there’s really not much to say.  The neckline is finished with a bias cut strip and the pattern includes a lovely deep hemline facing, which I edged with the same orange linen bias binding.  I think this looks so pretty.  Designwise, it has deep side pockets and sleeve cuffs.  Hmm, that’s it, really…

worn over my indigo dyed, linen Pauline Alice patterns Mestre shirt, blogged here.

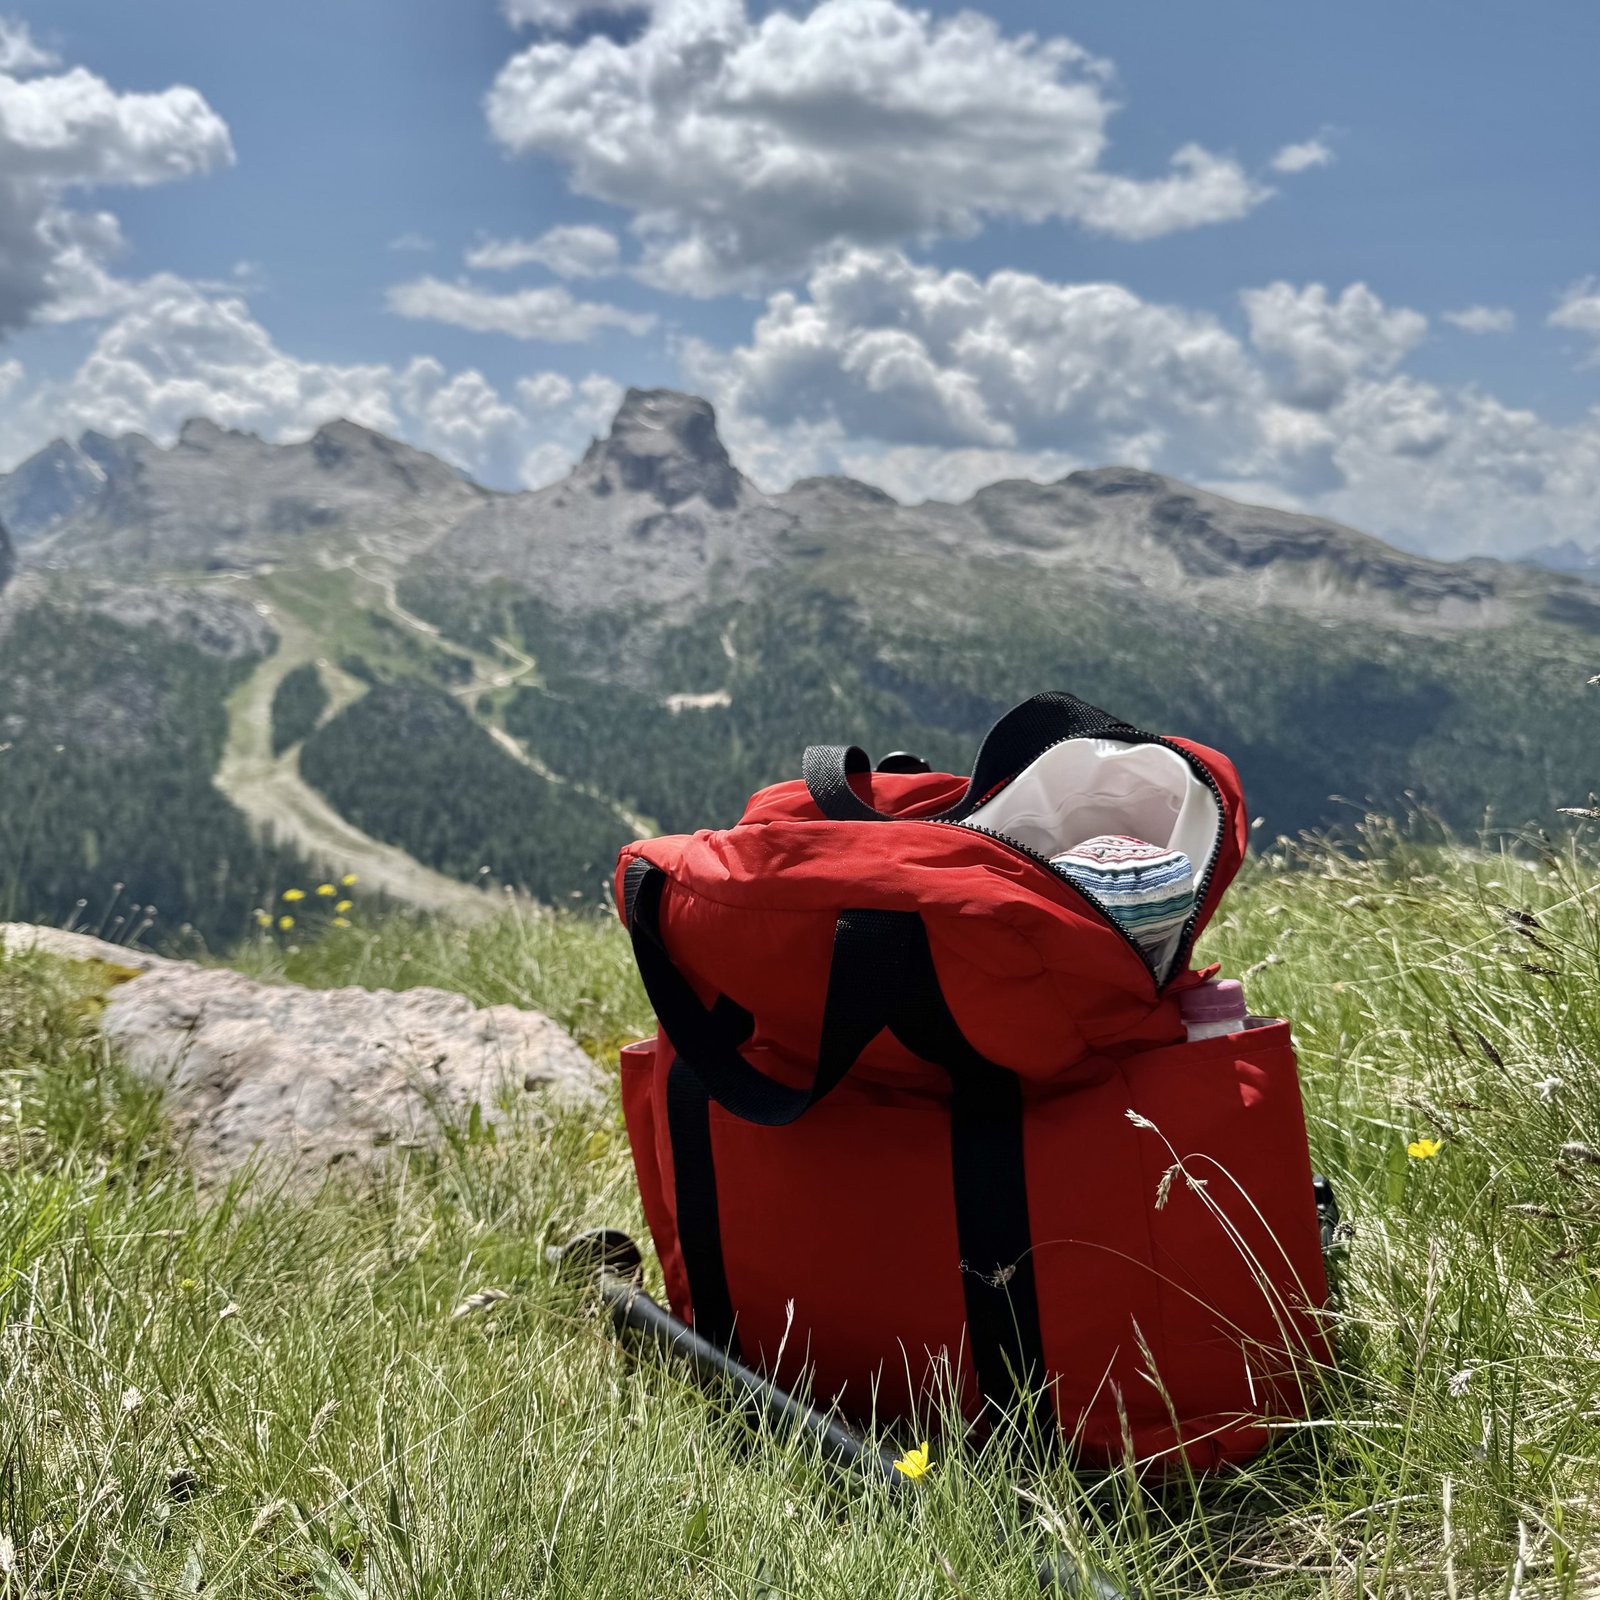
And, I made something else new on the eve of our departure overseas… a backpack.  I’ve never really worn a backpack much during our hiking travels but decided it was high time I got one so poor Craig didn’t have to carry everything in his backpack!  I used this tutorial called “DIY 3-pocket casual backpack” by a Korean channel, Tendersmile Handmade.  This was an absolute terrific tutorial, very easy to follow and I loved the final result.

I made mine from a tomato red water-resistant stuff that I bought many years ago, I think from a Morrison clothing company fabric sale.  I already had some white waterproof plastic fabric, leftover from when I made a whole lot of luggage for some of my family for Christmas one year (here).  I also interlined with some wool wadding between the two layers for a bit of padding. All these materials were from stash, and I bought the strapping, zip and plastic hardware from Spotlight.

I altered the dimensions by a bit; specifically making mine 10cm “higher”, and so made the side pockets a little higher to compensate proportionally.  My zip was also a different length, so all the dimensions of the side, bottom and top pieces are different actually.  It really wasn’t all that difficult to work out though.

I couldn’t get a zip like theirs that zipped from the middle out, mine zips from each outside edge in.  This wasn’t ideal, but didn’t make a lot of difference.  I also stitched the lining down firmly to the seam allowance inside to keep it firmly in place as far as I could possibly reach; the bottom and top edges, and part of the side edges. The tutorial doesn’t tell you to do this but I imagine the lining would just kind of float around inside the bag in an annoying way if you didn’t anchor it to the bag in a few key positions.

The backpack worked out really great! and would have been actually perfect if it had been for one small modification… to have a shoulder strap as well so I could carry it comfortably as a cross body bag if I wanted to.  I desired this variation so greatly that since I returned home I did indeed pop off to Spotlight for all the necessary bits and added one.  This can be removed if not in use.  As well, I added a “made in 2025″label, that I’d forgotten when I first made it.  Voila!

So this bag did absolutely great duty and I enjoyed making and wearing and using it.  It passed the waterproof test on one day of continuous rain and all my stuff inside remained perfectly dry.  My water bottle fitted in the side pocket just fine.  Having three internal pockets worked well for how I like to arrange my stuff.  I did think it possibly couldn’t carry a superheavy load, but then I wouldn’t want to do that anyway.


pinterestmail

some new things…

hello!  I’ve made some new things recently… firstly, some new winter pyjamas. 🙂

I used my usual Closet Core patterns Carolyn pattern for the bottoms, and for the top I used a pattern adapted from a Burda pattern, just a basic loose top with cut-on sleeves.  I went to Spotlight and bought 1.5m coral pink, 0.5m navy blue and 1.0m white cotton flannelette…  and right now I have to make a stern warning to future me; THIS IS NOT ENOUGH FABRIC TO MAKE A PAIR OF WINTER PYJAMAS.  Well, to be more specific, it CAN BE enough fabric, but only if one is prepared do lots of careful measuring, careful cutting and careful piecing to use as much of the fabric as is humanly possible.  And there will be practically zero fabric by the end of it.

I mean, this is a good thing, right?  Reducing waste?  To answer myself, yes it is, and I enjoyed the technicalities of the process and pretty proud I managed to use practically all of it, however this normally very simple project turned into a bit of an epic journey.  I think it’s ok to admit that it’s not necessary to virtuously use “all your fabric” when you make something.

I realised I had not bought enough fabric once I laid down my pattern pieces, and so had no choice but to cut and piece every single offcut in order to make the pyjama legs as long as I needed, as well as the pyjama top sleeves and body as long as I needed.  It was kind of fun to have the different colours appear as stripes like this too.

All the seams are overlocked on the inside, and all the seams are faux fell-stitched down using white thread on the outside.  I like that all those little bitsy-bits are highlighted like this!

This is the tiny pile of my total leftovers.  Honestly, in the end, “using all the fabric” became such a quest that I slapped on a few superfluous pockets, which is kinda silly really.  It was a fun experiment, but of course it’s a truth that superfluous pockets are not morally superior to throwing away small scraps.  Just saying.

I also made some new clogs!

I used a kit that I bought from Leather Needle Thread, hmm, perhaps a few years ago.  It’s taken me a while to get around to it, yes.  🙂

The colour is black, which of course will be extremely handy .  As much as I love colourful things in my wardrobe, black shoes really are the most useful ones.  As previously, I applied several layers of clear varnish to the clog bases with light sanding in between each coat before making the clogs.  I know the supplier of the clog kits doesn’t recommend this, but I personally have found it an excellent idea with regards to keeping the clogs clean.  Even if you scrupulously wash your feet each time prior to putting on your shoes, you still can’t help but get them a bit dirty, and varnishing the bases really makes the cleaning process a lot more effective.

pinterestmail

“cool bunny” T-shirts

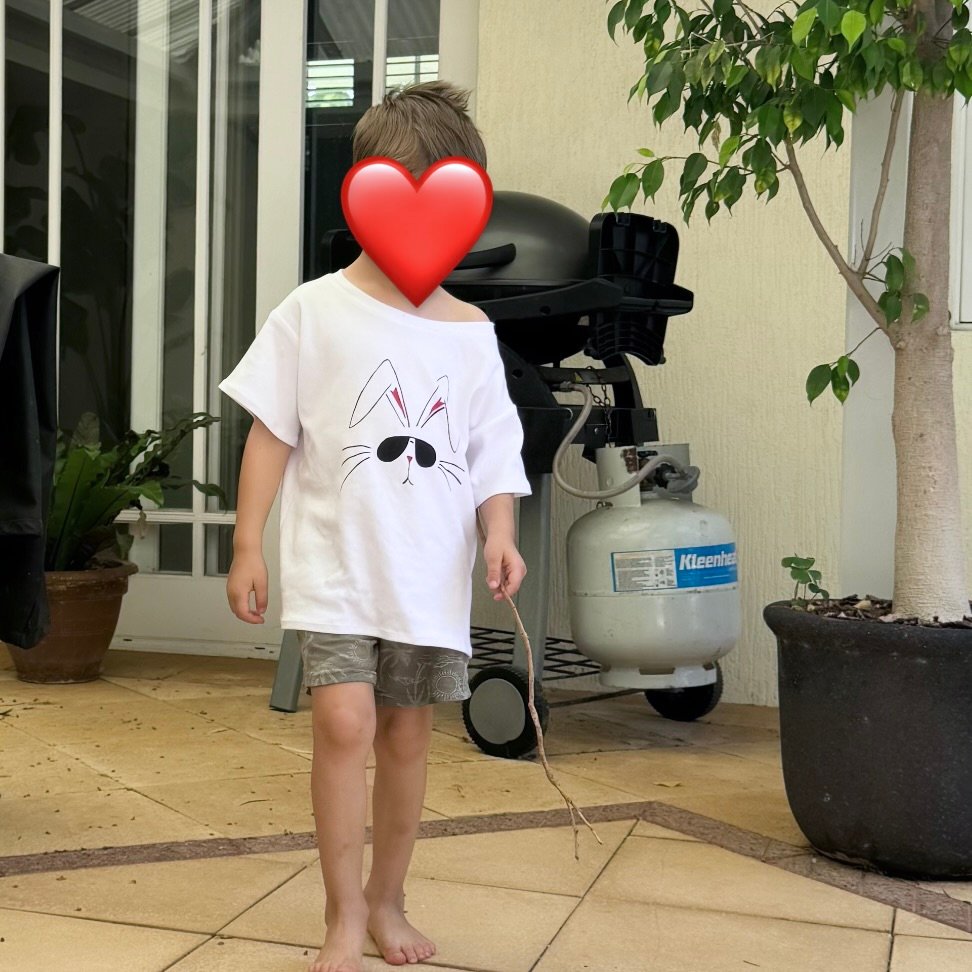
Hello!  For the Easter just gone by I wanted to give something to my three little grandsons… chocolate has been ruled out by the parents and so I had to think of something else.  I decided upon this!  As a teen, my eldest Tim used to have a pink T-shirt with a “cool bunny” printed on it which he absolutely loved.  It was actually a very different print from this one, but with this in mind I googled “cool bunny” and something like this was one of the millions that came up.  I thought it was really cute!

The following is my process… I’d done a screen printing course years ago and so already had all the materials on hand.  Most of my old paints had dried up but fortunately the red and black were ok.  Phew!

I hand-drew the design on tracing paper in lead pencil, then transferred the designs to equally sized pieces of wrapping paper.

Why wrapping paper?  Well, because it’s a little stiff and “waxy” in texture I thought it would last a little longer in the printing process, and hopefully not disintegrate after a few prints.  Yes I could have gone out to buy proper printing paper but I’m still on a “use what I’ve got in the house already” kick.  I’d pre-cut the paper pieces to be the exact same size, in the hopes of being able to overlay the two colours as perfectly as possible.

Using a scalpel, from my shoemaking kit, I cut out the two designs.  I’d also cut out four pieces of white cotton jersey (from stash) big enough for a T-shirt front.  Four pieces? but I only have three grandsons?  well I was accounting for one possibly not working out well since I wasn’t going to easily be able to do all this a second time!  Screenprinting is quite involved!

To help line up the prints, I’d drawn the corners on the white cotton jersey in disappearing ink.  As it turned out, this didn’t work out well at all because the edges of the paper are stuck down to the screen with masking tape which then obviously also masks the corners drawn on the cotton jersey underneath.  So of course you can’t see them.  I mean, duh!  It was actually pretty difficult to line up the screen for the red print afterwards.  I’m going to have to put my thinking cap on for future multi-colour prints.

First print done!

I’d cut the black with little “bridges” to keep the design actually together, so after printing I went over with a paintbrush and carefully filled in the bridges.

Second print!

These are the three that worked pretty well…

and this one did not.  If you can’t see it straight away, just look at the red, inside-the-ears bit, and you can see how skewiff it is compared the the others.  I’ve still got this fabric, and may use it for something else in the future.

Heat set the prints, and then I sewed up the T-shirts.
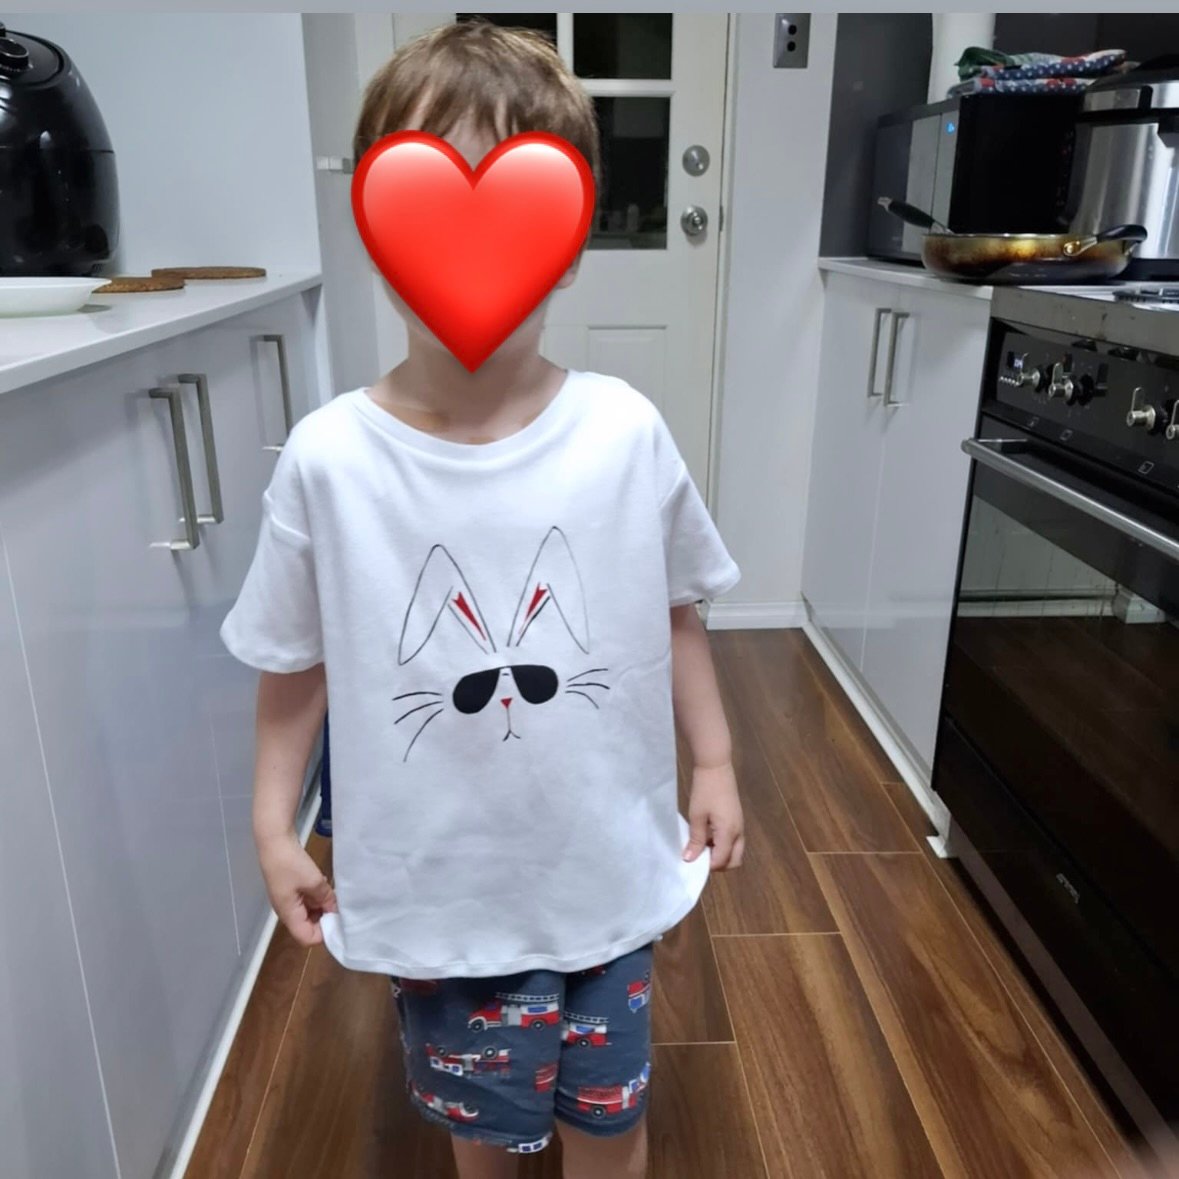
I used Butterick 5510 for G’s T-shirt above, that I’d used for him previously…

and for A’s and T’s I’d traced around a child’s T-shirt and adapted it to their sizes as well as I could.  I deliberately made them all oversized so they could grow into them, but they did all turn out pretty big.  Fortunately all the boys seem to like them and have worn them, so I’m happy!

pinterestmail

dazzling dazzle

hello!  I made a fun new little dress…

this is the new Fibremood Dazzle pattern, which is actually a top pattern but I lengthened it to be a dress, simply because I had enough of this gorgeous fabric to do so!


I bought this stunning cotton ikat in Stone Mountain and Daughters, a popular fabric store in San Francisco while I was there on holiday with Yoshimi in 2019.  Nearly six years ago now, wow, I can hardly believe how time flies!  Well, at least I finally found a good reason to cut into this gorgeous stuff!

I cut the collar and cuffs from a neutral linen that I’ve had in my stash even longer.  I think this is from Calico and Ivy originally; it’s been very useful over the years for just cutting pockets, facings, and other bits and bobs that require a sturdy and neutral coloured fabric.

I added inseam pockets to the dress, of course!  and I’m pretty sure I lengthened the sleeves a bit too, so I could turn the sleeve cuffs up properly.  I like the look of a turned up cuff, and prefer this look to a plain, added on cuff, if you know what I mean.  I usually secure them in the turned up position by stitching-in-the-ditch at the underarm seam of the sleeves and cuffs; and sew a few firm stitches at the outer edge inside the cuff and out of sight.  This seems to work pretty well for keeping the cuffs permanently turned out.

The front neckline is a polo style neckline, but slightly different from the usual in that it is stitched in a V-neck style, rather than the two sides aligning in the centre front.  Gives it a slightly more sporty look.  I love this dress, primarily because of the fabric, I have to admit! and have already worn it multiple times.  Little loose dresses that I can wear for walking on the beach are my go-to nowadays and it’s fun finding new patterns for this purpose.  This one has ticked all the boxes quite nicely!

pinterestmail

a purple mini and a striped tee

in the Nagano region

Hello!  We recently spent nearly a month overseas in east Asia, specifically South Korea and Japan.  I’ll write a bit more about our trip in a future travel wardrobe post, but for now I’ll just be focusing on the two new things I made to wear for our holiday…

First up! a new mini skirt.  I find a little stretchy fabric mini skirt to be an extremely comfortable and practical garment for hiking in a winter environment… which is why I make a new one practically every year, ahem.  I’ve actually promised to myself to branch out into different patterns this year but that promise was made after I’d made this, honestly.  Because yes, it’s yet another old favourite that pops up here with mind-numbing regularity, the Paprika patterns Jade mini skirt pattern.

I used a bright pink jersey that had been given to me by my friend N when she cleaned out her own stash.  I actually already have a pink mini skirt from last year that’s still in very good condition, so I made this new one with a view to dyeing it immediately afterwards.  I’d decided upon purple, thus the decision to use a purple zip which I happened to have in my stash too.   I’m pretty happy with the very good colour match after the dye-job!

btw, I don’t always put a zip in the Jade but it’s usually a good idea.  Also, I always have to substantially change the shape in the fitting stage, bringing in the waist by a good 15cm or so, which necessitated a redrafting of the waistband.  Over numerous iterations of this skirt, I have found it a good idea to line/interface the waistband with a non-stretch material for longevity, since otherwise it will eventually stretch out.

looks lumpy here but that’s because of the shaped waistband, which won’t sit flat nicely

I added a cotton pocket inside the skirt, this cut from an old worn out shirt of Sam’s.  I’ve found some sort of pocket a useful addition to the skirt pattern previously although I haven’t used this one yet, in spite of wearing the skirt quite a lot already.  As it turns out I always wore it with other garments with it that had more convenient pockets so didn’t need it.  The Jade pattern is not ideal for pocket addition at all, but I’ve still tried to force one upon it a few times now.  I’m confident that it will prove useful in future wears, though.

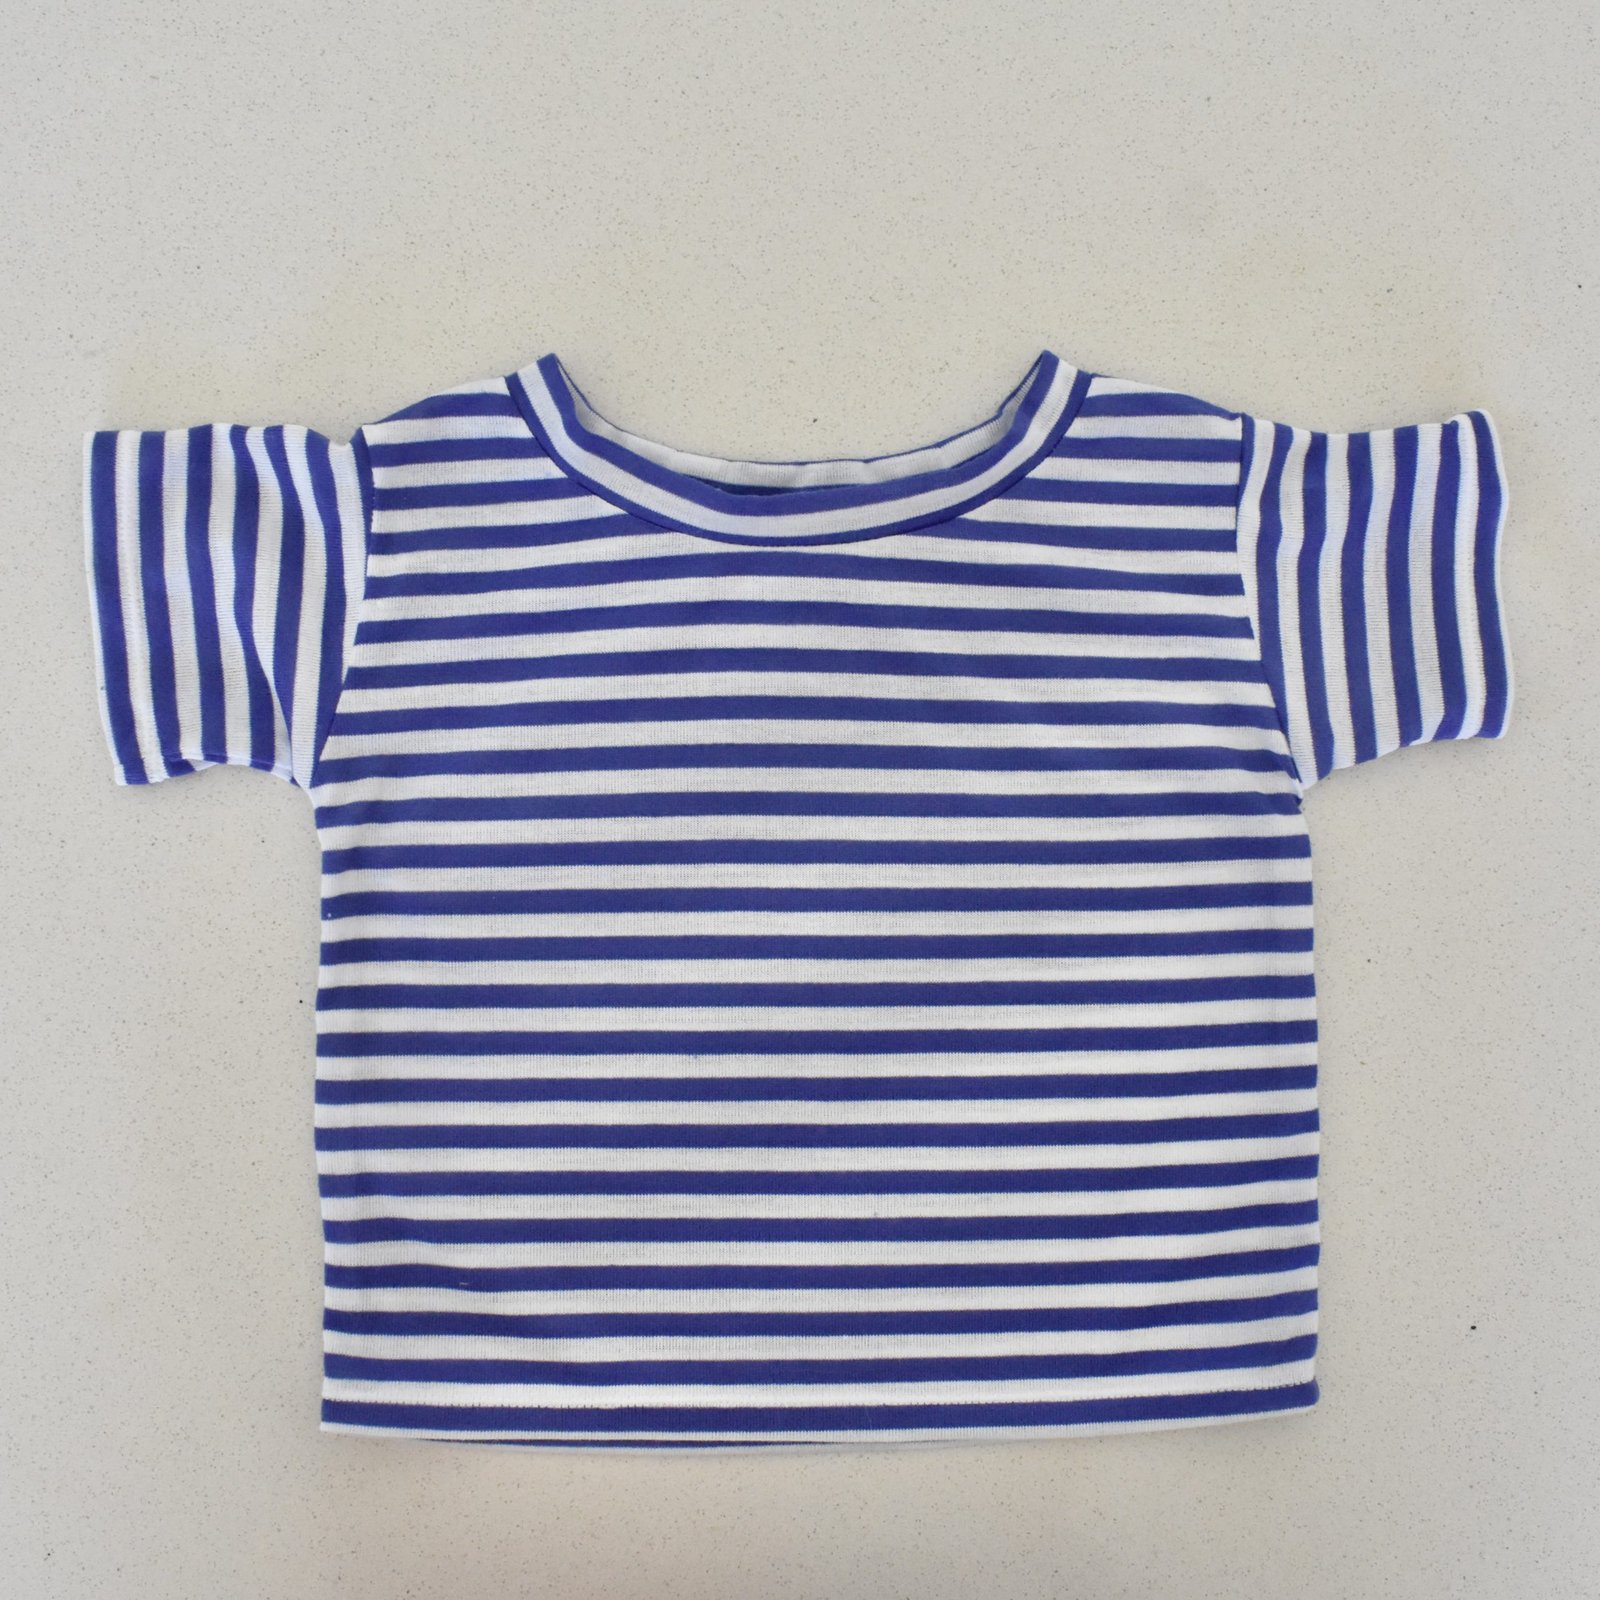
The other new garment is a T-shirt, made from a blue and white striped jersey also from N.  You may recognise it from G’s T-shirt in my previous post.  For mine, I used our own Carolyn & Cassie Pinjarra pattern, sizing up because the fabric doesn’t have much stretch.  I actually didn’t have much opportunity to take a photo of the T-shirt on our trip because it was rarely warm enough to wear it by itself!  plus for some reason taking pictures of my outfits didn’t take a lot of priority in my mind.  Is this a good sign?  Am I maybe getting more mature?!  All pictures featuring the Tshirt are pretty ordinary quality, haha…


Anyway, both these pieces are obviously comfortable and nice to wear, and feel like really good new basics for my wardrobe.

pinterestmail

water lily dress, a raincoat, and a stripey shirt

hello!

I’ve been making a few more things lately…

first up; a dress!  I bought this screen printed linen a few years ago from the Injalak Arts Centre, the design is Mandem (Water Lily)  by the indigenous artist Eva Nganjmirra.  The pattern I used is an old favourite by now, Vogue 2900.


Something charming about this screenprint, I discovered; was the designer’s “signature” of sorts…of course, I had to carefully cut around this and place it some where semi-prominent.

I decided the pieces had to be highlighted in some way more than just mere seamlines, and utilised a method I have written about previously here… namely this is a bias cut strip that is inlaid over the pieces before joining together.  I had a small length of mustard linen, leftover from this dress, that I used for this purpose.

Unfortunately there wasn’t enough to do every single seam and edge like I have done in previous examples of this method but I just did as many of the more prominent bodice seams before I ran out of it.

I know I’ve used this pattern quite frequently but it really is such a beautiful dress design that I don’t see myself every tiring of it any time soon.  Of course I really should branch out more and I’m resolving to try more new patterns this year and not fall back so often on the old favourites.  In the meantime though, some of my recent as yet unblogged projects have failed this resolution already whoops.

I think my only, somewhat trivial criticism of this design is its lack of shape in the waist area.  I have a pretty high waist to hip ratio that isn’t really suited to this drop-waist design however I still stubbornly persist in wearing it.  Sometimes I think I should try to modify it to look less “boxy” but the bodice pieces are so beautifully proportioned in themselves I’m not really game to fiddle about with it.


I wore this along with my me-made mustard clogs out to a meeting with friends recently and managed to grab a quick street shot.  I’ve always liked to get a real world photo the things I’ve made if possible, but it’s sometimes difficult.  If the coast is clear, like this time, I can quickly prop my phone up against my bag on the footpath and take a sneaky timed photo!

My little grandson G randomly ran up to join my while I was taking my more staged photos, which was happily fortuitous since he happened to be wearing a little T-shirt I made for him recently using leftovers from another, s yet unblogged, project to appear here soon.  Once I get my act together!

I used Butterick 5510, a great little pattern that I should probably buy in a bigger size now!  The blue and white striped jersey was tossed out by my friend N during her fabric purge recently.  It’s quite nice stuff, if you don’t mind the suffering that comes with matching stripes in cutting and piecing.  Fortunately I don’t mind this toooooo much.  Maybe just a little, but only if it’s just every now and then.

I lenthened the T-shirt considerably because it’s really way too short otherwise. I don’t know if all my kiddies are just super tall or not but I’ve always found commercial patterns to be ridiculously short and wide.

Please note careful stripe matching.  Oh, another problem with this pattern was the rather small neckline.  After cutting it and subsequently realising it was actually pretty tiny, I recut the neckline, cut some extra neckline edging and pieced it.  One join is pretty good, the other less so… I’m pointing the two out here.  Hopefully they’re not too terrible!  I’m pretty sure G doesn’t mind though, and at least it fits over his head!

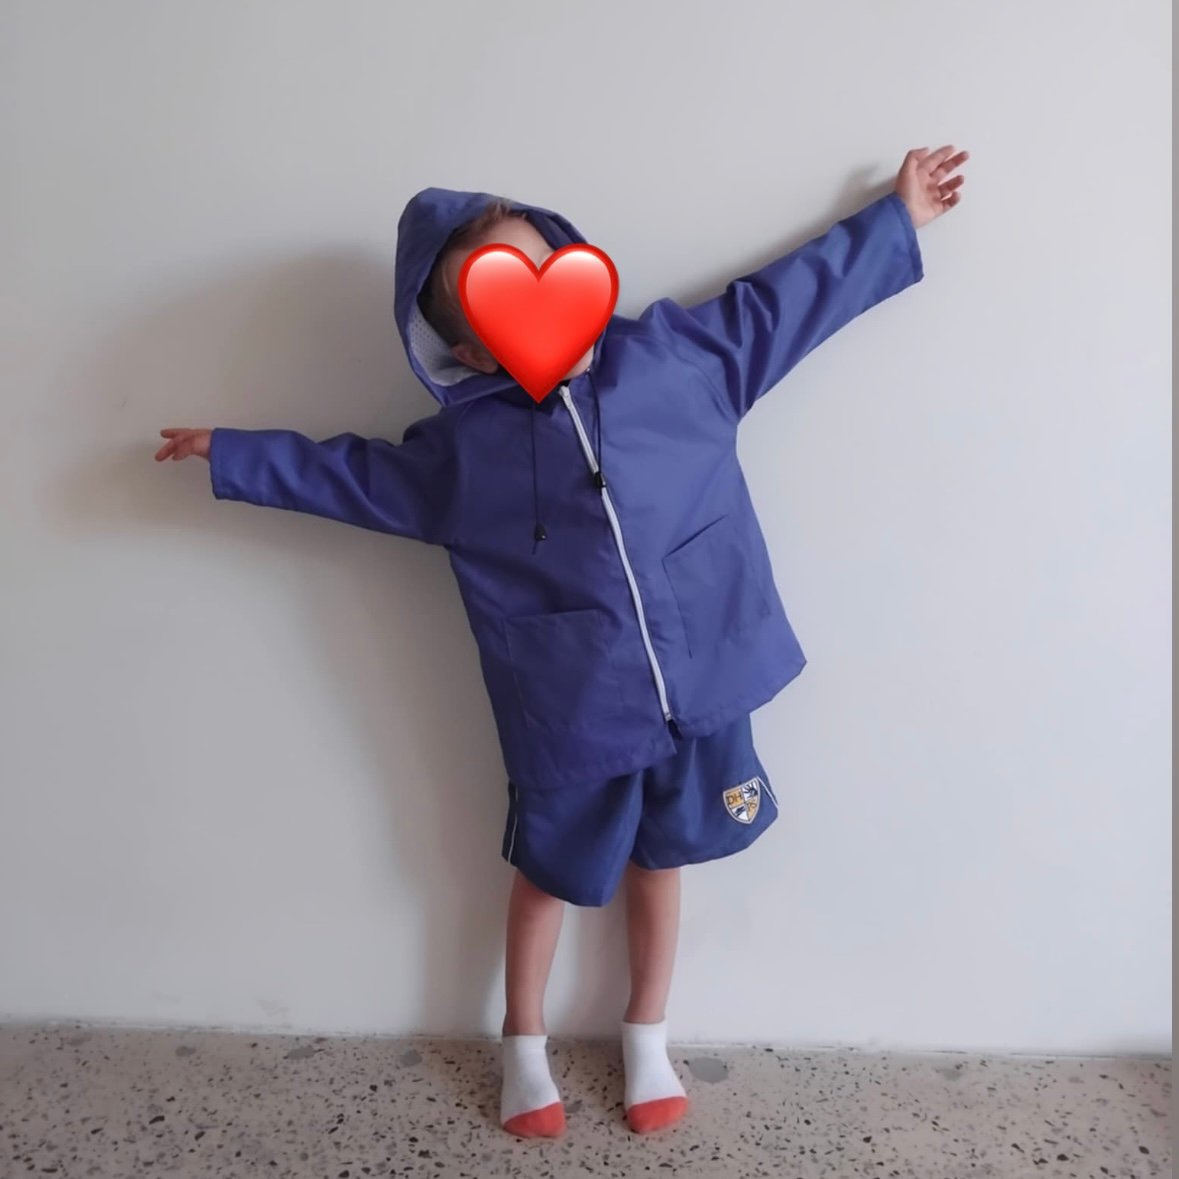
I also some leftover raincoat fabric from when I made my sister in law Sandi’s Mundering raincoat, back here; so I drafted and ran up a new raincoat for T.  He’s grown out of his yellow one, blogged here, which will be passed on to G this year.  I lined it with the breathable sporting fabric, a length of which I bought for raincoat vents years ago.  The zip, cord and eyelets happened to be in my stash already too, hurrah.


The pockets are just patch pockets. All seams are sealed on the underside using seam sealing wax that I bought for this purpose years ago from the camping and outdoor outfitter store, BCF.

I think he likes it!  He looks pretty cute in it anyway, and I think it turned out a pretty good fit considering I drafted it just using one of his T-shirts.  Phew!


pinterestmail

Why do I sew with striped fabrics?!

rhetorical question, don’t mind me.  I actually love stripes, even though when I do sew with them I feel inextricably compelled to pin each and every stripe. It’s ok. A small amount of suffering is acceptable when it leads to nice things.

Anyway,  I made a new outfit for myself, in anticipation of the slightly cooler weather that heralds the onset of autumn, hurrah.  The fabric is a really nice, crisp, slightly crinkly, and reassuringly sturdy ticking striped cotton, ivory with steel blue stripes, and a silver thread running through.  I bought it years ago from Fabulous Fabrics, and it’s been one of those lengths of fabric that I’ve “saved” for really a nice project, one far off day. It’s always a lovely thing when that far off day finally dawns.

For the top, I used the new Fibremood Kristy pattern, a smart top with big patch pockets with arrowhead flaps, and a nice shaped collar, with the most rudimentary of collar stands.

I lengthened the sleeves by several inches so I could turn up a cuff, and I love how this looks.  There’s double topstitching just about everywhere although it doesn’t stand out since I used matching ivory thread, but you do pick it up subconsciously.

My skirt is, of course, our own Meelup skirt pattern.  I do feel a bit bad about my possible overuse of this pattern and have decided I really need to branch out a bit with regard to skirt patterns, well, ALL patterns really, but it really does tick all my boxes so well.  Maybe I’ll limit myself to just one of a pattern per year?  worth a thought!

I lined the skirt with ivory poly acetate lining fabric, also from stash.  This adds a bit of necessary body to the skirt too, making it nicer to wear.  In fact, the whole outfit is very comfy, and happily has a certain subtle chic afforded by the details on the Kristy top; I really love it a lot.

I also ran up an adorable little pair of shorts for my littlest grandchild G, using the very last of the leftover “public pool” cotton drill fabric designed by his mother, which I bought from her Spoonflower shop, here.


 The pattern I used is Butterick 5510, size M.  This is the biggest size in the envelope, so I’ve realised I need to use it a few more times, and quickly too, before G grows out of it!  I’d almost forgotten how much fun children’s clothes are to make, so quick and easy compared to adult clothes.  I traced out the pattern and finished the shorts in about an hour, tops!

pinterestmail

refashioning some things

hello!  I’ve made a new outfit by refashioning some other previously worn old things…   from a skirt and old jeans, I’ve made a new/old tunic top and some new/old shorts.   I realise I probably I should be using some of the new fabric already in my stash instead of “already used” fabric – truthfully I am not very sensible a lot of the time – however if I really like a fabric but not the garment so much then I do feel like it just makes sense to reuse the latter if I can.  Actually, I have been making a number of things lately, and from my stash! but just haven’t got around to taking photos or blogging them yet.  For some reason, I’m finding taking photos to be the biggest challenge now.

Anyway, previously I had this skirt, and some of Mum’s old jeans.

I really love this fabric, but it was ultimately a bit on the flimsy side to be a skirt really.  I am, obviously, much happier with the new things.  To be honest it’s just a casual and fairly unexciting outfit but it is the kind of very comfortable and practical outfit that suits my lifestyle very well for the time being.

For the new top, I partially used a pattern from the Japanese pattern book, Stylish Dress Book, but just for the yoke.  I stitched up the pockets on the old skirt, cut out armholes and stitched it to the yoke.  The armholes are bound with the same linen.  The denim yoke is cut from old jeans, and lined with indigo-dyed linen.  I added a pocket harvested from off of an old pair of jeans.

I made the denim shorts using a heavily modified Pietra shorts pattern by Closet Core patterns.  My version is a lot more A-shaped than the original and there is absolutely no elastication at all.

My littlest grandson G enthusiastically rushed over to join me modelling here … he was so cute and funny! You just have to imagine his huge delighted smile here!  My legs are a little wider and I tapered off all pieces toward the top substantially to make it close fitting about my waist, and inserted an invisible zip in the centre back seam.

I cut the legs to be a little wider at the bottom edge, and substantially tapered off all pieces toward the top to make it more close fitting about my waist.  Closure is by an invisible zip inserted in the centre back seam.  The facings and hem edges are bound with pretty gingham printed cotton, leftover fabric from a very recently finished dress.

I removed the pockets from the jeans, unpicked all the old topstitching thread, and re-stitched these to the shorts back.  I had just enough burnt orange to finish the yoke and pocket on my new tunic top, and used a vibrant and sharp lemon yellow for the shorts.  These, along with the jeans in the first place, were inherited from Mum.

Worn above with my white Booragoon top, blogged here, and below with a matching Sorrento bucket hat in the same MaaiDesign wide checked linen, blogged here.

pinterestmail
Switch to mobile version
↓