 So, I made my own outfit for Tim and Kelly’s wedding too, of course! I’m posting about this outfit before the wedding dress, partly because I’m waiting for the professional photos … a social media blackout was imposed for the wedding, although of course I was far too occupied chatting to all our friends and relatives to even think about taking out my phone a lot of the time anyway!! I did take a coupla snaps during our getting-ready period, and during the reception, but for about 99% of the day my phone stayed firmly silent, neglected and untouched in my bag. And honestly, that’s the way important celebrations should be done anyway, I think!
If there’s a nice professional picture of my outfit from the wedding, I will edit later to put it here. But in the meantime these’ll do…
I used Vogue 1537, a Kay Unger design. I bought this pattern ages ago and have always wanted to use it for some special occasion outfit. What could be more special than my son’s wedding?!!
I knew in my head exactly the fabric I wanted to make it out of… textured damask or brocade ideally a nice warm light pink, though actually dark pink, would have been ok or anything even remotely pink would have been considered actually. Yes, pink is my current obsession, I may have mentioned that once or twice before, hehe…. anyway, do you think I could find anything even vaguely pink? of course not! despite the fact that pink is allegedly the colour of the season and although I scoured through every single fabric shop in Perth and Tokyo, and even hunted through the offerings of several online stores with the single minded determination of a sniffer dog. Ultimately a failed sniffer dog with absolutely nothing to show for a heckuvva lot of sniffing though, sadly…
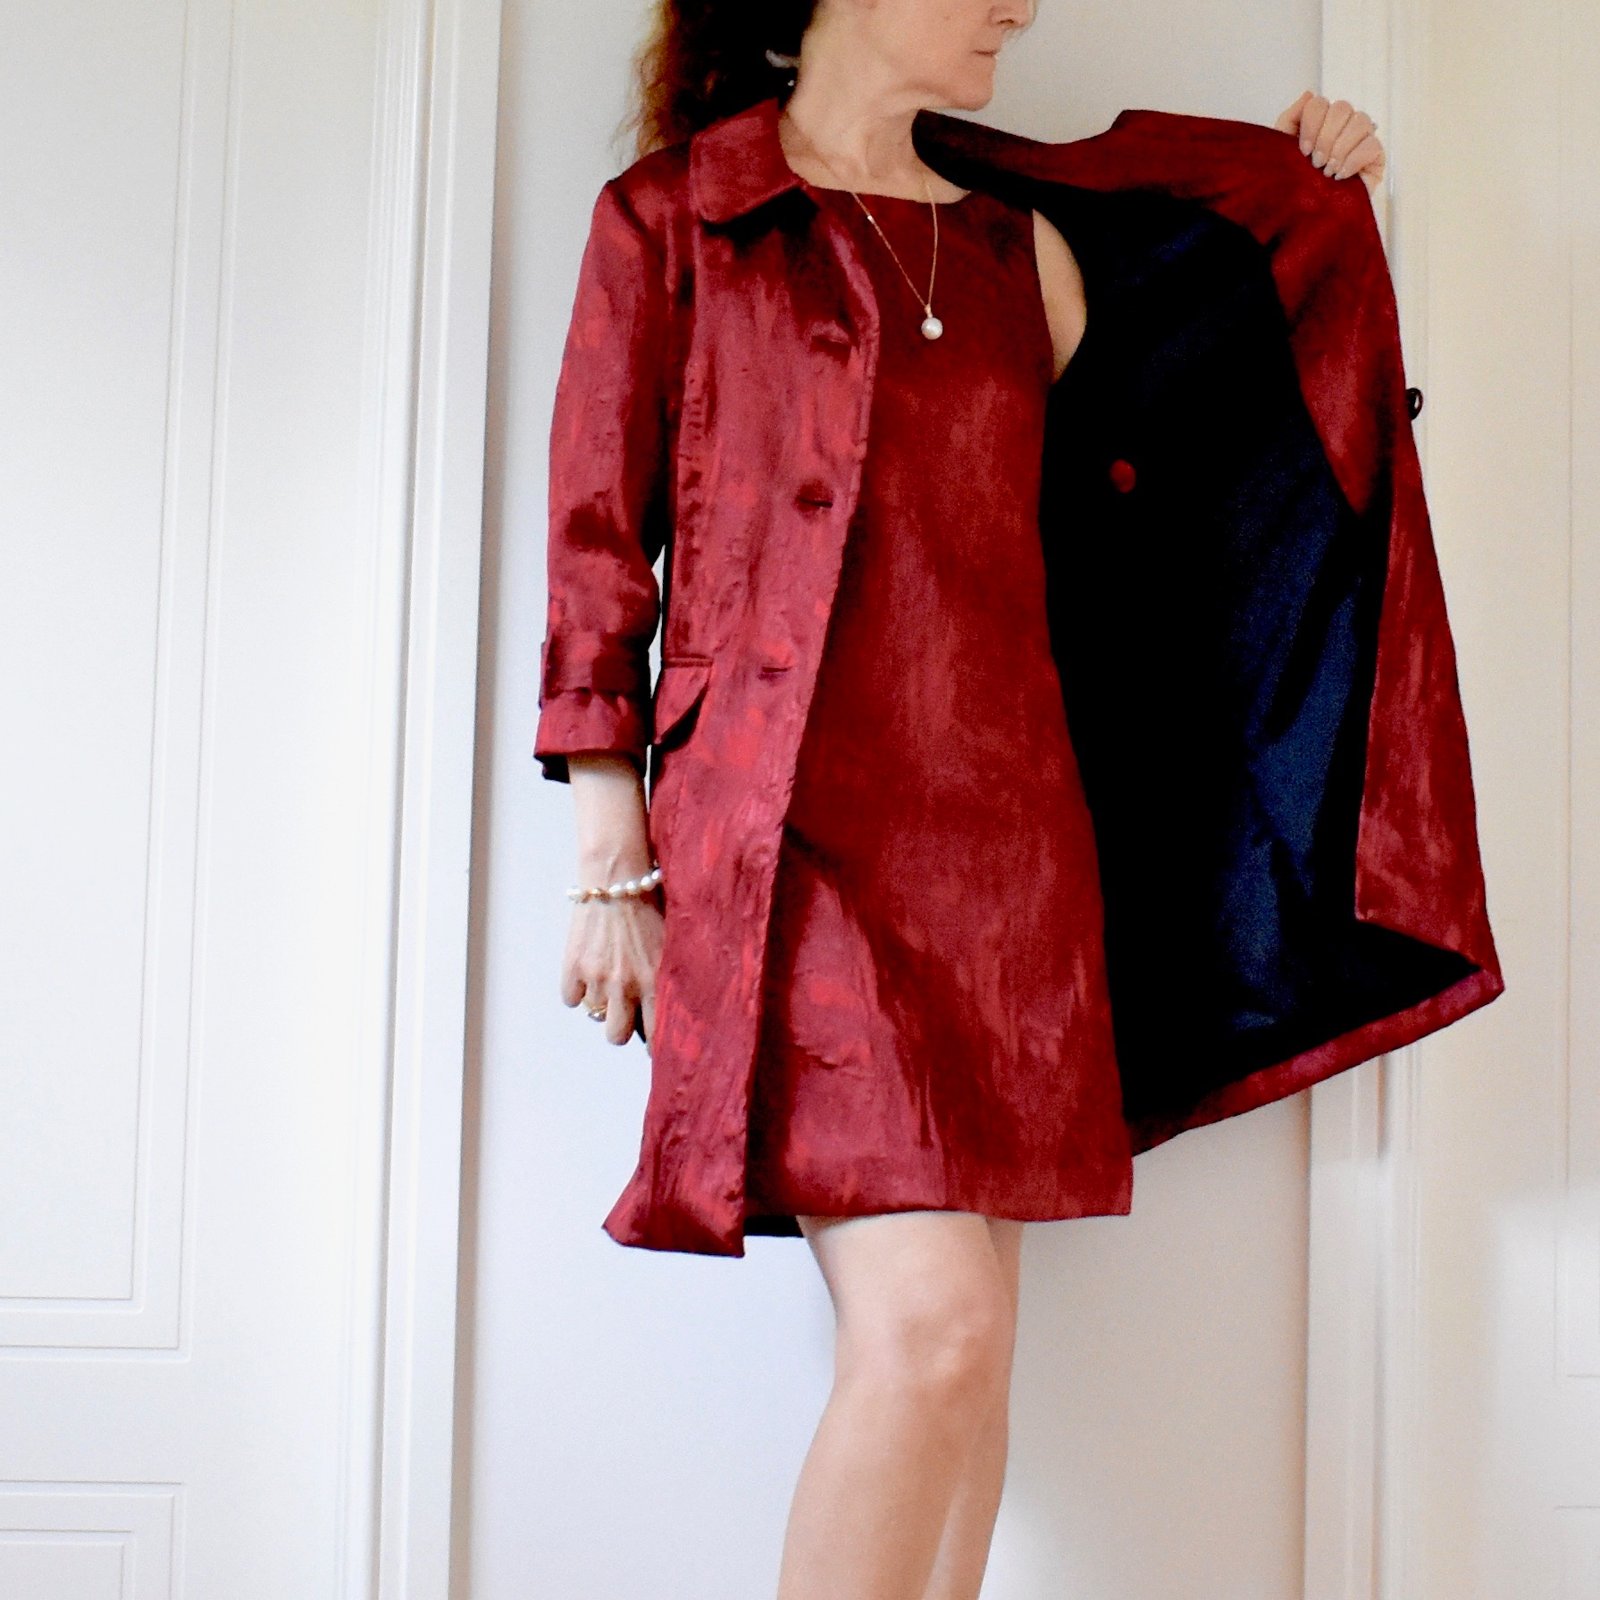
I found a few damasks at Fabulous Fabrics, less than a handful of colour choices, and the colour that was the most acceptable to me was this ruby red silk. Admittedly, it is a lovely colour. I did consult with Kelly as to whether she thought it too bright – I didn’t want to be be too conspicuous!! and luckily she gave it a big thumbs up 🙂

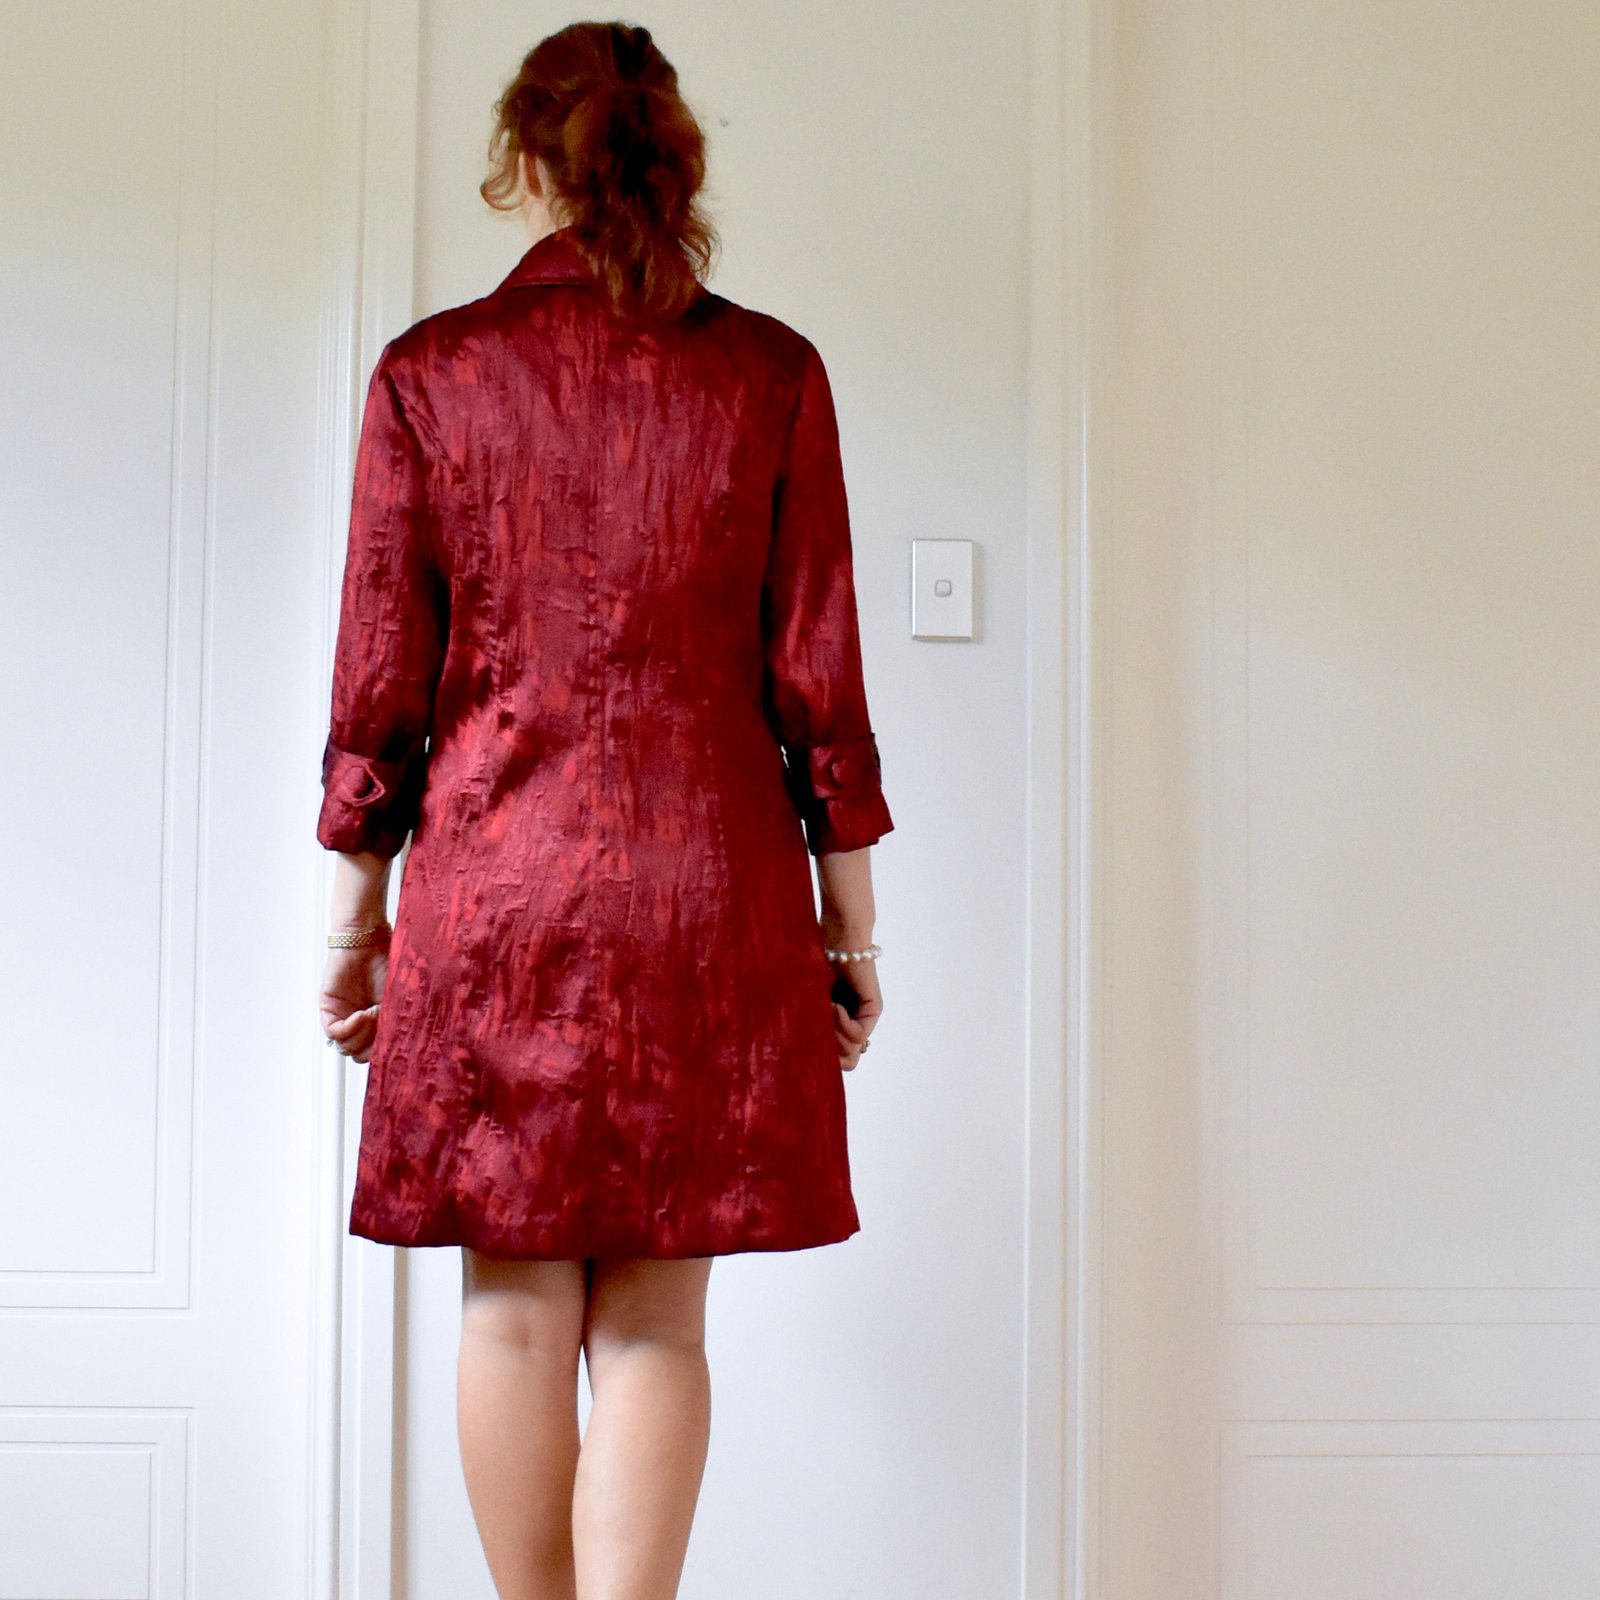
The dress has a fairly plain front, which I love! with a shallow scooped, wide neckline giving a 60s-chic, almost Jackie Kennedy feel to it! The visual interest here is in the back; a deep low V with wide straps to hold the two sides stable, and which also fortuitously happen to hide one’s bra strap. Handy!


The dress has neckline facings, and is fully lined with deep navy/gunmetal blue lining fabric, also from Fabulous Fabrics.

I bought the deep maroon zip from either Spotlight? or Fabulous Fabrics? … I can’t remember which now. Often one store doesn’t have quite the colour I need so I’ll just quickly stop by the other and hope for a better match there!

I attached a small length of ribbon with a press stud so to hold the bra strap securely under. Remember the lingerie set I made specifically to wear with this ensemble? Now you can see why although my outfit is not navy blue, how it matches perfectly!!

The sheath dress as it is drafted turned out way too boxy for my tastes, in fact I’m willing to bet money that the model on the pattern cover has the dress nipped in at the back with a big peg or two! – and I ended up bringing it in through the back princess seams by several inches to give it a lot more shape through the waist. I also had cut the dress longer by 5cm all round, and just had to trim the hemline off shorter around the front, to make the shaping adjustment possible.
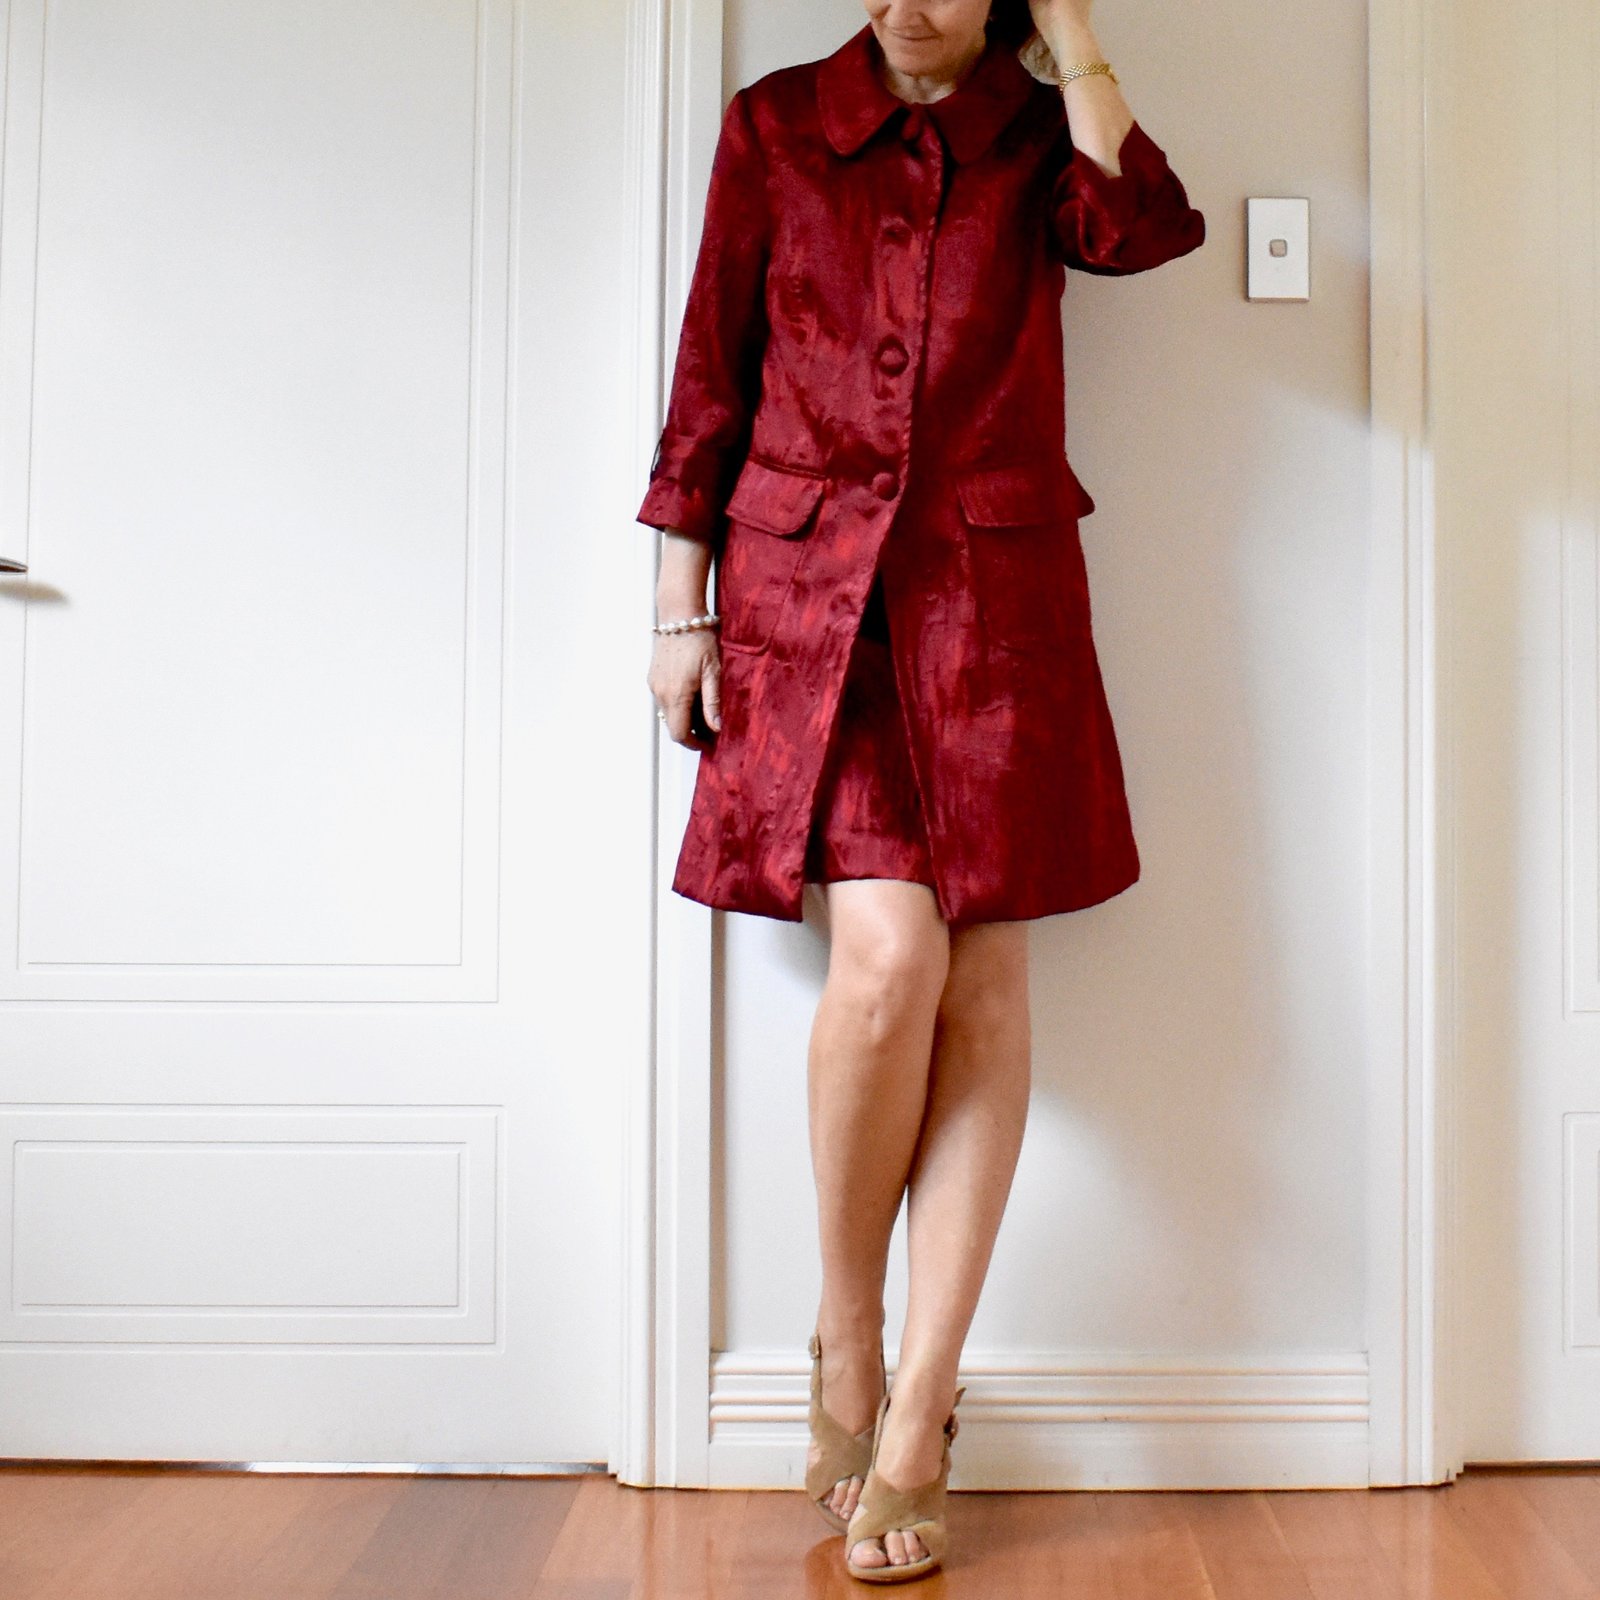
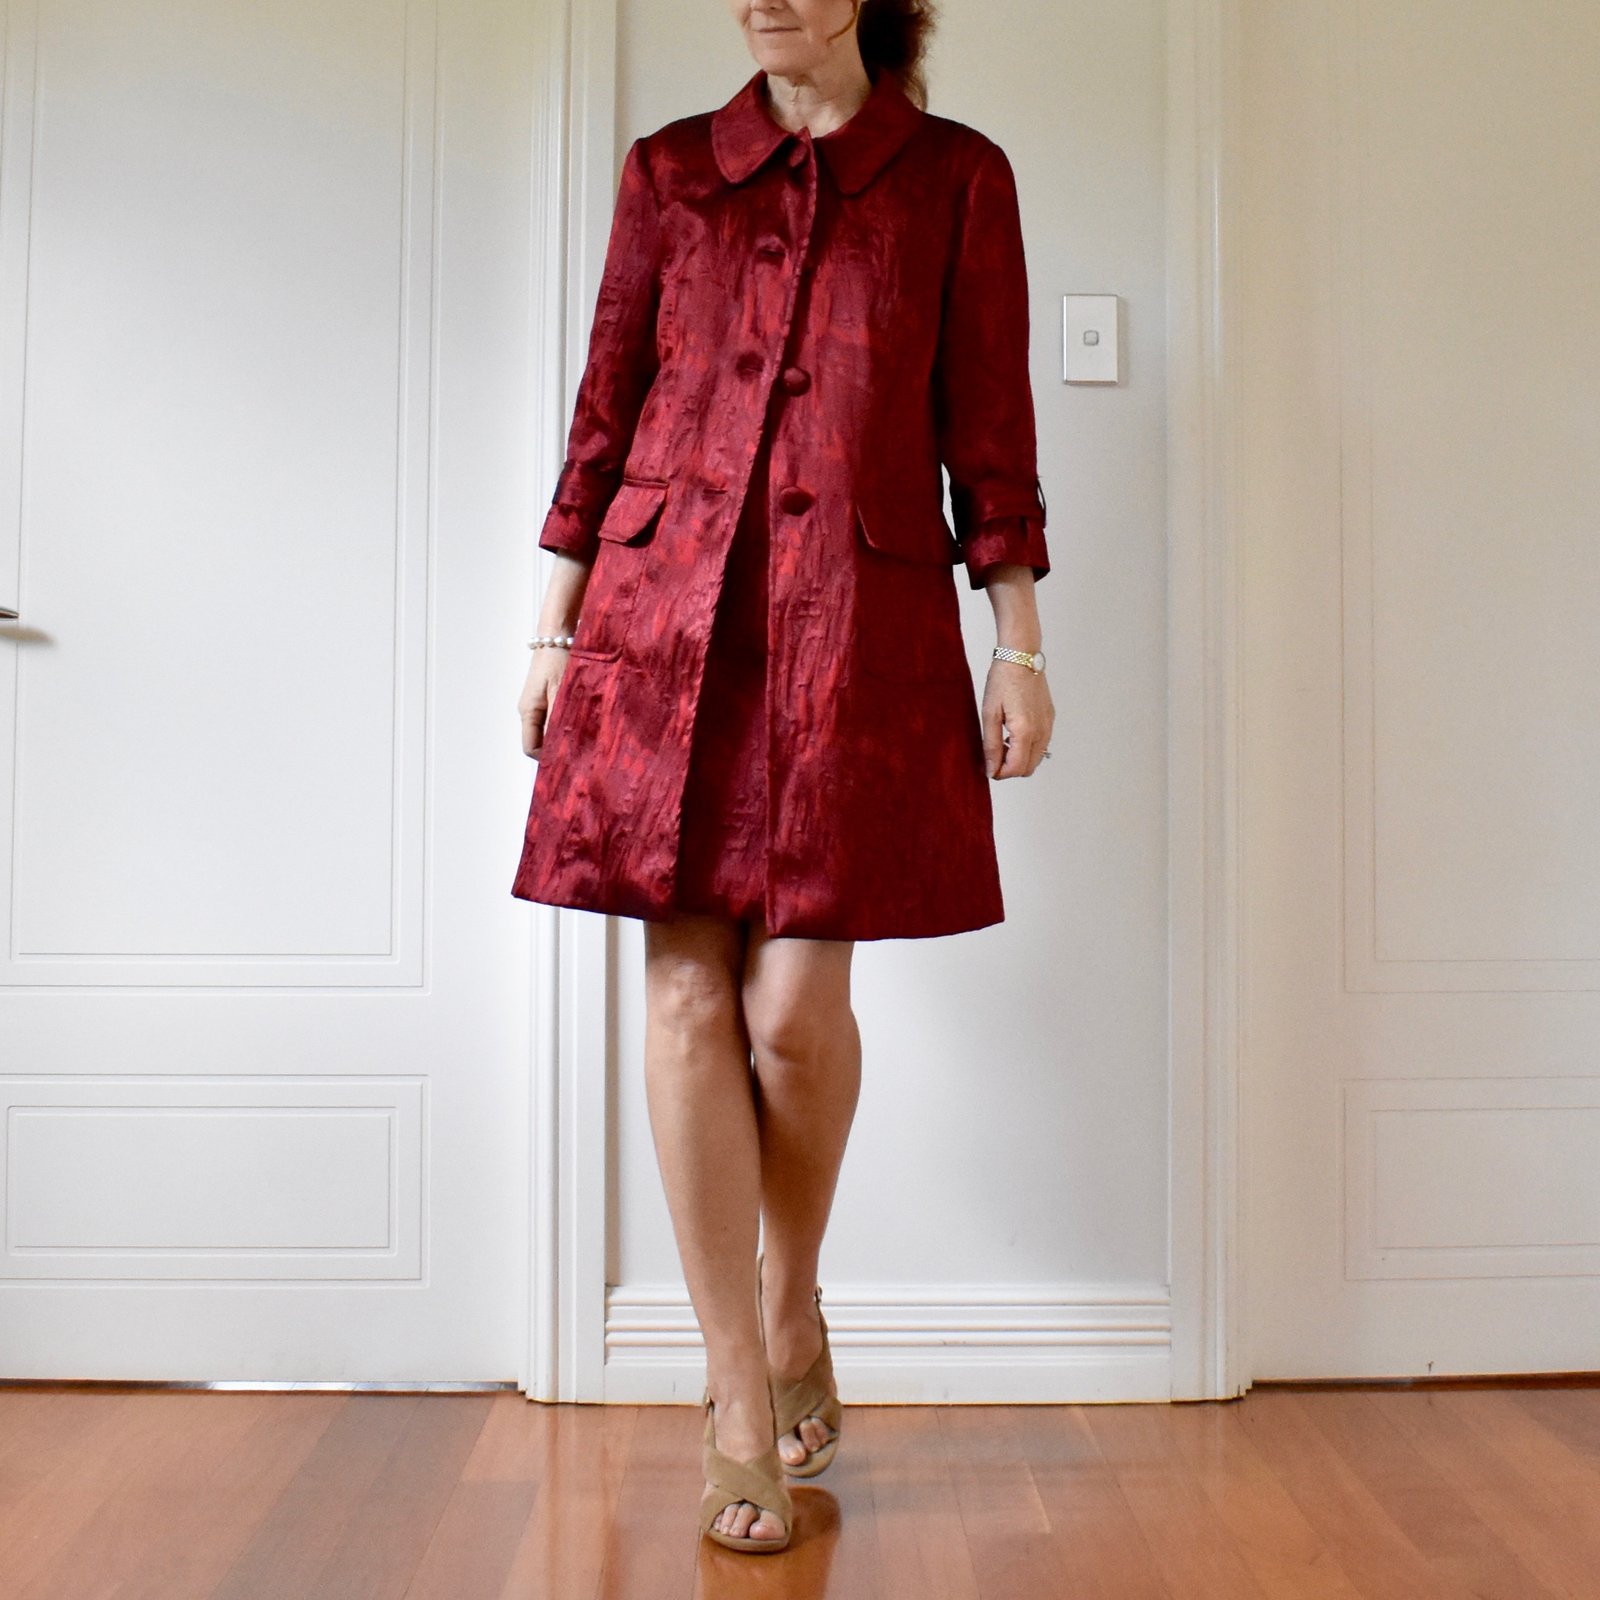
The coat!! I do LOVE the dress but the coat HAS to be my favourite part of the ensemble! It is single breasted, with three quarter sleeves, with arrowhead tabs and self-covered, decorative buttons – more about these infamous things later!, a deep, curved collar, and lovely deep deep patch pockets with flap openings.

It too is fully lined with the same navy/gunmetal blue lining fabric, and I stitched in one of my new labels…
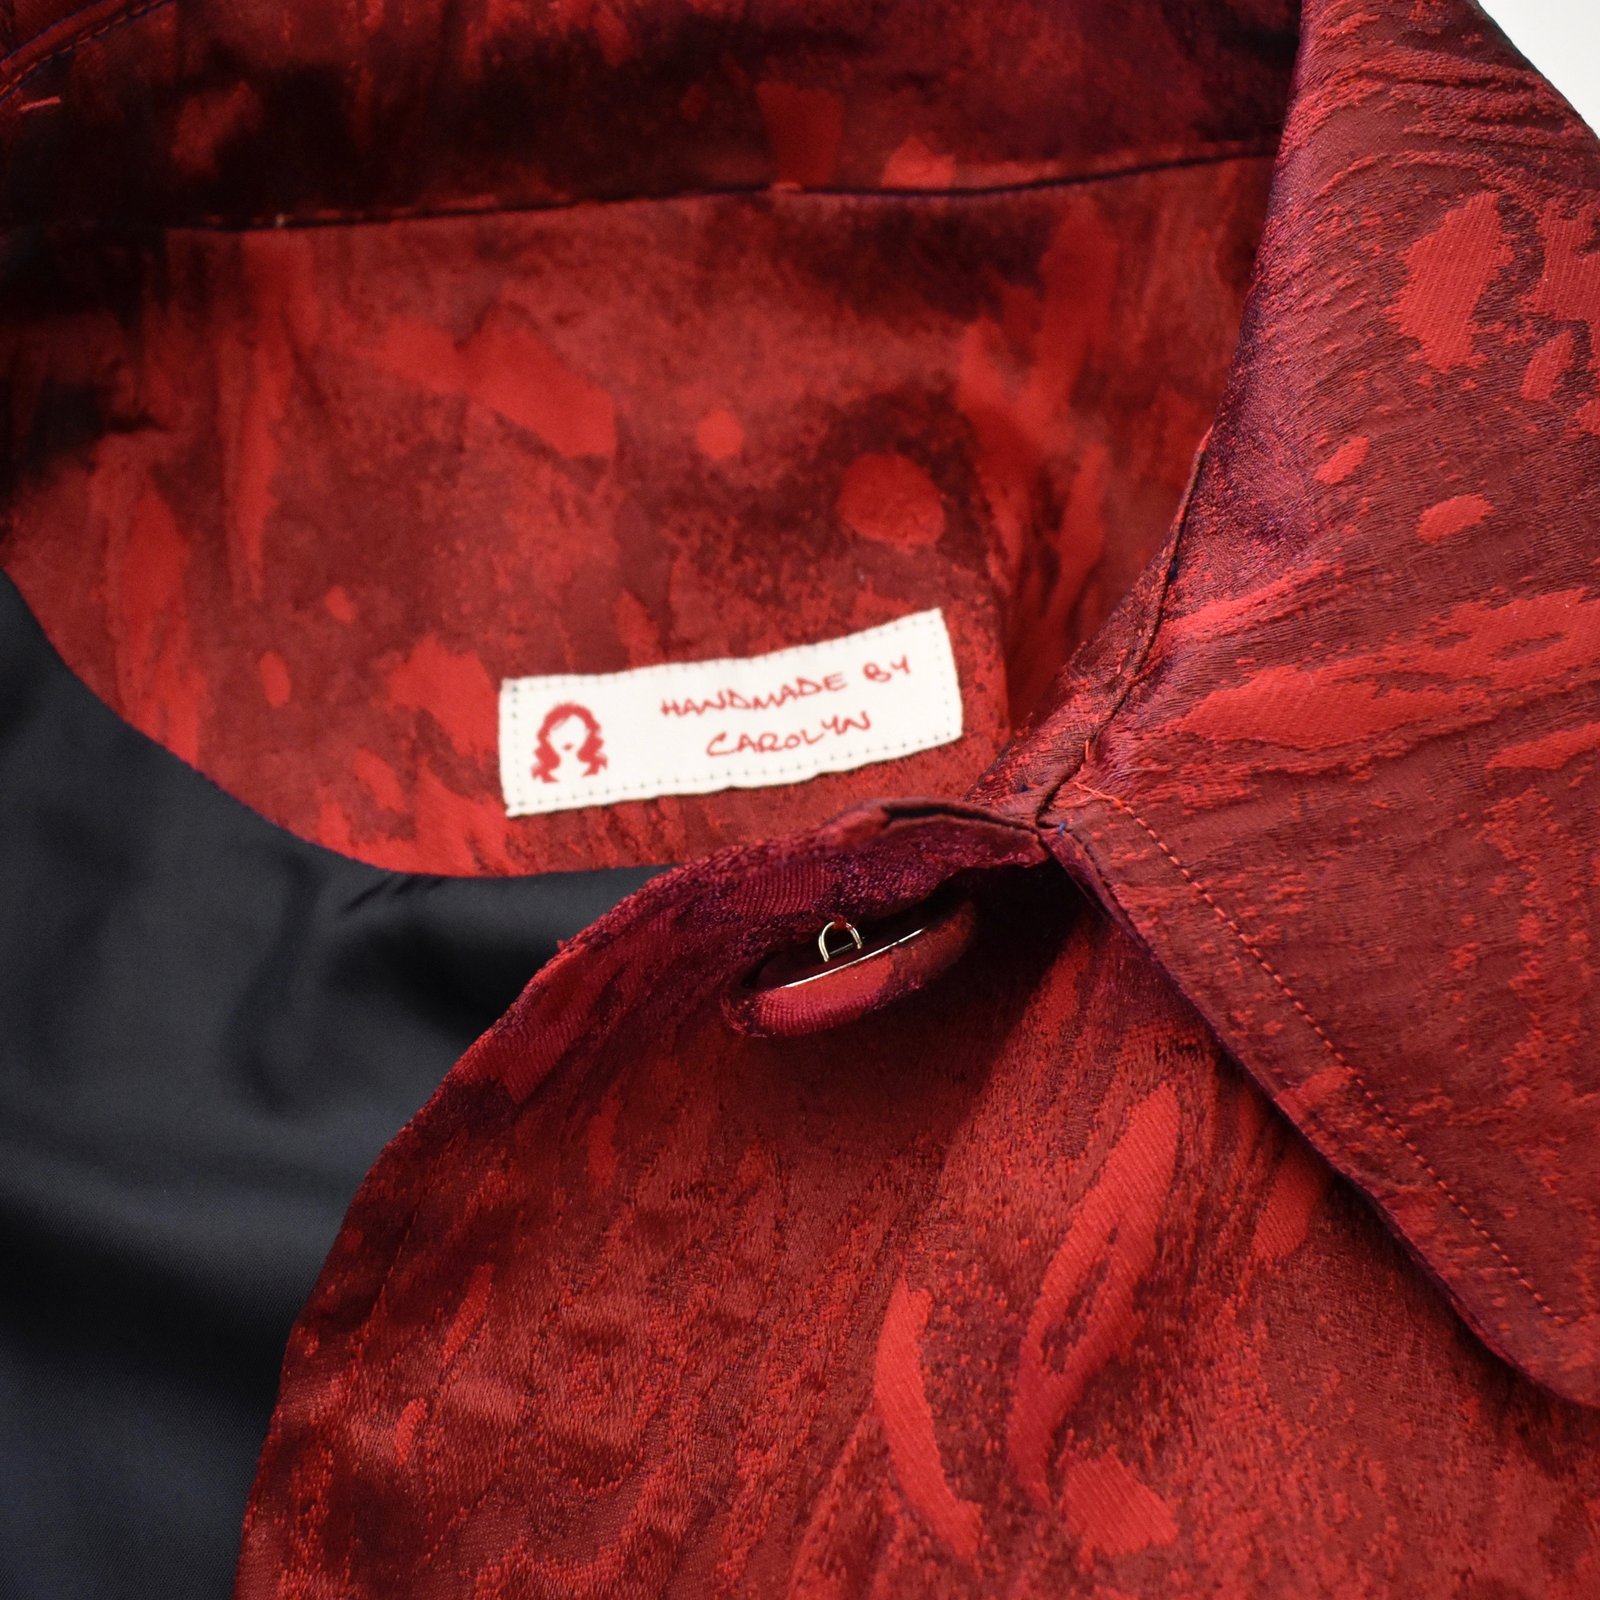
spare button attached inside….

I loved making this, and wearing it, and I think I will be able to wear it again in the future, even over jeans or dresses for daywear every now and then. I will see!
 I went all out with the bound buttonholes…
oh the button saga! sooooooo, as I’ve mentioned in a previous post, I covered 100 11mm buttons for Kelly’s dresss, and thought what this ensemble reeeeeeeally needed was also self-covered buttons, because after all the entire thing is all in one fabric and some other non-self-covered buttons would have just looked a bit random, probably not quite matching, and just scream “homemade”. So I ordered some 28mm buttons from the same vendor from which I purchased Kelly’s buttons. And waited. And waited. And waited!! For about three weeks! and I was just getting more and more worried, finally with only just over two weeks to go until the wedding, I thought that if they’d been lost in the post as I suspected they had, then I’d better order more NOW or the replacement order was just not going to get here on time. So I contacted the vendor with an emergency request to send me some more 28mm buttons by the very fastest postage service possible with a tracking number, and she did so. And to my great relief the replacement buttons turned up with just a week to the wedding! Phew!!

As I did with the bridal buttons; I spray painted the bare buttons with red spray paint, leftover from my Queen Rutela cosplay; which helps make the smooth metal surface a bit “grippier” and easier to cover. They covered up perfectly, and I could finally finish my outfit, in plenty of time for the wedding. So relieved!

there’s that spare button!
 Dressmaking details now, er addressed, haha; the following is story time… please feel free to stop right now if the sewing details are all that is of interest. Fair warning:

So, the previous modelled photos are obviously a bit of a pre-enactment, and the above mirror selfie in which I am all made-up and coiffured as befits the mother-of-the-groom status about to be undertaken, was quickly snapped on the day while waiting for my uber, … it was such a busy day!! In fact it was a super busy week beforehand too, come to think of it. Kelly’s family came over from Adelaide during the week, and we had a delightful dinner at the Boatshed Restaurant with her parents on the Thursday night, actually overlooking the jetty where Tim proposed to Kelly which was nice! Then on Friday evening, we had a big family dinner with both parents and all of our kids, and T & G who are the other groomsman and bridesmaid alongside Sam and Cassie.
On the day itself, Craig and I walked Clara early, then I had my hair appointment, then quickly came home and threw on my outfit and headed straight to the hotel to “get ready” with all the other girls! though obviously I myself was ready by that point, Kelly had kindly invited me to be a part of the girly fun and I was really excited to join in with them too. Craig had already headed in separately for his own “getting ready” session and photoshoot with Tim, Sam and the other groomsman T, before he had to nip out and come back home to meet the dog sitter, pick up Craig’s parents and bring them in to the hotel where they were checking in for that night.
The hotel room where the girls were getting ready was a scene of quietly controlled pandemonium. Kelly had booked a suite with a living area, coffee table and desk area; the coffee table was piled high with snacks, fruit and drinks and just general crap; and the desk was absolutely chocka with hair and makeup paraphernalia… Flowers, dresses, shoes, and overflowing suitcases were stacked up in the dressing room. Not to mention the room was bursting with people too! Kelly, Cassie and G (bride and bridesmaids), L and me (mothers of the bride and groom respectively), H (Kelly’s sister), the hairdresser, the makeup artist, Shosh the photographer and a male videographer whose name I was told but which is now lost to me in the excitement of the day… everybody bustling and chatting and working and laughing and manoeuvre-ing around each other taking pictures… so much fun!
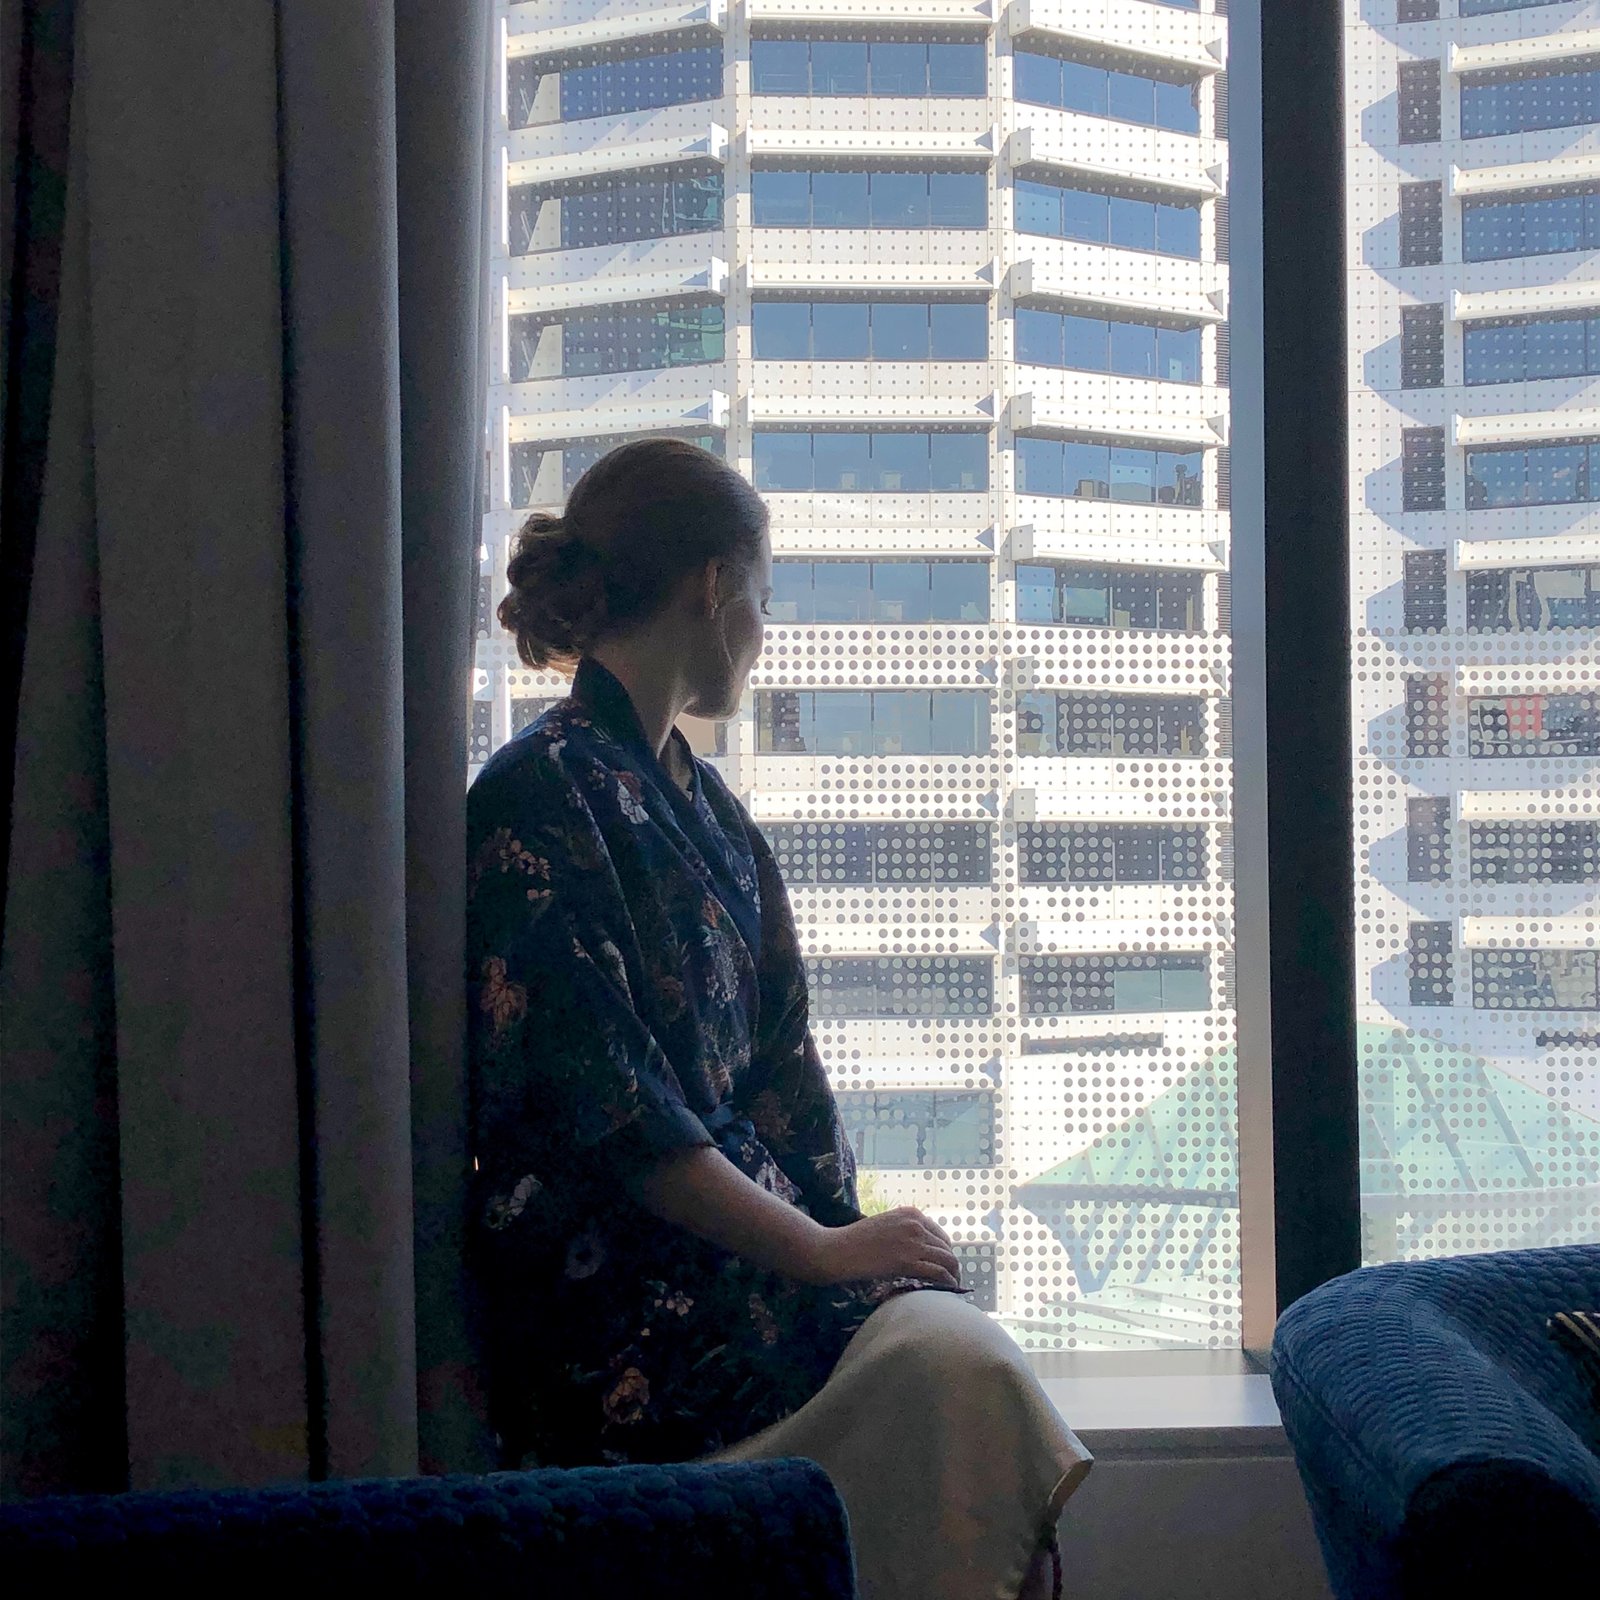
Cassie went and sat on the window sill to be out of the way, and she looked so pretty I couldn’t help snapping a picture…
we hung the wedding dress up in the window for Shosh to take some detail shots and I took a picture of her, taking a picture of the dress #someta …

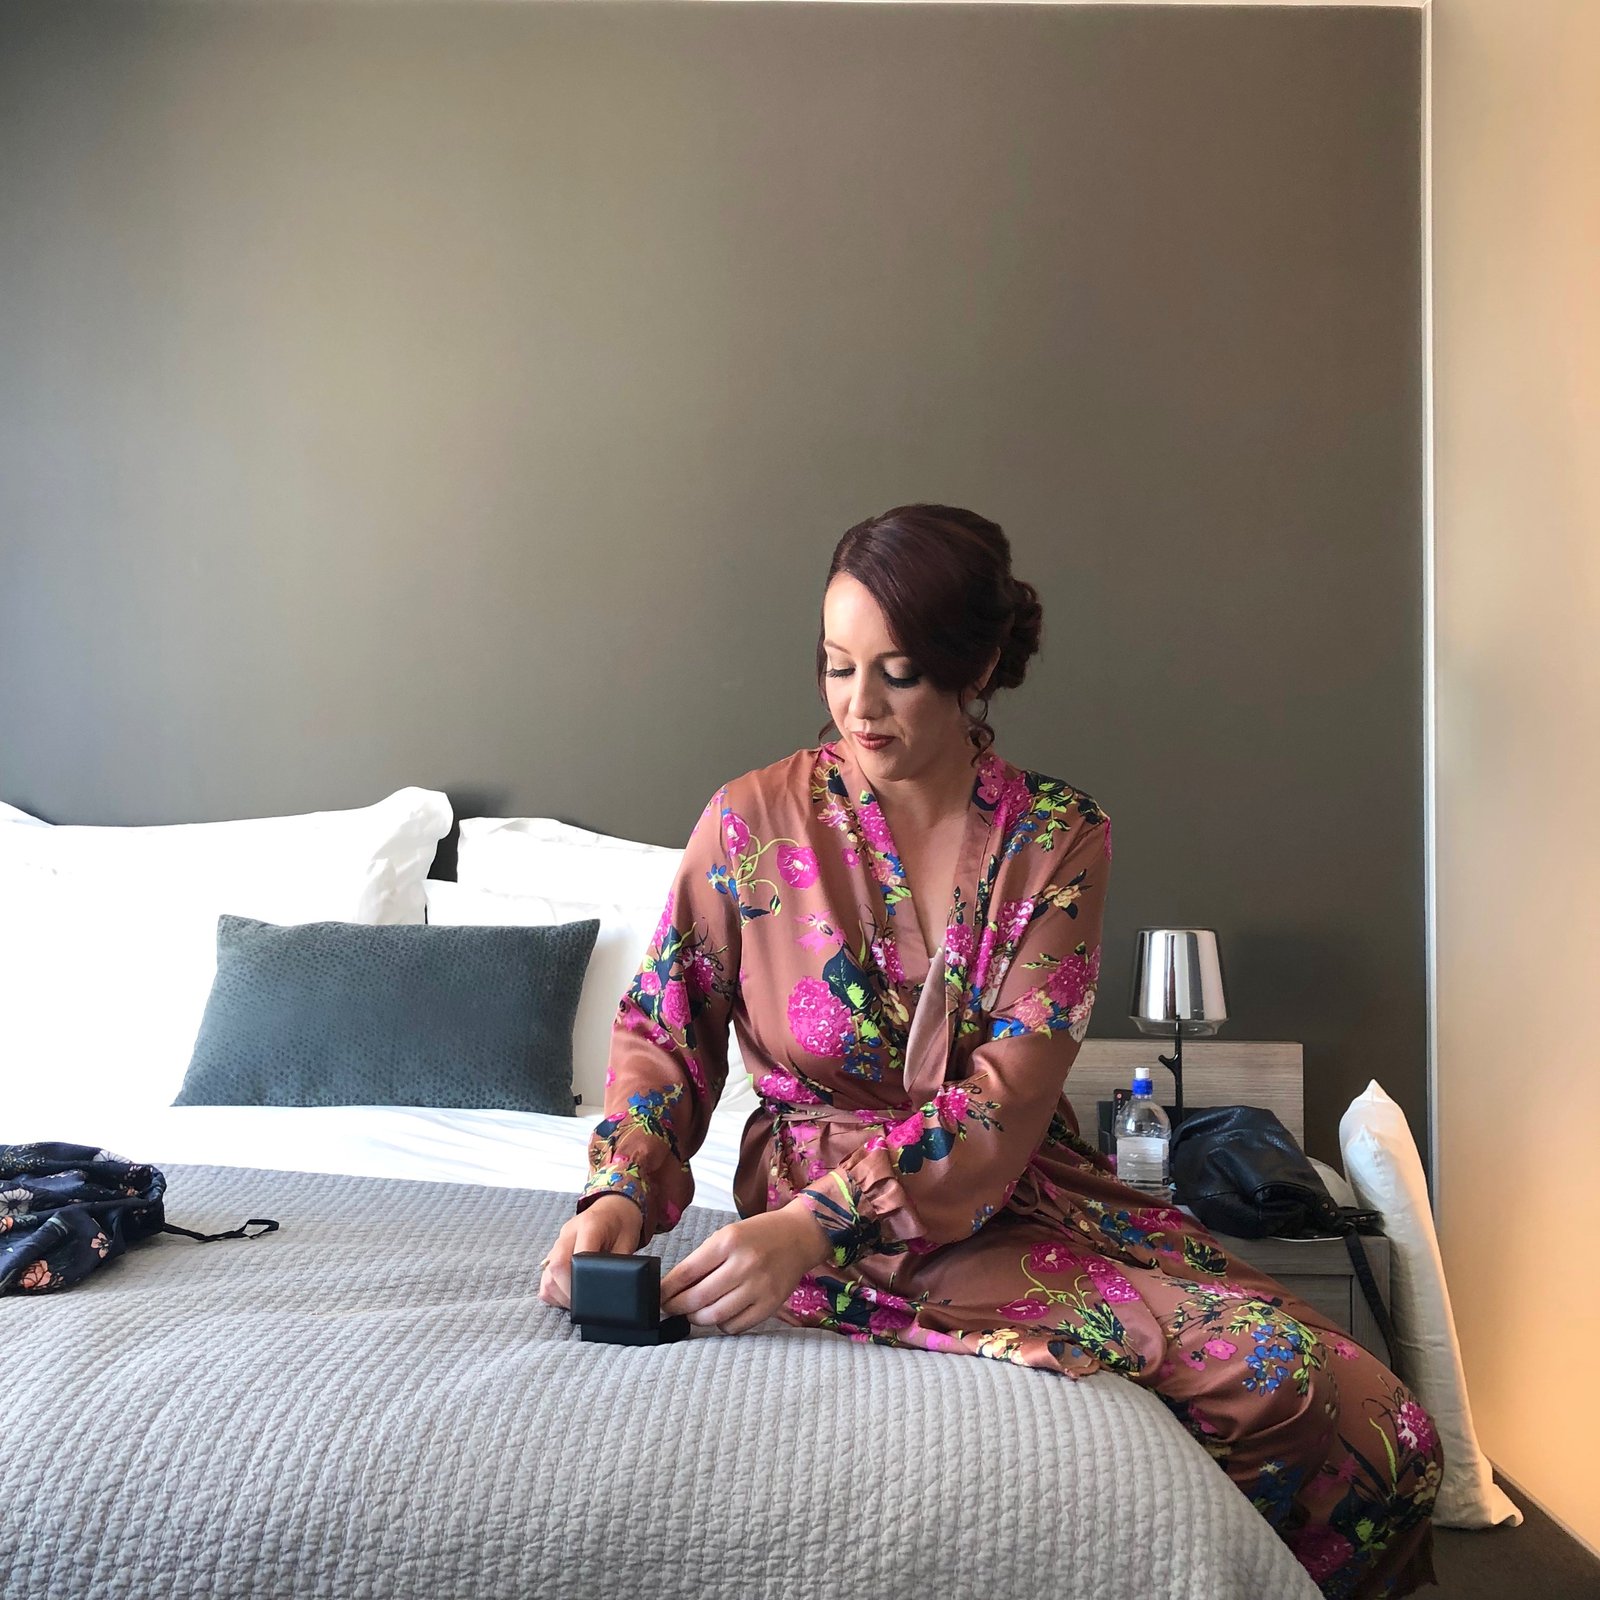
Kelly putting on her jewellery… she was supposed to be wearing a bracelet belonging to an aunt for her “something borrowed”, but there was some miscommunication, I’m not sure what happened, but I ended up lending her my own bracelet … Shosh took a picture of me putting it on Kelly’s wrist, I’ll post it when I get it!
also, my three at the reception… my heart was fair dinkum bursting with pride when I took this one!

Cassie made her own dress, and it turned out just beautiful!!

oh did I mention I made the other bridesmaid G’s dress? She looks absolutely lovely yes? I think so, and I’m so grateful to her for her charm and natural beauty, making my dressmaking look far better than I deserve. To be honest, I wasn’t very happy with this dress, it was actually a bit of a nightmare and once or twice I nearly despaired of it and seriously considered heaving the whole thing in the bin and starting over from scratch… however it came together in the end and on the night G’s radiant demeanour made it look far more lovely than I could have hoped for! Thank goodness for gorgeous young girls!!


Essentially, I used the same patterns I used for Kelly’s dress; the bodice from Vogue 9239 (above left) and skirt modified from Vogue 1032 (above right), all custom fit to G. Style-wise, for G’s dress I obviously cut the skirt pieces so as to not have a train, and the back pieces are cut so as to have straight up princess seams at the back and not have that weird seam curve in to centre back. I made the initial muslins to include that curve and we all agreed that it was, ah, unattractive… The front and back skirt pieces were all cut so as to have a straight-as-possible waistline seam at the top, attaching it to the bodice. I altered the seams on the bodice so as to join up to the skirt princess seams, and of course did a FBA for both G and K. Both girls I had to custom fit quite extensively from the pattern, and I think I did a pretty good job here if I say so myself, because the fit is spot on! We discussed the neckline for G, and settled on a wide, off-the shoulder V neck, which is absolutely lovely on her.
The slightly stretchy, navy blue crepe was bought from Homecraft Textiles? I think? and unfortunately it was pretty awful to work with. It did NOT want to iron flat and smooth and just seemed to shrink back slowly into a natural, very slight crinkle that just looked like it needed a good press all the time. So you’d give a good solid press, and an hour later it would once again look just like it had been rolled up in a plastic bag for the last few days. Also the neckline, despite extremely careful hand-basting and stay-stitching and under-stitching, just wanted to curl outwards, both front and back, in a way that fair dinkum drove me absolutely crazy and almost broke me, to be honest. I’m pretty sure I shed actual tears over this, at least once, although it’s all a blur now because I had “moments” over just about everything to do with sewing for this wedding #iwishiwaskidding. I tried everything I could think of to fix the aforementioned curling, ultimately the only thing that worked was a very subtle hand-done gathering stitch along the under-stitching line, which I drew up just very slightly and fastened off each end at each endpoint of the V, front and back. Sounds like a pretty tacky way of dealing with it, I agree, but I was desperate and in the end this actually seemed to do the trick. Hallelujah!
I did the narrow rolled hem by hand, which took about as long as you’d imagine #aLONGTIME The navy/gunmetal blue lining fabric from Fabulous Fabrics is the same that I used for my own outfit, navy blue zip from Spotlight.
When she was dancing she did a few twirls that really brought the dress to life for me and it really made me so very happy to see it looking so absolutely lovely in these moments… so I asked her to do an extra one for me at the end of the evening. Thank you G, for making this thing look actually amazing!!

Ohhh! I also made a tie for Craig! using leftovers from my outfit, so we can be all lovey-dovey match-matchy, hehe #SOnotus Well, I just thought it would be a nice idea. And while I had doubts he might actually want to wear it, he did, which I thought very nice of him 🙂
Of course the tie is properly made, with a padding, and an underlining as well as a lining because I do actually know how to make a tie! Also, many years ago I made a free pdf pattern for Burdastyle, it’s not a very sophisticated pattern by today’s pdf standards, but I’m thinking about polishing it off and making it more up-to-date for today’s seamster with much higher pdf expectations! However it does work perfectly well and my instructions, while sparse, do work! particularly if you’re not a beginner. Anyway! I slimmed down the shape because you know, even fashions in mens ties change and the width of that one is… well, wi-i-i-de in a most unfashionable way!


Aaaagh! One last thing, before I forget! I am sooooooo behind here… this one is not even wedding related?!
I made a new walkies-bag for Clara, to hold all her poo-bags and treats, here she is in all her haughty supermodel glory… I used the leg from some old jeans, the loop at the top is harvested from the double top-stitched side seam of the jeans so it’s super sturdy; and I also used one of the zips from the large bag of randoms Mum gave me a few years ago. It’ll be a miracle if I can actually get through that bag, but I’ve made a bit of headway over the years!
Hey Clara-banana!!!

So that’s all! at least until the wedding dress post, and that is going to be a HUUUUGE one, I’m sorry! I’m afraid that one’s going to take quite some time for me to put it all together… #gatheringstrength


 Hack attack!
 side view…


 Side seams were then stitched, corners trimmed and seam allowances finished etc. before pulling the whole thing right sides out. And that’s it!


 So, I loved
  Again, I used the pauline alice Turia dungarees pattern for the bodice section, and modified so the bottom part is a skirt. I put the pinafore on and pinned carefully so as to achieve the ideal proportion to suit my figure, but it actually turned out identical to the shape of my red one! I’m really really happy with the shape and length of this, it’s absolutely perfect for me,I think…
 I really love the front bib pocket of the Turia pattern, I think it’s super cute.


 I’ve loved this skirt so much! but it’s been worn and worn and worn and the placky-dack fabric got so crazed and brittle in places towards the end there, I’ve finally been forced, forced I say! to bid it adieu; because my husband was like, that skirt is AWFUL. And I had to sadly admit; dear, thou speaketh the truth.


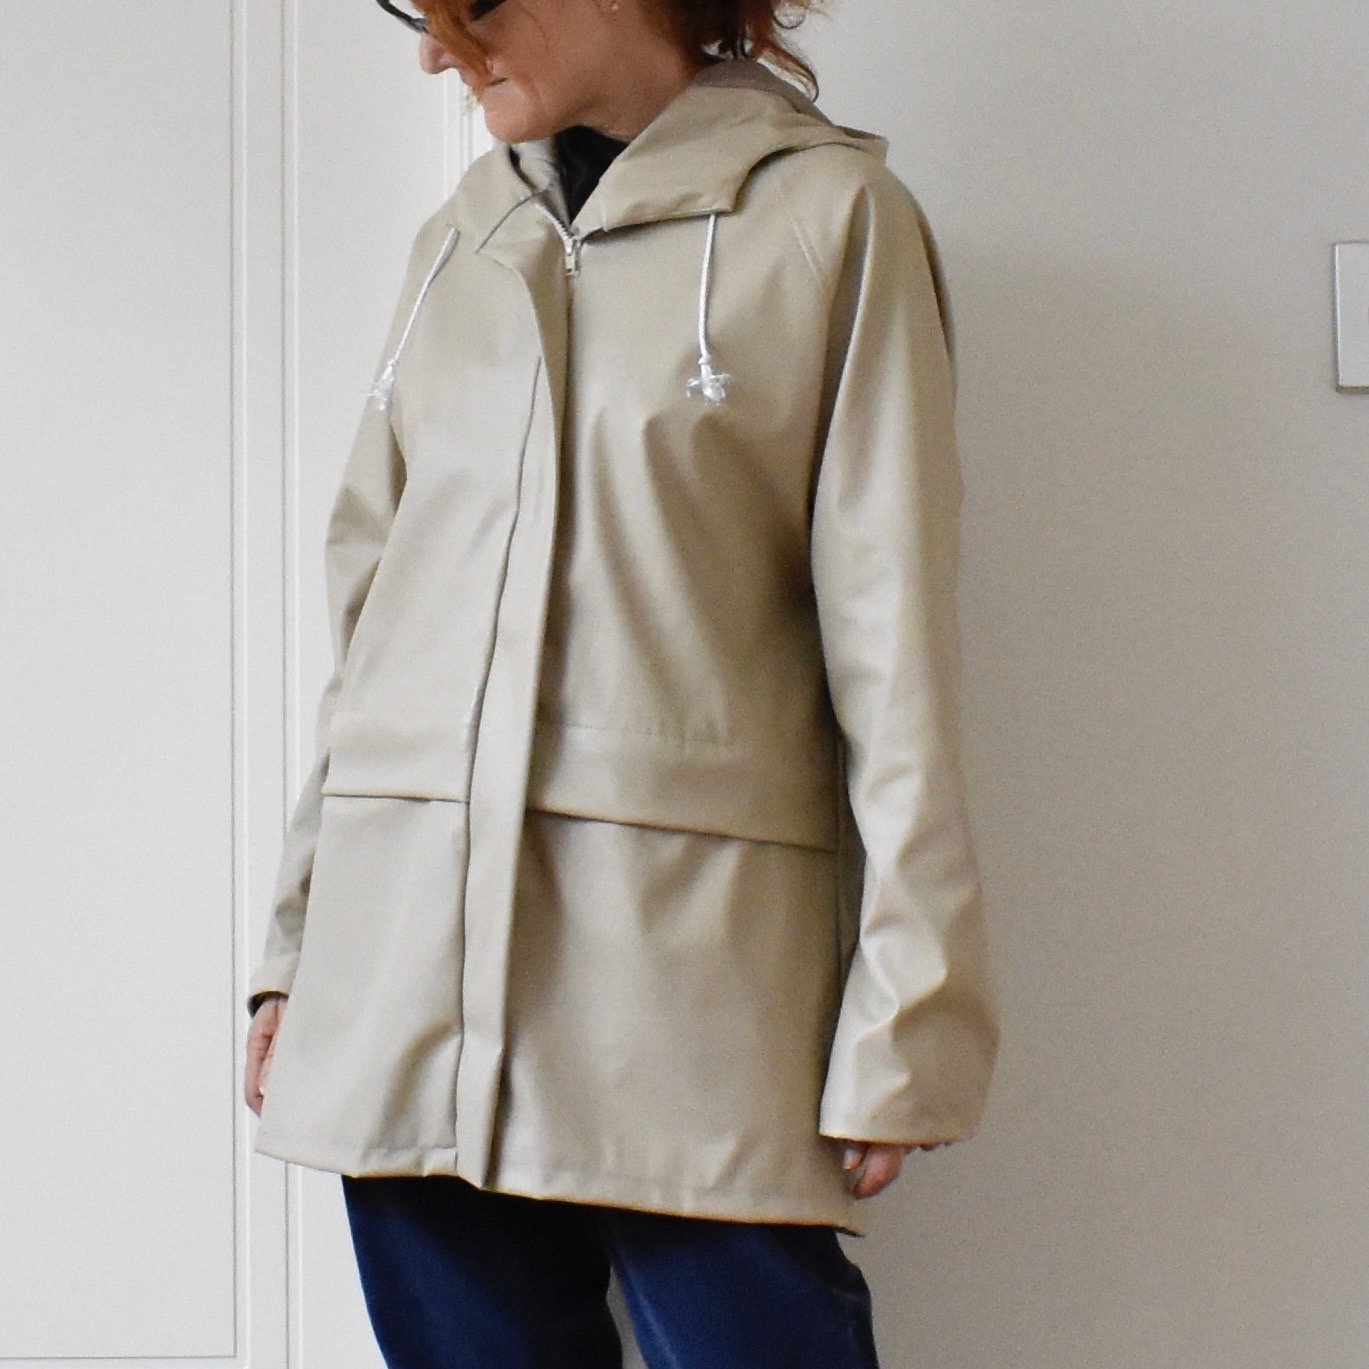
 Not very long ago, I was contacted by dp studio, a pattern company whose offerings I’ve always found super interesting and intriguing… I bought a few of their patterns last year but am still yet to find time to make them up… eek!! Anyway, they wanted to know if I would like to review one of their latest. Would I?! Omigosh, yes!! They have recently brought out a new thing… something called a
  The fabric from Hamon is absolutely lovely; a 100% viscose with a beautifully soft and floaty hand to it, and a loose flowy, silk-like drape. Divine!! Even better, the print is super pretty; black flowers and leafy tendrils on a creamy background. I think this creamy ground suits me quite well, my “white”, so to speak; so I was very happy with this. The kit also contained a lightweight, fusible interfacing, a stable, fusible stay-tape for the bias cut opening edges and the shoulder seams; and length of perfectly colour-matched satin ribbon for the belt/tie. Oh! and a reel of perfectly colour-matched, cream coloured thread. This was actually overlocking thread rather than all-purpose thread, but I found it quite nice, not woolly; and to be absolutely fine for the purposes of sewing this very delicate fabric.
 I really enjoyed making up my dress. Lately – well I mean, once I’d got my mad, rough knitting bag project out of my system; I’ve been more in the mood for careful, quietly lengthy and dedicated sewing projects; something that takes time and effort, and maybe even requires unpicking and re-doing things over and over until I get them right. I think it’s the process of making Kelly’s wedding dress that has brought this new mood for meticulous perfection upon me. Will this be the case from now on? possibly not! but it is right now so I’m contentedly riding that wave in serene and unhurried happiness.


