Tag Archives: Daily Outfit

Midnight Miette

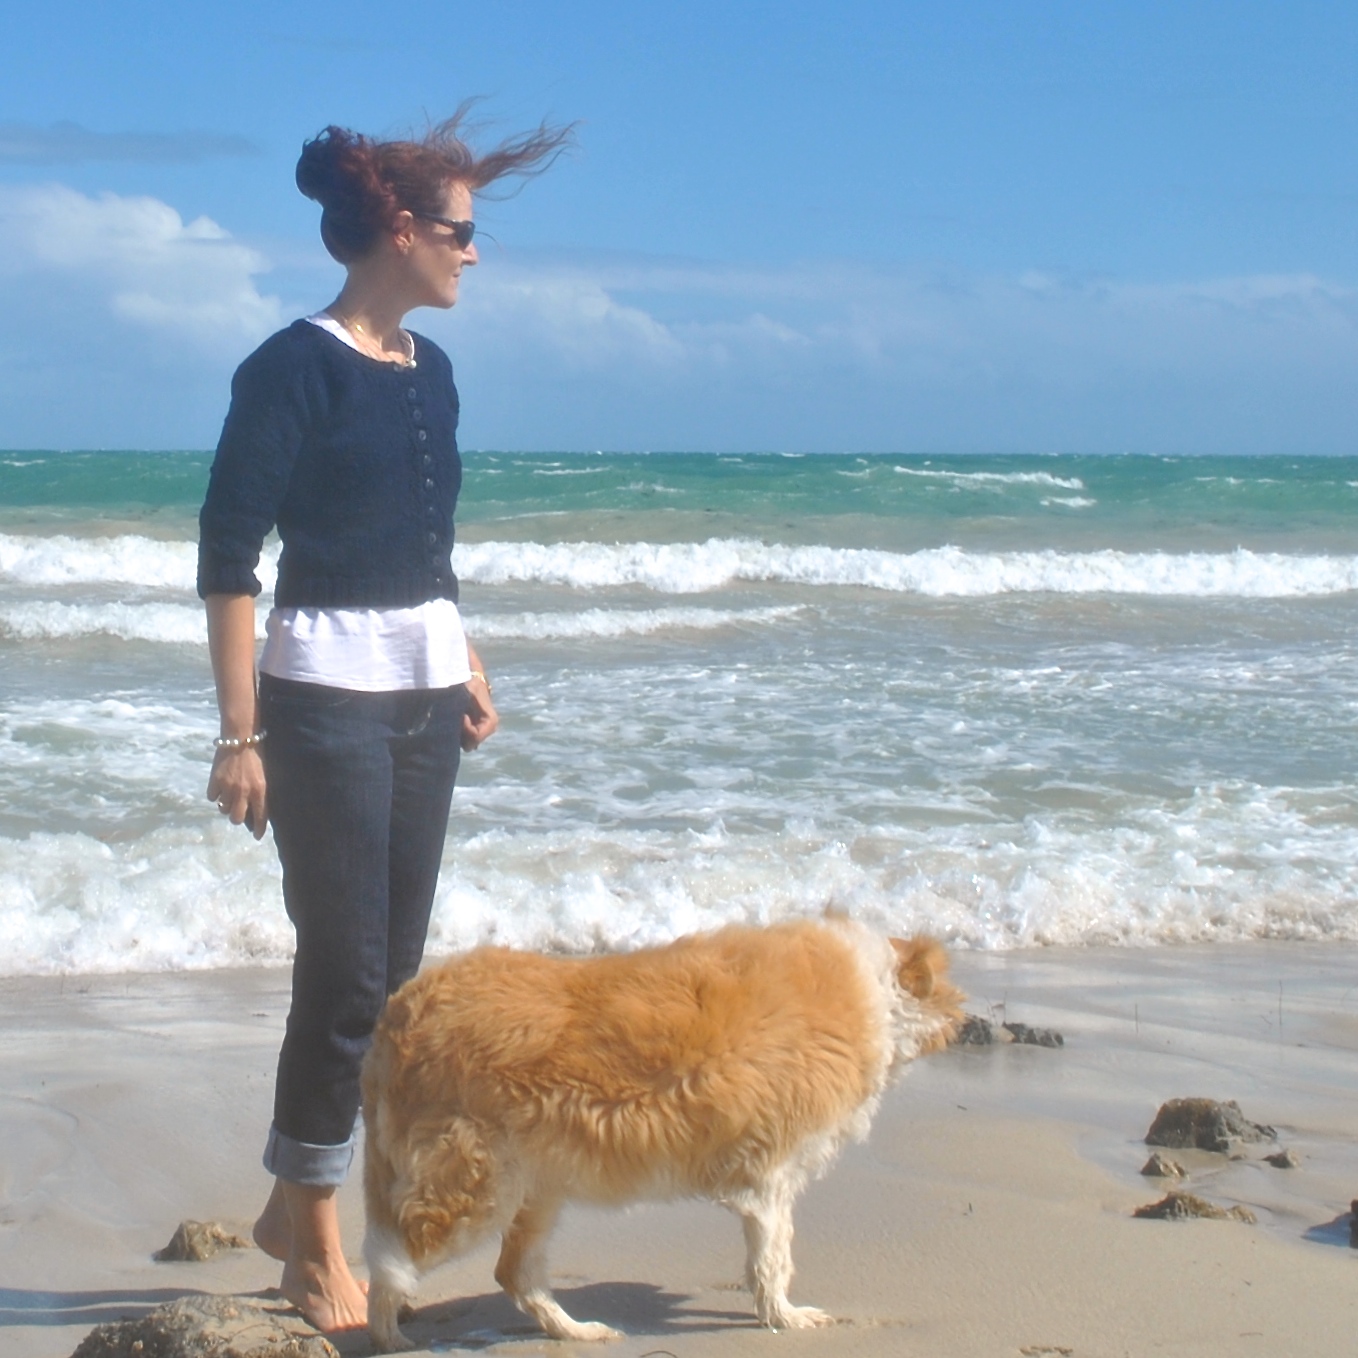
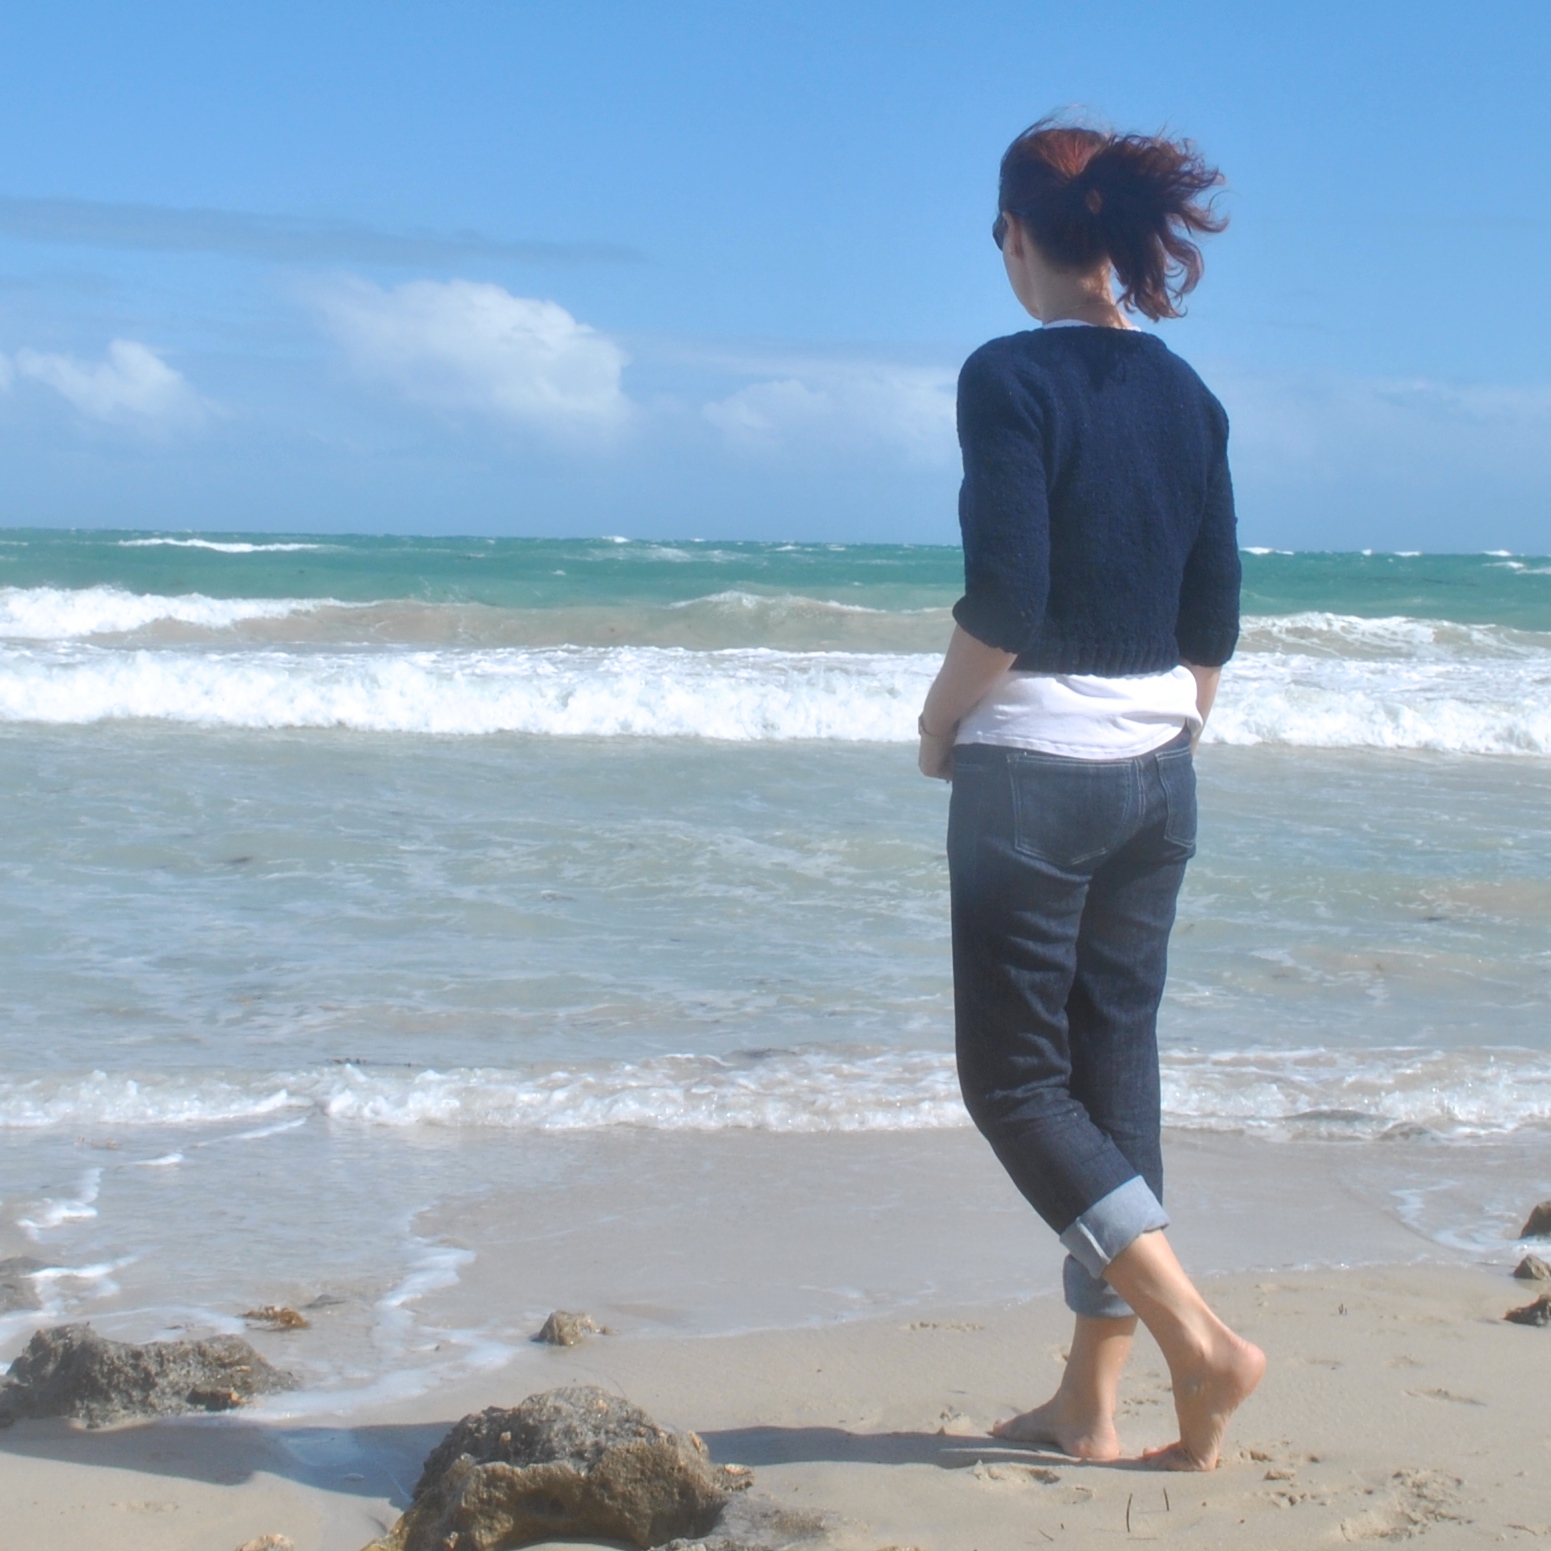
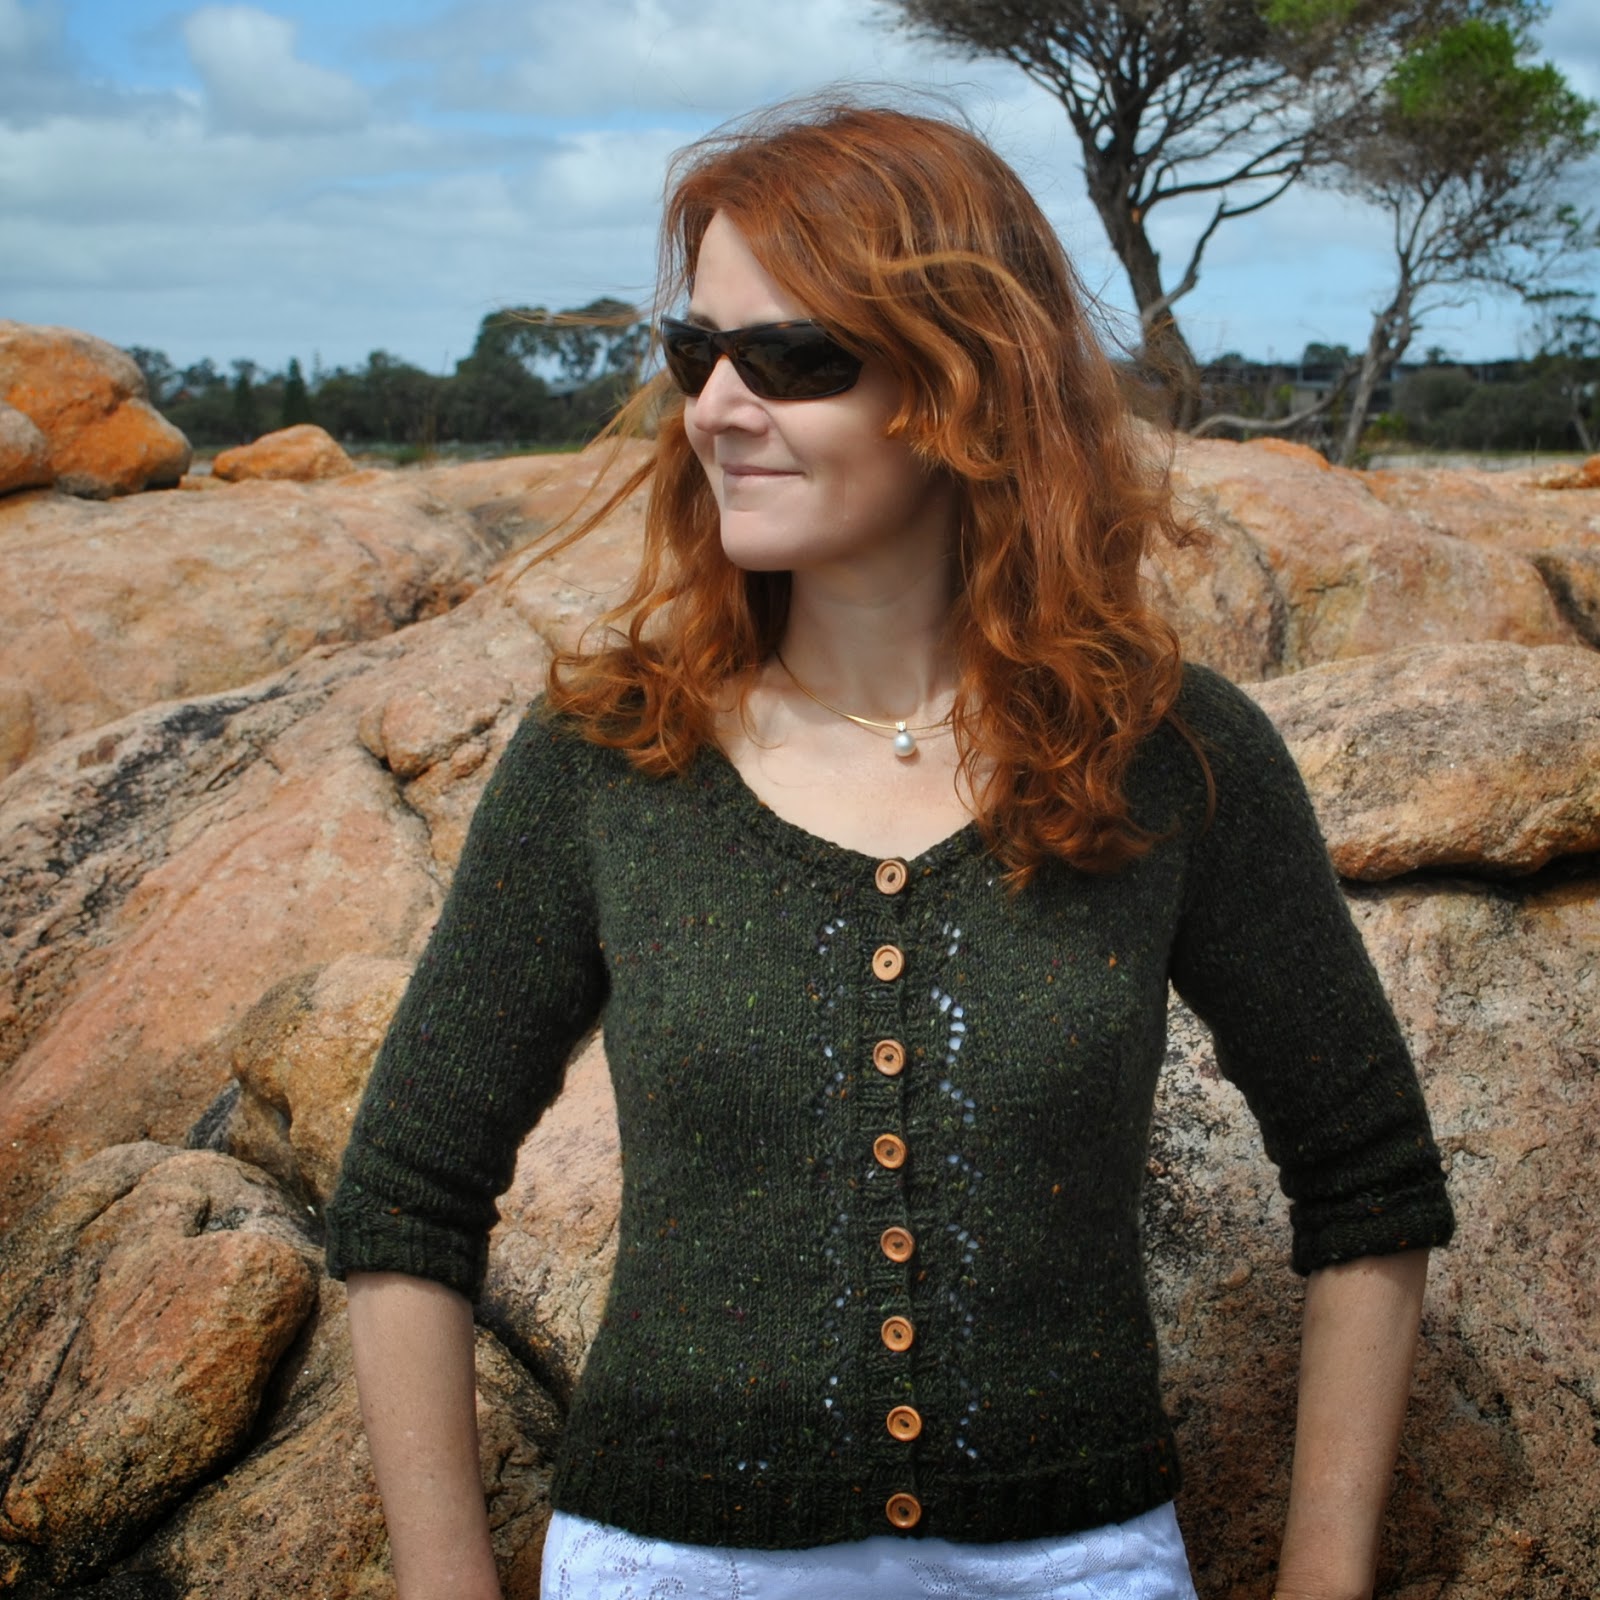
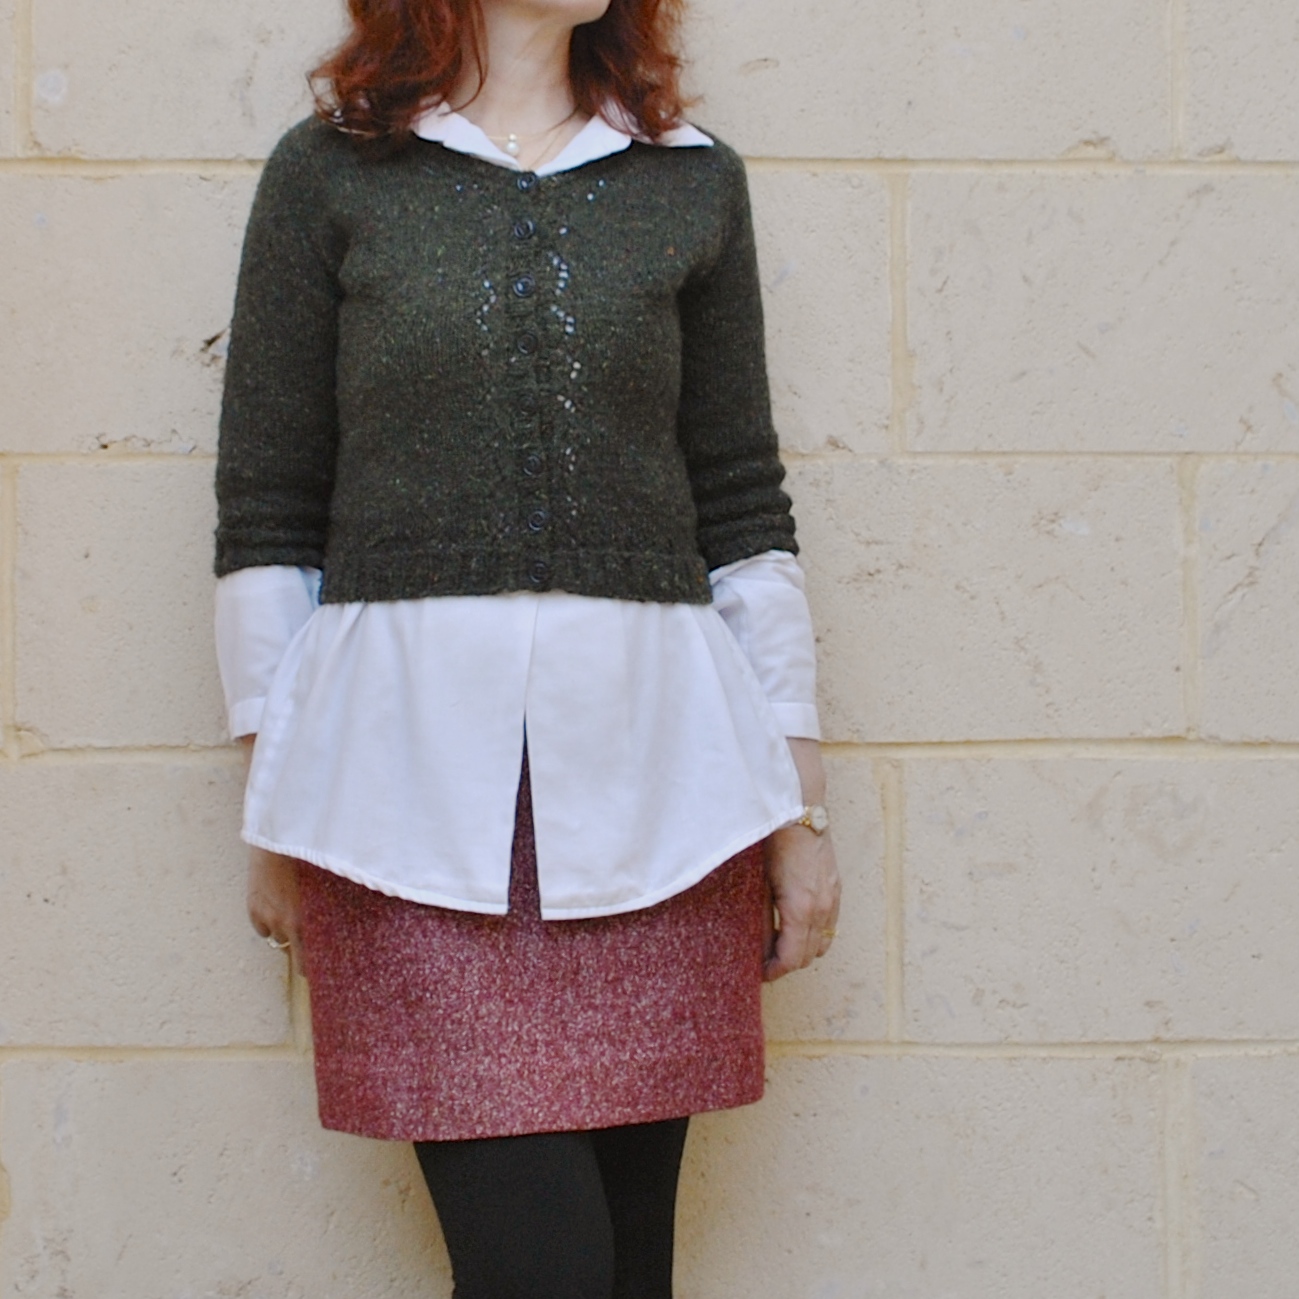
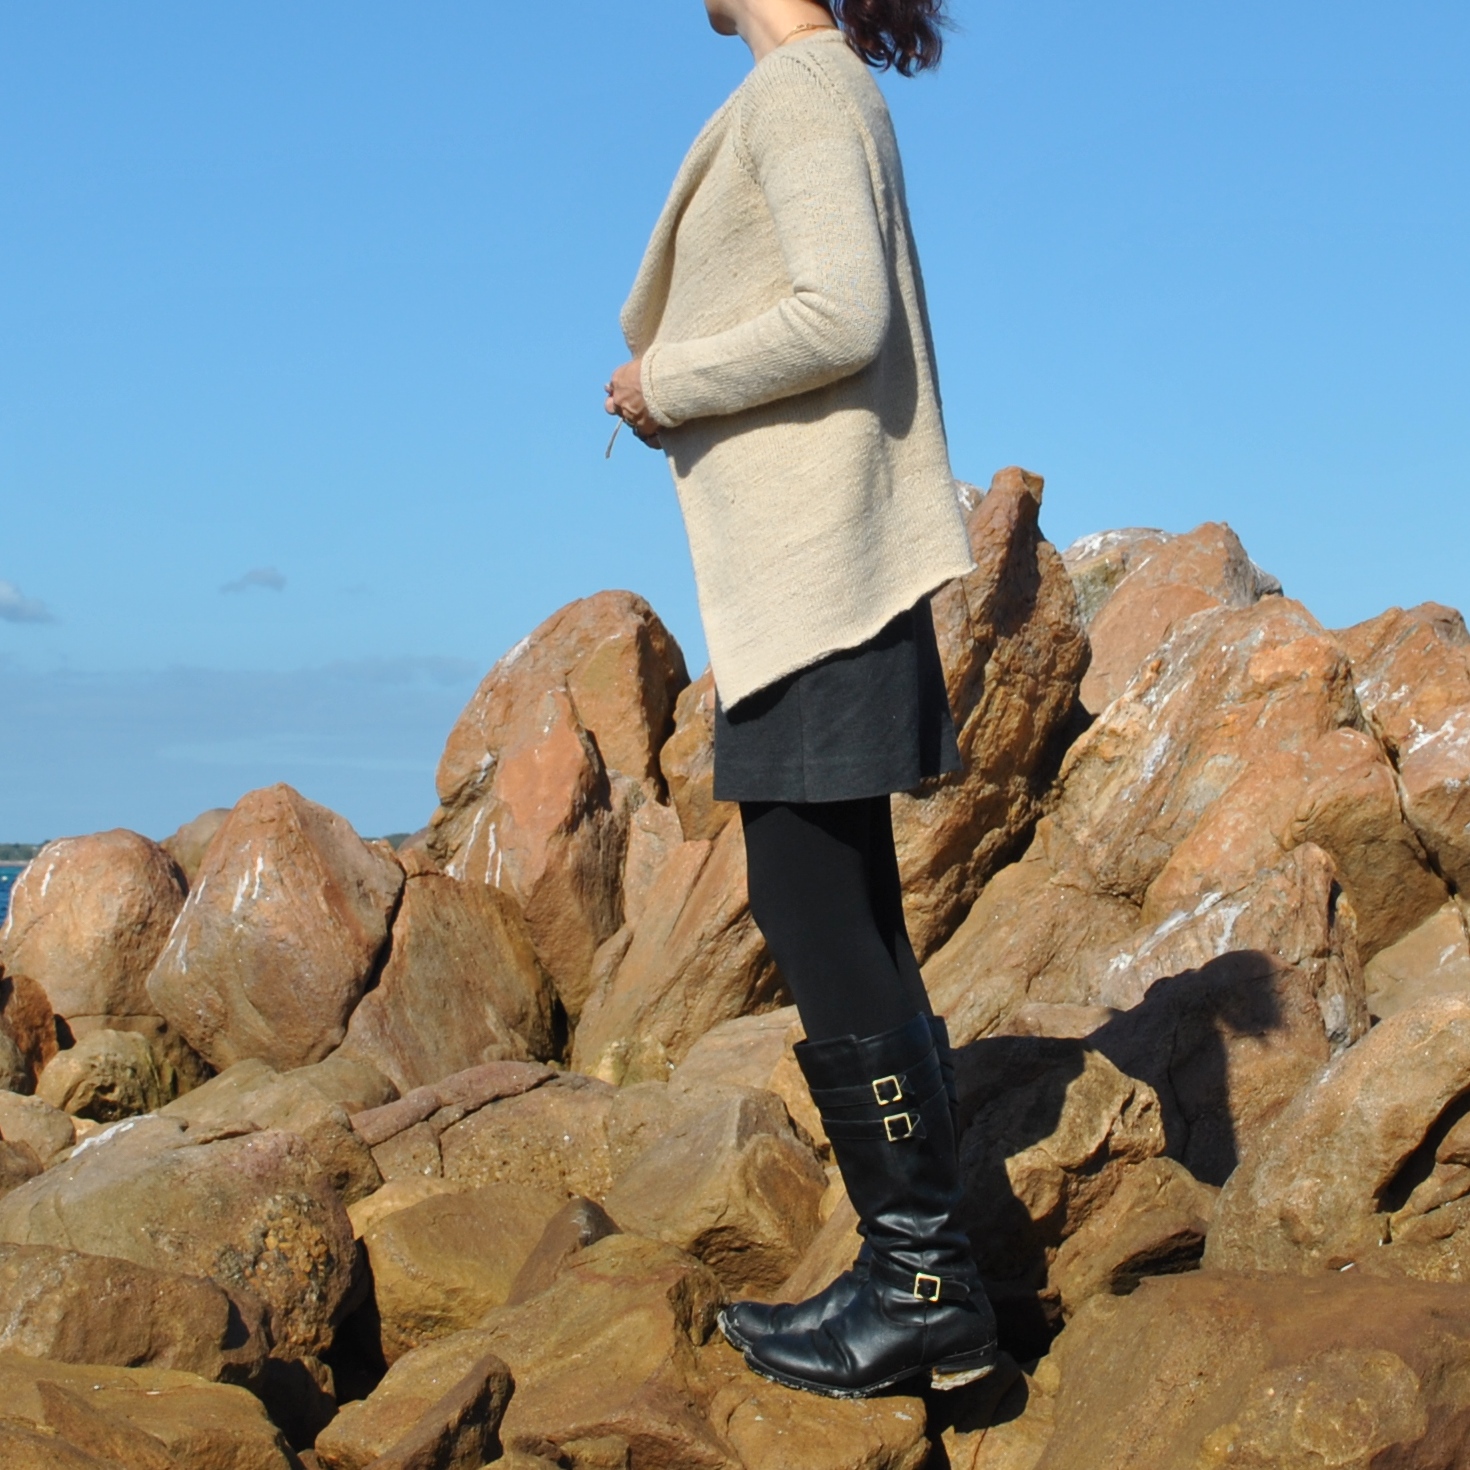
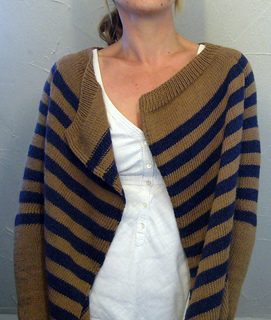
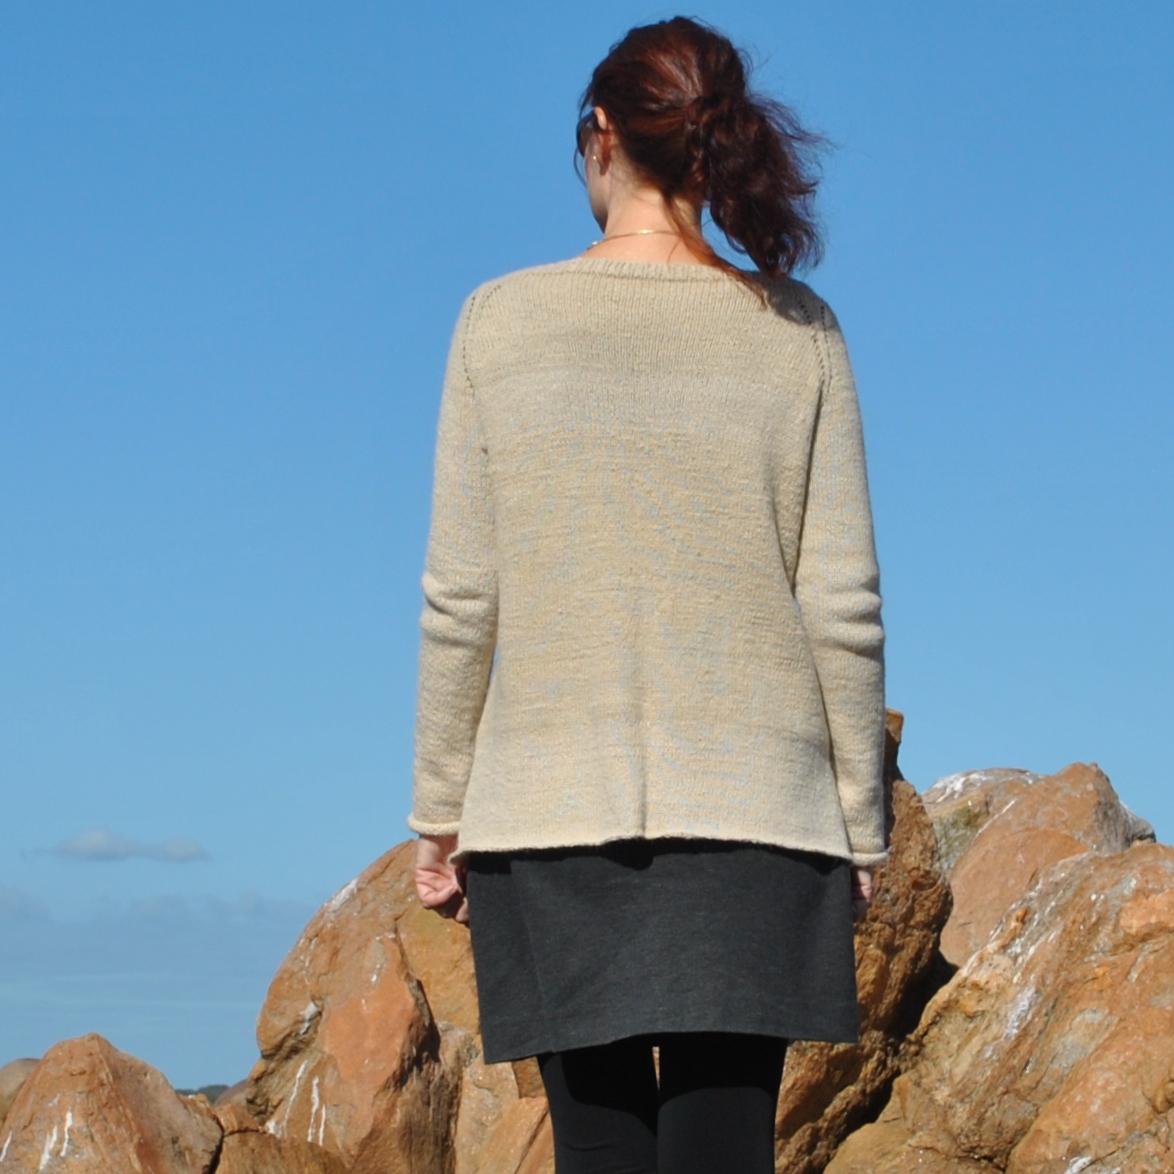
What: I’ve finished knitting a new cardigan; another Miette, yes, that fantastically popular cardigan design and it’s super easy to see why, too.  Such a quick and easy thing to make, top-down, seamless, cute with nicely subtle zig-zag lace design at all borders, free to download here.  LOVE THIS SO MUCH!   I’m just stuck on it and maybe I can never move on.   A bad case of “fools never differ” happening here  😉
This is my third Miette, my previous two are dark green and mustard, all of them in Debbie Bliss Donegal Luxury Tweed Aran.  Green, yellow and now blue.  Slightly embarrassing fact; I already have red wool purchased and earmarked for this design!  The same yarn too …  I could happily have the full colour range because they’re all pretty yummy  🙂

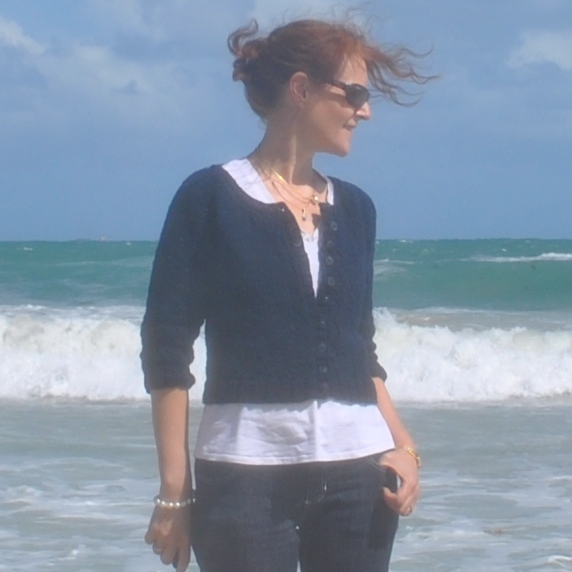
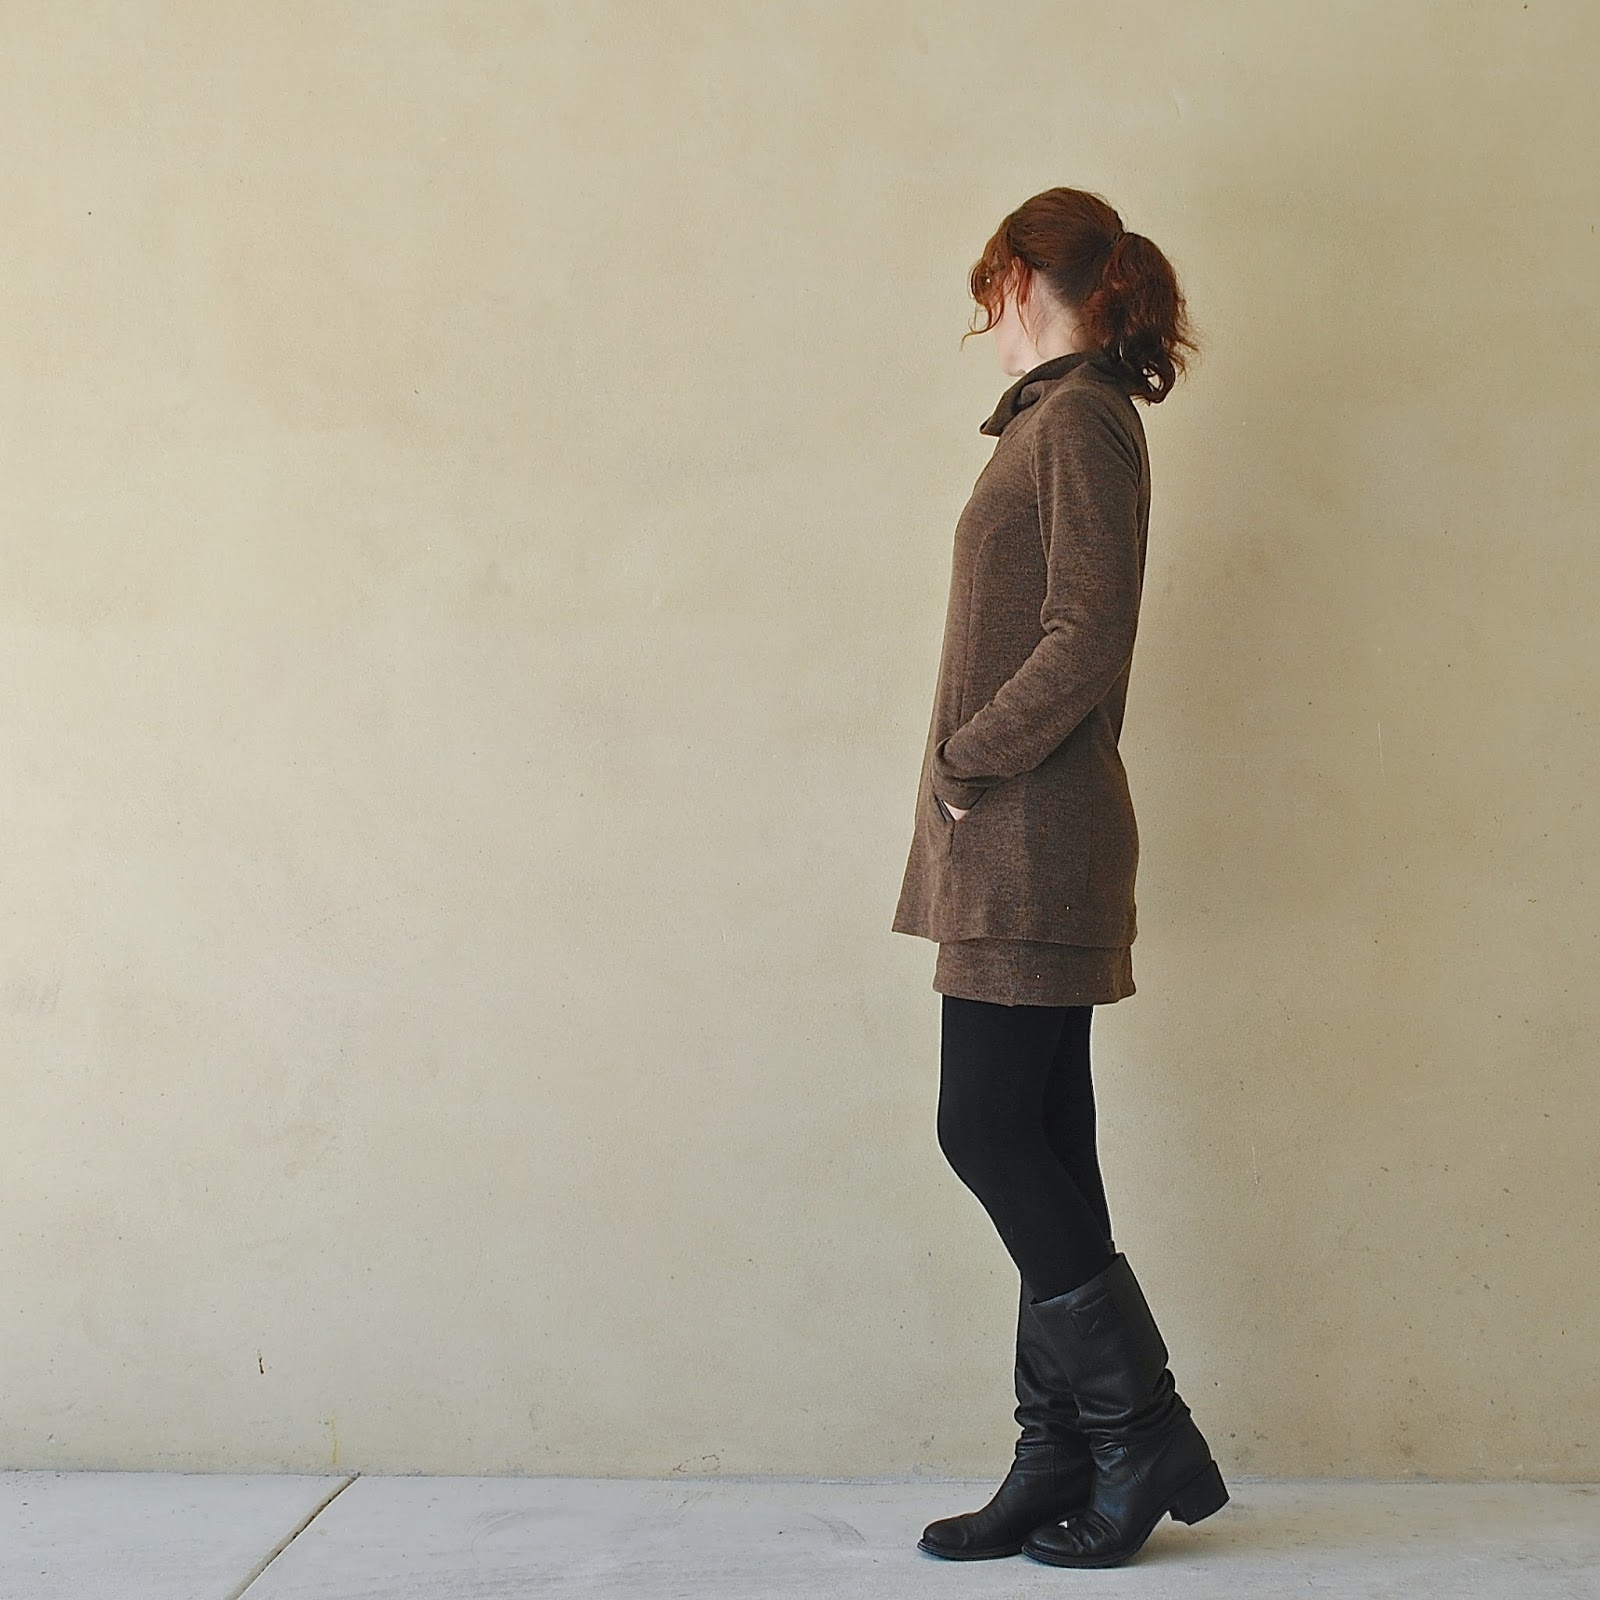
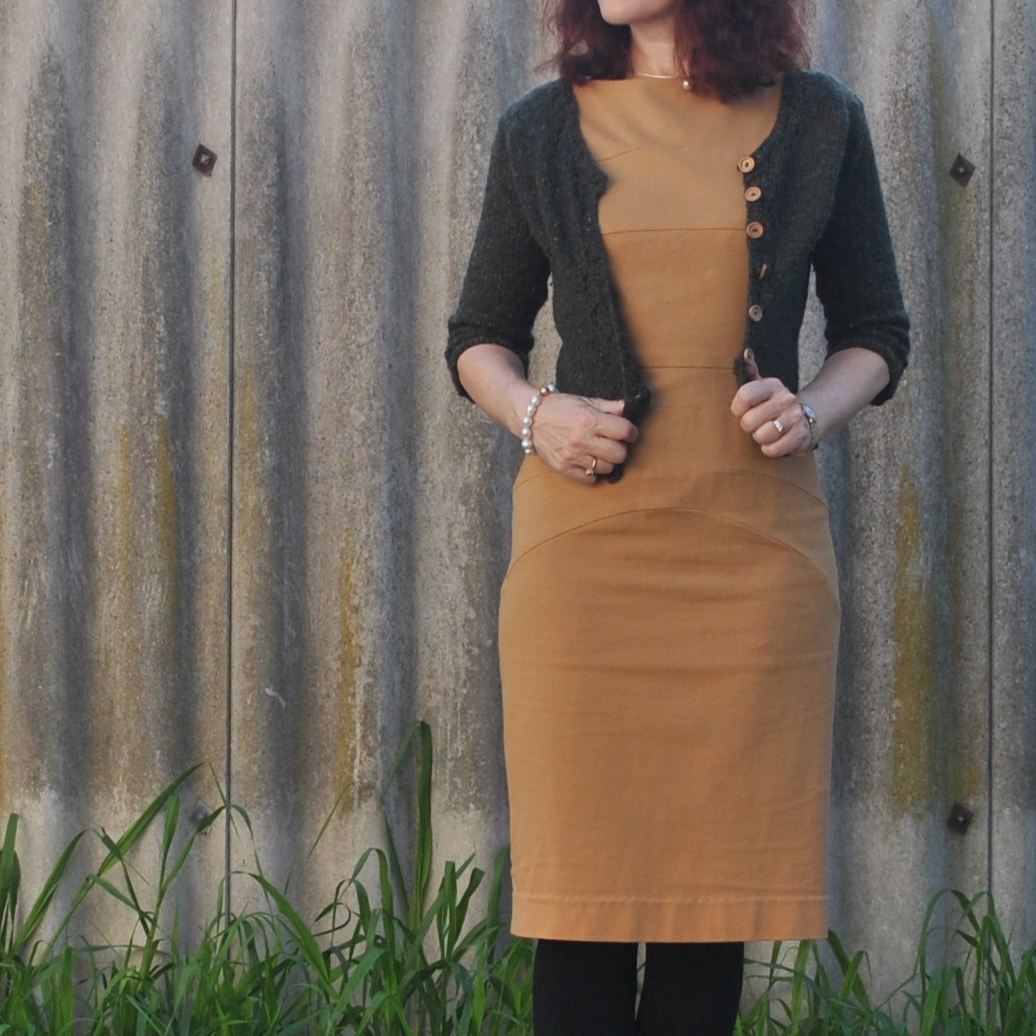
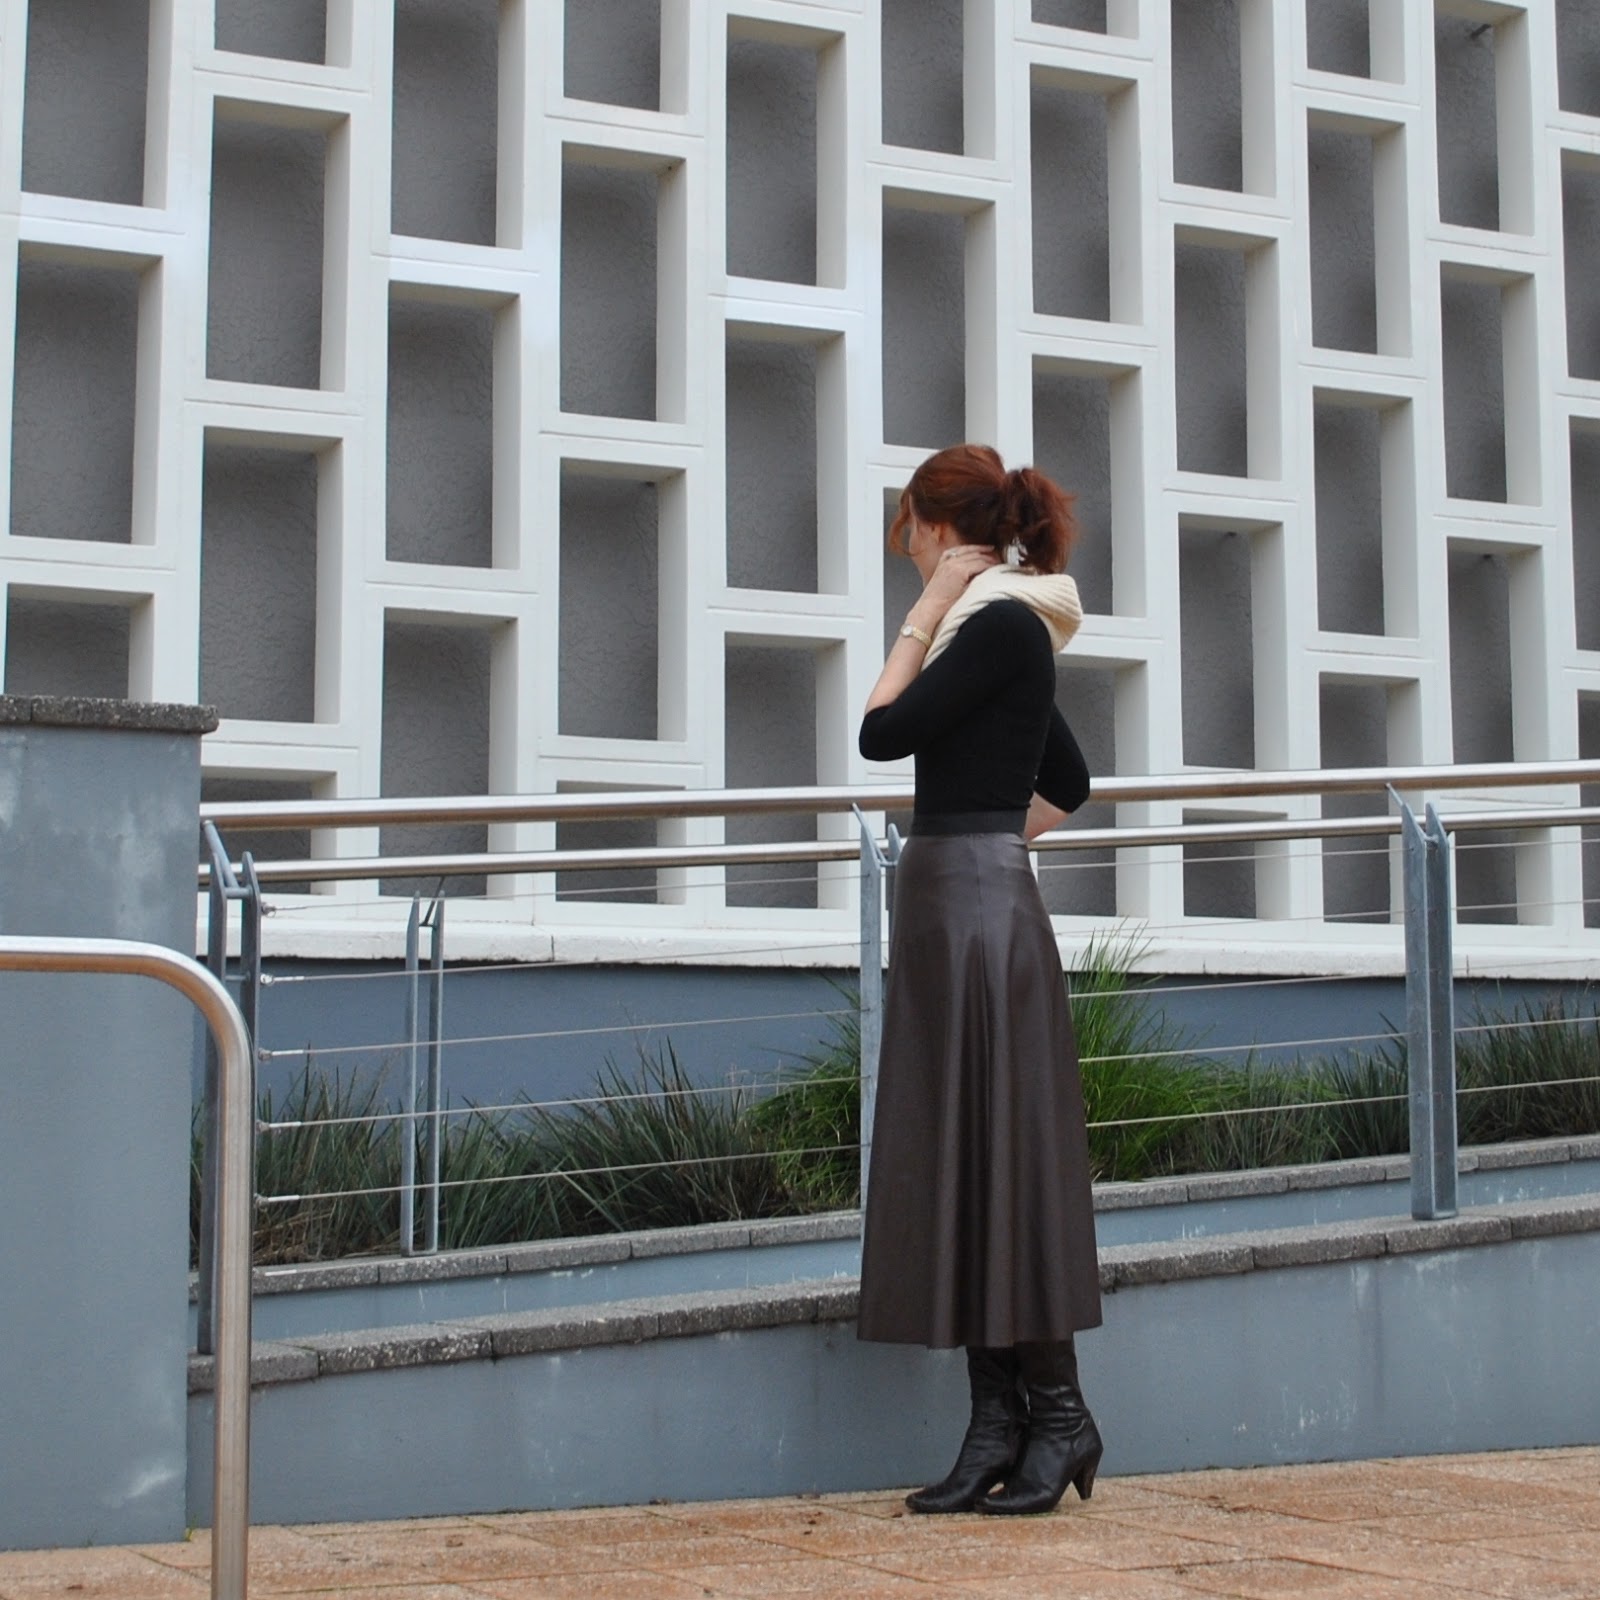
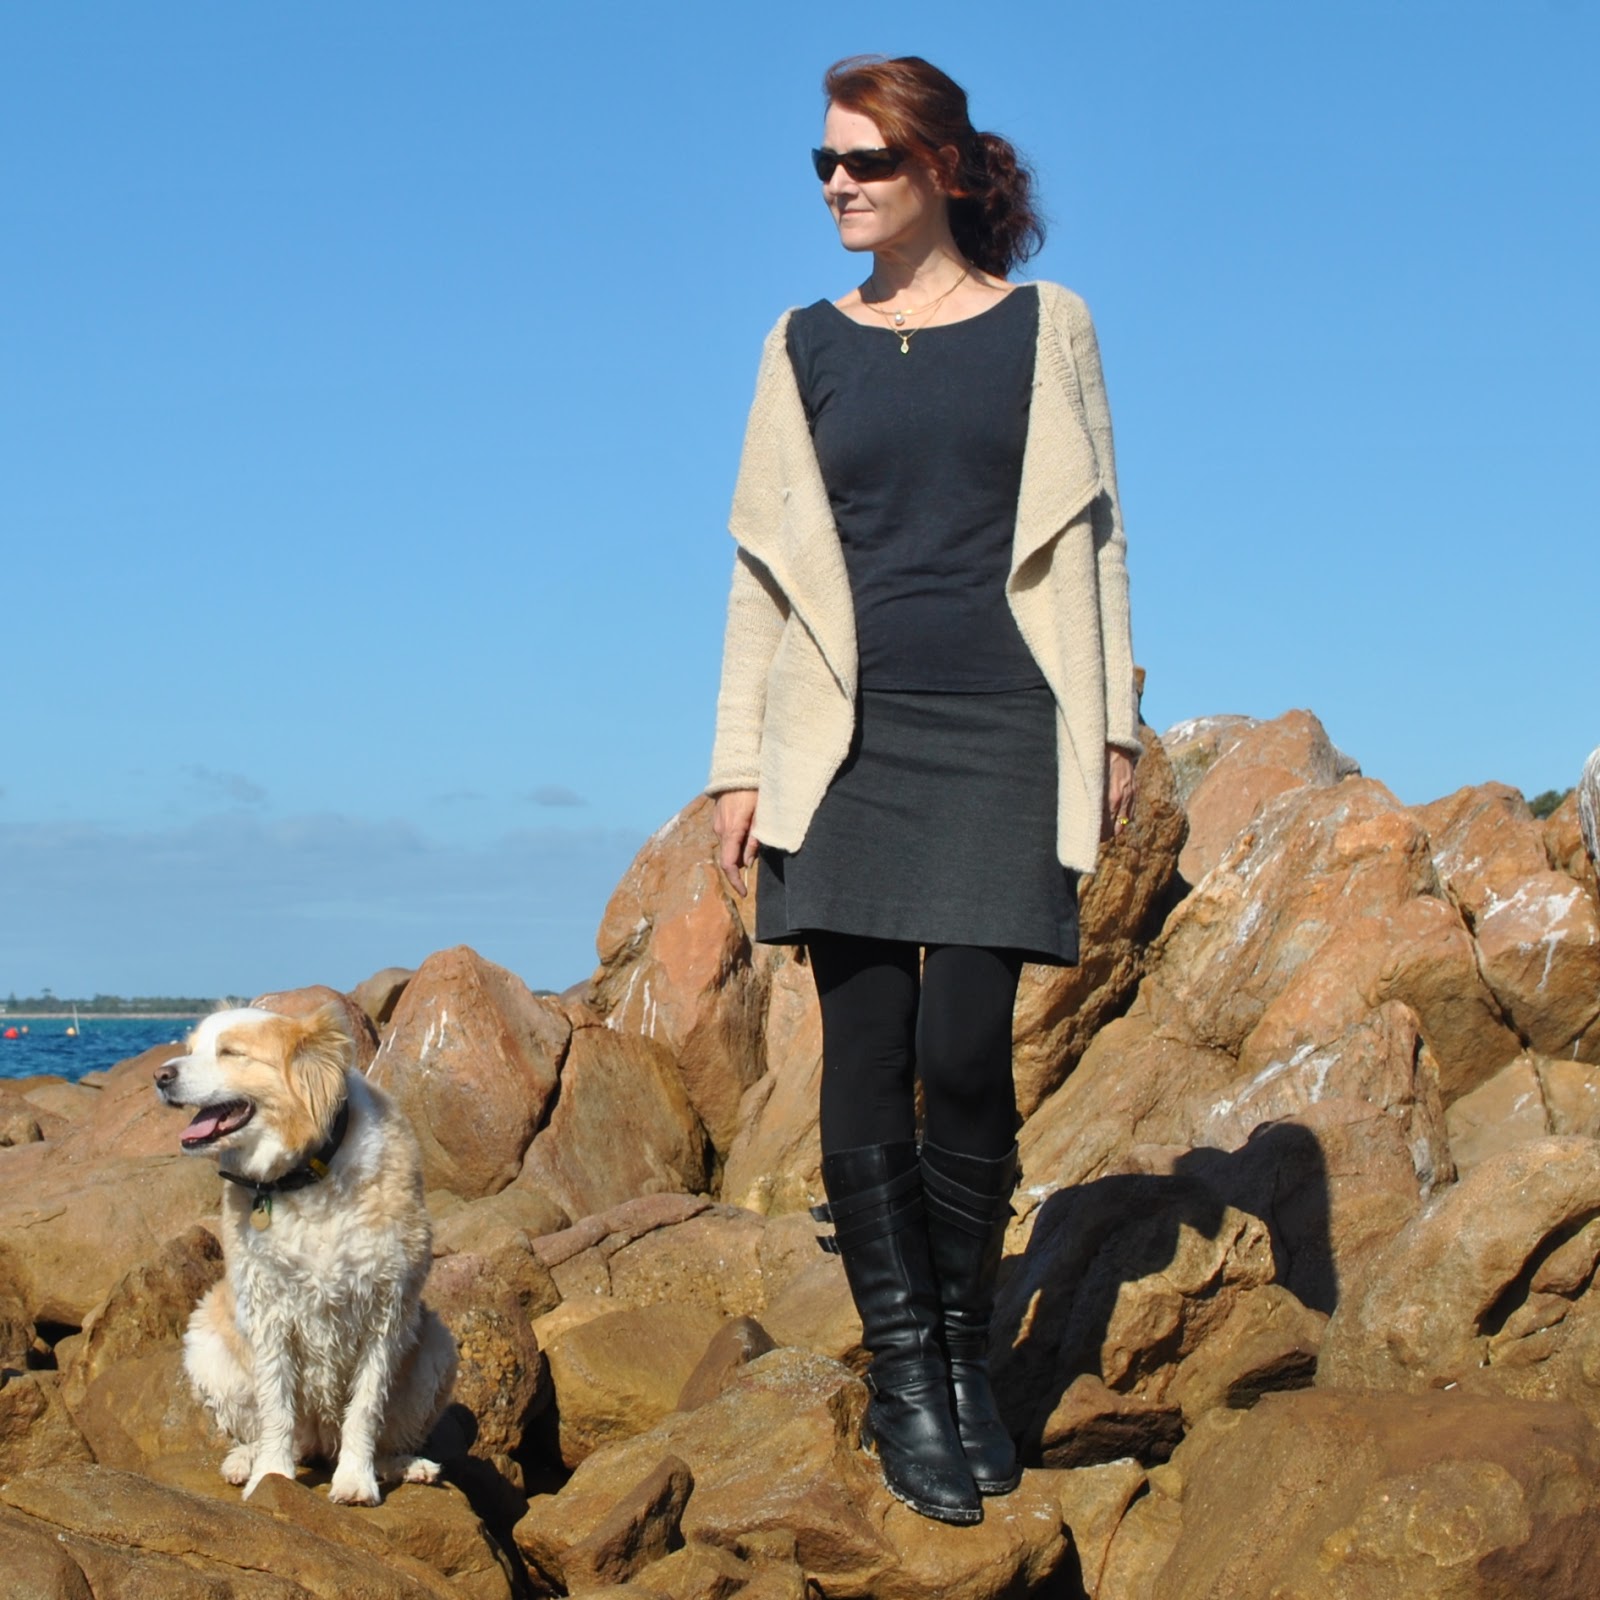
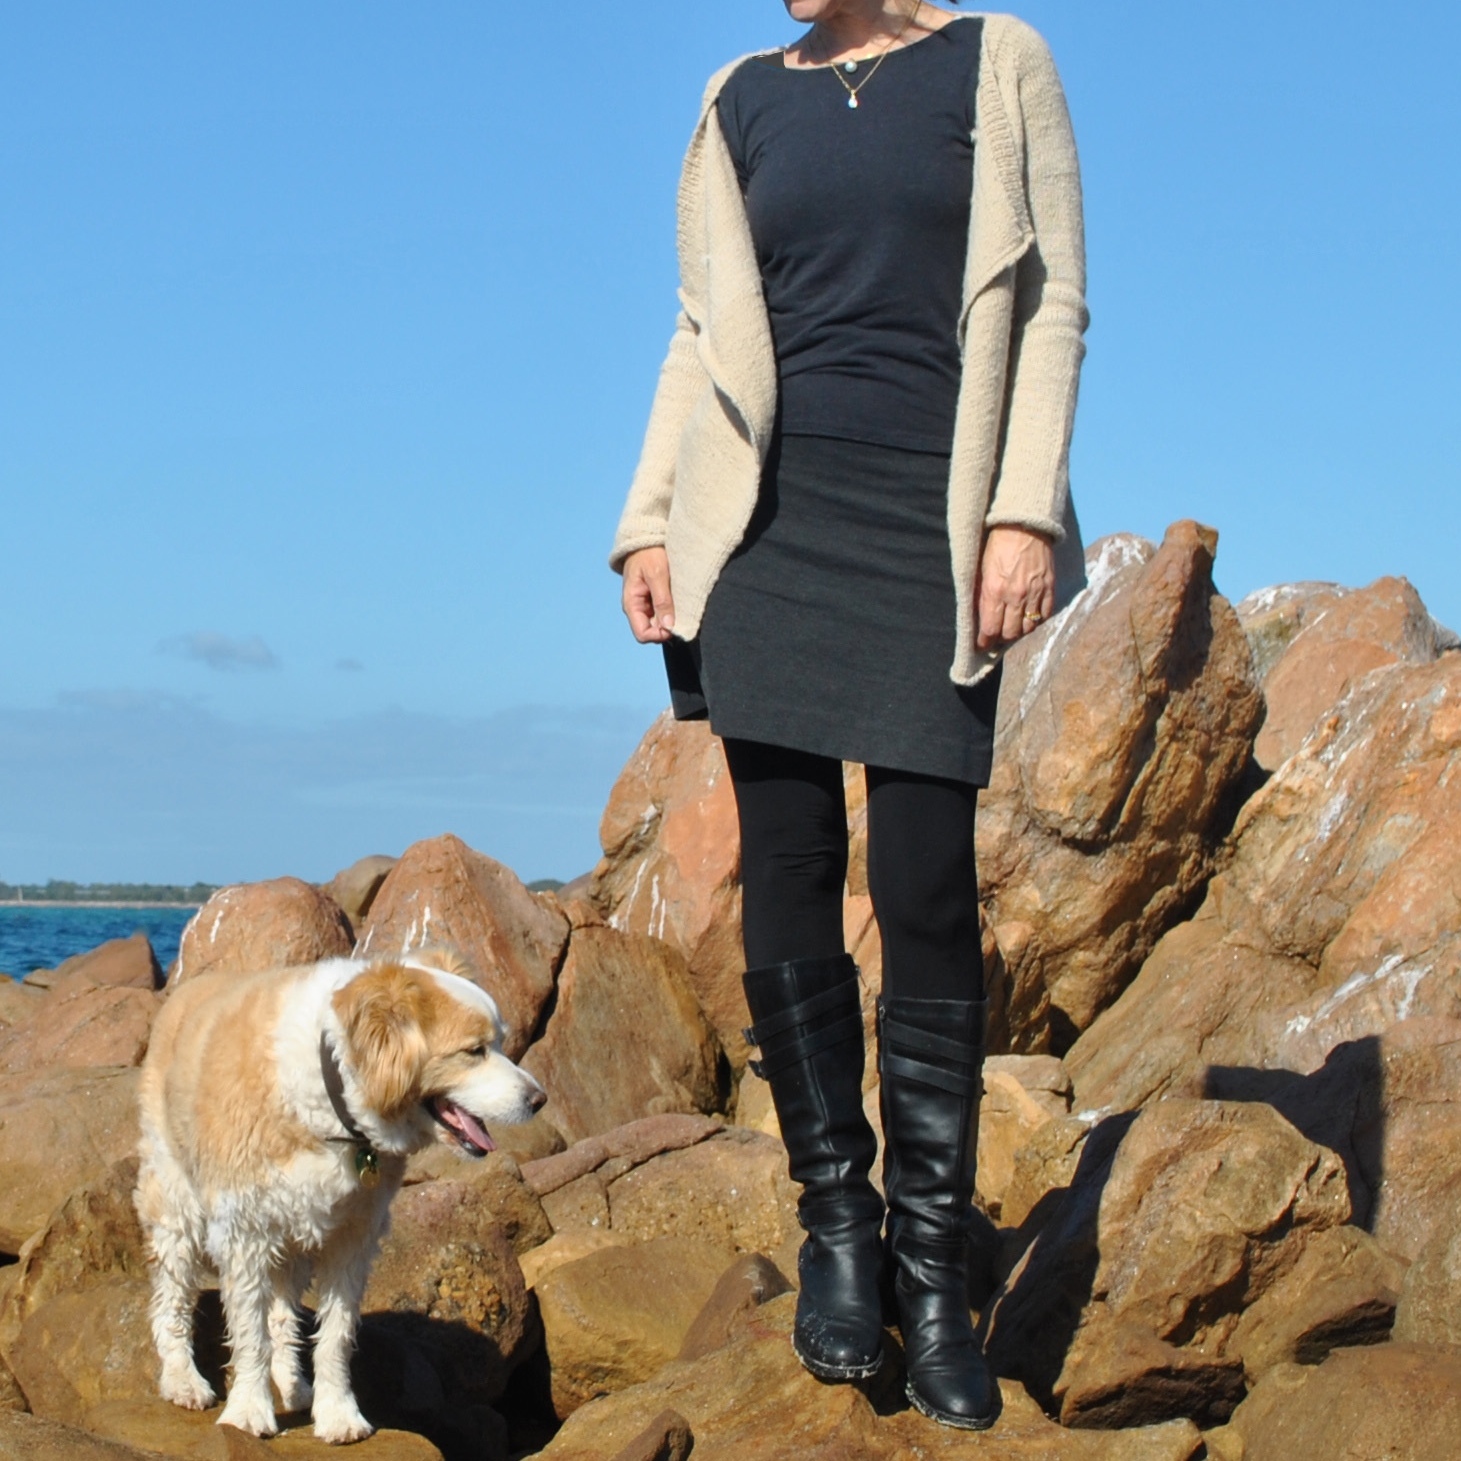
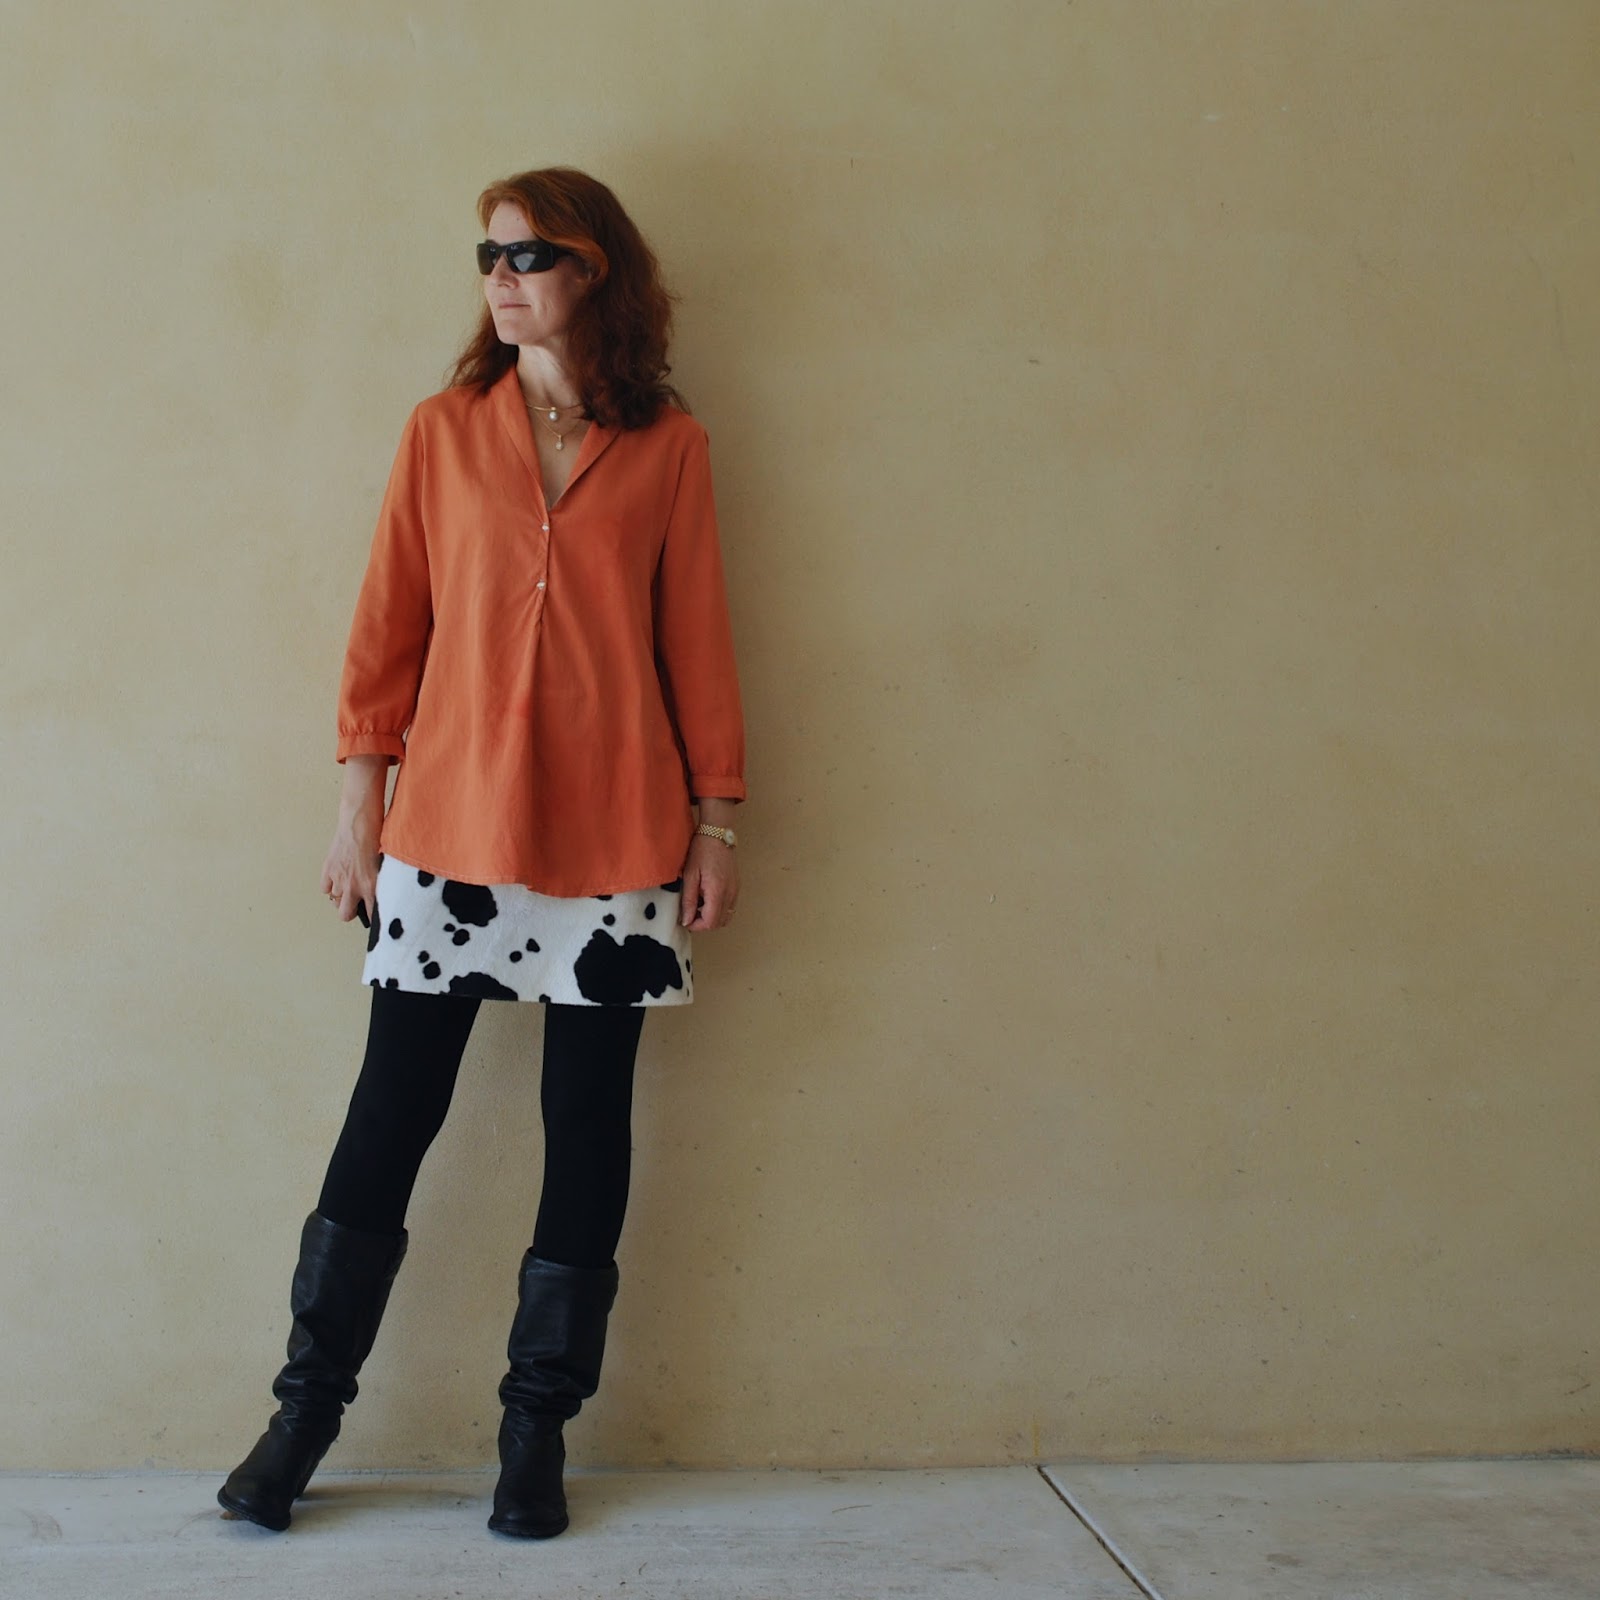
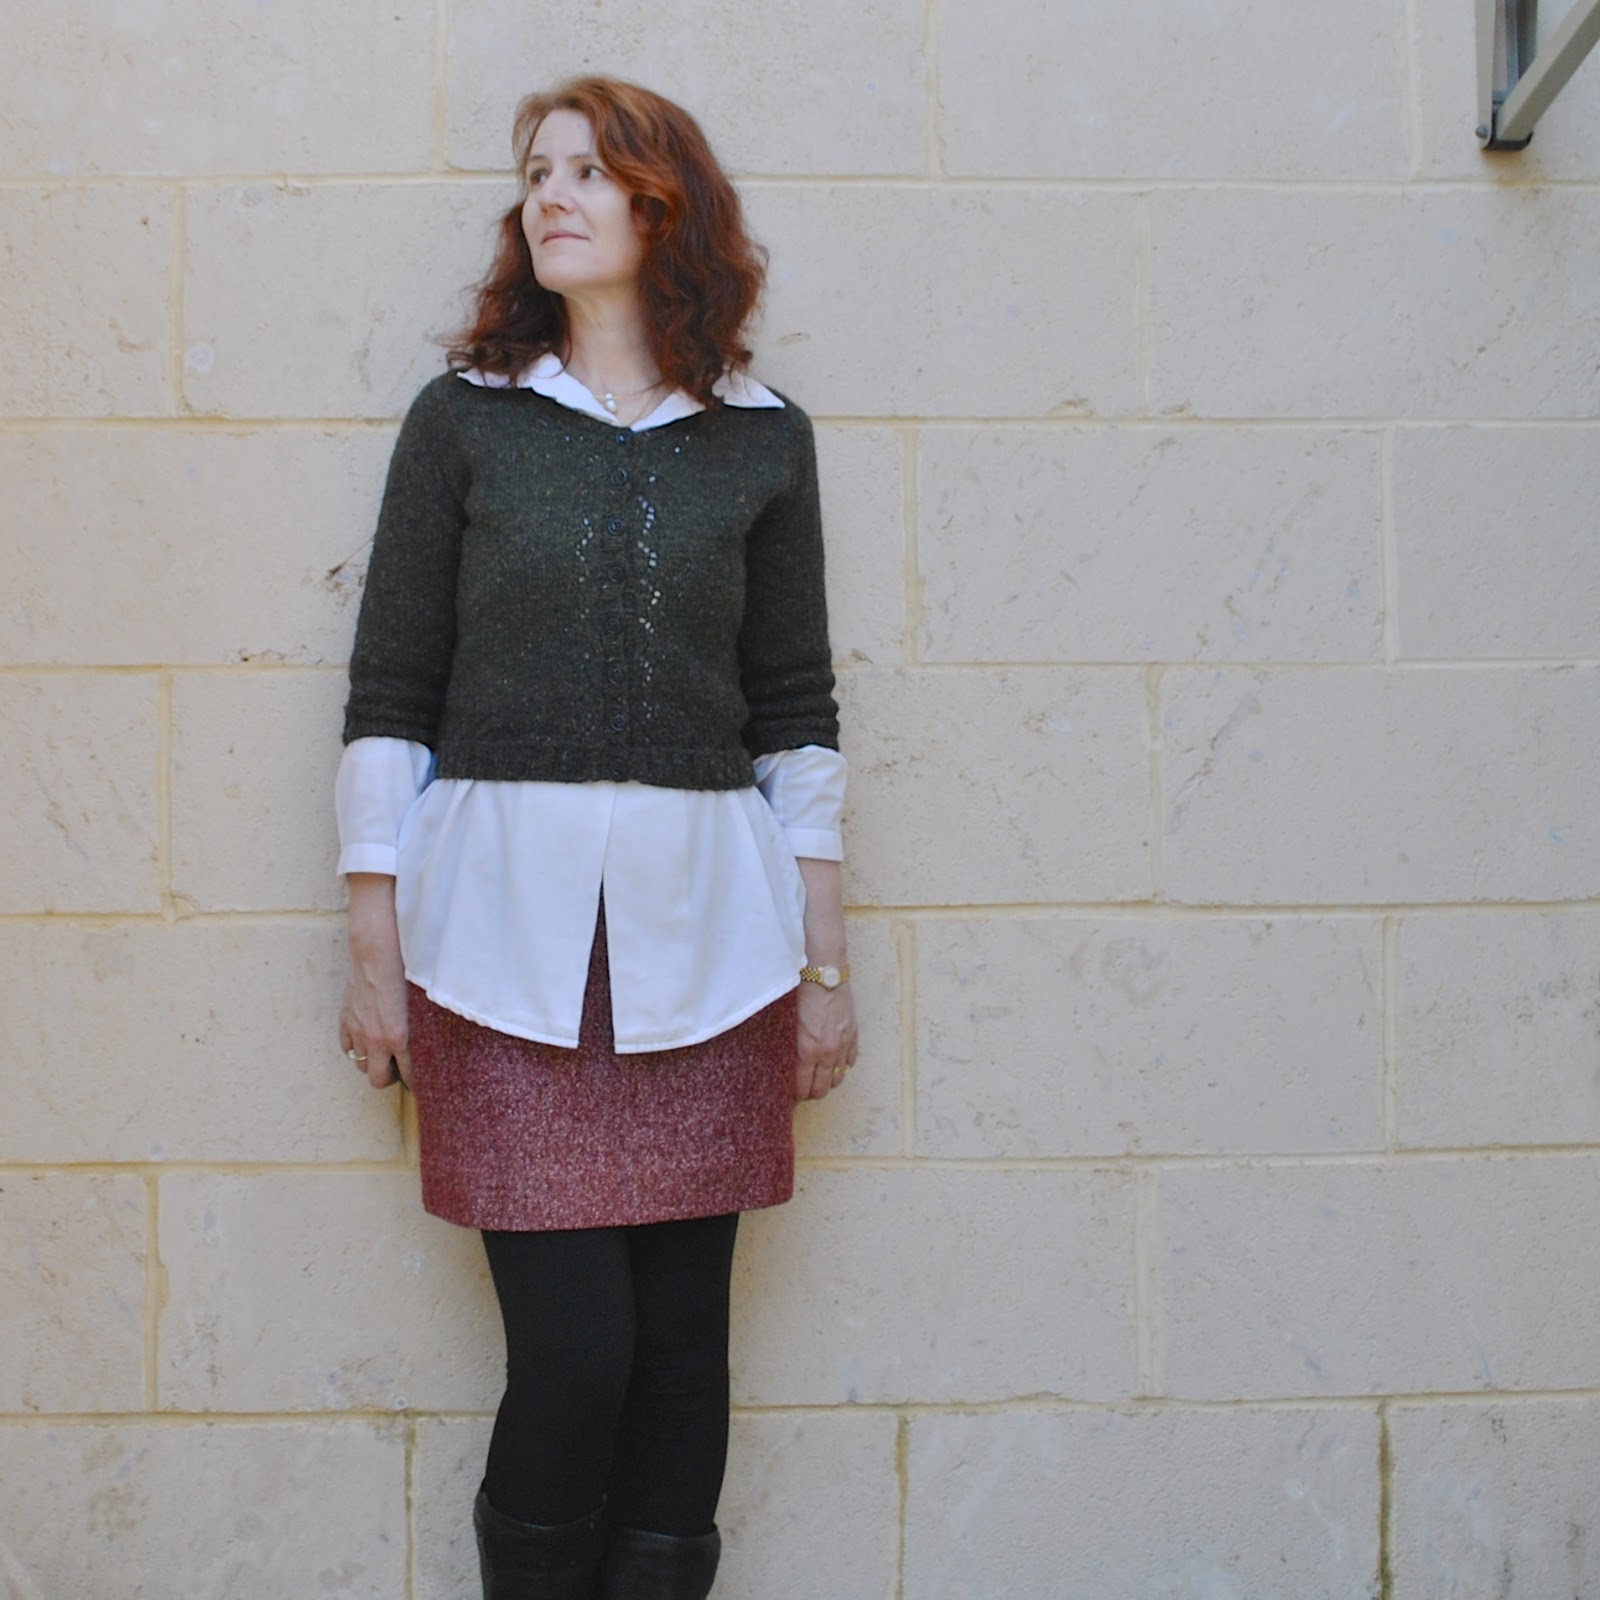
Why: Well, I have felt like a navy blue cardigan would be a very handy little colour to have on hand for aaaaaaages, and this is just me finally making it happen.  Navy blue is a great neutral, I reckon it looks fab with everything, and even though it’s not officially one of “my” colours I think it’s rather lovely against the browns, yellows, oranges and reds that I tend to favour.  I have a nice navy blue silk blazer which was/is terrific but I wanted a woolly cardigan.   I think I’m more of a cardigan person than a blazer person.
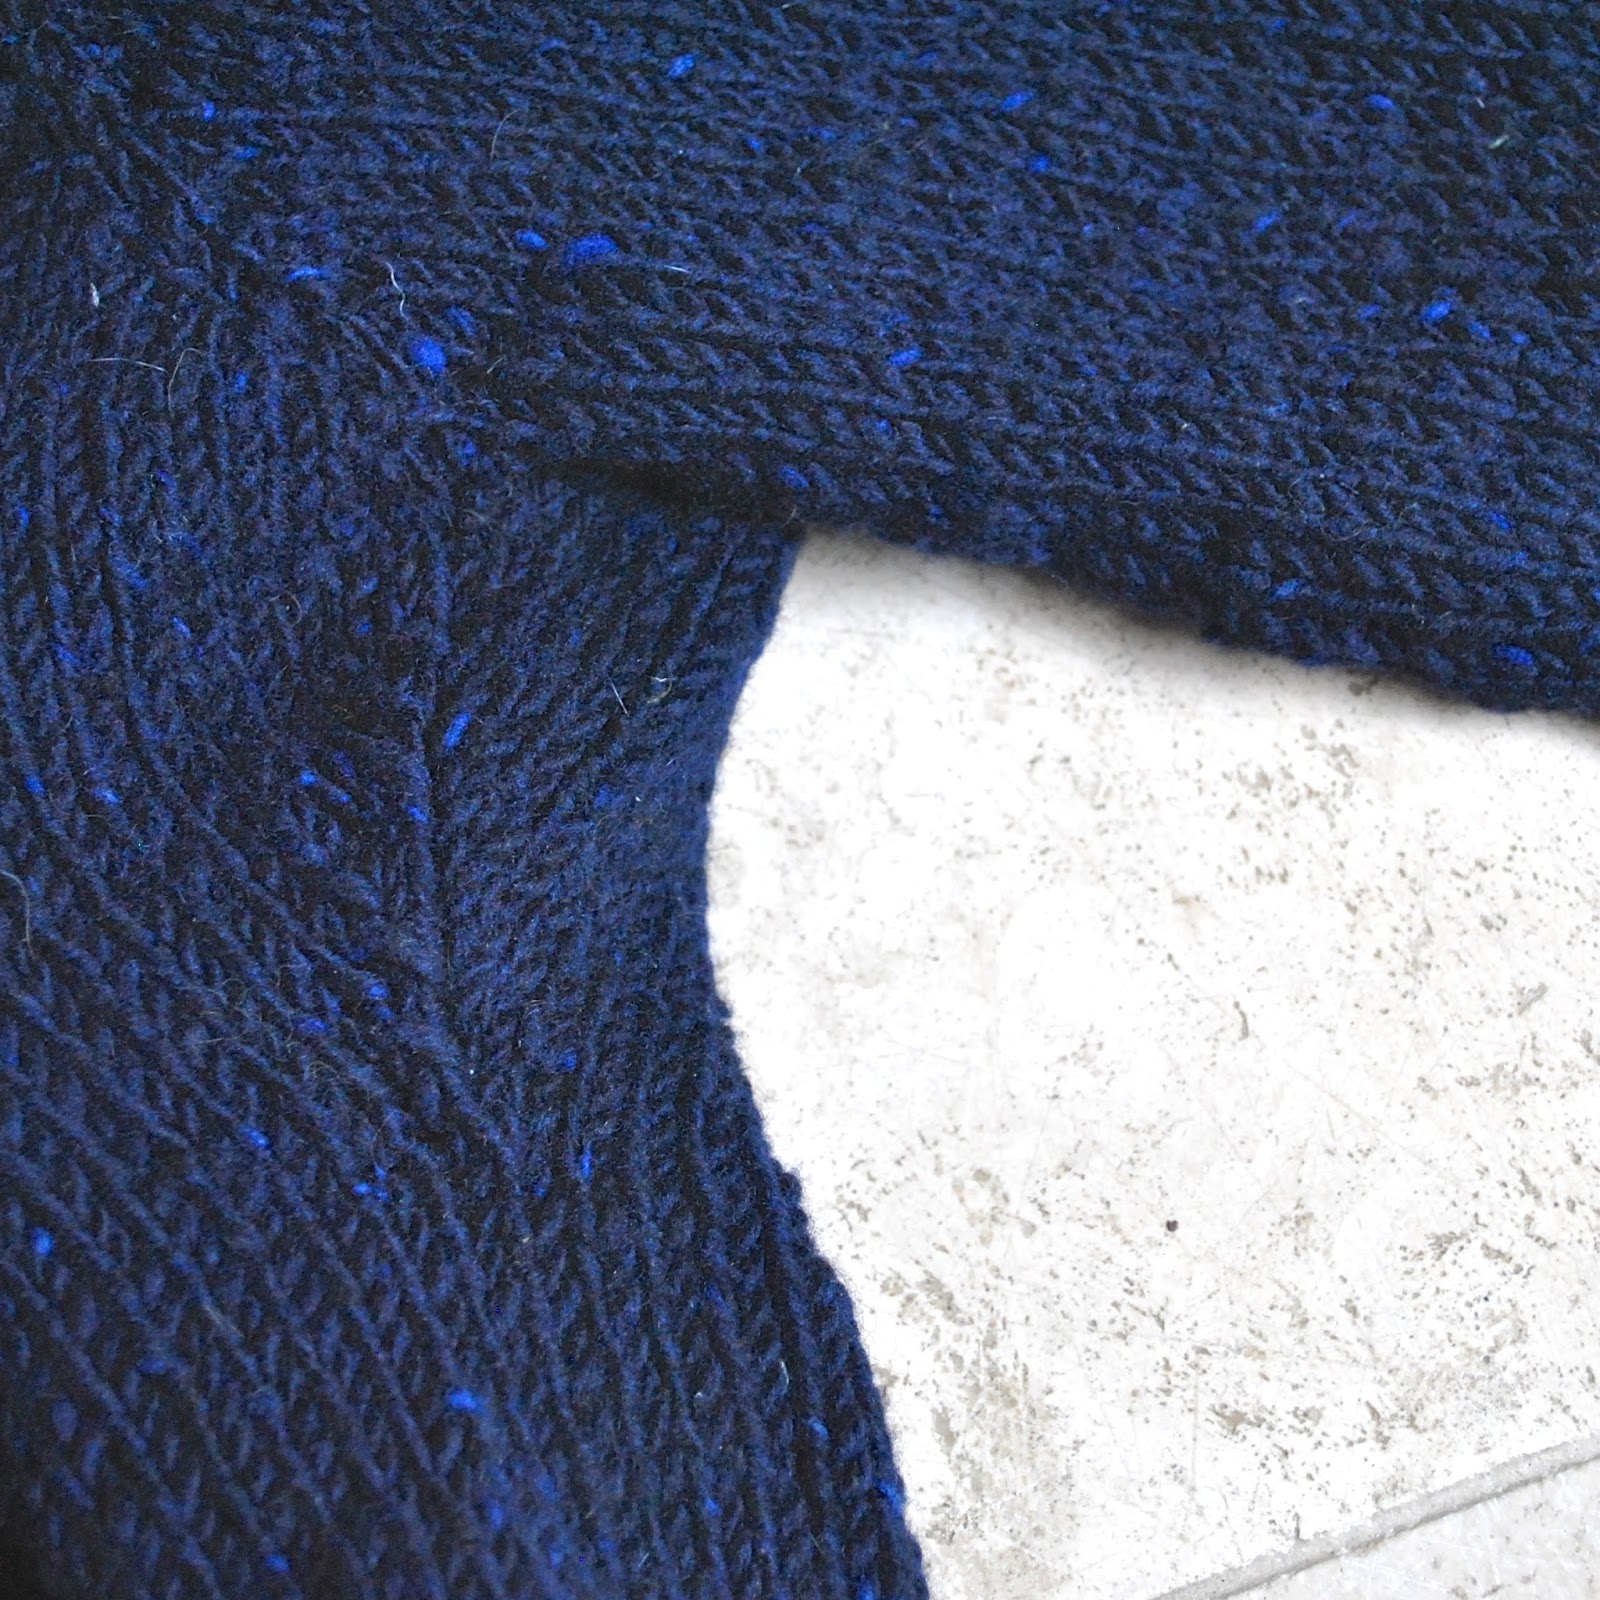
Problemmos: Actually I anticipated a quick project out of this one since it is super easy and not my first go at it, but I had surprising rough trot this time.  Mostly because this yarn is so dark dark dark navy, and I usually knit in front of the telly in terrible low light; and so half the time I literally could not tell whether a stitch was a knit or a purl.  Seriously!  Several times I had to frustratingly pull out a whole bunch of rows and re-do it because one wrong stitch had gone unnoticed…  I ended up having a torch on standby to illuminate and assess the situ-bar as required.  grrrrrr!  This cardigan has taken me nearly all winter to finish!
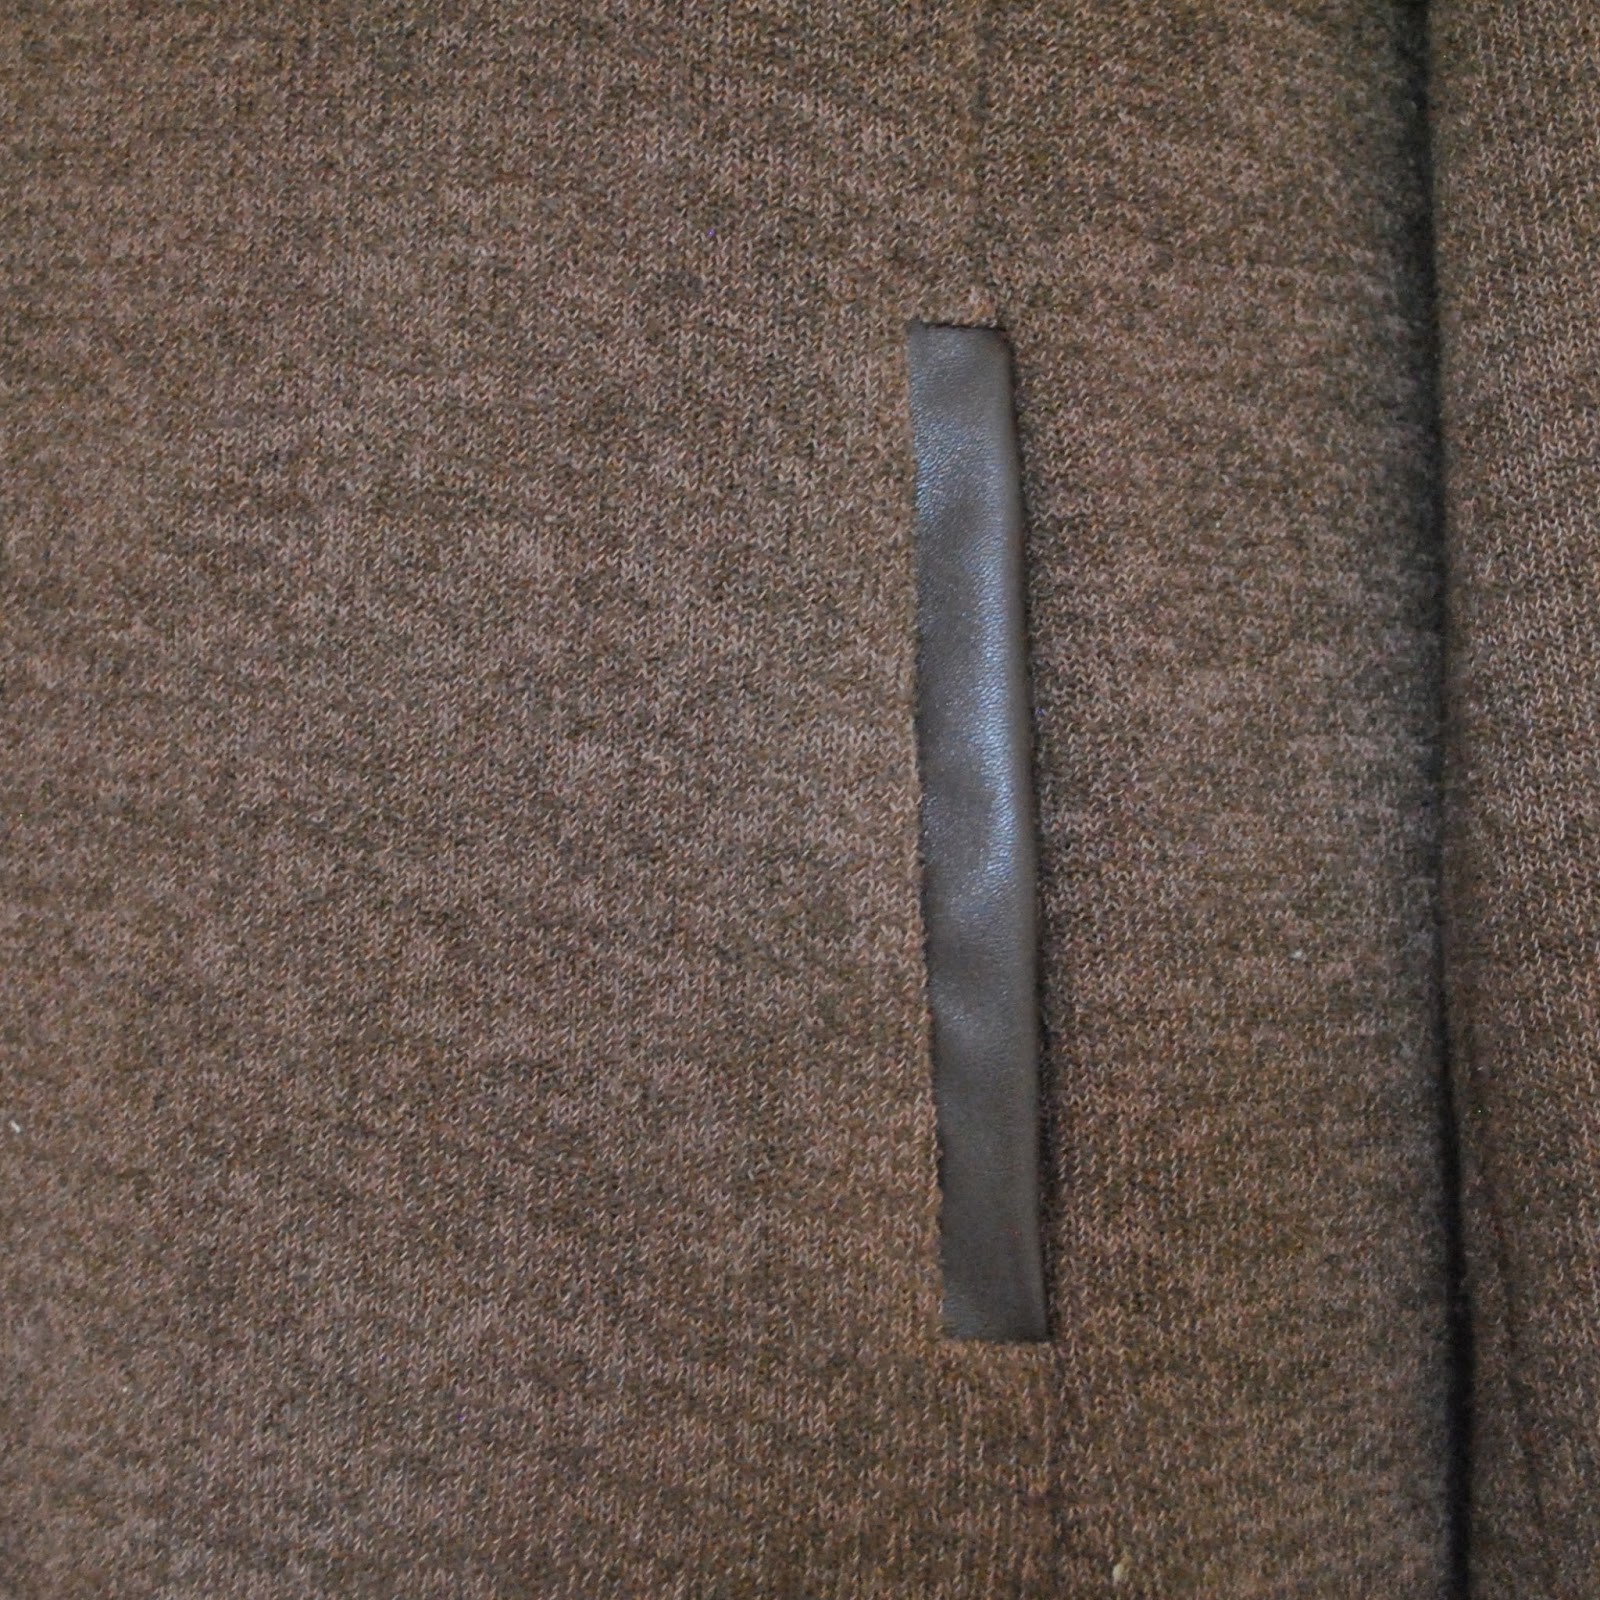
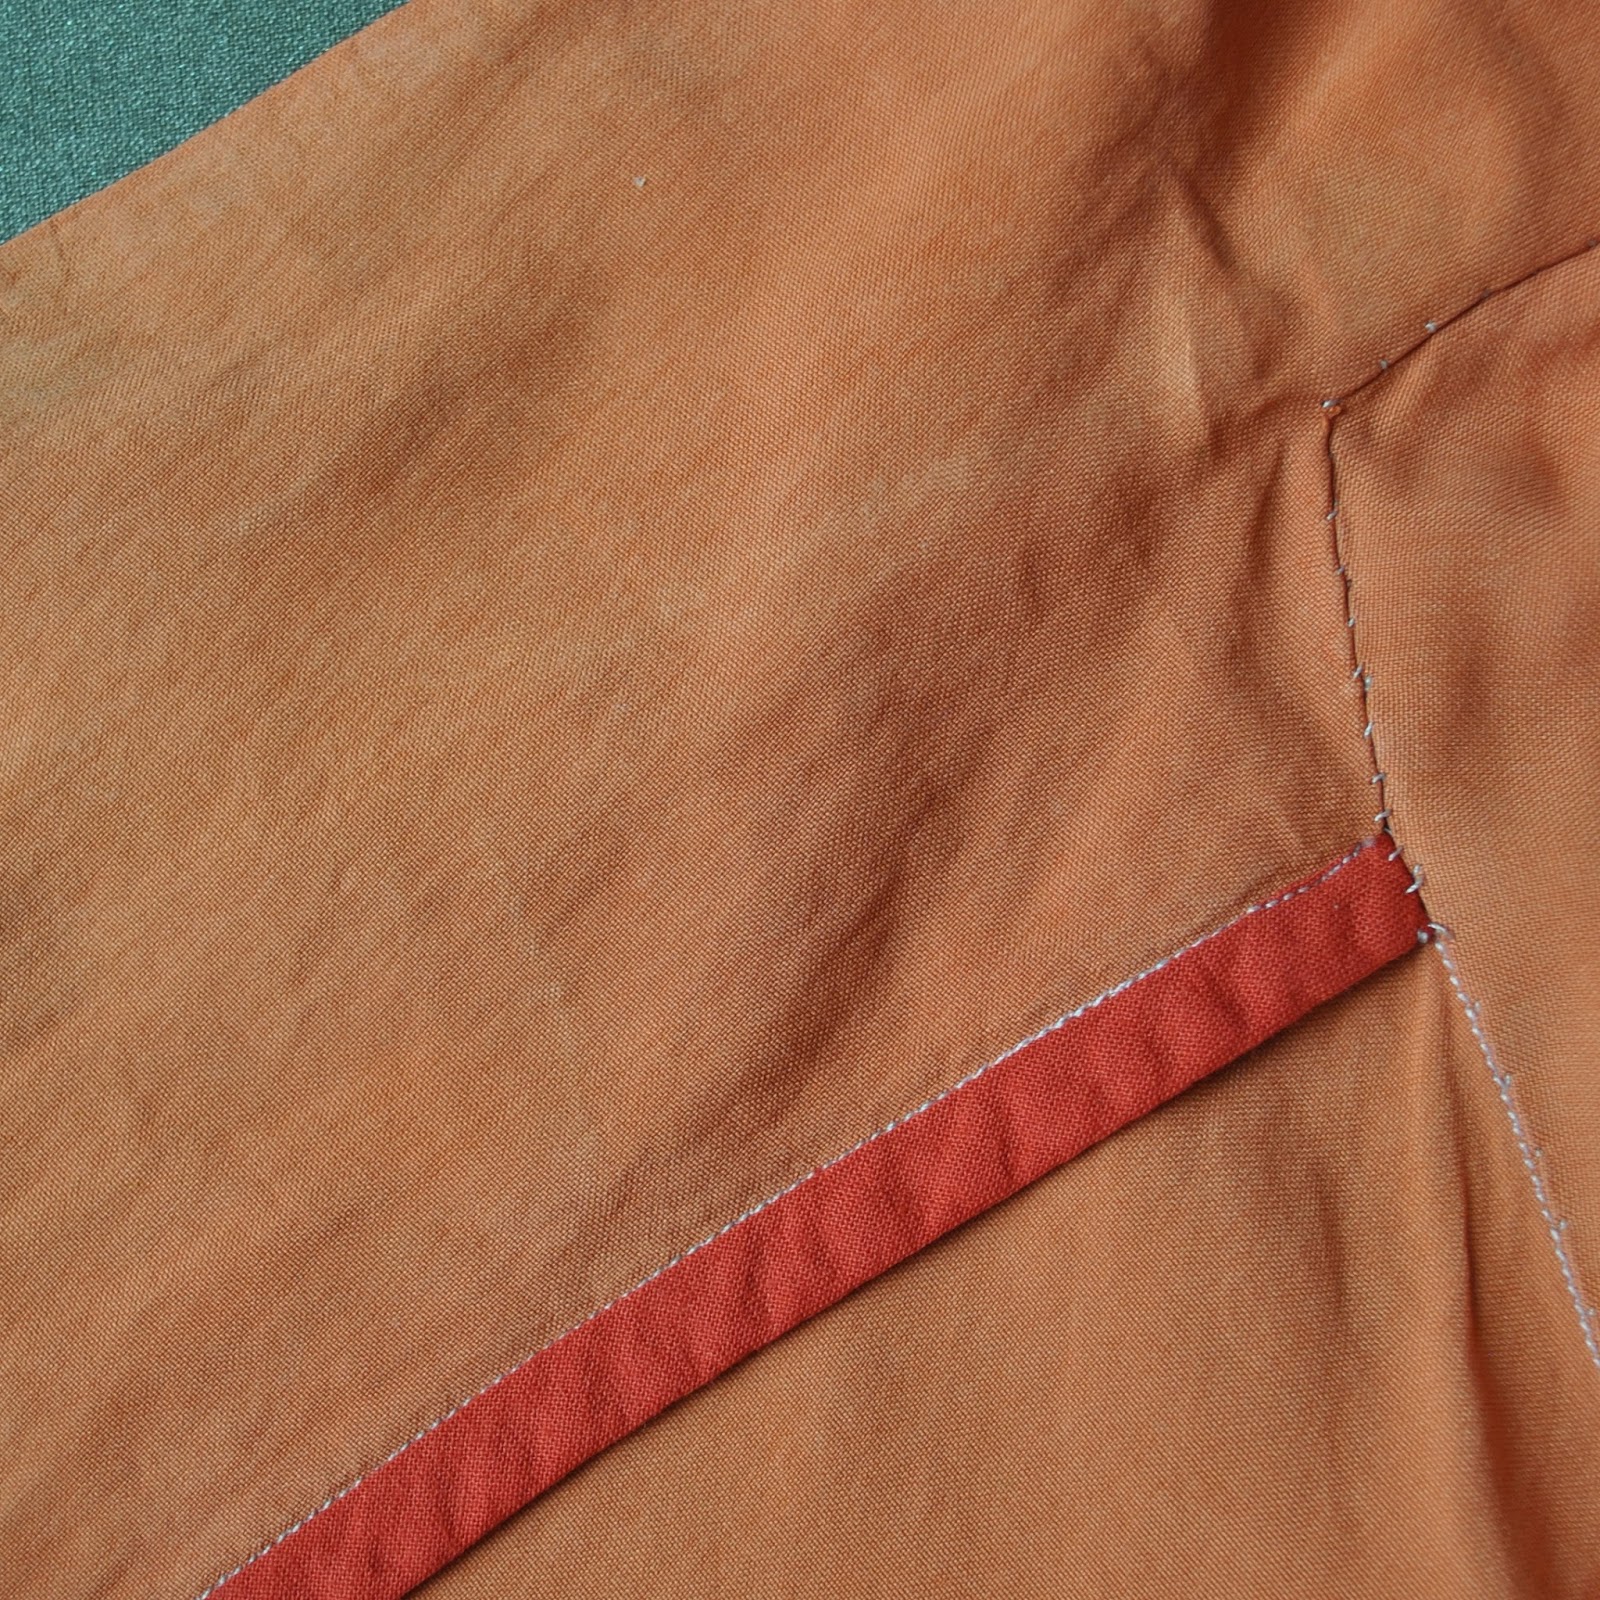
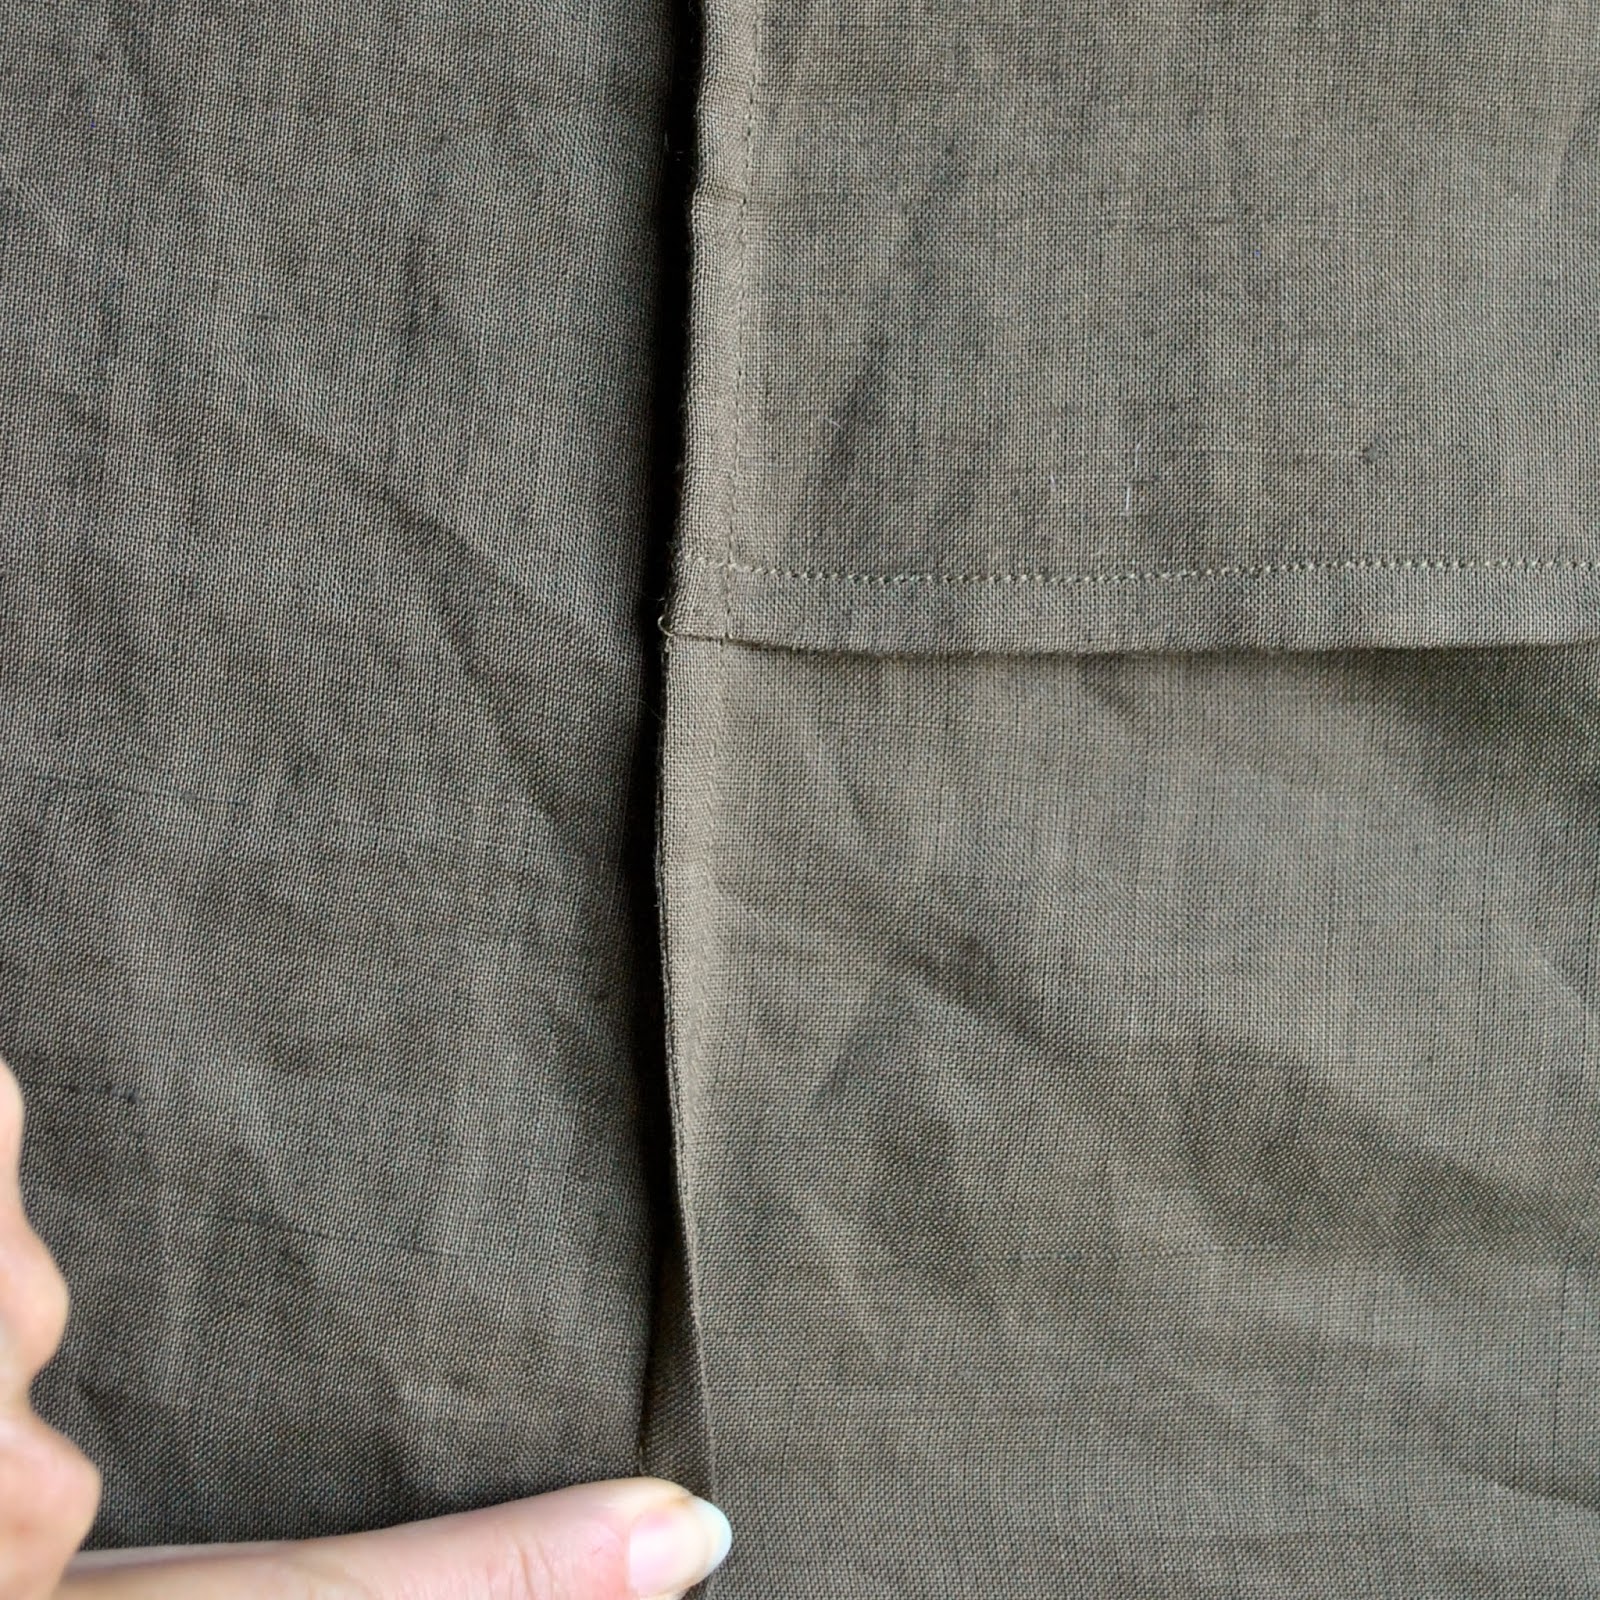
Changeroonies: I made a small but vital change to the design this time; I transferred the bust dart shaping to the underarm side seam each side.  I think this is a much better shaping pozzie for a small busted person like myself.

later edit; as requested, the details of moving the bust dart shaping to the underarms goes as follows:

To move the bust dart shaping to the underarm… row 56 is where the bust dart shaping starts; you follow the same shaping (reducing two stitches on each of the “fronts”) EXCEPT you are moving that shaping to the underarm stitch marker, instead of in the middle of the “fronts” of the cardigan.
So, instead of doing the ssk, k1, k2 tog in the middle of each front section of the cardigan, instead do this same shaping at the underarm marker. Do the same for rows 58,60,62,64,66

Details:
Cardigan; the Miette by Andi Satterlund, in Debbie Bliss Donegal Luxury Tween Aran, col. 360039 (Midnight) from Calico and Ivy (6 balls)
Jeans; the Ginger jeans by Closet Case patterns, navy blue cotton denim, details here
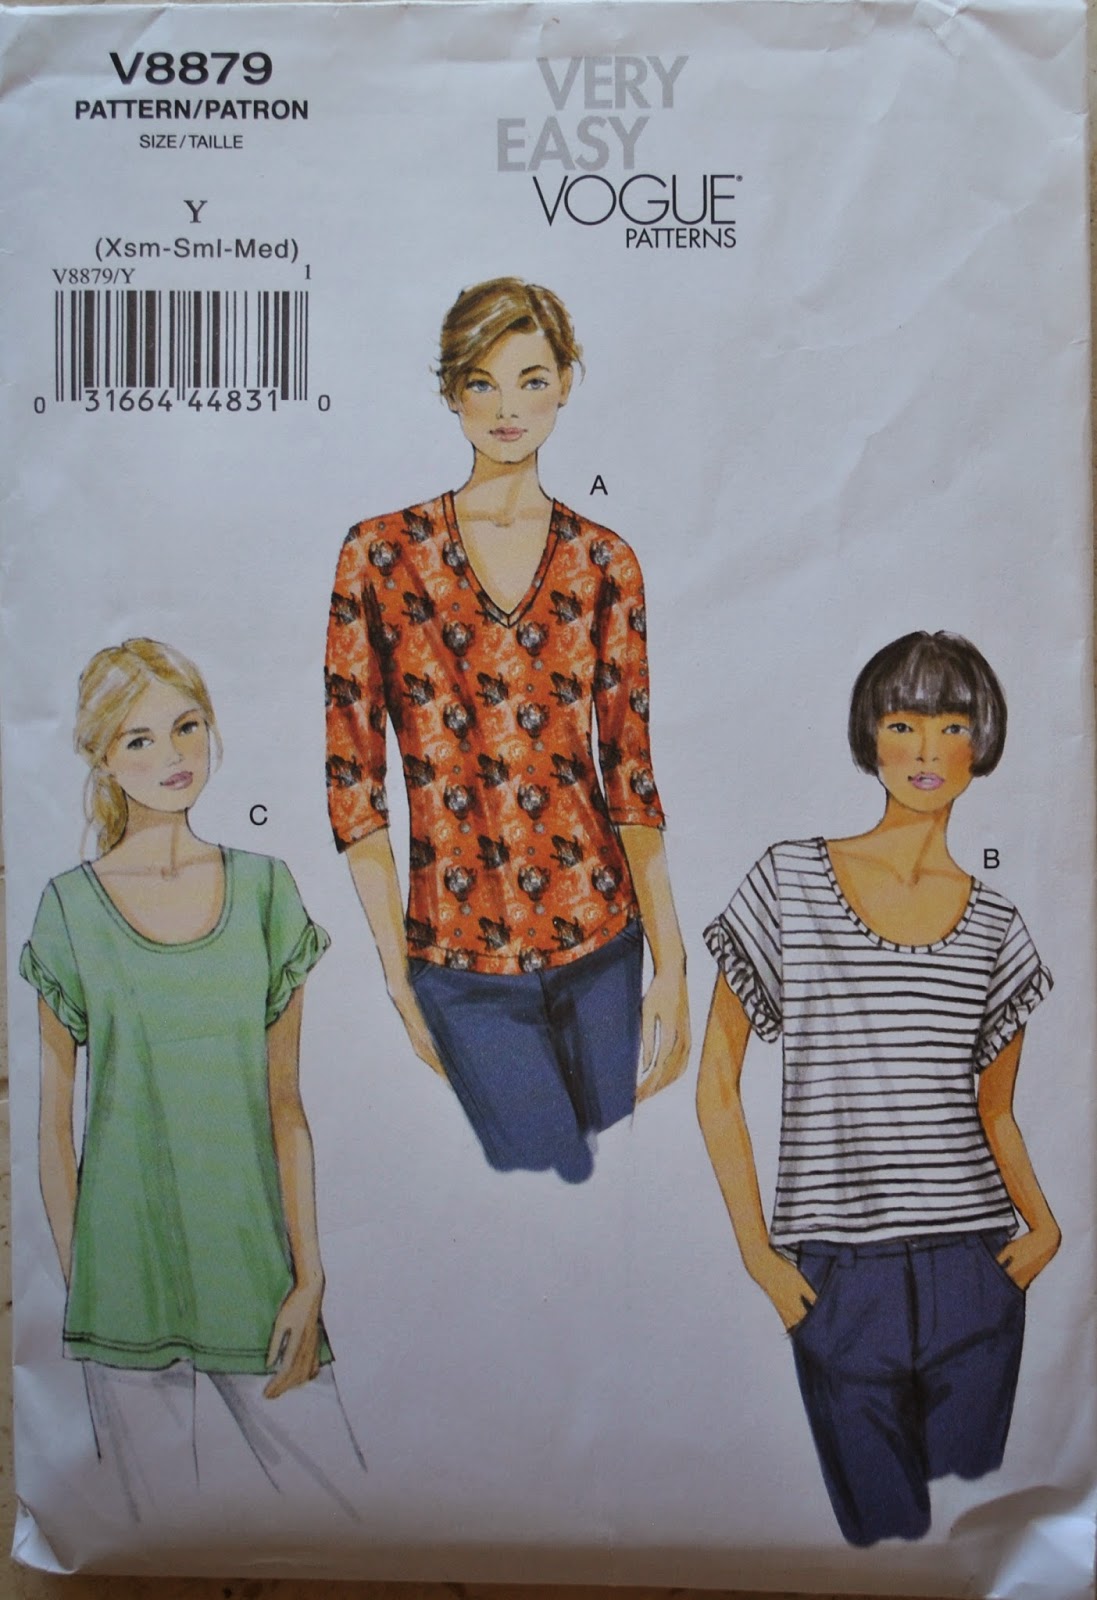
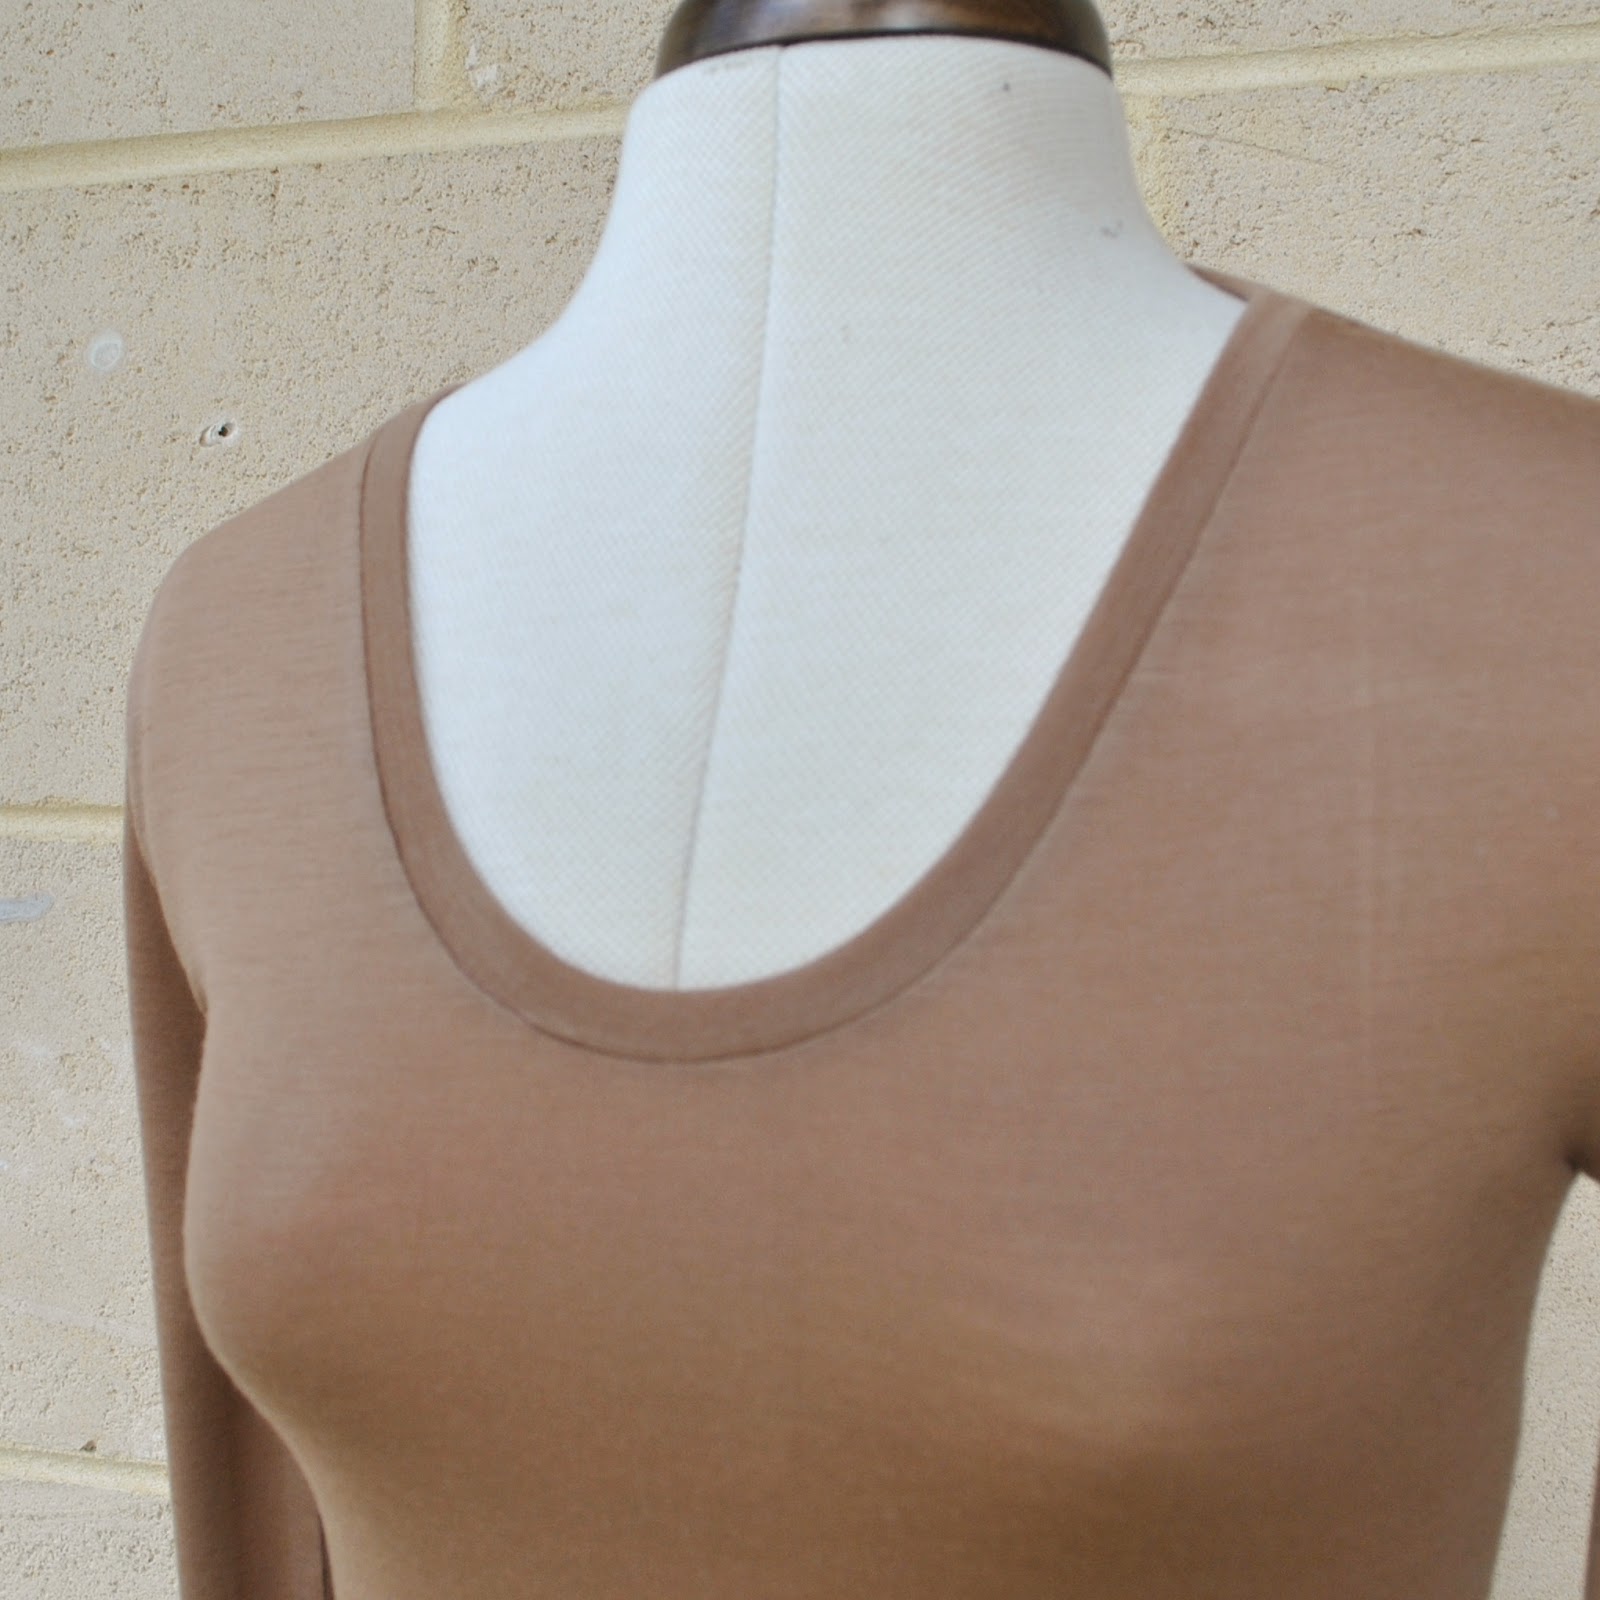
Tshirt; Vogue 8879, ivory cotton jersey, details here

The following is some technical blahdy-blah notes to myself, ‘cos I always forget this and have to re-knit tension squares, which I do not enjoy:
I’ve knitted the main using three different needle sizes for the three cardigans, because the tension of the design does not match the tension of my chosen yarn exactly.  The Miette recommends 16st x 22rows per 10cm square, while the DBliss Aran tension is 18st x 24rows per 10cm square.  So, my first, green Miette was knitted on size 9 (UK) or 3 3/4mm needles, giving a tension midway between that recommended  for the yarn and the design and is a slightly relaxed fit.  The second, mustard Miette was knitted on size 10 or 3 1/2mm needles, giving the correct tension for the yarn but a tighter tension than the design; and was a closer fit.  This cardigan is knitted on size 8 or 4mm needles, giving me the correct tension for the design and a slightly loose tension for the yarn, and is a more relaxed fit.  I like all of them, the differences do not feel massive.
I definitely prefer moving the bust shaping to the underarm.

Also, each version, I’ve extended the length by 2 pattern repeats, this requires picking up 79 stitches for the front button bands.  Each version I’ve selected size 42, which is technically a size up for me, but I remember from my first go at this pattern that “my” size would be a tad too tight for my tastes… I had to unravel and start over!  It might work to go down a size in the looser tension; would be a risk but maaaaaybe? I might just try it for my red version…  we’ll see.
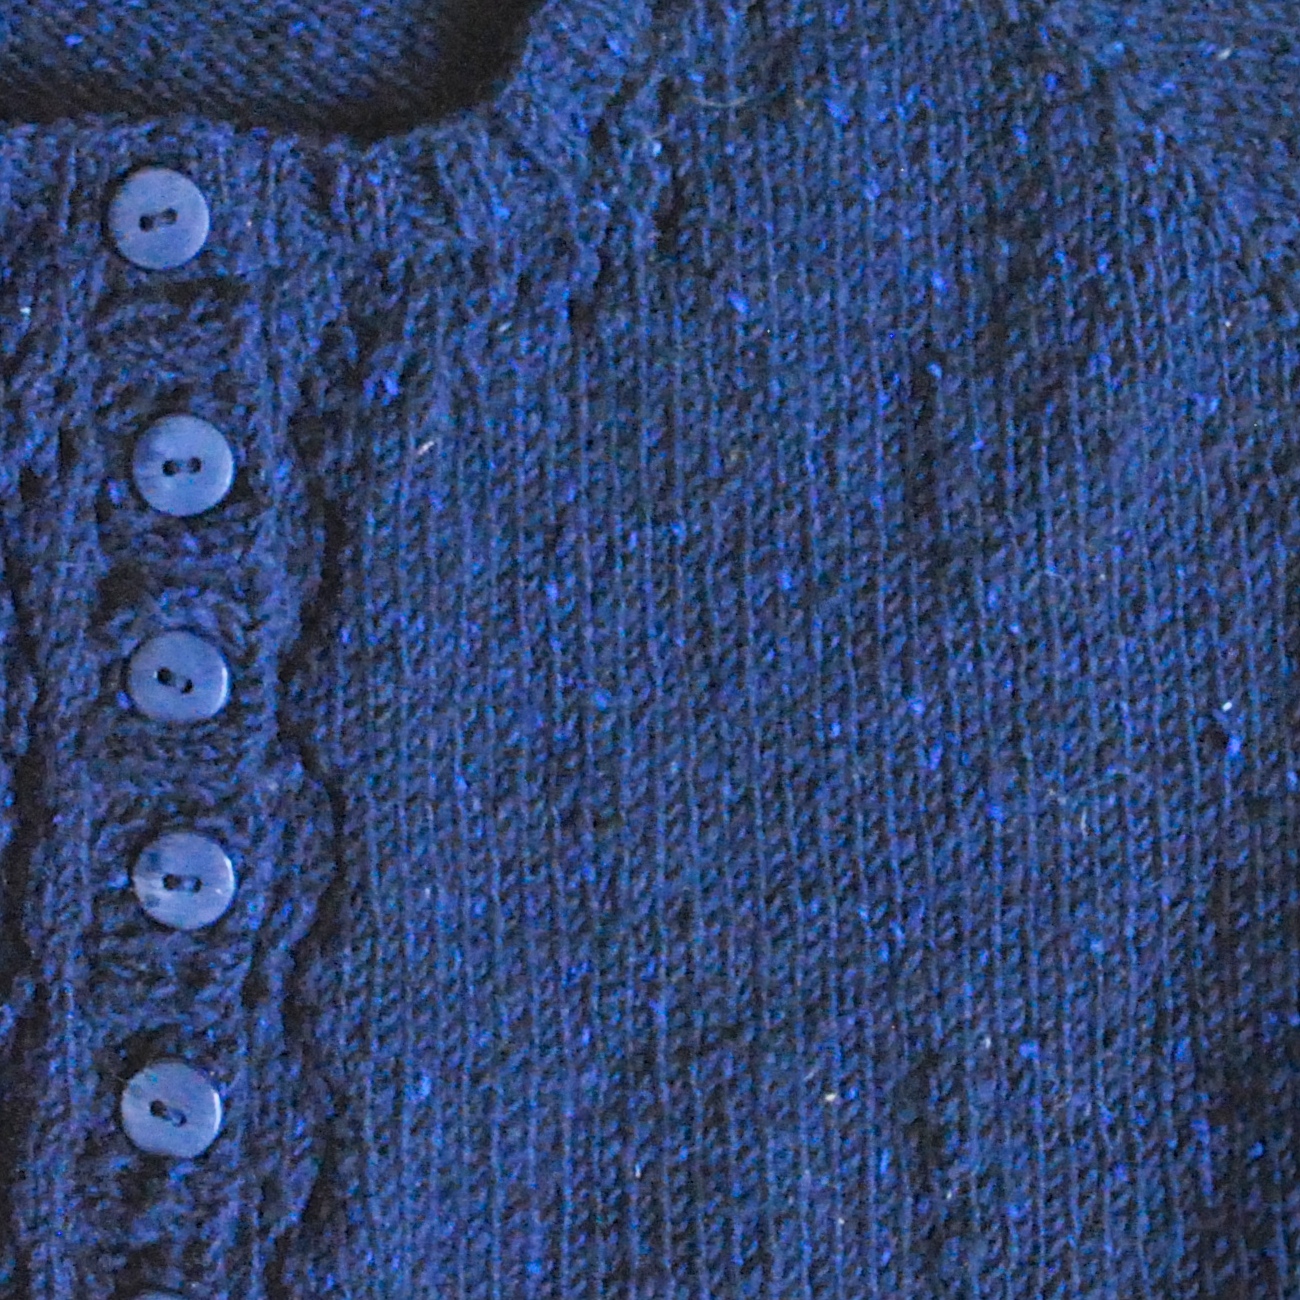
I need 6 balls of the Debbie Bliss Donegal Luxury Tween Aran, and with the two extra pattern repeats 10 buttons.  These 1.5cm, navy blue ones are from Fabulous Fabrics

pinterestmail

snuggly chocolate-y ensemble

True to form, right at the beginning of spring I’ve made a rather wintery ensemble for myself.  Typical!  😀
No, actually Mari from Seamster Patterns contacted me again asking me to take part in the second and last part of the SewIndependent month and as luck would have it Paprika Patterns Jasper sweater dress was one of the patterns available.  I’ve had my eye on this pattern thanks to Megan’s and Sue’s versions.  We’re all Perth girls so how fun would it be if we all met up wearing our matching Jaspers, hehe.  For my Jasper, I decided get some of this lovely chocolate-brown marled knit from KnitWit, which I have also had my eye on for some time but been unable to justify the purchase.  It’s gorgeous stuff.  Soft and springy and slightly fluffy and ever so snuggly.  With yet another little bout of luck, I discovered it was on sale for half price.  The advantages to shopping at the end of the season!  Booyeah!!  *does an almighty air fist pump, although only mentally because the lady in the store would have thought I was bonkers*
I made up the dress version with collar, and left off that buttoned placket thingie.  I was a little doubtful about how the curved-in nature of the skirt would look on my pear-shaped self, and so I cut the pegged portion edge of the pieces from hip level down to flare out straight and slightly A-line, rather than curving inwards.  I think this silhouette is far far better on me.  

I also left off the lower band and simply hand-hemmed the lower edge instead… this gave me a little fabric leftover, and so I decided to use this to make a kind of mini-slip to wear underneath the dress, so it’s like a set.  My “slip” is the simplest affair; comprising a “skirt” cut from the chocolate brown knit attached to a “singlet” cut from cream-coloured poly stretch knit.  I vaguely used the Nettie bodysuit pattern for this bit; cutting it wider and looser, the armholes quite a bit deeper and wider, and gave a random mid-point scoop to the neckline, to get more of a singlet shape at the top.  I finished the armhole and neckline edges using a self-fabric band and hand-hemmed the lower edge of the skirt.

I originally had high-flown ideas of adding a few faux leather details to my ensemble, thanks to a quiet ongoing little love affair with pleather detailing; and so I did the tunic welt pockets in pleather.  Also partly for the extra stability it lends to the welt.  I think they turned out rather well, and aesthetically I LOVE how the shiny smooth pleather contrasts against the fluffy softness of the knit.  

To visually tie the two pieces together, I then proceeded to finish the lower edge of the slip skirt with pleather binding.  I cannot stress enough how hideous this turned out; the pleather was so stiff and structural compared to my soft and super-flowy chocolate knit that it made the hem of the skirt flare stiffly and super-duper-unattractively.  No sooner had I finished it, put it on and laid eyes on it in the mirror than I seized the scissors and cut that bit off; ahem, taking absolutely no pictures to assault the eyes.  Trust me, it was just too awful for words.  So now, the welts are the only lonely bit of pleather appearing anywhere on the ensemble; nowhere else to balance it out. I’m a little disappointed, but think it doesn’t look too ridick.  Maybe a bit.  Anyway, it’s done, so yeah.  There’s no point in getting too upset after the fact.

LOVE this collar.  This colour, too.

Fortunately, I adore it and can see myself wearing it a tonne.  Besides being warm and comfortable and cuddly like wearing a blanket, it’s absolutely my winter style.  I love minis for winter, and I love loose drapey tunic tops, and double-decker love the combination of the two together.  It’s also “my” colour.  Sorry to yammer on about “my” colours, but I’m lately on a bit of a thing about autumnifying my wardrobe, colour-wise.  
Adhering dutifully but very happily to my resolution to be more mindful in my sewing  🙂

Details:
Tunic dress; the Jasper by Paprika Patterns, chocolate brown knit
Slip; Nettie bodysuit modified; chocolate brown knit and cream poly stretch knit
Tights; my own pattern, black poly stretch knit, details here It can possibly be seen from my pictures; these have HAD IT.  I’ve worn these to sags-and-bagsville and back; and desperately need new ones! but with spring here I’m trying to hold off until next year  🙂
Boots; Roberto del Carlo, from Zomp shoes

Funny coindidink; I’ve only just now realised that I mindlessly plucked the Nettie pattern out to eyeball for my slip because I already have this pattern; however it’s actually another one of the patterns on offer in sew indie month!

As mentioned, the pattern is part of the Sewing Indie month.  I received the pattern free in order to help spread the word, but chose it myself, paid for my materials, made it myself and am very happy with the pattern.  Please note that as always, there are no affiliate links on my blog and never will be.
The Paprika Patterns Jasper sweater dress, along with the Nettie bodysuit and eight other patterns, is part of the Indie pattern bundle on sale from Monday 1st September until Thursday 10th September.
As with the first pattern bundle there is a charitable component to the sale, with 20% of pattern sale proceeds to be donated to Women for Women, which helps women dealing with violence, marginalization, and poverty due to war and conflict.

My fellow seamsters participating and making their own version of the patterns are:
pinterestmail

forest green twist top

I’ve made a new top.
This is, as my title oh-so subtly suggests, the twist top from Pattern
Magic; and is my fourth iteration of this top.  First three are here, here and here.
Clearly I love this design. And I’ve often pondered upon how much I would
like to have one in every colour.  Except
that would be excessive and wasteful.  Bad me, for even thinking it.  Bad, extravagant, greedy, covetous me.  I guess one good thing about making everything
yourself is that you are constrained from having an overly huge
wardrobe by your own free time, or lack of it; by having to physically make each and every darn
thing yourself.  I like to pretend to
myself that this factor introduces some carefully considered introspection into
the matter. 
Ha!  We can but hope! 
I bought this length of stable, slightly stretchy, thin-but-warm, forest
green ponte from Potters Textiles, from the $2 remnant bin.  Hmmm, don’t you just HATE when someone brags about how cheap their fabric/pattern/clothing/whatever was?  Yeah, me too. 
Loathe it.
Anyway, it’s the kind of project that you can start and have ready to wear in
about half an hour, flat; even including weaving those bitsy overlocker ends back
in.  Fabric out, pattern down, cut, vroom
through the machines by turn, a few minutes of weaving and neckline-hemming.  Done!
Believe me, I needed something fast and brainlessly easy, as a little bit
of light relief from my 1year1outfit project. 
Honestly, that’s been a far bigger endeavor that I originally
anticipated.  But the good news is that the
second component of my outfit is actually and finally finished!!!  WOOOOOT! 
To be appearing here very soon.  Very
very soon.
In the meantime, this. 
So, in a nutshell…
One of my favourite designs; check.
One of “my” colours; check.
Is it seasonally appropriate… oh bum. 
No
Winter’s practically over and it’s actually getting comfortably warm
around about these here parts.  Oh well!
There’s always next year!  As if I have
any reason at all to complain about the return of warmer weather, no sirree,
not I most definitely do not.  Summer, oo
yeah baby, bring it.  I am so ready!!!
OK I got nothing else!  Tootles!
Details:
Top; the twist top from Pattern Magic, forest green ponte
Jeans; Burda 7863, brown stretch bengaline, details here and my review ofthis pattern here
Socks; handknit by me, details here
Shoes; Francesco Morichetti, from Zomp shoes
pinterestmail

a bit of re-colouration

I’ve just been updating a few bits and bobs in my wardrobe…
when I get bored or dissatisfied with a particular item but it’s still in perfectly good nick or I still kinda like it because of a good shape/style or I put a dangload of effort into finishing it off particularly well or whatever; I will not toss it out.  Instead I ‘avvago at re-vamping it somehow. 
And this often includes dragging out ye olde dyepot and potions, aka dyes, eeeeeeeEEE heheheheheheheeeeee!!  That was an evil witch’s cackle there, just in case my written word did not adequately translate to the spoken word, ahem.

So, revamp-eroonie; DONE. 

Exhibit A; my little yellow cotton corduroy skirt.  Absolutely nothing wrong with it, but I was just getting meh about it.  Plus the clear yellow colour was a bit sharp and not one of “mine”.  Since my khaki dress I have been thinking more about “my” colours and having more of them in my wardrobe.  Sorta de-wintering my wardrobe and autumn-ifying it some more, if you will.
I used iDye in Brown and a tiny touch of the True Red, and got this rather wonderful deep caramel colour, in the top picture.  Hehe, it’s funny; because actually I was aiming for mustard! important moral of the story; you should never ever never dye something that you are so much in love with that you couldn’t bear an unexpected outcome.  Potential dyers, engrave that on your dye pots as it is one of the Commandments of Dyeing.
Anyway, I could not be happier with this super yummy, albeit unexpected, colour.  
Unsurprisingly, the poly satin I used for the lining and bias binding did not take up the dye one tiny little bit.

woa, crack out the sunnies!

Exhibit B; while in the mood for dyeing, I also got out my pale blue, supposedly silk shirt (all original construction details here) and gave it a facelift.  Supposedly? well it was sold as silk, but its mild lack of enthusiasm for taking up the dye speaks to some synthetic content, ahem.  Not that I mind! it’s been a wonderful blouse and I love the shape unconditionally.  Just that it has faded drastically and its colour was now palling on me; or should that more accurately read, appalling on me?  Yeah, probably.
Anyway, it got treated to iDye in True Red.  

Much better!
Now; compare the new colour of the previously same coloured cotton bias binding … that strong red was what I was aiming for, although I like this warm tangerine colour just fine.  I’m just going to enjoy it as this colour for a while; and if I still want the deep true red colour I’ll pick up some red dye suitable for synthetics and give another whirl.  See how we go.

Exhibit C; not a biggie, but I switched the yellow buttons on my forest green Miette cardigan for new deep green ones.  

I think it’s going to be a tonne more mix ‘n’ matchable like this, since previously it pretty much went ONLY with my mustard dress below, or with all-white ensembles.  The yellow buttons were a distraction, I can see that now.  My mistake.  Also, I think the lacework shines a little more than it did before.

So, that’s it!  
In my current sewing news; I’m still struggling away with embroidering my felted wool, for my 1 year 1 outfit ensemble.  Every now and again I have to lay it aside and do something else.  It’s wearing me down a bit but I am certain I am going to love the finished piece and am quite excited to see it all come together.  Ever onward and upwards!

my tutorial on basic dyeing here

pinterestmail

Mississippi Avenue

I’ve made a little sundress for myself  🙂 in very fine, light handkerchief-grade linen from Fabulous Fabrics, deep browny/olive green.  I asked my husband how to describe the colour and he replied immediately “Sherman tank”, haha.  Hmmm!
I’ve been told a zillion million times that I should wear drab colours, but I struggled with them for years.  My teenage self desperately loved pretty feminine colours, hey it was the 80’s; and I thought muddy sombre colours like this were horrible and ugly, like the exact opposite of pretty.  *sigh*  Anyway.  I’ve learnt to embrace couleur de Sherman tank.
I added a little bit of pretty in the form of some cream lace-y motifs appliquéd around the lower hem edge.  I cut the motifs from a quite thickish, lace-y fabric and hand-stitched them on to look kinda random and rambling and lending some semblance of froth and frivolity… I think the lace was maybe from Spotlight originally, but honestly I’ve actually forgotten where it came from exactly.

I sewed all seams throughout as French seams

The pattern is the Mississippi Avenue top/dress by Sew House Seven, a pretty, easy-to-wear little number with a modest V-neckline and skinny ties gathering the shoulders up.  It’s a satisfyingly quick and simple project that goes together easily, and I think it’s all of sweet, cool, casual and flattering.  The very thorough and helpful instructions are aimed at the beginner. 
And it is included in the bundle of patterns to be sold as a set for Sew Indie Month.  
What is Sew Indie Month? do I hear you ask? well it is in September this year and has a charitable component, yes, we all joke about sewing selfishly and this is seamsters trying to give a little bit back!  The lowdown…

  • The idea behind Sew Indie Month is to create a global community sewing event, sort of like a big, online sewing workshop, if you like, while simultaneously supporting small women-owned businesses and raising money for charity.  During the month of September, pattern designers are collaborating on the Sew Independent site to put together blog posts and informative tutorials; and a terrific bonus is a sewalong contest with prizes!   Sew Indie Month is co-ordinated this year by Mari from Seamster Sewing Patterns
  • The pattern bundle is available to buy here, and the sale will run from Monday 3rd August to Wednesday 12th August.
  • 20% of bundle proceeds will be donated to the International Folk Art Alliance, which provides education and exhibition opportunities to folk artists from around the world. Just a few examples of what the International Folk Art Alliance has been able to accomplish by helping artists create stable, year-round livelihoods includes helping shelter women from domestic violence in Ecuador, building a school for children in Pakistan, empowering women in repressive cultures around the world, and feeding villages in Niger.
  • You can check out all the details and information on participating patterns and the pricing options, here; on the Sew Independent site

My fellow participating seamsters who will be making their own lovely and unique creations using one or more of the patterns are:

I also added slanted front pockets to my dress… because, well, pockets.  Where there’s a will there’s a way, mwahaha.  I did these same sort of pockets for my blocky sundress, and it’s an easy feature to add when the front is already in 3-panels like this.  For this reason, my method could also work in a princess seamed dress.  I took a few piccies this time to illustrate how I put them in…

Mark on the pattern piece a slanted line where you want the top of your pocket to sit, and another horizontal line to mark the bottom of the pocket edge.  Instead of cutting the side front as one piece, cut three pieces: 
1. piece at left, upper S (side) front, from the top edge of the pattern piece to the bottom edge of the marked pocket allowance, plus seam allowance,
2. middle piece, pocket; from the top edge of the slanted pocket line to the lower edge of the pocket allowance, plus seam allowances top and bottom.
3. piece at right; lower S front; from the slanted pocket line plus seam allowance, to the lower edge of the pattern piece.  It’s a good idea to add an extra, say, 4-5cm in length to the lower edge to allow for possible boo-boos in seaming, just in case.
Transfer all notches and new marks to all pieces.

Stay stitch the slanted edges, and then stitch the pocket piece to the lower S front piece, right sides together, along that top, slanted edge.  Press seam open, turn out, under stitch inside the pocket.

 Lay lower S front/pocket piece over upper S front piece, aligning notches, pin along side edges.  

Lift aside the lower S front piece and check how well the lower edge of the pocket aligns to the lower edge of the upper S front piece.  If they differ, trim them to match each other.

 Stitch lower edges of pocket and upper S front piece together in a French seam.

 Pin the three layers of upper S front, pocket, lower S front together at side edges, baste.

 Lay the original side front pattern piece over and trim any excess length off the lower edge.  From now on just keep on putting the dress together just as normal.

Voila! slanted front pockets!

btw; please know that, as always, there are no affiliate links on my blog and never will be.  I received the patterns free, for me to make an item to help spread the word, and I chose to use the Mississippi dress pattern 🙂

Details:
Dress; the Mississippi Avenue dress by Sew House Seven; in deep olive linen with cream lace appliqué
Hat; Vogue 8844, cream cotton corduroy, details and my review of this pattern here
Shoes; Bronx, from Zomp shoes

pinterestmail

the difficulty of black lace…

… is in getting it to show up in a picture.  My new skirt looks completely boringly plain in these pictures, which just proves it; the camera does lie!  Actually it has a rather beautiful lace appliquéd tulle overlay.  I guess I just fail at photography.

The appliquéd tulle came from the remnants table at Fabulous Fabrics and is so lovely that I was helpless to resist it when I saw it there.  Then again, I rarely do.  My relationship with the remnants table is somewhat akin to that of a vulture to a carcass, ahem.
Anyway, there’s not much else to say about the skirt except that it is fulfilling a desire for a black lace skirt that I have had for a loooooong time! so it’s kind of funny to me that it’s taken me this long to realise that desire.  I think I’m generally more of a whimsical seamster than a methodical or practical one, although I try very hard to be the latter.
It’s actually a very comfortable skirt.  The appliqued tulle is underlined with a black rayon crepe, a quite heavy and substantial fabric; both fabrics are quite crease-resistant too which also makes it almost… practical? dare I claim that for a lace thing!  🙂  and I lined the skirt with black polyacetate lining fabric.  All fabrics are from Fabulous Fabrics.

I used Vogue 8363, one of my favourite skirt patterns.  I say; “one of the favourites” meaning like top five material, easily.  I’ve just counted and I’ve made eight skirts from it!  not too shabby if I say so myself, not too shabby.  This pattern is a terrific one; with lots of variations and different views.  This skirt is a version that isn’t any one particular view, but I used the pattern pieces that gave me those lovely and very deep, front slanted pockets, an un-pleated one piece front and a back with CB zip.

I aligned the lace motifs to match each other up around the skirt and at the CB seam as best as I could, and used up all of my remnant bar a couple of scraps.  Yay!
I cut the lining using spliced together Vogue 1247, cut longer so it sits just 2.5cm shorter than the skirt.

Details:
Skirt; Vogue 8363 lined, black lace and black rayon crepe, my review of this pattern here
Shirt; Burda 7767 modified, of dk olive linen, details here and my review of this pattern here

Also I have been doing a tiny amount of unselfish sewing… I made a caramel-coloured merino wool top for Cassie, using fabric we bought in Melbourne’s the Fabric Store during our last girly trip away.  I used a pattern that I have custom-fit to Cassie; based upon my own custom-fit Tshirt pattern; itself originally based upon a Burdastyle Tshirt top, the details of my “custom-fitting saga” here.  I thought I had lost my own pattern, which was a pretty heartbreaking state of affairs, but I recently found it again.  I had just stuffed it into the wrong pattern envelope, seems so obvious now but still I could have wept for joy when I discovered it.   I’d been thinking hmmm, really should get onto properly fitting that Tshirt pattern again, but it just seemed insurmountably difficult so I’d kept putting it off.  Plus it’s winter, and too cold for all that, too.
Anyway, I found it!

The Tshirt does look a whole tonne better on an actual person with arms, however its intended person had to suddenly hurry away for an important social engagement and I was too impatient to wait for her to return to perform modelling duties.  It has long sleeves, a scooped neckline finished with a folded band as described in my tutorial here, and with sleeve and hems finished with my twin needle.  There was an awkwardly small piece of merino left over which was too small for anything on its own but too big and too nice a fabric to throw away.  So I cut the ends square and straight and now it is a scarf.
I might borrow the scarf occasionally  😉

pinterestmail

that 70’s show

I dragged this dusty, cobwebby ol’ 70’s skirt from outta some trunk in the attic… hehe, just kidding.
It’s new 🙂
A chocolate pleather, A-line, midi skirt was high on my mental list of things to make for myself this winter and I’d bought all the fabric etc… then I somehow got chooffing along happily, oh yeah went away a coupla times too, then got bogged down in several other, quite involved, longer term projects, and just suddenly realised we are halfway through winter and I still hadn’t made it, ha!  So yesterday I got cracking and whipped it up quick sticks.  Done!
Technically speaking; this is the second thing to go towards fulfilling my vintage pattern pledge to sew up five of my vintage patterns this year.  The pattern is Simplicity 7308, hailing from 1976.  I say “technically”, because this is like the very plainest of plain, classical of classic patterns you could possibly imagine; so… Am I cheating on my vintage pattern pledge by using this?  I feel like maybe the purpose of the pledge is to get you acknowledging some the more obvious and recognisably vintage styles, in which case this one is a cop-out!  eeeep sorry!  I promise that some of my other vintage pattern plans are definitely of the more dated variety!  Maybe I’ll make up an extra vintage pattern, to make up for it  🙂

Back in its day, this could likely have been made up in beige, or tan suede, maybe pale blue denim or possibly a large scale plaid on the bias.  In my memories my Mum had a blue denim skirt just like those… Can you just imagine?  Instead I’ve used a very NOW fabric; a deep chocolate fake leather.   At the first stirrings of winter this year, the fashion column in our local paper advised all who cared that leather and leather details were the absolute dernier cri for Perth fashionistas.  My brain seems to have latched on the idea, since several of my newer wardrobe additions have gone this route; my moto jacket, my cow skirt, and another skirt I’ve ig’ed but is still in the works.
Clearly I’m a lemming.

failed twirl.  gawd knows why I even attempt this nonsense.  at least it shows the skirt in motion…

Nuts and Bolts: a plain A-line, midi-length skirt, side seams and a CB zip, pretty timeless and possibly very boring.  I eliminated the CF seam since I have an irrational grudge against them in a skirt, placing the CF on a fold.  The width of my fabric also allowed me to widen the flare by just a touch, both front and back.
Fake leather is from Spotlight, all other materials from Fabulous Fabrics.  Lined with chocolate polyacetate lining fabric and with a waistband of black silk dupion leftover from my cow skirt.

Details:
Skirt; Simplicity 7308 from 1976, chocolate pleather
Bodysuit; the Nettie by Closet Case patterns, black stretch, details here
Tights (not seen); own pattern, orange stretch, details here
Scarf; own pattern ivory wool, details here
Boots; Sempre di, from Zomp shoes

pinterestmail

alpaca cardigan; a 100% local product

So, at the beginning of the year I mentioned that I was taking part in one year one outfit, the brain child of Nicki of this is moonlight; the challenge being that we participants have one year in which to make an outfit for ourselves that is 100% locally grown or sourced.
And this cardigan is my first thing! the first component of my outfit finally finished.  Phew!

Earlier in the year, Nicki drove Sue of fadanista and me to Toodyay, where the three of us visited the Fibre of the Gods, the alpaca farm owned and run by Hazel and Michael McKone.  The farm is also home to a tiny and thriving wool mill; processing fleece into yarn for anyone who has some and wants it done; AND very importantly for the purpose of our project, also processes and spins its own alpaca yarn, shorn from their very own animals!   The lovely Hazel took us into the girls’ paddock and introduced us … below are some of the hembras.  That’s the term for a female alpaca, fyi.  Also did you know that a male alpaca is known as a macho?!  We saw one macho, out on his lonely lonesome in a separate paddock, all manly-like and aloof, looking down on us girls.

No, they’re not checking out the macho…  they’re giving the evil eye to the farm’s cat!  Alpacas are very wary of cats; and dogs too, according to my friend J, who has a small herd of her own. They will protect your sheep from vermin like foxes, and are likely to turn on a dog and kick him out of a paddock if they don’t know him well.

Hazel kindly showed us the mill equipment and explained how the entire operation is run entirely on their farm; from the animal right through to the finished yarn.  And then we obviously shopped in their tiny store, cleaning out a, erm, sizeably large chunk of their eponymous stock, eep! They do stock some lovely coloured yarns and a few knitted and felted products for sale, however we were all of us after their own natural, un-dyed yarns for the purposes of our 100% homegrown project  🙂

Sue and Nicki also have written about our day out on their individual blogs too.

Anyway; my cardigan!

I used natural or undyed alpaca yarn from “white” alpacas, which when viewed objectively and ex situ is actually not even vaguely white at all really! but this lovely, very pale caramel colour.  So how apt that I should choose a pattern called “Caramel”!  
The Caramel blanket-style cardigan or jacket is designed by Isabell Kraemer, and is freeeee! available to download here on Ravelry.  Basically; I put the search words “free” “cardigan” “8ply” into the Ravelry search engine and this came up… I thought it a rather nice and elegant shape.    Well, “shape”; of course “blanket style” is basically another way of saying “giant rectangle with sleeves”… anyway I love how it looks loose with the fronts gently draping upon themselves, the points hanging down longer than the back.
My Caramel is knitted pretty much to the pattern; with just a few minor variations. Obviously mine has no real stripes.  My sleeves and body are much longer.  Also, I left off the the decorative? purl side seam stitching and the ribbing off the sleeves and lower edge.  In the process of knitting I decided I really preferred the streamlined look with slight curl-up of the ends that you get with no ribbing.  I had initially finished a sleeve lower edge with ribbing, to trial it; but then I unravelled that bit and redid the edges sans ribbing. 
Plus; and herein is a huge advantage of a top-down knitted design, I just kept on knitting knitting knitting until I had used up all my wool, then cast off that lower edge.  It’s a lot easier to do that if you know you don’t have to allow for ribbing.
Result; barely no leftovers!  Win!

One thing about the Fibre of the Gods yarn that I really really LOVE! is how Hazel and Michael have labelled the balls with the name of the animal along with a little picture of them.  So I know that my alpaca yarn came from Bandit, Coral and Pearl. 
Hey, guys! Thanks so much for the shirts off your backs… figuratively speaking.  😉

I did notice some slight variation in the shade of the yarn, due to the slight variations in the three alpacas’ different natural colourings.  I find these subtle “stripes” quite charming.
 subtle stripes are very subtle

I also made a little wooden “pin” to hold the cardigan closed if it’s cold; by sanding down a nice and straight, little stick, found on my morning walk.  It’s local obviously, so it too fits in with my one year one outfit challenge!

I can’t decide if I prefer my cardigan open or closed; I think I like it both ways equally!

Details:
Cardigan; hand-knitted by me, the Caramel pattern by Isabell Kraemer, natural alpaca yarn from Fibre of the Gods mill in Toodyay.
Tshirt; own pattern, blue jersey over dyed black, details here
Skirt; own pattern, charcoal ponte, details here
Tights; own pattern, black stretch poly, details here
Socks; not seen, hand-knit by me from Noro wool yarn, details here

pinterestmail
Switch to mobile version
↓