Tag Archives: Own Design

the Perth dress pattern, new size range

This much-requested new pattern has felt like a long time coming…  I had a lot of requests from ladies wanting our Perth dress/blouse pattern to be made for a larger size range… so ta da!  this new version is for sizes 46-54.    It’s now available here  in our etsy shop; CarolynandCassie, as a pdf and also a paper version in limited numbers.

I apologise for the delay; we’ve had to contend with a computer issue that has been pretty devastating, some extremely costly software that we desperately needed in order to function has been practically obliterated, it’s been so difficult… All I can say is thank God for Craig who eventually managed to work it out.

Anyway.  No one wants to hear about computer blurb, yeah?  On to the pattern!

ye all-important size info….

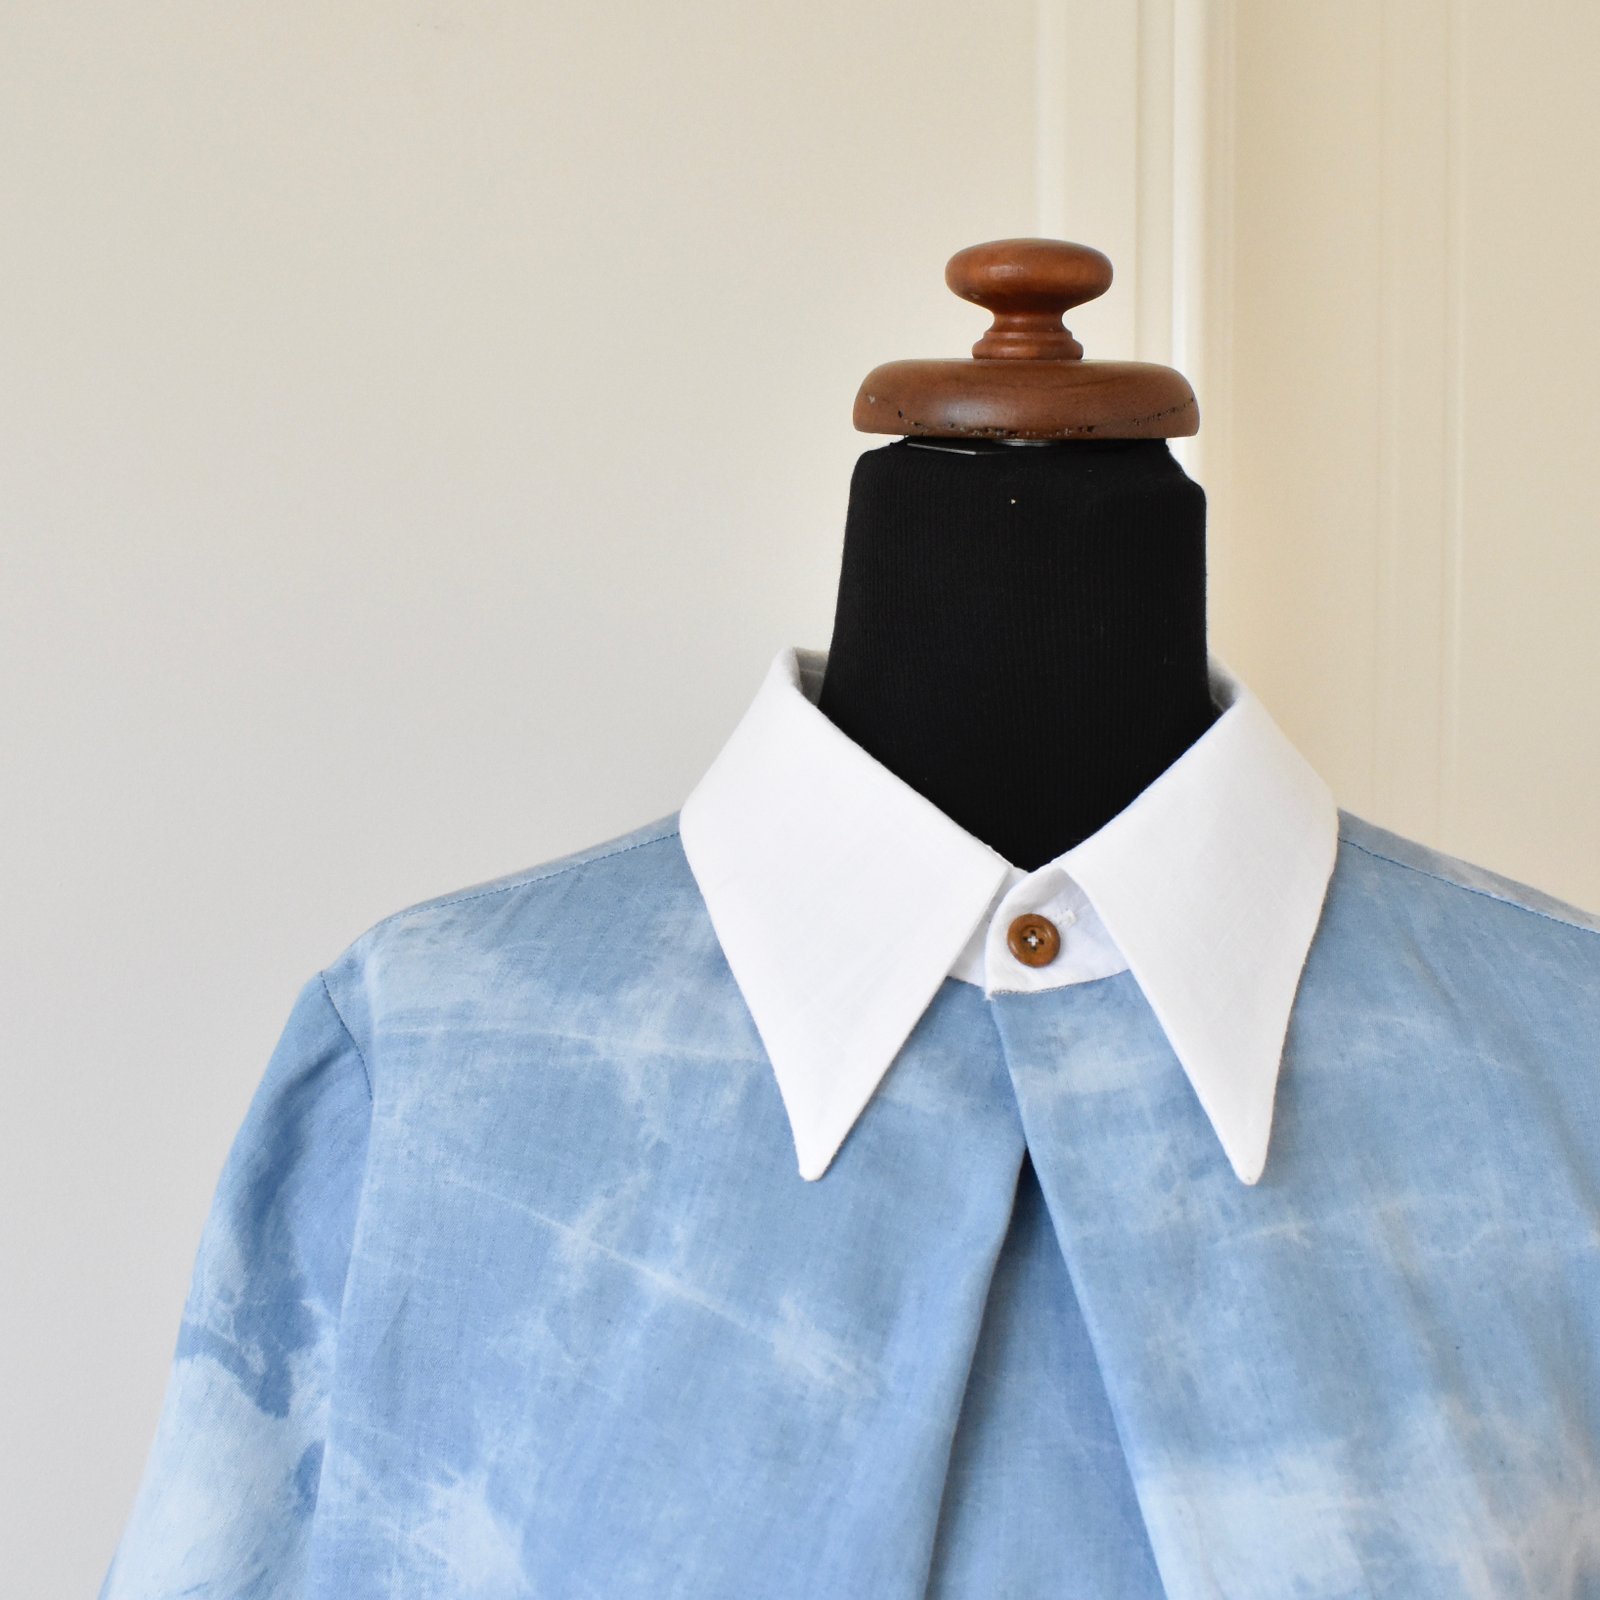
Sam’s girlfriend L is in our new size range so I asked her if she would kindly model for us.  I’m so happy she agreed because she is super cute! plus now I had a good reason to make something for her, hehe…  The dress I made for her is in a rather beautiful cloudy-sky print, cotton drill from Spotlight, with a white contrasting collar.  I absolutely adore this on her!

My favourite part though is the crisp white collar; just love this look! the button is a little wooden one from my stash

Thanks so much L; for being such a totally gorgeous model!!

I also made two blouse versions for my sister in law, Sandi.  This first version was initially a bit big on her, which totally did my head in – what did I do?!!! – but eventually I worked out it was all due to a very stupid mistake which I am too darn annoyed and exhausted to even talk about how this happened, suffice to say that one should ALWAYS check the test square BEFORE leaving the copy shop.   I know I personally will never ever neglect this ever again!!  #superannoying

I took it apart and re-made it to fit properly, just because I’m a glutton for punishment well really, I cannot bear to waste perfectly good fabric!  And also, Sandi really likes it  🙂 #allswellthatendswell  which is why I went to the effort of re-fitting properly.  I cannot say how much I LOVE an appreciative recipient! makes it all worthwhile in the end, yeah?   The fabric is a really very nice charcoal and white striped linen, that I ?think? I bought in either Tessuti’s or the Fabric Store in Melbourne, during one of our visits there.  The only giveaway that it was initially made to a larger scale is the the overly long collar points, which I just left as they were.

The blue and white striped version, which was correct all the way from go to whoa, yay!! is a rather lovely shirting cotton from Homecraft Textiles.

Yes! Homecraft Textiles actually stocks a really nice little range of crisp shirting cottons… who knew?! certainly not me, since they were hidden way back at the very back of the store behind the vast wasteland of lurid polyester satins and “chiffons” and fleeces that takes up like 90% of that store.  One day I was hanging around in there and discovered it.  EUREKA!!!

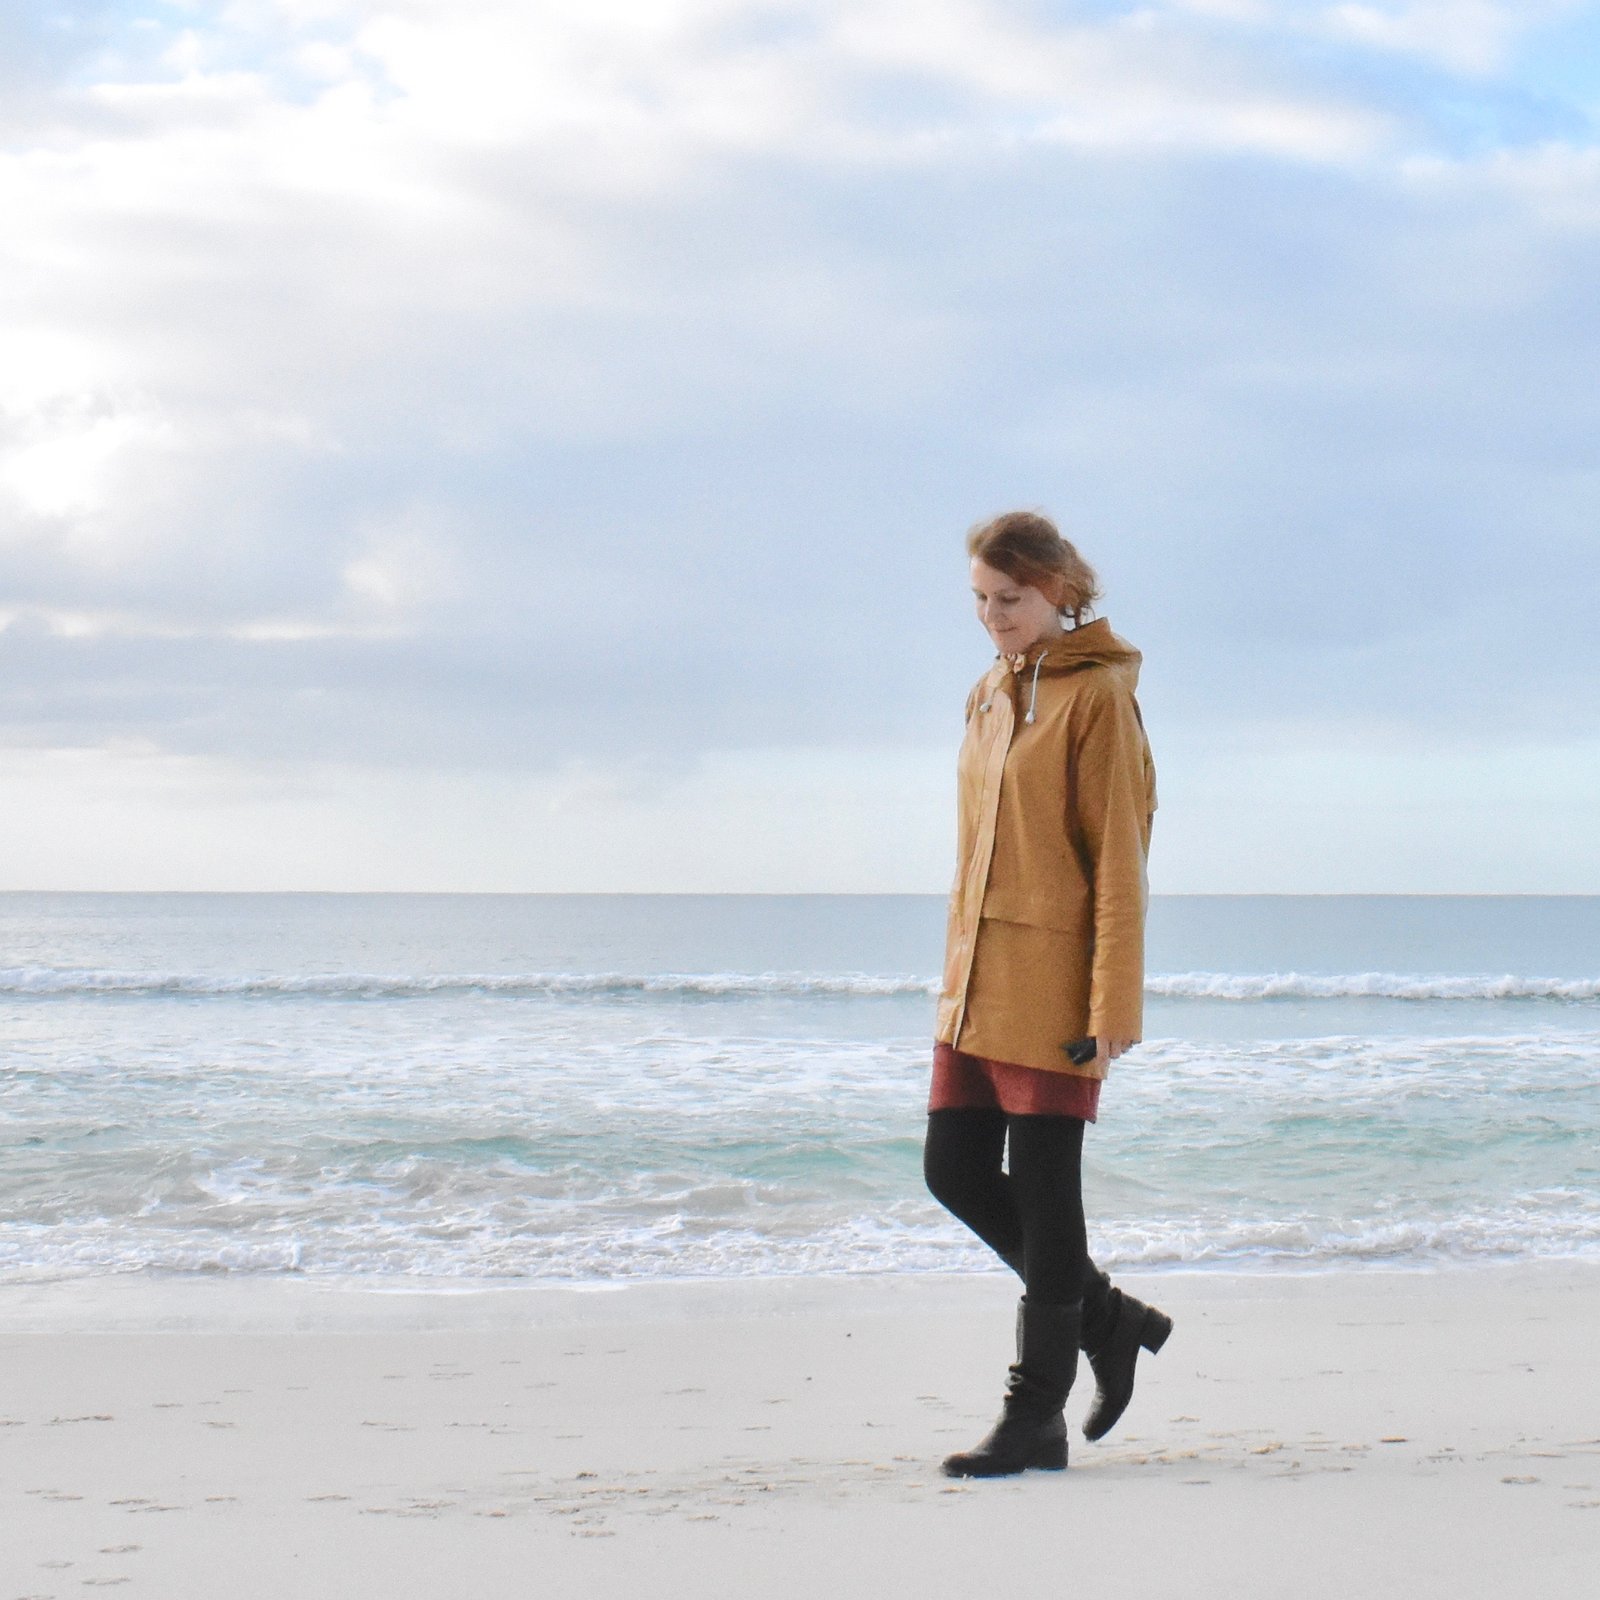
Oh! Something else I made for Sandi recently, which is completely unrelated to our Perth dress pattern so if this seems a little random and out-of-the-blue, sorry! but this seems like a good a time as any to lob it into Le Blog… I promised to make a custom-fit top pattern for Sandi, for her birthday, she put in a request after I had done the same for Mum, a few birthdays back.  So I made this one…  The shorter, open front T-shirt over a longer one underneath in a contrasting colour is a design modelled to a favourite top she has already.  We chose and bought the fabric together from Fabulous Fabrics.   I’m kicking myself I forgot to take a picture of her wearing it, because she looks so lovely in these moody pinks and blues.  AND she professes herself to really LOVE this one too. This just makes me so happy!  See what I mean about a grateful recipient?

pinterestmail

Ms Winter

O hello, dahlings!

This is Ms Winter.   So very pleased to meet you!

Her first name?  well, what is in a name?  Is a name, “just a name”, or does it mean something?  We all know someone who makes us think, “well she certainly doesn’t look like a “Carolyn”, I’ve always thought she looks just like a ____  “(fill in the blank)  When I was making this young lady, I did not intend to give her a name myself, in fact I purposely tried to avoid thinking of one.  Howeeeeeever, the same as when I made my Sally doll, I couldn’t help it but a name did pop into my head in those quiet zen moments as I was working on her.  So, in that respect, she actually does have a name; a quiet maker-born name… but first things first, let me start at the beginning.

I really enjoyed making my first doll Sally, which is why I decided to make this other… she is quite similar but actually quite different too in many little but significant ways.  I used the patterns in “the Making of a Rag Doll” by Jess Brown for Sally; whereas I drew up my own new patterns for this girl and for all her clothes.  The new girl is taller, has a smaller head and is quite the lanky skinny-minnie compared to the pear-shaped Sally.

She has pale skin, blue eyes and a thick long mane of charcoal-black merino hair… technically “beluga” hair, actually the wool leftover from these hand-knitted gloves, as well as from the heels and toes for nearly all my hand-knitted socks.  Just like Sally, her hair fully covers her scalp and can be styled a little.

I started out thinking of her as a Winter girl, thus her colouring; and was just going to make the above winter outfit for her… black merino tights,  a black and white striped sweater dress (leftover from this little top) and a knitted beanie (leftovers from these arm warmers)  The pattern for the beanie is adapted from that free one from the tiny sparks website, designed for preemie babies.  I’ve previously used it when I made a bunch of little preemie outfits.  And I added a pompom.

But of course, the minute I’d finished her winter outfit I couldn’t resist making a summer outfit for her too;  an elegant and ladylike wrap dress – le dernier-cris!! – in a swishy, prettily floral rayon.

Having two outfits made me realise, of course she was going to be getting undressed every now and then…. which can only mean one thing; underwear.  Even dolls deserve pretty underthings! so I made a little pair of lace boy-leg knickers for her too.  I embroidered a tiny rosebud with flanking leaves on the front,  just because.

And then I thought… all these very casual clothes: what if this glamorous young lady wants to sashay out after dark?  Every girl needs a chic little sparkly number for a special occasion, yes?  So I whipped up a hot-pink, sequinned, raglan sleeved sheath; in a mini-length in order to show off her enviably long slim legs; and for a finishing touch, added a matching jewelled necklace to nestle at that alabaster throat.  Oo lala!

But, all these clothes? How is a girl to get from A to B with all this lot?  Not to worry! she has a lovely cherry red duffle bag with a black strap to sling over her shoulder, as she dashes through traffic twixt office and taxi, taxi and theatre.  Just like all the cool girls.

Just a note to be real here; the duffle is actually empty in the below picture… she has a tendency to topple over when it’s packed full with her wardrobe!

Oh, her name?  Well, that’s for me to know and for you to find out!  Anyone who likes to “pin” will be able to find her name easily enough… !  There now, that’s a clue!

This is the first girl in a small seasonal set that I am planning to make, and sell in our shop.

Later edit; I made little raspberry coloured drawstring carry bag, with an inset tulle window so that she can see out… this can store her and all her stuff for when she’s not out and about  🙂

pinterestmail

a mustard raincoat, oh and a skirt too

Hello!  I’ve made a new raincoat!

So, I’ve been wearing my pale pink Kelly anorak raincoat, made from a shower curtain, for several years now, it was undoubtedly my most worn garment of last year by a fair dinkum mile!  and it’s been such a trooper.  I love it so much, still!  However it is looking a wee bit shabby now… so I’ve been toying with the idea of a new raincoat for little while.  Getting nice waterproof fabric is quite a challenge in Perth, you come across it so rarely and I was wondering if I’d have to brave the scary gamble that is Buying Off the Internet.  Then I happened to be browsing in Homecraft Textiles during their yearly 50% off sale, and unearthed this gorgeously mustard-coloured waterproof fabric.  The colour was particularly exciting.  Something that actually suits me? that’s not black, or navy?!!!   Take my money!!!

Having said that… it’s not the most wonderful raincoat fabric in the world and I had struggles APLENTY  but more on that later.

Patterns!!  I loved the Kelly anorak pattern, and it did work really well for me as a raincoat, however I have this maybe erroneous belief that a raglan sleeve is better suited in a raincoat… I think that a rounded armscye seam could lend itself to a higher chance of leakage.  I could be totally wrong there though, but I just think it anyway.  I’ve been looking out for a good, raglan sleeved jacket pattern that would lend itself to being a good raincoat, but to no avail.  So I made my own pattern.  My previous, blue, raincoat was a pattern I’d worked out for myself; inspired by a cheapie old RTW one that I’d bought for Tim when he was a young ‘un, and which I’d inherited down the track as he grew out of it.  I devised some rather unusual pockets for it, and actually totally loved how they worked out.  I dug out the pattern, made the modifications to bring it into line with the shape I wanted for my new raincoat.  Everyone’s heard of the famous FBA… well I have no use for a full bust adjustment, but in a raincoat I could definitely use a FPA.  What is that? a Full Ponytail Adjustment, of course!!  I have pretty much never had a raincoat, rtw or me-made, with a hood that accommodated a ponytail comfortably.  The hood is always pulling back off your head and exposing your forehead, which is annoying.  I’m happy report that this hood is so far perfect!

I’d originally bought some soft tulle to line the raincoat.  I’d managed to get some soft netting to line my first, blue raincoat and it worked a treat, and I wanted something similar for this one.  But the tulle was horrible; just not soft enough and too scratchy against my sensitive snowflake skin after all, so I’d ended up ripping it out.  The raincoat is actually fine without a lining, because the inside of the mustard shell is a rather nice, soft woven stuff.

the white sports fabric seen in the pic is a ventilation panel, hidden underneath the upper back flap

The outside is laminated, actually the fabric could best be described as a lightweight, thinly laminated, woven cotton.  The plastic laminate was obviously downright hideous to sew.  For one thing, it had quite a sticky waxy coating on the laminate, which gummed up the needles, and the eye of the needle, making re-threading the needle a freakin’ NIGHTMARE.  I wiped the laminated surface with a lightly soapy solution before sewing, which did help a tiny bit, and occasionally wiped down the needle too, but it was still pretty bad.  When it came to top-stitching, well there was absolutely no way the laminated side up was going to move underneath the foot at all.  I cut strips of tissue paper to stitch over, and tore them away afterwards; fiddly, but not a difficult thing to do (above).

seam sealing, also a view of the fabric’s wrong side

Sealing the seams; I used a no-name seam sealer from BCF, a local boating camping and fishing store.  It’s supposed to be used for tents and sails I think, but it works beautifully for raincoats too!  I used a cheapie old paintbrush to work it into the stitch-holes, and seal everything thoroughly.  Since then, it’s been out in three very heavy downpours, and I’m happy to say has stood up to the task beautifully!  All the traumas, and it’s been worth it!  It’s early days, but I think I’ve found my new favourite wardrobe item!

Want to read all my tips for making a raincoat?  They can all be found in my original raincoat making post, here.

Oh, and I made a new little skirt too,  but it’s not nearly so exciting.   Well, I had a small piece of coffee-coloured, wide-wale cotton corduroy, leftover from when I made this dress, and when I was dyeing the fabric for my Sherlock Holmes jacket I’d also tossed in the coffee-coloured corduroy.  And it came out a nice shade of golden-mustard.  So I managed to squeeze out this little skirt.  It’s not made up to any real pattern really, I basically put an invisible zip at centre back, held the front and back up to myself and pinned the side seams and where I wanted darts.  Pretty lazy genius, huh?  It was a very small piece of fabric, and the resulting skirt was too short for a hem.  I edged the bottom edge with a chocolate linen bias-cut strip to finish, and the skirt is lined with pale golden polyacetate lining fabric, itself also leftover from something else, can’t remember what.

And that’s it… until next time!

Later edit: this skirt now has pockets!

Details:

Raincoat; my own pattern, made from thin, plastic-laminated cotton
Skirt; my own design, dyed cotton corduroy
Bobbly top (just above); Burdastyle 04/2014;111, details here
Tights; made by me, details here and my tute for making your own custom-fit tights pattern is here
Boots; Roberto del Carlo, from Zomp boutique

pinterestmail

scraps cardigan

A couple of years ago, I went down to help Mum clean out her “doing room”, the obvious outcome of such an exercise being that I then took home an embarrassingly huge amount of fabric and yarn supplies to add to my own stash…. we did manage to throw some stuff out!  Not much though!!

This is just the wool.  All scraps and leftovers  …. scary, huh?

There’s no rhyme nor reason to the colours or thicknesses of wool there, it’s just a completely random hodge-lodge of odds and sods and bits and bobs.   Hmmm, well you know me…. CHALLENGE ACCEPTED!!!

See, I reasoned there had to be at least ONE cardi in there.. somewhere…! it just had too be found!  So I selected a bobbly, chocolate yarn and just cast on…

And I found it! a cardigan, I mean  🙂

I picked out a mostly autumnal colour-palette of warm golden mustards, greens and browns though there is a pretty solid presence of randomly thrown in purples, greys, orange, chartreuse, raspberry and pink too.  Some of the yarns are tapestry wool, some are real knitting wool.  Around all edges is a border of the same, bobbly chocolate yarn; which I’m pretty sure that Granny used to knit a set of three matching jumpers for my brothers and me when were all quite little…

Apart from the crazy mix of wool, it’s a pretty basic stocking stitch cardigan with a rib border along all the edges.  I made-up my own pattern, loosely inspired by the free Miette pattern in that it is cast on at the neckline then I increased stitches at four places to create raglan sleeves; all knit in one piece, and with a single wooden button closure at the neckline.  With a bit of careful measuring and halving and rationing out of yarn I made sure the two sleeves are reasonably identical to each other, a small modicum of order and method! but otherwise the colours in the body are pretty random.

knitting under the strict eye of my supervisor…

So, yay! for what is basically a freebie!!  It’s kinda crazy but I’m very happy with how it turned out.

I did sort of write down a pattern, but it’s in such extreme shorthand that even I can barely work out what I did now!  Sometime, when I’m feeling super enthusiastic, I might even have a good look at my notes and transcribe them into something resembling a pattern.  Until then…!

Details:

Cardigan; my own design
Trousers; the Closet Case patterns Sasha trousers, grey stretchy stuff, details here
Tee; Closet Case patterns Nettie, details here
Scarf (on the rocks); knitted by me, details here
Socks; knitted by me, details here
Boots; Francesco Morichetti, from Zomp shoes


I’m wearing it today too! with the same Sasha trousers, my grey Vogue 1152 dress and my new kicks from Trenery 🙂

So, nothing to do with knitting or what I’m wearing, but I was cleaning out my phone, and found this picture of some apples I bought a couple of weeks ago… how cute are these?? they called them Mothers Day apples at the grocer.  I bought some for myself since my own mother is away at present 😉

pinterestmail

coupla delicious merino tees…

So, every now and then I tell myself that I’m not going to make any more winter tees since I have quite a nice little collection, really.  And I think I really should be making do with less; wearing what I have, more.  I tell this to myself quite firmly.  But then also every now and then the fashion-loving side of me is dreaming up some outfit and identifies a few colour gaps, and thinks, if only I had a mustard tee? or a nice navy blue…?  And that fashion-loving side can be a terribly convincing wench, especially when I’m standing in the Fabric Store in Melbourne, with Mum and Cassie, fingering the diviiiiiiine merino collection for which the Fabric Store is justifiably famous.  On our last trip over, suitably enabled, I bought a few pieces.  There may be a few other colours that came home with me and are still lurking in Le stash, too…

If I’m allowed to toot my own horn for a bit, I really feel like I’m nailing the tee-construction front at last, which is nice.  I have my tried and true pattern, and my technique is pretty solid now.  My tried and true pattern? well, my paper pattern was originally the Nettie, but I’ve sliced off here and added on there; and generally butchered it so much that literally nothing of the original remains.  Interestingly, I originally used to use a Burda pattern for my tried and true Tshirt pattern, and heavily modified that too.  Then I mislaid the Burda, and started using the Nettie instead.  Then, at one point I found my old Burda pattern again, yay!!  So, of course I had to overlay them, just to see.  And hilariously found I’d modified these two, completely different patterns to be basically the same, final pattern, in the end.  Hahaha.

 blue tee has a wider neckline and lower scoop than the gold one

I’m just laying my construction out here in the interests of documenting my “sewing journey” – ha! – just because this, my current go-to method for making a plain tee nowadays, is one which has been working pretty well for me.

Seams: first I stitch a seam using a medium-long straight stitch, and stretching the fabric slightly as I go.  This is partly a basting step, really.  Then I go over it with my overlocker, which is both the “finishing bit” and also a reinforcement of the first stitching.

Order of construction; shoulder seams first, and once they’re overlocked I go over and top-stitch the seam allowances down to the back, about 5mm from the join.  Then I put in the sleeve caps (no topstitching) and press the seam allowances towards the sleeve.  Then stitch the side seams in total, from the bottom hemline right along to the wrist edge of the sleeves.  Next step is to measure the neckline… sometimes I cut a low scoop neck, sometimes I leave it a bit higher, depends on my mood at the moment … and cut a strip for the neckline, 95% of the length of the neckline, plus 2cm for the joining seam; width; I generally like about 4cm, resulting in about a 1cm finished width.  Stitch it in a loop and insert it, as per this tute.  I then go and back edge only! top-stitch the seam allowance of the strip down to back edge of the tee about 2mm, or quite close to the join, to stabilise and strengthen this area and help prevent it from stretching out.

The sleeve edges and hemline edges; variously, I like to either add a strip, of whatever width takes my fancy at the time, or to fold the edge under in a traditional hem and stitch it using a twin needle.    I’ll either overlock the edge and simply top-stitch it with the twin-needle, leaving the overlocking showing inside; or do the double fold and baste first before twin-needling if I can be bothered, which is not so often.  In the case of my mustard tee, this time I actually could be bothered.  If doing the strip method; it can be cut EITHER to 95% the length of the edge for a “pulled-in”, sorta sporty look, or the same length as the edge for a smoother, more sophisticated look (I think)  For my gold-y mustard tee, I did a strip edging (same length) for the sleeves, and the twin needle finish for the hemline; while the navy blue tee has a strip edging (again, same length) for both the sleeves and the hemline.

It’s probably hard to tell, but I used the navy blue fabric inside out, because it was a little more intense in colour and duller on the wrong side, which I preferred.  The right side of this merino knit is a touch lighter and shinier.  For this reason I kinda wish I’d used the wrong side out for the mustard tee, too.  Oh well, next time!

I’m wearing the mustard tee/charcoal outfit today, in fact, right now, because basically I finished it and HAD to wear it straight away!  THIS COLOUR IS TOO TOO BEAUTIFUL, OUI????  The navy blue tee/red skirt/tartan scarf outfit above was put together just for experimental styling purposes, and to model it for this post; but I adore that one too so I think I’ll be wearing that tomorrow  🙂


Details:

Tees; kinda Closet Case pattern Nettie, kinda my own design; fine merino knit
Skirts; both the Paprika patterns Jade skirt, details of red one above here, charcoal one below here
Tartan scarf, above; made by me, details here
Coat, below; McCalls 5525, charcoal wool, details here
Tights; my own design, black polyester stretch, details here and my tute for making your own custom fit tights pattern is here
Boots; Roberto del Carlo, from Zomp shoes

also, on a completely different, not-even-sewing related, random note; I was outside by the clothesline with Bessie, taking pictures of her wearing my new tees, and noticed these teeny. tiny, weeny little mushrooms growing in the seat of the jarrah chair I keep by the clothesline, to put my laundry basket on.  How cute is that??  I guess we have been getting a lot of rain lately!!

SaveSave

SaveSave

pinterestmail

a chattering of cockatoos

‘Ello, cocky!

First things first, I have some very exciting news! For one month starting now, Spoonflower are offering a 10% discount on purchasers of ANY Spoonflower fabric by using the code “carolyn10” at checkout.  Pretty awesome, huh?!  I’m beyond thrilled to be able to pass on such a cool offer to anyone who reads this blog!

Now, if there’s anyone still left reading who hasn’t raced off already to scroll through the millionty-and-one gorgeous prints on offer over there….  my new outfit; and how gorgeous is this particularly amaaaazing print, huh?

my PS tute for making your photos coloured/B&W like this is here

Fabric: cotton sateen, the gorgeous print designed by su_g on Spoonflower. I was contacted recently by Allie, of Spoonflower who asked me if I would like to be a part of their roundup of “makers of Australia”… would I?! well of course I was totally honoured to be invited! and immediately raced over to Spoonflower to check out the Aussie offerings, and discovered there were SO MANY really lovely designs, it was super hard to choose just one… however I just kept coming back to this one and in the end couldn’t resist its humour, its artistry, and of course its Aussie tongue-in-cheekiness.

 The Andy Warhol-inspired portrait grid of the humble cocky, designed by by su_g on Spoonflower  caught my eye and made me laugh straight away; subtly Aussie, artistic, and witty with a bonus irreverent swipe at the serious art world on the side! So fun and actually it’s rather fabulous too, yes? those lovely bright beautiful colours, I knew whatever I made with it I just couldn’t go wrong! but ultimately decided its amaaaazing eye-catchiness would be the best set off by the most basic of simple shapes, a plain little pencil skirt, and rather featureless top… yes all very plain, all the better to perfectly showcase that chatteringly gorgeous print!

So, did you know that the the collective noun for cockatoos is a chattering?  other acceptables are a clattering, a cluttering, a crackle, and last and least excitingly, a family….  I like chattering, personally  😉 and did you also know the term for a group of seamstresses is a “scolding” haha!  Hilarious!!  NOT how we like to think of ourselves, usually!  Unfortunately there isn’t one for bloggers, as yet; but writers have a “worship of writers”… which is weird, no?!  But I digress…  #yetagain

oh, I also added two new pairs of black tights to my current stable … boring? yes… most worn things in my winter wardrobe? also yes…  I use black polyester stretch from Spotlight, the pattern is self-drafted.  My tute for how to make your own pattern for tights is here

Patterns: the top is pattern 4, the epaulette top, sans the epaulettes; from the Japanese pattern book “she has a Mannish style” by Yuko Takada… I’ve made this top up five times previously so obviously I love it!! here, here, here, this one for Cassie and lastly here. The skirt; so I keep calling this Vogue 1247 but really I’ve adapted and fine-tuned to the point where it barely has any of its original lines so I feel a bit of a fraud describing it thus. It’s basically just a very plain, darted pencil skirt with a straight waistband and central back zip.

Thoughts… so it does look quite a simple project… deceptively so! she declares with a dramatic twirl of her moustache!!   Just kidding, it really was; though I ended up deciding to take the annoying, time-consuming, but ultimately necessary step of tracing full size copies of all my pattern pieces; both sleeves and a full size front skirt piece, both back skirt pieces, and front and back blouse pieces… why? TO FACILITATE THE ALL IMPORTANT PATTERN MATCHING TETRIS, OF COURSE!!!  Given the size of those cockatoo motifs, which are actually quite large, well it took a little bit of doing, that’s all I can say…

My plan, in a nutshell; the back has a white dividing line down the centre back of both top and skirt; I knew it would be basically impossible to pattern match around the zip any other way; and then the front of both skirt and top has the opposite, a panel of cockatoos centrally aligned down the centre front of both top and skirt. Little bit of a difference twixt front and back, not a very obvious one…

I also carefully arranged the pieces so there would be a full cockatoo square at the lower hem of both skirt and top… I didn’t want for a row of cockatoos to be chopped in half! Same with the sleeves, and I also managed to arrange the sleeves so my favourite two cocky-portraits were the placed centrally on each sleeve.  Obviously I also wanted for the colours to be somewhat “random” and not have an obvious double-up between top and skirt, or either side of the skirt back… It was actually pretty fortuitous than I managed to get all this just how I wanted… super lucky actually… there lots of re-arranging of pattern pieces and sighing and brow-furrowing and even a short period of time when I thought I’d have to order more fabric in order to not completely stuff up *wipes sweat from brow * very fortunately I eventually got the layout I wanted!!

Hehe, I realize now that was a rather looooooong nutshell! with probably a lot of introspective agonising that makes no sense at all, but well; it does to me. In a much more succinct nutshell; laying out the pattern pieces took almost as long as to make the outfit!!

Construction; I fully underlined the bodice and the skirt with pure white cotton voile; bought from Spotlight during one of their “buy the whole bolt and get 40% off sales” I find plain white voile to be one of the most useful fabrics to have on tap, so there was that time Spotlight announced this oft-repeated sale when I took the bull by the horns and just went for it! The cotton voile adds some structure and body to the sateen, which probably doesn’t have quite enough on its own to be a fitted skirt, really.  The blouse could have gotten away without underlining, I think; but I opted to treat it the same for the sake of continuity, to give the top and skirt the same visual heft. The sleeves however, are not underlined.  And if deep hems are a sign of quality, then yay! ‘cos my hems are DEEP!!

Lastly, because I love to be reminded of the provenance of things, if I can then I like to attach interesting selvedge info on the inside somewhere, in this case, the left side seam on my top…

And lastly lastly, because this bit of awesomeness is really worth repeating… for one month from now, Spoonflower are offering a 10% discount on purchasers of this, or in fact ANY Spoonflower fabric by using the code “carolyn10” at checkout. If you’ve ever been even a little bit tempted to try Spoonflower out then maybe this small incentive could be that time?!

I hope you enjoy looking through all the amazing and gorgeous designs over on Spoonflower as much as I, and thank you so much to Spoonflower for this very kind, generous opportunity and offer!


Details:

Top; pattern 4, the epaulette cut and sewn from the Japanese pattern book “she has a mannish style” by Yuko Takada, organic cotton sateen fromSpoonflower, in a print designed by su_g
Skirt; the vestiges of Vogue 1247, kinda. Actually just a plain pencil skirt… organic cotton sateen from Spoonflower, in a print designed by su_g
Tights; my own design, black stretchy polyester… my tute for making your own custom-fit tights pattern is here

SaveSave

SaveSave

SaveSave

pinterestmail

high heeled black oxfords (shoes), plus some other stuff

I’ve made some new shoes!

These have had a bit of a journey in the making, with a gap of about five months in the middle of it when I did absolutely nothing to them!  Several things; feeling torn as to the colour I’d chosen, as well as a little overwhelmed with the thought of actually finishing them, when it was actually all pretty quick and simple and painless once I got over that…

So obviously, they’re black.  However! my original plan back in December of last year was to make some two-tone saddle shoes.  I cut out my pieces using the same beige upholstery suede that these shoes are made in, and dyed the pieces respectively caramel brown and “black”, though the latter turned out to be more of a deep charcoal really.

I thought the combo would be pretty cool… but once I’d formed them on the lasts and it came time to sole and add heels, I was starting to go off the saddle idea already.

I already suspected that what I really wanted was for some plain black heeled oxfords in my shoe collection… but it was summer at the time, too hot for winter shoes to be a tempting project anyway, and truthfully?   Christmas had exhausted me a bit and it just all seemed too hard, so I just chucked the half-made shoes into a drawer and basically didn’t touch them again for the next five months…

Fastforward to last week; winter has started to creep in with cold, probing tentacles, and with it the need for warm shoes.  I got the half-made saddles out of the drawer where they’d lain, idle and ignored, and re-assessed.  Carving the heels was the next step, that had been such a stumbling block to me, and really? it’s not that hard of a one.  I bought some wood from Bunnings, got Craig to help me set up the sander on the triton, and sanded myself some heels… hilariously to me, after all that procrastination it took about an hour, tops!  Soled my shoes, glued and nailed on the heels.

oh hey Clara!! and NO, lovely girl…. these are NOT for eating!

I painted the heels with a coat of black satin enamel paint.  I probably should have just painted the whole shoes themselves at this point too, but I still had that tiny shred of uncertainty that I might still want saddles …?  but nope.  Seeing the heels painted a beautiful pure black made the dyed suede look quite muddily unattractive, banishing all doubt.   I went right ahead and did a few more coats taking in the whole shoe, using the same black enamel paint.  Bunged in a foam insert, covered with the same chocolate brown suedette that I’d used to line the uppers, and FINALLY FINITO.

I’ve worn them four days straight already!  A coupla times they’ve got drenched in the pouring rain… in the past this would have filled me with horror but nowadays I have more confidence in the strength and durability, and importantly the waterproof-ness of my shoes! and of course they’ve held up beautifully.   Seriously, I’m totally chuffed! could not be any happier with them!!

Having said that, well of course theoretically I could actually be happier… they’re not perfect and I can certainly see little bits that I could have done better.  But with each and every pair of shoes I really do feel like I’m improving – to see my shoe-making journey, it’s all here under the tag “shoes” – and these ones are very satisfying to me.  They are exactly what I want to wear right now!

This is how I wore them for their maiden voyage… out to lunch on Friday with my friend J, and then later on to book club with a larger group of my friends… I felt pretty cool and chic!  No one asked me if I’d made my shoes! which means any one of three things; they look OK enough to pass for rtw (yay!) or SO bad that people are just too embarrassed to say anything (not-so yay).  The third and most likely option is that no one actually noticed them.  I’m ok with that option, to be honest  😉

Details:

Dress; V1351, floral chiffon, details here
Cardigan; the Miette, a free pattern by Andi Satterlund, all details here
Tights; my own pattern, details here, and my tutorial for making your own custom-fit tights pattern is here
Shoes… MADE BY ME!!!!!

SO, while I’m here and writing stuff… I’ve been making some other things lately too, that I haven’t got around to mentioning so far.

I discovered this pattern for little sockettes that you wear with ballerina flats; the Sytt & Prytt Florens Ballerina Socks, designed by Lena Lundvall.  I found this through a mention from someone doing me-made May on instagram, though for the life of me I cannot remember who it was.. so if that person is reading this then I’m sorry not to give credit!  Anyway, I looked up the Sytt & Prytt Etsy shop and bought the pattern.


This blue pair is made up exactly to the pattern; my toes are covered… JUST

It’s a super quick and extremely easy thing to make, though I altered the pattern somewhat to make them exactly what I wanted…  specifically, the socks as they are quite “skimpy”.  To be fair, I think this coverage is perfectly adequate if you’re wearing them with ballet flats, which is totally what they are designed for.  However, for me personally, I’m really so not a ballet flat person, and I wanted to wear them with my oxford shoes, that have higher sides and cover the top of my foot too, and so I wanted my sockettes to have more foot coverage too.

I wanted EXTRAAAA!!!

Adding on a good inch nearly all the way around and reducing the elastic length gave me this!  much better suited to the kind of shoes I wear.

my white oxford shoes, blogged here

I made nine pairs overall, including my trials runs, which I’m still going to wear, ‘cos it’s not like anyone can see the less-than wonderful ones in situ.  With the exception of the white ones, which is fresh fabric, the others are all made from old Tshirts.

Thanks for helping me with my pictures, Clara!! xxx

And finally… !

I made a toiletries bag for a friend for her birthday, using the dopp kit pattern from the Grainline Portside Travel set… I’ve made quite  a few of these, see my previous versions here.  The cool crackle print is cotton canvas hand painted in Zambia, I bought it at the Fabric Store in Melbourne during my holiday there with Mum and Cassie, and made a skirt for Cassie for Christmas.  This is the very last of it!

I lined it fully with plastic waterproof stuff from Spotlight, and made little zip pulls for fun, using beads and earring wires leftover from my jewellery making days.  I think it turned out pretty cute, and my friend professed herself very happy with it too  🙂

SaveSave

SaveSave

SaveSave

SaveSave

SaveSave

SaveSave

SaveSave

SaveSave

pinterestmail

saving a little bit of sunshine

So, once upon a time I picked up a lovely remnant of fine-grade sunshine-yellow linen from a sale at Potters Textile … and then at some point decided I wanted to make a yellow skirt.  I plucked this, my only piece of yellow fabric, from Le Stash; and selected Burda 2/2015;109, which I’ve been admiring and coveting for some time.  I traced it out, noted very happily that the pieces fitted perfectly on my piece of yellow linen with practically nothing to spare whatsoever, cut it out and made it up without much further thought.

And lo, it was horrible.  I can’t even begin to describe just how frumptastic it looked.  I didn’t even take a picture of myself wearing it, it was that bad, though I did have the presence of mind to force it upon poor Jane to model before taking the scissors to it again.

It actually looks quite nice on Jane here, but trust me, it didn’t look nearly so nice on ME.

I don’t blame the pattern, which I still think will be quite nice with the right fabric, of a stiffness and body that can hold its own with a pleat.  In a lightweight linen?  NUP.

Anyway, obviously I cannot bear to waste a lovely piece of fabric, and particularly one of such a sunny disposition.  And this time I listened to what it was whispering to me in its tiny, squeaky, linen-y little voice (yes, Virginia, fabrics DO have a voice) and realised that this delightfully lightweight loveliness wanted to be a delightfully lightweight, breezy little TOP.  Of course I granted its wish.  Who am I to deny a fabric its destiny?

Fortunately it wasn’t too difficult… the skirt had long long ties to go around the waist, and it was easy to open out the waistband and let out each of the pleats just a little, to allow what was previously the waistband to be an underarm band instead, and re-jig the old side seams.  I harvested what was remaining of the waist ties to be shoulder straps for my new top, unpicked the two big pockets, and re-cut one to be a triangular insert to go in the previous skirt opening to fill in that gap, and re-cut the other to be a big kangaroo pocket to go on the front of the new top.  By the way, the old side seams are now at the centre front and back of the top, and the previous centre front and centre back, which is where the big skirt pleats were before, are now situated at the underarm seams.  Finally I stitched a buttonhole and a button from my stash to the newly extended underarm band so it can close, since the ties are gone.

Et voila!  a bright and sunshine-y little top.  I love it in this guise so much! it’s hard to remember how sad and tragic it was as a skirt.  I took it to Bali, when we went there for L and L’s wedding – ah such a wonderful time we had!  I’ll have to write something about that here soon  🙂

note; Craig does not take pictures of me as a rule! but I basically forced him to each day we were away.  I’m like, but it’s me-made May!!  Reaffirming long held suspicions that the depths of the feminine nature will forever remain a mystery best left unsolved #instagramhusband  

Now we’re back home and  winter is creeping slowly into Perth and I’m reluctantly putting it away with the other little summer lovelies… but am happy to think it’ll be waiting in the wings, an cheerful little thing for when summer rolls around again.  🙂

Details:

Blue trousers; the Sasha trousers ,by Closet Case patterns, blue stretch denim, details here
Red cardigan; the Miette, in Debbie Bliss donegal irish tweed, details here
Clogs; designed and made by me, details here

Bali pics:


Skirt; variation on Vogue 1247, in a map print
Hat; Vogue 8844, made from old ivory corduroy jeans, details here
White sandals, designed and made by me, details here

SaveSave

SaveSave

SaveSave

SaveSave

pinterestmail
Switch to mobile version
↓