Tag Archives: Own Design

brown

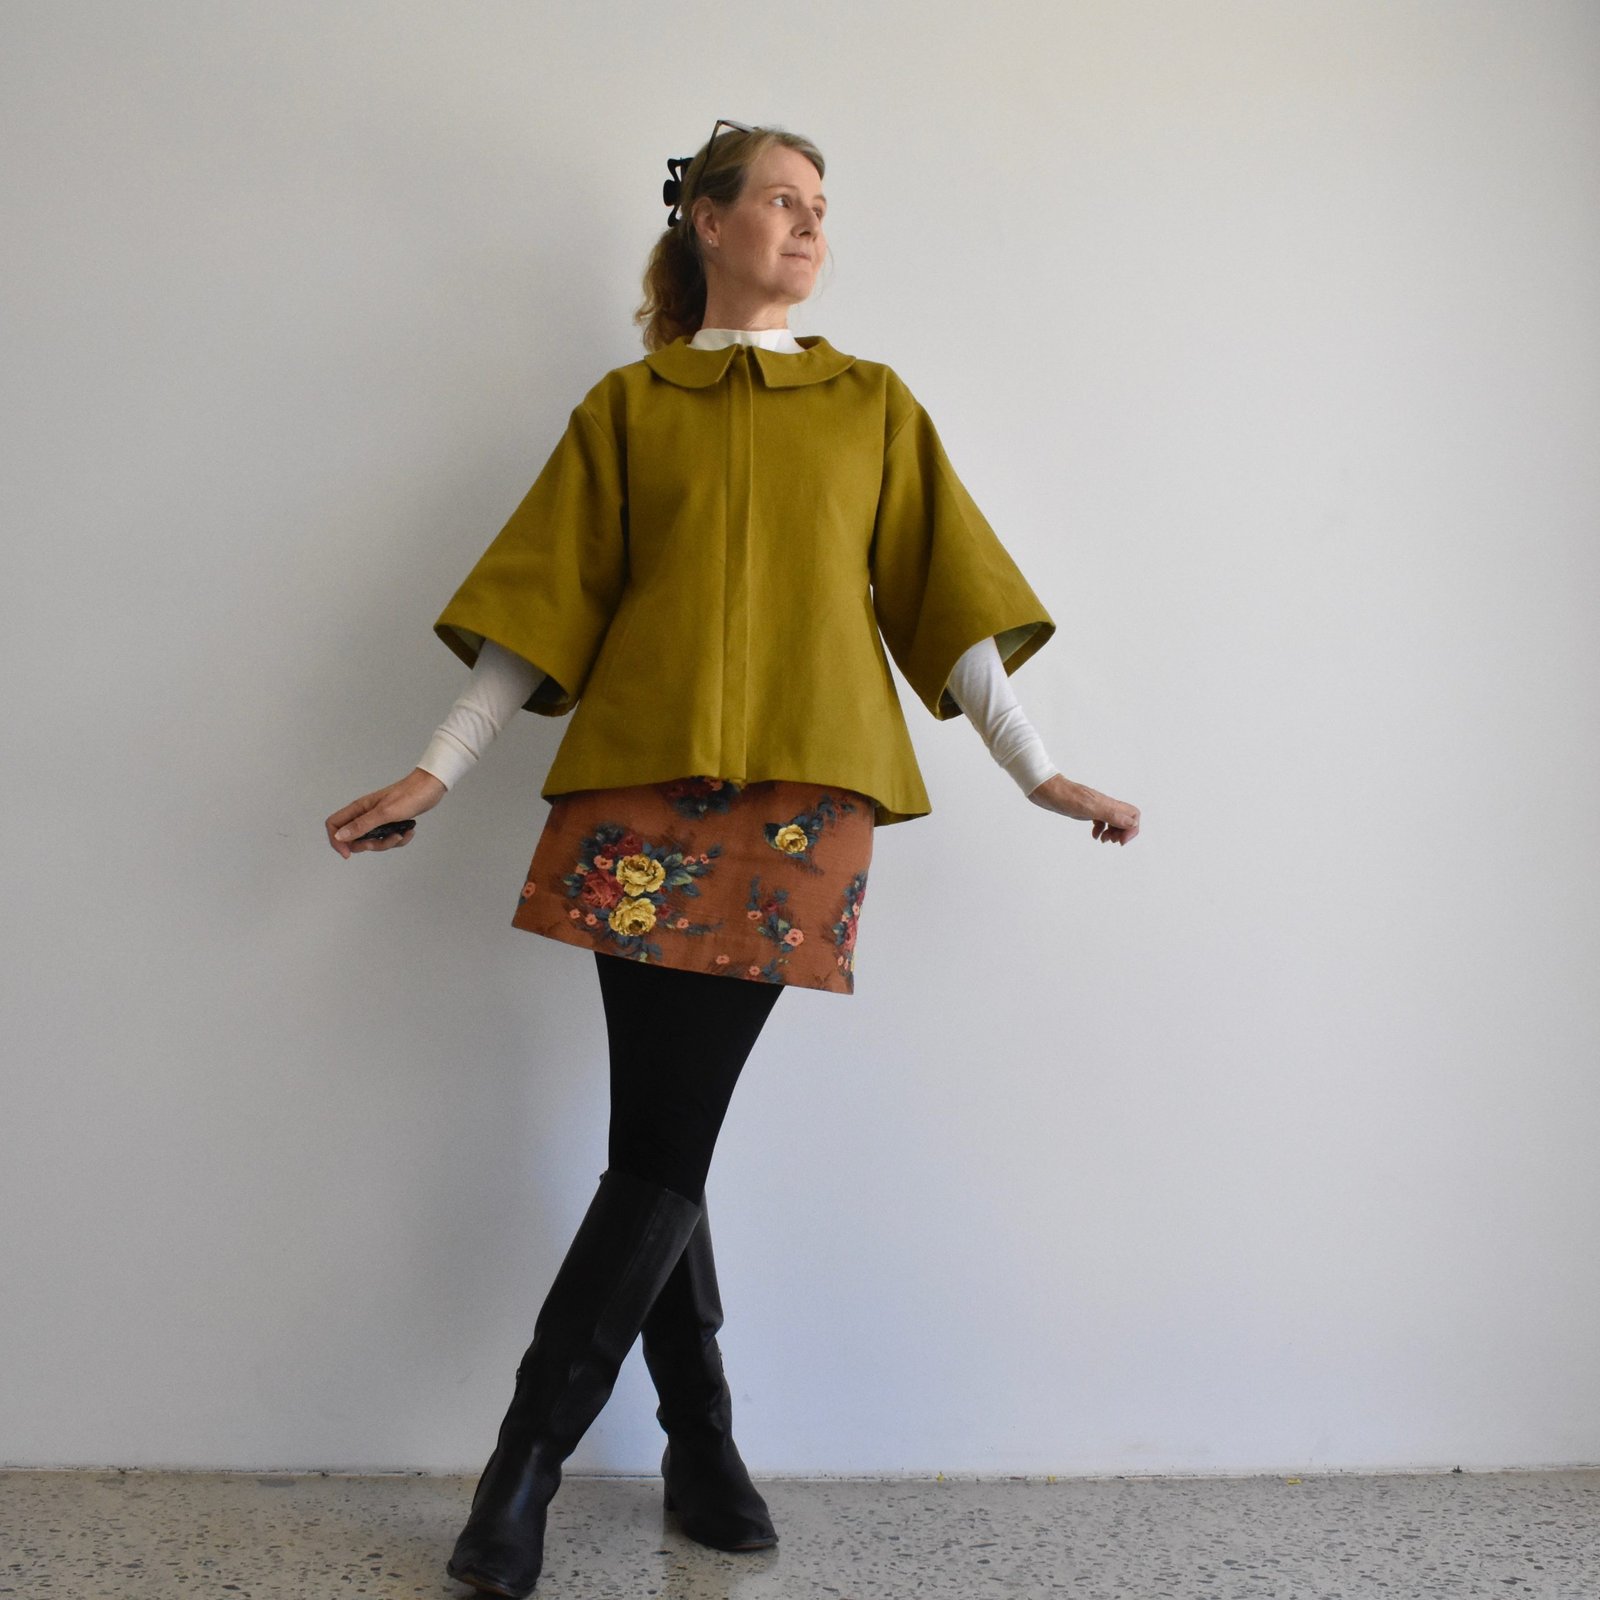
Yes, it is still extremely hot here.  And I am dying a little bit in these photos.  But what can I say?  I found all of these coordinating fabrics in my stash -mostly leftovers! – and each one was the perfect size to cut out the individual pieces for the skirt.  Win!  And I also had the acorn brown merino, that I’d bought last year during a sale from the Fabric Store.  So I feel like this is a totally seasonally inappropriate outfit that was nevertheless just crying out to be 🙂

The skirt pattern is the new FibreMood Crystal skirt… with some alterations, of course!  Let me explain… the pattern is very simple really; the front and back are the same except mirror images, and the waistband is straight.  Very uncomplicated.  I’ve made several skirts like this in the past and they’ve usually been fine.  However, nowadays I have higher expectations of my skirts, and I really really want for all my skirts to have pockets.  I know pockets can sometimes be a bit of a hot-button topic.. I’ve been seeing sewing peeps on instagram lately saying that they usually leave off pockets?! and that they hate them?!  amazing! but well to each their own.  This is why we make our own clothes, yes? not someone else’s.  I personally, love to have pockets, so I set about plotting how I could add them to the skirt.

I cut my waistband at my regular size, but cut the skirt pieces a size bigger than I would normally go for to allow for hands in pockets. I also cut and put in slanted pockets, and added darts to the skirt front and back to bring in that extra width to the waistband.  Instead of a zip, I made the skirt closure to be part of the pockets, as per this side-opening-over-a-pocket tutorial that I published previously here.  It’s quite a good method for adding pockets to a skirt actually  🙂

Added bonus is that my skirt fits really well now too, thanks to the darts!

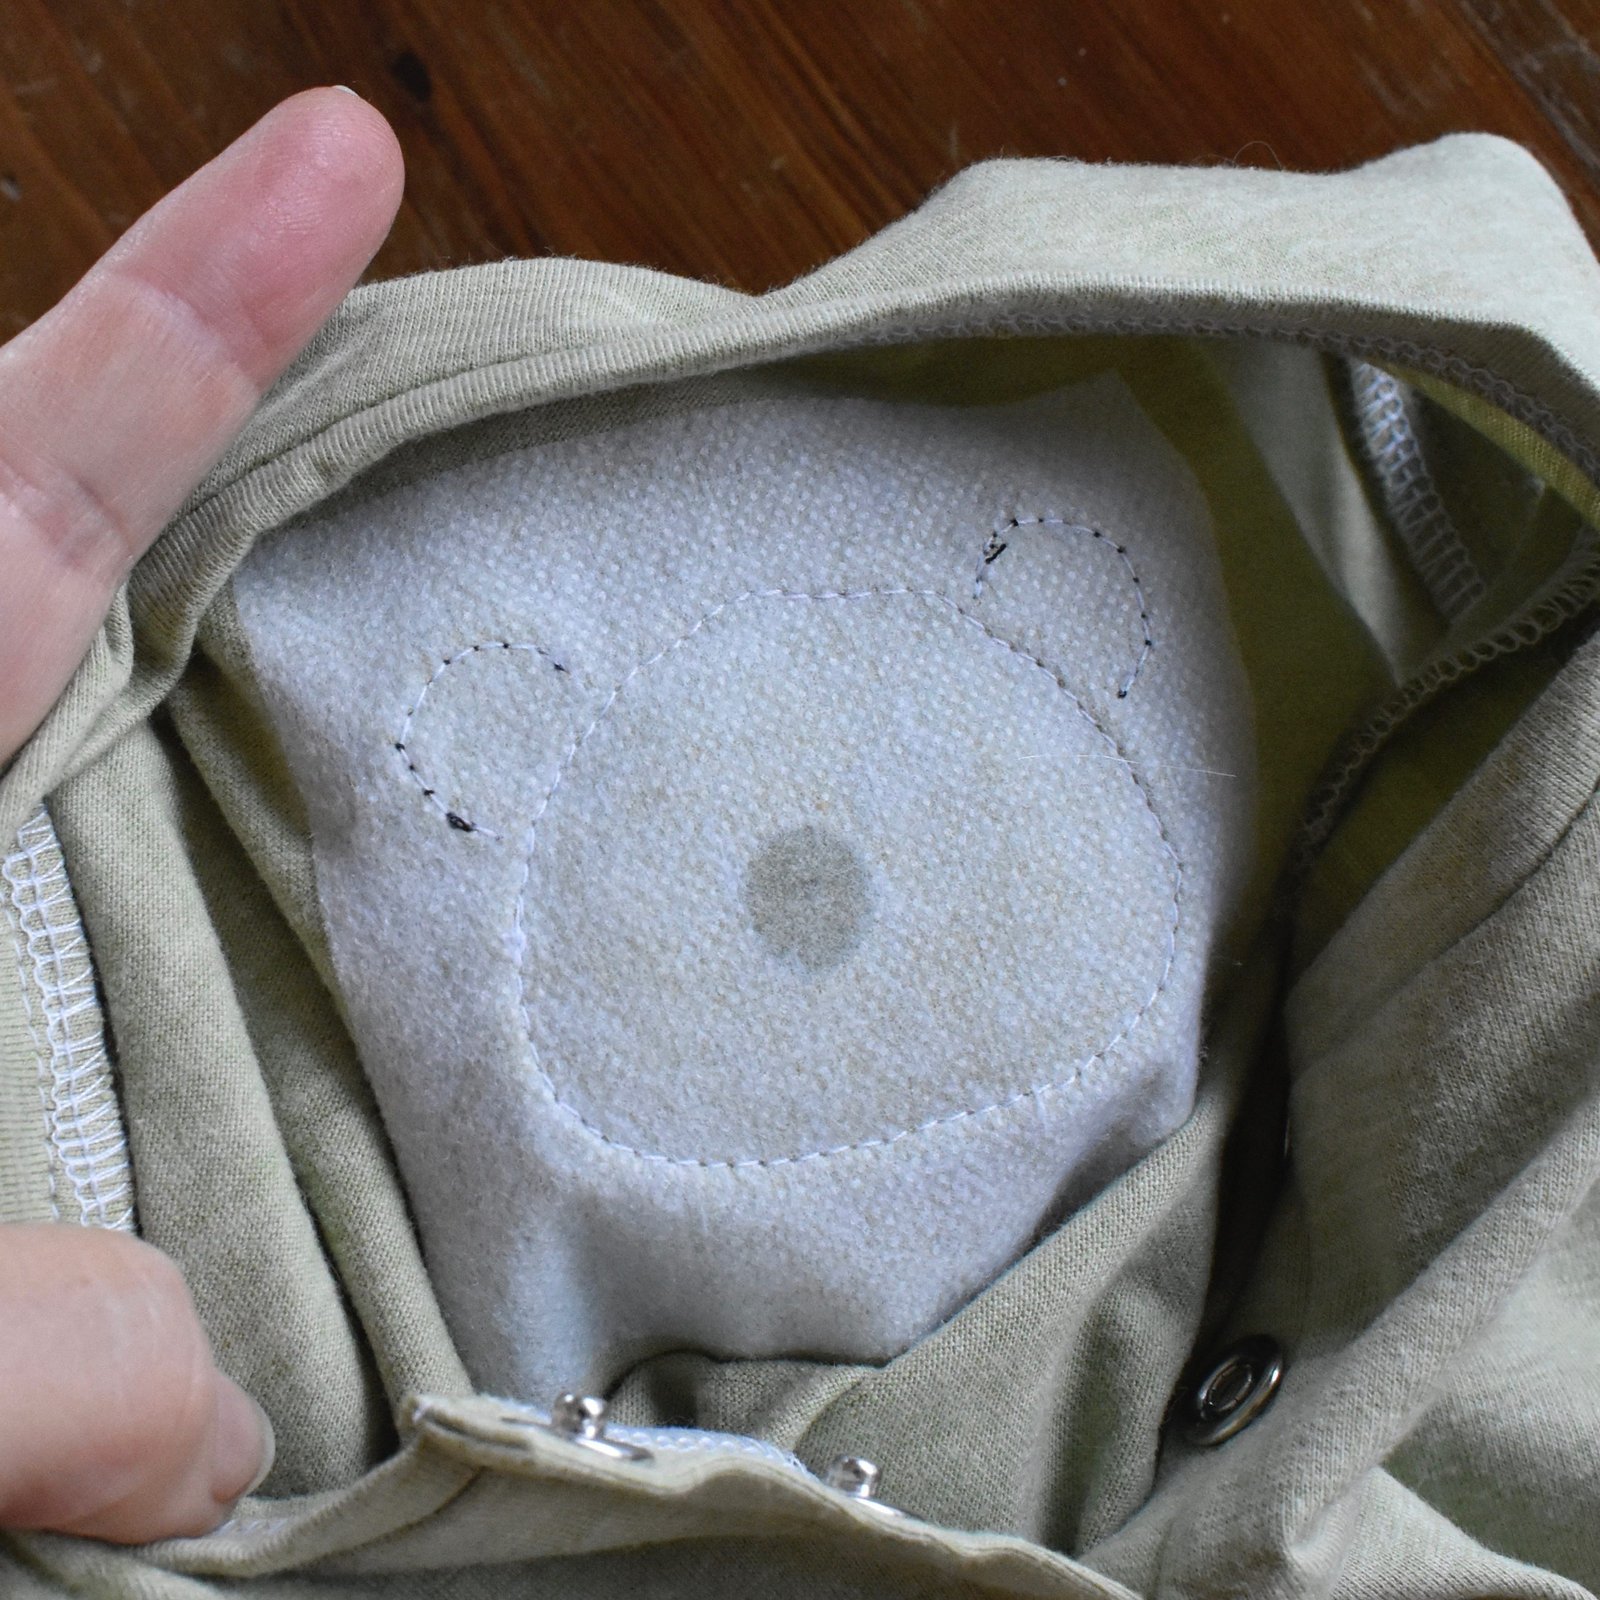
I bound the edges of the pockets with some other brown cotton from my stash, which appears mysteriously to be grey in these pictures, but honestly it’s a deep black/brown.  I used the same brown cotton to bind the hemline.

My top is, of course, my usual modified Closet Core patterns Nettie.  This time I used my twin needle to finish the sleeves and hem, instead of bands.  I used thread from stash also rather than go shopping just for new thread, and the close-ups show how it doesn’t really match very perfectly… but honestly, the difference doesn’t show up quite that much!  Actually, all the close-ups here make the different browns look shockingly different, far more so than they are in real life!

Of course I added some of my new date-stamp labels.  Love these!


the caramel corduroy at the top of the skirt was leftover from these jeans, and the two middle cotton canvases were leftover from my Blanca flight dress and my Issey Miyake trousers… the dark brown, lightweight cotton corduroy that I used for the frill at the bottom was not a leftover, but one that Cassie had bought for me from Tessuti during a trip she took to Melbourne one year.  And, as mentioned, I bought this acorn merino last year.

Taking into account that I do have some leftovers still; these two pieces used up about 3m of fabric from my stash…  meaning this outfit brings me up to 13m for the year!  17m to go!

pinterestmail

some more stuff…

just a few more things! I’m trying to get everything that I’ve made this year, also blogged this year, and so far there have been a few things that have fallen through the cracks!

I made another romper for Theo recently.  It’s the same design as the previous few I’ve made for him, just sized up a bit so he can wear it through into autumn..  Seems only fitting, given the very autumnal themed fabric, don’t you think?

Oh! The fabric! it’s very special!  It is designed by Cassie herself, called “Autumn tree swirl” and is one of the suite of autumn designs that she has in her Spoonflower shop, here.  This is the organic cotton jersey.

I also made another top for Cassie’s new work wardrobe, that I’m working on for her… the fabric is the same inherited vintage suiting as the skirt I made for her recently, here. and the pattern is NewLook 6483.  Such a great pattern, I’ve made it loads of times for myself and she has a copy of the pattern for herself too.  She wanted an oversized look so I cut a size 12, but I think it turned out a bit too oversized though…  so will go down to a 10 next time,I think  🙂

I made her skirt too previously; using my heavily modified V 8363 and crackle printed cotton drill from The Fabric Store in Melbourne, bought during one of our girly trips over there… aaah, happy times.  I wonder if we will ever do something like that again…??

pinterestmail

(almost) zero waste jacket…

Hello!


I’ve made a new thing… an “almost” zero waste jacket.  I’m pretty proud of this fact!  Ok, to be totally honest; I didn’t set out to make an almost zero waste jacket; I actually just set out to make a mere jacket.  This whole exercise turned into a case of sheer dog-at-a-bone stubbornness and a masochistic refusal to be beaten by my own plans…

Storytime; so, I had this lovely stuff and I wanted to make a jacket … It’s kinda hard to tell but there’s a little less than 1.5m of 106cm width fabric, folded lengthwise in the pic here.

I took out my first chosen paper pattern and laid it down onto the fabric; absolutely no way was it going to fit.  I got out another paper pattern from my stash, same story.  Damn!  I then searched through my entire collection of Burda magazines for a smallish, or at least cropped jacket; selected and traced out a pattern.  Laid it out on the fabric, hmmm, that didn’t fit either.  Searched for and selected yet another, even tinier, cropped jacket, and traced this out too.  Nope.  I felt like my fabric was gaslighting me! because it certainly “looked” like I could get a jacket out of it, but absolutely nothing was even close to fitting!

Ordinarily I might have given up and just gone for a skirt or something, in this case I was absolutely determined to make that jacket … why the stubborn insistence on a jacket, you might ask?  well, only that I had previously selected the fabric for my #use12 capsule wardrobe for this year, and this was earmarked to be a jacket.  I can’t have a capsule wardrobe without a jacket!  and of course I’ve already used all the other fabrics for other things, so this HAD TO WORK.

And it did, obviously, and I may be feeling just a wee bit smug about it!  I did a quick mud map of my design… in case anyone is interested.  F = fold, S = selvedge

You can see the back and two fronts to take up the entire width of the fabric, even so the width wasn’t enough to be comfortable over my hips, especially with the pockets I sorely wanted, so that is what the triangular “side gussets” are for.  These are stitched into the side seams.  I stitched all my seams at 6mm – also for minimum waste reasons! then overlocked all raw edges and faux-flatfelled the seams down.

The jacket length was determined by the length of a nice, heavy, open ended zip that I already had in my stash; its colour blended in nicely with my fabric which is partly why I chose it over buttons.  Also for the minimal streamlined look!  I don’t have any perfectly matching buttons, and I’m still on the buy-almost-nothing stint that I’ve been on most of the year.

The “front placket” sits underneath the zip inside the jacket, the “back neckline facing” was stitched together down the straight edge, and attached to the back lining.  I didn’t even have enough fabric to cut the under collar, so this is cut from brown cotton corduroy, leftover from these jeans.

No, it’s not ideal to have that different colour there, but I don’t think it’s too visible.  You can also see the corner of a patch pockets stitched to the lining there… there’s one on each side, just for extra, just in case.  You can never have too many pockets!

“Pocket welts” is self-explanatory, and “pocket facings” are stitched to the pocket bags at the opening so that this is the fabric you see when the pocket peeps open.  The inner pockets themselves are cut from the lining fabric.

The fabric.. oh btw, I bought it in Japan, in Stripe & Check in Tokyo during our last trip there… and posted about here.  It’s a beautiful, quick thick brushed cotton, almost like flannelette but more solid and “coat-like” in its weight and feel.  The colour!!  Isn’t it gorgeous?!  I’ve already mentally dubbed it my pickle jacket, for some reason…  🙂

The lining is from a pale green polyacetate that was already in my stash.  I cut it a tiny bit bigger than the pattern all the way around, and then widened the seams towards the edges so that they would fit at the sleeve hems and bottom hem, though there is a small tuck in the lining at each side seam of the hem. The lining is machine stitched to the neckline and zip tape, and hand stitched to the sleeve and bottom hems.  The hems themselves were also invisibly hand-stitched to the jacket.  The only thing I had to buy for this was some matching thread!

obligatory boastful pic of scraps…

I’ve got something to say about the collar and zip opening… so, when I had my Mundaring raincoat tested by all my lovely testers; one of them commented that the front opening was “off-centre”.  What that meant: was that while the zip is actually bang on centre front, it has a weather placket over the zip, and the opening edge of the placket is obviously not centre front, but a little off to the side.  It was planned that way, but her comments certainly gave me some pause, as though maybe it was perceived as “wrong”??  Well, it’s not, of course because coats have their openings situated in many different ways…  however, I’m mentioning it because with this coat I decided to make it so that the edge of the jacket opening was situated at the centre front.  It’s neither right or wrong either way, of course; and while the opening edge of this jacket is satisfactorily right boom in the middle, the zip is, by necessity, off centre underneath.  The collar comes up to the opening edge of the “uppermost” front, while falling short of the “underneath” front, if that makes sense.  It’s no big deal, of course, just thought I’d mention it.

This is the 11th thing in my #use12 from my stash, wardrobe capsule.  Only one thing to go! although, to be honest I’ve since added another piece to the collection actually, which I am making next before the real “final thing”, hehe.  So the project is now a use 13 really… All will become clear soon!  I’ve even started photographing my final mix-and-match of my capsule wardrobe for a final post on the project.  I’m so excited for it!

Oh, sincere apologies to Sanni, but I did some more baking this week from the cooking tree… I made these oreo macarons, using this recipe.  SO YUMMY!!  I don’t know how I’m going to stay away from them until the family gets some!

pinterestmail

work outfit pt 2, blueberry crepe cake

Phew!  I’m currently feeling like the Red Queen! in that I’m running as hard as I can just to stay in the same spot…  anyway, a bit late, but here are some more random things I’ve made recently.

Items 1 and 2;  new things for the little work capsule-wardrobe I’m making for Cassie… and btw, WHY am I making so many capsule wardrobes lately?!  Actually it is kinda fun, so I’m not complaining 🙂

The pistachio green cowl neck top is similar to the previous, avocado green one that I made for her, with a few improvements…  I made it from the leftover cotton jersey that I made Theo’s little panda romper from… so they have a matching mother/son ensemble, should they want to wear something like this!

The mint green skirt is from fabric that I inherited from Mum’s stash, when she cleaned it out… it’s a really lovely suiting fabric and we have enough leftover for a little top too, which I’m planning to make next  #spoilers

The skirt is another heavily modified Vogue 8363, and lined with mint green lining fabric from my stash; this is an absolutely perfect colour match which is nice!  It’s the exact same fabric that used to the blue skirt I made for her recently.  Again, the only new thing I bought for this outfit is the invisible zip, yay!

Item 3; I rarely post cooking/baking projects here, but this one was kinda… out of my comfort zone, should I say!  I recently came across the Cooking Tree on YouTube and quickly became slightly obsessed with her beautiful creations, her beautiful videos and was completely inspired to give it a go.  I picked something super easy, haha; the Blueberry Crepe cake; and for my first crepe cake I’m quite pleased with how it turned out.  The mixture was supposed to make 21 layers; my crepe cake has 20 layers because my first crepe was a fail which means there is absolutely zero excess for spares!

Anyway, it was quite yummy and I really enjoyed the challenge of making it, so I’m definitely going to have a go at some other of the Cooking Tree’s recipes  🙂

pinterestmail

a cute little outfit for the little guy…

I made a new little outfit for the littlest guy in our family! isn’t he the cutest?!!  of course I am not in the least bit biased, hehe

The little romper is self-drafted, the same pattern I used for the bumblebee and the sloth rompers made previously.  And now he has a panda romper… hmmm, what animal should this sweet child become next, I wonder?


Yes I went to the trouble of changing between white and black thread because, of course…

Actually, there is a tiny design difference… Cassie requested that the romper be made even more clownsuit-y, if that was at all possible.  So I added a little pleat in the crotch area, this adds a bit of extra volume without ending up with a complete straight line at the bottom…

The panda patch is an iron-on from Spotlight; I ironed in on and the also stitched it on too, just because I don’t actually trust the long-term adhesive capability of these things to be honest.  Before stitching, I also pressed a layer of lightweight iron-on interfacing on the inside of the romper underneath it too, for stability.

I was really pleased with how neat the grandpa-placket closure turned out at the back!

The T-shirt is the same pattern I used for the ones I’d made previously for both T and A too, in this post here.

That little smile!!  Totally melting my heart!!

Striped fabric is leftover from a T-shirt I’d made for myself previously, I think originally from Fabulous Fabrics, and the green fabric and panda patch is from Spotlight.  Although they appear “new”since they are not leftover from anything I’ve made previously, they both are actually from stash, because I bought both of them quite a long time ago, seduced by one of those treacherous 40% off everything sales that Spotlight has periodically.  I’m not falling for those again, trust me! at least until I’ve used up my current stash.  I’m a changed woman, I promise!

oh, I also made some soap.. this is my favourite buttermilk recipe, outlined here; and I made a video

I hope you like it!

so pretty!  I almost can’t wait until it’s ready to use!

pinterestmail

yellow Yallingup dress

So my niece is having a yellow themed birthday party! and since I currently have zero yellow garments in  my possession therefore I needed a new dress… obviously.

I needed to test something out for our Yallingup dress pattern… an add-on that Cassie really wants to introduce for it; but didn’t have any suitable fabric so I had to go out and actually BUY new fabric… imagine!  It’s been quite a while!  I found some suitable yellow linen in Spotlight.

Even though it’s our own pattern and maybe I shouldn’t play favourites like this, but I REALLY love this style… it’s really so comfy and fun to wear.

I made another youtube video on the process… it’s slower paced than my previous few.  Honestly not sure what is my motivation to keep making videos since they get very few views and even less “thumbs up”! so I guess they’re pretty bad but I’m going to keep going and try new things to hopefully improve.  I might try doing a voiceover next time because maybe that’s the problem and maybe the music is a little irritating?… but this is a scary thought.  What on earth am I going to say?

it’s here should you be be so curious…

https://youtu.be/IEkyycm_em8

btw, very pleasantly surprised that I managed to get Thing 1 and Thing 2 on the neckline binding like this.. total serendipitous!


also.. yallingup in action!

pinterestmail

made some stuff…

thank you so much everyone; all your kind words about Sophie mean so much more to me than I can say…


just a few more pictures:

Now:

I really should blog about these few things that got made, in some cases, weeks ago!… and just for something a little bit different I’m just going to go with short and sweet, bullet point kind of blogging.  Ready set go!

Item 1!

  • a new raspberry pink skirt…
  • piece 9 in my #make12 capsule wardrobe from my stash challenge that I proposed at the beginning of the year, hurrah!
  • self-drafted
  • upholstery fabric from Spotlight stores, and the leftovers from my fibremood Heaven dress that I made previously here
  • I bought absolutely zero new things for this skirt!
  • huge pockets
  • fully lined!
  • added a nice bias bound finish to the bottom edge before hemming
  • used the same wine-coloured cotton to line the waistband
  • actually very pleased with the lining to invisible zip attachment this time
  • LOVE IT and already worn it several times
  • am thinking of making this into a pattern and writing an accompanying tute for how to do the zip this nicely!

Item 2!

new onesie for little Theo!

  • own design, the same one as this one
  • cute sloth cotton jersey from Piermont fabrics in San Francisco… I bought this when I was out shopping with Shams, Beth and Yoshimi, during Yoshimi’s and my joint trip to USA together.  Wow, I wonder if we will EVER travel overseas, ever again?!
  • I did the back opening a little differently from the last time, and it is not as good.  Definitely sticking to the way I previously from now on
  • nonetheless this is a HUGE success and both he and I (and Cassie) all love it!

Items 3 & 4

little T-shirt and pants for Arthur…

I used some of Tim’s old trousers for the pants… I actually love doing this recycling old clothes/fabrics sort of thing and really want to get back to doing this more again.

  • self-drafted pattern, using a pair of his rtw leggings to gauge the size needed
  • I added pockets! so cute …
  • to line the pockets and make a kind of facing for the faux fly, I cut pieces from an old purple shirt of Tims… recycling/reusing for the win, or what
  • T-shirt based on one of his currently well-fitting T-shirts.
  • white cotton jersey thrown out from Mum’s stash, when she did her big cleanout
  • I bought absolutely zero new things for this cute little outfit too!

That’s it for now!  I’ll be more talkative next time, I promise!  🙂


pinterestmail

bumblebee baby

Le Bebe needed some new outfits… so I made one!

The little clownsuit/jumpsuit is totally adorable in my opinion!!  it’s partly based upon two other different rtw ones Cassie already had for him for gauging the size and width, and I drew up my own pattern from those measurements…

For the little T-shirt, I used the cardigan pattern in Butterick 5583, just cutting it as a T-shirt instead of as a cardigan, and also accordingly making the neckline wider by about 1.5cm each side so his head can fit through the hole… the funny thing is that this size is the newborn size!   It’s very big and loose on him and actually he is NOT a small baby.  It just goes to show once again how strange the sizes are in baby patterns.

the fabrics are pretty cute, I think!  both are from my stash, originally bought from Spotlight.  I’m still virtuously using stash fabrics but have recently bought some new fabrics from Spoonflower, so that’s a bit of a setback in my use-stash only plans for the year, whoops! but actually I’m not going to get too down on myself because each of the fabrics I got is really cool and, you know what? Life is too short to be hard on yourself if you don’t have to be!

In random wardrobe news, Cassie came around last weekend and helped me to do a big closet cleanup, and we tossed out a huge garbage bag of my clothes… this felt SO GOOD! because I’d got into a bit of a rut with my winter wardrobe, basically forcing myself to wear shabby and old things that really were not doing me any favours.  Now I have a smaller collection of winter clothes that I really like and that also actually look good on me!  I’m not planning to make much more in the way of winter clothes to replace them though, but am revving up for spring and/or summer now.

So, wanna see a video of the making of this cute bumblebee baby outfit?  Because I made one!  It’s fun making videos and I enjoy it, but it does take quite a long time; so I’m not going to make one every time.  Maybe just for special or interesting things… we’ll see.  Anyway, I hope you enjoy it!

It can be seen here:

https://www.youtube.com/watch?v=FbO0gTSl-WQ


pinterestmail
Switch to mobile version
↓