Tag Archives: Tutorial

I made a little blue book

So the title explains it all really, hehe…

I’ve been reading the blog Lil’ Blue Boo by Ashley Hackshaw… partly for chicken stuff since Tim and Kelly got chickens recently and the whole family has been invested in their care and involved in the Building of The Chicken Coop, and can I just say… wot a saga… but also because I’ve found Ashley to be the most inspiring and creative lady!   And I especially loved a little book she’d made recently, and it got me thinking again how I would like to make a book.  Just yet another of those things that I’ve wanted to have a go at for years… I have a huge list, btw.

Anyway, her adorable little notebook got me revved up to actually take scissors to paper… I googled for how-to’s and found Lee (Crafty Loops)’s amazing tutorials on YouTube.  I pretty much followed her method, with the exception that my own book is made entirely from scraps, rubbish, and leftover bits and bobs.

We have a whole lot of scrap paper in our house… old, partially filled notebooks, scrapbooks, graph paper and lecture pads from the children’s days at school etc; that I’ve kept just in case I ever need scrap paper.   I semi-roughly cut stacks of various sorts… I went for sort-of neat but not perfectly neat, because I really like the imperfectly, imprecise handmade look in a book.  Like Lee did in her demonstration book, I cut eight signatures with five pieces of paper each… which gives you eight little booklets of ten pages.  Since you’re glueing the frontmost and backmost pages to the cover, this means I ended up with a little book of 78 pages in all…

For punching the stitching holes… I don’t have an awl and was too impatient to run out and buy one.  However necessity is the mother of invention, as they say; and I found a dried up ballpoint pen actually works as a pretty good substitute… for backing I used a dried-up old foam squeegee block #whenhoardingpaysoff

For binding; I used a small scrap of bias-cut white linen, and for stitching I used a leather needle and cream-coloured Gutermann’s upholstery thread.

spine all glued up and drying… I used regular ol’ PVA glue

My cover is cut from a discarded cardboard box that I rescued from our recycling bin… I covered it with white paper first… this too was scrap actually!  an un-needed page of a new pdf clothing pattern I recently printed.  And made.  And have not yet blogged, oops, I’m so lazy…

The final cover for my book is linen; this was a piece of indigo-dyed linen leftover from a natural dyeing workshop, run by Trudy Pollard.  I attended the workshop with Nicki, Sue and Megan a few years ago.  Long term readers of my blog may remember that I made this dress from the linen.  I’ve kept the leftovers all this time! well, natural indigo is kinda precious and nigh on unavailable here, and I thought the scraps might come in handy one day.  And they did!

Et voila!!

I’m so ridiculously pleased with my little blue book!  And it was so much fun to make too… like being in kindergarten again!  have no idea what I’m going to write in it yet.. maybe poetry? artsy doodles? a journal? or maybe a little sewing book, to keep track of fabrics and haberdashery requirements?  So many options… I need more books, obviously  😉

Later edit: Also, completely beyond the level of an amateur … but if you’re interested, check out the amazingly beautiful work of artisan bookbinder Glenn Malkin

SaveSaveSaveSave

SaveSave

pinterestmail

Sydney jacket

have you guys seen COLOSSAL… ?

Bet you can’t guess where I am here…   Yeah, I know, it’s a tough one.   Some locations are just so obscure and far off the beaten track, but I do like to seek out these especially quiet and sleepy, tucked-away little spots to highlight here on ye olde blog…  GO me.

Yeah, so I’ve made a Sydney jacket… I bought the pattern from Tessuti’s in Melbourne back during my March trip away there with Mum, Cassie and my niece Tiffany; and have finally got around to giving it a whirl…  I think I first saw this design on Sue, at one of our meet ups and was instantly interested.  It’s a pretty nice design with a true shawl collar and not just your usual body with two set in sleeves.  This is like my wearable muslin, if you like.

I used a very blankety-like wool-mix from Spotlight, which I think is definitely a lot more “mix” than “wool”, haha! but that’s fine by me!  I tossed it in the machine when I got home and it washed up beautifully, absolutely zero shrinkage and just a bit of light “fluffing”, which was equally ok with me; in fact any and all fluffing is totally welcome in all my winter clothing, thanks.

I agonised for ages over which side to use; one side was more vibrant but “flatter” with a more pronounced twill to its appearance; the other side is fluffier, and with more muted colours.  I loved both sides equally! and couldn’t decide… finally I asked Craig and Cassie to choose for me.  They both voted vibrant OUT, fluffy IN.  Hurdle number one; cleared!

It’s a lovely fabric really, warm and cosy and with that richly colourful blocky weave, the perfect drape;  and I loved the idea it for this particular jacket pattern… however! the Sydney instructions have a big bolded announcement on the first page… IMPORTANT: Not suitable for woven fabrics that fray when cut  What is my chosen fabric? only like the most fray-able of fraying fabrics ever invented by mankind. Typical of me, so stubborn.  I’m like… Oh, I’m not supposed to use a fray able fabric?  JUST WATCH ME THEN mwahahahaha.

Solution; I edged the visible raw edges with bias binding… oh I’d bought a mid blue poplin for my bias binding, but it was a bit bright.. so I sludged * it up nicely with a bit of iDye in Brown, to make a nice deeper dirty blue; a much better colour for my fabric.  I think it turned out a rather nice match!

Hurdles two and three; cleared!

new colour, with scrap of the original colour on top…

*”sludged” as a verb. along with the associated adjective “sludgy”, are technical terms used a lot around here… where Brown dye is employed liberally and frequently to tone down the overly bright colours beloved by commercial fabric designers and that form about 99.99% of commercially available fabric, so they better suit those of us who look hideous in said brights.

What else is there to say?  I lengthened the sleeves to bracelet length… I really like them at this length, and even though I wasn’t very serious about it at first I absolutely love my jacket now it’s finished.  It’s rather Lagenlook, yes?  I’ve worn it two days in a row since I finished it… and that’s just about unheard of for me! who pretty much has to mix it up some every day… There’s just something about this rather simple yet inherently dramatic style that prompts the adoption of random flamboyant poses.  My enthusiasm for photoshop going only so far, you’ll just have to imagine the appropriate backdrop in each case…

exhibit A, supersleuthy spy… the scene: nighttime; the main gallery of the Louvre in Paris, a dim light glistening off the polished parquet floorboards, while painted masterpieces look on silently

exhibit B: busy woman-about-town hailing a taxi on the streets of some mega-metropolis no, not in her garage, oh no not at all) the scene; outside the New York stock exchange, close of business, important business-y types milling about on peak- hour sidewalks

exhibit C: Victoria’s Secret model strutting down the runway.. except she forgot her wings and is instead clad in rather unsexy but warm, warm winter woollies in lieu of the cute little bejewelled bikini.  Or alternatively; Rio de Janeiro’s Jesus… or a tightrope walker…

Because the wrong side/underneath of the fabric shows around the neckline I applied the bias binding on the inside of this centre back seam here instead… it’s not super visible, under my hair and all, but you know… I made a little hanging loop too…

So that’s it!… oh wait, one last thing to add; and that’s my method for dealing with a frayable fabric in a pattern that calls for un-frayable fabric.  In this pattern the seaming is the simplest method possible; seams are formed by overlapping the raw edges and simply topstitching in place… and using my method you first bind the upper raw edges with bias tape, so you end up with all the seams thus highlighted throughout.

First step; overlock the raw edges of the underneath edge…  the bias binding will be applied to the upper edge only.

Cut bias binding strips 2.6mm (1″) wide… this allows for a seam overlap of 1cm (3/8″) For patterns calling for a wider overlap, the same method applies, just cut the bias binding strips correspondingly wider i.e., for a 1.5cm (5/8″) overlap, cut bias binding strips to be 3mm (1 1/4″) wide.. etc.

Stitch bias binding to the upper side raw edge in a 6mm (1/4″) wide seam.

Press over and around to enclose the raw edge.

Position the upper side edge over the underside raw edge, with the overlocked edge even with the bias binding edge.  This corresponds to a 1cm (3/8″) overlap, as required by the pattern.

Topstitch the two pieces together by stitching in the ditch, or if preferred, just inside the bias edge.

Topstitch a second time, with a second pass of stitching a scant 3mm (1/8″) just inside the folded bias edge of the upperside.

For the opening edges, lower edge and sleeve edges; I simply applied the same bias binding and slip-stitched it down inside just like a regular bias-bound edge…

Voila!  Jacket made the same way you’re supposed to, and using the forbidden fabric to boot!  Ha!

Details:

Jacket; the Sydney jacket by tessuti patterns, wool-mix blanket fabric from Spotlight
Top; twist top from Pattern Magic by Tomoko Nakamichi, green stretch, details here
Skirt; Jade skirt by Paprika patterns, in red stretch knit, details here
Tights; self-drafted, details here and my tutorial for making your own custom-fit tights pattern here
Boots; Roberto del Carlo, from Zomp shoes

SaveSave

SaveSave

SaveSave

SaveSave

SaveSave

SaveSave

SaveSave

SaveSave

SaveSave

pinterestmail

more liberty lingerie… and why do I make my own?

On the “news” * the other night they had a little segment where Kmart introduced their new range of $5 bras, which is insanely cheap… and all over again I got to thinking about why I make my own in the face of the ever plummeting prices of rtw clothing.    See, a lot of people I know think I’m completely bonkers (source; they tell me)  for making my own when it’s so cheap to buy a perfectly pretty and well-made bra, and without the angst of sourcing all your own bits and pieces and spending the few hours it takes to put it all together.

* “News” in inverted commas… because some of our local news programmes go for a full hour here while at the same time this is a city where basically nothing ever happens.  The world news, or REAL news, is raced through in about ten minutes; local news might be another one or two minutes, tops, and usually is something like “the Mayor in hot water because she tried to claim her wardrobe as a work expense!”; the twenty minute sports section is always lengthily and disproportionately weighted towards Aussie rules football and stats and is highly detailed, let’s not even go there! ; the weather is a brief high point; and the rest of it is thinly disguised ads.  The Kmart bra story definitely fell into the category of thinly disguised ad.

So, summarising into a neat and tidy little list of pros and cons…

CONS

  •  it’s relatively expensive to make your own.  During my year where I added up how much I spent on my totally handmade wardrobe, I discovered that bras and undies were amongst the priciest of things to make yourself.  Sure, you’re only using teeny pieces of fabric and/or lace, but once you include elastics, hook and eyes, rings and sliders, and even the optional underwires, underwire casing and foam paddings… well it adds up pretty quick!
  • it’s fiddly
  • if you buying a rtw bra, you can reject any one that is not completely perfect and just keep trying on different ones until you find The One… when you’re making your own it takes time and maybe even a few less-than-satisfactory bras before you work out the perfect fit for you with any given pattern.
  • it can be difficult if not impossible to find colour-matching bits and pieces.  You can dye your own (more fiddle) or settle for good old boring black, white or beige.  Kind people may give you their old colourful bras from which you can harvest the colourful bits.. however in my experience the hooks and eyes closure at the back which is the very hardest bit to source in different colours is usually the very first bit to look hideously wrenched and worn out, and is not worth saving.

PROS

  • you can be creative… express yoself!!
  •  I feel a lot better about myself and my wardrobe if it is my own labour being poured into it, rather than someone else who is being grossly underpaid for doing so.  Many years ago when I took my Lifetime Pledge in Wardrobe Refashion, I thought long and hard at the time about doing so… and my reason has remained unchanged… I love fashion, I love the artistry and creativity and self-expressiveness of it, but I can only live with myself by taking that ethical stance
  • it’s actually kinda fun
  • it’s fiddly.  Yes, I also claimed this as a “con” but I’m the kinda loon who actually thoroughly enjoys doing detailed and fiddly things.
  • I like that my free time is spent doing something productive and useful… and there’s not much more productive and useful than making your own consumables.  Plus, last but certainly not least:
  • I LOVE sewing with a weird and totally unreasonable passion.  Perhaps that should have been number one on the list.

Well, anyway, there it is, annoyingly inconclusive.  I suppose what I’m saying is that as long as I’m able, I’ll probably continue to make my own, while questioning my own sanity at the same time.  Definitely bonkers.

Oh, and yes, I made a new lingerie set… ta da!


Fabric; Liberty cotton Clifton jersey Josephine’s Garden in the Pink colourway …  this is the other piece of liberty cotton jersey that I bought from the Fabric Store in Melbourne during my weekend away there with Mum, Cassie and Tiffany… and now I’ve made up all my Liberty and have NONE LEFT! (sob)  Knicker elastic, and the white cotton jersey used for lining from Spotlight.   The pink ribbon that I used to make the little decorative bows, white rings and sliders, and the bra hook and eye thingie were all from Homecraft Textiles.

Pattern; both bra and the two identical pairs of matching knickers are the Watson by Cloth Habit… with a few variations of my own, namely:

1) the front crotch seam has been eliminated from the knickers, as per usual.

2)  I really like the shape of the Watson bra pattern, however the raw edges showing inside has always been a problem for me… anyway I made this one so the bra cups + front band are fully lined and with NO raw edges showing on the inside.  My method is outlined below.

Stitch the side seams…

then stitch the cup into the cradle curve… taking care to leave free the narrow upper seam allowance of the cup at the centre front

Wrong sides together, stitch the cup lining to the cup/cradle seam allowance, cradle side up so you are stitching along the previous stitching line.  After this, fold out and twist the shell and lining cup pieces so they are right sides together and stitch the upper, inner-front cup seam with a narrow seam allowance. (no picture of this, sorry!)

Pin cradle lining right side to the seam allowance of the existing cup/cradle seam allowance, and stitch together with the shell pieces uppermost, so you are stitching over the previous stitching. Trim and grade seam allowances…

Now, take the cradle lining and twist it round so you can pin the side seam edge to the outside of the bra side seam… i.e. the right side of the cradle lining is up against the wrong side of the bra back piece.  Holding the pinned seam with the shell fabric uppermost, and taking care not to catch any other bits of fabric in with the stitching, stitch along the previous side seam stitching.

Trim and grade seam allowances…

Looking pretty neat and tidy already!

Attach the upper and lower elastics as per usual, and it’s all perfectly clean and neat in there with absolutely no exposed raw edges…  *satisfied sigh*


SaveSave

SaveSave

SaveSave

SaveSave

SaveSave

SaveSave

SaveSave

SaveSave

pinterestmail

deep teal, suedette dove blouse

Hey!

I’ve made a new blouse.  It’s the Dove blouse by Megan Nielsen patterns, in an lightweight but warm, faux suede from Spotlight.  So, the recommended fabrics for this pattern are shirt-weight stuff like voile and crepe de chine and chambray and linen… not a wintery fabric like this.  However, when have I ever taken any notice of fabric recommendations? Pretty much NEVER, haha.

And I love it.  Very very happy.  Look at those sleeves.  Oooo yeah.

this is a blouse that demands at least one dramatic arm pose

Now, remember how I mentioned pretty recently that I was looking out for this pattern??  Well, Evie, of Indie Stitches very kindly emailed me to let me know that she had one in stock… and offered to send it to me… thank you so much, Evie!  Indie Stitches is an online pattern store with a very nice range of both paper and digital patterns, obviously as the name suggests specialising in small and independent pattern makers like Closet Case Files, Grainline, Sewaholic, Jennifer Lauren Vintage, Papercut, By Hand London, Tilly and the Buttons, Waffle patterns, Megan Nielsen and would you believe this is just a selection?! There are many many more!  If you love supporting small independent pattern companies then I highly recommend heading over to the Indie Stitches pattern store and having a browse, at least.

Please note; I did receive this pattern gratis, however there are no affiliate links in this post.  I will always notify my readers if there is an affiliate link in my posts.  Also on a tangential yet related note, I read somewhere that people think bloggers are raking in the money through affiliate links, well! that may be true for some types of bloggers, like maybe fashion bloggers?  but sewing bloggers…  NO.

For the sleeves you do a triple-stitched skinny hem… it’s a hem finish I have used a few times before that gives a neat little baby hem but with no rippling or “lettuce-leaf” curling that you usually get with a single-stitched or machine-rolled hem… I think I read about it first years ago in an issue of Threads.  I wasn’t sure how it would work out with the slightly thickish suedette, but it did beautifully! and I had a request from my daughter and also from sewnewbee in IG as to how exactly is it done so I did a little sample and took a few pictures for a short tute…

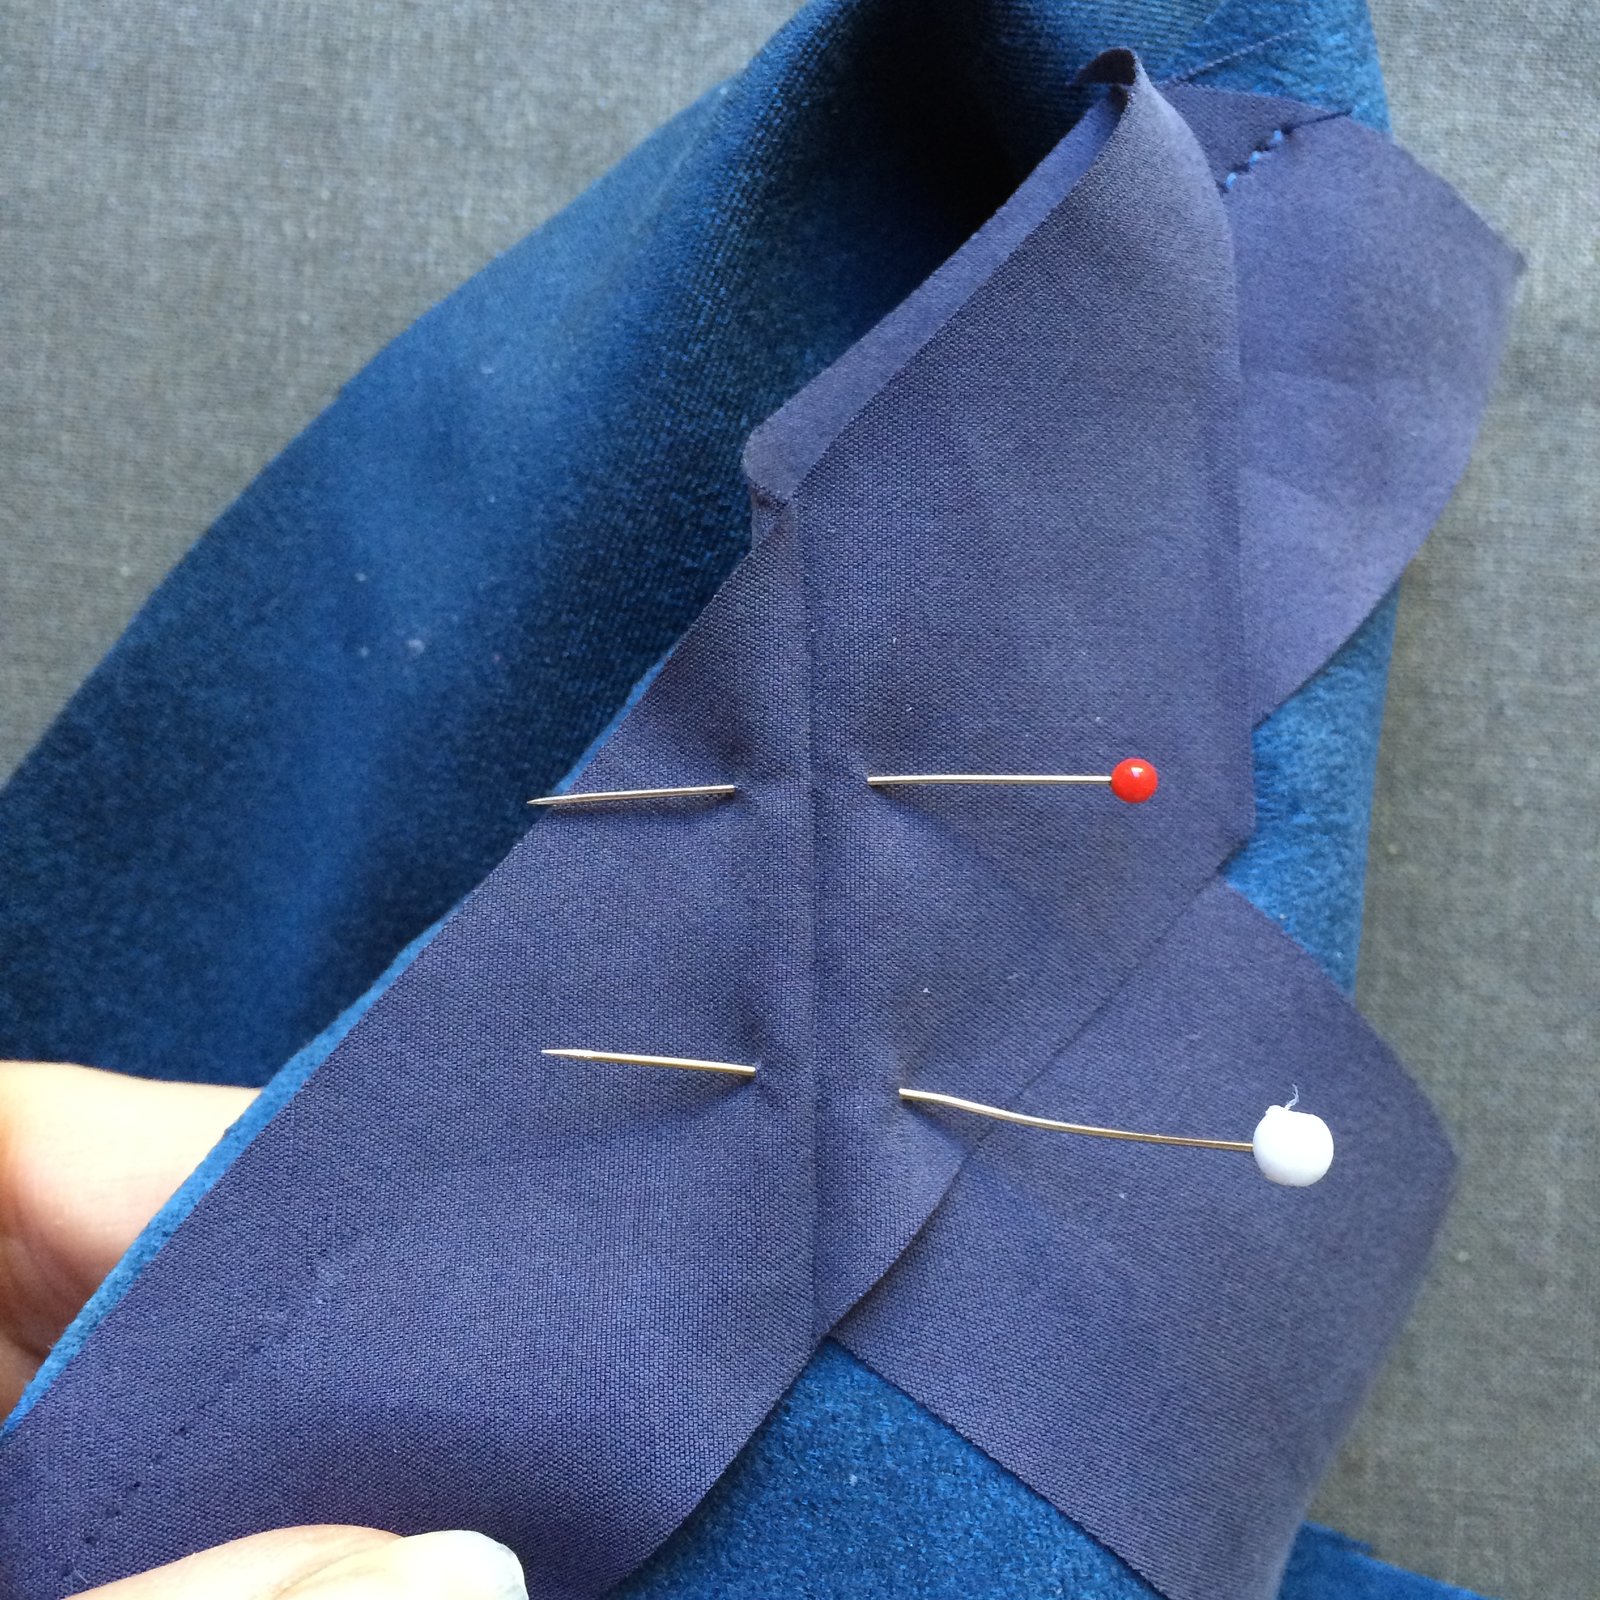
I used a contrasting white thread here because I found you could barely make out a single thing in my pictures with the matching thread!  anyway:

First; stay-stitch at a distance of 6mm (1/4″) inside the raw edge, being super careful NOT to stretch out the edge while doing so.  This is the 1st row of stitching.

Turn the raw edge to the underside just outside the previous stitching, so the stitching sits just inside the pressed edge, and press.

Stitch again (the 2nd stitching) at a distance of 2-3mm  (1/8″) inside the pressed edge, and give it another quick press…

Trim away the raw edge as close to the 2nd stitching as you can.

Turn under this now extremely skinny, double stitched edge and stitch again (3rd stitching) right over the visible (2nd) row of stitching.  The first two lines of stitching help keep the hem from stretching out as you sew, so your edge will be nice and flat and with minimal “lettuce-leaf” curl along the edge.

Inside: looks almost like one row of stitching, but it is actually two; one over the top of the other

Right side has only one row of stitching… plus a very skinny, nicely non-curly edge achieved in a difficult to hem fabric  🙂

excuse me ma’am, your remote is showing

Details:

Blouse; Megan Nielsen Dove blouse MN2105, version 2, in petrol blue suedette
Skirt; Vogue 1247, yellow corduroy dyed brown, details here and my review of this pattern here
Tights; self-drafted, black polyester stretch, details here and my tutorial for making your own custom-fit tights pattern is here
Boots; made by me, and my own design, details here

location: South Perth foreshore, Western Australia

pinterestmail

bunny top

I’ve made a new little top… I really wanted to debut it today seeing as it’s strewn with beautiful bouncing bunnies.  A bunny-tastic, rabbit-iferous Easter-rockin’ top!  😀

You know when you go to Spotlight for a handful of bits and bobs, not including fabric, but you grab a bit of fabric anyway just so you can pay for everything at the fabric counter and save yourself from queueing at that hideously long queue at the front checkout?  No? Just me then… 🙂  #anyexcuse #addictedtofabric  #ineedhelp

Well, this was a result of one of those times.  I do really love this though.  I mean, I don’t know if I’ve ever been to a fabric store and not spotted something I really love?! seriously! but I do manage to restrain myself most of the time.  In this case, the soft, washed out, almost-antique-y ink drawing-like look of the bunny print is really beautiful to my eyes, it’s a novelty print and pretty cute but I think it’s also still quite sophisticated in feel.  The print is more like a dirty charcoal than black, and the background has a sort of marled oatmeal/ivory blotchiness to it, which is very much my best sort of white.  The selvedge says it’s a linen mix, although truthfully  think the linen content is not huge.
   

Pattern; the epaulette cut and sewn, pattern No. 4 from “she has a mannish style”, or “she wears the pants”, by Yuko Takada.  I know, I just made another of these very recently… which is why I used it probably, it was handy to pluck out from my pattern stash again, and I didn’t have to put any thought into going through my top patterns searching for a different one.  #lazybum  Although, to be fair; I knew it’s loose-fitting unstructured lines would be perfect for the flimsy floatiness of the fabric too.

Because the fabric is almost sheer, I lined the body part of the top with a pale coffee-coloured jersey knit, that I bought yeeeeeears ago at a Morrison sale.  I’ve used little bits of it here and there, namely for this lingerie set, and also for this one too.

I cut the lining to be the same size as the shell from the armpit up, and just a bit slimmer in the body so the shell could skim over it better.  I put quite a bit of thought into the best way of lining it.. should I line it or underline it? have the bottom edge enclosed? neckline binding or clean edge? line the sleeves too?  eventually settled upon this way and think it’s turned out a pretty good way to line a loose top like this one. No bindings; it’s attached at the neckline and the sleeves, but otherwise floats freely and separately inside the top.

Construction method is as follows …
Firstly, sew the shoulder seams of the shell, likewise the lining pieces.  With this fabric being pretty flimsy and virtually see-through, I finished all seams very close to the stitching with my overlocker.


Pin the shell and lining right sides together around the neckline, stitch and finish.
Understitch.


Sew the side seams of the shell, and separately, the side seams of the lining


Pull the lining inside the shell, wrong sides together and keep both layers together, raw edges even, when stitching the sleeve in the armscye.  Sew the sleeve seams, pin sleeve cap in the shell/lining armscye right side of sleeve to right side of shell, stitch and finish edge close to stitching.

Hem the shell and lining separately.  I chose to invisibly hand-stitch the lower hems in place.

For the sleeve hems; I really like the raw sheer edge and the way it gently rolls up, and wanted to keep this look, however the knit does fray a little. So I made an attempt to employ something similar to what I’ve seen Sasha of secondopiano do… I was so impressed that Sasha unravels a length of the fabric filament and uses it to properly cast off the edges of her knits in the knitting way! Or is it crochet? I just checked… it’s crochet!  Her work looks so beautiful and perfectly finished.  Well, I didn’t  manage to crochet my edges here, I tried! but failed… I really need to get myself a teeny tiny little crochet hook I think! so instead I did a sort of cheat’s version… I threaded a sewing needle with the same beige all-purpose thread I’d used to sew the top together, and loop-stitched through each loop to finish the edge.  It’s secure, it won’t fray and it’s pretty much invisible, and I love how this turned out.  Thanks for the brilliant idea, Sasha!

OK, I have no idea what promoted this mad bunny pose… I’m gonna go with too much amaaaazing hot-cross bun?!  Or maybe… not enough amazing hot-cross bun?  Yep, that sounds far more likely…   better hop off and eat another one! 😉


Details:

top, the epaulette cut and sewn, pattern No 4 from “she has a mannish style” or “she wears the pants”, by Yuko Takada, soft linen-mix knit.  My previous versions of this pattern are here, here and here
Skirt; Vogue 1247, red velveteen, details here and my review of this pattern here
Shoes: black clogs made by me, here; white oxfords below, also made by me, here  I almost cannot believe I have TWO me-made pairs of shoes to choose from when deciding what will go with an outfit…  I feel like my self-made shoe collection is taking OFF!!!!

pinterestmail

making your outfits “pop”

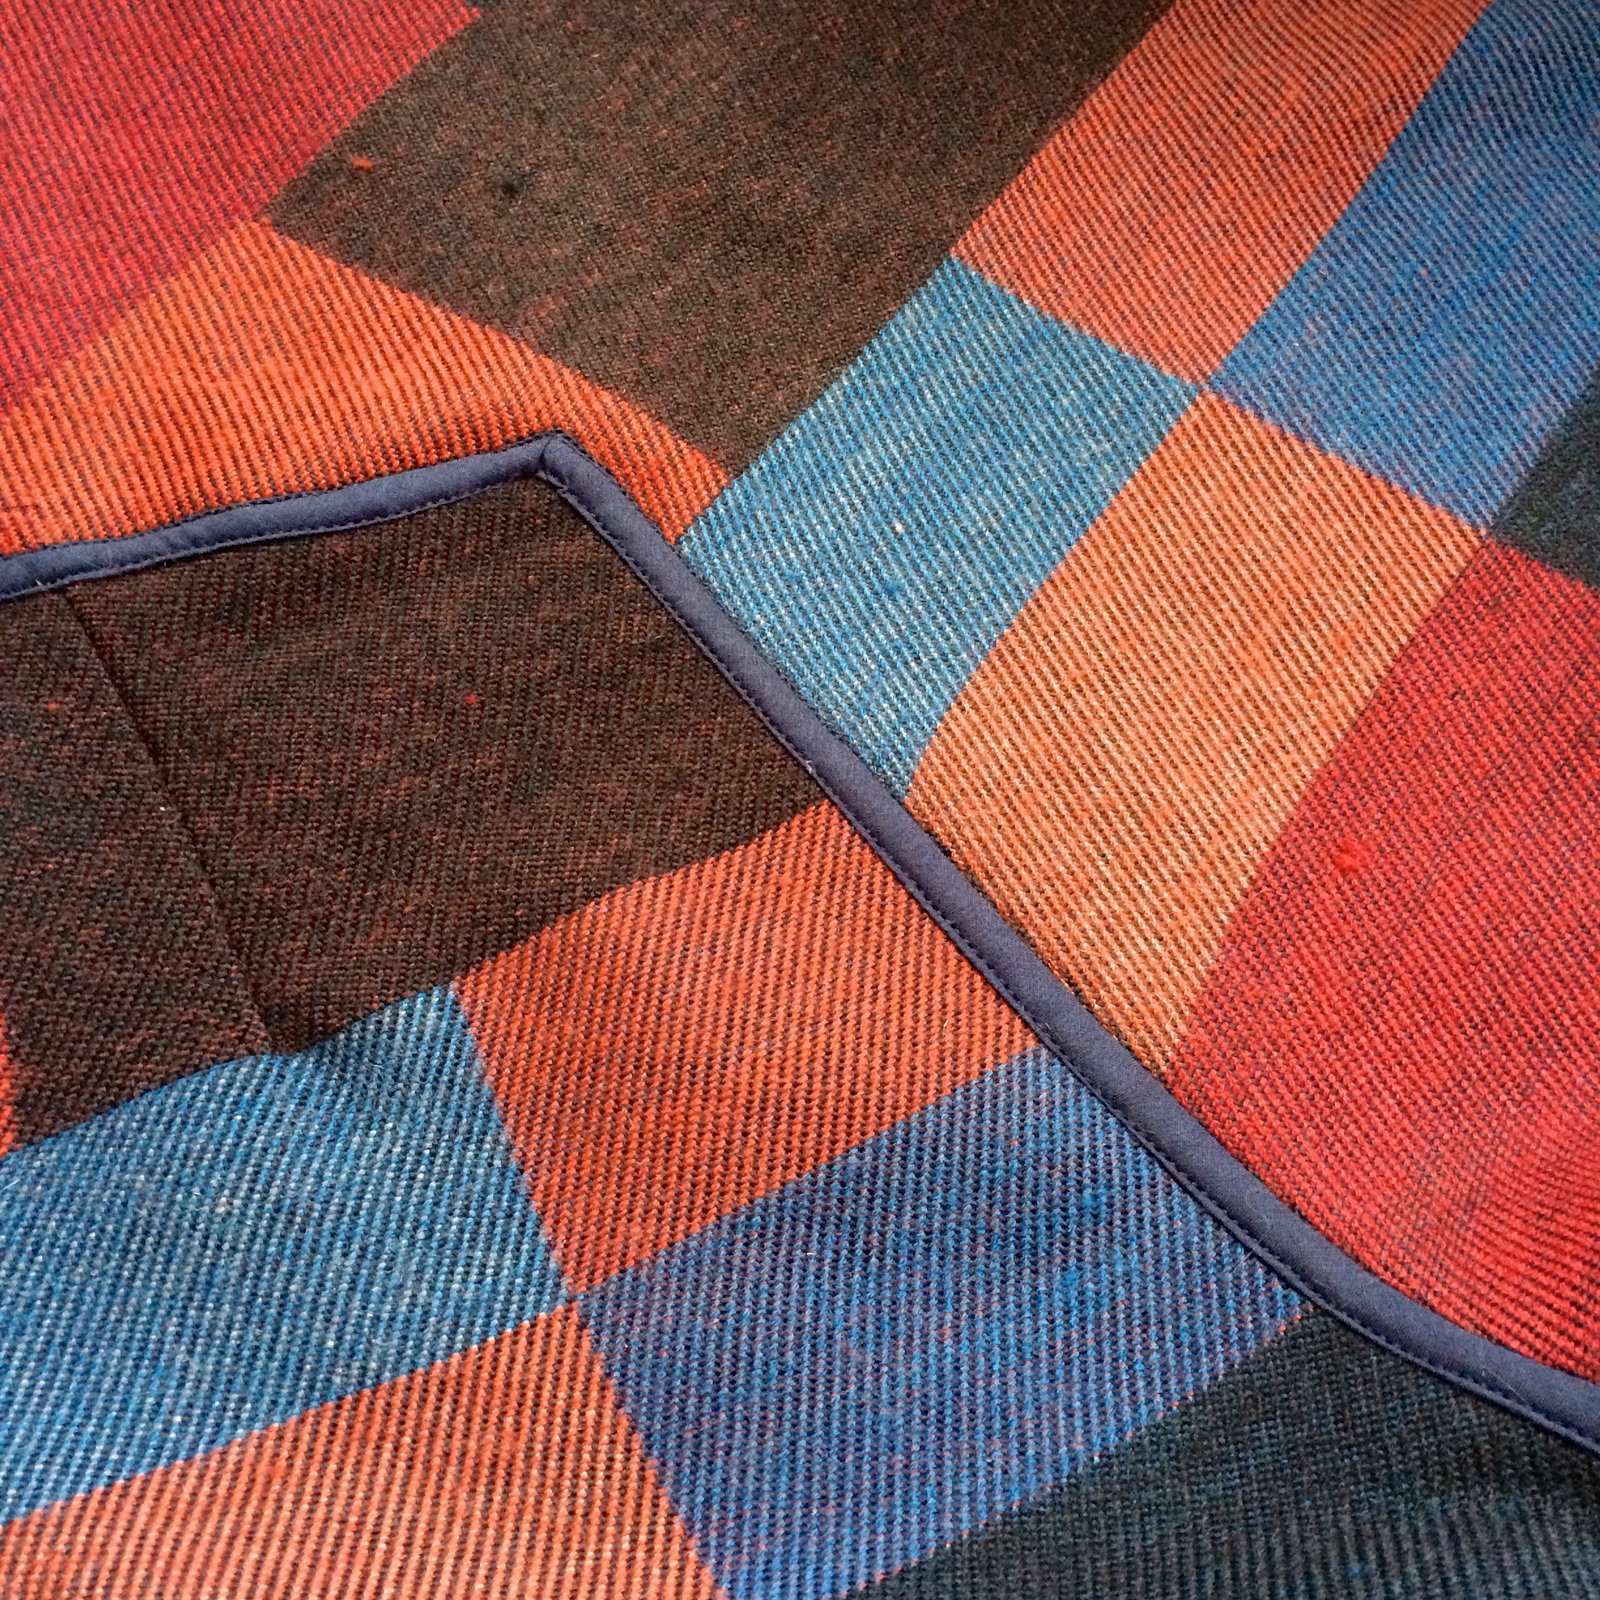
Like most bloggers, when taking my pictures I usually try to pick some nice location as a backdrop to my creations, something that has the colours and the “feel” and/or just some general overall appropriateness in subject matter or whatever, that I think enhances whatever it is I’m showcasing.

my West Aussie outfit in its place of absolute origin, the West Aussie bush

However, even if you LOVE your background, it can sometimes swallow up your colours into its gorgeousness and your outfit kinda disappears and doesn’t show up very well… And also, sometimes I just like the idea of being able to eliminate the background.  I really like that look where you have a black and white background, and the thing you’re showing is in full and glorious colour… and after a bit of fiddling about I’ve worked out an easy way to do it and am sharing it here just in case it helps anyone else who likes this look too!  🙂

SO.  You need Adobe Photoshop;

Firstly open your picture in photoshop.  Go to Image, Adjustments, and select Desaturate.  This makes your picture black and white

Now go to the icons on the left and select the History Brush Tool

On the right in Brush selects, have the brush as the big, round-edged solid one at the top.  You can change the width/size of the brush using that size scale just above.  For the edges, make it a very small size and zoom right in on your picture so you can get it into the edges and corners as close as possible, getting it all nice and neat and no going over the edges.

For the “colouring-in”, size up the brush width a lot wider, for speed.

Once it’s all done, save it as a new jpeg.

Oh yeah!!  Doesn’t it all really POP now?!!!

“POP”:  hehe, I never use actually that phrase; I’ve always been like, pop? I heard no pop, am I going deaf? well ahem, ummm ok yes, I am actually… the perils of ageing, you know,  but um, oh alrighty then!  Guess that explains everything!

pinterestmail

white Issey Miyake shirt

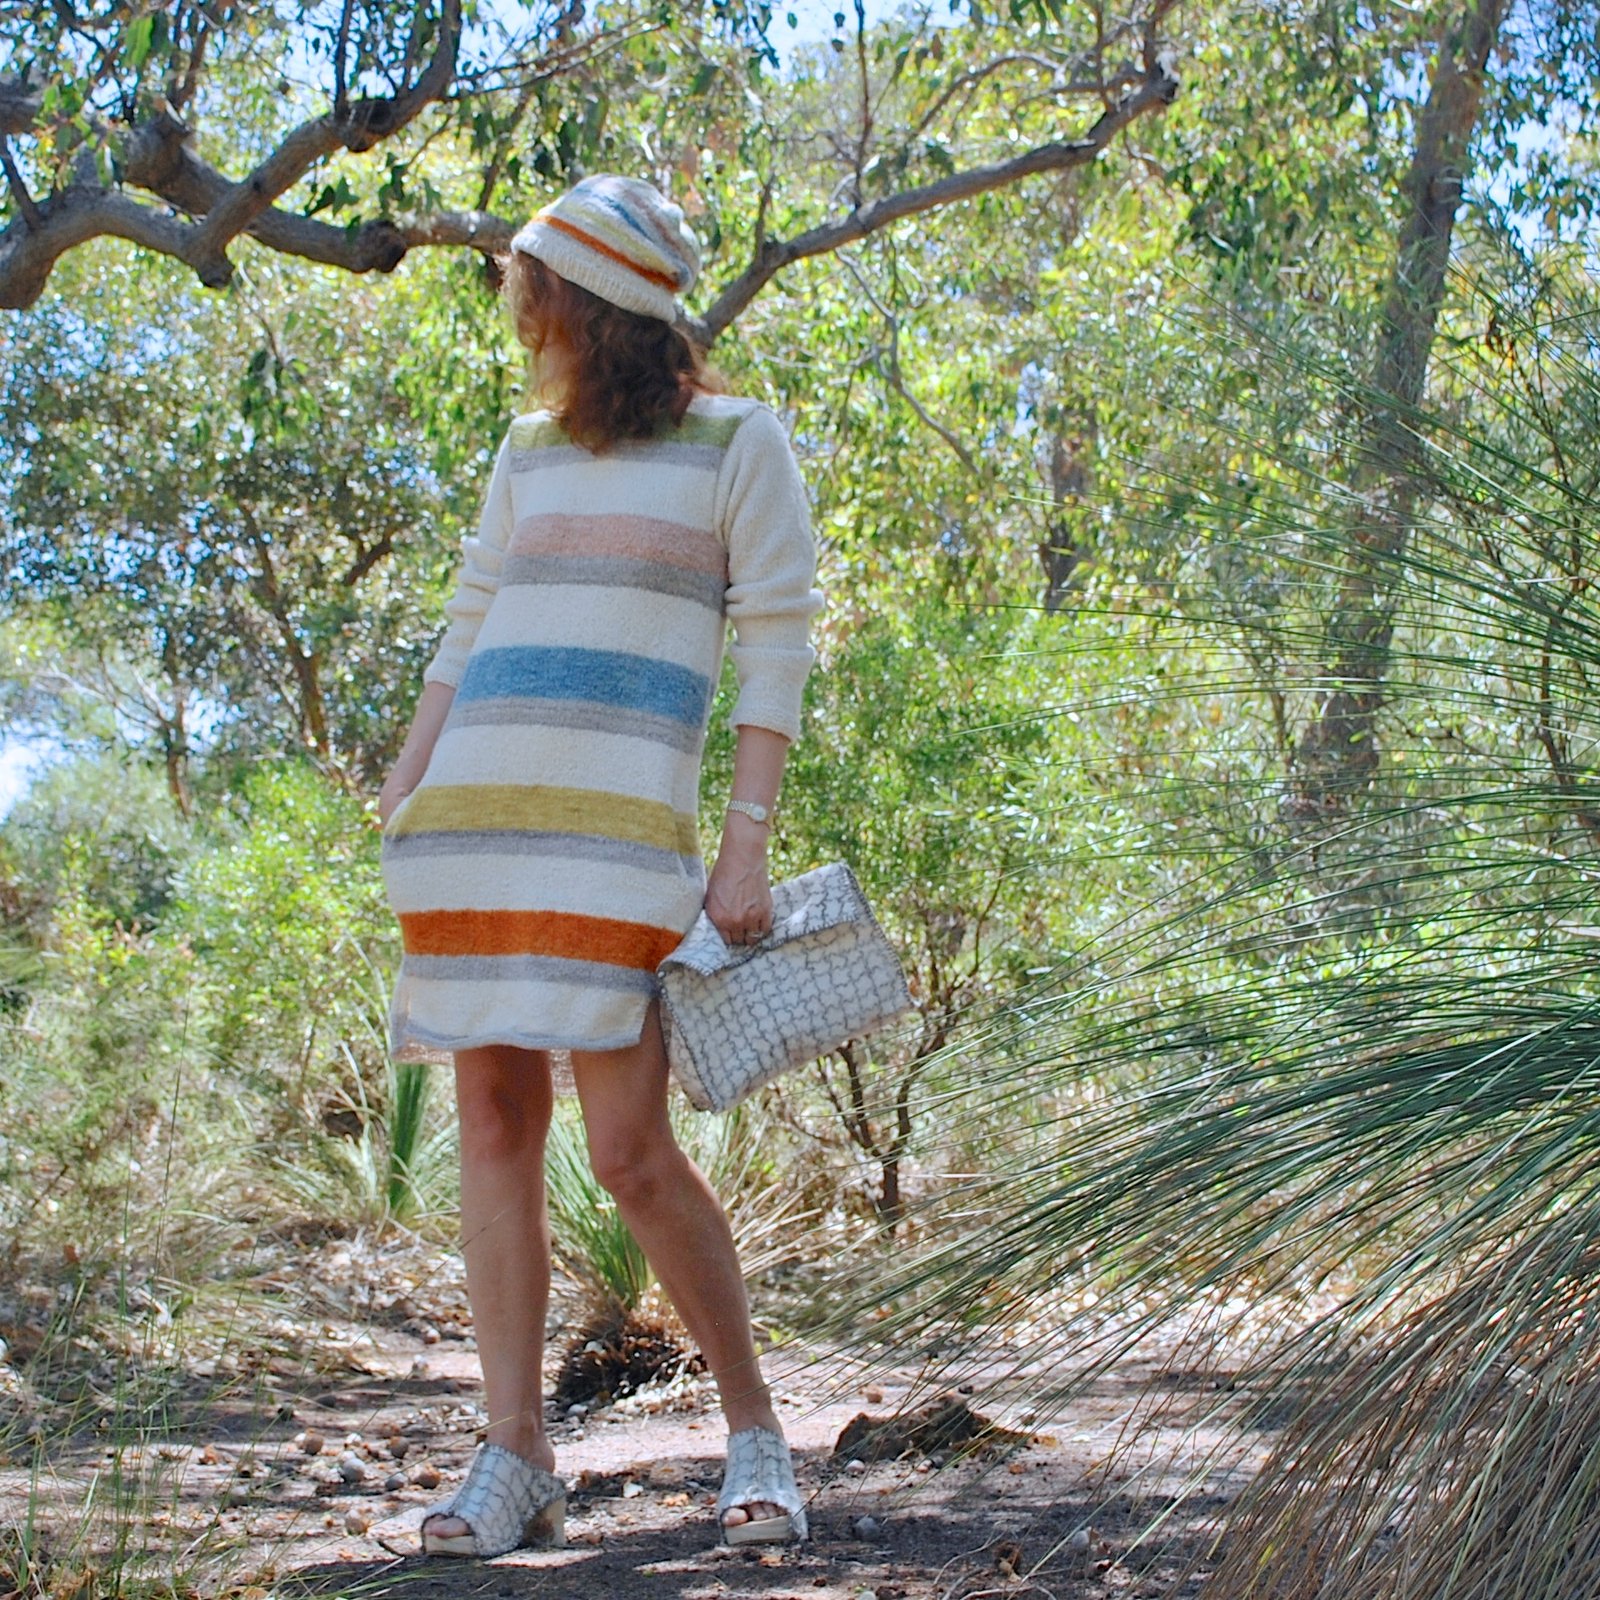
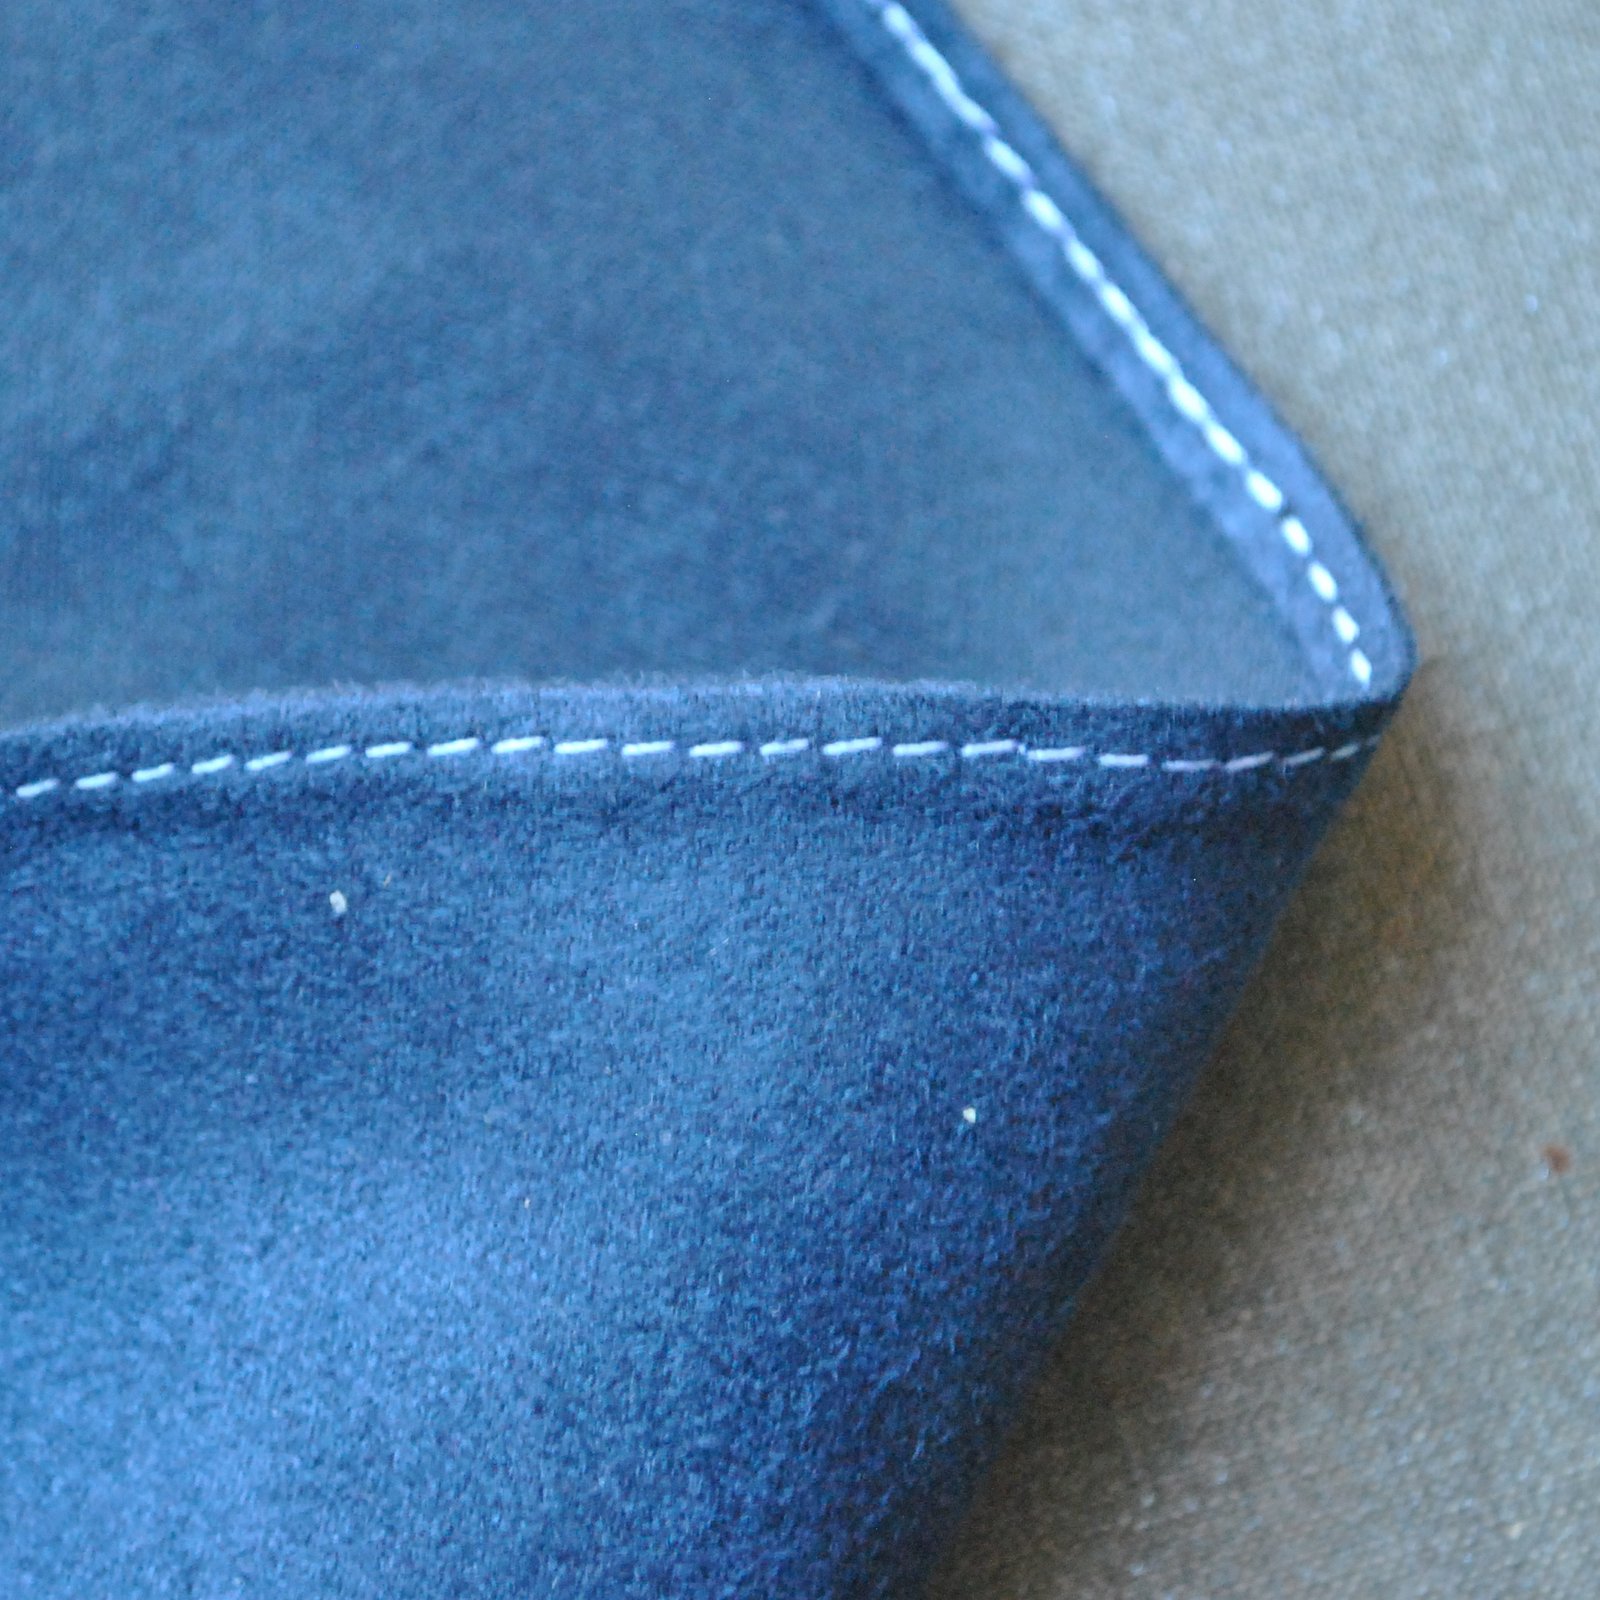
Self-explanatory, really.  #endblogpost  😉
Pattern; Vogue 1384.  It’s a vintage pattern, hailing from 1984, sorry. Yeah, it’s annoying when people make things in vintage patterns that you can’t get a hold of anymore.  But I’m sure this is not particularly aspirational actually, it’s a little weird in that 80’s way.  That high, slightly floppy collar combined with a billowing pirate-y blousiness is giving me serious Duran Duran vibes.  That’s sort of a good thing btw HUGE Duran Duran fan, once upon a time… only you know, dating myself here  #woops  On a side note; watching that clip again, wow I think I’ve suddenly identified the genesis of my lifelong white shirt obsession…   Also, haha, I totally dance just exactly like that, to this day still, lol.

I’d actually vaguely planned to make this shirt for quite a while, then Anna of blogless Anna proposed an IG #sewjapaneseinjanuary sewing challenge; prompting a jump to the top of my queue… sewing challenges are such fun!

I’ve previously made the skirt from this pattern too; here.  That now resides in Cassie’s wardrobe.  Thing is; the pretty floaty pink-ness, while lovely, I’ve decided is just not really ME.  Not to mention that she put it on one day and obviously it looked only like about 999999 times better on her than it ever did me (sob)   I’ve got to stop giving her my clothes to try on!!   Just kidding; I wore it a few times but tired of it quite quickly and I don’t miss it, not one little bit.  Though I do still really like that design and am thinking of making it up again, just in a more me-friendly fabric and colour.

Fabric; a thin, sparsely-dotted swiss cotton voile with ever so faint and equally sparse paisley embroidery on it in bits.  Very very subtle.  I bought it in Potters Textiles a few years ago, when it was in its other location.

The top looks at its best when it’s either tucked in or belted-n-blousy, and while I have a small collection of self-made belts… like, four maybe?  none of them looked very right with this sheer-ish white top, so I quickly whipped up a thin white one in the same fabric to wear with it.  Kt-chaaaaaaa!! *whip-crack sound effect*  Sorry, I simply cannot read “whipped something up” with regards to sewing without hearing a crack o’ the whip sound in my head.  Craaa-aack that whip!  *  (Devo, and a warning, do not click that link unless you WANT to be subjected to some really random and classic 80’s, madness.  Yep, I was a fan of that too, *blush*)

The belt is basically just a waistband really.  A poor, bereft and lonely little waistband, with no skirt to call home…  *sad violins*  It’s exactly the same deal as the one I made for my tartan dress.  Just two buttonholes, and one button, and you wear it so the button is on the inside.

Also, interesting pocket tab/flap detail.  You can’t really see it on the outside, which defeats the purpose a bit really, but oh well.  It’s kinda cute when you notice it!

I flat-felled all seams throughout, as usual.  Btw, you CAN flat-fell all sleeve and armscye seams too… my tutorial for flat felling the armscye seam is here… and the sleeve seam itself can be flat felled by starting from the middle of the seam and stitching OUT.  Be sure to have the sleeve RIGHT SIDE OUT, so that you are sewing inside the sleeve… this will ensure that you are in no danger of stitching down the other side of the sleeve underneath…

In the case of this shirt; I stitched the sleeves to the shirt, and flat-felled that armscye seam before stitching up the sleeve and side seams…
First, stitch the sleeve and side seams in one fell swoop.  Press seam open and trim one side.  If you are flat-felling the seam towards the back of the garment, trim the back edge of the seam.

Press the front edge back over the back edge, turn under the raw edge, and press in a neat even width.

Turn sleeve RIGHT SIDE OUT  (v. important) and from the wrist end of the sleeve; bundle the tube of the sleeve up to locate a point roughly midway up the sleeve.  Position the bundled up sleeve tube behind your machine and pull the wrist end of the tube through until this midway point is under the needle.  Take it nice and slow, and stitch the flat-felled seam from here out to the wrist.

To complete the seam; just repeat the same process as above only bundling up the sleeve from the armscye side… locate that same midway point of the sleeve, and stitch the seam from there, to the underarm, and keep going in one long continuous seam down the side seams to the bottom hem of the shirt.

Done!

Details:

Blouse; Vogue 1384, white swiss voile
Skirt; Vogue 1247, striped stuff, details here and my original review of this pattern here
Sandals (above): my own design, made by me, all details here


Denim shoes (below); my own design, made by me, all details here
location at top: Preston St overpass, Como, Western Australia

Replicating the 80’s pattern envelope pose,  just because…. the 80’s.

pinterestmail

finishing an edge with bias binding

Now, I promised to write this tutorial to show my Mum how I applied this finish to her top… and others expressed an interest too; thank you so much to everyone else who did… I finally did it, yay  😉

Mostly I would use this finish for a neckline that is wide enough to need no zip or button opening, as pictured above. Another example of its use is for a hemline such as the skirt demonstrated here.  I’m making this in a totally inflexible fabric with about zero give, PLUS the design has such a sharp curvature around the bottom edge a regular turned-up-twice hem is quite difficult to execute neatly.  The bias binding finish is a good solution for this 🙂   It results in a clean, banded finish on the inside of the garment, with one row of 1cm (3/8″) topstitching visible on the outside of the garment.

This method is just one of several ways of doing this kind of finish, I prefer this way because I find it the quickest and easiest, results in minimal fabric bulk, and minimal mucking around.

Firstly, make a strip of 2.5cm (1″) wide bias cut fabric long enough to fit the opening to be finished, plus at least 20cm (8″) extra.  Best fabrics to use are something woven that is very thin, fine and lightweight, like cotton voile, silk or handkerchief linen; in an unobtrusive colour toning in with the fabric.  For Mum’s cotton top above I used the self-fabric because it is quite light; for the blue suedette skirt I used a scrap of leftover silk-like microfibre.

Right sides together, pin around the edge to be finished, and stitch in a 6mm (1/4″) seam, leaving a gap between start and finish of around 15cm (6″) and ideally tails of at least 20cm (8″) 

Fold and press the strips to meet together on the bias.  I find it best to leave a very tiny gap, like 1-2mm or so, between the pressed edges.  Don’t have any explanation for this, just that it works better when it can stretch into it just a touch.  Keeping everything straight and right sides together, pin along the folds, stitch, and trim.  Press seam open.

Stitch up the gap to complete the bias strip attachment to the edge.  Press the bias strip, bias strip seam allowance, and garment seam allowance away from the garment.  Understitch these three layers together close to the seam line, keeping just the garment layer free.

Turn the garment wrong side up and press the bias strip back onto the garment, keeping the seam line just inside the pressed edge.

Turn under a 6mm (1/4″) seam allowance on the bias strip, press and pin in place.  Topstitch 1cm (3/8″) in from the garment edge.  Done! and the nice thing is that you won’t ever be able to see where the strip starts and ends  🙂

pinterestmail
Switch to mobile version
↓