Monthly Archives: December 2016

You are browsing the site archives by month.

2016; a retrospective

Soooo.  It’s the last day of 2016.  Cheers! and here’s to the year that was… *chinks champers flutes*   Mwah, mwah, darlings!

Kicking off with my favourite ootd/blog pictures, just one for each month…  Apart from January, well obviously I did not make January’s outfit.. I am wearing a full traditional kimono in Tokyo! but it was definitely a highlight for my year! spending the day with my dear friend Yoshimi and with Cassie and Kelly, getting dressed in kimonos and having a Japanese lunch together.  So very interesting and so much fun!

Apart from this one picture, I made 100% of what I am wearing in every other picture…

January;

February;

March;

April;

May

June;

July;

August

September

October;

November;

December

Oh dear, oh dear; looking through all my old pictures to compile this post has been a little sad, Sienna features in so many of them.  yes I miss her so much, in fact everyday.  We’ve still been quite down here.  But I will not get all maudlin now…

Ever onwards.  So, my year in making:

I made a total of 101 things this year.  I don’t think this is too bad, considering it included a fully embroidered Alabama Chanin skirt, and 19 pairs of shoes.  Yep! NINETEEN pairs of shoes…  ahem, some of them are just a tad better than others, and several of the earlier, shonkier pairs have already winged their way to that big eternal shoe box in the sky…

Da breakdown…  13 dresses, 1 doll with a full wardrobe, 12 skirts, 5 lingerie sets, 5 prs of bathers (1 binned without blogging because it was an abject fail), 1 knitted cardigan, 5 jackets/anoraks, 2 prs thongs (flip-flops), 10 prs oxford/lace-up shoes, 1 pr winter boots, 2 prs desert boots, 2 prs slippers, 20 tops/shirts/blouses, 2 prs sandals, 5 prs tights, 1 pr jeans, 1 pr hand warmers, 13 bags/pieces of luggage.  Phew!

Selfishness vs. virtuous brownie-point earning:  63 plays 38.  Maybe a little tipped towards selfishness, but since that figure includes all the shoes, and practise shoes! that I needed just so I could lead a self-shod, but functional life, well I don’t think it’s too terrible.  I think I make just enough things for others that I’m not a pest about it, you know?

Costs… dunno.  Haven’t been keeping track.  Probably a small fortune?!  😉  No really, I did 3 refashions, and also 24 items were made from free “old” fabric being tossed out by others, or using leftovers, or scraps.  Really could improve upon this though…

Most worn items:  ah, this is my favourite bit…  For four years now I’ve kept track of what I’m wearing, three of those years via my ootd blog..  I keep a spread sheet that I update every month, so I know just how often each and every thing has been worn.   I know I know, super nerdy stuff.  But, real talk; it’s been an eye-opener I tell you… someone who tells you they’ve worn something hundreds of times…? well, if you actually add it up, for real; you may not have worn it as often as you think!  Truth!  Anyway, my most worn clothing items for this year can be summed up in the following outfits:


The obvious basics were my black winter boots (70 wears), black tights (109 wears over 4 prs), white LS woollen winter tees (30 wears over 2 tops), other white beige/ivory Tshirts(41 wears over 5 tops); my staples are all 4 of my coloured Miette cardigans, my little mini skirts for winter, and all my loose linen, cotton and silk dresses for summer.  For the most part I stick reasonably well to my autumnal palette but I’m not strict about it

Favourite creations:

I would have to say, topping of the list are my winter boots!!  so unbelievably proud of these things!!! and which as mentioned have been worn a TONNE.  I can still hardly believe I managed those things!

Followed closely by my Magdalena Dusk Alabama Chanin 3-piece ensemble.  I’ve worn it twice this year, not very much! I think I suffer from might-ruin-it-itis.  Gottta snap outta that.  This thing deserves to be paraded about more, not just for the several months worth of hand-embroidery it represents, but of course for its connection to my lovely friend Lisa of Lisa’s Carolina 🙂

I’m also pretty pleased and proud of my Tosti jacket...  🙂

Goals for 2017; Mainly, I want to see out the end of my 100% handmade challenge of course! I have just 53 days to goooooo!  But in making goals, well I don’t need anything, so my creating is going to be aimed at maintaining a useful wardrobe, and concentrating on higher quality, and more interesting things.  I would like to occasionally make some more fun and frivolous things too.   And to continue making shoes, and improving my cobbling skills.

Finally and most importantly of all, I just want to say THANK YOU to everyone who reads my blog and who takes the time to leave a comment, I am grateful for each and every kind thought.  Thank you so very much, and I’d like to wish all the best to everyone for a safe, happy, peaceful and creative 2017!  xxx

pinterestmail

buttonhole loop; a tutorial

Aaaages ago, Susan asked me for more information about the buttonhole loop used in this top, and I totally forgot!  I’m so sorry! right up until yesterday when Pencil Girl asked the same thing about Cassie’s top.  Ladies, thank you so much for asking!  I hopped to and wrote up my method… and if you dislike sewing tutorials then please skip over this… we’ll just pretend that this isn’t even here and we can still be friends, yeah?  winkwink ;D

The buttonhole loop is a quick, easy and very unobtrusive button closure, made using thread alone.  It is most often used for a short slit opening at the top centre back of a dress, blouse or a top, where two finished edges abut each other with no overlap; it is practically invisible as well as a quicker alternative to a rouleau loop.  My grandmother used it aaallll the time, and taught me how to make one…

also, please let’s just pretend that this is the back of a divine little blouse made of Liberty lawn or something, and not what it is.  Which is two measly scraps of  leftover upholstery fabric from my recently made duffle bags… #notliberty #notsilk #ohtheshame

Stitch the button in place.  Which side is up to your personal preference… although to have the button on the right hand side is conventional

Cut about 30cm (12″) of the thread you’re going to use.  Buttonhole twist is traditional and the best if you are lucky enough to get hold of it, I am using upholstery thread here which is an excellent substitute.  You can also just use regular, all-purpose thread or even embroidery thread if you like, it will probably be just fine if a little more difficult to work with.  Reason being, regular thread is thinner and twists and tangles more easily, so is more likely to develop knots, and also results in a flimsier loop, naturally; and embroidery thread, being stranded, is more difficult to pull firmly into the knots you are forming with each stitch.  But either would work out ok, in a pinch.  There are no rules in sewing!

Secure the thread at the top of the left hand side of the opening.  This should be at a level with the top of the button.

Lay it over the button so the thread lies around the button shank/stitching, and pull firmly until thread and two garment sides are sitting in the desired position.  It’s more neat to have the sides abutting each other closely, although if you want a bit of a gap between the sides make the loop longer.

Stitch the thread once in the left hand side, level with the bottom of the button.

Lay the thread back around the button again, and stitch back in the top edge.

Being careful not to pull the loop out any looser or tighter, undo the button… now you’re going to work buttonhole stitch to totally cover up that two-stranded loop…

Bring the needle over the loop, insert it back under the loop and over the working thread on the other side… this is the buttonhole stitch.  It’s basically the same as blanket stitch, but instead of doing it into the edge of fabric, you’re doing it over a thread in mid air, so to speak.

please excuse my dodgy drawing skills…

Pull it down firmly, and repeat; just keep going, going, going; pulling each stitch firm and trying to keep it all flat and even and straight; and not to rotate around the loop as you’re going along.

When you get to the end, secure the thread into the bottom of the loop by sewing three tiny stitches  into the same spot three times.

aaand; done!

pinterestmail

… some clothes for Cassie

… and finally, I made some clothes for Cassie for her Christmas pressies too.  At first I had wanted to make some luggage or a travel set for her too; but we were hanging out in Spotlight together, you know as you do… and I discreetly sounded her out about the particular fabric that I had in mind for her.  And she basically nixed it.  Aaargh!  So I had to change tack.  Realistically, she probably needs clothes more than she needs a travel set, anyway!

Particularly she needed little separates and dresses for work.

Et voila…

1. a little spotty top.  The pattern is the cap-sleeved crop top;  Burda 02/2015; 127 and is one I’ve previously made for myself, here.  This one is sized to fit her and lengthened by about 5cm too.  The fabric was a surprise goodie from Spotlight.  I prefer polka dots to be irregular in some way, either in size or arrangement.  When I spotted (hehe) this one, well I just couldn’t resist!  A lovely soft grey crepe, with ivory spots in a satisfyingly random, non-grid pattern, and feels very luxe, just like silk.  I don’t think it is actually silk but it does feel exactly like it; lovely, slippery and whisper-soft.

Funny story; I made this nearly two months ago… and risked posting it on IG for bpsewvember “spots and stripes”… I don’t know what I was thinking … that she might be too busy at work to notice it or something? but she did! and commented “thanks, Mum!” eek!  I proceeded to just keep quiet about it and hope she wouldn’t actually come around asking for it, and luckily she didn’t think to do that!

that IG pic… with my own striped skirt

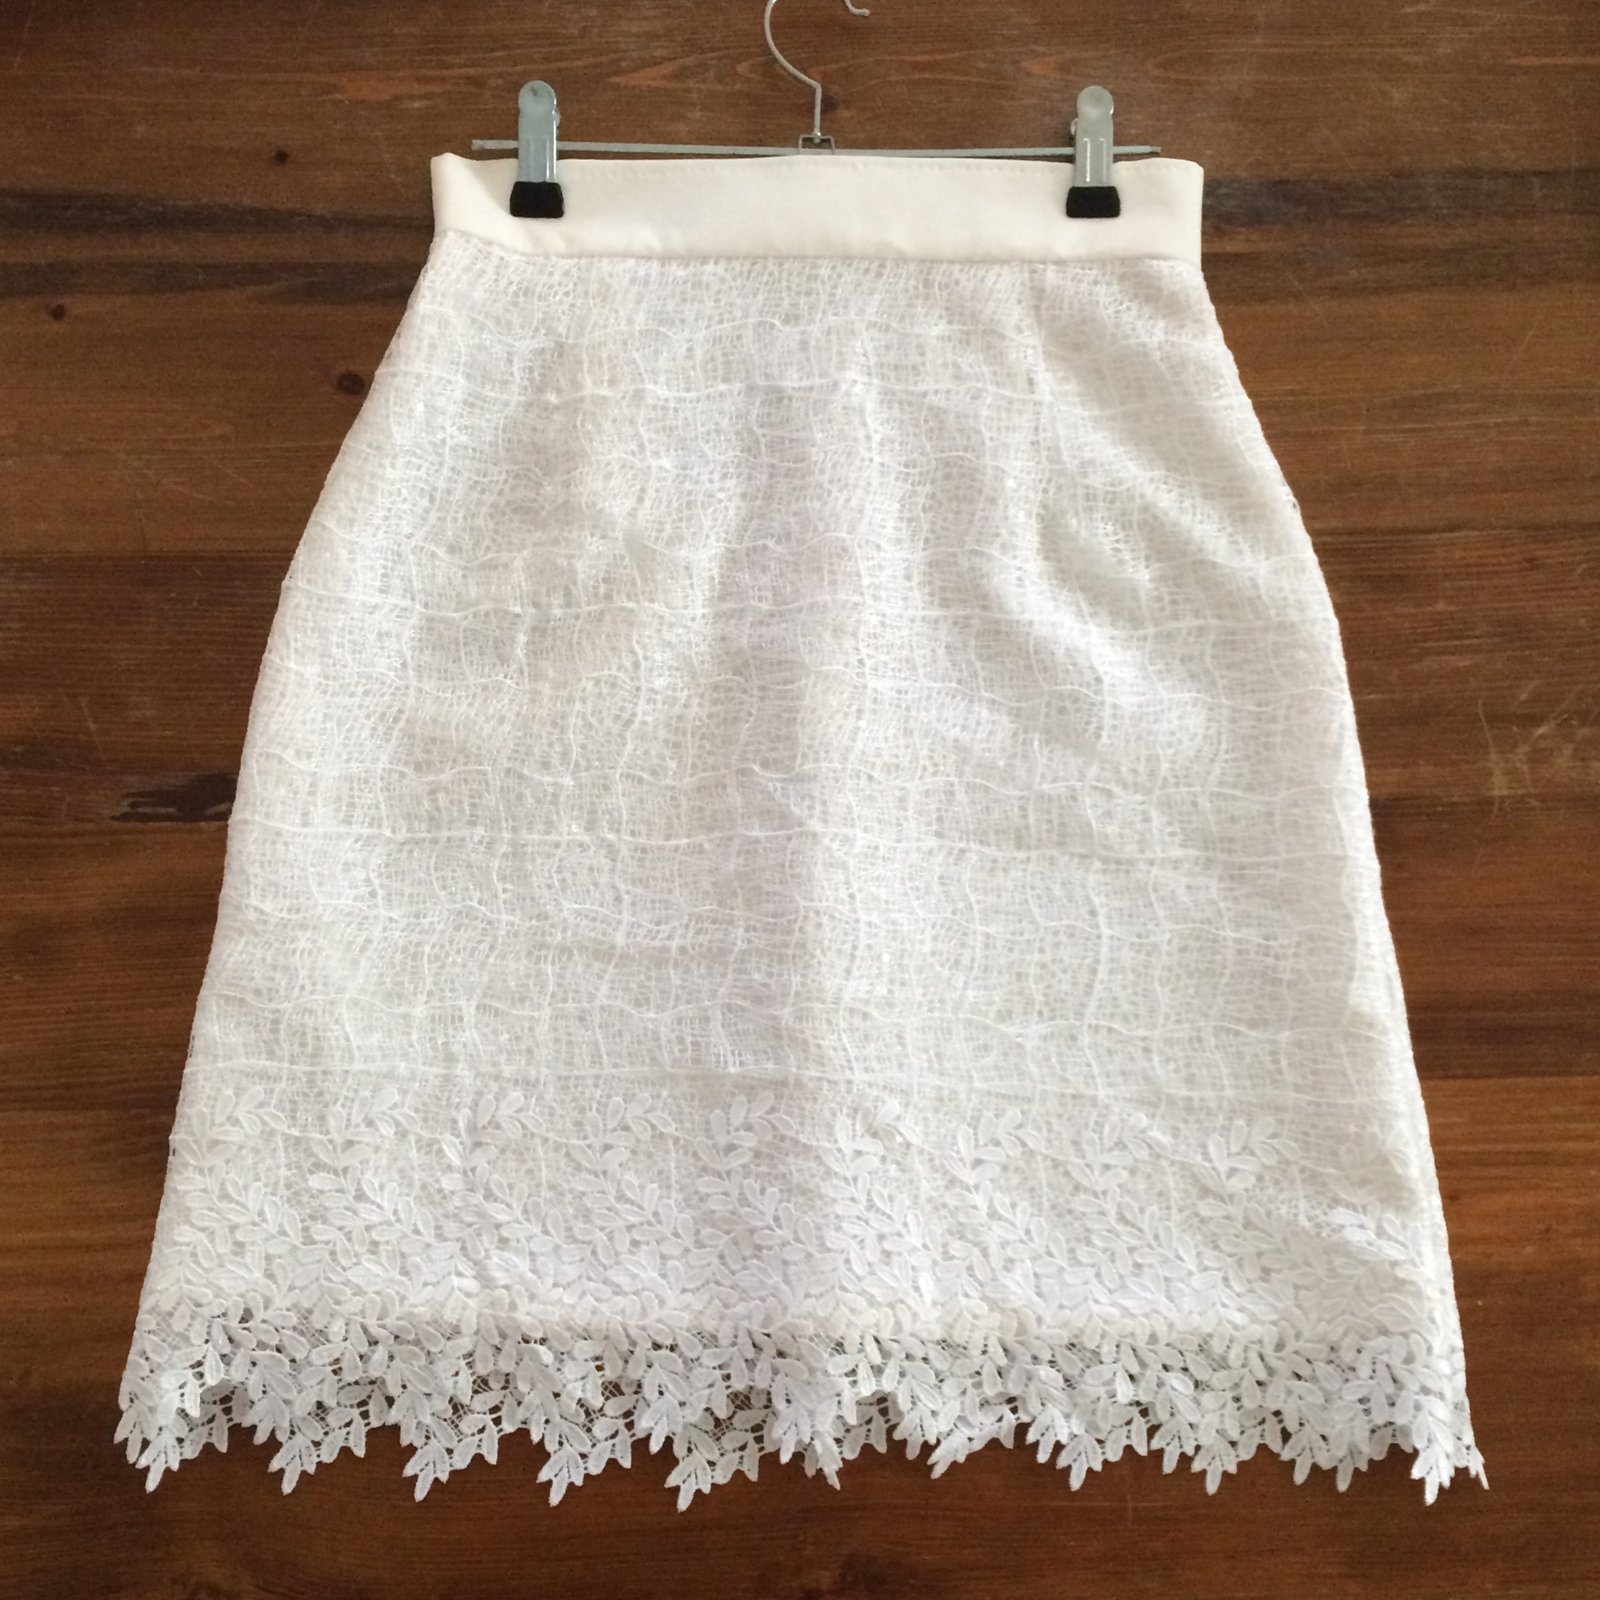
2.  a white cobwebby, lace-y skirt, with a very pretty border.  I used Vogue 1247… again! and spliced the pattern pieces together so there’s just one seamless front, and the two back pieces with one centre seam for the zip.  The white lace shell and cream suiting gabardine lining/underlining fabric are from Fabulous Fabrics.  The waistband is cut from the same cream fabric.  I like the cream peeping through from underneath the pure white lace, I think it makes a really nice, tonally subtle contrast.  The waistband looked a little bland by itself but I didn’t want machine topstitching, I thought it would look a little… I don’t know, like it would lower the tone of the skirt or something.  But it needed something.  So I did some hand-picksitching along the top edge… and really like how this looks; it adds a little bit of something, a certain handmade je ne sais quoi, and practically speaking achieves the stabilising effect of topstitching without the regimental look of machine topstitching.

note: shoes are Melissa

3.  finally a plain pink Tshirt. Looks boring, but she was over the moon with this!  This is my attempt to clone her favourite and beloved Cotton On Tshirt style and make a pattern from it for her… she has several of these and they’ve all been loved almost to rags!  I borrowed one that hadn’t been stretched out toooooo badly, and made a pattern from it; this was also a Christmas gift for her  🙂  I think it turned out pretty good , the fit and style is just about identical to the Cotton On one, so yay!  There’s nothing quite as valuable as an excellently fitting Tshirt pattern! and, bonus; they take barely an hour to whip up.

I finished the hems and sleeve edges with my twin needle, and since I was too lazy to wind up a new bobbin of pink, the double topstitching has one strand of pink, one of white.  You can only really tell if you look right up close! and I kind of like it.

And that’s it for my Christmas pressie making this year!

Oh! I almost forgot! not a Christmas present, but a few months ago I also made a Named pattern Inari tee dress for her.  This isn’t for work obviously, it’s just a casual, slop-around-at-home thing… the fabric was leftover from a hoodie that she made for herself previously, and she bought it in Tokyo during one of our holidays there.  I added a kangaroo pocket at the front because, well you know; pockets! and finished the neckline and opening edges of the pocket with a bias binding; left off the slits and finished the bottom gently curving longer at the back than at the front, mimicking the high-low hem of the original pattern.

It’s not a very exciting dress, but she likes to wear it on the weekend, or in the evening when relaxing, or to watch tv and stuff. An after-work, but pre-pyjamas thing.

Ok, now that’s really it.

Now, to make something for meeeeeeeeee!  she skips with a clear conscience to the sewing room, self-indulgent frippery in her heart… 

(btw; I apologise for the terrible quality pictures.  I just snapped most of these very quickly with my phone, on Christmas Day, as she tried everything on.  I’m hoping she will give me a little time for me to take some nicer pictures sometime… but she’s currently away and I reeeeeally wanted to get these blogged before the end of the year, to round all my “made” things off!  This post to be updated, in time!)  Update; DONE IT!!

pinterestmail

the year of handmade, 10

above are just a small selection of some of my favourite outfits for the last month, the entire collection for the year so far can be viewed in my Year of Handmade flickr album, here

Oh, running behind my blogging schedule… oh well, it’s a self-imposed folly anyway, right?! 57 days to go!

This last month has been pretty intense, not so much in the wearing handmade clothes and shoes side of things, which to be honest has been just about the easiest thing going on my life!  but just in the ordinary life side of things.

Obviously losing our dear Sienna has been a huge blow to the family.

In other “things”, we finally sold our old beach house, which is a good thing because it has been on the market for a LONG time… not such a good thing was the three day window in the week before Christmas; in which we had to go down, pack the house, move it, clean and clear out.  Man.  It was pretty crazy, but did come at just the right time when we needed some hard physical work to distract us from our sadness.  We just worked our butts off for three days straight and flopped into bed late each night, exhausted, sleeping like babies.

All plonk in the middle of the pre-Christmas work/social scene, my “real” work, and of course my own Christmas present making period too… and I’l be the first to admit that I sometimes set making-goals for myself that can sometimes be quite ambitious.  Basically, every spare minute has been very full and a bit stressful.

I’m not writing any of this to whinge or whine, but just stating the facts for the month.  I think it’s good sometimes to acknowledge stuff, you know, not make like everything is easy-peasy, no sweat.  You know how sometimes Christmas Day can be more of a relief than anything else?  it was actually rather nice just to merely have practically nothing left to do, just chill with our lovely family.

Anyway, the last few days since Christmas has brought some peace and quiet and the feeling of more optimism.  The last few months of my handmade challenge are going to be pretty breezy, I’m sure.

I’m actually even a little enthusiastic about making something for myself, soon…  Can’t even believe I’m saying that! but … yeah!

pinterestmail

some shirts…

… in addition to luggage pressies, I made some shirts for those incredibly difficult to buy/make-for men in my life.  Honestly, it would be so much more fun and frivolous if I only had girls to make stuff for, but you know.  I love these big blokey-bloke creatures anyway.

My husband and sons all do like shirts fortunately, and I recently bought this new pattern, Burda 6874, and made a short-sleeved version for Craig, here.  For these new ones though, I went with the full-on, long-sleeved version.
Prior to Christmas Craig and I went to several Christmas parties, and on on a fair few we encountered our good friend S, a man who is the most super-stylish, fashion-forward, hip dresser you could imagine in sleepy old Perth.  Needless to say, he is not actually a born-and-bred Perth man.

I always look forward to seeing what he is wearing.  Anyway, a couple of weeks ago he was sporting a floral shirt.  And not a traditionally manly type of a floral, like a Hawaiian print or abstractly/discreetly masculine-y subdued-colour floral either, but a distinctly “pretty” floral with rambling roses in shades of pink and pale yellow.  Well!  With the way he’d styled it, with rolled up sleeves and faded blue jeans, it just looked so awesomely cool, it blew my tiny little mind.  SO ON POINT!!!  With brain a-buzzing, I forthwith made haste to the fabric store like immediately; to add some cool-dude florally goodness to Craig’s wardrobe.  I should just slip in here, Craig is not much of a fashion-forward guy actually.  To his credit, he wore this shirt on Christmas Day, and looked super cool.  He garnered many compliments too, hehe (rubs nails on chest pridefully)

I also made a shirt for Sam.  His is a fun and beautifully coloured feather print, that I just fell in love with, randomly.  Oh, in each case, I’ve customised the fit of the pattern to suit each guy… Sam is my easy one, in that he just about perfectly fits a size 38.  YAY!!  Craig is not so perfect, ahem  😉 he still requires that 2cm extension out and down from each underarm point, plus the same modification to the sleeve/underarm point.  Otherwise I run him up a straight size 40 with a little added length in the body too.

All fabrics and buttons are from Spotlight, both a crisp cotton print. Funny thing, while I was making each shirt, I kept each guy’s shirt super secret from that particular guy, but was less careful when that guy wasn’t around.  So every now and again they would catch sight of the other one’s shirt.  And even though I was careful to say to them, “btw, this is NOT for you!” they each privately thought the other’s shirts WERE for them, and were looking forward to wearing them!  I’m sorry! but yes, I was telling the truth  😉

I altered things very slightly on each shirt… the pockets are different on each one.  They both have two breast pockets; but Craig’s has arrow-pointed bottoms, and I did a little bar tack on the top edge of the topstitching, in lieu of the usual triangle.  I don’t know why, just a whim.  For Sam’s, the pockets have a rounded bottom, and the regular triangle at the top edges.  I chose shiny black button for his shirt, to pick out the black feather borders, and unobtrusive, white, matte buttons for Craig’s shirt, to allow the floral to truly shine, hehe.

The other alteration I made for both was to make the sleeve plackets with an arrowhead top…  the previous pattern I used Burda 7767, had this feature and I’ve just grown to like it.  The Burda 6874 sleeve placket has a flat, rectangular head; I did use this pattern piece still, just cut it a little bit longer at the top and stitched it with the arrow head.  I had to giggle at myself though, because there’s pretty good chance these shirts will ALWAYS be worn with the sleeves rolled up, they’re just that kind of shirt! and those immaculately stitched sleeve plackets won’t ever be seen.  Ha!

When I wrote about this pattern previously, I mentioned how I always hand-slipstitch the inner collar in place before topstitching, and quite a few people commented how you could dispense with the hand-stitching; just press the SA in and topstitch and voila!  However, maybe it’s just me, but I just do not get a very neat finish that way.  I’ve tried it, but nearly have always ended up unpicking and re-doing little bits here and there, where it ends up a bit uneven.  So, now I save myself the unpicking and just do the invisible hand-stitching, then topstitch from the outside; and get this satisfactory (to me) evenness in the collar finish.  I suppose I am pretty pedantic, but I just cannot dispense with that step and I admire anyone who can.

topstitched on the outside

still looks kinda neat inside

In both shirts; all seams are flat-felled, including the armscye seam (tutorial for flat-felling a curved seam here)  It’s a bit crazy, particularly given my very tight schedule for making Christmas gifts this year, but since I discovered that I could do this level of finish for my mens’ shirts, now I just can’t let it go and always have to do it.  Really, it doesn’t add that much time overall.  Sometimes I wish a little that I could go back to those days of carefree-ly zipping the seam allowances through the overlocker, but no.  #sigh

This side seam, um… gusset/insert-thingy?  don’t know what you should call it really, but this is a feature of the pattern.  I love this!  It’s just a little thing, but I think it looks really nice.

I’m planning to write a pattern review for this pattern too… but in a nutshell; LOVE almost everything about it! with the one exception of the instructions for doing the front buttonhole bands.  Those are a little light-on and it’s not intuitive, really.  You kind of have to work it out from scratch each time… I’m thinking of doing a little tute for myself to refer to in the future.  Next time I make a shirt  🙂

pinterestmail

a whole swag of bags (portside by grainline)

I haven’t felt like blogging very much, but absolutely must otherwise I’m going to get SO far behind… it’s time to get back on the wagon.  I’ve been super busy busy BUSY, sewing up Christmas and birthday presents; including this bunch o’ stuff.

Luggage, or “travel sets’.  This was my choice for a lot of my pressies for this year.  I made three complete sets, plus four extra toiletries bags.  Everyone (said they) loved them!
Pattern; the Portside travel set by Grainline Studio.  I bought it during their Thanksgiving sale and got going on it immediately…  It’s a nice little pattern for three pieces of luggage, a duffle bag, which is quite large,  a “dopp kit” which is what we would call here a dilly bag or a toiletries bag, and a “pouch” which is a nice and handy, flat little purse-thing that you could store phone/device chargers, keys, cards, or just any small things that you don’t want getting lost as they knock about in the duffle bag.

Fabrics; all fabrics and bits and bobs are from Spotlight, except for the lining of Craig’s set, which is from Homecraft Textiles.  The shells are constructed in thick, strong nylon drill from the upholstery section, intended for use in outdoor cushions and furniture, and all pieces are interfaced with the thickest, iron-on interfacing I could find.  It stands up by itself rather nicely, and it should be nice and tough too!  I lined everything with thin, waterproof, plastic-coated fabric, so the bags can be wiped clean inside.  The interior of a dilly bag should be wipe-cleanable and waterproof in any case so your fabric doesn’t get stained and dirty from makeup/shampoo/toothpaste leakages, and I decided to use the same stuff for everything because I was thinking they all might want to sometimes use the duffle bags as gym bags, or alternately as beach bags.  I just wanted all pieces to be both practical and tough.

Tim’s; made first.  All grey/black/white, very masculine which at first I thought perfect for a professional young man.  I actually made a matching grey/white dilly bag for him to start with, then suddenly felt all that extremely tasteful grey-and-white was all a bit plain-y plain blah blah blah, and decided it desperately needed an injection of FUN somewhere… we’ve been in sore need of fun around here lately… and Tim is naturally a pretty fun-loving kinda of a guy.  When I saw this black/white Darth Vader/stormtrooper fabric in Spotlight, well it all just fell into place.  I had bought some Star Wars Lego key rings for gifts when we were in Copenhagen last year; and had some leftover, and thought C3PO made a good zip pull for Tim’s bag.

Kelly’s set is all tropical palm print.  Also fully lined with the same thin, white plastic waterproof fabric.  And may I say… if only Spotlight had had this fabric in when I was planning my raincoat! I would not have resorted to using a shower curtain.  But they didn’t. Oh Spotlight. you crazy hit-n-miss, lucky dip of a fabric store, you.

I also made a full three-piece set for Craig, for his birthday… the grey is the same as in Tim’s, and I bought a dirty camel-brown for the contrast, and a dull, air force blue webbing for the trim.  I love these sludgy colours together, this one is actually my favourite colour combination out of all the sets…  I didn’t like the thought of a white lining for this set, too stark; so went hunting for a “browner” alternative; and found this great, beige plastic at Homecraft Textiles.  Actually, Homecraft Textiles had a really great range of waterproof fabrics… I’m seriously contemplating going there to get some raincoat fabric, hmmm.

In addition; I made two more of the Star Wars dilly bags; pretty much identical to Tim’s, except for the zip pulls.  One was for Sam, and theother for Cassie’s boyfriend D.  Unfortunately I only had one more of the Star Wars key chains, R2D2, which I put on Sam’s dilly bag; I had to promise D that if we ever got to Copenhagen again I would definitely get another key chain to finish his off to perfection!

I also made a pink flamingo dilly bag for my friend P, who LOVES hot pink and wears it a lot, thus the choice of this fabric.  It’s funny, I wouldn’t have chosen this otherwise but I kinda fell in love with it while making it, and ended up utterly adoring it.  Actually, it’s been pretty hard to part with any and all of these, for real  🙂

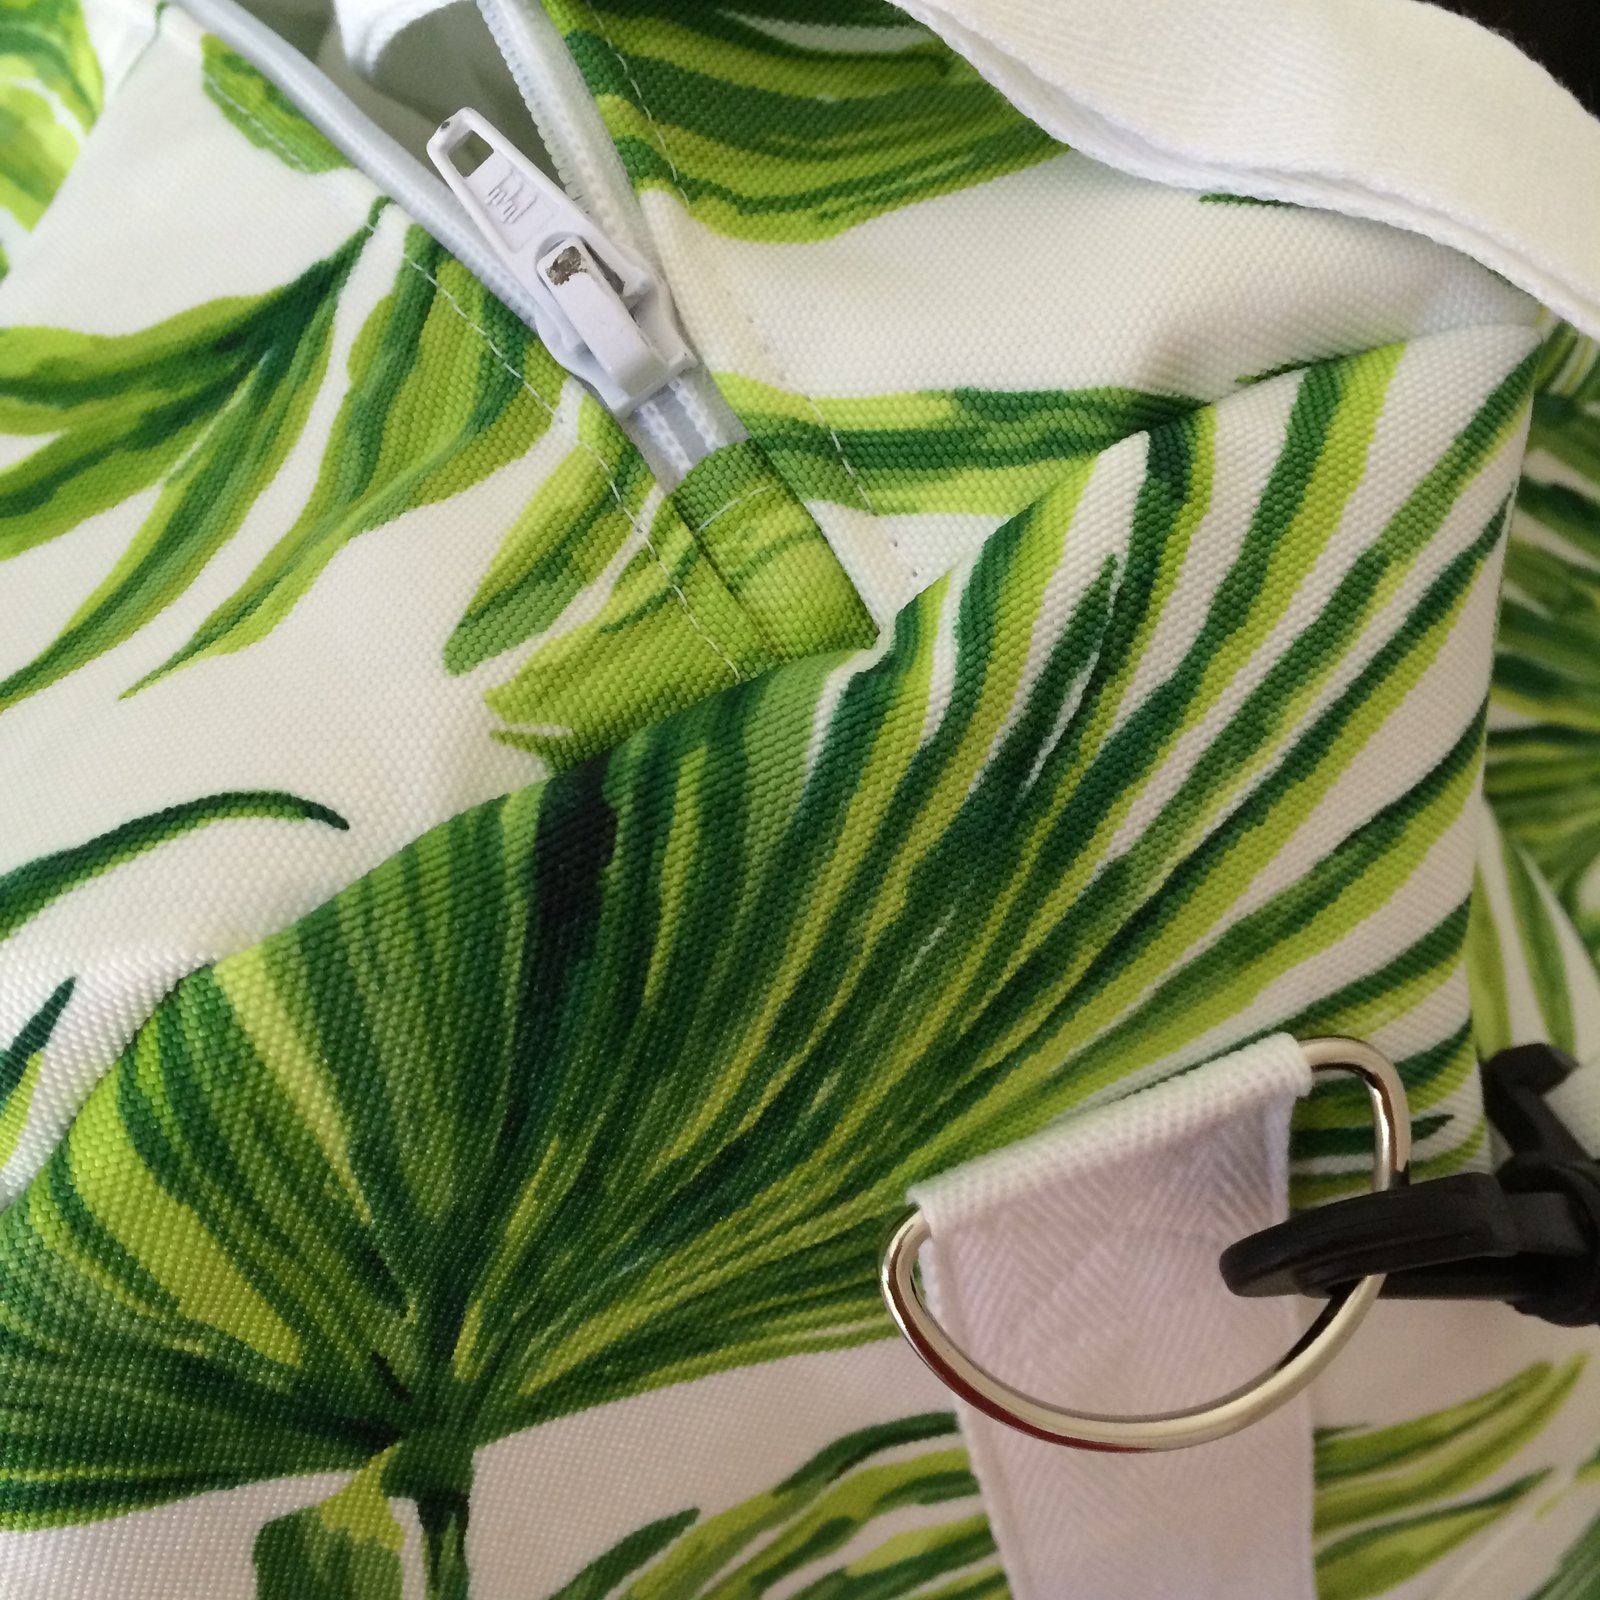
Finally, I made a second palm frond dilly bag, for another friend, M.  She’s been so kind and sweet and generous to me all year, and I just wanted to make something for her.  The only thing I’m super ashamed of is that I ran out of time and only just finished this one on Boxing Day, so it was a little late.  Eeeeeeek!

I enjoyed making all of these.. the only difficulties I had was in getting the hardware, I cleaned my local Spotlight out of their entire supply of 25 and 35cm white and beige dress zips, 51cm white “chunky” zips, and also all their swivel clips and D-rings; completely! and had to visit Homecraft Textiles for more.  I like the plastic swivel clips a lot; I know metal ones would be more “classy” and sure I could have found some online, but I just wanted everything lightweight and easy care, and I think these plastic ones are far more practical.

Some thoughts about the pattern and its construction… it is a good pattern, it works, fills a niche, all that; but I made a few minor little upgrades/mods/changes to the way I constructed mine, which I thought were an improvement to the outcome too.

As follows…

When sewing the side edges of the duffle bag and the dilly bag; start and stop the seams 1.2cm (1/2″) from the bottom edge… doing this makes it far easier to stitch the bag bottom piece on to each.  Trust me, it really really does.

pictured here is the lower corner of a lining bag, but the same tip applies to the shell also

Also; before the stitching the lining bag to the inside of the zip tape: secure the linings to the duffle and dilly bags, between the shell and the lining bags, up the side seams and the four upper corners, as well as the bottom of each duffle bag.  This helps further to keep the lining tamed firmly in place inside the bag, and not billow inside of the bag whenever you take things out.

Zips… the bane of our existence,  no?  Never the right length… for the duffle bag the pattern calls for 53cm zips, the closest I could find here in Perth was 51cm.  To  cover up the shortfall, I made a little inset bit to slip into the end of the seam covering the bottom of the zip.  I think this looks really nice.

Likewise, the pattern calls for 33cm and 23cm zips; here they only come in 30cm and 35cm; and 20cm and 25cm.  So for the 33cm; I bought 35cm zips and just cut the bottom ends off; and for the 23cm zips, well Spotlight ran out of the colours I needed and for several of the dilly bag pocketes I had to resort to a 20cm zip instead and made similar inserts to cover the bottom edge in the same way.

I added a little tab to the bottom end of each dilly bag zip, giving you something to grab at that end when you’re zipping it up.  It’s just a short piece of the same webbing that I’d used for the duffle shoulder strap, folded in half and stitched in with the bottom of the zip.  This helps a lot when you’re closing the bag.

I also lined inside the side pockets of the duffle bag, and also the side pocket of the dilly bag. It’s just neater and nicer, and more complete that way, I think.

To line the dilly bag pocket neatly… after stitching the upper side piece to the upper zip tape, lay the lining piece right side to the wrong side of the lower zip tape as pictured below, and stitch.

Proceed as per the pattern instructions, by topstitching the lower side piece over the lower zip tape

Not a mod, just a self-evident necessity; for the dilly bag I found I had to clip the freakin’ heck out of the top pieces, to get the top to fit in to the curve of the front/sides.

stretched out to the utmost…

Now, it has to be said; the complete absence of metric measurements in the Portside pattern is pretty annoying.  When I saw this I was like, really?!  I mean, I can forgive that in a pre-70’s vintage pattern… but not in a modern day pdf, sold internationally.  It’s not a deal-breaker for me, but still, this is just not good enough.  Sure, it’s not hard for us pattern purchasers to convert all the measurements ourselves and jot them directly onto our pattern, that don’t forget, we had to print out ourselves too; but when you’re paying $14 for it… well, I just don’t think you should have to do that.

Now it looks messy…. should NOT have to do this….  

… I’ve only just noticed this; that under “gather your supplies” the list includes “sewing machine”  ;D

…  but I don’t want to end on a down note.  Overall I’m pretty happy with my decision to buy and make it, well obviously, since I’ve made so many!  Maybe I should … er, make one for me?!

SaveSave

pinterestmail

thank you

To everyone who left such caring and lovely thoughtful words on Sienna’s last post, thank you so very much.  Your kindness has meant so much to me, more than I can say.

picture from 1 year ago, Bunkers Bay

pinterestmail

Sienna

This is the hardest post that I never wanted to write, but I feel I owe this to all my lovely long term readers who have over the years come to know our darling, dear old lovely girl, Sienna…

She’s been here on my blog with me since the very beginning, from my very first post, and has been my beautiful partner in crime, so to speak, on so many of my weird and funny blog-photo taking outings.  Oh how I’ve giggled on many an occasion as we scrambled about on rocks and on beaches and in the bush as I’ve set up my camera and tripod and Sienna has stuck faithfully to my side, sat patiently beside me, or foraged about sniffing and waiting loyally for me to finish whatever the heck I was doing.  I often took her into many an isolated, deserted spot, mostly because I was so terrified of someone coming along and seeing this insane woman posing in some outlandish home-sewn outfit, posing ridiculously in front of a tripod… oh man… and having Sienna with me always made feel safe and of course, accompanied.  She was my little assistant.  My bloggy-doggy friend.  She kept me company, that was the thing.  Keeping me company.  She listened silently and unjudgingly and lovingly as I talked endlessly to her about life, the funny things we saw.  Oftentimes about the craziness of blog photos, how was I going to set up my camera in whatever position this time, to get the picture I wanted? and how ridiculous I was being.  Just politely wagging her tail every now and again.  Just “being there”.  And I would hug her and tell her over and over what a good good lovely girl she was.

 as a puppy

Oh, I’m crying my eyes out even writing this, even though I thought I had no more tears to cry… saying goodbye to her and hugging her for the last time, crying into her ruff; was so hard, so so awful…

Poor Sienna had been unwell for many months; she was diagnosed with inoperable liver cancer back in May.  She had been a bit poorly, and I had taken her in for a scan just after taking this picture for me-made May, and was told the terrible news that same day.  I thought about saying something here or on social media, but decided I wanted to give her her dignity for as long as possible …  we’ve known her time was limited for quite a while now.  The last month she has been quite frail, had all but given up on eating and she deteriorated very rapidly over the last few days of her life.  I wanted desperately to wait longer than we did, but even I had to admit in the end that to wait longer was possibly cruel and selfish.

she absolutely LOVED this fluffy cushion…  would toss it around the room, then lie and contentedly suck on it for ages….

Sienna loved the beach.  Well, she loved walks and walking anywhere really, but the beach was her very favouritest walk of all.  It perked her up and she would frolic in the shallows like a puppy.  We took her to Dunsborough last month, like we always do; and as always, I took her out for our early morning walkies while Craig slept.  She had a tiny, brief little dip but came out straight away and sat down, refusing to walk.  She just wanted to lay on the beach quietly.  For Sienna to not want to walk on the beach, well, it was jut a big thing, that’s all.  A big, huge thing; something that she loved most of all, and she didn’t want to do it… earlier that day I posted this picture of “my view” for bpsewvember and it seemed particularly poignant…. that was a heart wrenching moment.  That moment was like a turning point for me, in letting go of my denial.

So there it is.  I thought about editing a lot of this, but no.  Sienna was the best-est of friends to me for so many years, and she deserves all my words and all my thoughts.  Even all these silly tears, although she wouldn’t have understood them.  She would have just sat quietly with me, looking lovingly at me, as always and just privately wondered what the heck I was doing probably.

actual shot from a blog photoshoot

Thank you for reading, and for all the lovely comments about Sienna over the years.  It’s meant the world to me that other people have loved her too xx

pinterestmail
Switch to mobile version
↓