Category Archives: Sewing

Christmas pressies; a sewing marathon

Tim and Kelly…

As usual, I made Christmas presents for my family… I started late October, so I was giving myself plenty of time, or so you’d think!  I’m a fairly efficient seamster, and I still only just finished a few days before Christmas!  it’s been a little intense and stressful, actually; every year I underestimate how busy the lead-up to Christmas is and how I just don’t get as much time to devote to sewing presents as I thought.  Plus, I’m a lot more finicky and particular – maybe excessively so?! about my sewing now too.  I think this is a good thing, but I have to accept that I’m taking longer to make things, and should start sooner!  Or maybe make less?

Anyway, it got done!  *phew

Listing everyting in the order I made it…

First thing to get made was a shirt for Tim… He has a job now where he has to look smart, so I decided to make a business shirt… I bought the really lovely deep maroon, mini-scale gingham cotton shirting from Tessuti’s in Melbourne, and used Burda 6874, my kinda go-to shirt pattern since I semi-retired Burda 7767.  d’you know I made that pattern 37 times… can you believe it?!  that tissue paper was wearing pretty thin in some places and in some other places I’d trimmed off the cutting lines altogether, woopsies!!

what sleeve placket…? of course I busted a gut matching those teeny little checks everywhere, took me two days before I could see straight again…

I made the buttondown version… see how the collar up there buttons down onto the shirt?  This is what qualifies it as a buttondown, folks!  I don’t wanna get all grumpy and pedantic here, being Christmas and all, but the number of times I’m reading about someone’s very lovely, but NOT A BUTTONDOWN shirt erroneously labeled as such and have to hold myself back, because we all hate a little lecture, right? I’m gonna stop right now otherwise I’m going to become that painful lecture-r.
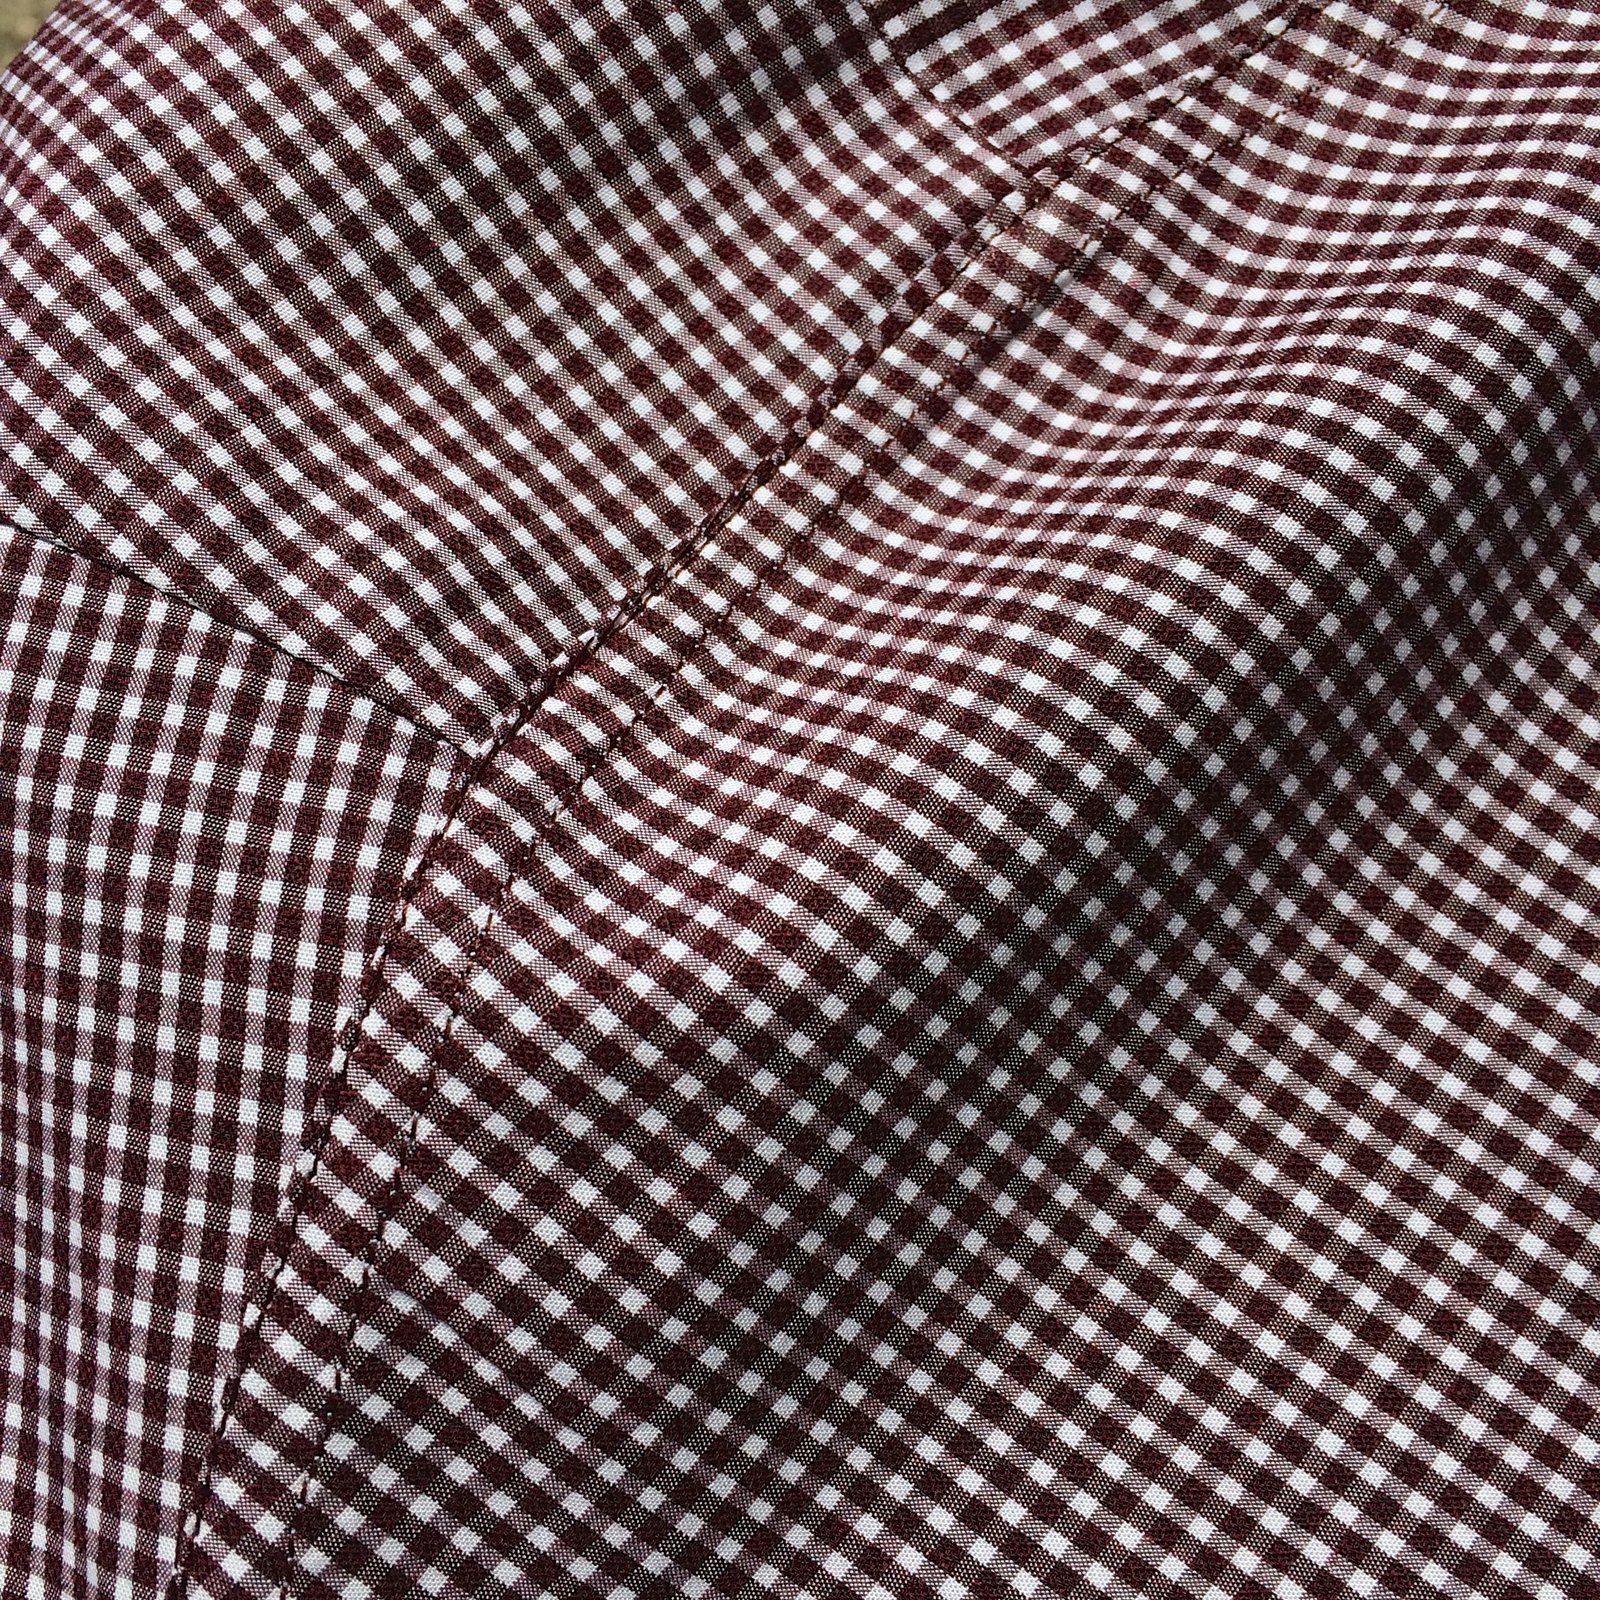
this is the inside of the shirt… I’m pretty proud of my flat-felled seams… and I use the burrito method for the yoke so that’s all nicely enclosed too

All seams are flat-felled, using my own tutorials here and also this one here… yes you can flat-fell every single seam in a shirt! and it’s so much better and nicer… although I’m starting to realise that this is probably why what used to take me maybe two days to make a shirt…  now takes me double that time at the least! but anyway.  My guys appreciate the tailoring, so I’m happy that they’re happy.

Sam’s shirt…

I’m just SUPER happy with how my buttondown collars are looking nowadays!  It’s pretty hard to get that sitting just right and perfectly symmetrical; and I think after all the shirts I’ve made I’ve finally got it down…

Next up; I made a matching top for Kelly.  I’ve previously made matching tops for the two of them and noticed that they wear them together a lot! yes, it’s super cute…  I did a little bit of subtle inquiring as to whether matching clothes were still something they liked before I went there and got a positive response.  Alright then!

I had to be far less subtle about fitting it though!  I’d previously taken Kelly’s measurements for when I made a Kelly anorak for her… it’s impossible to do this without it being obvious! and made a block for her, using my Pattern Magic book to help me.  Yes, this is a pretty involved thing to do, requiring protractors and algebra and such-like! but honestly I’ve always found it to be a hugely worthwhile exercise when drafting new patterns.  Then I mocked up a quick plain bodice, and got her to try it on, and made the necessary changes.  In Kelly’s case, the block fitted but the armhole/bust dart had to modified considerably… the famous full-bust adjustment.  I regret now that I didn’t take any pictures of the mock-up bodice and the changes I made because it was a new learning curve for me that I wish I’d documented!

For Kelly’s top, I’d chosen the asymmetrical cowl top from Pattern Magic 2; the shape of the cowl is dictated by the shape of the facing.  It’s always a bit of a challenge to draft your own patterns, but well I love a challenge! and I knew the shape of this top would be super flattering for Kelly and suit her beautifully…  I cut the pieces on the bias and inserted a maroon invisible zip in the left side seam, so it zips down undone… however Kelly says she can squeeze into it without having to undo the zip which is cool.  I think the bias-cut is what gives it that little bit of stretch.

Next up! a business shirt for Sam! He has also started a new job which requires business dress everyday… I’d noticed a lot of young men wearing gingham shirts while we were in Melbourne… a good sign that gingham is super on-trend! so hot right now! which is basically why I bought gingham for both my boys in the first place.  It’s a bugger to pattern match though, even worse than stripes! gnnnnnnn  but oh well…

Again I used Burda 6874, flat felled seams throughout, same links as for Tim’s above… aaaaand so not much else to add.  Both Sam and Tim have been working out some lately, so I think I’m going to have to make some small adjustments to their shirts in the future.

Next up!  I made some little things for Cassie, she needs more work clothes so this was another practical gift really.  I made three things for her…. I just want to say here; it might seem unfair that I made one top plus TWO skirts for her, when compared to just one shirt for each of the boys, but it really does even out because the TIME I spent making these three little separates is actually the same as the time I spent on EACH of the boys’  shirts.  I know, crazy right?!  it’s all that tailoring bizzo that takes so much time…

Likewise, Kelly’s top needing a block made, plus the fitting muslin, plus drafting a pattern, also took about the same amount of time as making three tried and true things for Cassie!

Anyway; Cassie had already chosen this lovely crackle-y hand-painted cotton from the Fabric store in Melbourne while we were there, and I secretly bought the mustard gingham printed silk from Tessuti’s while she was looking elsewhere.  So the little top was a surprise!  The crackle print really is gorgeous, it is hand painted in Zambia and has that handmade naturalness to it…  LOVE this but pattern matching those hand-painted stripes was never going to happen!  of course they are all different widths and thicknesses which just adds to the charm of course.  I just shut down my inner-obsessive for a little while and did my best… at least I got the centre back seam to match!

The other little skirt is a cityscape print, maybe New York City by the looks of that Lady Liberty in there!  We’d seen the fabric in the upholstery section of Spotlight, so she’d known this one was coming too…

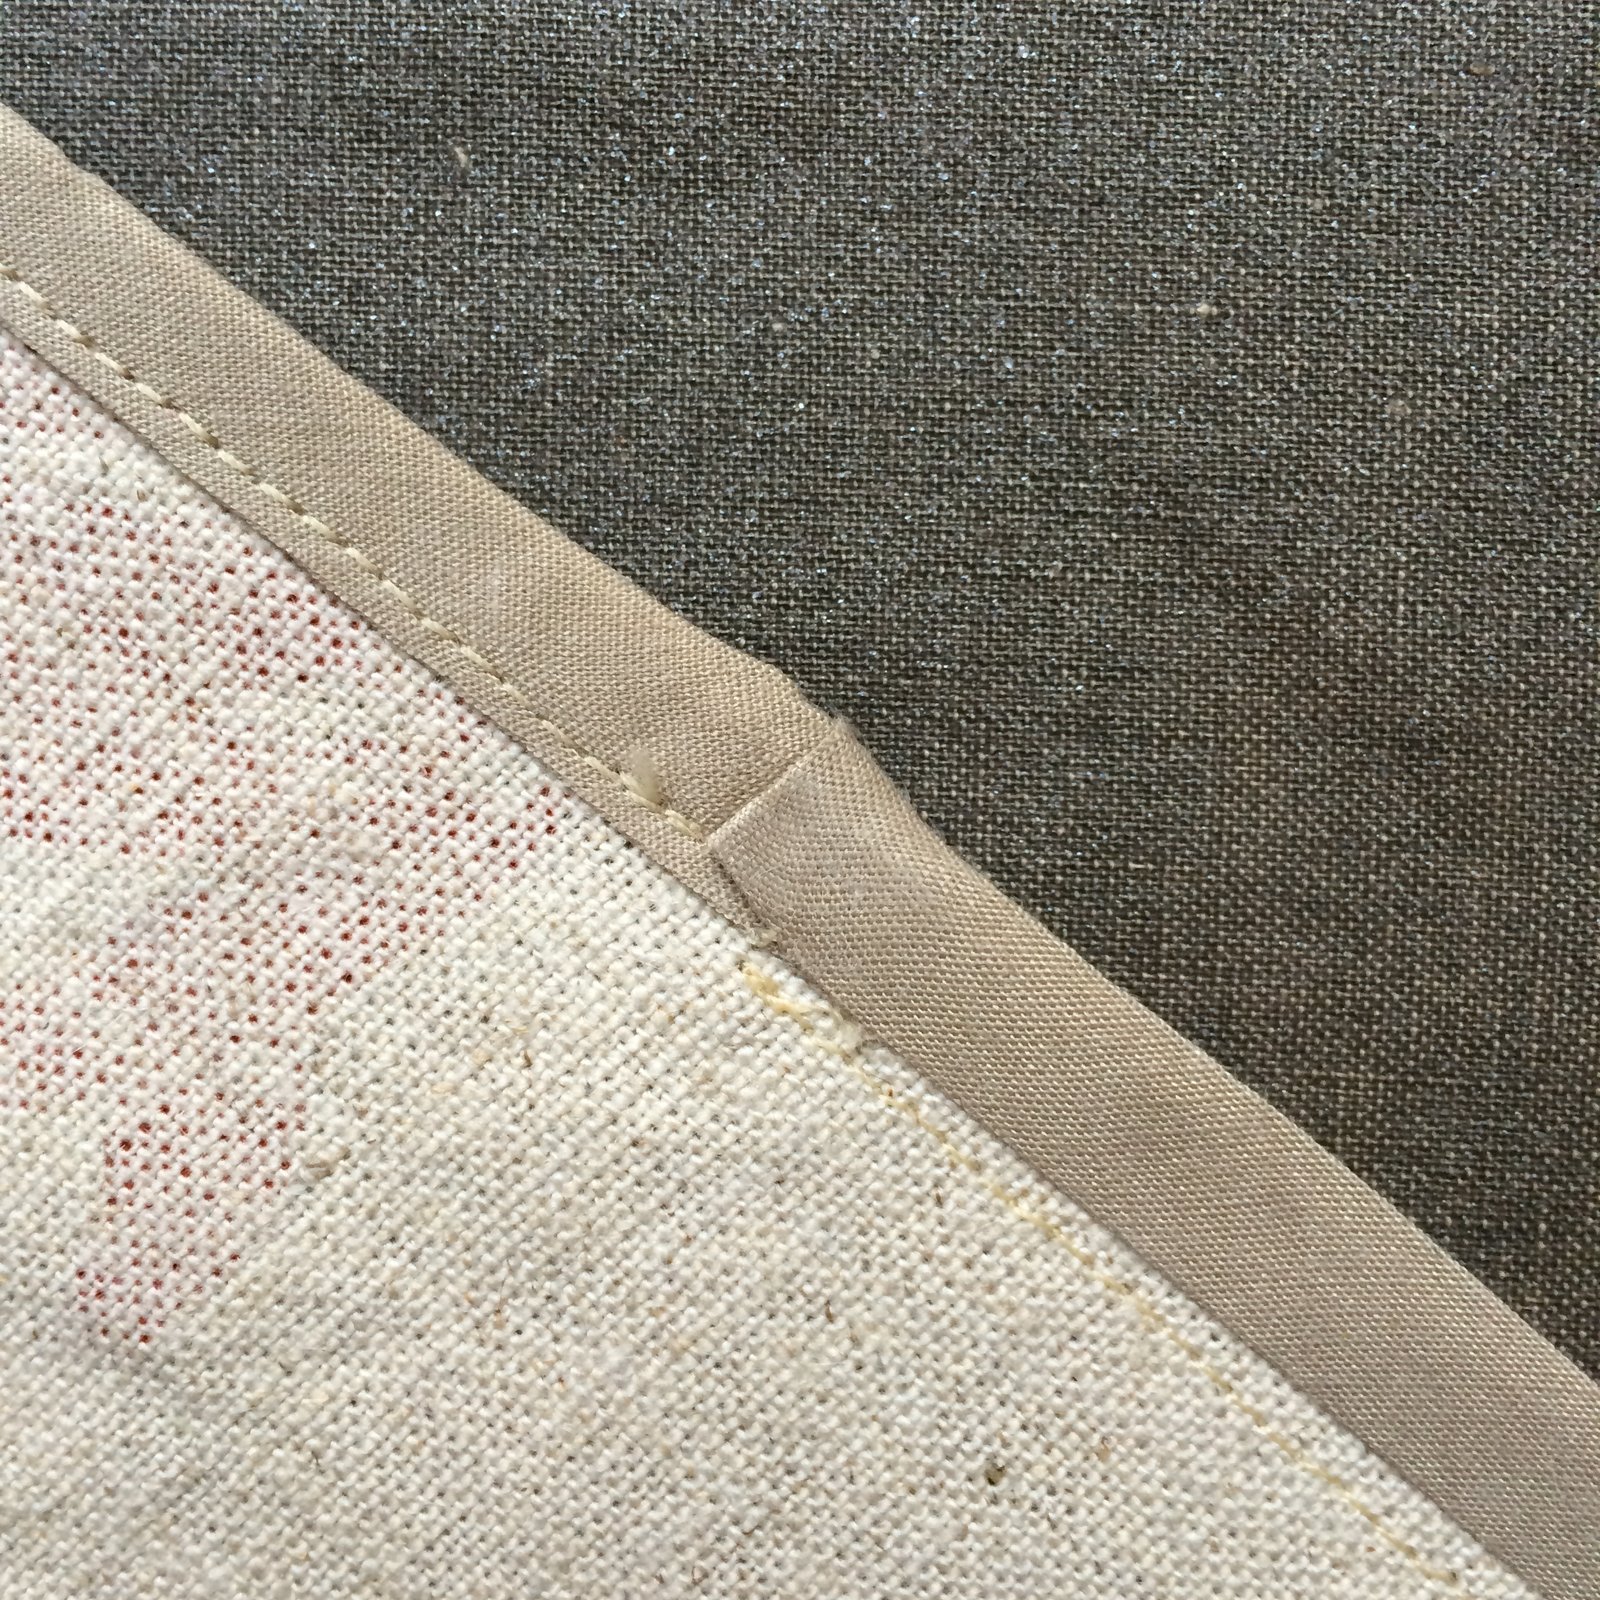
for both skirts I bound the lower hem seams using some leftover purple pin-striped linen, the leftovers from when I made this shirt for Craig a few Christmas’s ago.

I have also taken to binding the bottom edge of the zip and stitching it down to the seam allowances… often the bottom edge of a zip has a slightly scratchy bit which can be extreeeeeemely irritating when you’re wearing it… so I’ve taken to doing this whenever I made an unlined skirt with an invisible zip.  Such a small thing that greatly increases the comfort factor when wearing the skirt!!!


Oh! patterns!  I used the Inari tee pattern for the little top and Vogue 8363 for both of the skirts, and since I’ve made both of these patterns for her several times already they were super quick and easy to run up. For both skirts I added belt loops so she can cinch in the waistline a bit; in self-fabric for the Zambia striped one, and in black denim for the cityscape one.

Next up! a short-sleeved white shirt for Craig! also using Burda 6874 and a white cotton broadcloth from Spotlight, this was intended originally to be the same as this little shirt that I made for him a few years ago and which happens to be his most worn shirt … then just before making this I’d whipped up my little yellow/black&white lingerie set and had the gingham ribbon sitting out, and suddenly had this brainwave as to how I could use a bit more of it! I stitched the gingham ribbon carefully down the button line of the button placket, and used a little bit to trim the pocket.

To match this gingham detail, I lined both the collar and collar stand with some cotton gingham that I’ve had for aaaaages, and used black buttons to finish the shirt.  Note; IT’S A BUTTONDOWN SHIRT!  Also, of course it’s nowhere near a clone of the other white shirt any more but I still think he’ll wear it a lot…

Next up! a pullover/sweatshirt for Craig!  truth now… I was running out of time, and steam! and this fair near killed me!

Craig with a much much smaller Sam and Tim…

So, once upon a time, nearly twenty years ago, we went on a summertime camping trip down south and it was blooming’ freezing, our tent nearly blew away, we got rained on, hailed on and fair near froze to death!  In pure survival mode, Craig drove to the nearest town bought a red sweatshirt that he has since LOVED and worn about a million times, almost to bits since it’s getting reeeeeeally worn and threadbare now.  At some point he asked me to make a clone of the famous sweatshirt…

Of course it’s easy to clone a sweatshirt, but the challenge is in finding suitable fabric! I found this blue marled French terry in Spotlight, and while the colour is a teeny bit blah and the texture is not as nice as his original sweatshirt, it’s going to make a reasonable stop-gap until winter rolls around, the winter fabrics come into the shops, and hopefully I can find something nicer.  I busted a gut finishing off all the seam allowances off beautifully inside though… imitating the exceptionally beautiful finishes that were in the original.  For the pockets and bias binding I used some of the leftover navy/white gingham that I used for Sam’s shirt, above.  The pockets are French-seamed and the rest of the seams have an interesting amalgamation of HongKong bound AND flat-felled seams… not sure if my method is the same as in the original but I worked out a way to do it and took a few pictures along the way.

First, stitch the seams, then figure out which way you want the seams to be stitched down and apply bias binding to the topside of the seam allowance… ie. to stitch along the same stitching as previously you will be pinning/stitching along the UNDERNEATH,

OR alternatively you can save yourself a step here and stitch the bias binding on at the same time as you’re stitching the seam; your choice.
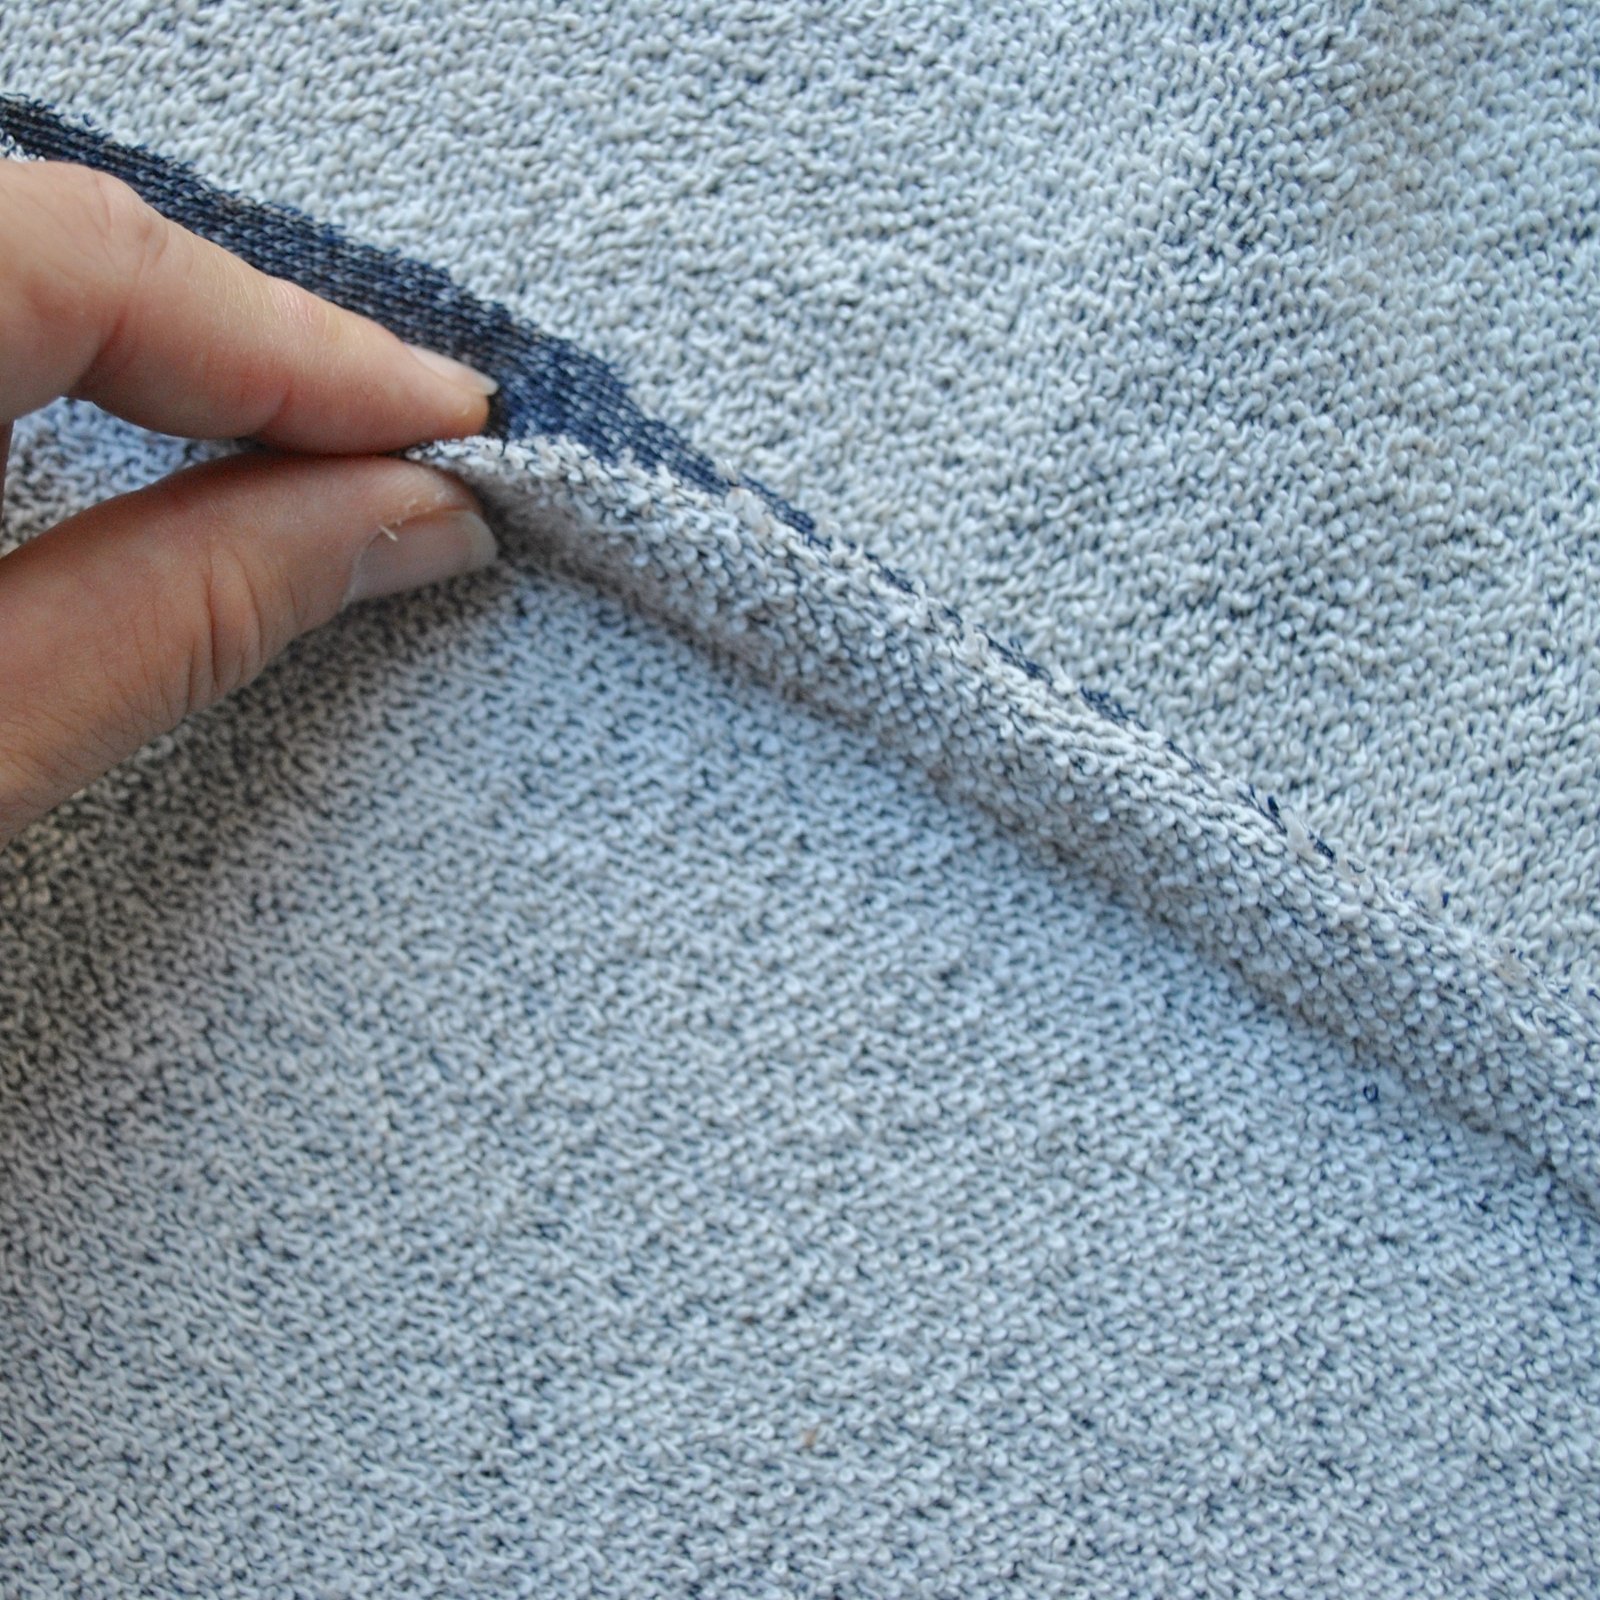
Press the garment seam allowances open, then press them to the side where they will be felled, with the bias binding on top.  From the other, right side, of the garment, pin through all layers.

With the right side facing up, topstitch the garment to the seam allowances plus binding, through all layers, just to the side of the garment seam…

view on the inside…

Keeping the bias binding free and clean, trim and grade the garment seam allowances…

Turn under and press the raw edge of the bias binding down so as to encase the seam allowances of the garment, pin in place.

With the bias binding facing up, and following the previous stitching as a stitching guide, topstitch the pressed edge of the bias binding down.  Since you’re using the previous stitching as a guide, the width of your double-topstitching will be nice and even from the outside.

Voila!  Such a nice neat finish!  at first I thought it might be overkill, but it is rather classy, if I say so myself; looks pretty good both inside and outside.  I will definitely be using this one again!

As seen above, I also applied bias binding all around the zip tape and stitched it down with double top-stitching the same way to match… this really does make a nice, neatly finished look when the zip is down.  Which it will be, most of the time.

And, last but not least!  I also made a few more little hardback notebooks… just fun little things, however I do know that the recipients do actually use notebooks regularly so I know they will be useful too!  I used mostly a mixture of leftover and old papers; from old scrapbooks, some with the children’s scribbles still on them!  I’m sentimental that way  😉 , various papers, musical paper, some pale coloured wrapping paper, writing stationery; just lots of different stuff.

The notebooks are covered variously with linen, velvet, printed cotton.  The one I made for Mum is covered with raw silk hessian.

So! Yes, it was quite a lot of stuff to make and I was working on it all like billy-o from touching down after Melbourne right up until I finished right on the wire only two days before Christmas…  I’ve been thinking about this… why am I taking longer to achieve less nowadays?  and I think it’s because I used to be happy and content with a slightly more unfinished approach… slapdash is maybe too strong a word? whereas now I am far more, possibly excessively? finicky and particular about perfect finishes on the insides.  I think I’m ok with this…  I feel like well-finished clothing is what I’m into right now.

However, to avoid the Christmas stress maybe I need to start making Christmas presents a LOT sooner!  Each year I start way ahead of time and think by doing so will relieve the stress, each year I get super stressed out and have at least one “I CANNOT DO THIIIIIIS!!” moment.  But I did.  And now for a break from deadlines!!

SaveSave

SaveSave

SaveSaveSaveSaveSaveSaveSaveSaveSaveSave

SaveSave

SaveSaveSaveSaveSaveSave

pinterestmail

Liberty bathers

I made these bathers and took these photos over a month ago… hehe I just checked; 19th November!  What with the pre-Christmas social whirl and pressie-making craziness, I completely forgot about putting them up here, although I’ve been wearing them almost every day and actually happen to adore them too.  Oops!

I bought this gorgeous Liberty swimwear fabric from the Fabric Store, it’s the Liberty of London Argyll Swim in Mistral B… fell in love with this pretty print just about immediately; and those lovely bubblegum colours!  I’m having such a pink moment!  I planned at first to sew up my regular tankini adaption of McCalls 2772, and even cut out the pieces for the tankini.  But then hesitated, had a sudden attack of the oh here we go agains… see; I always make the tankini version of this pattern and never the bikini.  Plodding about mindlessly in the ol’ comfort zone as usual… and I really enjoyed wearing my black Sophie bikini last year.  Why not be daring and make the bikini?!!  Old-me would have worried about such nonsense as age-appropriateness, but now-me is getting over that now.  I  also asked my resident swimwear experts (Cassie and Craig) who both voted for bikini.  Alrighty then!  So I just dived right in … dove?

Not much else to say! only that I really really love this style of slightly blowsy halter neck top; I think it’s quite flattering to my figure, and I like the nice full-bottom coverage of the bottoms too.  One of the reasons I started making my own swimwear in the first place, even before I swore off buying rtw, was because of the at-the-time fashion for extremely skimpy bottoms.  Oh, and also because you weren’t allowed to buy a different sized bikini top and bottom, in spite of the fact that they’re priced as separate items.  Ha!  I still have vague memories of the actual day I called a halt to the sheer awfulness of swimwear-shopping… three very small children in tow, one in the pram… back and forth, in and out of the changing room… and those lights!! the refusal of the sales girls to comprehend that one wanted a size 12 bottom and a size 10 top… “No, I’m afraid you’ll have to buy two pairs of bathers if you want that!”  It was so frustrating!  I just went straight to the fabric store for a pattern.  Never again!!

Details:

Bathers; McCalls 2772 bought probably about 22yrs ago now, in Liberty swimsuit fabric
Hat; Country Road, also bought probably 22 yrs ago now!  it’s been a goodie.  I like it because I can hide my face like a movie star and thus be kinda anonymous while wearing my bathers on the internet, hehe  🙂

SaveSave

SaveSave

pinterestmail

neon yellow and black gingham

So, Mum was coming up to stay recently and we were going to be doing some sewing together… for a variety of reasons I didn’t want to be doing my Christmas sewing, the biggie being that I needed a little break from all that #exhausted  #needsomeselfishnessSTAT

Anyway, I decided I wanted to just whip up something quick, fun and easy.  A simple lingerie set.  So quick!  Such fun!  So easy!  And, I reasoned; I have a billionty-one lingerie bits and pieces on hand already, so I could easily shop my stash and avoid any last-minute dashes to the fabric store.

Obviously when anyone sets out to do such a thing, a last minute dash to the fabric store will be an absolute certainty.  Ha!

So I had this small piece of neon yellow bamboo knit (Fabulous Fabrics I think), always intended for lingerie but never-got-around-to-it; and some bits of both white and black elastics, enough of the both together to cobble together a bra and two sets of sorta matching undies.  For the set to look cohesive, I used both white AND black elastics on all pieces…  so it’s kind of a case of nothing matches so everything does.  I do really like black ,white and yellow together though, so I think it turned out very nice.

The difference between the two pairs of matching knickers is subtle, oh so subtle! but it’s there.  One pair has black elastic on the waist, and white on the legs, the other has white elastic on the waist and black on the legs.  Subtle!!  To further emphasise the black/white dichotomy, I used black zig-zag topstitching everywhere there was white elastic, and white zig-zag topstitching everywhere there was black elastic.  This was not a totally successful ploy, since the white zig-zag stitching basically disappears into the yellow and you can’t even see it, but hey.

On another note; high contrast black zig-zag top-stitching on yellow is a deeply unforgiving exercise.  Much quality time was spent with my seam-ripper.

I’d planned to use a few little plain black and plain white ribbon bows in my stash, saved from old lingerie sets… but inevitably I became more and more convinced that black and white ribbons were just not right, and more and more convinced that the only option was something black AND white.  Like, gingham.  In fact I decided that gingham was the only possible choice, eventually.  At first I first made some ultra skinny rouleau loops with a scrap of gingham fabric from my stash – must avoid any last minute dashes to the fabric store!!! – and made some little bows, but they were just too bulky for the set.

Thus, the inevitable last-minute dash to Spotlight, for gingham ribbon.

It’s OK, I bought other stuff while I was there!  Alway, but always; there’s a little list building up.  (sigh)

Mum agrees that the gingham bows were exactly what the set needed.  The only thing is, that since the gingham ribbon is sold by the spool only, I now have about 3m left out of a 3.5m spool to do something with.  Lol!  MORE RANDOM STUFF ADDED TO THE STASH WILL IT NEVER END

Oh! pattern… I used the cloth habit Watson pattern for all pieces, except I used my own method for ensuring that all seams in the bra are enclosed in the lining, and as usual cut the knickers front and crotch lining as one piece so as to eliminate that horizontal front seam.  I love the Watson bra more and more nowadays; it’s funny; I’ve always preferred a slightly padded bra with a foam-lined cup, basically my whole life, but just lately I’m really into this soft, unwired, unstructured type of bra.  Especially for summer, when I’m not wearing tight Tshirts.  Sure, they result in the flat-chested look, but you know what? I’m at peace with that aspect of my body now.  I mean, it’s what I’ve got, it’s me, my body is just my body; and I’m ok with it.

Thank you, Jane for being such a fab lingerie model… and now, back to sewing the Christmas pressies!!

SaveSaveSaveSave

SaveSave

SaveSave

pinterestmail

Sasha trousers

husband is off waiting with Clara and calling me; haven’t I finished taking pictures yet?

Hmmm, I know how this seems; I’ve only just written a post where I say how I am busily focused on solely making things for other people, as Christmas gifts and then here I am popping up with more things made for ME… haha, well there is a perfectly reasonable explanation, and that is that I actually made these trousers a few months ago and am only just now getting around to taking some pictures and writing about them.  See?  Perfectly reasonable!

Pattern; so this is the newly released Sasha trouser pattern, by Closet Case patterns, named for the impossibly chic Sasha of  secondo piano…  Heather contacted me asking if I would again be willing to test the new pattern for her… would I?! well yes, of course!  I actually love testing patterns, I can feel like I’m doing something useful and productive and actually even helpful? one can only hope… Instead of the embarrassing truth that I’m clutching at any old excuse to nip into the sewing room and selfishly indulge in my favourite hobby once more, hehehe.

Fabrics; a blue stretch denim, thickish; and a thinner, maybe a bit too thin? grey-green stretch gabardine, both from Fabulous Fabrics.  Yes, two pairs!  actually the blue pair is really the first pair I made and is an earlier version of the pattern, the grey pair is my second pair and is the final version of the pattern how it’s been released out into the wild.  I really love my blue pair though so I’m still going to wear them  🙂

Pockets: the blue are in blue linen, a leftover scrap from my stash that was initially a toss out from my friend L; and the grey are in some the leftover floral from this shirt I made for Craig last year, and also some StarWars fabric leftover from when Cassie made some boxer shorts for her boyfriend.  Love me some crazy pockets!!!

Thoughts; so what to say? what you see is what you get here… this is a very nice pattern for a pair of very nice, sleek and elegant, slightly tapered, slightly low-waisted trousers.  One of my favourite features is that smart flat front which I always think of as vaguely menswear-inspired, rightly or wrongly; and I absolutely LOVE the menswear look on women.

Lately I’ve kinda been in the habit of having my trousers a little more high-waisted, but I do think this lower-waisted look does sit and look better when one has a little bit of a tummy.

The trousers are satisfyingly equipped with a plethora of pockets; four, in fact.  Two welt pockets on the back, I have to say these are super well-engineered, and intricately explained in the instructions.  I can see the sample ones have button closure under the welt, which mine don’t have so I think this must have been an add-on after the testing process.

And two slanted hip pockets, I absolutely adore these, they’re totally perfect.  Toss in the un-topstitched waistband/belt loops and hidden button and hook/eye closure, and it all adds up to quite a tailored and “formal” looking pair of trousers, perfectly suitable for business or office wear.

I mean, not that I’m an expert on office wear; but you know.   In my sadly inexpert opinion, I think these would make great work pants.

just imagine I’m walking into an important office building in the city instead of a blank wall…

Also, they’re stretchy so they are also perfectly comfy and fine for doing a spot of gardening…   We went down to our beach block to prepare it for bush fire season and the weather was a little cold… and none of my other “gardening” duds that I’d taken down were actually warm enough so I ended up wearing these all weekend.  They were awesome.   So comfortable! And practical!  Hardy!  I wore them to scramble about on all fours most of the weekend, pulling weeds, raking, and loading the wheelbarrow.  And going to the rubbish tip!  I lead such an exciting life!

obviously you can wear them to the beach too.

All details:

Trousers; the Sasha trousers by Closet Case patterns, stretch denim and stretch gabardine (pattern 1, below)
White blouse with lace; my own design from heavily modifying NewLook 6483, details here  (3)
Ivory/caramel clogs; made by me, details here
Brown blouse; MN 2004 (Sudley) by Megan Nielsen patterns with my own modifications, details here  (4)
Cream, cowl-neck tee; the loose-draped top from Japanese pattern book “drape drape” by Hisako Sato, details here  (2)
Tan low-heeled shoes; made by me, details here
Black high heeled clogs; Dimattino, from Zomp shoes
below; I’m also carrying my Kelly raincoat

1,2,3,4


SaveSave

SaveSave

SaveSave

SaveSave

SaveSave

SaveSave

SaveSave

pinterestmail

Lisa Carolina dress

Hello!

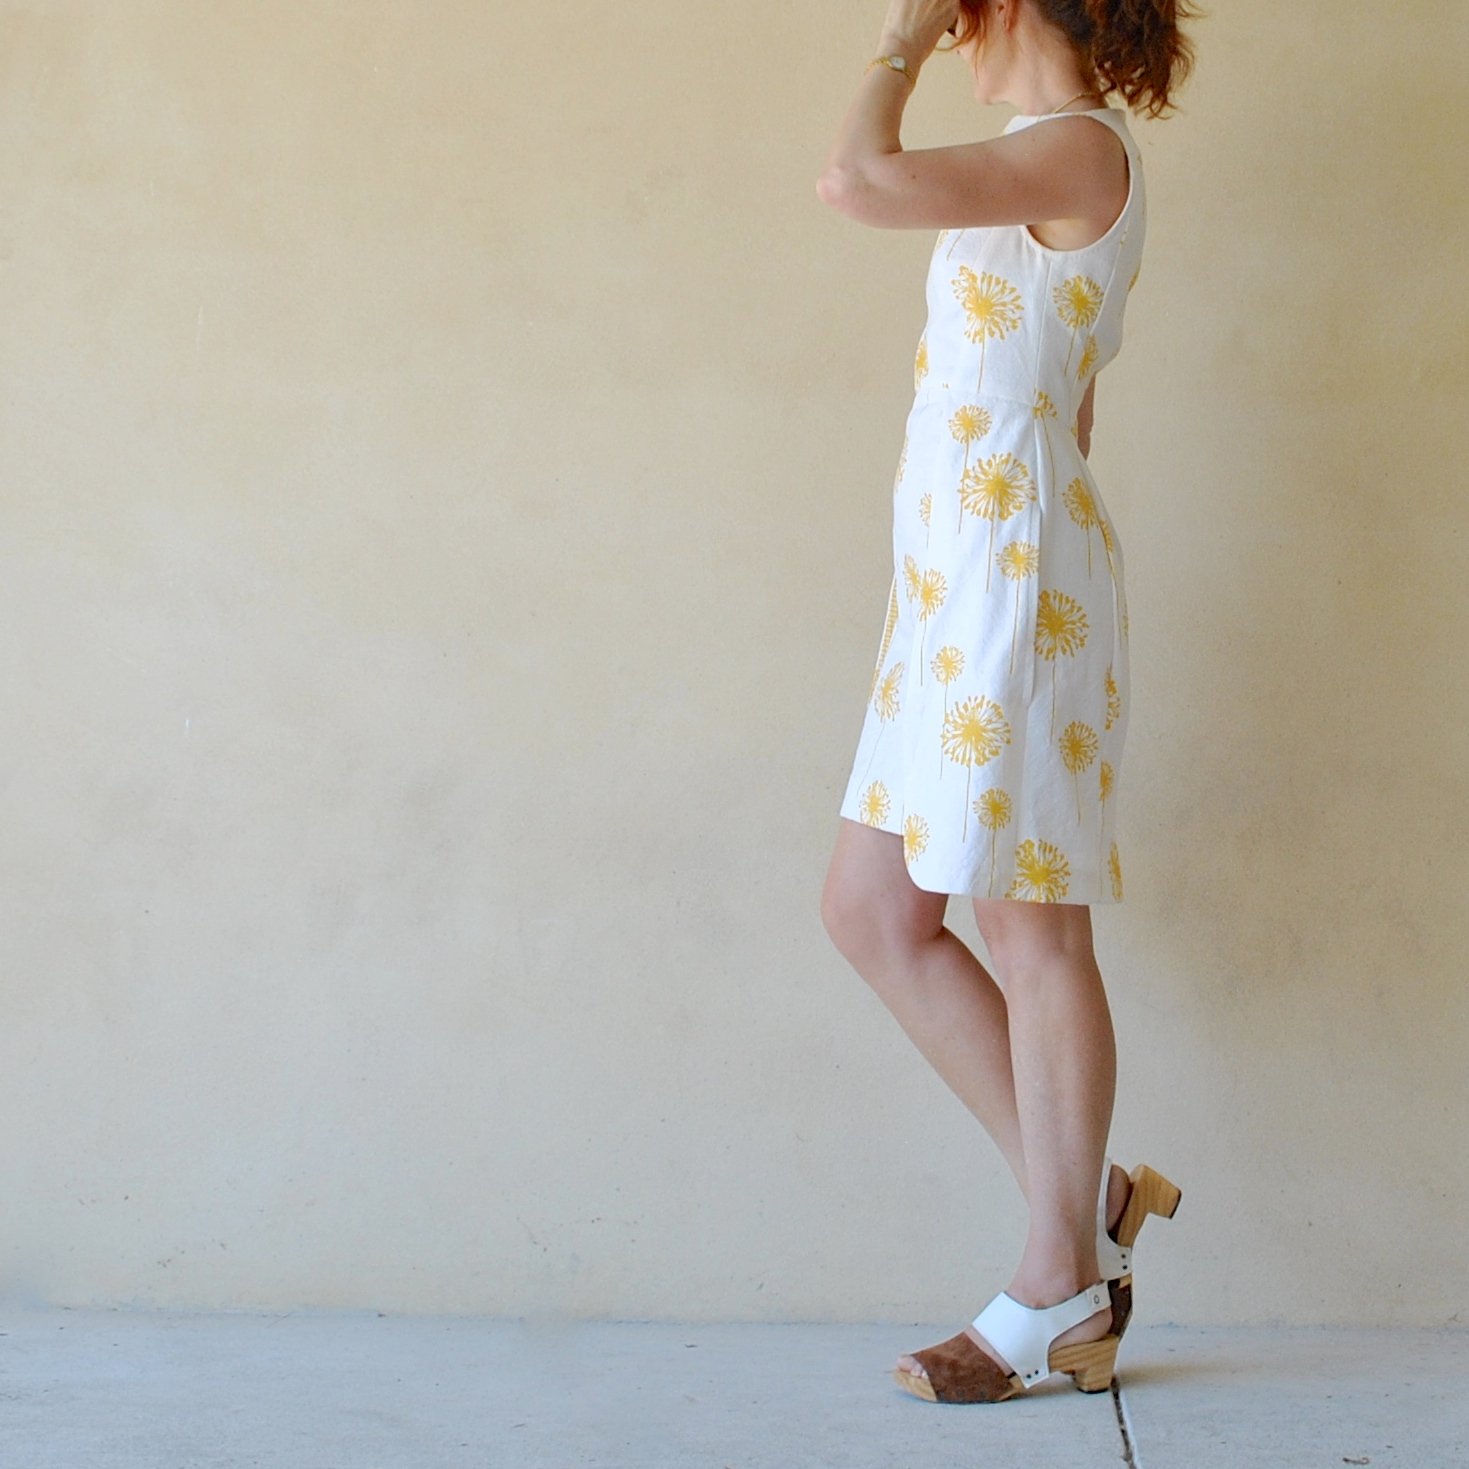
I have made a very special dress lately… actually I am super busy at the moment sewing up Christmas goodies but I have deviously made sure I always have something on the go for myself at the same time too, hehehe.    And I knew I wanted to devote some of my time to making something from this deliciously cheerful and sunny dandelion fabric sent to me by my dear friend Lisa, of Lisa’s Carolina.  Thank you so much Lisa!

Lisa has also made something for herself in it too.. . a Lotta Jansdotter Pilvi jacket.  I really loved how she bound her seams inside using a yellow gingham, and I shamelessly took a leaf from her book and used small-scale yellow gingham for the facings and bindings inside my dress too.  Thank you for this super pretty inspiration, Lisa!

armhole edge

skirt facing and pocket binding. and hemline binding.  gingham galore, in fact…

For my piece, I decided to make the Wings dress, which is the cover dress of Burdastyle 04/2014; pattern 108.  I’ve previously made this pattern up once, here; and that is one of my favourite dresses to wear, so I wanted to make another one for this summer.


I very much like this style of simple, fitted little flared dress, the “wings” have lovely roomy pockets in them which is just the most perfect arrangement!!  and I juuuuuust managed to squeeze my pattern pieces onto the piece!  though doing this took a little bit of placement magic… Like I mentioned in my initial review of the pattern it is quite boxy in the bodice so I slimmed down the bodice by about 3cm from the centre, and also by shaving off some width from the princess seams at the waist…. the design is more slim-fitting up top now but is has plenty of wearing ease enough for me, I think.


Also, I forgot to mention this the first time I made the dress, in which I did this exact same thing, but in order to avoid having visible topstitching on the “wings” that outline where the pockets are inside, I interlined the pockets with a light, white cotton voile.  The back part of the pocket, that you see inside when the wings flap open, is the self-fabric.

This little strip of gingham inside the pockets was put there by my mistake understanding the pocket construction … but then I left it in place because I think it’s kind of cute  🙂

Details:

Dress; Burdastyle 04/2014;108 slightly modified, in a slubby woven cotton, slightly spongy and wholly delicious

Shoes; made by me, details here

Clara is such a lovely addition to our family, so fun and full of life and love and doing very well. And growing up fast. I can even take her for walks now without having my arm pulled from its socket

SaveSave

SaveSave

SaveSave

SaveSave

pinterestmail

magnolias

Originally I bought this lovely magnolia print fabric to make something else… but ended up making this random frock  instead.  Spring was coming…and I really wanted something romantic and floral.  I sorta couldn’t picture anything properly, there were false starts… then Mum, Cassie and I had planned another trip to Melbourne this year, to go to the Dior exhibition at the NGV and I became enamoured of something old-fashioned, feminine, of an easy-wearing, pfouffy skirt.  So this is me, realising that.  I feel a bit like an old-fashioned housemaid, like Cinders before the pumpkin, or an Arthur Rackham-illustrated Alice.

This is all good  🙂

I thought I would get a nice picture of my dress at the Dior exhibition… but do you think I did?!  nope! I wore it, but well, Mum, Cassie and I were so busy looking at all the delightful Dior, listening to our audio and ooh-ing and aah-ing so I didn’t even think about it!! however I did notice a few days later that my dress was serendipitously a lovely colour/design complement to the floor in the NGV.

You just have to picture it on there!

Fabric; a stretch cotton sateen from Spotlight.  I went to considerable trouble to make sure the magnolias are scattered randomly and unevenly across the dress with no discernible pattern repeats … even laying the pattern pieces down upside down sometimes so as to avoid too much same-ness.

Pattern; Vogue 1317, a Chado Ralph Rucci design.  I have made this pattern exactly once before, here.  I loved that dress and wore it a lot; but the tight underarm issue due to the unusual seaming with gusset and the cut-on, close-fitting sleeve arrangement, that I discussed in that post, turned out to be quite annoying after all.  You might love the style of a thing, but if it’s uncomfortable then there comes a time where you’re like; why am I wearing this?? … and at one point I had one of those kon-mari urges to do a whirlwind clean out.  I read a good tip somewhere… can’t remember where… that a good way to do a quick clean out of a closet or wardrobe that was stressing you out due to vague feelings of having Too Much Stuff was to walk up to it and just immediately and spontaneously pick out ten things to throw away,right then and there.  You’re not supposed to spend more than, say five or ten seconds thinking about each thing… but just a gut reaction; do I love this? or not really? Because honestly, you know in your heart the answer to that question already and not allowing yourself time to talk yourself out of it does make the process of jettisoning rubbish a lot easier.  Trust me, it does.

So, out it went.  In my opinion the importance of using a stretchy fabric for this pattern should be printed in large bold letters across the front of the envelope.  It’s absolutely fine in a stretch fabric.  Well, of course it is!  Everything’s fine in a stretch fabric!!

the ability to lift your arms up comfortably is always a plus

Mods:

1) I left off all the double topstitching for a clean stitch-less look, finishing off the hemline with bias-cut white voile… I also left off the giant birthday-present bow that ties in the middle of your tummy.  I thought about cutting it longer and wrapping and tying it at the back like I did with my first version, but really the print makes this dress pretty busy enough already, without a belt-y thing as another visual distraction.

2) I shifted the pockets out towards the side seams by about 4cm, just like I did with my first version…  you can just tell the pockets are situated way too close to the centre front, just by looking at that cover shot.

3) and most obviously; I wasn’t happy with the dress how it is here in its intended short version; in fact at this point I took a violent dislike to it and almost abandoned it completely.  A few weeks of despondency passed by, and I was thinking about the Dior exhibition coming up, which let me to think of the Dior shape, which in turn inspired me to add the long ruffle/frill around the bottom….  I used leftover fabric from which I cut random “doughnut segments” and “pieces of pie” shapes, joined them together to make a giant, sorta fluted doughnut… and attached this to a white cotton voile skirt lining

I felt a lot better about the dress after this.

So I’ve worn it several times now… hmmm there I go, wearing things before blogging them, again!! Oh, I also decided to permanently stitch the collar flaps down inside to make it a V-neck.  I just like this look better than the high slit front, in this particular fabric.  Not quite so prim and proper.

The good thing about wearing something before blogging it is that I can, at least report on how it feels out in the wild, so to speak.  I’ve worn it on the beach, to walk my dog, to do housework and the shopping… as well as in amongst the divine Dior.  And I’m happy to say that the delightfully feminine swishiness afforded to me by this dress indeed sparked much joy in my heart, rendering it safe from kon-mari-ing, at least for a while!

Details:

Dress; modified Vogue 1371, in stretch sateen
Shoes (above); made by me and my own design, details here

SaveSave

SaveSaveSaveSave

SaveSave

pinterestmail

kangaroo paws… and making a skirt with a side pocket opening; a tutorial

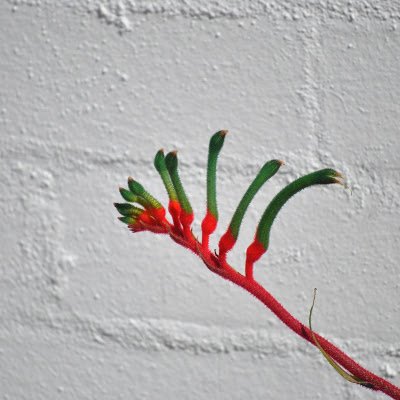
I made a new skirt using a pretty special piece of fabric… there’s a little story behind it.  It’s a handprinted organic cotton/hemp from Ink & Spindle with a really lovely kangaroo paw motif; designed by Lara Cameron and handprinted in Melbourne… mmmm everything in their range is SO yummy, it was reeeeeally hard to choose just one print…!  I bought a piece and sent half to my friend Lisa of Lisa’s Carolina… she had once shared a piece of lovely Dusk blue Alabama Chanin cotton jersey with me and we made something in the same fabric… and I thought it would be fun for us to do the same with some Australian stuff.  And it doesn’t get much more Australian than this!

Kangaroo paws are the state flower of Western Australian, so an apt pressie for an international sewing friend!  And I thought the colours so pretty and earthy; rich tomato-ey/paprika and warm dusky pink on a natural unbleached background… actually I’ve just checked the site and it’s called “desert red on sand”  Perfect!!  I cannot WAIT to see what Lisa makes with her piece!  🙂

Anigozanthos manglesii… picture taken by me of a particularly nice specimen in our neighbour’s garden.  Kangaroo paws come in many different colours now, however this red/green is our state floral emblem

I got to mulling over what to make with my bit…  a skirt seemed like a good choice for this full-bodied canvas-sy stuff.  I wanted no seams on the front and the back, because I wanted to make the most of the random print, and hunted out an old favourite Vogue 8363, a pattern I’ve used loads of times before.  But I didn’t even want a side zip closure either… then I got the idea in my head to make it to have pockets that perform double duty as the closure of the skirt.  Meaning… NO ZIPS!  I’ve made a couple of skirts like this before and knew this pattern could happily be adapted pretty easily to have this feature…  I’ve written a little tute below in this post on how I did it  🙂

Because this is going to be a summer-y skirt, I left it unlined and enclosed all the raw edges with HongKong binding, using a pale coffee cotton voile from Spotlight.  I also used this for the pocket lining and the waistband lining…

This skirt has taken me the LOOOOOOONGEST time to write a blog post for it… I’ve even worn it a few times…  which is a kinda fail for me since I have this thing that I shouldn’t wear something until I’ve written a blog post about it.  Naughty!  Partly because of my plan for the pocket closure tute, about which I’ve been terribly procrastinate-y.  Well I’ve finally done it now, at last.  Please do let me know if you find this useful and/or helpful… and if you use it of course!


How to adapt a pattern to have a side-pocket opening… this is a good feature since it negates the need for a zip AND you get the bonus of pockets, naturally!

skirt map

The pattern I used here comes with a slant-edged pocket pieces and either a CB zip or button front closure so it’s pretty easy to adapt the waistband and method of construction to accommodate the pocket closure.   However, even if your skirt pattern doesn’t come with pocket pieces you can still draw your own pocket pieces and adapt any skirt pattern to accommodate them… as long as you remember this VERY IMPORTANT NOTE:  your skirt pattern MUST be roomy enough in the hips so that you can comfortably shove your hands inside without making the skirt too tight by doing so  i.e.. NOT a figure-hugging body-con pencil skirt.  Though you can of course start with a figure hugging pencil skirt pattern; keep the waistline and just grade the side seams out at the hips to give you the pocket room you need… allow around 12cm at least of extra ease at the hips from a pencil skirt starting point.

My pictures demonstrate a skirt opening at the LEFT hip… for a right hip opening just flip sides!

The pocket (below, at right) has the same top and side edge as your skirt front piece, and the pocket bag (at left) has the slanting opening edge.  This slanting edge should be cut identically on the each of the topside edges of the skirt front itself also… If you’re drafting your own just ensure it has the width to accommodate your hands.  Also, the waistband is going to overlap at the top of the pocket… so cut the waistband piece long enough to go around your waist, plus at least the width of the pocket bag top edge.

For the L pocket only: mark with a pin a point A on both pocket and pocket bag pieces as indicated here, roughly 12cm (5″) from the top edge.

Finish the raw edge above this point.  I have finished mine with a bound HongKong finish, however a skinny hem or overlocking is perfectly fine.

Stitch pocket bags to each side of the skirt front along those slanting opening edges.

Press seam allowance open, grade seam allowances, re-press all seam allowances towards pocket bag, under stitch, press pocket bag under.  At this point, pocket bag and skirt can be basted together along the top edge.

Pin under-pocket piece to pocket bag piece along unfinished curve edge.  Stitch from point A to the side edge.  Note: the R pocket is pinned in the same way, and stitched along the entire pocket edge to the top edge.

Finish seam allowances. R pocket edge can be finished along the entire seam, L pocket must be left open above point A

For a HongKong finish, leave a little tail which can be turned under and enclosed within the binding as shown in the following pictures…

Stitch a bar tack at point A to reinforce and strengthen the pocket opening,

Align the skirt front/pocket bag over the under-pocket, keeping the finished edges together. … and baste all three pieces together along the side seam below the slanted pocket opening. This is the skirt front, finished, at this point join skirt fronts and backs together along the side seams.  Above the slanted pocket opening, the skirt back is stitched only to the under pocket piece for both R and L sides.

Attach waistband to the top of skirt, commencing from the skirt front/L pocket bag edge, encircling the waist and extending past the L side seam taking in the top of the LH pocket piece also.

Hand slipstitch the waistband facing inside in the normal way, and stitch press studs and/or a wide hook and eye on the waistband overlap…

Ta da!!


Details:

Skirt; modified Vogue 8363, upholstery fabric; worn with:

(at top)

Drape-y top; the loose draped top from “drape drape”, by Hisako Sato, details here
Hat: Vogue 8844, ivory corduroy, details and my review of this pattern here


(below)

Tee; modified Nettie, Closet Case patterns, details here
Cardigan; my own design modifications of Nettie, Closet Case patterns, details here
Raincoat; Kelly anorak, Closet Case patterns, details here
Shoes; made by me and my own design, details here

the skirt is a little longer here… This was its first length and is how I wore it for its maiden voyage… and then I took one look at my pictures and thought, hmmmmm.   I don’t know if it’s just on me, but I find knee length skirts are an instant frumpify-er… I like them to be EITHER a few inches above my knee OR to be full midi length, halfway down my calves, every time I’ve gone for a middling length I’ve regretted it.  Like, it’s gotta be one extreme or the other… but NEVER in between!  I think it’s just right now!

SaveSaveSaveSave

SaveSave

SaveSave

SaveSaveSaveSaveSaveSave

SaveSave

SaveSaveSaveSaveSaveSaveSaveSave

SaveSave

SaveSave

SaveSave

SaveSave

SaveSaveSaveSaveSaveSave

SaveSave

SaveSave

pinterestmail

not another striped tee

New Inari tee, sort of.

I bought this striped fabric from Fabulous Fabrics at the same time that I bought the striped fabric for my zebra striped skirt… that I made nearly two years ago… oops!  I was going to make a matched set.. but I got distracted, as you do and just never made the top.  I have now, obviously.  Finally.

dressing to match your puppy. it’s a thing, ok?

Not sure if the skirt and top look too… er, costume-y together??  Is it just me or are stripes feeling just a shade on the side of… last year?  Not that I don’t like stripes or anything… I DO! we’ve all bought into the stripe-hype that stripes are a neutral and go with EVERYTHING for years now… but everything runs its course.  Not to mention, and speaking  as a seamster, they’re an absolute pain in the bottom to sew.  Crazily; I bought enough of this striped fabric to make a Named patterns Inari tee dress for Cassie, but I don’t think I have the intestinal fortitude to face two entire dress-lengthed striped side seams right now.  I need time to recover.

failing to match my puppy

Modifications: I redid those blasted striped side seams several times… but I think it was worth it in the end.  Behold, attempt number one.  The stripes are all matched perfectly fine, but the V-ness they make as the side seam tapers outwards looks kinda weird.

so I unpicked those perfectly matched stripes, sobbing only just a little bit, re-pinned and restitched.  Hallelujah for the cropped-ness of the Inari!! shorter side seam, naturally; phew.  Now, my side seams still taper outwards some in the spirit of the Inari, but the angle is more subtle, and I just think the way the stripes are now is visually a lot more pleasing to the eye.

My other alteration was my now usual one to widen each of the sleeve hemline and the cuff by a good 10cm (4″) using this method described here.

ON another note; I actually made everything I am wearing in all these pictures, including my shoes… not something that happens all the time now my Year of Handmade is over, but just every now and again  🙂


Details: (above, with striped skirt)

Top; modified Inari tee by Named patterns, with modifications, slightly spongy striped knit
Striped skirt (above): Vogue 1247, striped woven, details here
Denim shoes (above); made by me, details here;  these are getting pretty old now, which is making me sad  🙁

Details: (top picture, with floral skirt)

Floral skirt: Vogue 2894, floral cotton lined with purple
Black clogs; made by me, details here

So that’s it!  I decided to wear it with my red floral skirt, for its maiden voyage into the city today to meet my friend J for lunch… the stripes/floral combo still feels fresh and springy to me and I really love it.  Cassie came around later in the evening, coincidentally wearing her little cottages Inari tee that I’d made for her! and mentioned that she really loved this outfit.  Oooh, praise from a daughter; that’s high praise!!

location: Elizabeth Quay, Perth

SaveSave

SaveSave

SaveSaveSaveSave

SaveSaveSaveSave

SaveSaveSaveSave

pinterestmail
Switch to mobile version
↓