Tag Archives: Dress

pretty little maternity dress

No, I’m not pregnant, obviously, but I do currently have a pregnant daughter … She is wearing the things I’ve already made for her constantly, AND I’ve also lent to her my rusty lace Cissy dress for however long she needs it – and boy do I miss it!  Even so she is in desperate need of more options.  Well, how could I not do something to help out?

I’m modelling it here though, because she and D have moved into their new, own home and she is now a half an hour’s drive away (sob)  I still can’t get used to her being so far away!!

While I was wearing it I was reminded how much I love this cute style.  The pattern is the Megan Nielsen Sudley dress, one I’ve made for myself once previously here, and once as a dress for Cassie here.  I really like the oversized, comfy skirt and three quarter sleeves, which I have gathered up with a loop of skinny elastic inserted in the casing; and the keyhole neckline with spaghetti tie is really pretty.  Otherwise, the style is quite similar actually to the aforementioned Cissy dress in many ways, with a few key design point differences of course! but the style and feel make them very much sister designs, I think.

The fabric is this, very pretty, rayon crepe from Minerva… isn’t it lovely?  I think it’s really sweet and “granny’s wallpaper”, in a pretty old-fashioned sort of a way.

Now I have a confession, I initially cut out a different thing from this fabric, and … well it was terrible.  There’s no sugar-coating it.  I was quite depressed about it actually, had bought the pattern with great expectations and excitement, and it didn’t take long before I realised it had … issues.  I won’t name and shame it, well, not just yet! but I think I’ll give it a revisit at some point and work out a re-jig.  I already have plans.. but more on that at a future date!  I managed to cut out the Sudley pattern from the pieces, and miraculously I’m fairly confident I have enough small pieces leftover that I think I can cobble together for a thing for me too.  I just need to get around to it!!

… crazy Spiderman picture inspired by a Vogue magazine shoot…

pinterestmail

heaven…

Heaven by name, heavenly by nature?  Well, I think it’s a pretty nice dress, at least!

🍓
this is the new Heaven dress pattern by @fibremood; an unusual design with a chic, wide trapezoidal neckline and an interesting combined sleeve/yoke arrangement that I’ve only ever seen in a few Japanese patterns before now.

I’ve learned to overlook the awfully unflatteringly “puffy” line drawings featured in all the fibre mood patterns, because the finished products are invariably not at all like that! anyway I was quite intrigued by the lines of this design…  initially, while perusing the promotional photos… see below! I did worry that the sleeve/bodice corner junction at the neckline looked like it might be a little on the tight side… however when you’re wearing it, it’s more like nicely “firm” rather than tight and I think that structure is necessary to keep the neckline in place and also from gaping open.  The dress is actually very comfortable and I really enjoyed wearing it!  I even got down on the floor and had a play with Arthur in it, and was perfectly fine!

🍓 I also feel like it turned out to be pretty cute too  🙂  I bought the lovely cotton/linen mix fabric from the upholstery section in @spotlightstores … I just fell in love with the gorgeous deeply, dusky-raspberry pink colour and HAD to have it!

🍓This dress really was a fun thing to make, very quick and easy… I like the way the elegant and unique sleeves are set off against a sleek, just slightly fitted body section.  I like the sleeves pushed up, but they do look very elegant let down to the wrists as well, I think.

sleeves down

🍓 closure is by invisible zip in the L side seam.

🍓I didn’t line it but to be honest I think it would be better lined, particularly for an “autumn” dress, which it is definitely designed to be. I might even have a go and add a lining somehow, when I get a bit more time… I will update here when I do!

another bonus; all that ugly overlocking will be covered up if I line it!

It has to be lined, a petticoat will not do.  I did try it with a few of my petticoats and they all show at that wide wide neckline.  Yes, my bra strap shows at the neckline in a few of the pictures here, which I know is such a no-no.  However I felt a bit better about this when I noticed that even the model’s bra strap shows too.  I’m in good company!

🍓 btw, I did NOT shorten mine, this the length of the pattern.  I honestly think they must have added length to the above one modelled for the magazine!  Actually, I prefer it as that little bit shorter than knee length… it feels more like an autumn-al length, if that makes sense.

Details:

Dress; the FibreMood Heaven pattern, upholstery linen mix from Spotlight
Shoes; asics, from the Foot Locker

pinterestmail

snowy white dress


It’s a bit sad that this dress looks like a white-out and doesn’t photograph as “exciting” because it’s a thing that’s been on my sewing bucket list for YONKSSS, and I absolutely love it!  I think it’s elegant and beautiful and, excuse me for saying so, but I think perfect also … and I’m gonna wear this to death!!

Cassie gave this piece of soft ivory crepe to me for Christmas one year… quite a few years ago actually.  I feel a little terrible that it’s taken me such a long time to getting around to making it up, but I also don’t! because I really wanted its outcome to be perfect. Ok ok, to be as close to perfect as possible… and I’m so very happy with how it did turn out that at the same time that I’m relieved I waited til I was really ready.

The crepe is from Fabulous Fabrics, as is the lovely, light beige lining fabric.  It’s actually leftovers from my mother of the bride dress, for Cassie’s wedding, and beautiful quality too.

Ordinarily I wouldn’t put one of my labels into the back of a delicate dress like this, but I’m determined to use these labels as often as I can, because they’re such fun! and it gives me such a kick to see them in my clothes.

For the hem, I used this triple-stitched method, which makes a really nice, beautifully clean finish.  The only thing to be careful of, especially in a slightly “sponge-y” fabric like crepe, is to just slightly stretch the fabric as it goes through the machine… if you don’t I find the fabric bunches up just a bit, draws in the hemline.  Stretching it doesn’t give the expected lettuce leaf finish but instead gives a beautifully smooth hem.

This is my eighth thing in my #maketwelve this year, from my twelve selected designs and fabrics… hmmm what should I possibly make next?!! I wonder!

pinterestmail

an exciting need for maternity gear!

so, I have some very exciting news!  I’m going to be a granny again!  Well of course I’m already a granny to darling little Arthur, but I am going to be granny to TWO.  That’s cause for celebration, I think!  Especially if by celebration, I mean celebratory sewing … which is specifically the kind of celebration this blog recognises, hehe.

Cassie is quite early on in her pregnancy but is already uncomfortable and in need of maternity clothes. Kelly passed on to her one or two of the things I made for her last year, but they are different sizes and so Cassie needed some things of her own, too.

Exhibit A!

I printed out another Closet Core patterns Ebony pattern to cut out Cassie’s size… now I know it’s not technically maternity, but in my opinion this makes a really good maternity option!  And there are so few! Honestly, you  go and check out the maternity range around at the moment and it’s quite shocking how few there are on offer.  Quite disgraceful, to be honest!  There used to be lots of options back when I was sewing for my own pregnancies, but those options seem to have sadly dwindled…  today’s pregnant ladies who sew for themselves have to be resourceful because there is practically nothing at all being designed specifically for the expectant figure.  And even less that’s very interesting.

Anyway.

The first thing I made is the above cotton jersey floral dress for Cassie… she absolutely loves it, which is great because I was initially not a fan of the fabric she chose!  However, once I’d made it and she put it on I could see she looks lovely in these fresh, bright, pretty springy colours.  She wanted something that could work for just about everything, casual and comfortable for both at home and out, she can wear it to work, and even to a formal event if she wants with the appropriate shoes.  Specifically, she has a friend’s wedding coming up, to which she is planning to wear this; and with her high heeled black booties I think it’s going to be lovely.  Plus, it’s stretchy fabric, so it’s very comfortable too, she can curl up on the couch in it just fine.  Pretty? and comfortable too?!!  win win!

I used the aforementioned Ebony pattern, of course, with the set-in sleeve.  The swing of the skirt is a little less than the pattern, because the fabric I had wasn’t as wide as needed.

Exhibits B! and C!

This top is another Ebony, naturally, in the tunic length and with the raglan sleeves.  This spotty cotton jersey is absolutely lovely! such a pretty print.  Oh, both of these fabrics, the spots, and the green, plus the previous blue/pink floral, were all from Spotlight.

please excuse the lumpy look, there’s a cushion doing baby stand-in duties in there and it’s not doing a very good job…

The skirt is Burda 7023, one I made several times previously for Kelly, so we know it’s a fantastic little pattern.  Thanks again to my lovely reader Graca, who very kindly sent this to me!  xx

I did the same thing I did before for Kelly’s skirts, with a self-drawstring in the front band coming out through little eyelets on the inside, so she can tie the front up tighter during these earlier days before she’s very big.

Exhibit D! and sorta E? though I’ve shown this little top here before so it shouldn’t really count actually.  Cassie made the skirt herself, using the Megan Nielsen Axel skirt pattern, and a pretty embroidered and pleated organza that she bought from Megan Nielsen store too actually.  It has a stretch jersey waistband, and is lined with lightweight cotton jersey too.  The little top is one I made for Kelly, and is a streamlined Closet Core patterns Ebony, first blogged here.  I made it using the same oatmeal-coloured, lightweight cotton jersey Cassie used for the waistband and lining of her skirt…  I originally bought this gorgeous stuff at Homecraft Textiles.


I just wanted to add pictures here of two other me-made clothes that Cassie is finding very useful in her pregnancy, a sort of pregnancy-appropriate, pattern round-up, if you like.  Both these dresses are getting worn a LOT.

Exhibit F: this Megan Nielsen patterns Sudley dress that I made for her in 2017, in a gorgeous spotty rayon from Spotlight, originally blogged here.

and also Exhibit G: this Burda dress also from a few years ago, made using a really beautiful, Amalfi coast printed crepe from Fabulous Fabrics, and Burda 02/2015/107, and originally blogged here.  This was my Christmas present to her from 2015, so I’m thrilled she’s got so many years of great wear out of it!

pinterestmail

adding the almighty pocket

So, recently I’ve been on a bit of a pocket binge.  You see, one has a phone which has rapidly become the ruler of one’s Life, and one has decided that this little autocrat needs to be on one’s person at all times.  So if something doesn’t have a pocket?  BAM! it’s getting one, like it or not!  Take that you pocketless fiends you!  Picture, if you will; pockets raining down upon Le Wardrobe, with lightning bolts and attendant thunderous cracks and booms as they attach themselves fiercely and fearlessly to the offending garments cowering on their hangers… ahem, my apologies.  Maybe I’ve been isolating too long.

Anyway, meet the victims:

please note; The Eye…

Firstly, my plaid Delice dress

I’d already promised to myself that I would add pockets once I got around to it… it’s a loose-fitting little thing, and while the attempted side-seam pockets did not work I knew welt pockets would be fine.  I just needed to get onto it!  and finally, voila. I still had the pocket bags, and I cut welts on grain from the very tiny amount of fabric I had leftover.  Both welts and the opening area of the pocket were interfaced with iron-on interfacing for stability – this fabric is basically a brushed cotton flannelette and so it has pretty poor stability actually,  A pocket bag on a welt sans interfacing stood a good chance of becoming a gaping, saggy mess, so I used nice firm stiff stuff, and the pockets turned out a charm.  No I didn’t take any progress pictures.  Bad me.

Secondly, my rusty coloured Sabrina skirt


this has always been a little on the baggy side for a pencil skirt, I think I might have selected the incorrect size in the first place because I’m slightly terrified of making a thing too small or too tight; a problem which is practically unfixable, and the fabric was kinda precious to me.  I mean, if you make something slightly too big, that is a problem that is eminently fixable down the track.  Except that “down the track” never seems to come… anyway, flash forward to a few days ago when I realised that same slight bagginess could easily accommodate some inseam pockets.  So I went for it!  I did remember to take some pictures of this one for posterity…

Firstly cut out the pockets lining at the size of pocket you want.  Stitch to the skirt front seam allowance at the place where you want your pocket to be in a skinny seam allowance, and press towards the skirt front.

Cut the pocket itself from the self-fabric, with an opening extension that covers the width of your side seam allowance once it’s laid over the pocket lining.  My side seam allowances for this skirt are actually quite huge, showing that I really truly overestimated how much wriggle room I needed; but since that mistake resulted in such a good prognosis for future pocket insertion, I forgive past-me.  Trim to fit, and finish the raw edge.  Stitch to the back seam allowance, right sides together in a skinny seam allowance, and leave it laying towards the front.  Check the pocket piece and pocket lining piece are aligned perfectly.

Now open the two pocket pieces apart and gently rip open the skirt side seam.  Leave at least 1cm closed at both top and bottom edge of the pocket pieces, and then reinforce the side-seam stitching at these points both top and bottom with some quick forward/backward stitching so the seam doesn’t open any further.

Now; open out the back skirt side seam allowance and as far as possible, stitch the skirt back and the pocket piece together, using the previous pressed seamline on the skirt back as a stitching guide.  Be sure to keep the skirt front free from this stitching!!

Lay the pocket pieces over each other again, and stitch them together around the curved edge, commencing and finished the seam at the skirt side seam, taking care to not go over it and into the skirt itself.  Finish the raw edges as far as possible on the overlocker.

Now open out the side seam allowances away from the skirt front and back, and at the top and bottom edges of the pocket, perpendicular to the side seam: stitch the pocket to the front skirt seam allowance up to the side seam line, and the pocket piece ONLY to the back skirt seam allowance up to the same seam line.  These short seams are indicated in white on the previous picture.

Ta da!

And, while I still had the machine threaded with chocolate brown thread… victim number three.  This is a great little corduroy skirt, very simple and plain and useful.  Except that it had no pockets!  Problem solved!  For this one, simple patch pockets were the go; but slanted at what I find to a optimal angle for my hands.  I used some of the leftover corduroy from which I made my wide-leg Sashas, and even though it doesn’t look like it I spent ages and aaaaaages aligning them to be perfectly symmetrical.  Yes they probably look a bit weird but I have pockets so I care not.

That’s it for now, until next time!

pinterestmail

crimson rosellas

{Sooo, what’s going on?  It’s actually been well over a month since I made this dress, took these pictures and half wrote this whole post too so maybe I should say something about my absence.  Later.

Meanwhile, over to 6-weeks-ago me …}

This fabric is so cute!  I absolutely love it! well I love the pattern too of course, but I’m going to start with the fabric… I bought it at Spotlight last year, it’s a Jocelyn Proust design.  Actually, Spotlight is on a roll with great Jocelyn Proust designs at the moment… there are lots of absolutely gorgeous ones and it’s nearly impossible to choose just one.  Fortunately when I got this one it was the first one I’d seen, as well as the only one in the store at the time, so I was just like WOW! I love this!  *grab*  *buy*  A coupla weeks later and there were now lots of really beautiful Jocelyn Proust designs in the store from which to choose… but I think I still would have chosen this one!

It’s cotton drill; such practical stuff, and nice to both sew and wear, and I absolutely couldn’t resist the colours … I love navy blue and raspberry pink together.  Also; crimson rosellas.  Any Aussie-specific print is going to catch my eye in the shops and I think this one is really cute.

The pattern is the cover dress of the Burda 07/2018 magazine, dress 118; I’d earmarked it as a must-make from the first flick-through of the magazine… then as soon as the crimson rosella fabric came into my life I was like bingo.  The design of the dress is quite interesting, with a sort of faux bib-front look to it, a raised faced section both front and back of the dress with set-in side panels that help form the pockets.  It’s hard to explain actually, but you can get an idea of how the front sits out over the side panels in the side view shot above.  The “sitting-out” bits have long, oddly shaped facings, that I managed to miraculously cut out from a fairly small piece of navy blue cotton drill, the final leftovers from these Issey Miyake pants from a few years ago.  I only had to piece together one little bit on both facings.  The pattern stipulates a lining, which I decided to leave off because I want to wear mine in the heat of summer… so I needed a way to finish off the armhole edges.  I drafted some facings by just splicing the side pieces together, tracing the raw edge, and cutting the subsequent facings to be the same width as the other facings, for a matching look inside.  All edges inside are finished on the overlocker, with matching bone-coloured thread, mostly because I couldn’t be bothered changing the overlocking thread to navy from the bone I used for the fabric itself! but in the end I really like the look of contrasting colour here.

The dress is drafted as a petite design, so I checked the burda size charts to see what changes I might need to make.  I decided to add in 2cm length to the bodice area of the dress on all pieces, did a quick pattern mockup and this was just the right amount, I think.  The pockets would have just been sitting that little bit too high on me, otherwise.  I love the pocket design on this dress too, but if I made it again I would make them just little bit deeper, maybe 2cm or so.  They are ok the way they are, but you know.  When it comes to pockets, size does matter!

The pocket linings are also cut from the same navy blue cotton drill.

I love the design; it is just slightly on the boxy side which I like for a summer dress.  You’re supposed to put in a whacking long invisible zip in the centre back seam, which I did, very obediently.  And then discovered, as you do; that I can actually slip the dress on over my head without having to undo the zip.  Of course!

Oh, and I ended up re-hemming the dress to be about an inch shorter.  That doesn’t sound very much, but I think it looks a lot better, even that small amount made a difference! From just verging on slightly frumpy to Jackie O chic in just an inch!

This is the fifth thing made  from my #makenine  that is really twelve, list of 12 designs and fabrics that I promised myself at the end of last year.  Hmmm, what should I make next?!

Details:

Dress; Burda 07/2018;118, cotton drill
White oxford shoes, made by me, details here
Black tights; made by me, details here
Black boots; made by me, details here

So… what’s been happening, indeed… well LOTS in the world obviously.  From the perspective of our family here, we lost an important, elderly family member at the beginning of June, and it’s been a very emotional and rather difficult time for us, separately and on top of everything else.  By “everything else” I mean the continuing and not inconsiderable anxieties of Covid-19, and the very important “black lives matter” movement – for which I am obviously pro – and just some other family stuff, so mmm.  It’s been a lot.  I don’t want to go on and on about it because this is my just-for-fun sewing blog and not a “let’s offload all one’s emotional baggage upon an innocent world” blog, and I prefer to dwell on the positive.

With regard to the BLM movement, so I’ve been buying fabric! supporting indigenous makers.  I’m just going to copy and paste here what I already wrote in instagram…

I’ve been thinking about the best way to show my support for blacklivesmatter and as a fervent sewing peep I think using more indigenous textiles is a good start… I was so excited to receive my first purchase the other day… this beautiful piece of fabric, “Tjilkamala Rockhole” designed by Alice Nampitjinpa… this talented lady recently won a collaboration with Gorman clothing with another piece of beautiful artwork so I’m extra excited my first purchase should be from such an amazing artist! …
.
This piece was produced by @ikuntjiartists and purchased through @flyingfoxfabrics and I’m so grateful these cooperations exist to make indigenous work accessible and available to us…
.
I am humbled and inspired by my country’s rich and ancient indigenous culture that has survived here for millenia … I wish to learn how to better honour and protect the Aboriginal people, as well as acting to create a kinder and more respectful future for everyone here in this beautiful country I am so grateful to call home … I’m looking forward to researching and buying more indigenous art fabric, and, if I’m allowed a rather shallow final note, cannot wait to sew something lovely to wear from it, too! #sewing

AND

I’m so thrilled this beautiful length of art fabric has arrived! This print is “Mandem” designed by Eva Nganjmirra and printed on linen by @injalakarts a wholly Aboriginal owned and governed community art centre in the Northern Territory… and from whom I purchased this piece. .
I can’t wait to trawl through my patterns and make something hopefully worthy enough to do justice to this beautiful work.
.
#sewing

ALSO…  in the meantime, I also participated in me-made May last month, as usual.  I pledged to wear 100% me-made, including my shoes and underwear, because why not? I have plenty of me-made things to wear!  I was happy to achieve this, and to also mix and match my existing wardrobe so as to not repeat anything during the month either, apart from obviously black tights and a few of my shoes.  There was only one tiny fail at the end there, where I neglected to wear me-made shoes for the final two days of the month, because we’d gone down south and I just decided oh to heck with it.

Here are my outfits for the month.  Absolutely everything made by me, except for the boots on the last two days of the month  🙂

pinterestmail

pink Axis

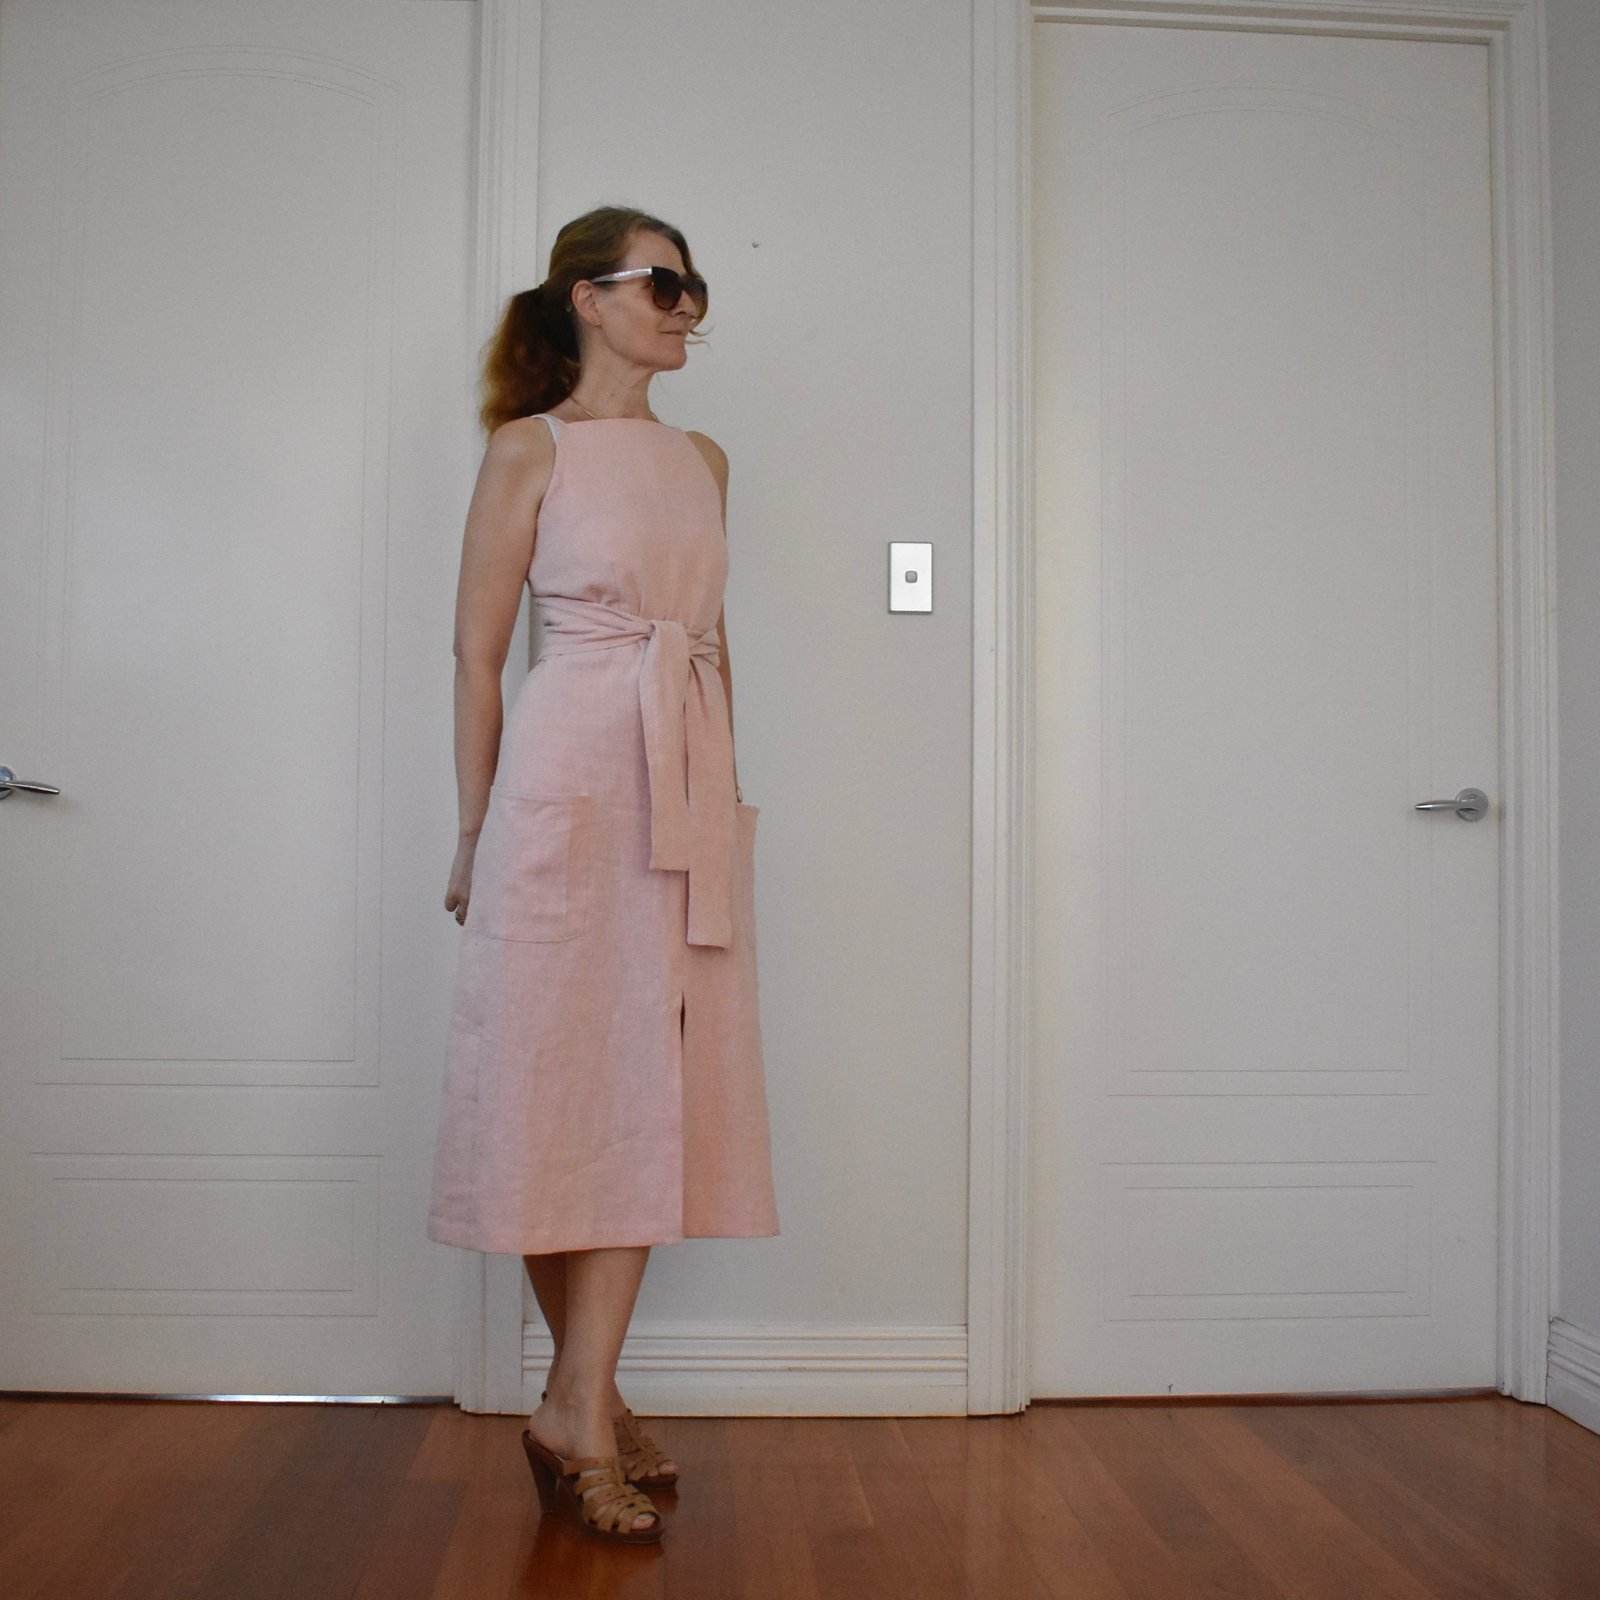
I absolutely love this, my new dress!! for several reasons, upon which I shall now proceed to wax lyrical…

The pattern is the Axis dress by Papercut patterns… I’ve loved this pattern company for several years… for one thing their packaging is absolutely the most beautiful of all.  I know that seems like a shallow sort of a reason to buy a pattern but hey, it’s ok to be shallow when you want to be.  I think we’ve all deserved that right!  The patterns are printed on nice crisp brown paper, and the instructions are printed on the same paper as the pattern pieces.  You cut them off and accordion-fold and glue them together to make up your little instruction book.  This is a pretty fun crafty little thing to do before you make up your pattern!

Secondly, Papercut patterns are a New Zealand company, and I have a soft spot for the land of the long white cloud.  Also I love to support fellow antipodeans.

Additionally, Papercut Patterns have always had this indefinable aura of the cool-girl about them, and who doesn’t want to be a cool girl, hmmm?   to be honest I’ve sometimes thought some of the designs are a little … basic, but at the same time that wonderful packaging makes it worth paying for those of the designs that are more individual, if that makes sense.  By the way, absolutely nothing wrong with basic patterns! and from what I’ve observed in the sewing world it’s often the most ordinary of patterns that seem to be the biggest and most popular sellers.  So there you go.

In any case, I love the Axis pattern, I happen to think it’s pretty unique, and it appealed to me immediately.  I also have their Sapporo pattern, and hope I can get around to it finally this year!

My fabric is a really gorgeous, slubby cotton from Fabulous Fabrics, a Christmas gift from Cassie last year.  Actually we’d been shopping there together and I almost bought it for myself before Cassie stopped me, and reminded me that she needed to have a Christmas gift for me!  She knows me so well!

This fabric is the same stuff from which I’ve made:  this set, this dress, this dress, and this dress too; each of them just in a different colour way.  You can see how much I love this fabric! I have bought some of practically every colour way it’s ever come out in, and all of these things have got worn a LOT in their time.

I made my dress to have the A-line skirt version, but I also added in the front walking slit too, which is really supposed to just be put into the straight version of the skirt, so you can walk normally of course.  I take very big strides while I walk, so I did the walking slit AND the A-line cut.  Rebellious!!  I cut my top as a size 3 and the skirt graded out from the size 3 waist to a size 4 at hip level.  This is why I make my own clothes!!

The Pocket is something I will often try to bung in to a pocketless new thing somehow, if possible…  in this case I decided the best sort of pocket for this sleek, body skimming style could be a patch pocket.  Craig thought they might turn out to be a mistake, spoil the line, but I stuck some on anyway, figuring I could take them off if they looked awful.  But I really like them!  both how they look and obviously they’ll be practical even if you can only fit slimline things like a phone, credit card and maybe a key in there…  I kinda pictured them standing out from the body at the top edge rather than laying flat on the body, and fine-tuned the exact amount of “stand-out-iness” and placement in pinning trials.  They are simply top-stitched in place; my slubby cotton is quite “sponge-y” and so the stitches sink into it quite beautifully.

I had not quite enough fabric to cut out the dress completely… those back bodice pieces are HUGE and you need to cut out FOUR of them! but I had nearly enough that I managed to make it all work.  There is just the tiniest amount of pink voile pieced in at the top of the front facing shoulder strap.

With the front slit, you’re just supposed to turn under the seam allowance in a single layer and top-stitch it down but I finished mine with a little facing.  I think this adds a small but nice amount of weight to the hem, and balances it out against the heavily faced bodice area.  The facing is stitched on, trimmed, graded, turned under and under stitched, and hand slip-stitched in place at the same time I did the hem.

Look at that perfect zip!!

hmmm, so why has Carolyn just posted two sets of near identical pictures of the zip?? so maybe you can just barely detect that the zip in the second set does look a little bit pink? compared to the first?  Yes, there is a little disaster story there…  I originally put in that cream coloured zip above, patting myself on the back that I had a mostly suitable zip in my stash already and didn’t need to pop out and buy a new one.  I even took all my pictures here with that zip in.  Then I was re-pressing this brand new dress and putting it away, and what should happen but to my horror the zip just casually split open underneath the pull.  Aaaagh!!   I simply could NOT believe it!  My brand new, perfect dress!!  I tried and tried to tease the teeth back together, resurrect the zip, but it was truly stuffed and there was nothing for it; I just had to unpick the wrecked zip, and head into Spotlight to buy a new one… since I sadly did not have a second suitable zip in my stash.  I made my trip worthwhile though, by picking up a little range of new threads and some more zips that I knew I’d need in the future.  I tried to nobly restrain myself from buying more fabric too, but failed in such endeavours.  Well, I needed to cheer myself up!  You just do sometimes, you know?!  Especially when one suddenly needs to replace a BRAND NEW ZIP in a BRAND NEW DRESS 🙂

I think the problem was too much bulk in the back waistband/skirt junction, since I had stupidly tread quite light while trimming the seam allowances in there…   The waistband is a single piece foldover one, interfaced fully, so you end up with triple thickness of interfaced waistband, interfaced seam allowance and interfaced self-facing, add in a skirt seam allowance too, and that’s a fair amount of bulk at that junction.  The zip “looked” perfectly fine, but the bulk of fabric hard up against the zip pull did make it difficult to pull up and down past that point and I’m not quite sure how it happened but it all proved too much for the mechanism. When I inserted the second new zip I aggressively trimmed away a lot of that bulk inside before stitching in the invisible zip, and this helped a lot, I think.

Anyway; zip drama notwithstanding; I still really really love this new dress! we’re still getting warm enough days every now and again that I can wear it now! and even in slightly cooler weather it’ll be still be nice with a little white tee worn underneath too.

This is my fourth thing from my #makenine but actually twelve, that I challenged myself to make for this year.

Details:

Dress; Papercut Patterns Axis dress with pockets; textured pink cotton
Sandals; ariel, from an op shop years and years ago

pinterestmail

I sewed selflessly

So, I sewed some stuff!

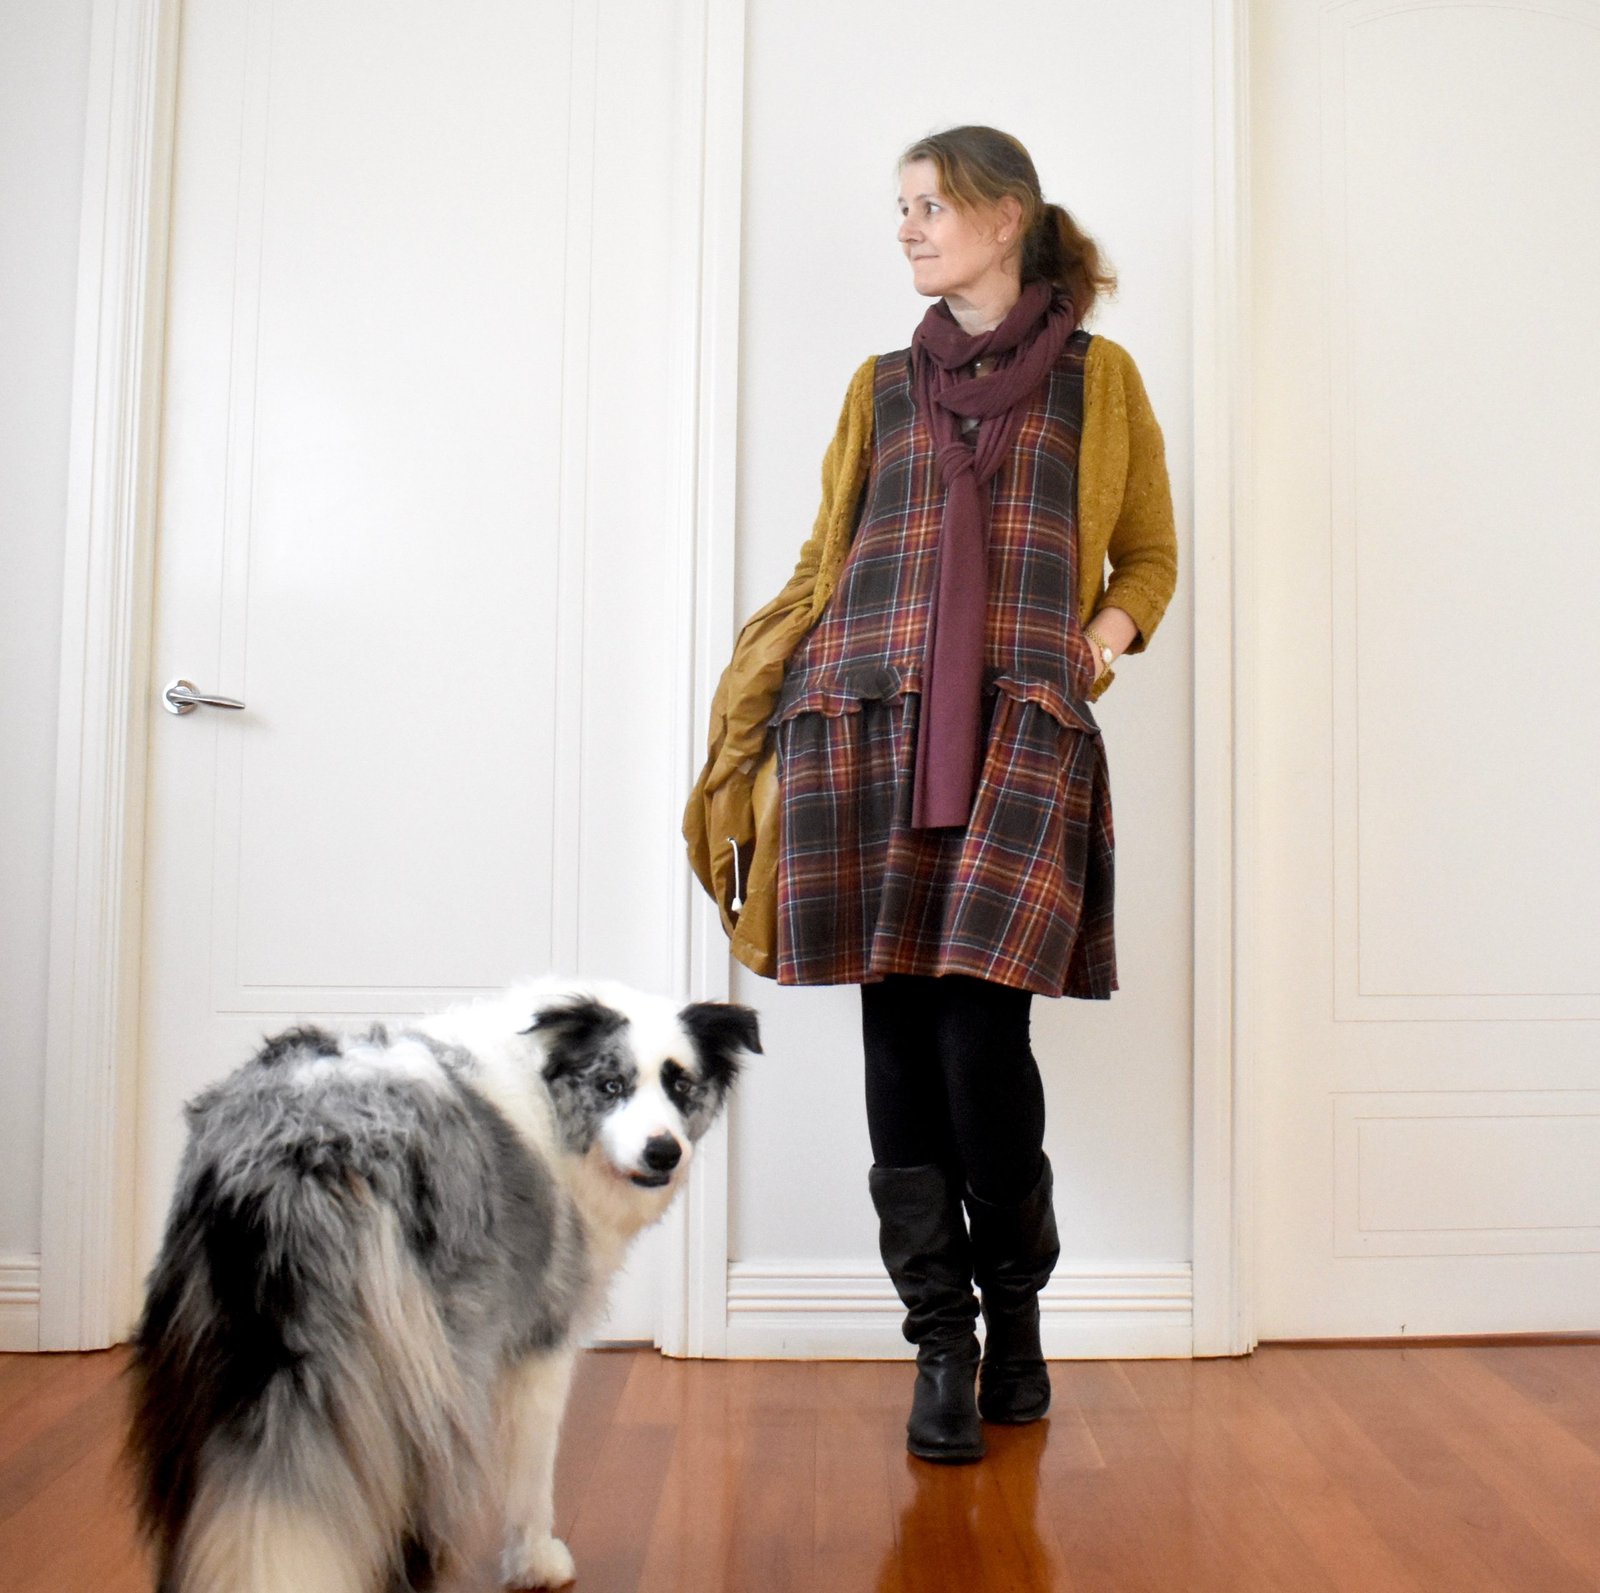
Item A; a dress for Mum to wear to Cassie’s wedding…

I started out with Burda style 09/2019; 109 because I thought the sleeve cuff really lovely; however I ran up a muslin – actually 2 –  and we decided the cut-on sleeve just wasn’t that nice and that a set-in sleeve would be much better.  So I ended up re-tracing and -fitting the Esme pattern from Lotta Jansdotter’s Everyday Style book again since Mum had really like the one I made for her previously.  I just adapted the sleeve to have the Burda cuff on the sleeve end.

The fabric is a really beautiful, green polka-dotted ivory crepe from Fabulous Fabrics; Mum and I went in together and chose it one morning.  Fun!  I didn’t use the neckline facing pieces, opting in stead to fully line the dress with an ivory lining that I already had in my stash, the lining negated any need for a facing…  Mum kindly hemmed the dress herself since I was seriously running out of time by the end of it!  The dress shell has french seams throughout, though I used the overlocker for the lining.

At the same time that we bought the fabric, Mum bought a length of emerald green chiffon and finished it with a hand-rolled hem to make herself a lovely matching scarf.

I thought she looked absolutely lovely!

Item B; a shirt for part of Cassie’s birthday pressie…

For her birthday, we went out together and bought a few lengths of fabric which I was to make into some simple work outfits for her.  Of course now she’s working from home but that’s ok; at least she’s still working!

This is pattern 02/2015; 113, adapted to be much slimmer in the body due to the fact that I didn’t buy enough fabric, ahem… that’s fine since the style is so super wide I think Cassie would have requested it be slimmed down anyway!  This thing is BOXY!!  I also had to leave off the sleeve cuffs, but Cassie absolutely loves it just as it is  :)..

The gorgeous polka-dot fabric is a linen from Fabulous Fabrics.  The buttons are leftovers from Kelly’s wedding dress!

I did manage to snap one photo of her wearing the top! kinda a miracle given how crazy busy we were before the wedding, and then I’ve barely been able to see her after the wedding during these virus social-isolation times… this is her on the eve of her wedding, when she was preparing to practice her father/daughter dance with Craig… yes, she’s wearing her wedding shoes of course  🙂

I actually made a little video on the making of this blouse, which was fun.  I’m hoping to make more of these for my YouTube channel  🙂

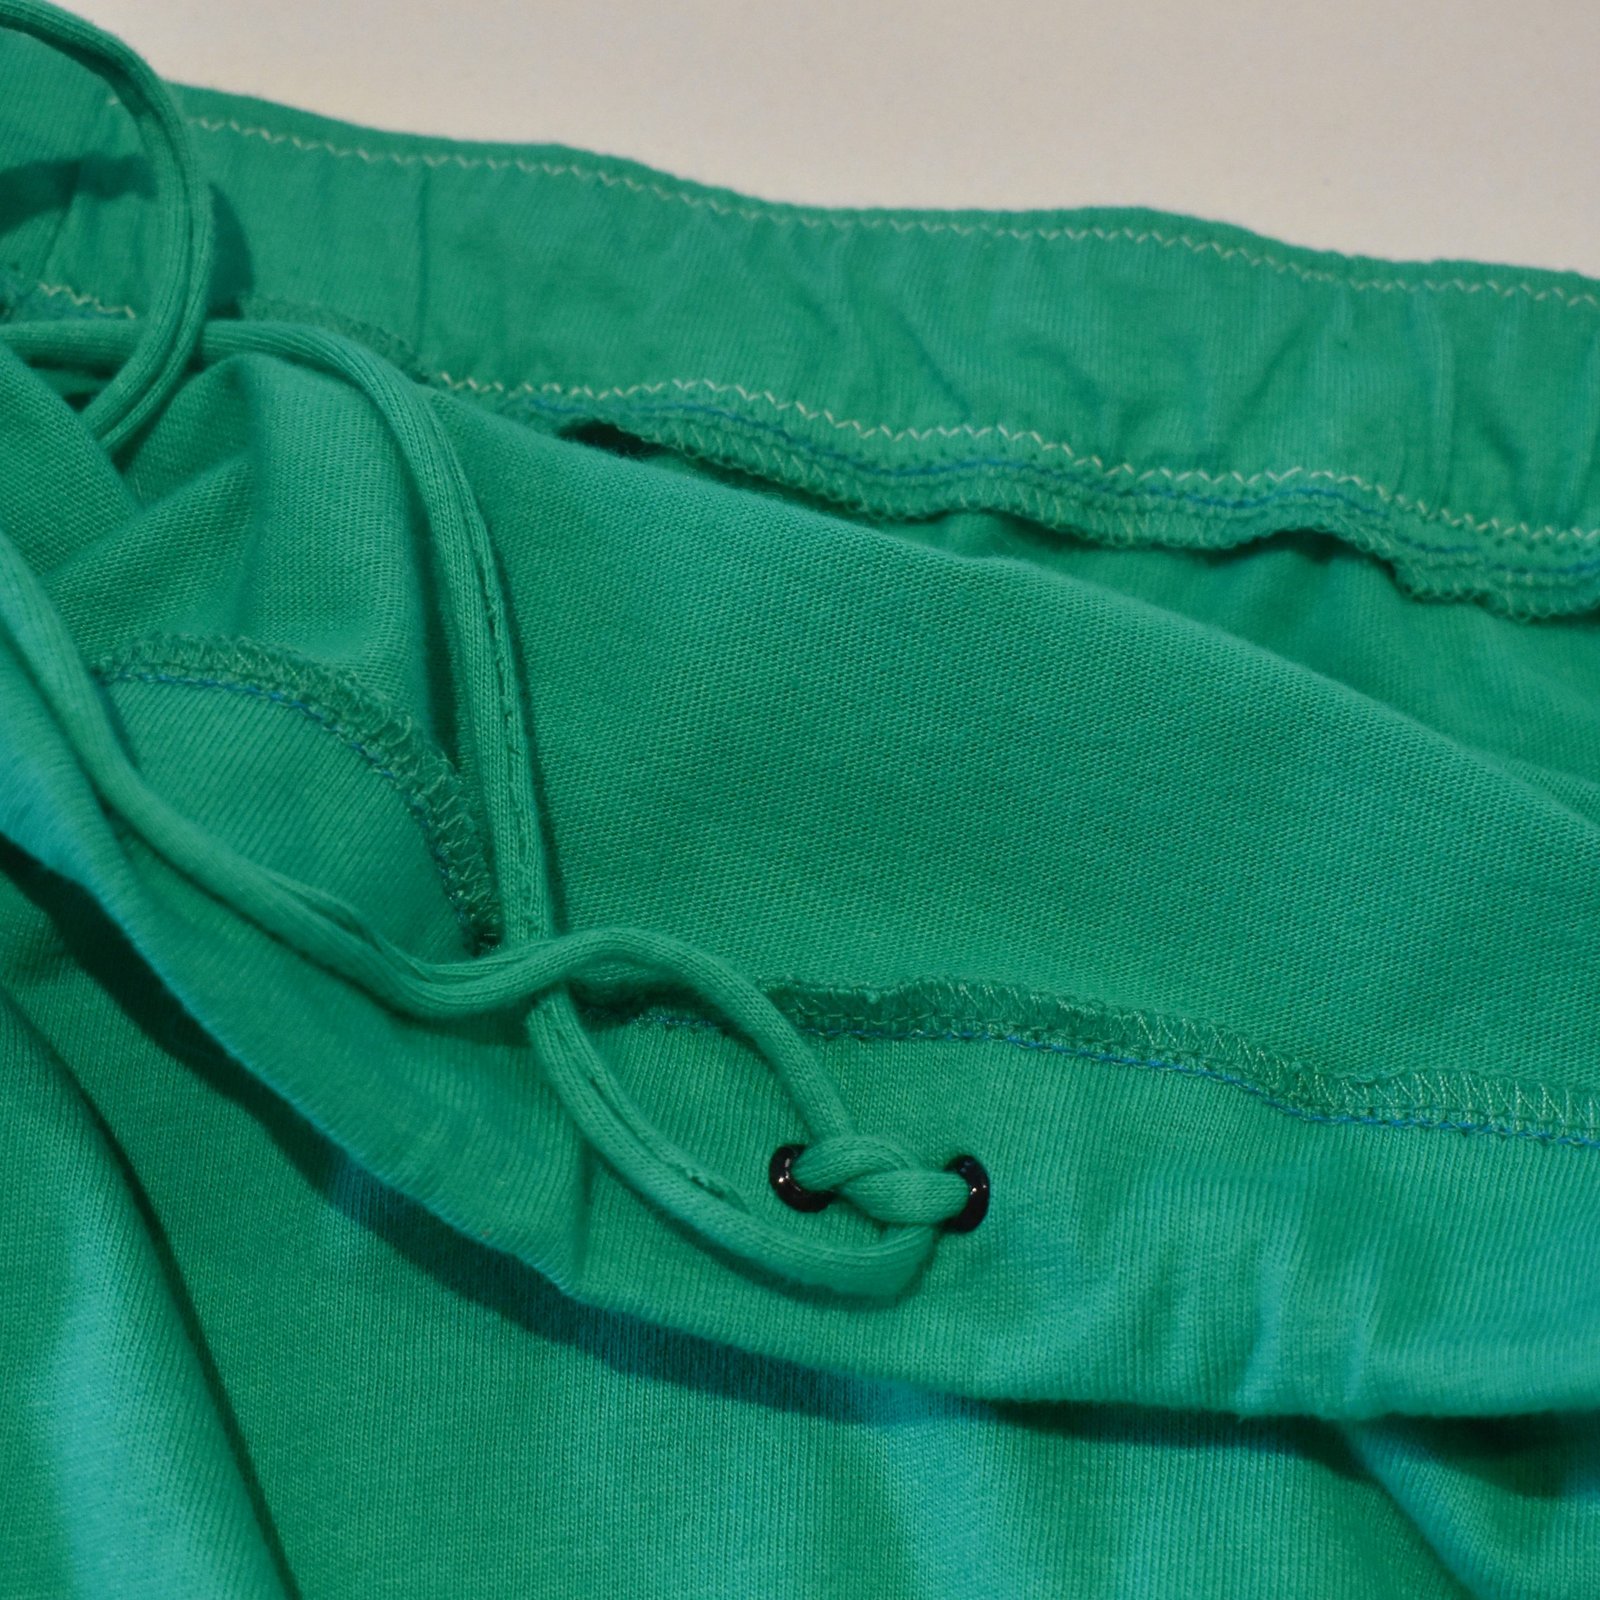
Item C; some shorts for Cassie’s birthday.  For these I started with the Closet Case patterns Pietra shorts and did the same elastic-waist elimination that I did for my own shorts… shown here.

The fabric is a cotton twill from Spotlight, in Cassie’s favourite duck-egg/mint green colour.

Item D; another little top for Cassie… this is the Closet Case patterns Cielo top, lengthened slightly. This is a lovely little pattern and I will definitely be using this one again!  No other adjustments.

The pretty rose-print is a linen from Fabulous Fabrics.  I should say, that while these pieces are all a gift from me to Cassie, she did choose the fabrics herself.  We had a lovely fun morning checking out fabrics and chatting about work-wardrobe possibilities!

Items E & F; I made two different masks for myself.  I haven’t used them very much but am really trying to get more used to the idea!  When we’ve visited Japan I’ve seen lots of people wearing masks all the time of course, and while I think they’re a great idea, especially in our current virus-centric lives, we’re just completely unaccustomed to wearing them here in Australia and it’s really hard to get used to it.  I find them very claustrophobic and a little difficult to breath in them!

The first one, above; I used this pattern/tutorial on the Makers Habitat YouTube channel, it has a lining with an opening so you can insert a filter inside.  It’s a nice straightforward pattern, very quick and easy to make.  I added a skinny channel to the top, and cut a short length of wrapped florist’s wire to insert in there for a nose support; this can be removed for washing.

This second one I used the Trend patterns free mask pattern, here.  This is also a nice pattern, very “designed” and I really like it, but I did find I had to fold a quite wide dart in the under-chin piece to get a good fit.  Also it is a more complex and involved thing to make than the previous pattern,  For both masks I used a leftover piece of cotton from my stash, the most tightly woven and with the densest thread count I could find!   They are both lined with cotton voile.  The ties are just thin strips of cotton jersey, cut with my rotary cutter, left unhemmed, threaded through the side channels and simply knotted.

pinterestmail
Switch to mobile version
↓