Tag Archives: Own Design

all Aussie adventures

MY OUTFIT IS FINISHED!!!
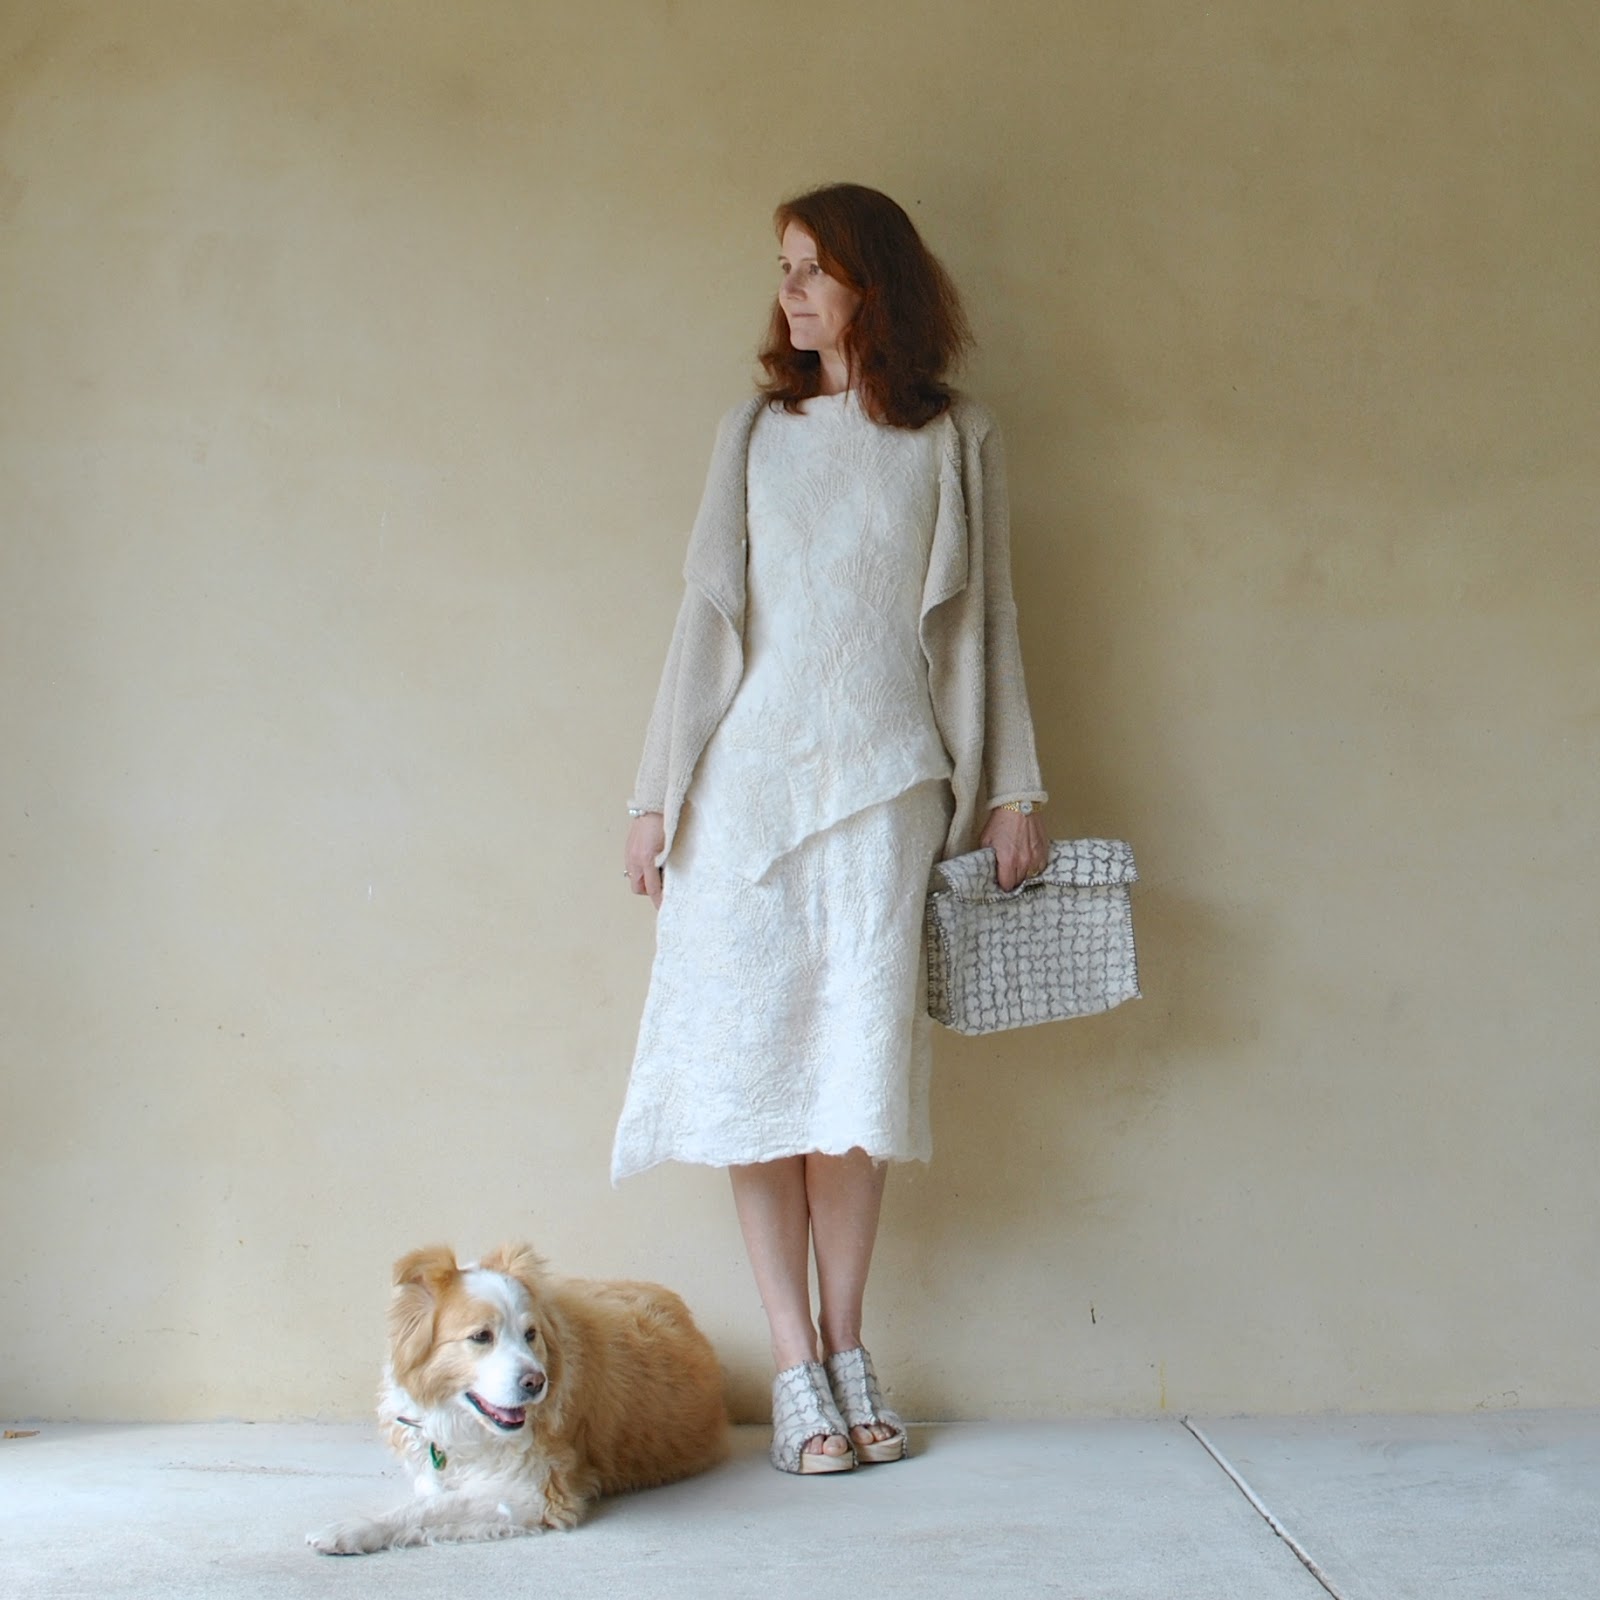
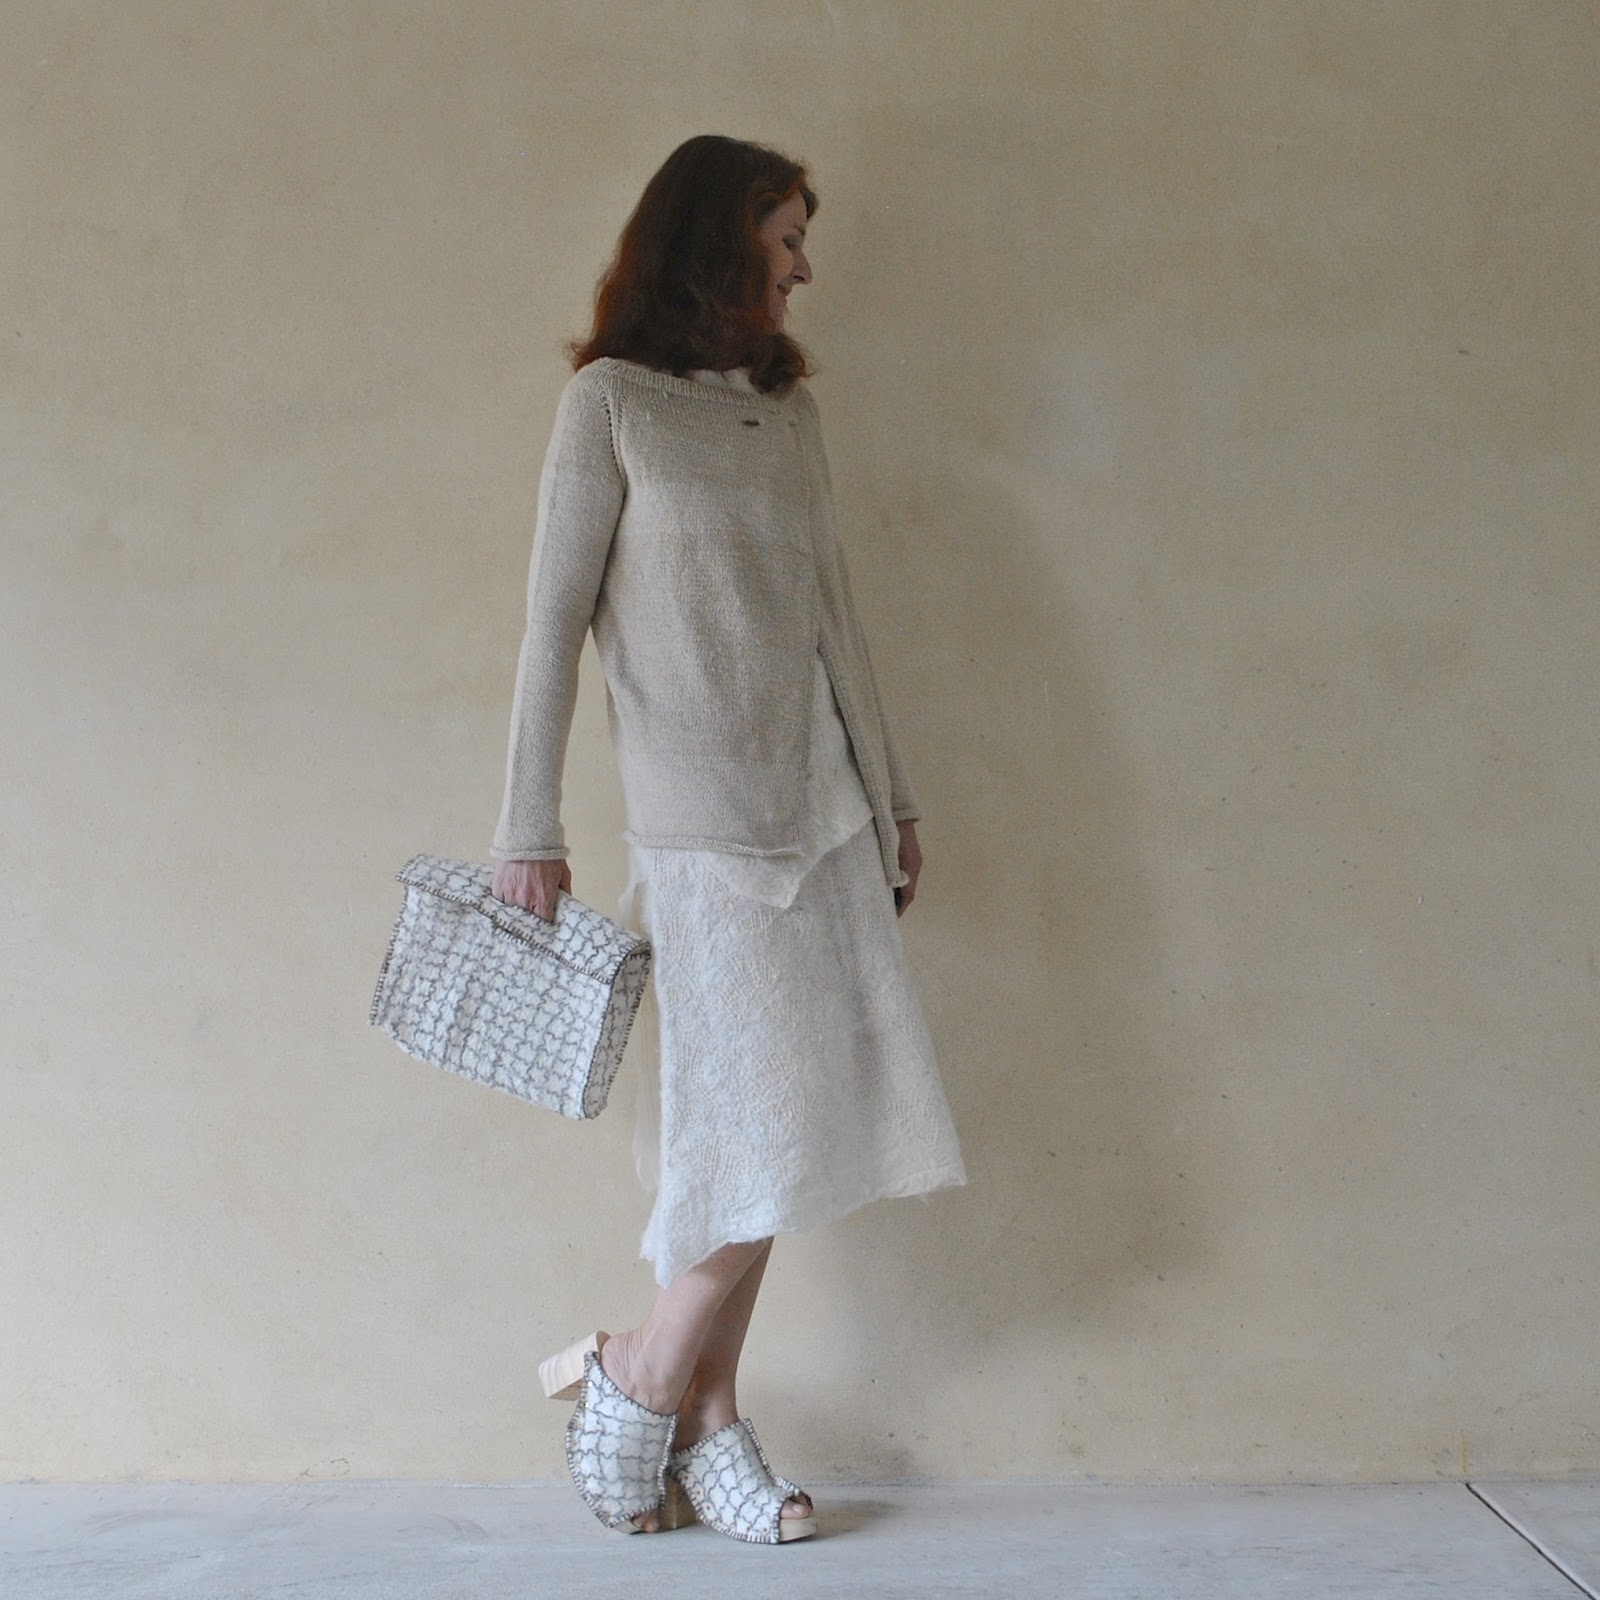
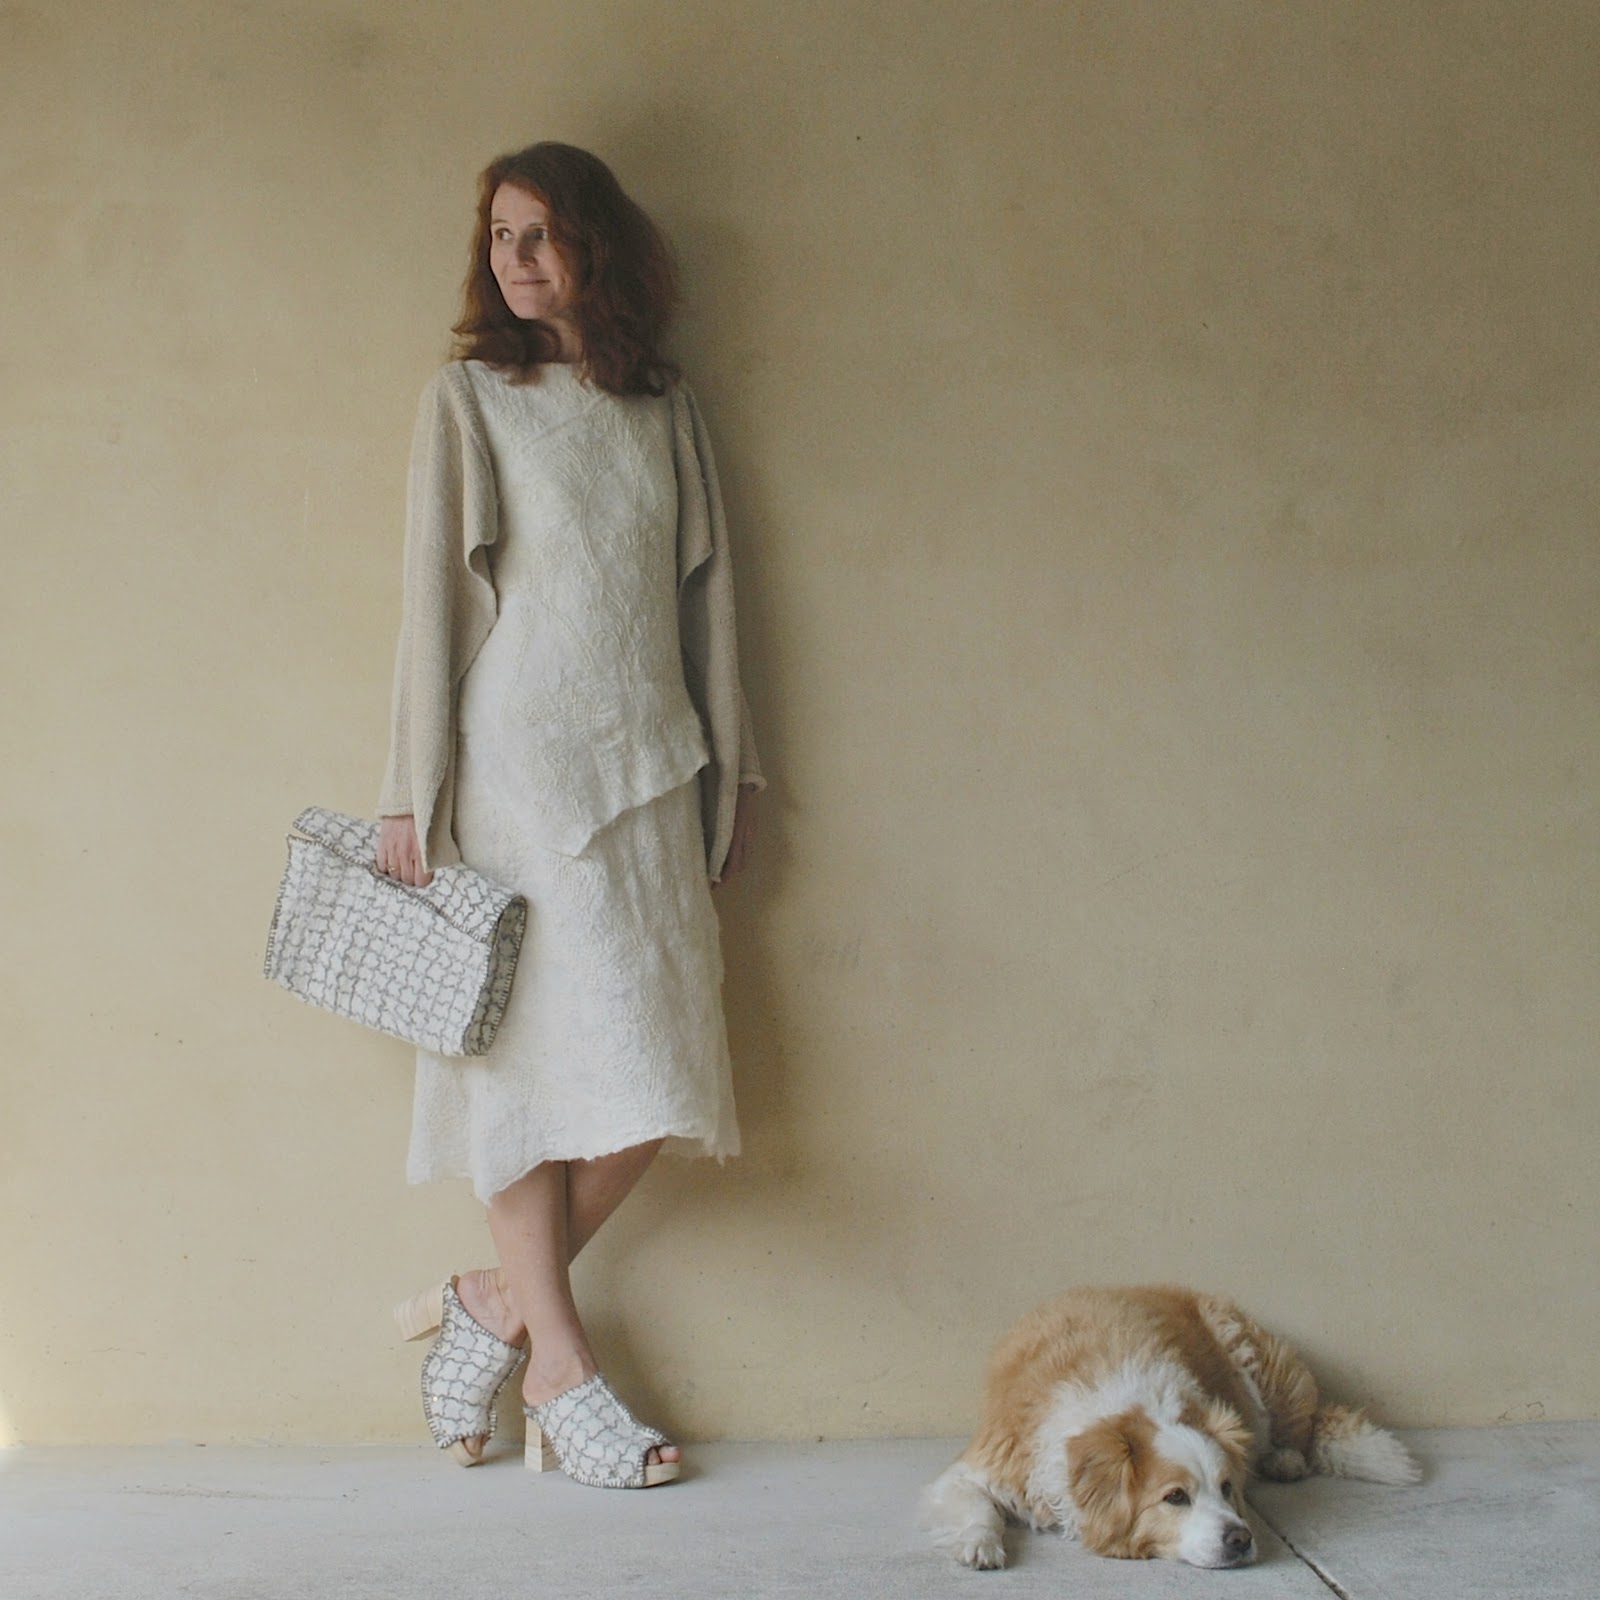
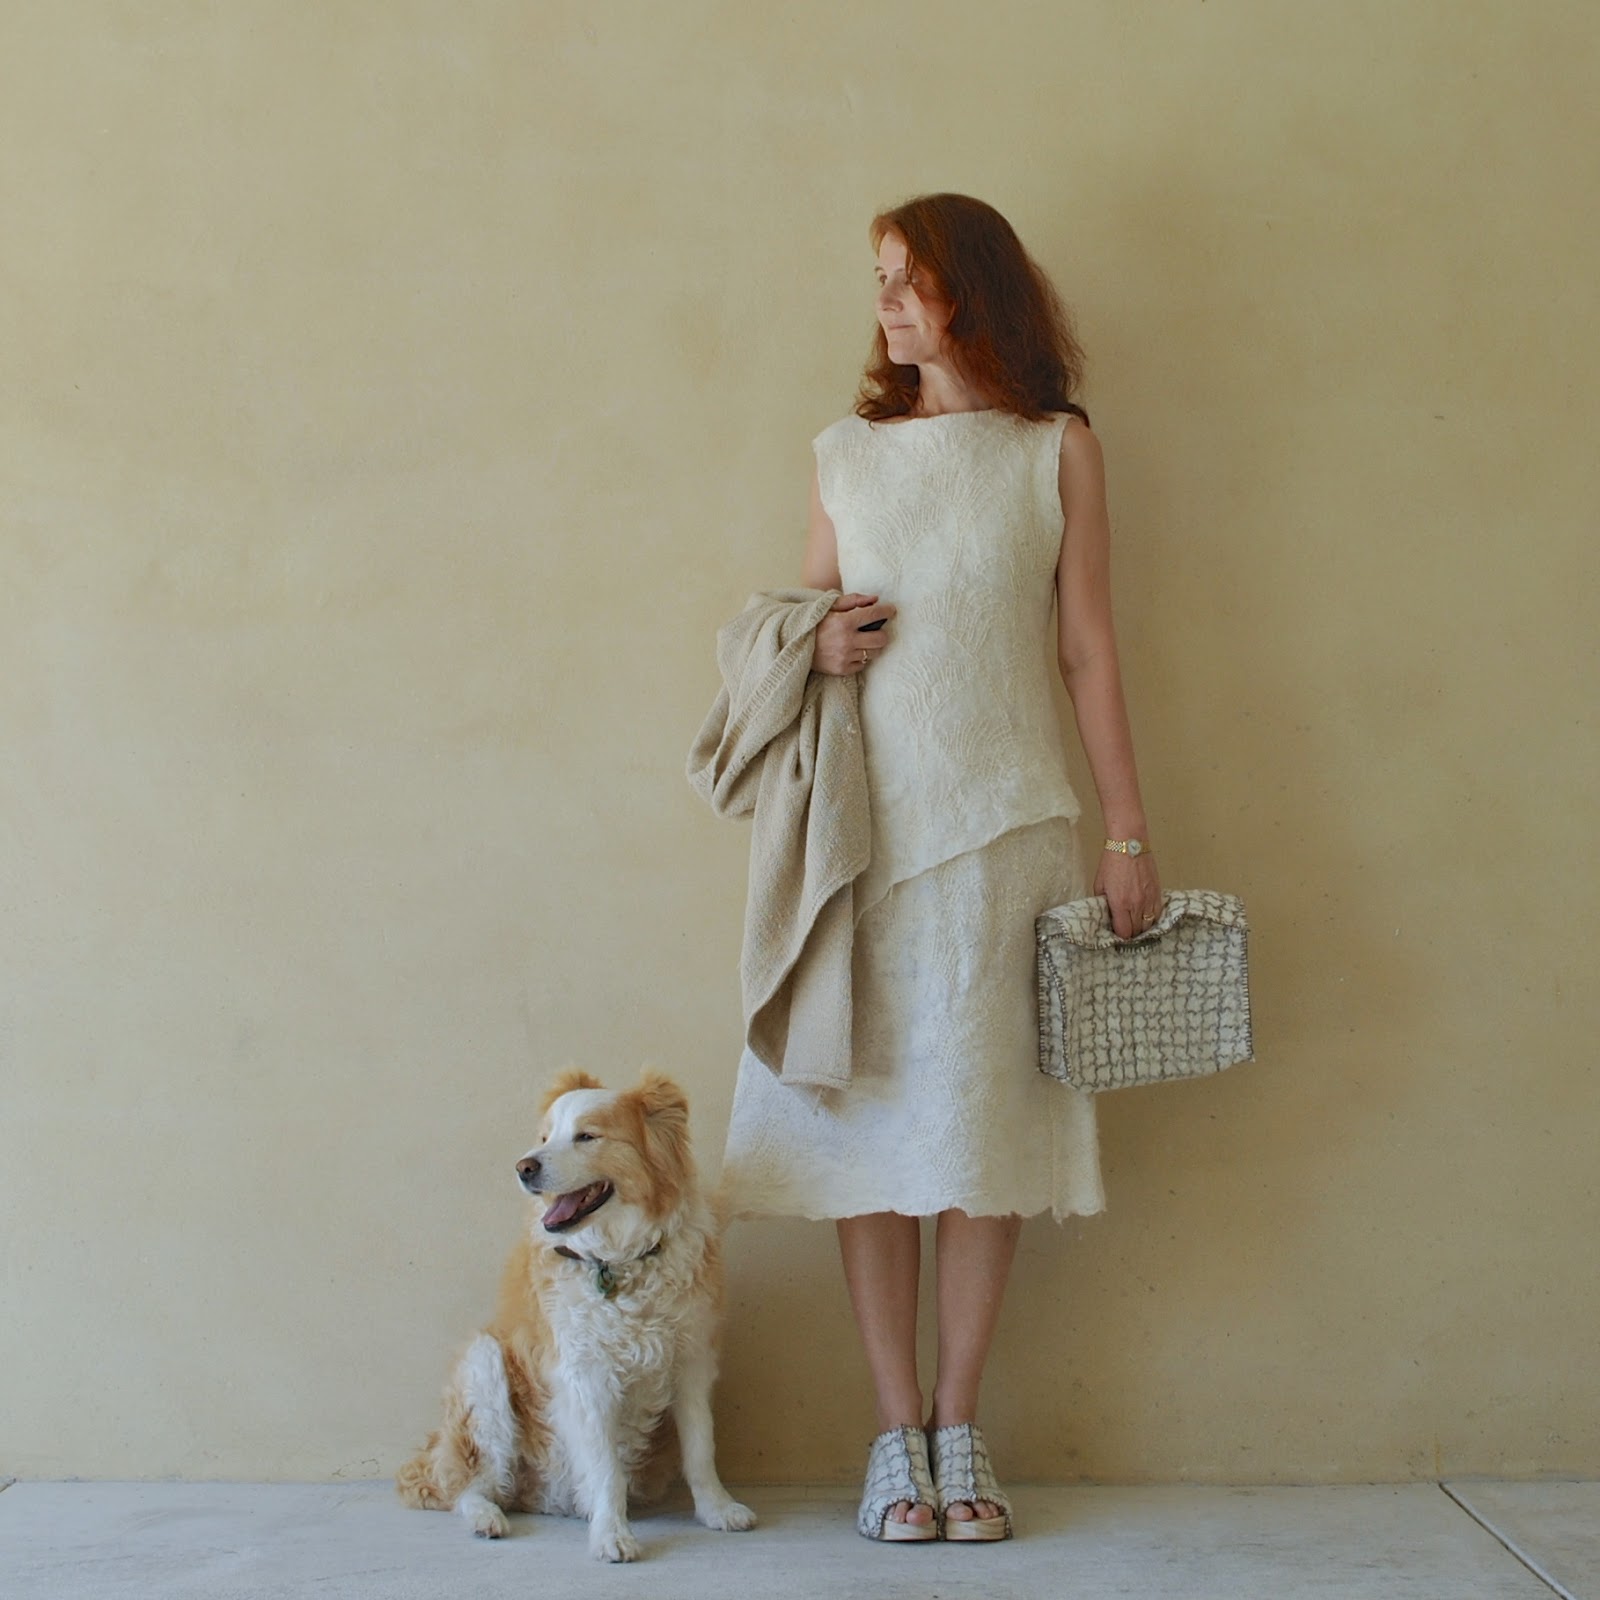
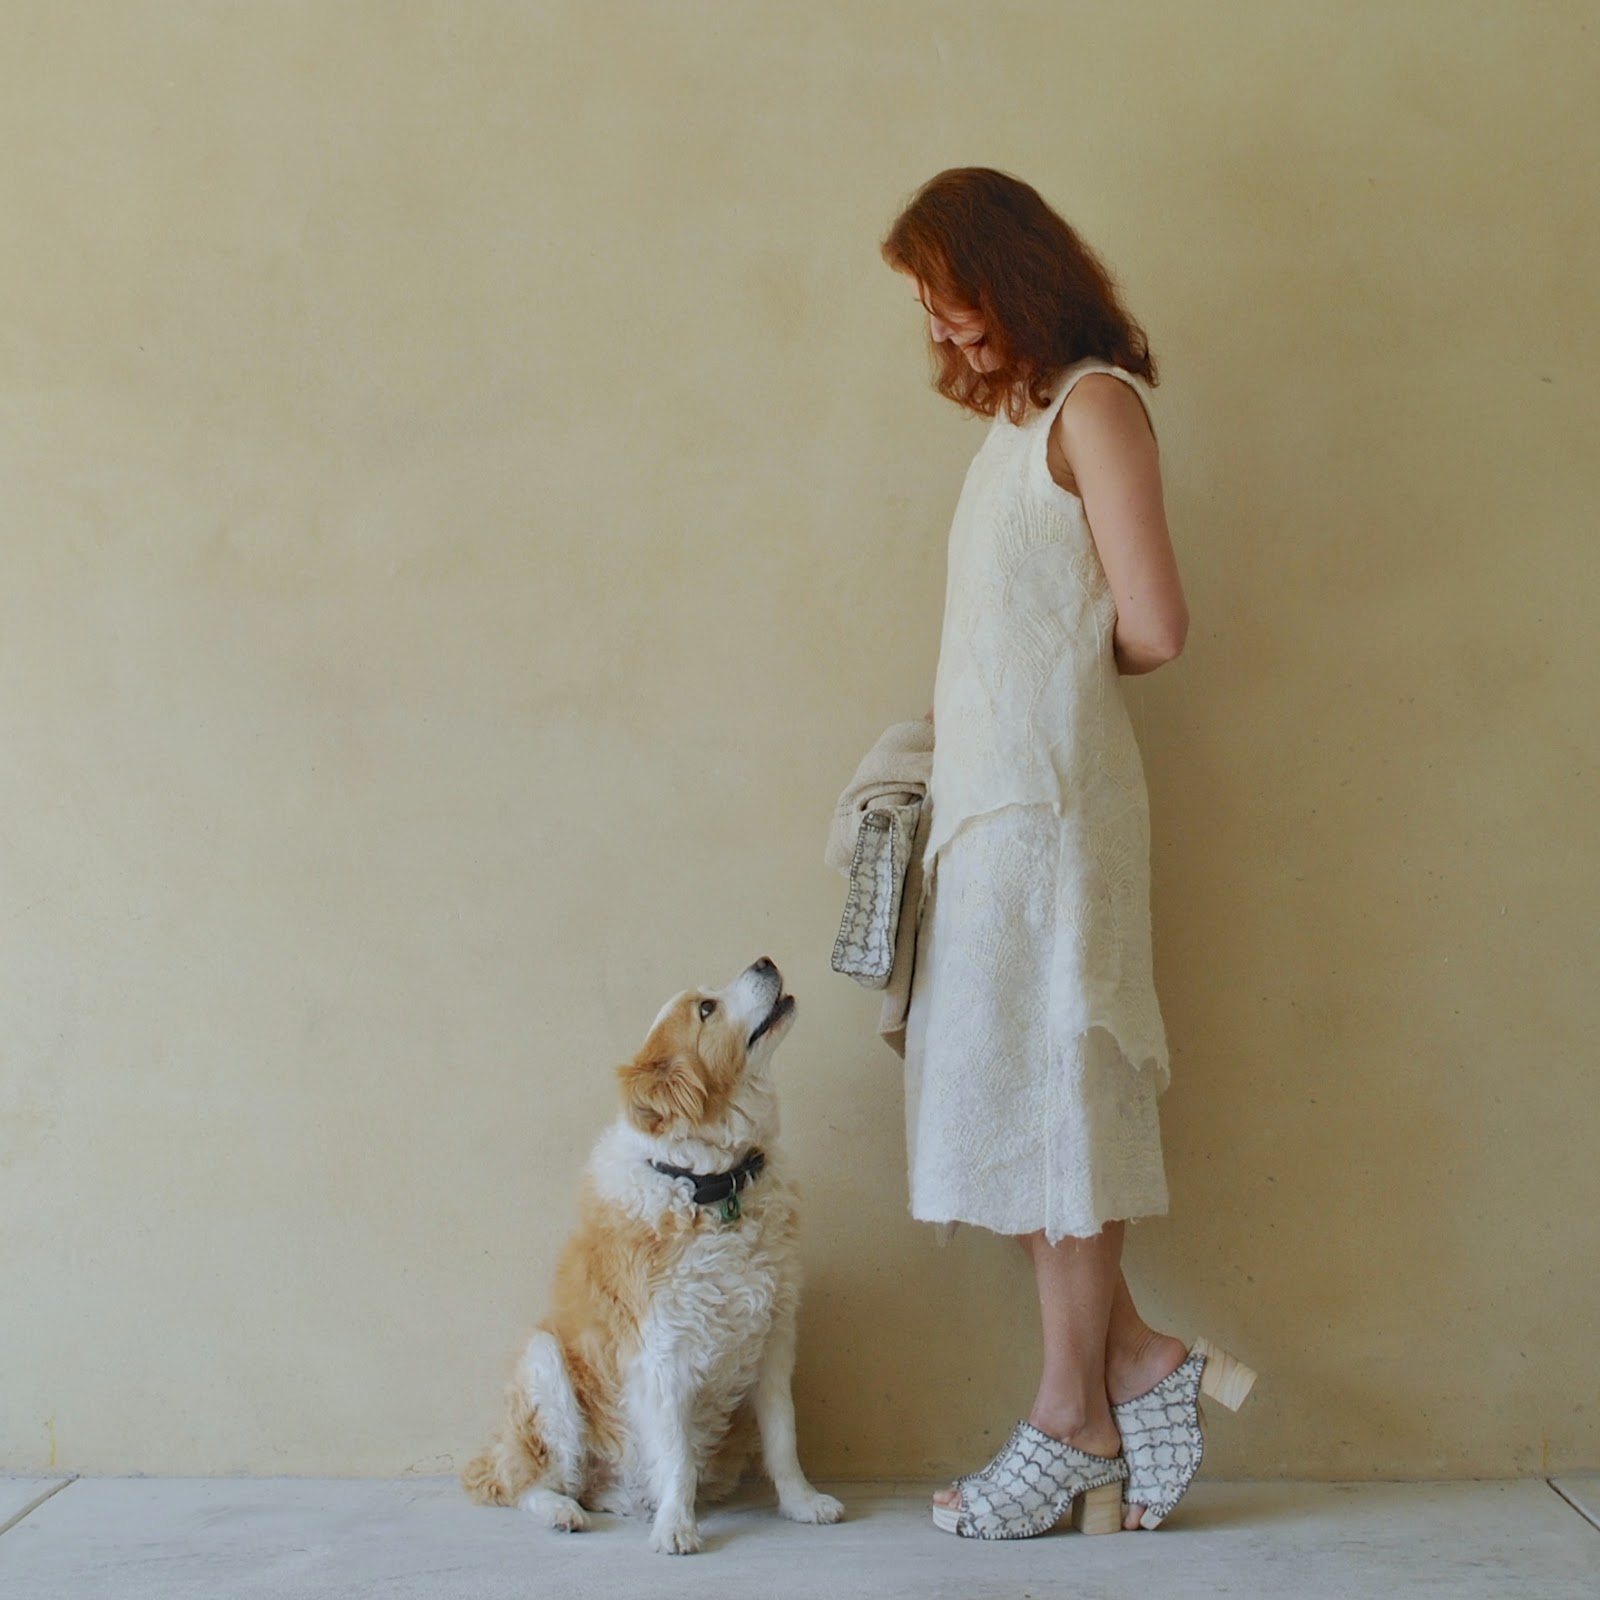
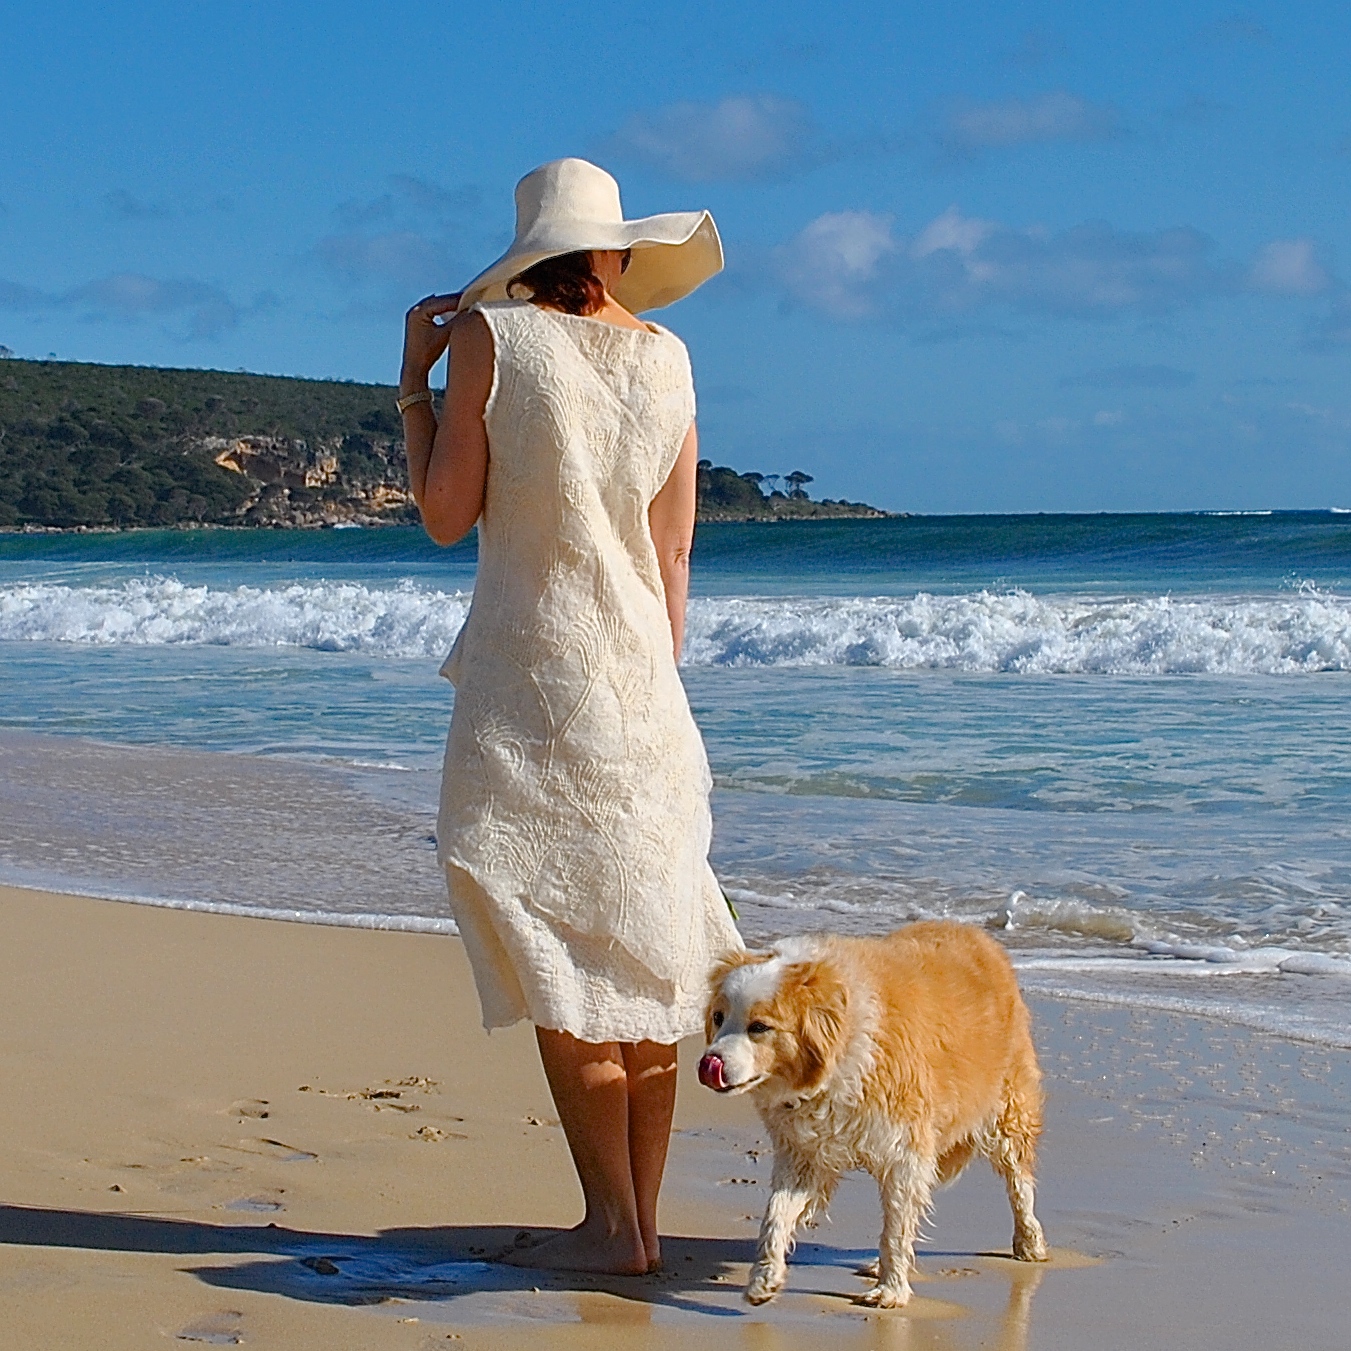
And I am showing it all together here for the first time.  Can I just say right here; wooooohooooot!
The challenge, as laid out by Nicki of this is moonlight, should you choose to accept it, and I did! was to make for yourself an entire outfit using ONLY locally sourced materials.  Sounds simple, right?  It has been anything but!
I’m very grateful to Nicki for conceiving this brilliant and very thought-provoking challenge, and for inviting me to take part.  This has been one exceedingly amazing ride, has blown my mind more than any other dressmaking challenge I’ve ever done, and really pushed my creativity to the limit.  At the beginning of the year I seriously did not think I would be taking my outfit to the levels I did…. I thought for sure I would be giving myself a pass on some things, for example;  thread, and allowing myself to use regular Gutermann’s thread.  As time went on though I toughened up, embraced the idea of going the whole hog; and I’m very pleased that I did manage to rise to the challenge and make the maximum possible from locally sourced products!
In fact, I’m quite proud and extremely happy! :))
For the challenge, I made:
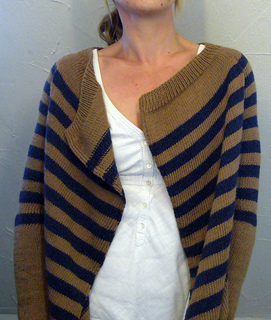
a knitted alpaca cardigan/jacket
a merino felt dress
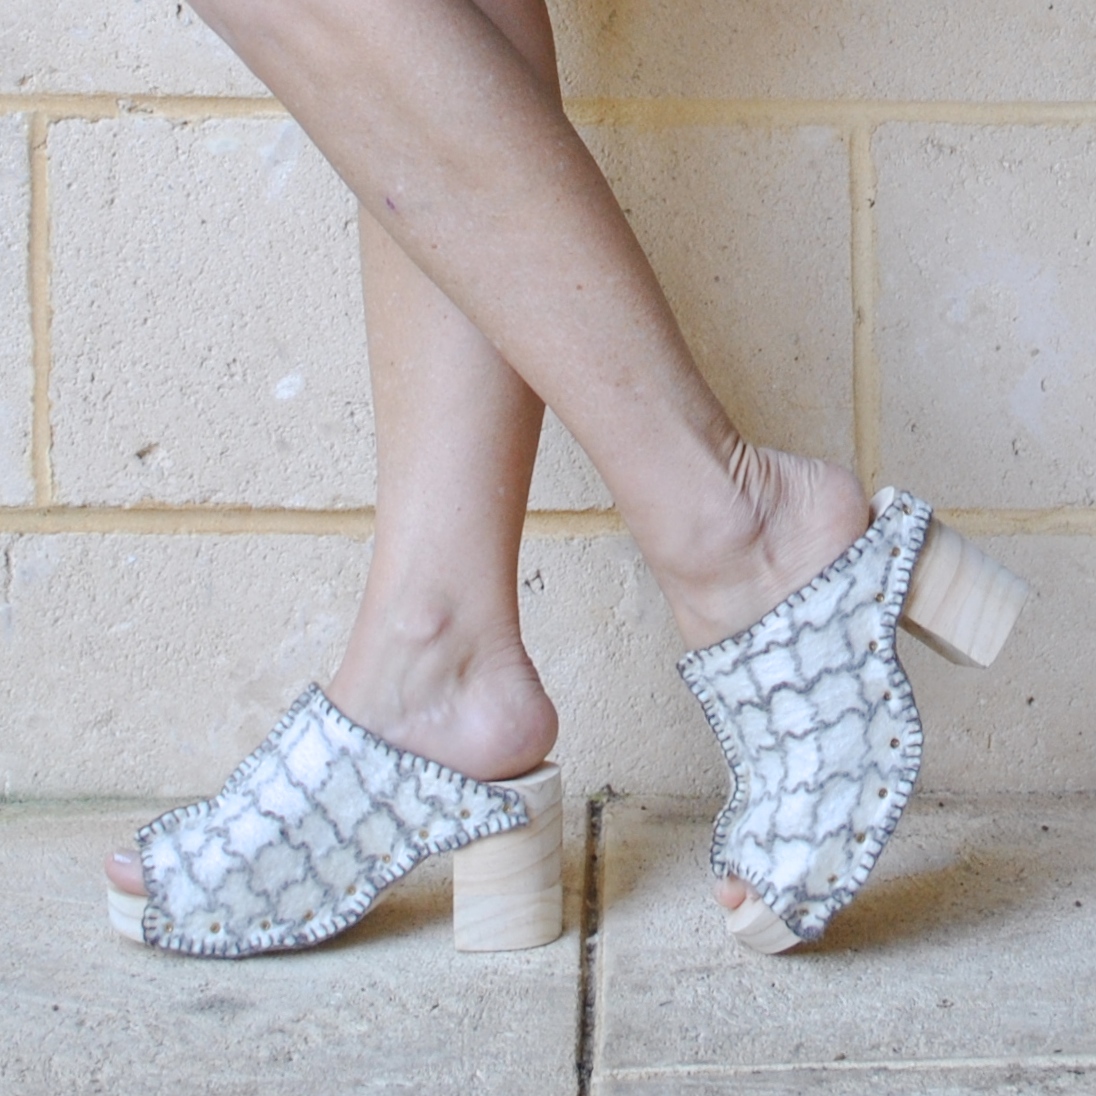
merino felt and pine shoes
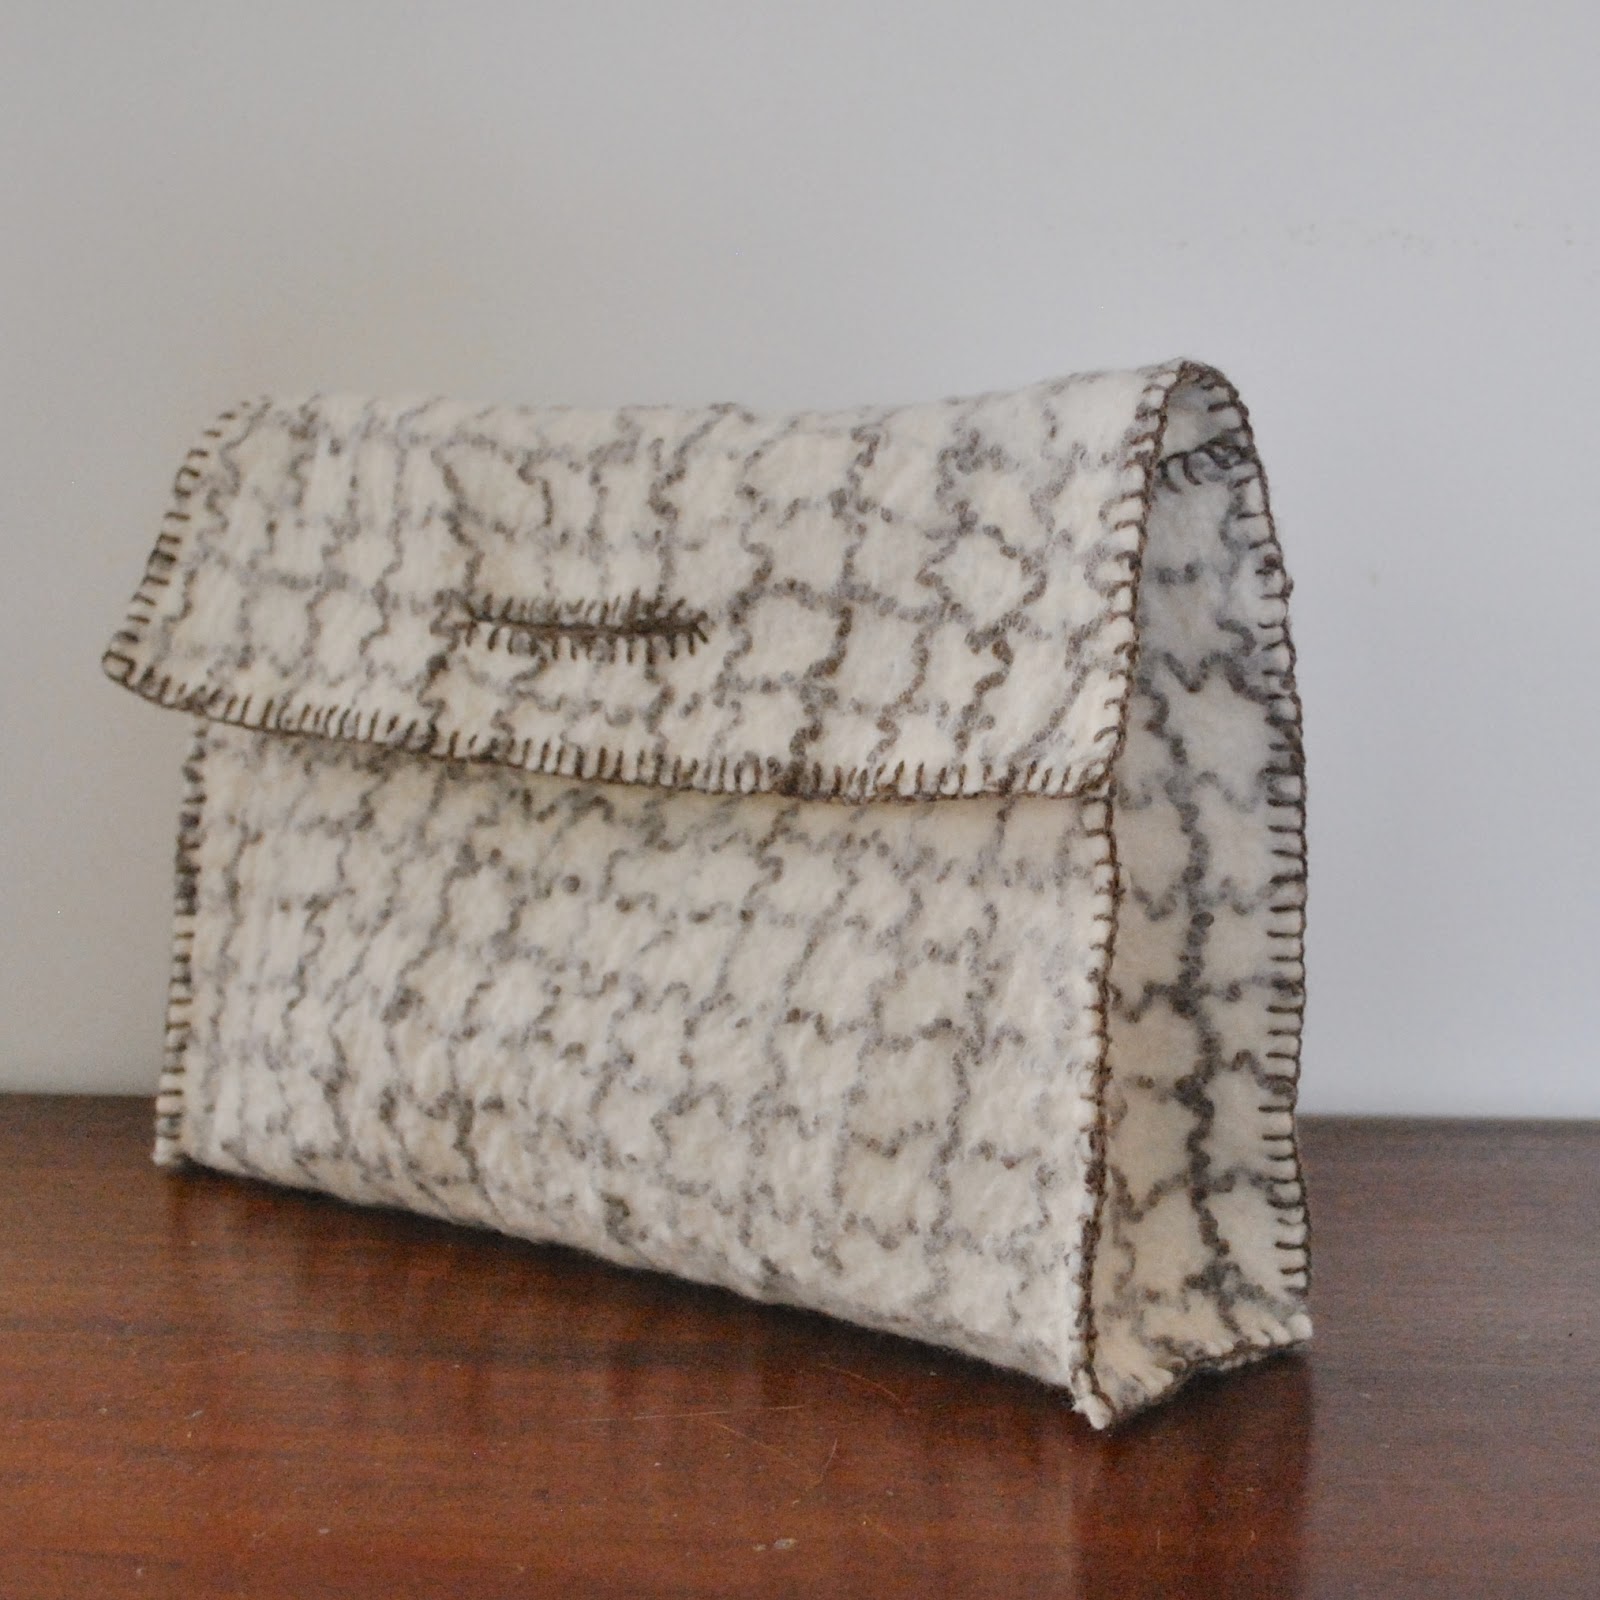
a merino fleece bag
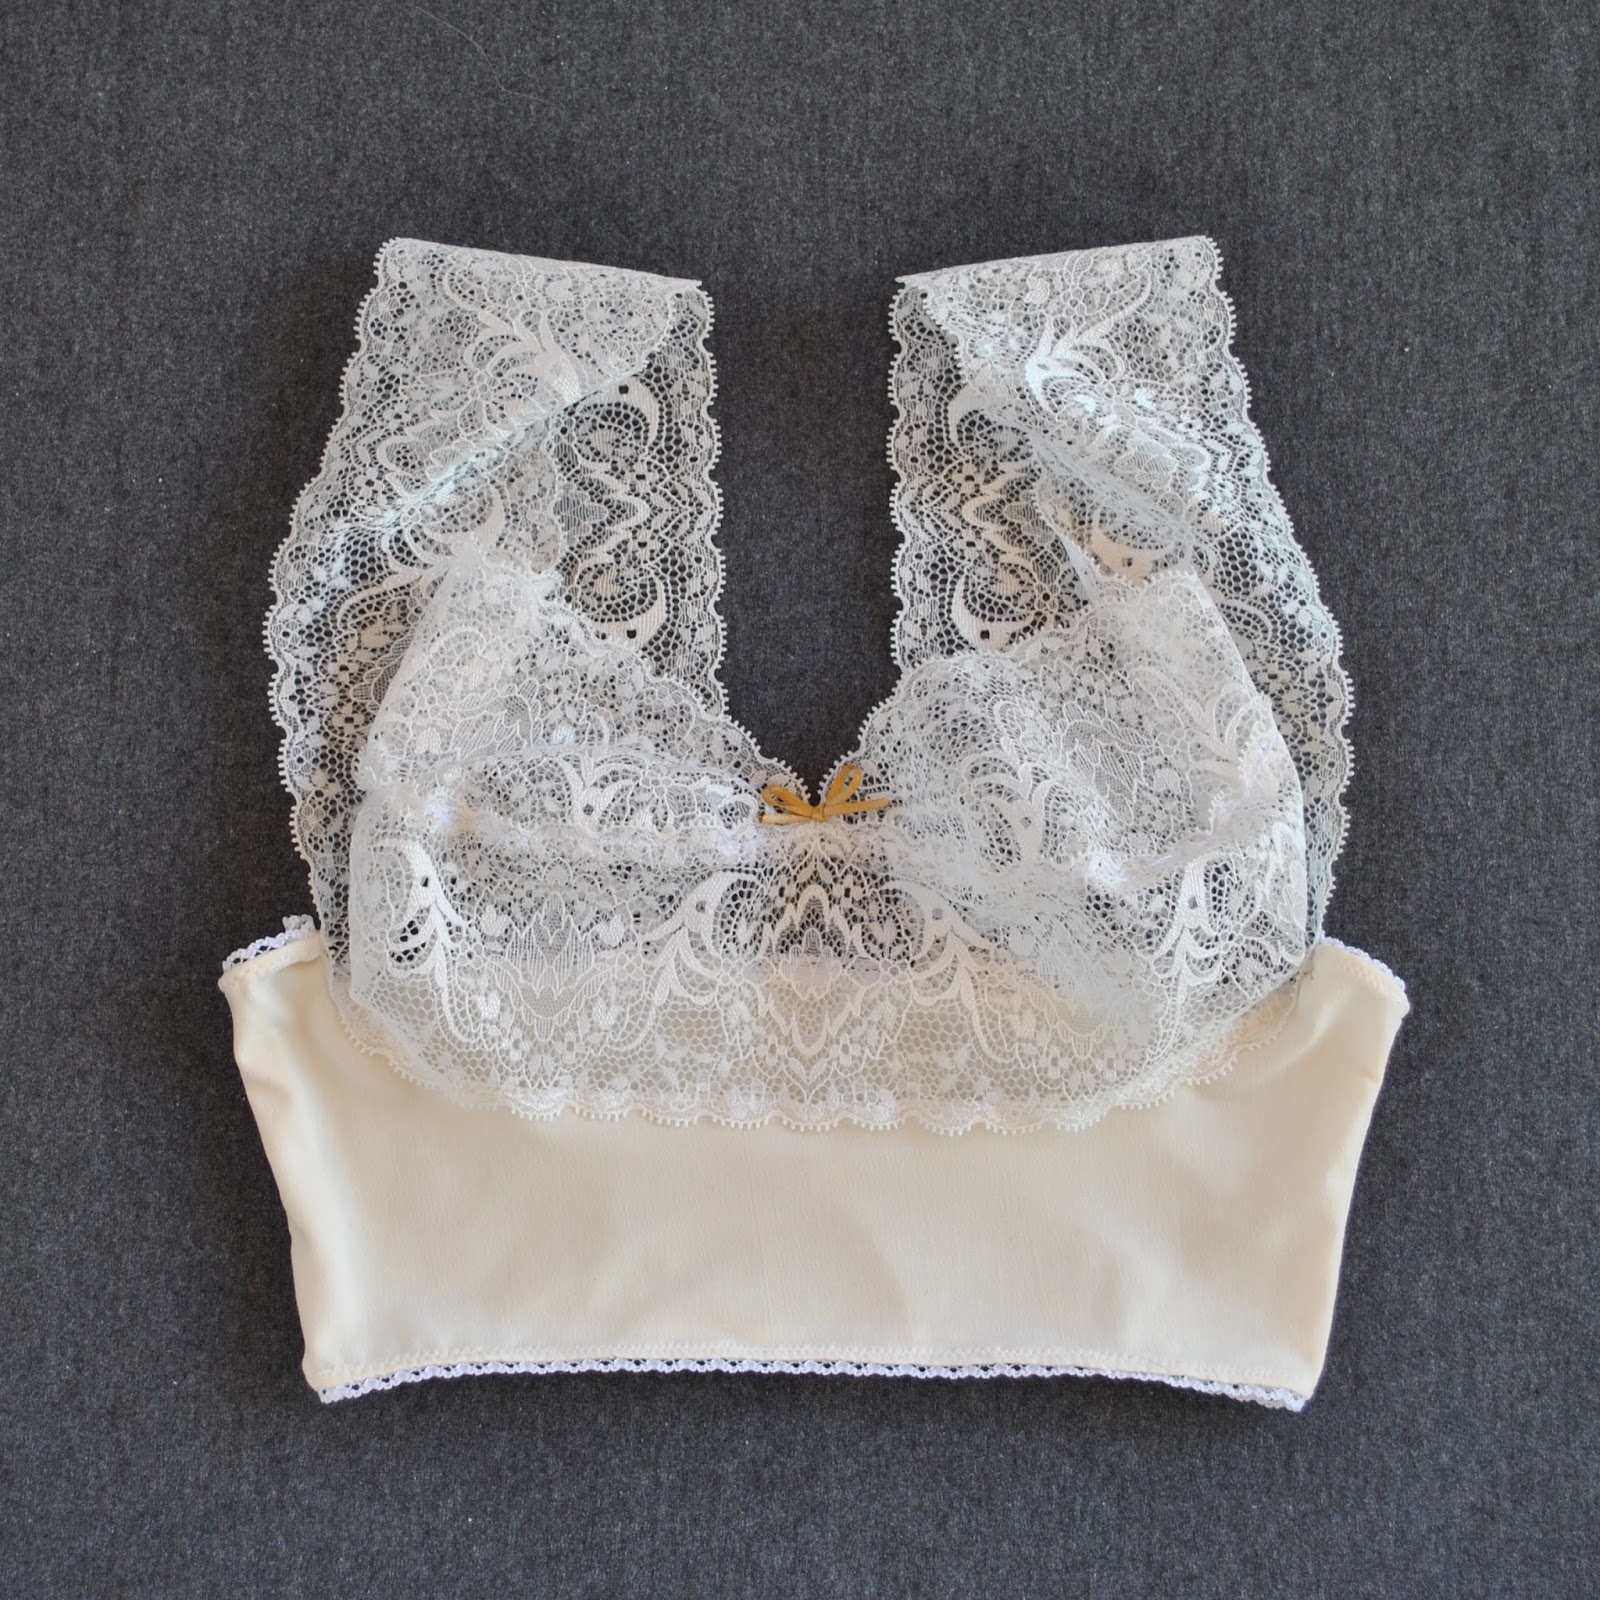
merino fleece undies and bra
In a nutshell, every single blinking thing I have on here is made by myself, using pretty close to 100% south-west Australian sourced materials

Those of us in Western Australia; SueMegan, Nicki and myself, have had to be quite innovative in our approach, I think.  I mean, forget zips, thread, elastic… there is not even any freaking fabric made in WA!  This was our single biggest hurdle, I think!
However, we are extremely fortunate in that we have wool available to us; lots and lots of wool!   Australia has the world’s biggest wool economy… did you know that 80% of the world’s apparel wool is from Australia? and Australian merino is the world’s best quality woollen fibre.  22% of the country’s wool production is here in Western Australia (source)

Hardly surprising then that all four of us have used wool as the majority component in our outfits.
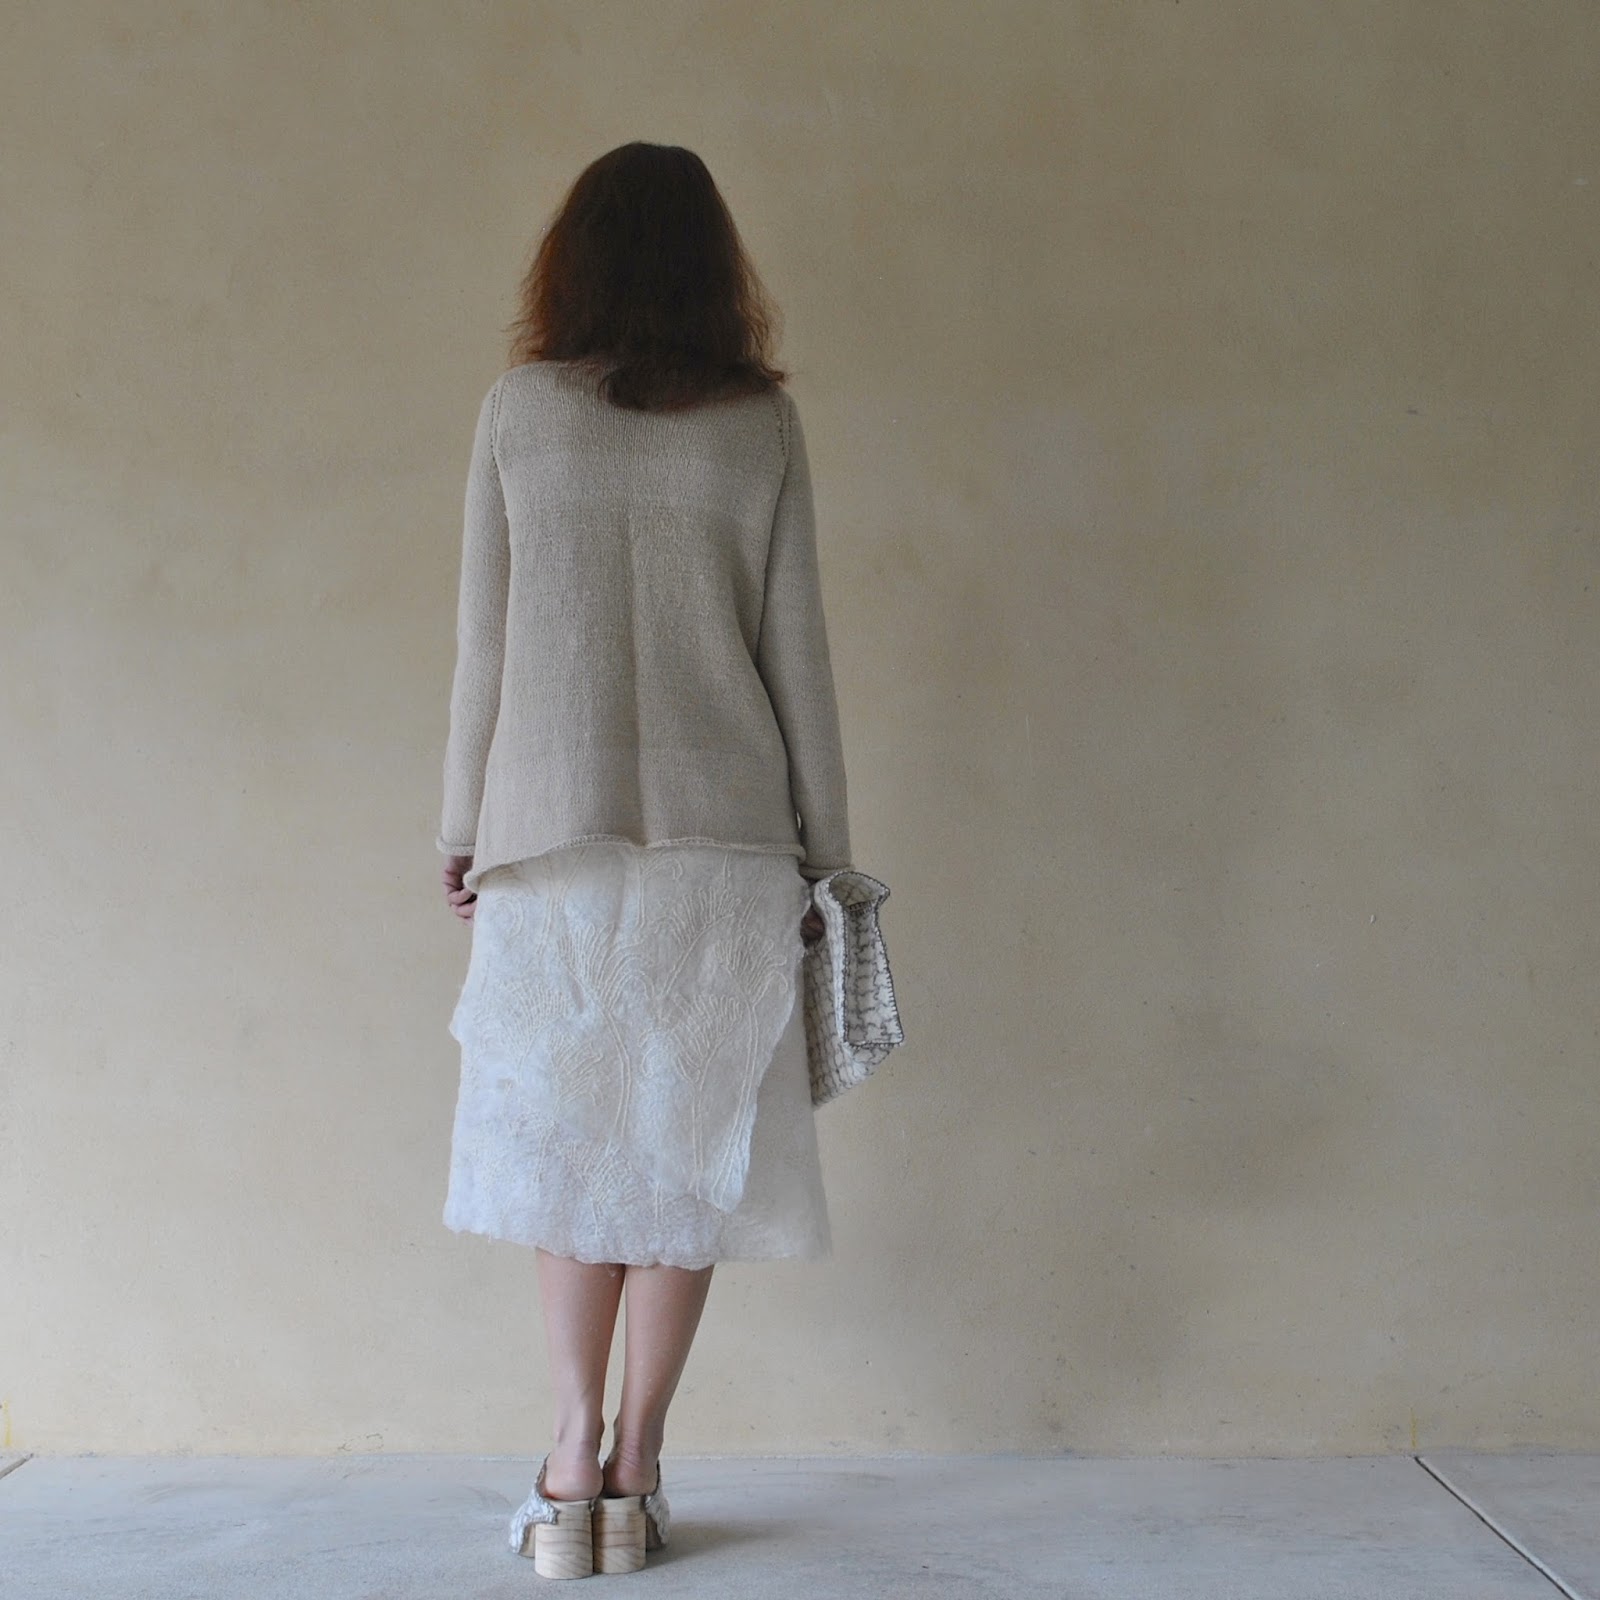
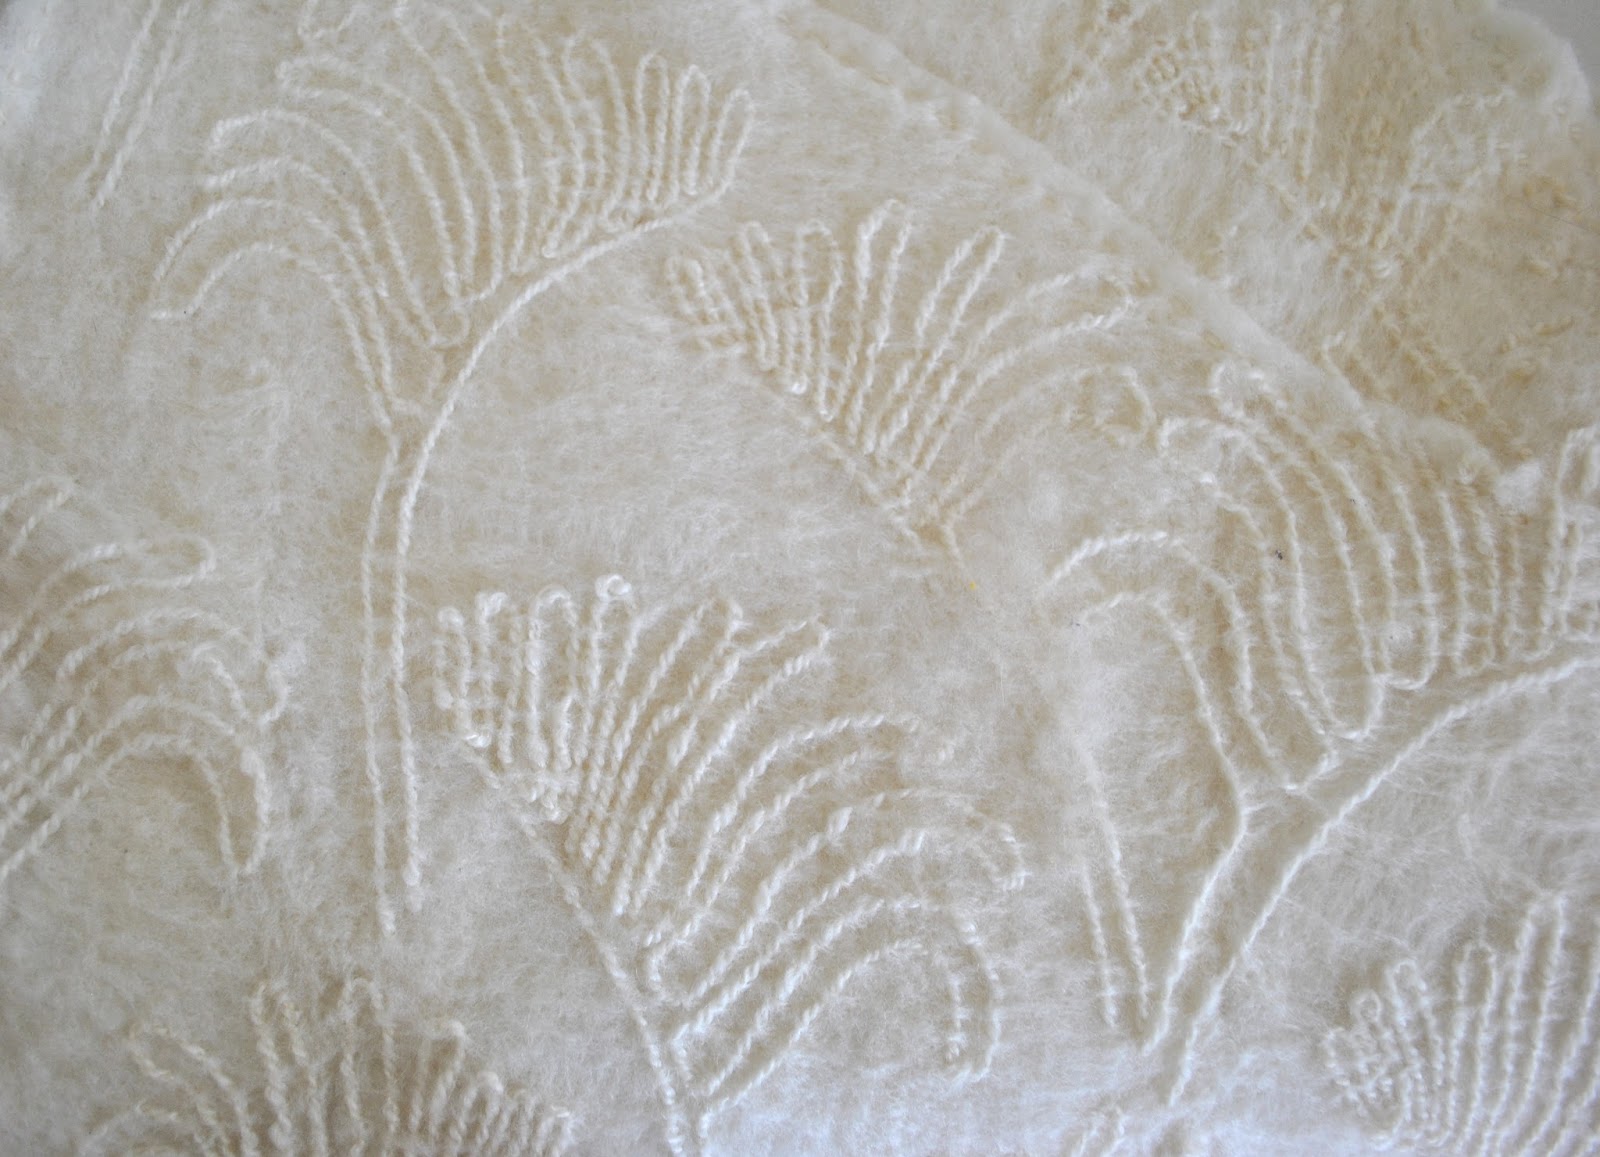
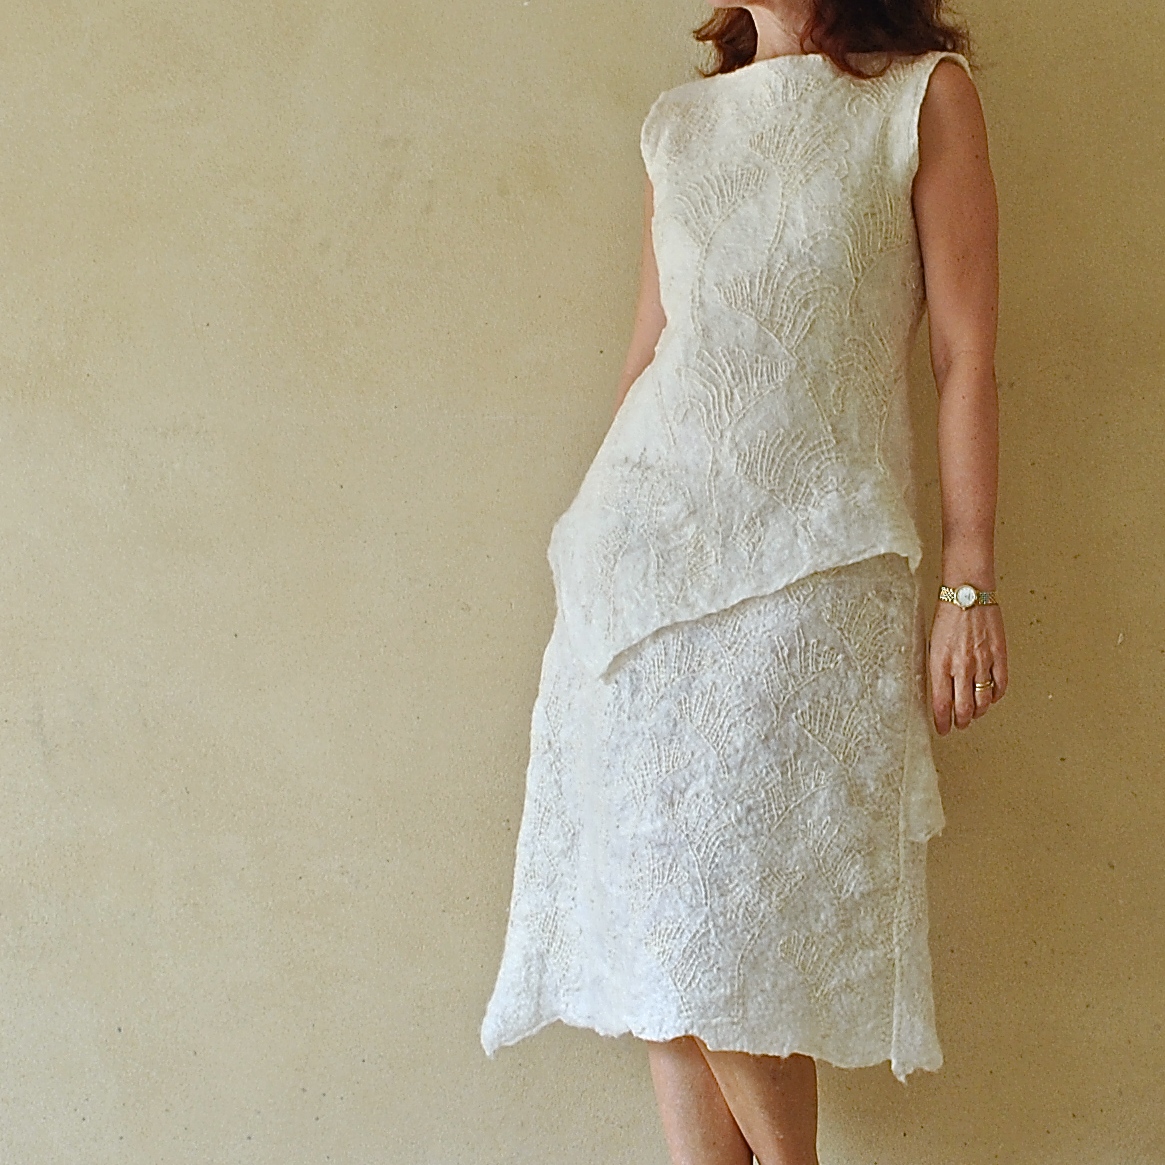
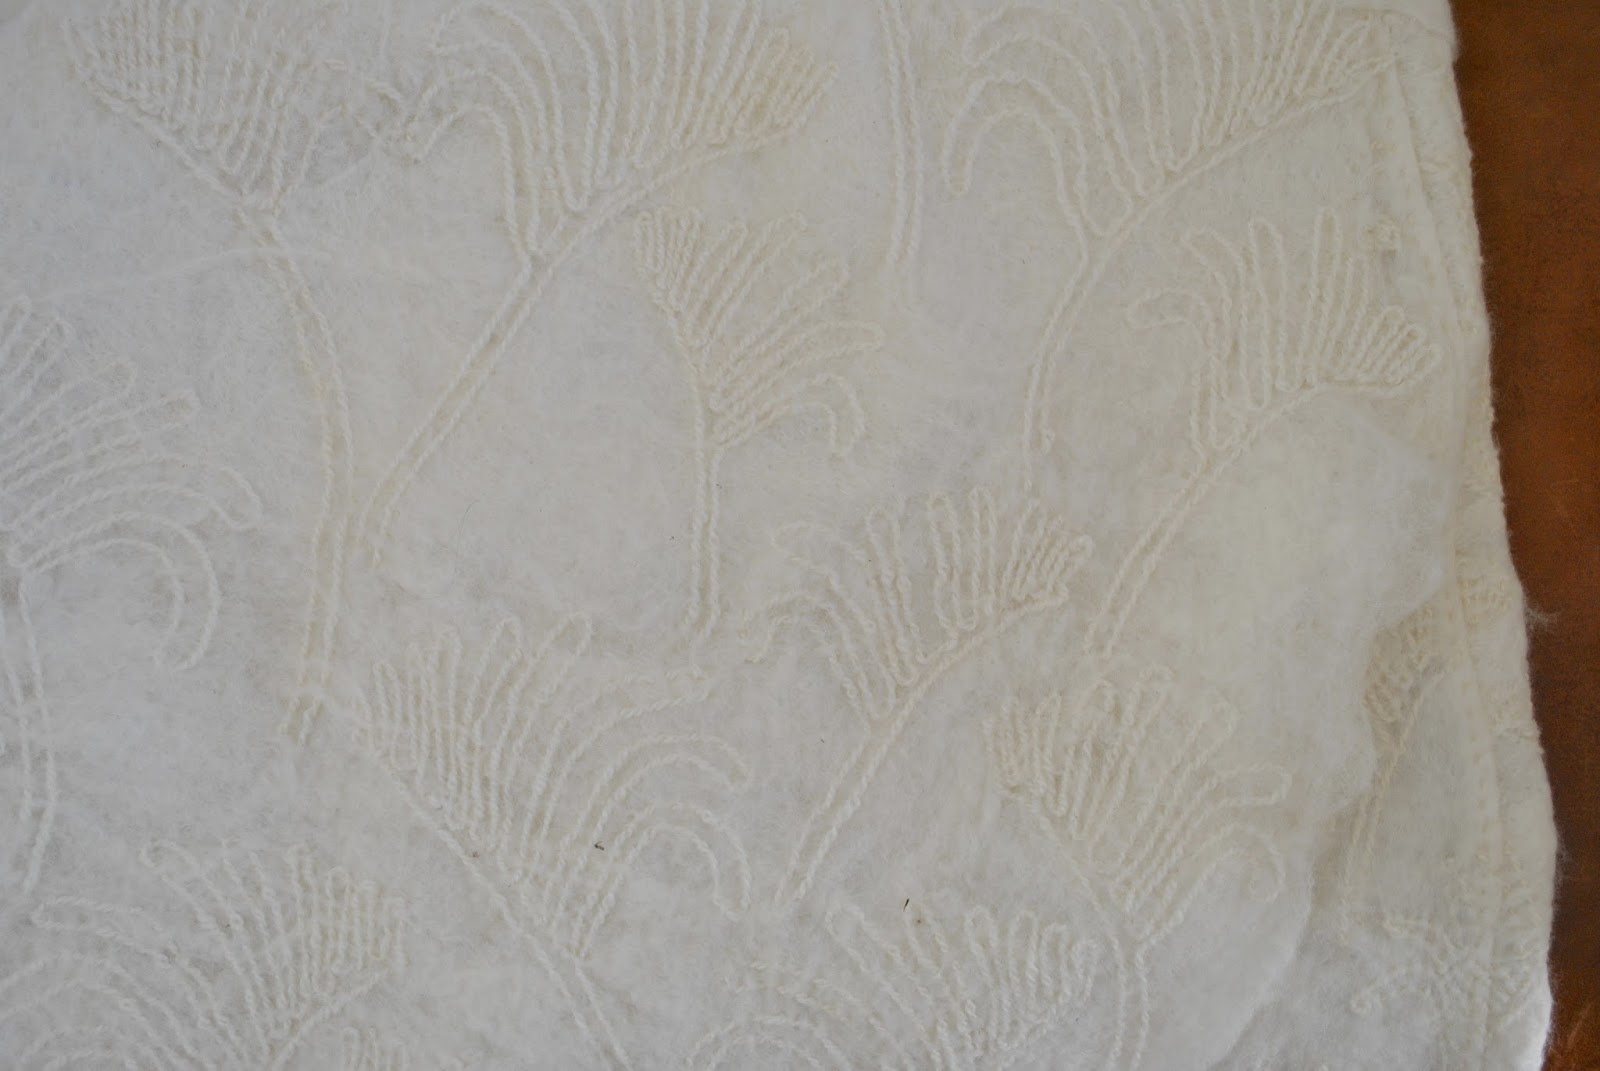
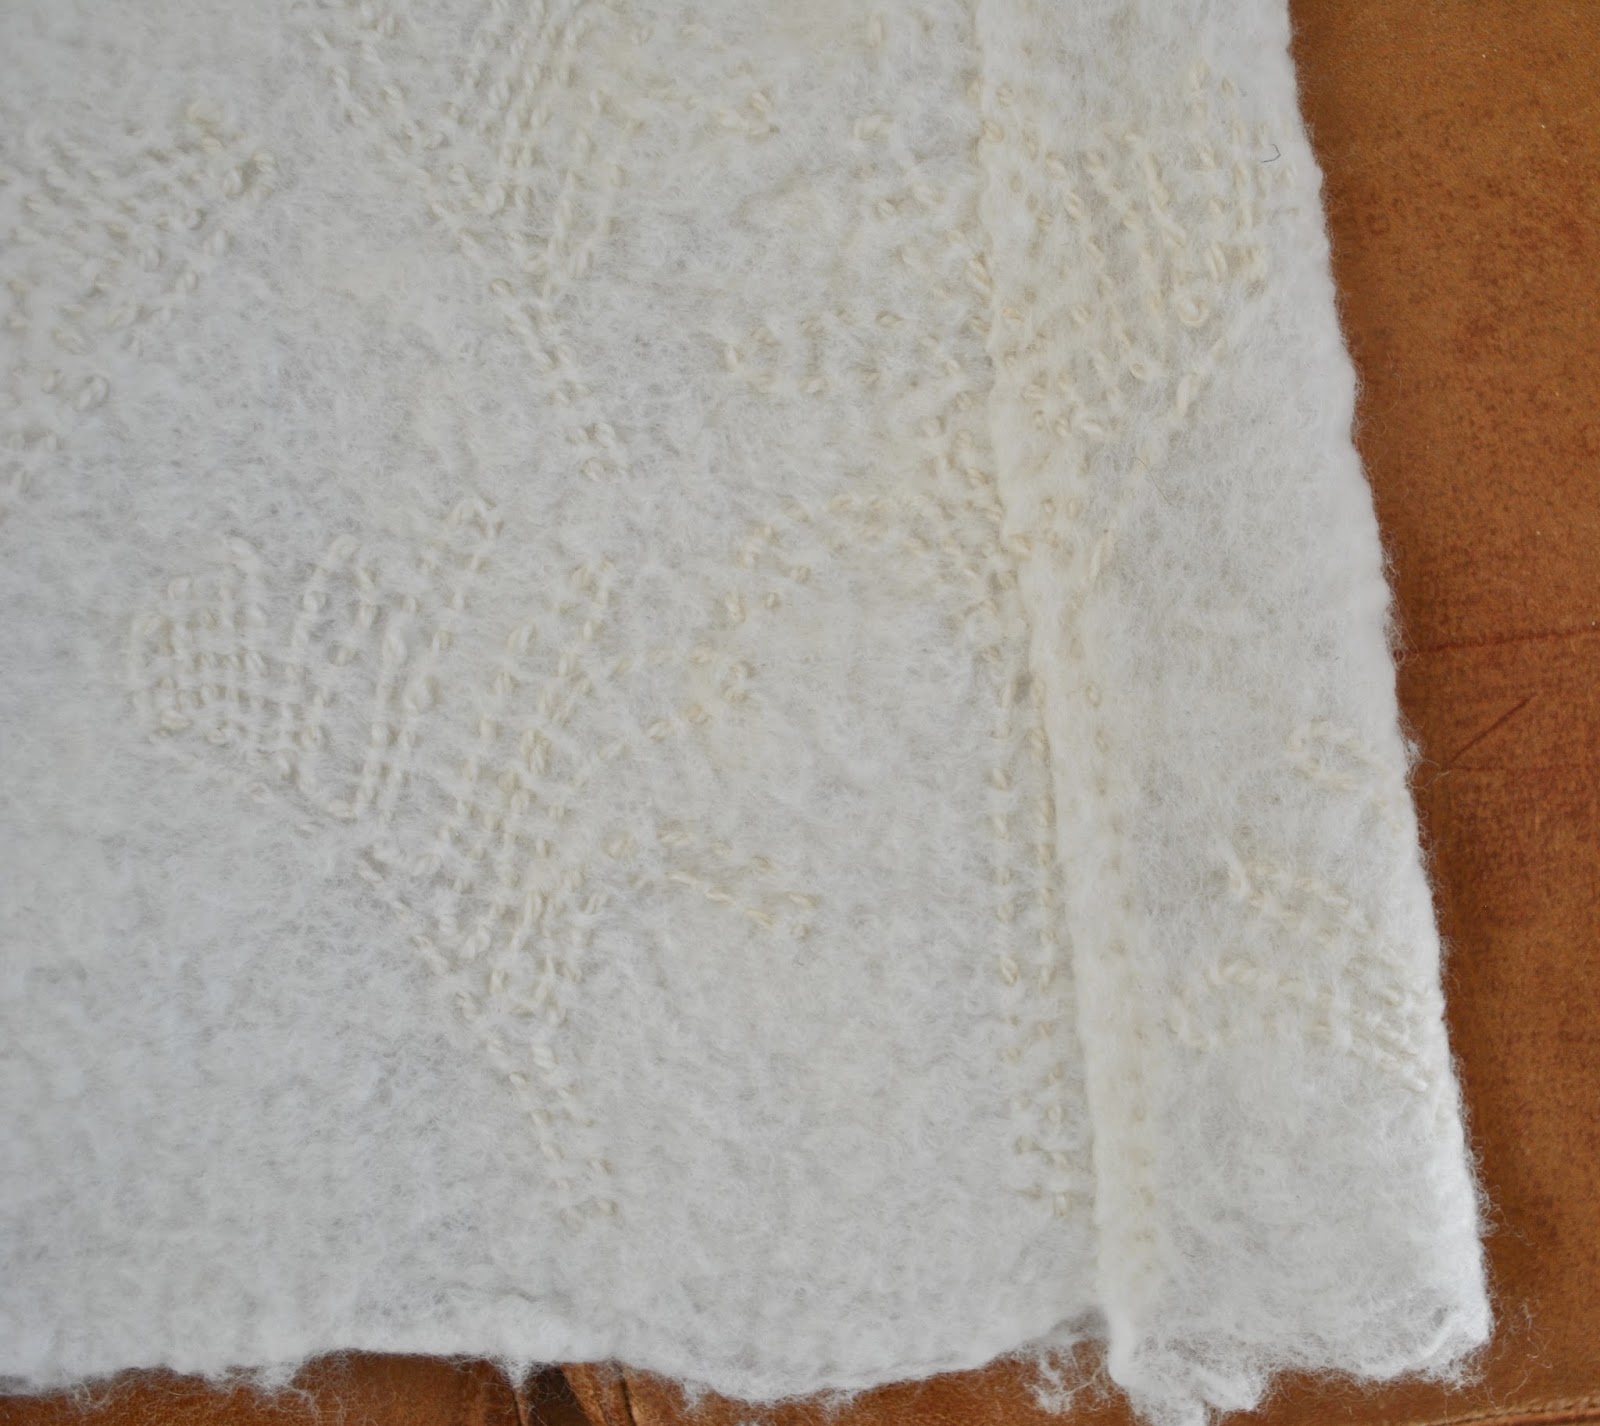
My dress, bag, underwear and shoe tops are made from Western Australian merino fleece.  I made my wool felt fabric from the fleece as outlined in this post.  My dress is made from natural undyed merino fleece felt, and I hand-embroidered the fleece all over with locally handspun, undyed merino yarn.

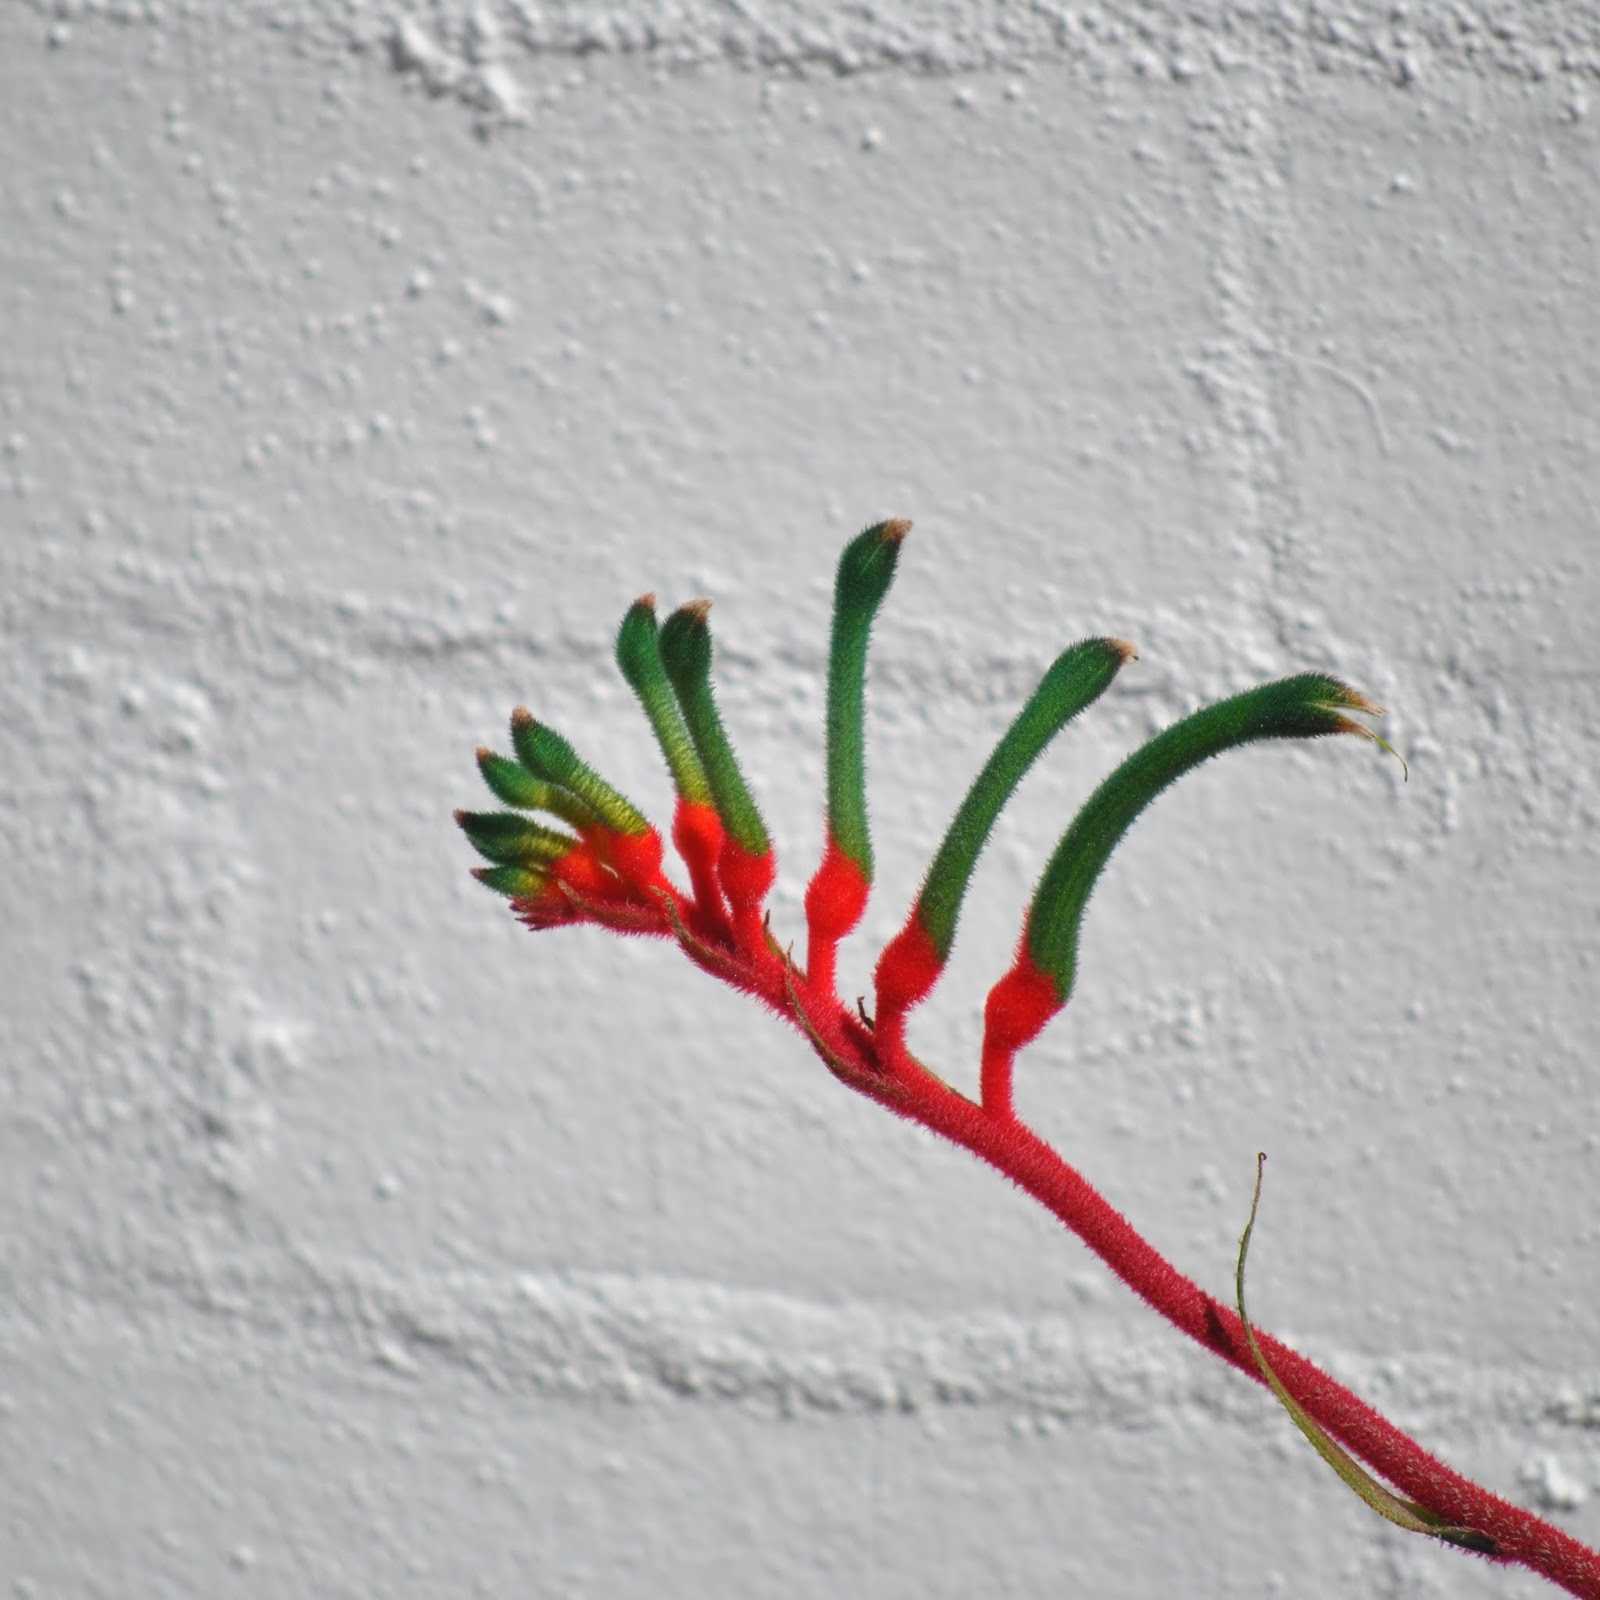
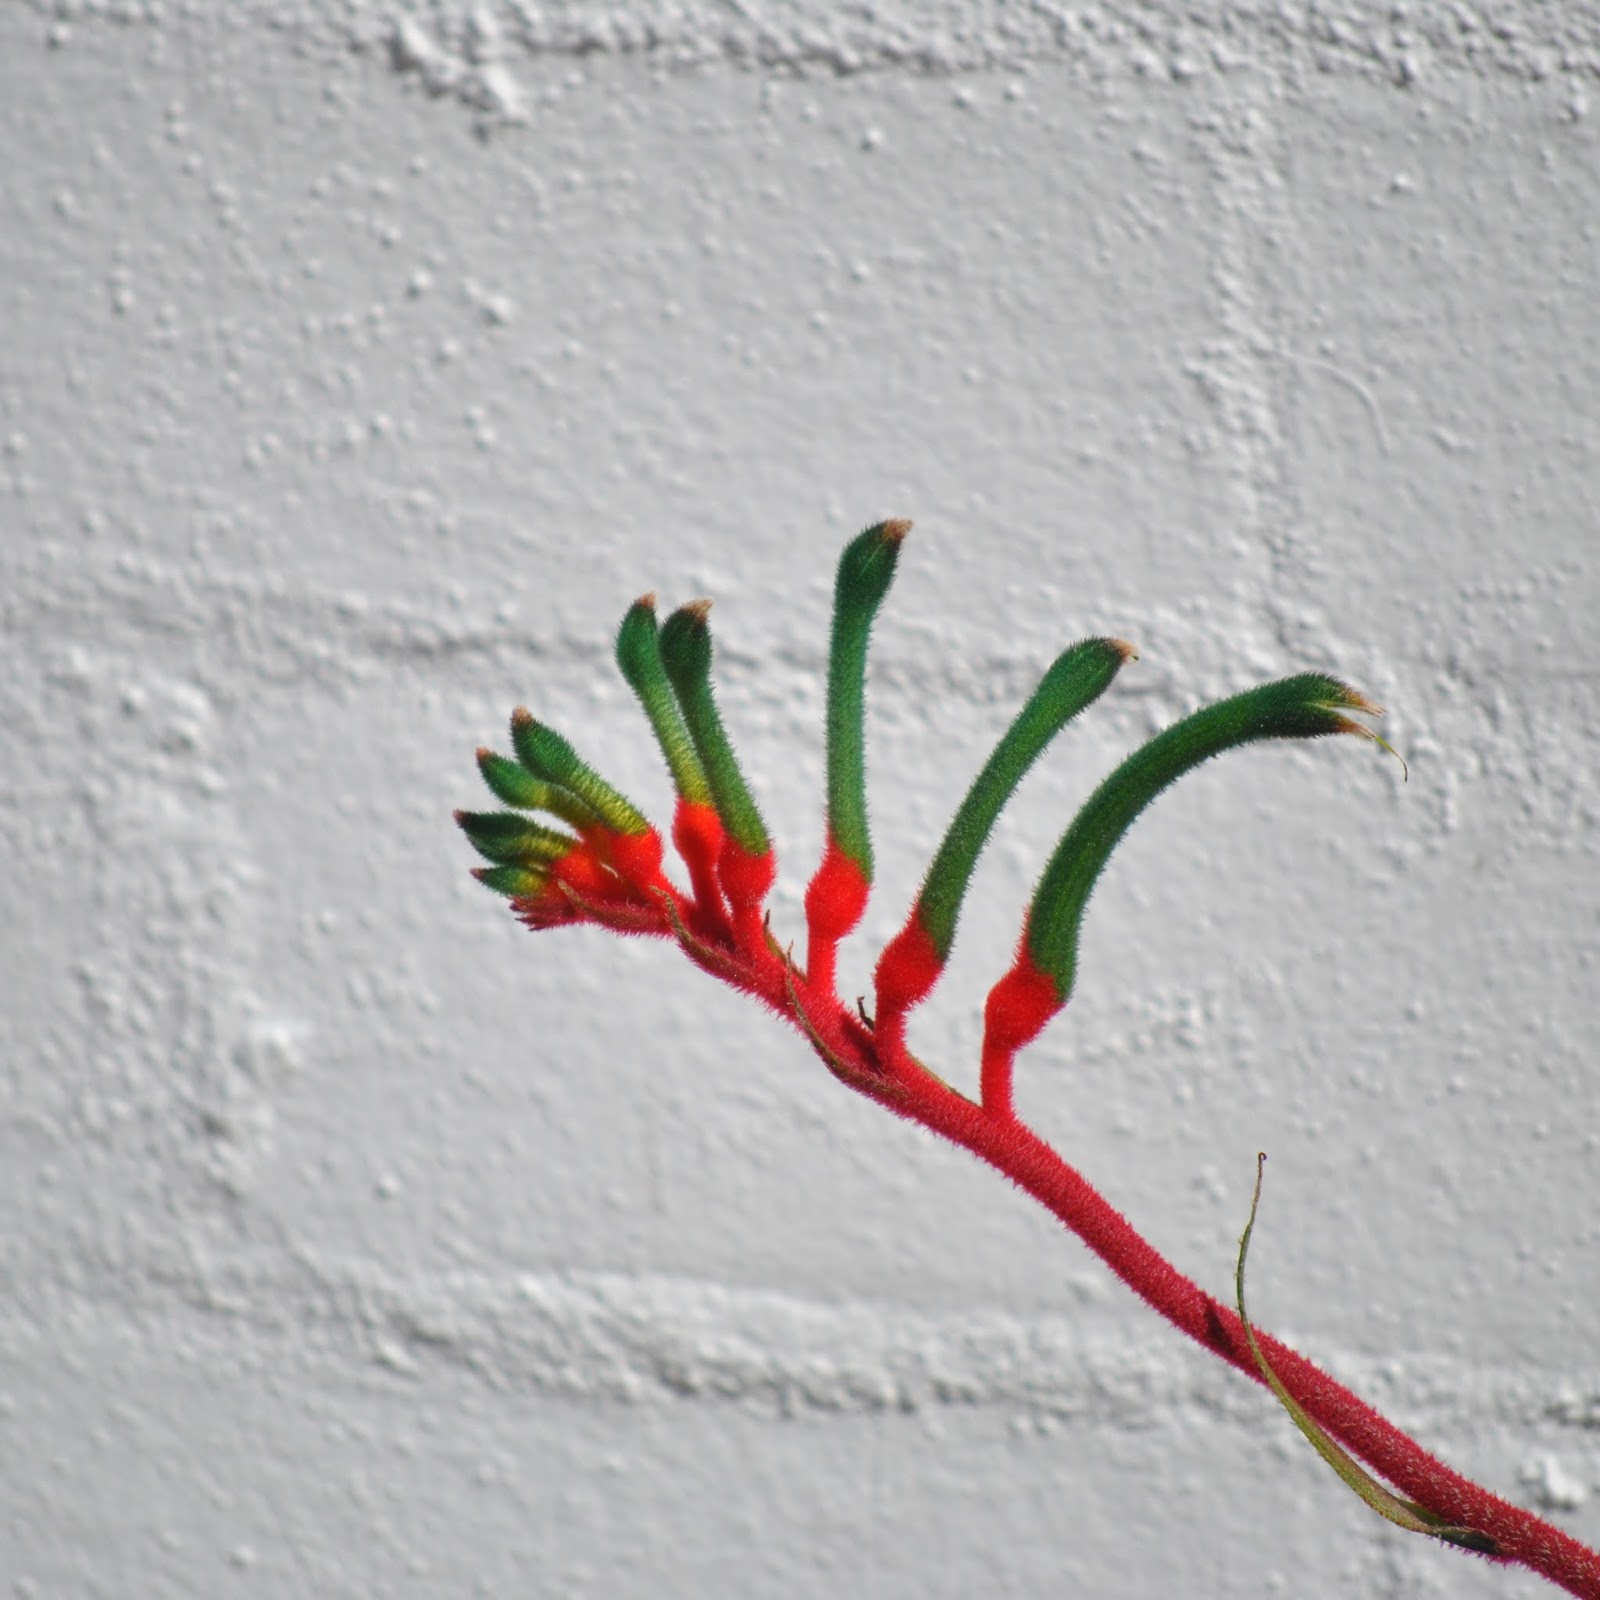
Anigozanthos manglesii

The embroidery design is my own; a random arrangement of of kangaroo paw motif, for our Western Australian state floral emblem.

My underwear features the only “colour” in my entire outfit; I dyed the decorative yellow edging and ties using sour grass picked from my own garden, as posted here.
All the other fleece, yarn and wood in my outfit I left in its naturally coloured state.

My cardigan is alpaca yarn, from the Fibre of the Gods, a tiny mill operating on a farm in Toodyay.  This establishment produces alpaca yarn on their own property, from the fleece of their very own alpaca herd.  I bought some of their yarn directly from off the farm and knitted my cardigan, as posted here.

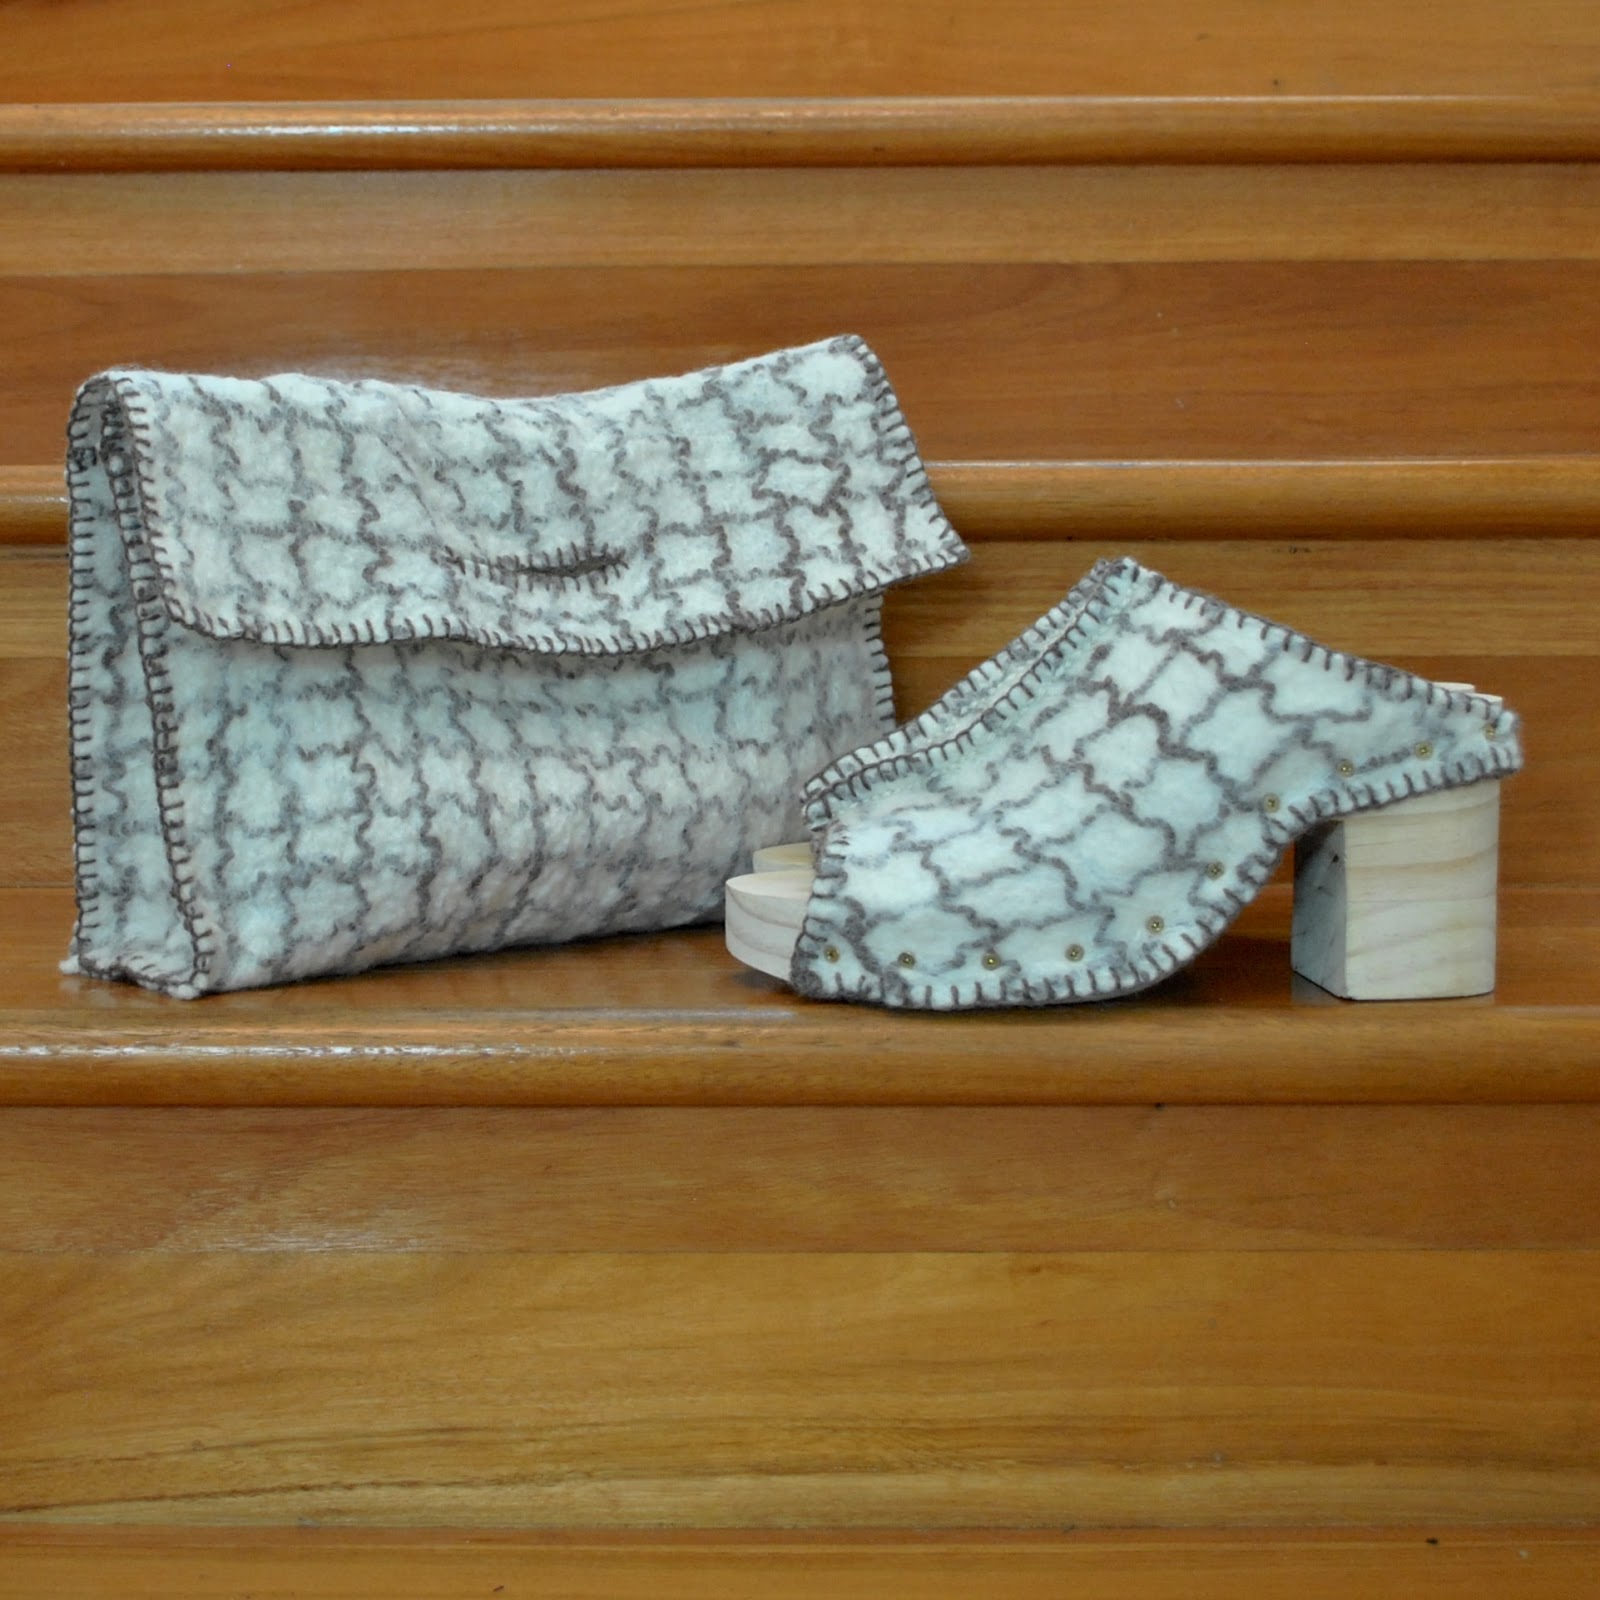
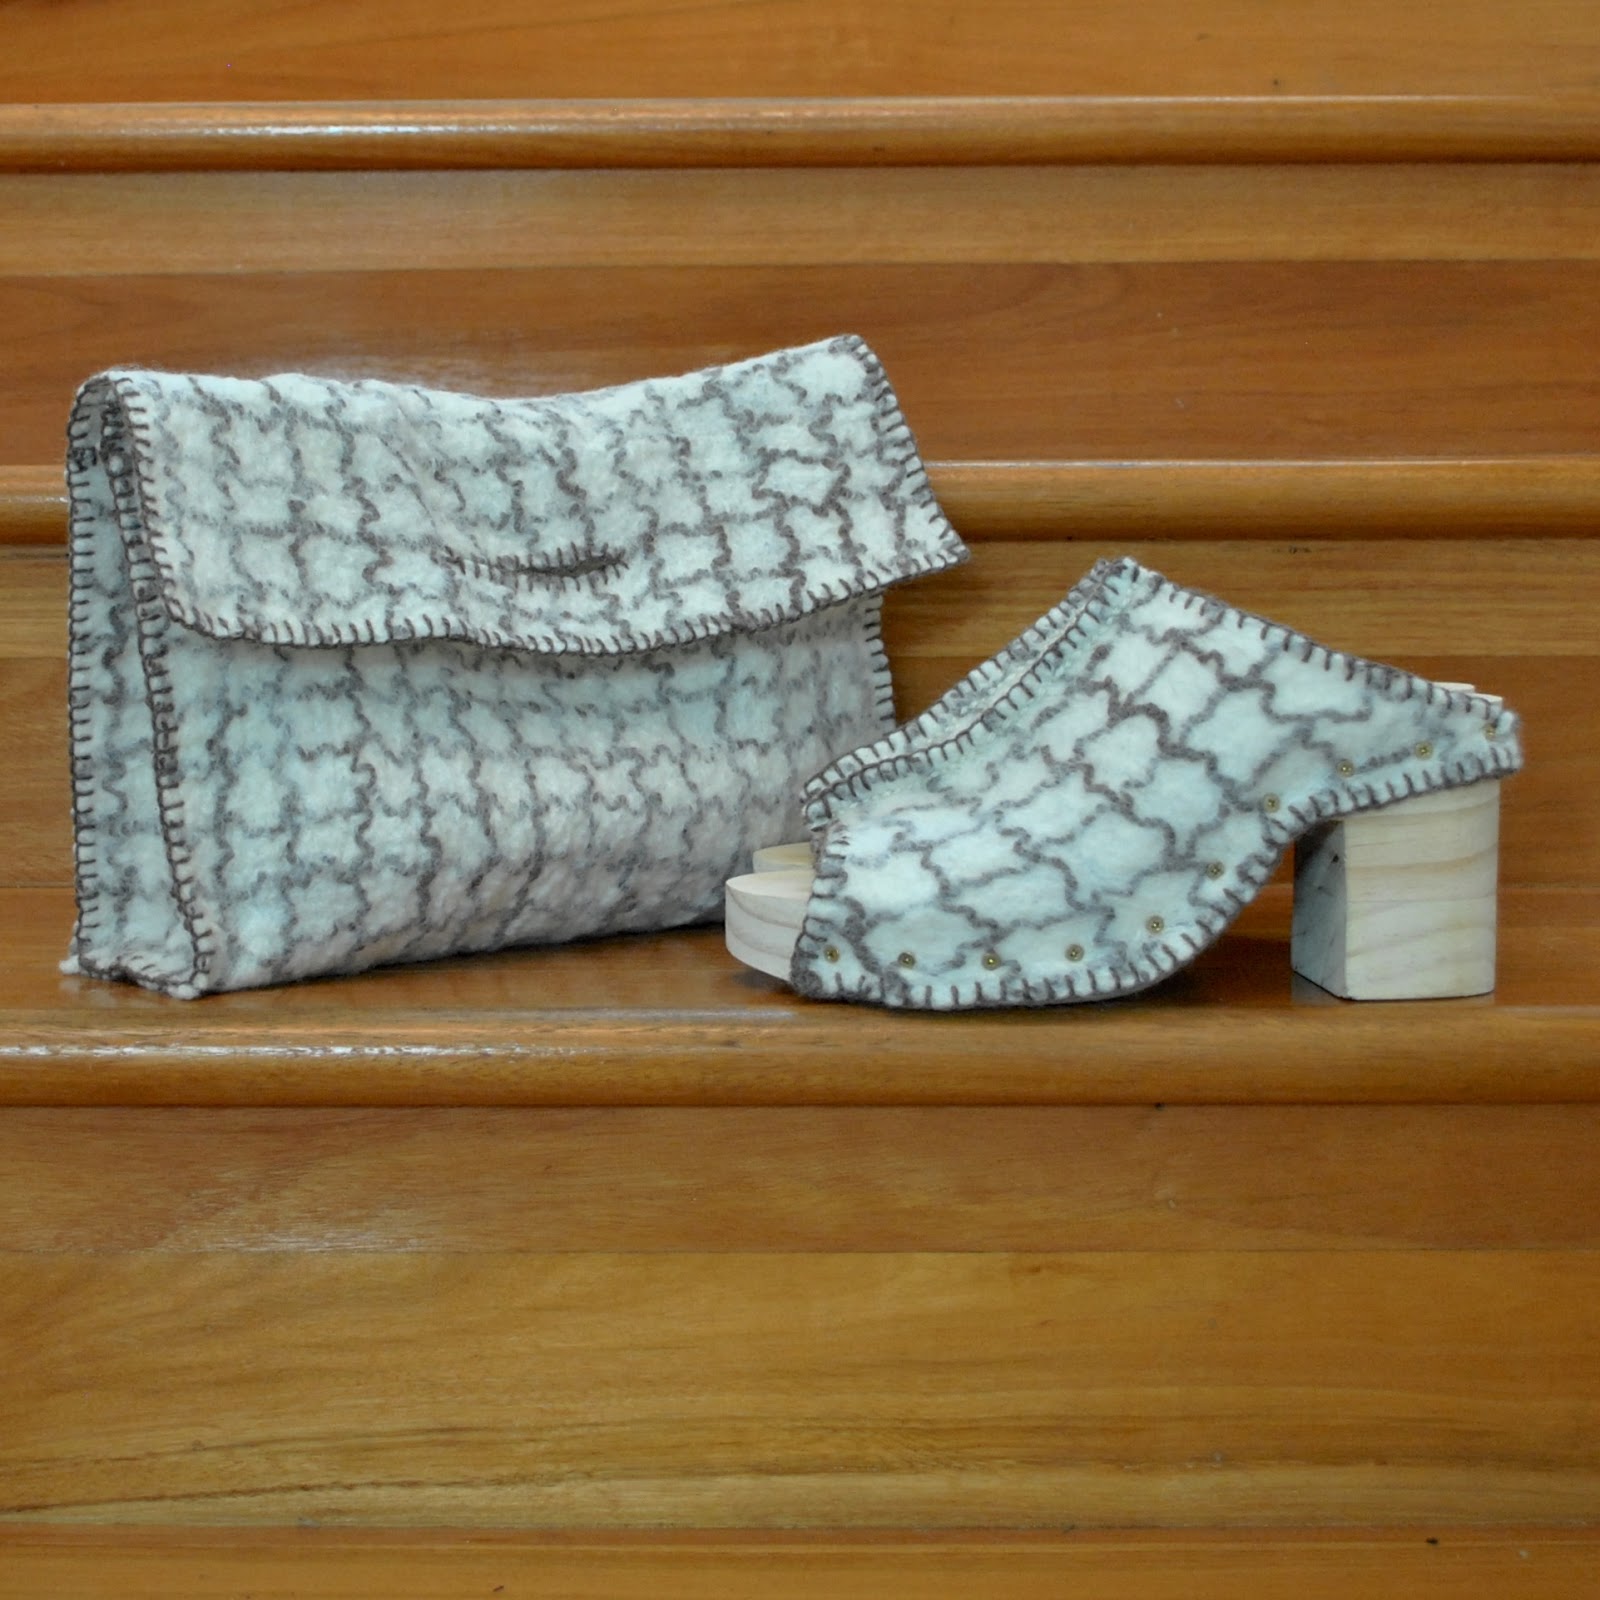
My wooden shoe soles are hand carved by me, using Western Australian pine.  The pine is grown by Bunnings on their own pine plantations down south and milled by Bunnings in Manjimup.  I made my shoes and my bag from my merino fleece as outlined here My bag and shoe tops are also merino fleece, with a grid pattern made of naturally black sheep yarn.

And that’s it, in a nutshell!
Well, typing it all out like this has kinda brought it home to me for the first time; I am wearing a pretty-close-to 100% homegrown outfit, top to toe, for maybe the first time in my life!  I’m kinda amazed, even at myself.  It’s a little mind-blowing to me.
Final thoughts: I’ve learnt a tonne doing this challenge.  Firstly, our local industries are precious and need our support.  That goes for everywhere, not just here in WA!  I personally am going to put more effort into supporting our local products regularly.  I mean, I’m definitely not giving up my more “regular” sewing, but I am going to do this challenge again.
Secondly, that if you really put your mind towards doing something, keep yourself focused on getting a project done, to overcoming obstacles, then you probably can do it.  Sometimes you need to sleep on it, think outside the box a bit.  I learnt a lot as I was going along, and several times had to improvise a solution to a problem.  There were moments when I questioned my sanity in doing this, when I wondered if my ideas were even going to work… a felt dress? unlined? felt underwear? sounds like the vision of a lunatic, or at least a recipe for disaster, for sure… well OK even I can admit that felt underwear is not really a practical nor a workable thing!  … do NOT recommend.  😉
Also, I had lots of fun!! I LOVE a challenge and this challenge really stretched my capabilities; which is the very best sort of challenge, in my opinion!   I thought hard and long about each aspect of my outfut and tried very hard to honour the materials, to minimise my waste and to make something truly Western Australian in feel and flavour as well as provenance.
There were also moments when I realised I had to accept a small defeat; in the case of this outfit; the glue holding pieces of wood together in my shoes (from NSW, Australia), the nails holding the felt to the soles of my shoes (China) and the cotton jersey liner for my undies (China).  They are very tiny elements so I’m not going to beat myself up over them too much.
I guess the important thing is that I gave everything careful consideration,  and really thought about provenance and the possibility of substituting local products in as many instances as I was able.  As well, I wanted to produce something stylish and lovely, that I knew I would love wearing and feel proud and happy in.  I genuinely love my outfit, and feel pretty pleased with my efforts!
Lastly; maybe I’m on a bit of a post-challenge high, but I’m quite excited about attempting this again next year… in fact I already have ideas and plans!
Mad? maybe, but quite happy to be so!

Details:
Cardigan; the Caramel cardigan, in Fibre of the Gods natural alpaca, grown, shorn, washed, carded and spun in Toodyay, Western Australia and hand-knitted by me, details here
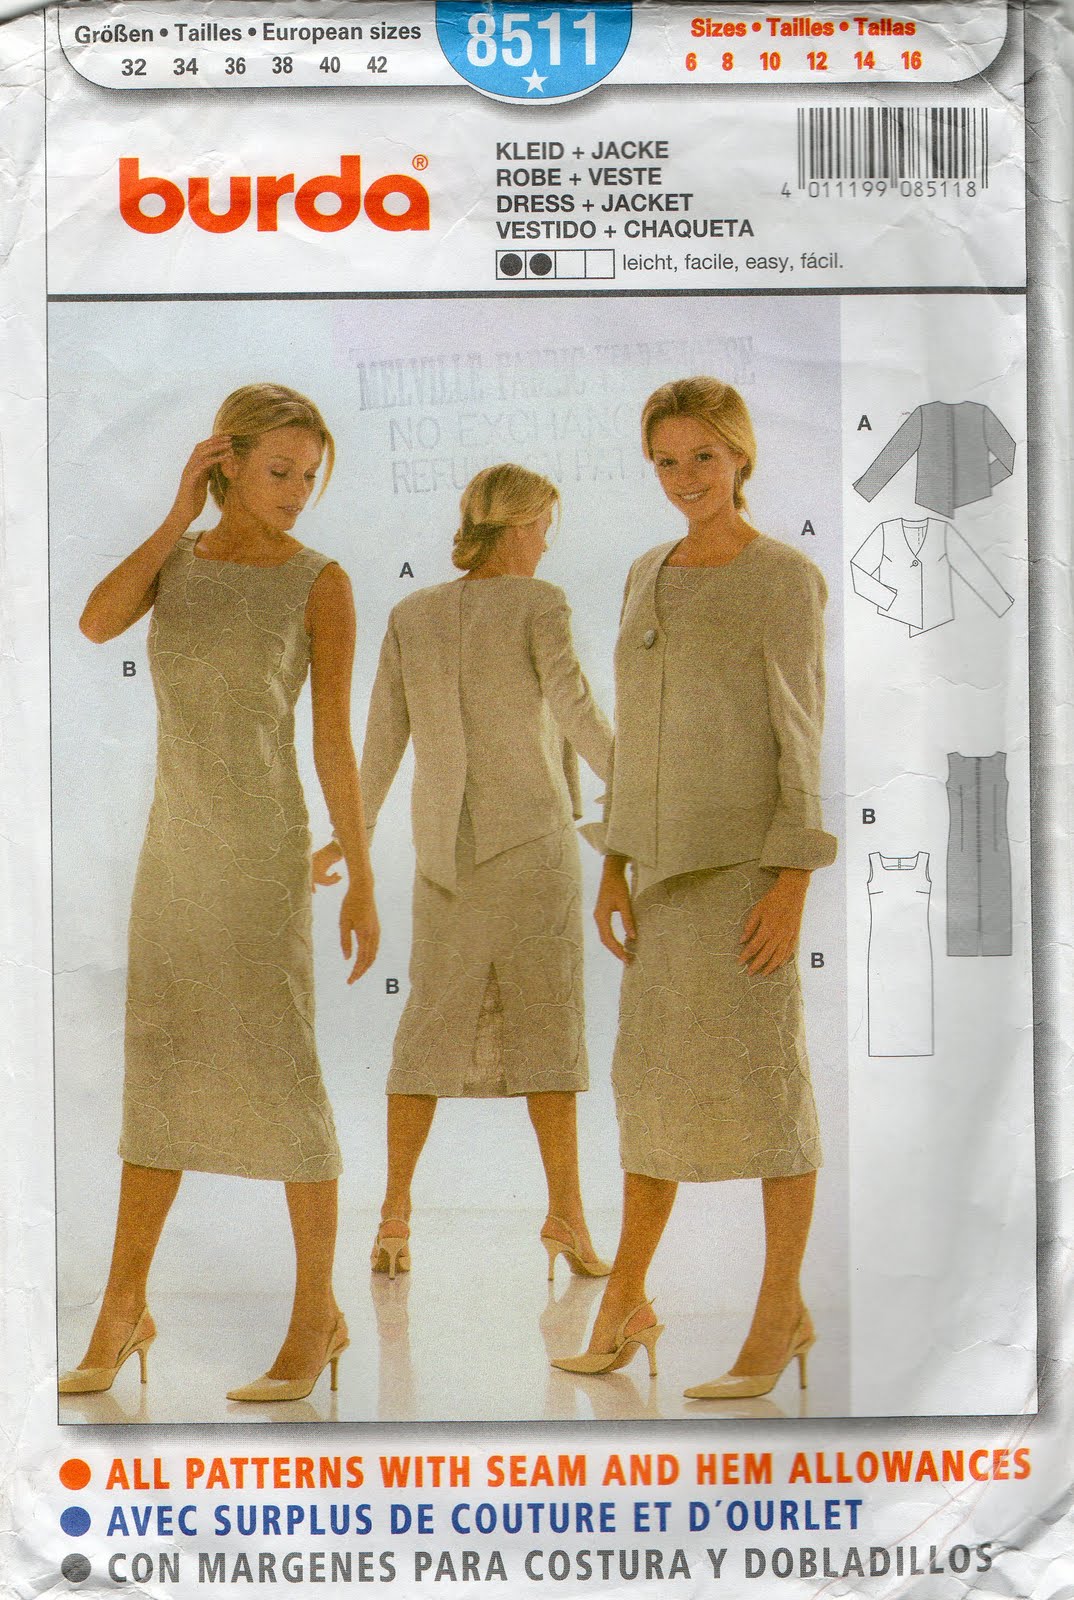
Dress; my own design based upon Burda 8511, made from merino felt made by me and hand embroidered with locally handspun merino yarn from Bilby Yarns, details here
Shoes; my own design, pine soles from Bunnings hand carved by me, felt tops made by me from merino fleece bought at Bilby Yarns, details here
Bag; my own design, in felt made by me from merino fleece bought at Bilby Yarns, details here
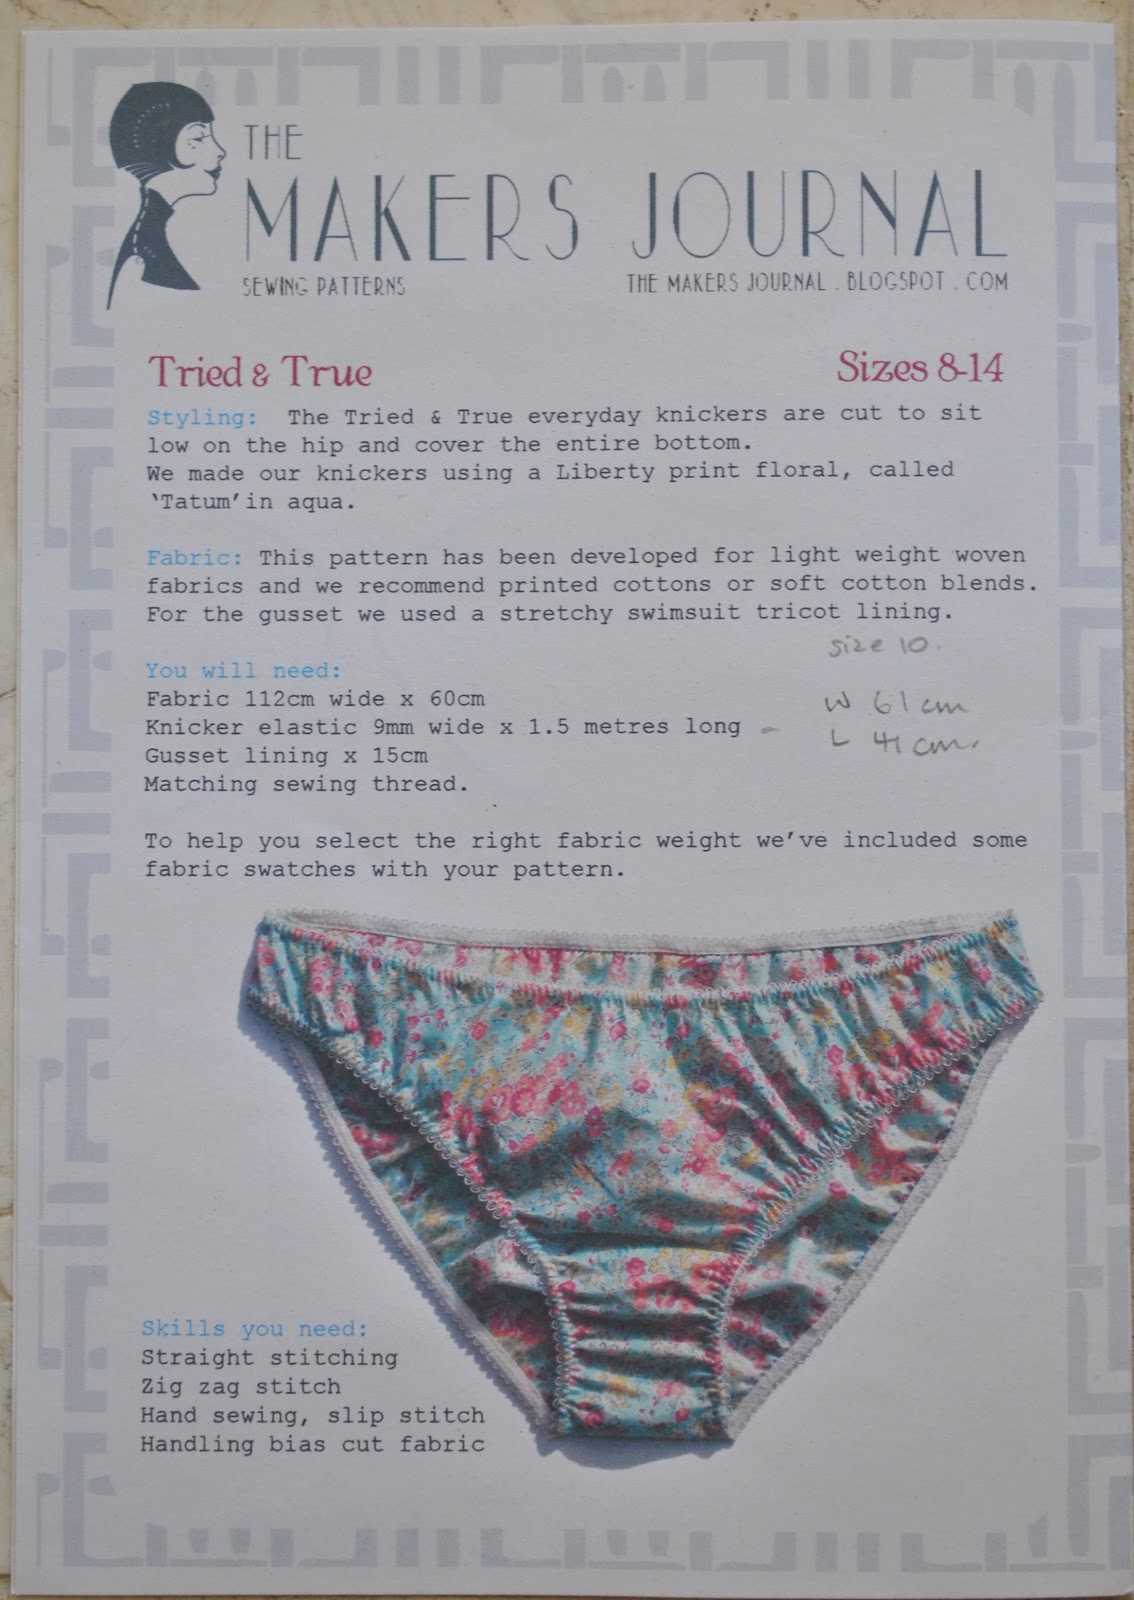
Underwear; my own design, knickers derived from the Tried & True knickers pattern by the Makers Journal, in felt made from merino fleece bought at Bilby Yarns, details here

pinterestmail

a strange lingerie set

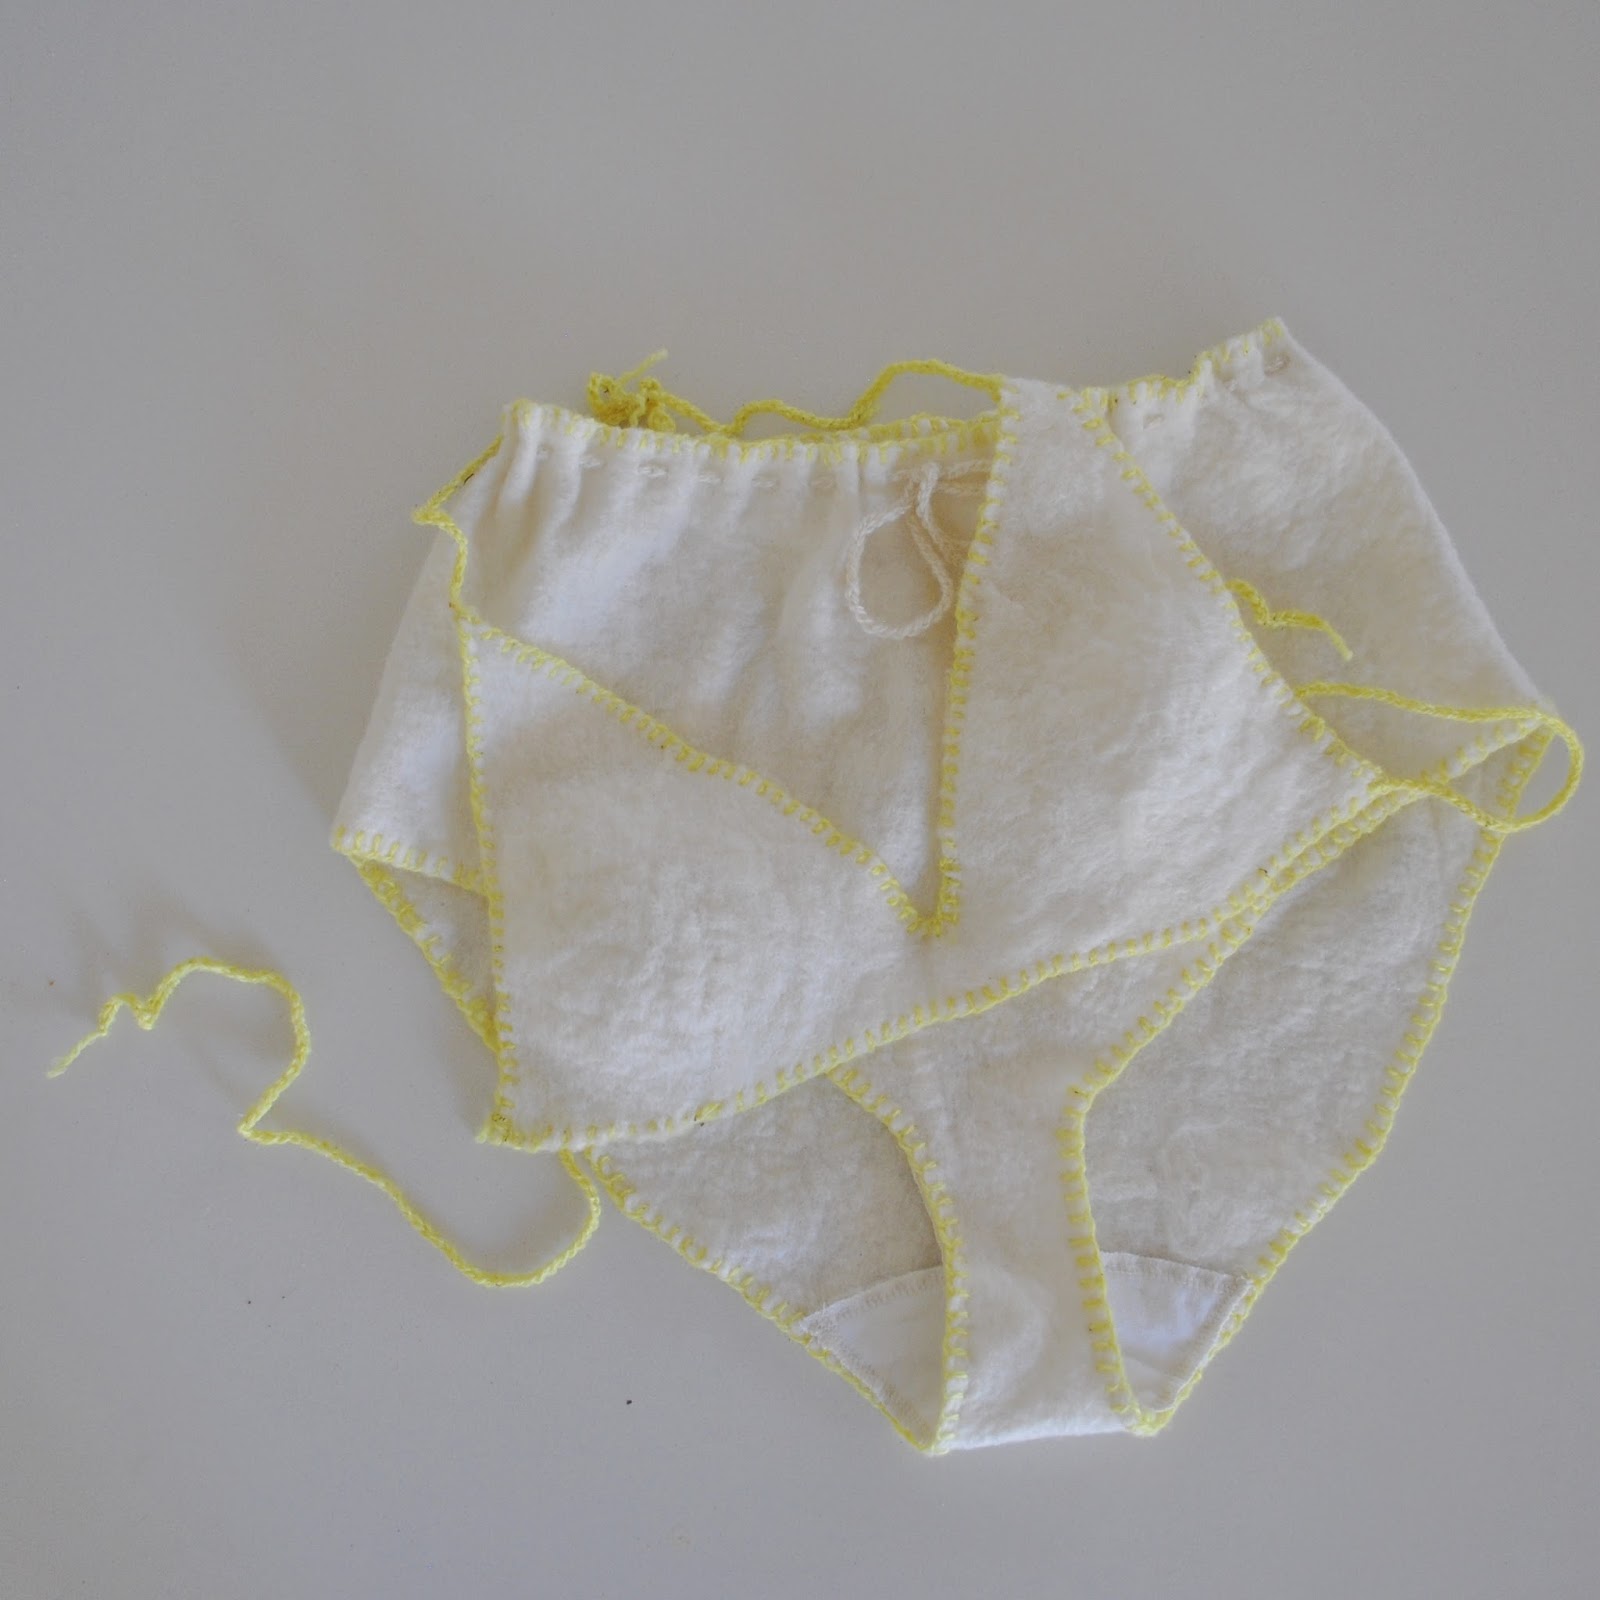
I fully admit it; this could very well be the weirdest, most bizarre thing I’ve ever made! I had toyed with the idea of making a lingerie set to complete my one year one outfit… er… outfit; but rejected the idea as being impractical and unwearable; then re-embraced the idea, then rejected it again. And found myself pondering it again… and then dismissed it again.  Finally I just decided to have a go, although this part of my project was in danger of never ever getting blogged!
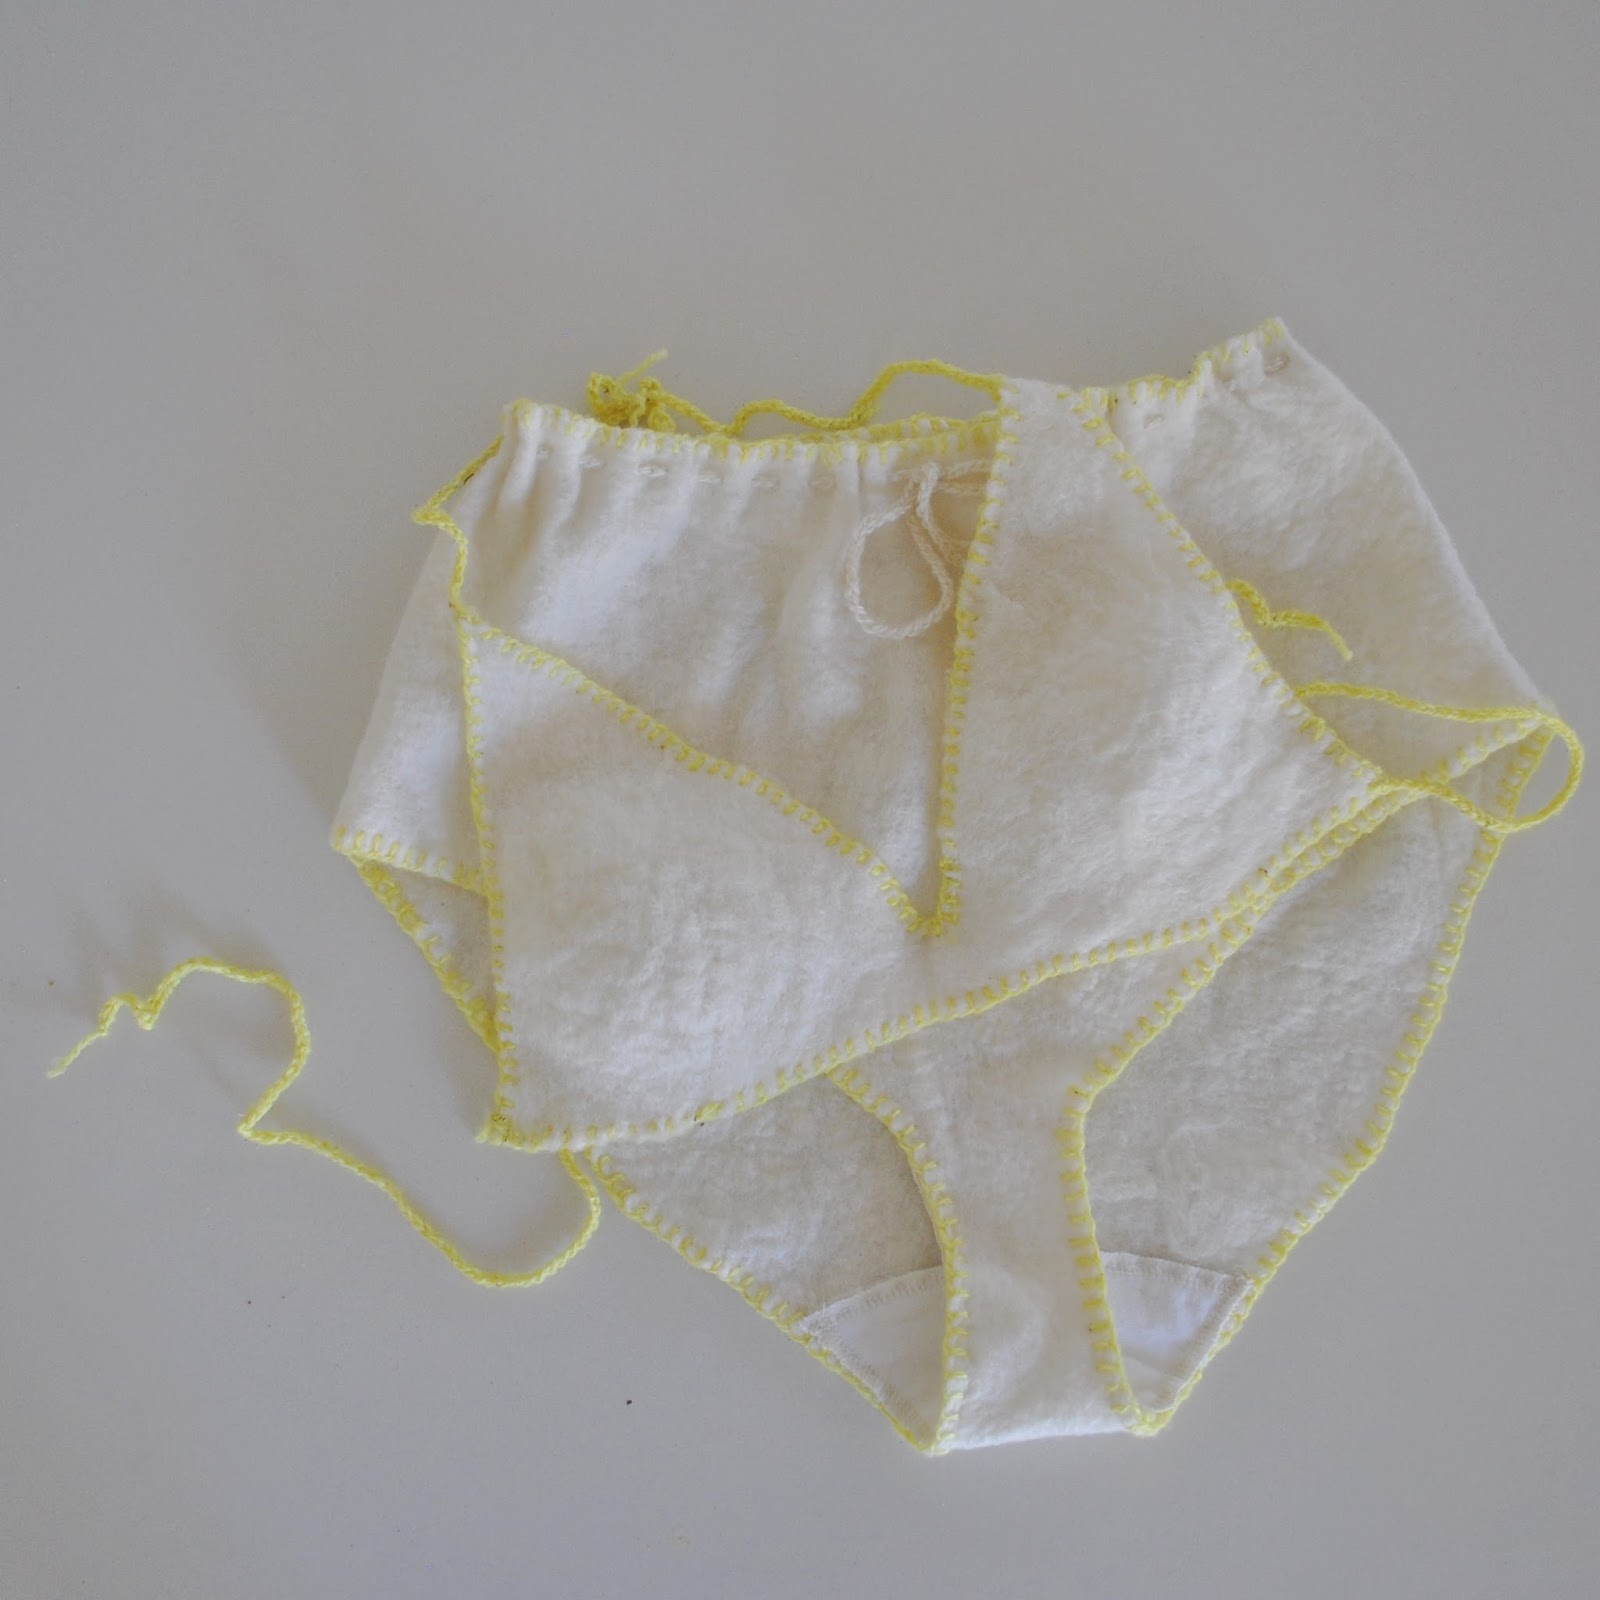
So; lingerie, made using ONLY locally sourced materials; quite a challenge, quite a challenge.  My set is very very simple; a string bikini top and high waisted knickers cinched in at the top with a drawstring.  
As per the criteria of the challenge, I could not use anything not made here in Western Australia … which ruled out elastic, findings, thread and even FABRIC!  Hmmm, yes, quite a challenge…   Like every other part of my outfit for this challenge, I had to make my own fabric.  Fortunately I had some pieces of merino felt leftover from my dress, and I made another small piece to complete the knickers, so my set is mostly made from scraps, yay!  The yellow blanket stitch edging is in locally handspun merino yarn from Bilby Yarns, that I dyed myself using sour grass from our garden; here.  The bikini strings and the drawstring are a single crochet chain. 
In my early planning stages, I had contemplated knitting some knickers and bra from my handspun Western Australian merino yarn, and actually found a free pattern for a knitted bra too! but rejected that idea… why? well to be perfectly honest, this set is probably not going to get a hekkuvva lot of wear! if any! and so I really wanted to minimise the use of my beautiful handspun yarn.  I felt OK about using my leftover felt though, since that was made from my own labour.
The bra is self-drafted, if you can call two, felted-together, darted triangles a self-drafted pattern, ahem.  I gave them a gentle cupped shape by cutting darts from the lower edge and felting them closed with my felting needle, just like I did the darts in my dress, so the darts are seamless; and felted them together at centre front the same way.
The knickers are loosely based on the Tried & True knickers pattern, by the Makers Journal, an undies pattern designed for non-stretch wovens.  This design is a little on the low-rise side which I modified slightly by making it a higher rise design with a drawstring to pull them in at high hip level, also the crotch and leg holes have also been cut away significantly with a deeper curve to the crotch and straighter front leg-line; I did this because the fabric was a tad on the bunchy side around this area otherwise.  When they’re on the knickers look like tap pants, flaring out a little from the waist and away from the hips, and are actually quite cute, believe it or not!

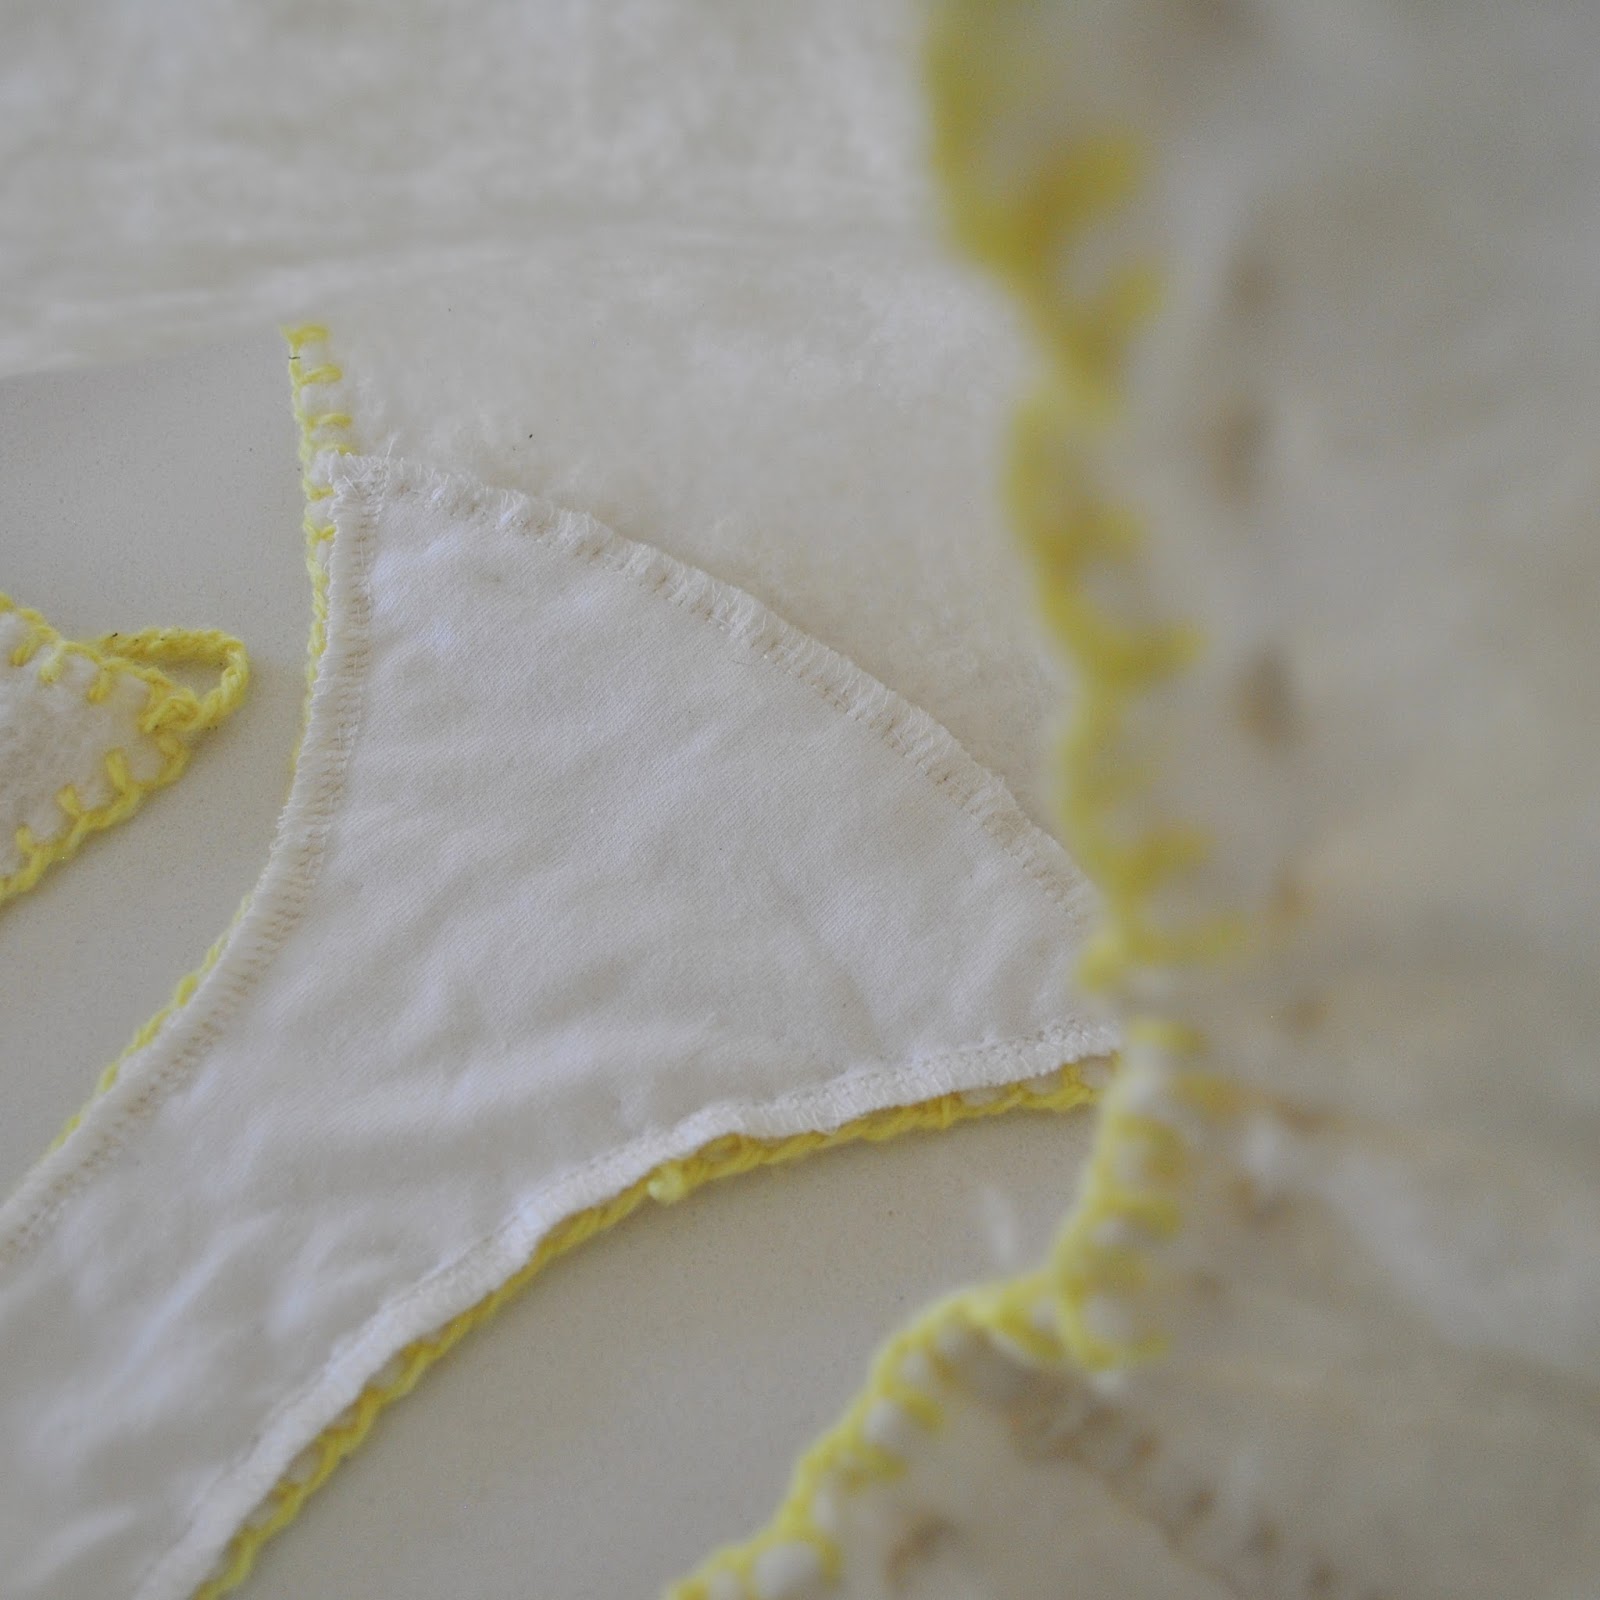
I made a little cotton jersey lining for the knickers, and have loosely tacked it in with running stitch  This small piece of fabric is the only part of the set that does not fit the criteria of my one year one outfit challenge; but I’m sorry, I just consider a liner to be an absolutely essential thing to have in a pair of knickers.  I’ve done my absolute best to eliminate non-local elements in all of the components in my one year one outfit, but you can only go so far for this challenge! and I’m drawing a line at unlined knickers.
While making them I was reminded of Sheldon fashioning historically accurate undergarments from linen just to wear to the Renaissance fair… so funny!… meaning, yes; I’m fully aware that this is just about the silliest set of lingerie ever, but I made them mostly from my leftovers and using my “experimentally” dyed yarn so I don’t consider making them to be too much of a waste of resources.  I think I made them just for fun, really!  Think of it as wearable art!

pinterestmail

Lace-y bralette + undies

I’ve made a new lingerie set and I think it turned out quite noice.  
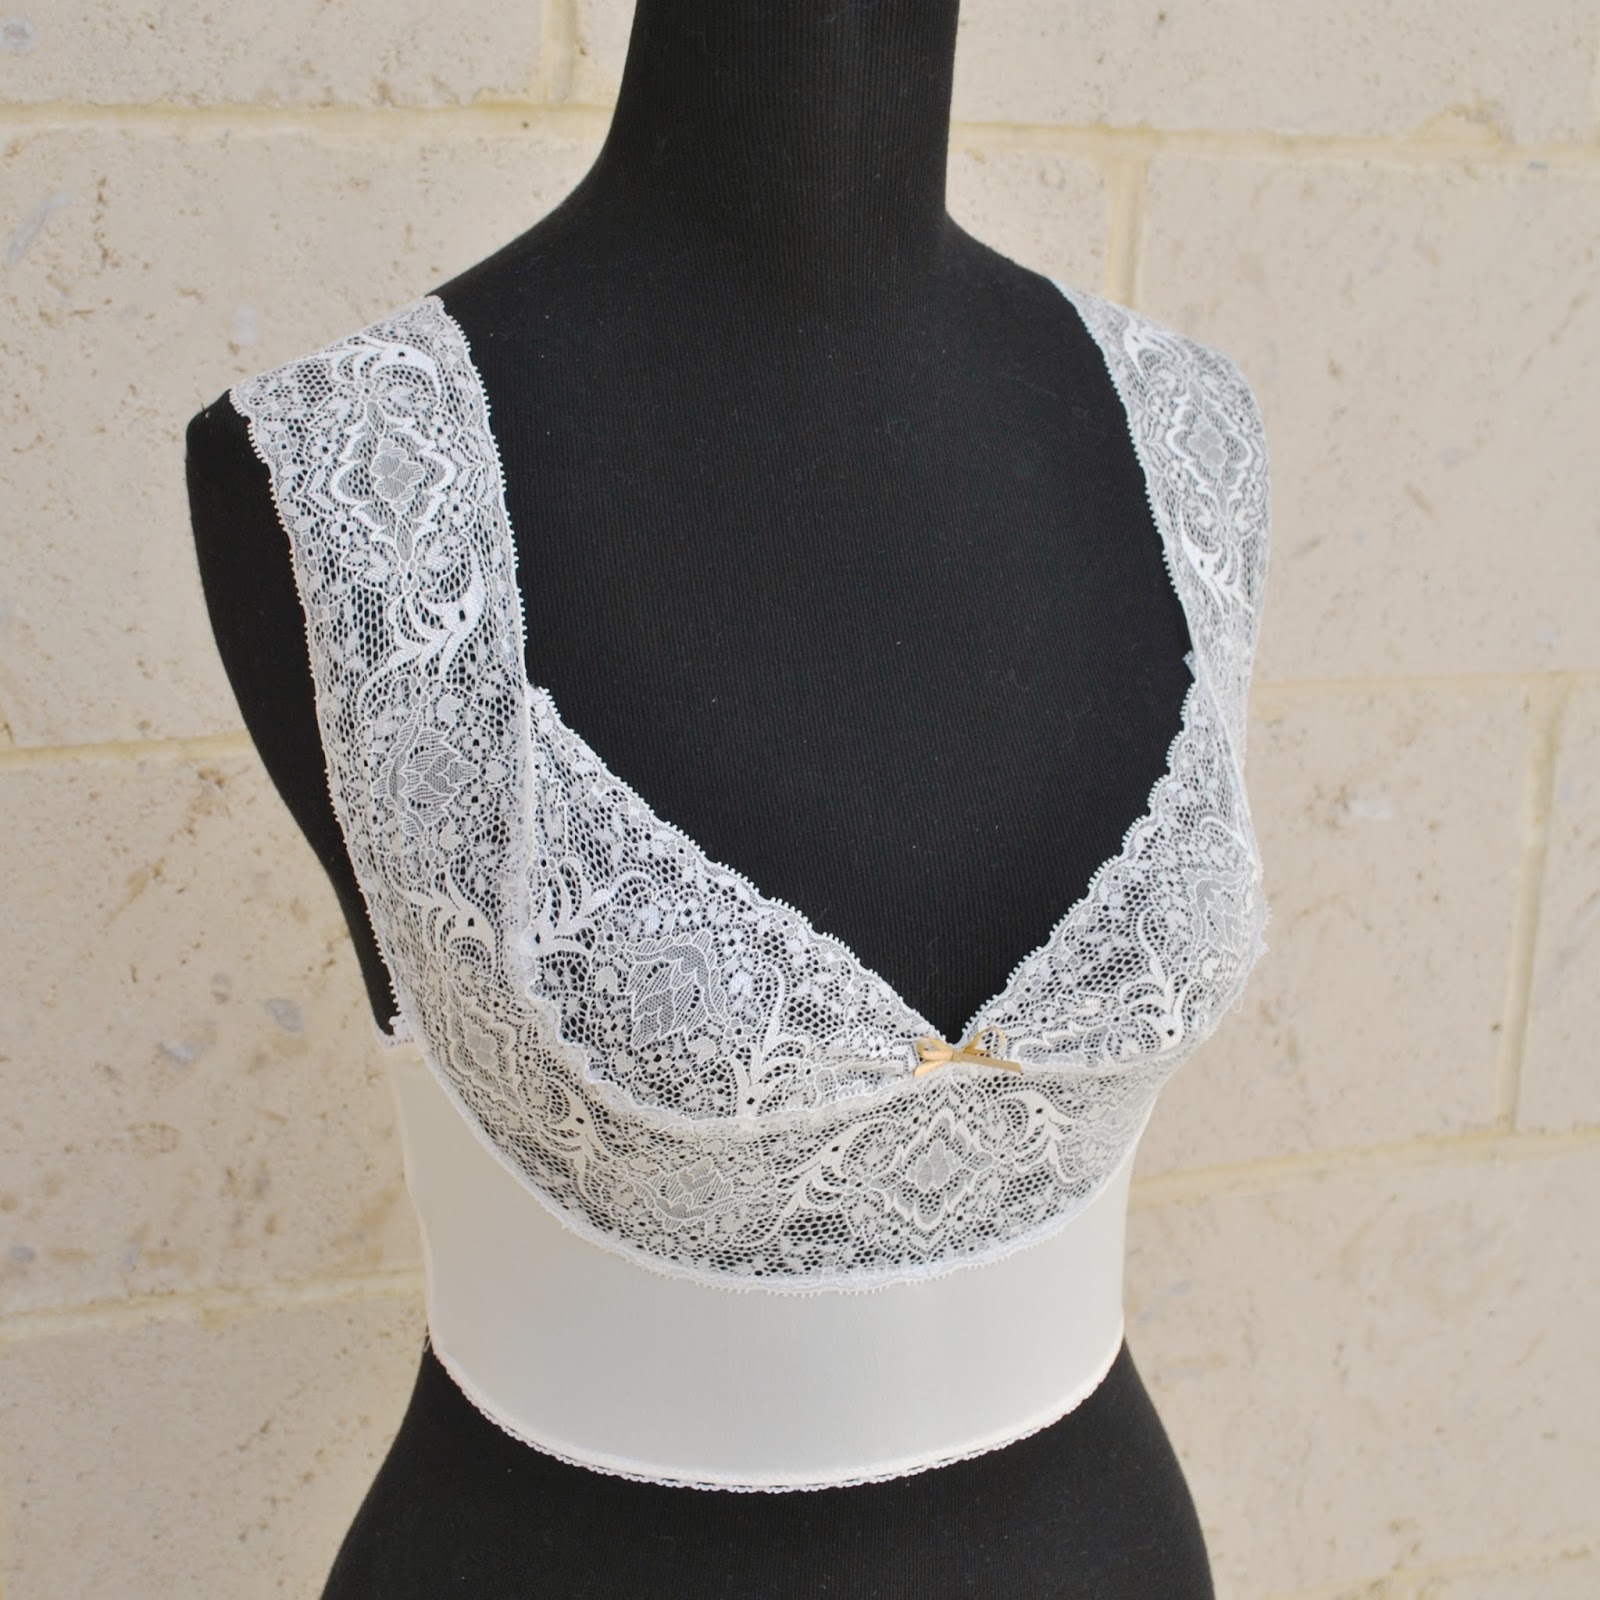
This little soft bralette design has been bouncing around in my mental wish-to-make-list for yonks.  It’s more of a pull over the head, lacy camisole than a bra really; and is a near-copy of a Lovable bralette I used to wear donkey’s years ago.  I’ve even kept the original one tucked away in a drawer, just to try to reproduce it one day.  That day has come, weeeee!  I’m very happy with my copy, even though the lace I used is a bit too wide.  It’s such extraordinarily pretty lace though, so that’s an ok compromise in my book.  
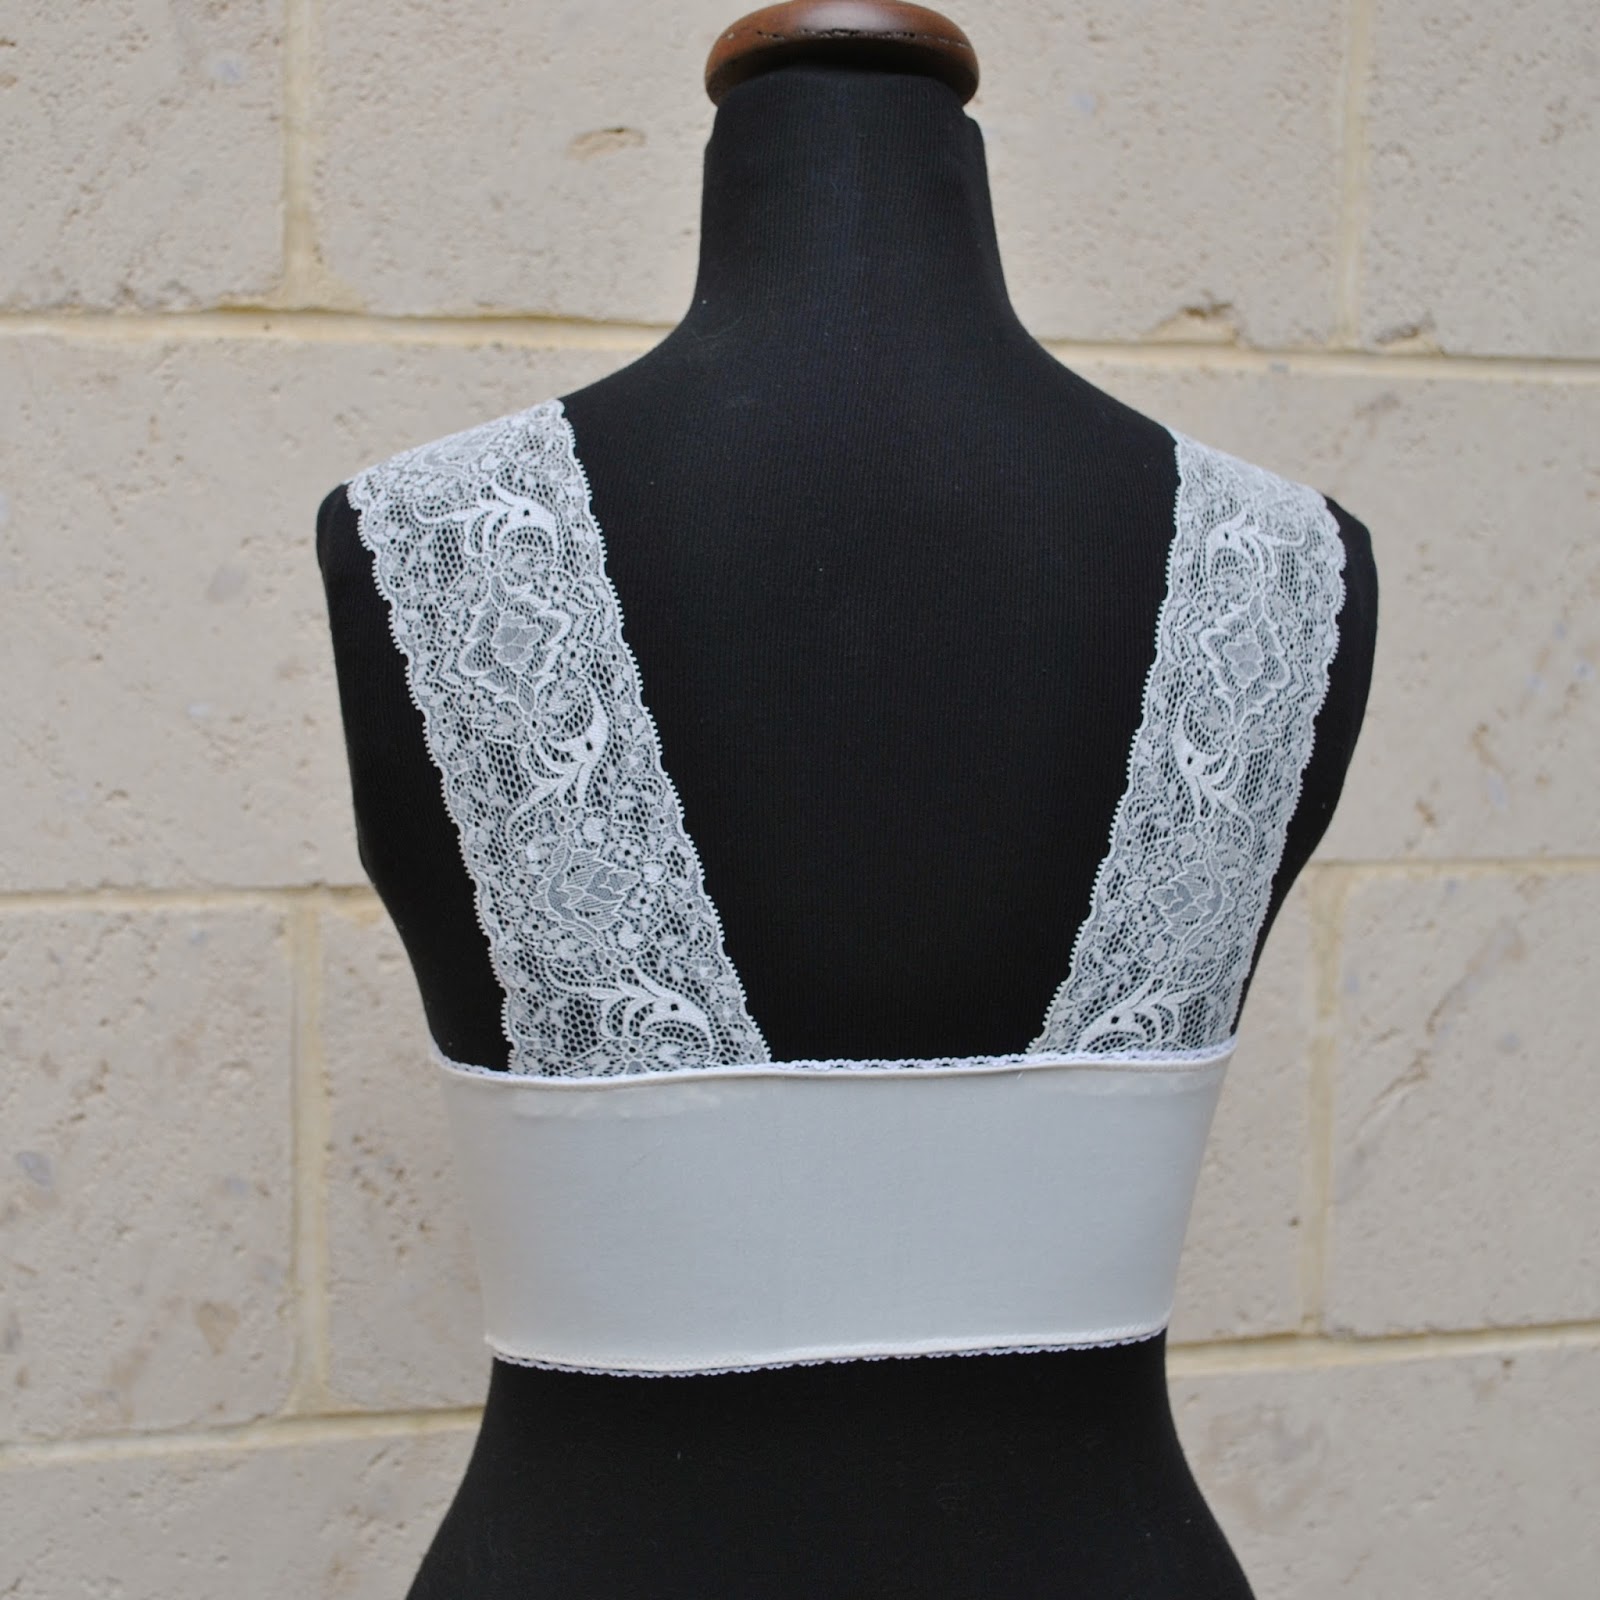
The reason I wanted to make another one for myself is that the original one really was such a nice thing to wear under big loose tops or something a little sheer.  The lace shoulder straps look really pretty if they happen to peep out and don’t really look too much like a “bra”.
Also I wear a lot of white/ivory in summer, so white/beige underthings are always very handy.

It’s super comfortable, and although it doesn’t look particularly supportive, it actually is.  Pictured above on poor long-suffering Bessie, that joining seam appears to cut right across her bust in a most uncomfortable way; however Bessie is actually  bigger than me.  On me the shoulder strap lace comes down and around and sits perfectly moulded underneath my bust and so it’s actually does give a surprisingly good amount of support.   I’m fairly fortunate I guess in that I don’t need much, hehehe… well, hey; there’s got to be some advantages!!

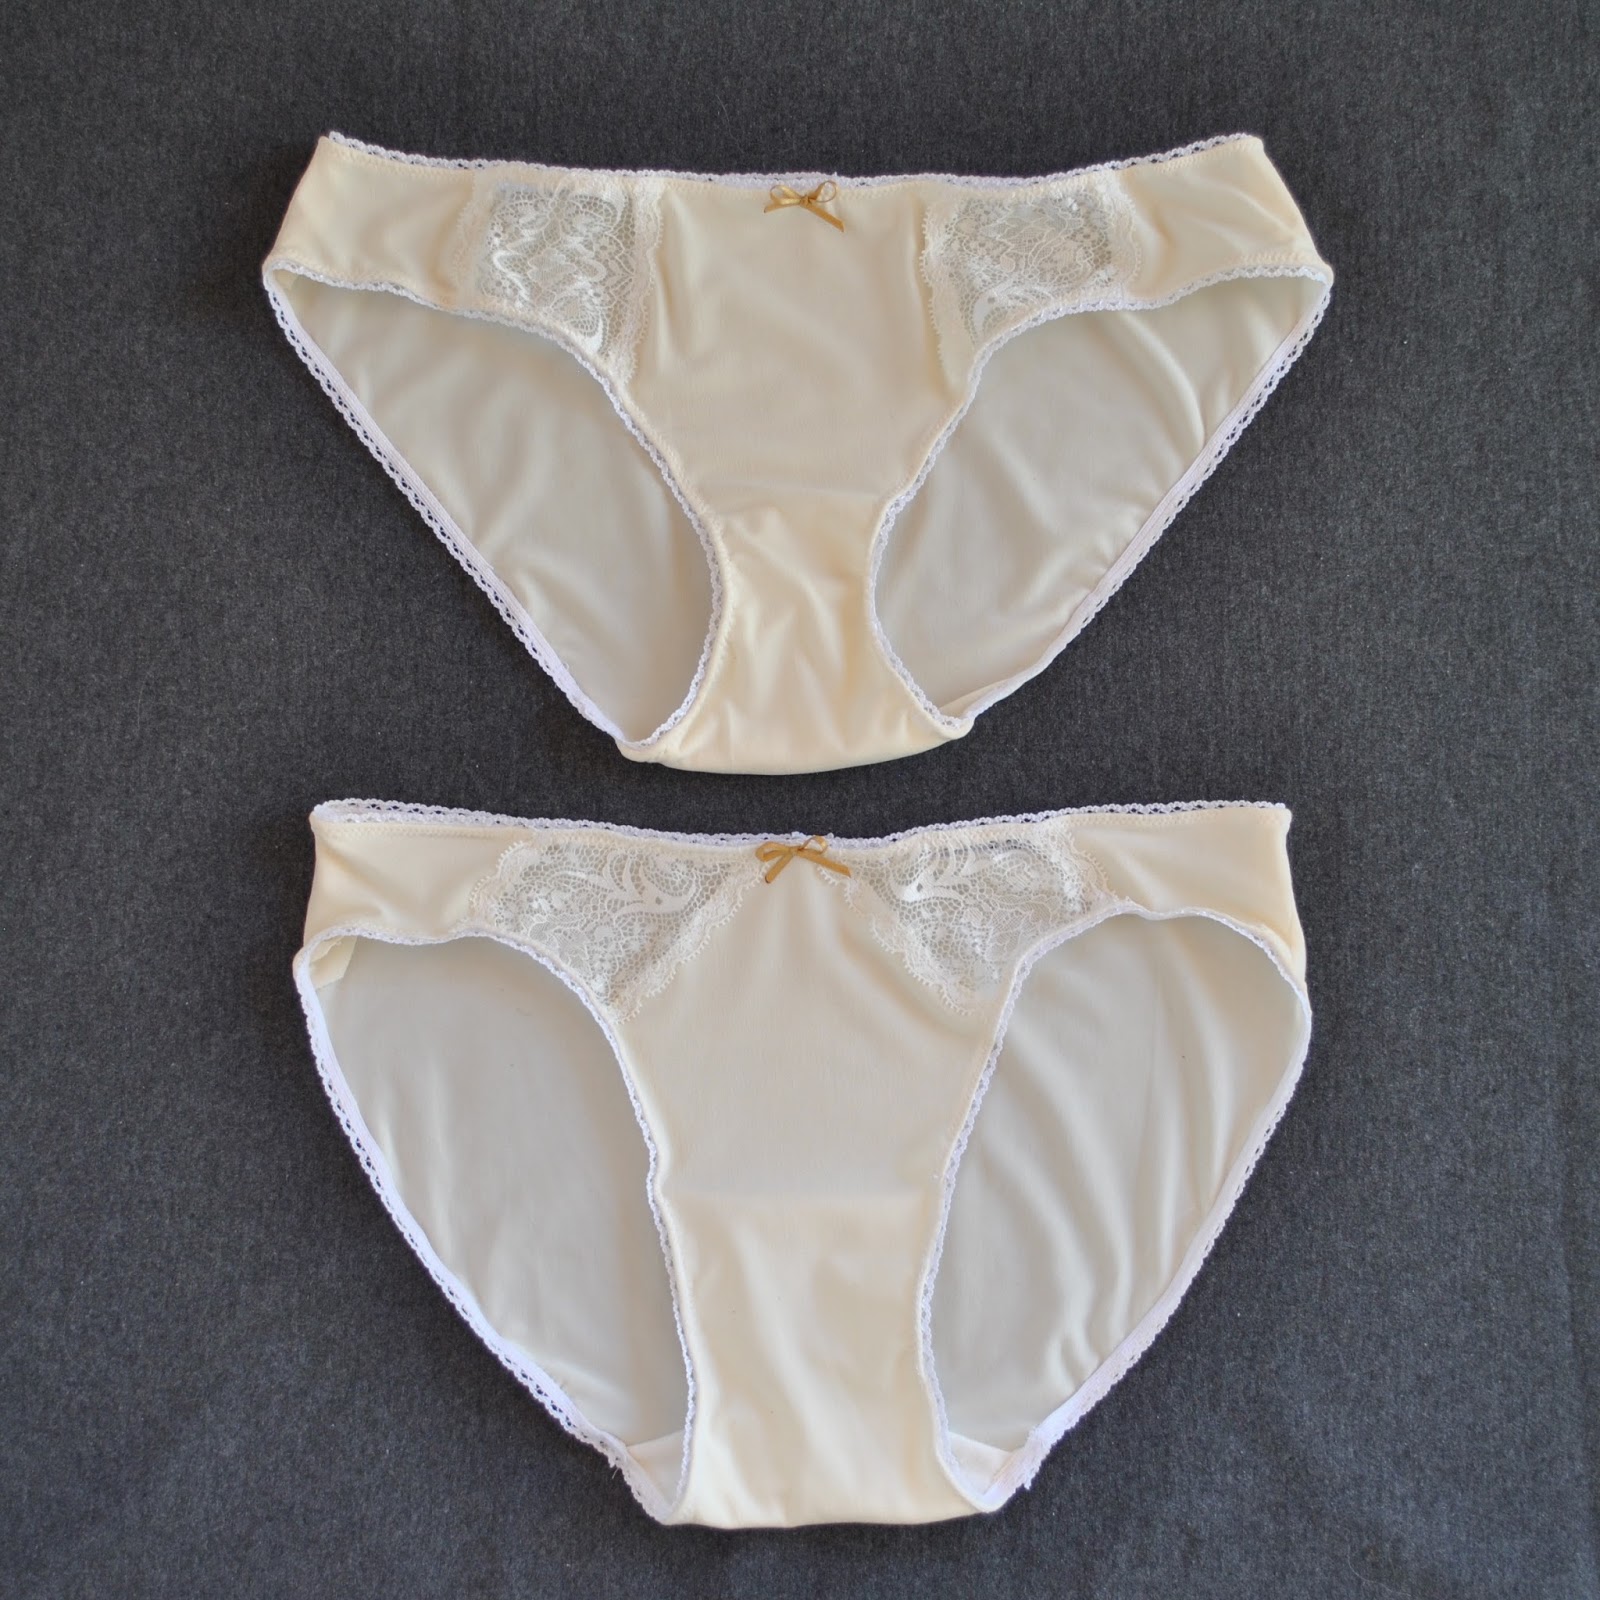
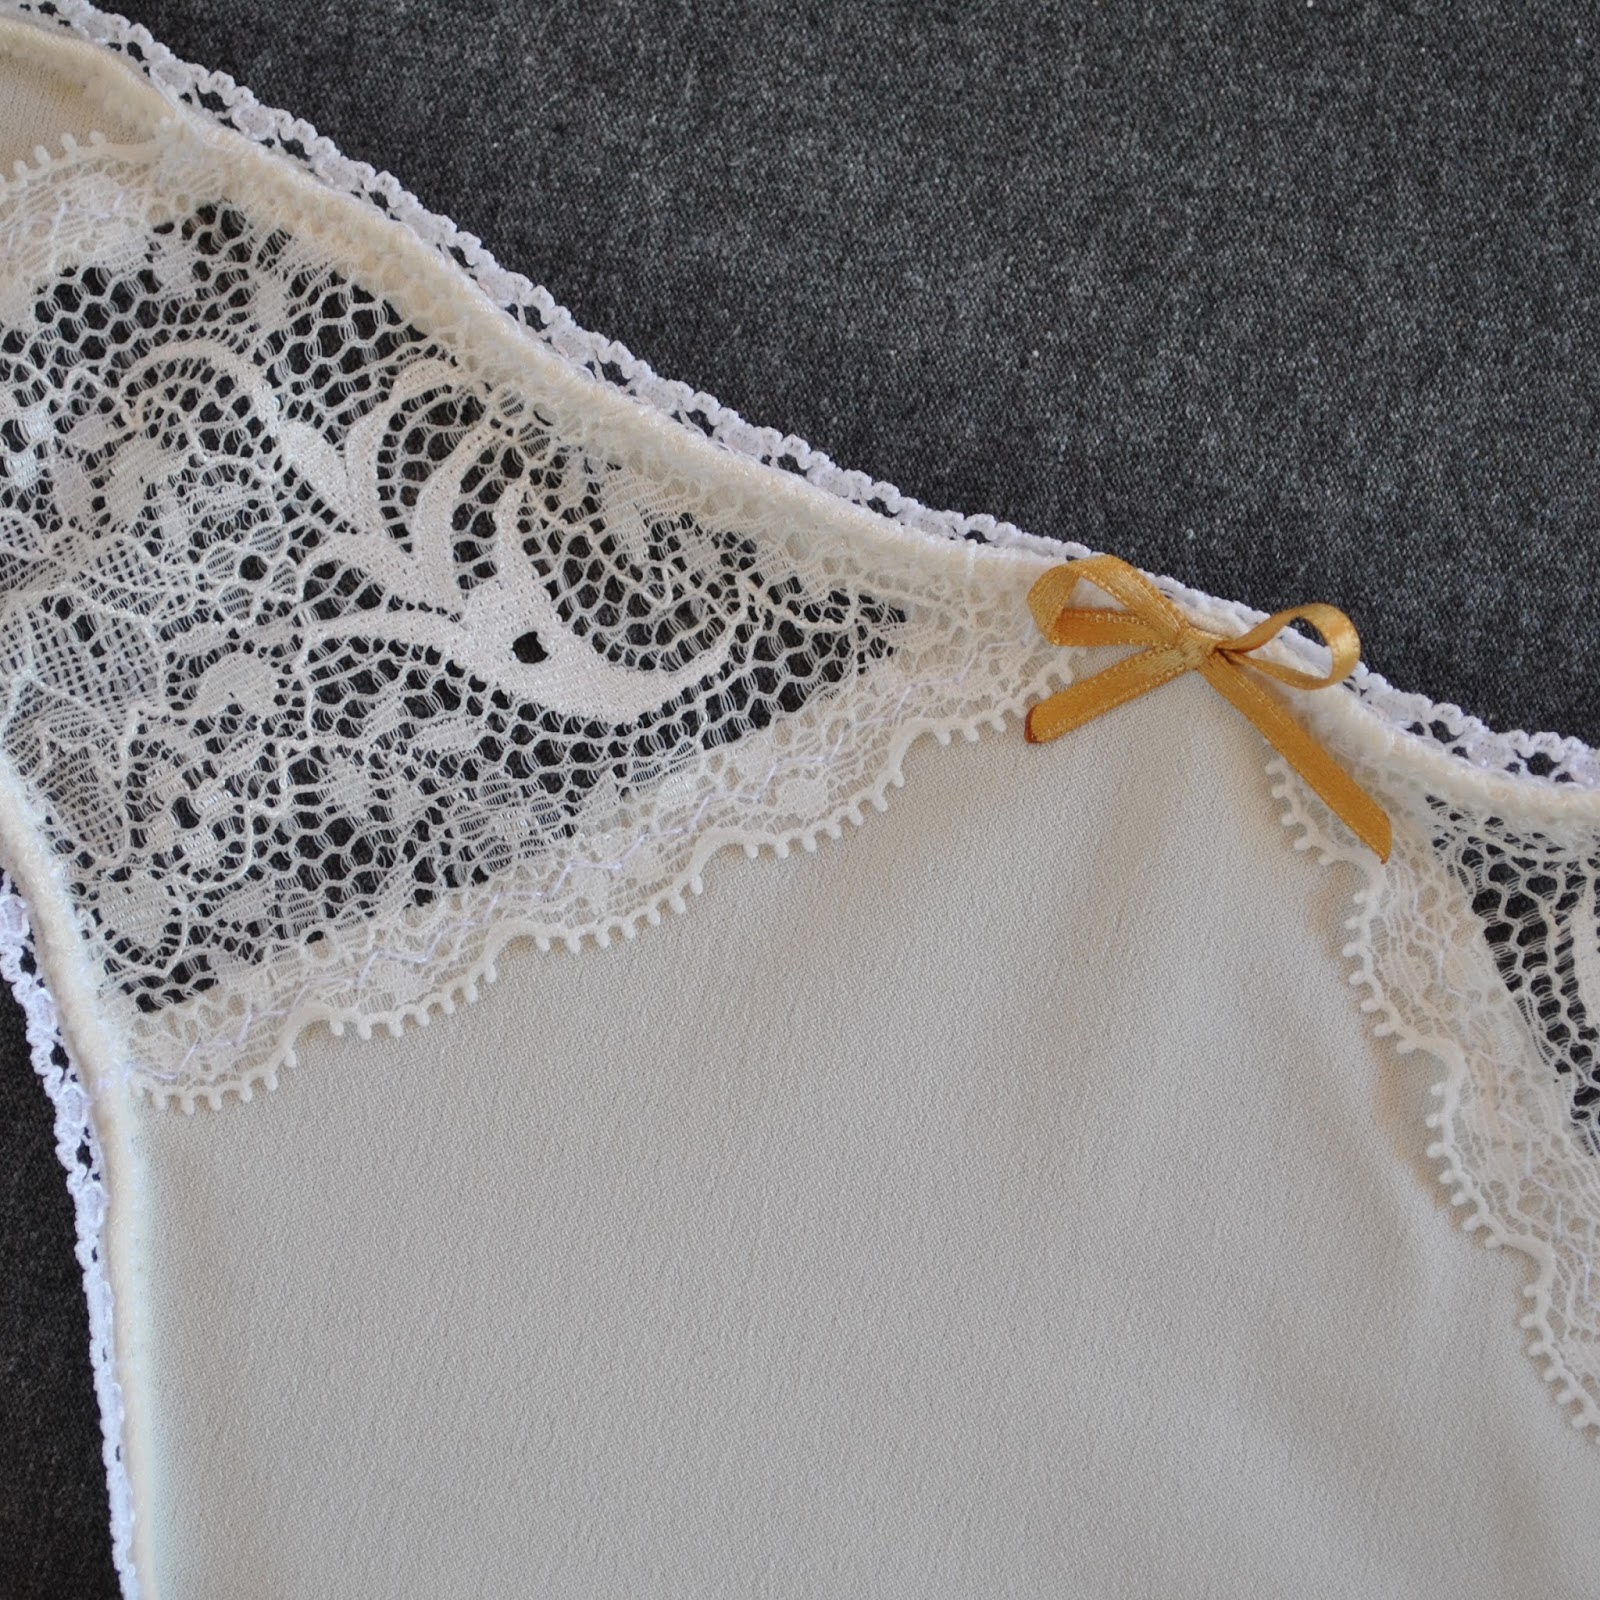
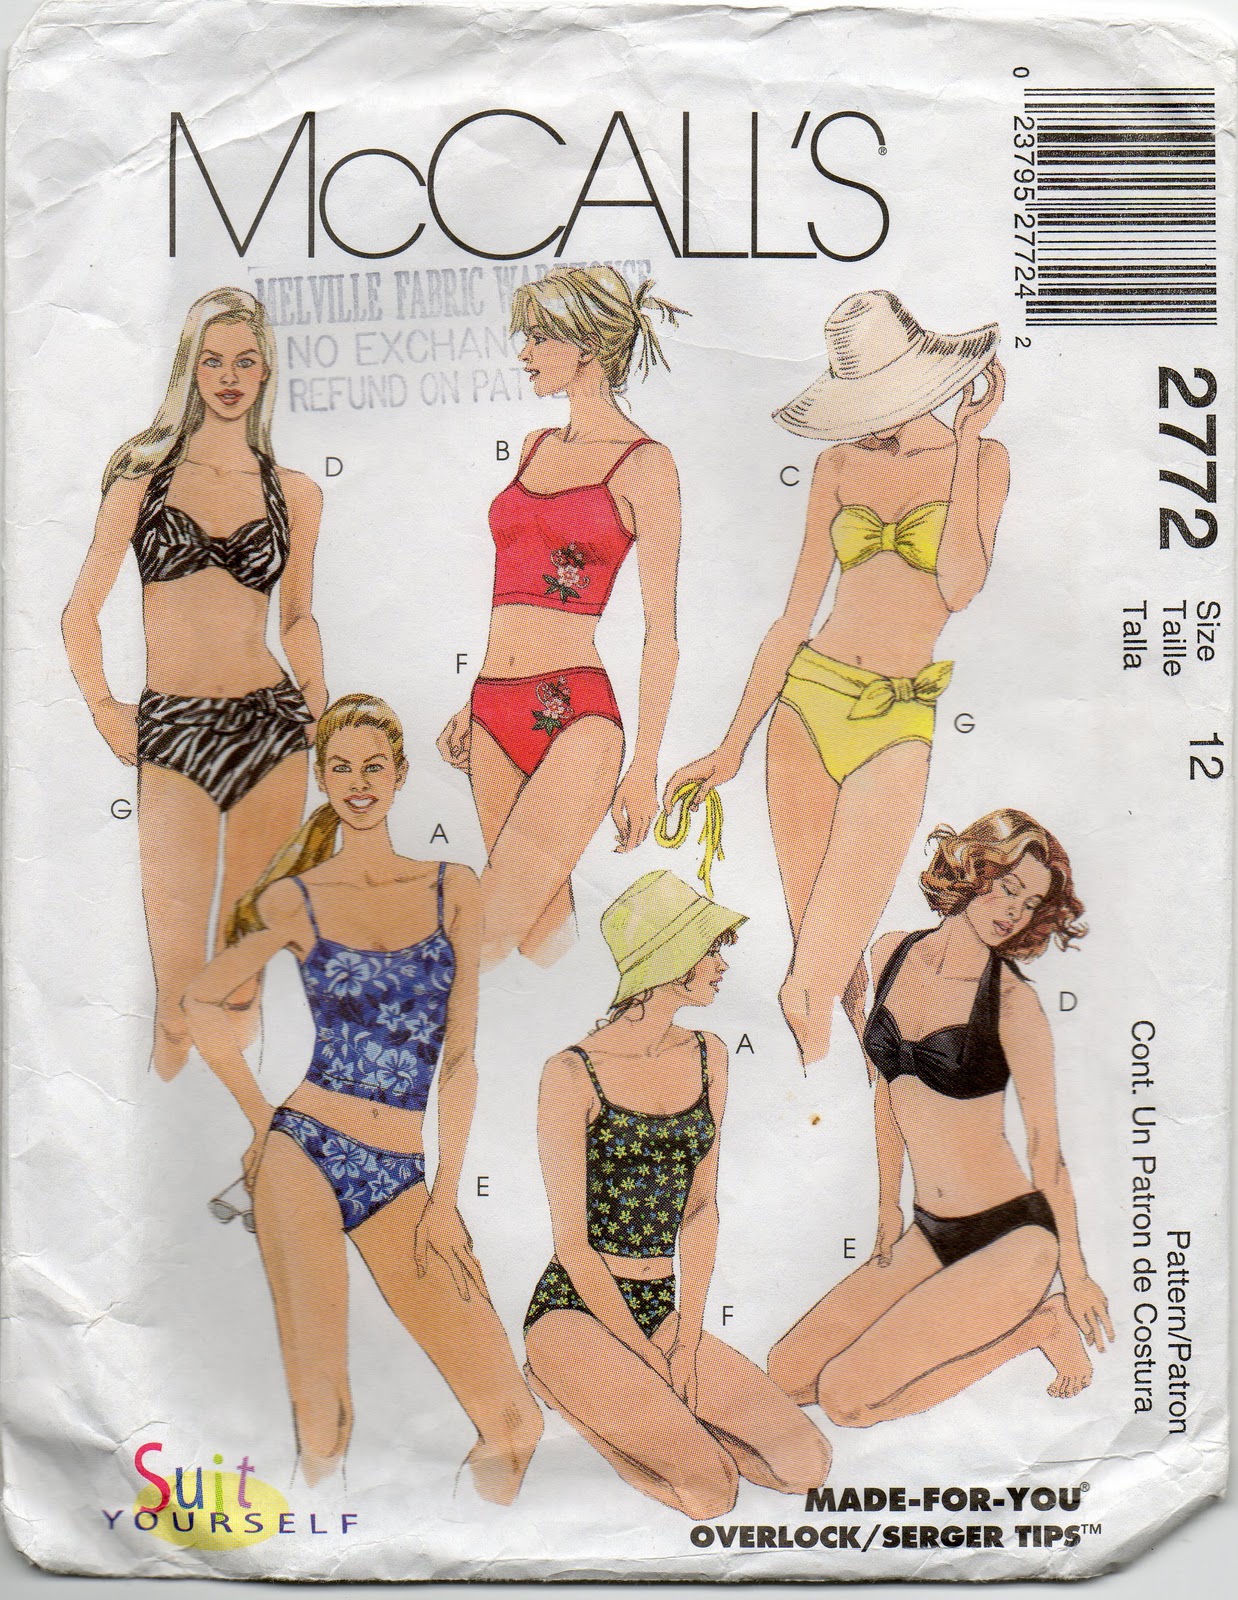
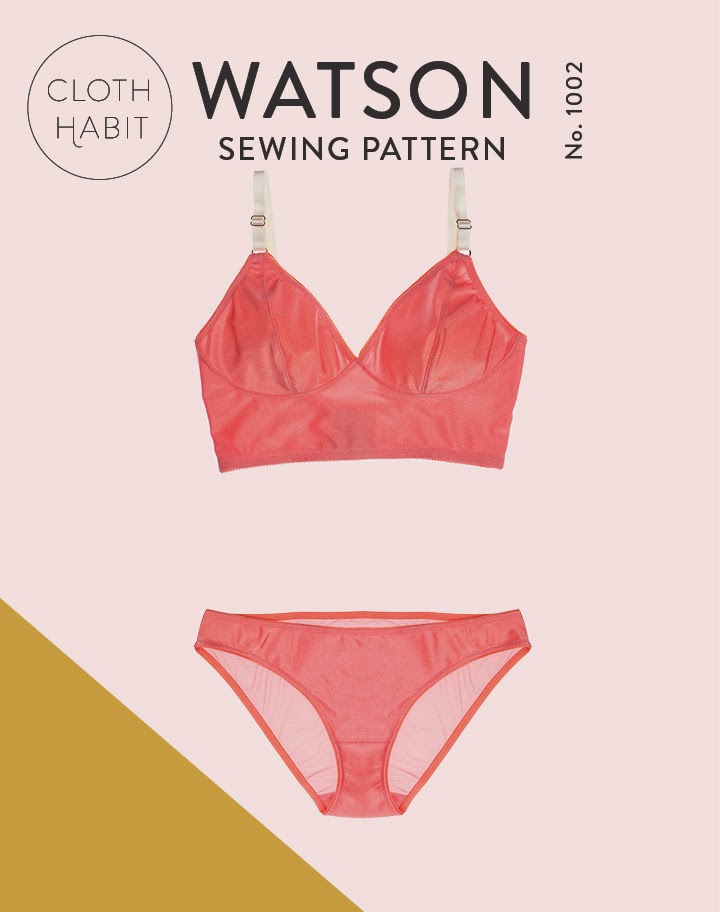
I made the usual two pairs of matching undies to wear with it; at bottom is my old favourite McCalls 2772; above it is the cloth habit Watson knickers, which I also like a lot.  They’re very similar designs, I like wearing both.  The Watson sits lower on the hip and is thus a touch broader in the beam; the McCalls sits at high hip and is is actually cut a bit slimmer.  I added some lace scraps to the fronts for decoration and bravely snipped away the poly-knit from behind; something I haven’t done before.

Fabric notes: Clotted cream poly-knit and gold satin ribbon from Spotlight; my hand hovered over the ivory ribbon but on the spur of the moment I honed in on gold!  I love how it gleams quietly and luxuriously against cream and ivory.  
Ivory stretch lace and lingerie elastic from Fabulous Fabrics.  This lace is 8cm wide, and yes; it works fine and is super pretty.  I mean, no way was I going to walk away and leave that in the store!!!  However my original bralette had considerably narrower lace, 5cm.  I still need to keep my eye out for some 5cm lace so I can someday have another go at that perfect reproduction.  I think the ideal combination would be 5cm wide lace for the straps and 8cm lace for the cups.  But it’s hard enough finding lovely stretch lace even in plain black and/or white/ivory here, let alone specific widths, and in matching colours!  The search continues… 🙂

bralette; copied from an old Lovable design
pinterestmail

I made matching shoes and bag

I’ve finished the next coupla components in my 1 year 1 outfit project!
First up; shoes!
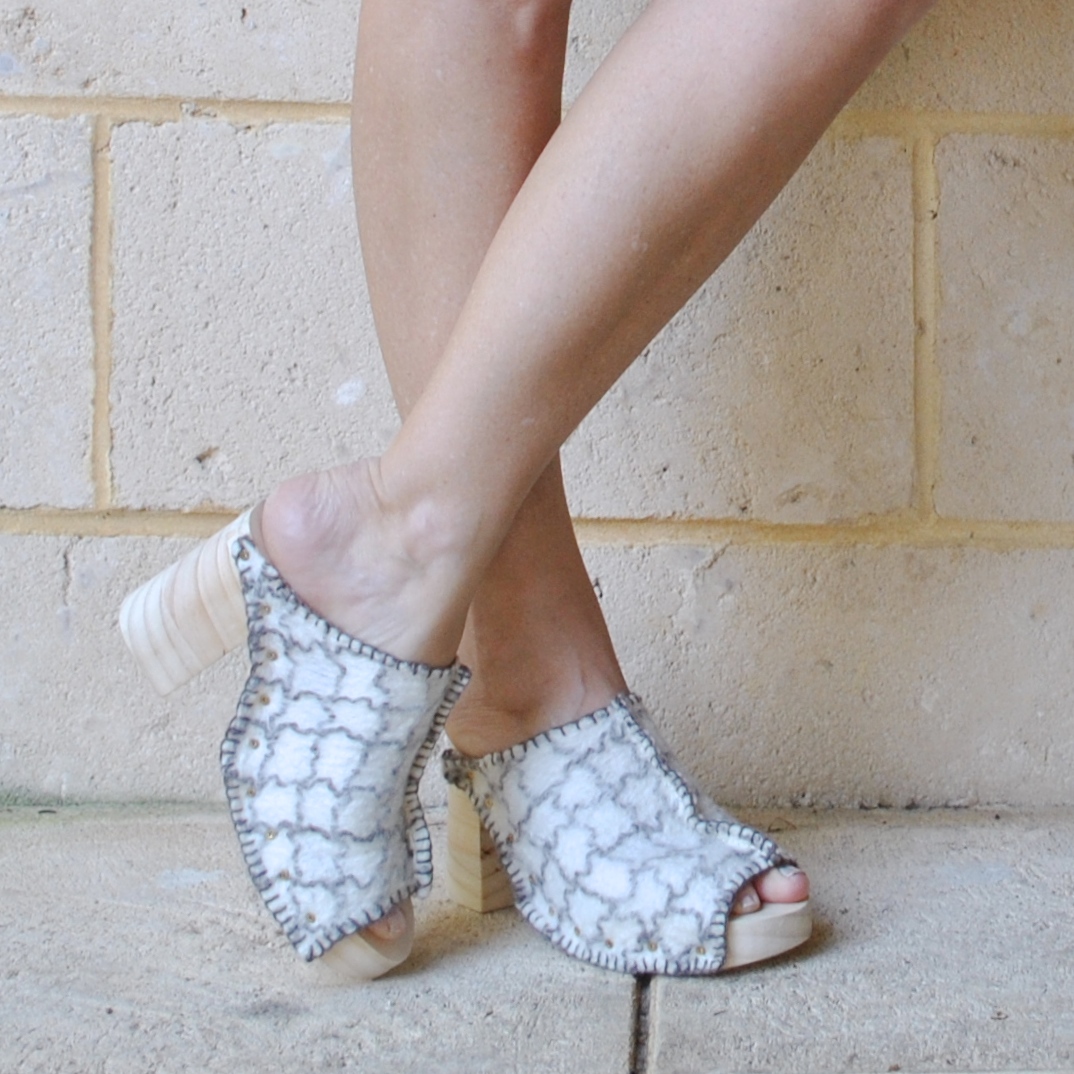
Following the same formula that I used for my previous two pairs of shoes; these have a carved wooden base and a fabric top.  For the soles I used Western Australian pine from Bunnings.
I actually had several pieces of wood from which to choose for this project; my Dad had given me some marri from their block; and I also, albeit briefly, considered jarrah as another truly Western Australian product.   Also, my brother had given me some jacaranda logs from when he had to lop a branch from the tree in their back yard.  But I eventually decided to go with pine … why?  Well it’s the softest, lightest and easiest to work with! and our ancient old bandsaw has finally given out, meaning it was going to be a ginormous struggle to cut the marri or jacaranda or jarrah either on any of our other equipment. These are all pretty rock hard woods, also both marri and jarrah weigh a tonne and you’d only want very thin soles of it for a shoe.  Pine was the path of least resistance.  I have definitely not ruled out using the other wood that I have for future pairs of shoes though.  I just need to get better at woodworking first  🙂

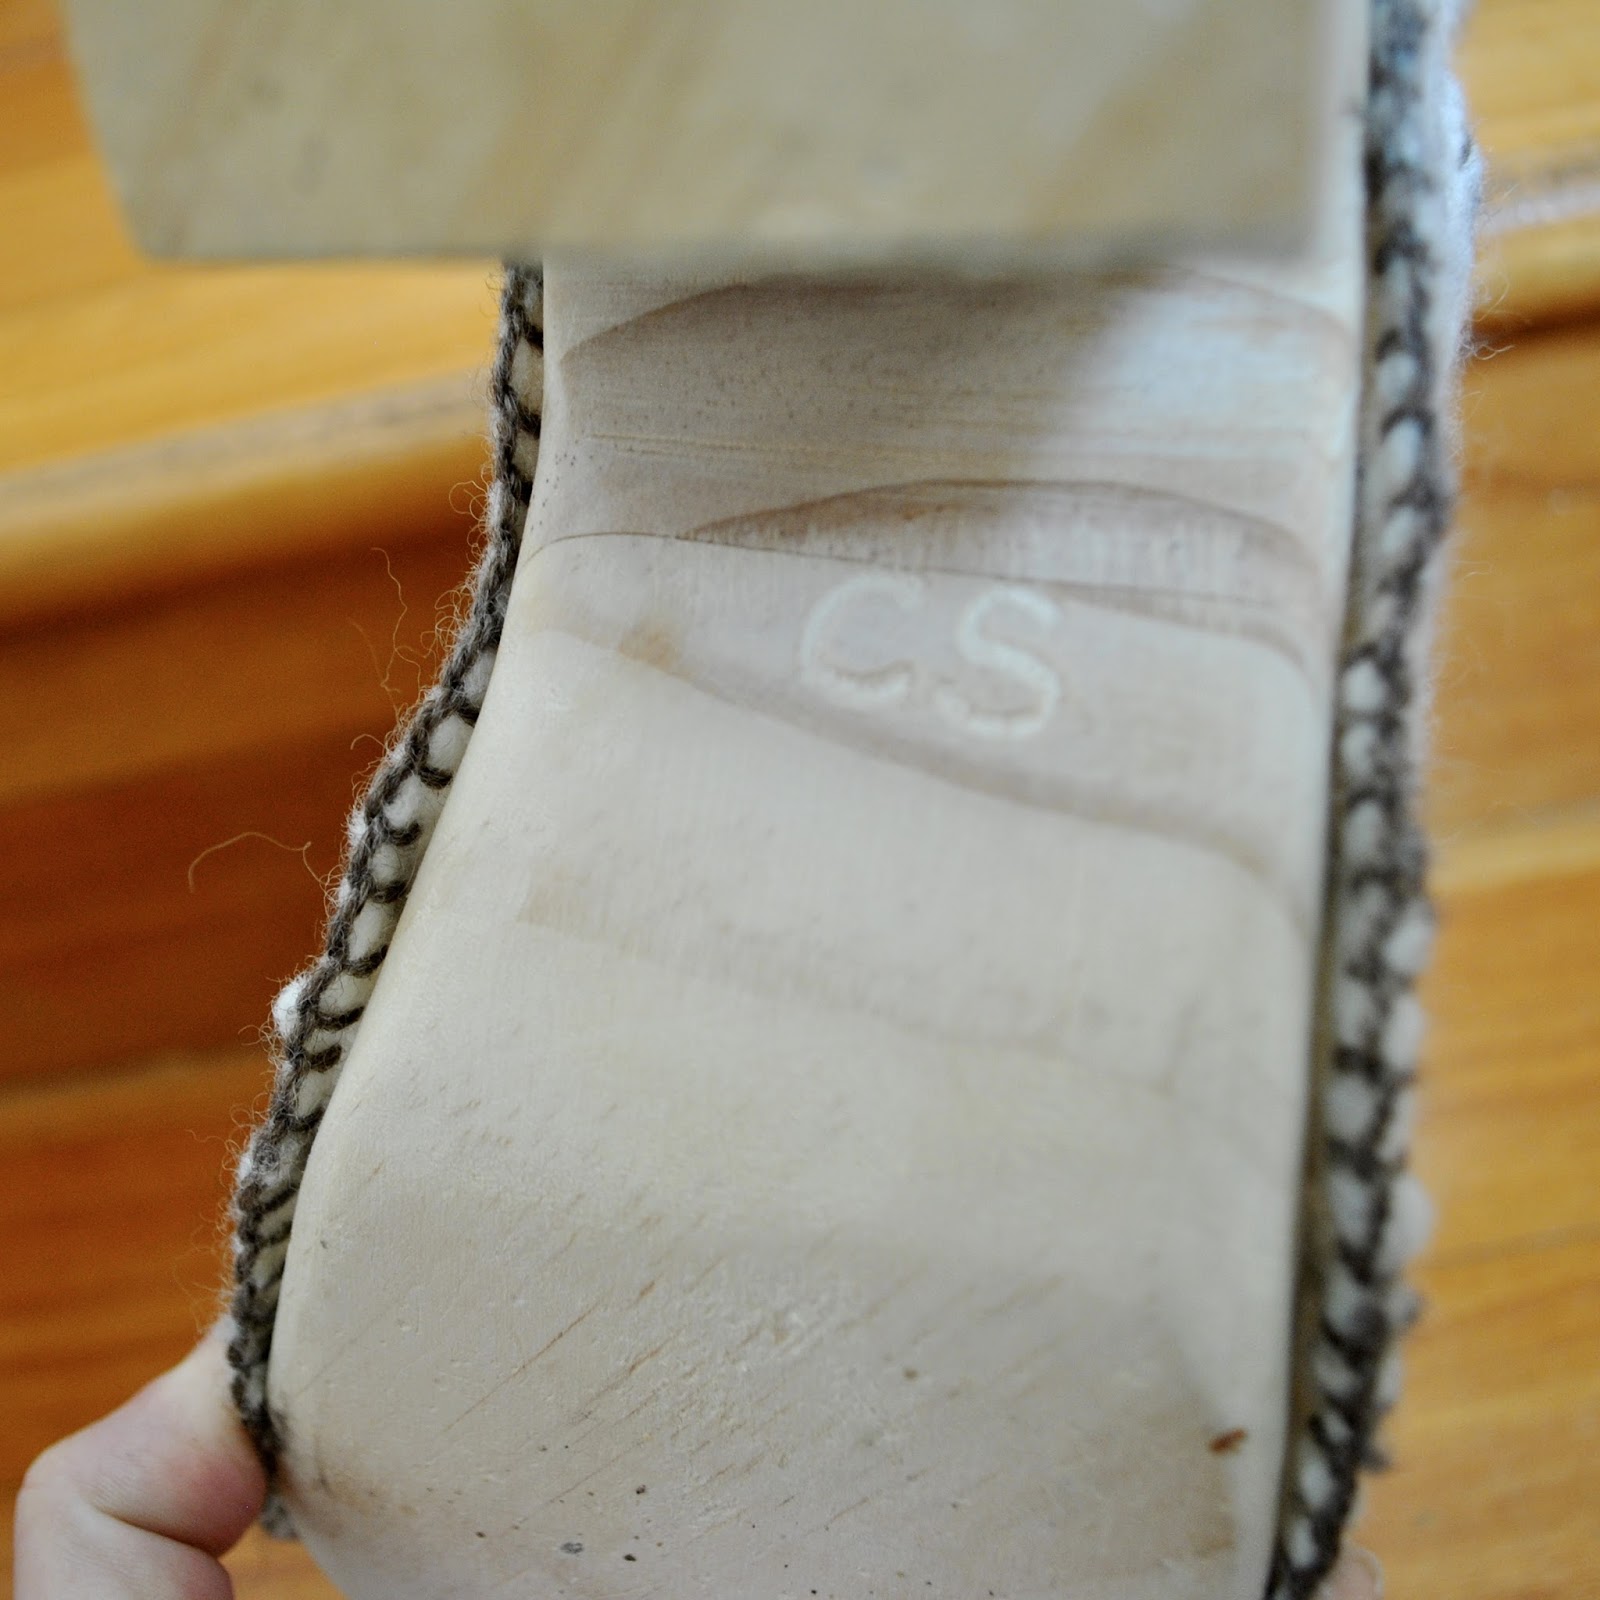
personalised soles  🙂

Craig helped me with the big cutting and I did the finer shaping using the belt sander, and hand-sanding out the heel groove and some grooves for the ball of my feet.  I also carved my initials, just for fun  🙂
The upper is 100% Western Australian Merino wool felt; made from natural, undyed, white fleece and natural, undyed, handspun black sheep’s wool as outlined in this post.  By the way; I incorrectly stated in my previous post on my dress that the wool I used for the felt was Corriedale, and I have since discovered that it was pure Merino wool, sorry!  I’ve corrected the error in that post now.  And am actually rather thrilled to be wrong, to be honest!
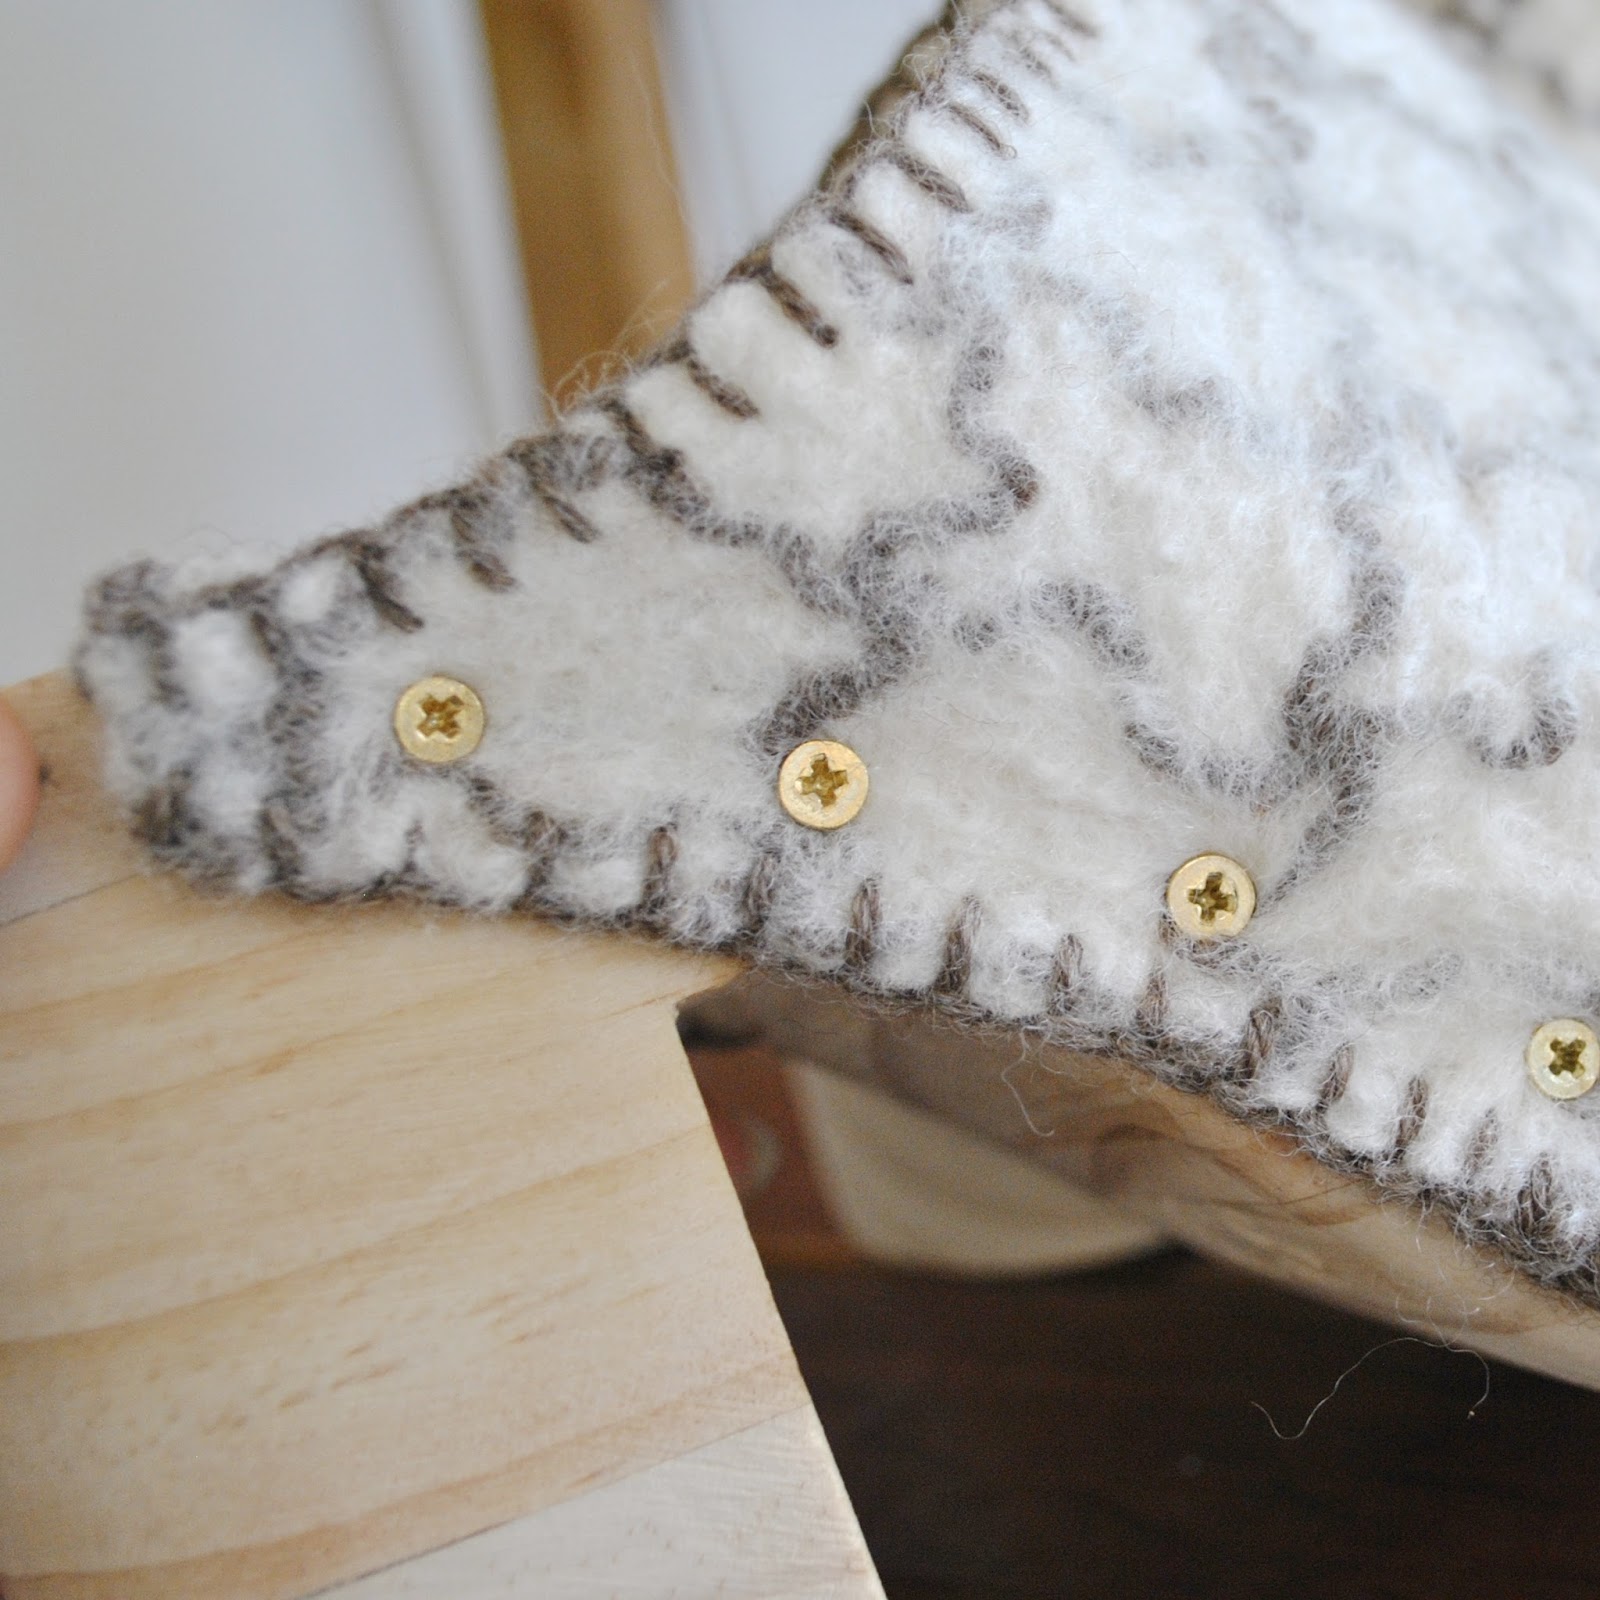
Anyway my black and white “plaid” was the thickest and strongest of the felts that I made, so I kept it for these more demanding of my outfit components.  Sadly, I realised that it’s still not particularly sturdy and is probably going to stretch out pretty quickly  :((  But I’ve devised a devious plan to cope with the inevitability of The Stretch, mwahahahaha… see that central seam running right down the top/middle? well as it stretches out I can just unpick it, cinch in the top seam a bit, trim and re-stitch.  Simple!  And when it has stretched out past the point of saving, which it will; then I can easily unscrew the screws from the sides, remove the whole felt top and substitute something sturdier like leather.  Hopefully I can somehow find a nice piece of thick WA leather, so that my shoes will still be eligible as a 1 year 1 outfit piece!

OK: confession time… I did have to cheat on a few minor parts of this project; the glue holding the pine layers together is made in NSW, and the screws holding the felt upper to the wooden soles are made in *embarrassed whisper* China.  I did investigate making these; and concluded that to make my own local glue and “nails” is both possible and achievable.  You can make your own glue using boiled animal bones, sap, or milk and vinegar; and I could have made wooden “nails” using jarrah or pine dowel.  And originally I was seriously gung-ho about doing just that; until my Dad and my husband advised me to get real.

You see, the wooden soles are honestly such a hugely time-consuming and difficult component for me to make that I really really wanted them to hold together firm and fast and be perfectly secure; and NOT EVER fall apart.  A rank woodworking beginner like me could all-too-easily destroy my carefully hand carved soles trying to ram wooden dowel “nails”, with hot homemade glue dripping everywhere; and even then if I was miraculously successful; they could later on just fall out or snap at a moment’s notice.  Which, according to my experienced father and my husband; is pretty darn likely.
And I would, um, yeah; be sad.  Understatement of the year, right there.
Anyway, I went the route of properly manufactured wood glue and steel screws…  but I just want to say, for the record, that I did investigate the 100% hardcore approach, and gave it serious and careful thought.
And I do not regret not going there either, not one little bit, sorry!  You can only do so much!
What is more! I will also be gluing some thick rubber to the soles to protect them from damage.  I haven’t done that yet, I plan to “show” them first in this virginal state.  But I will.

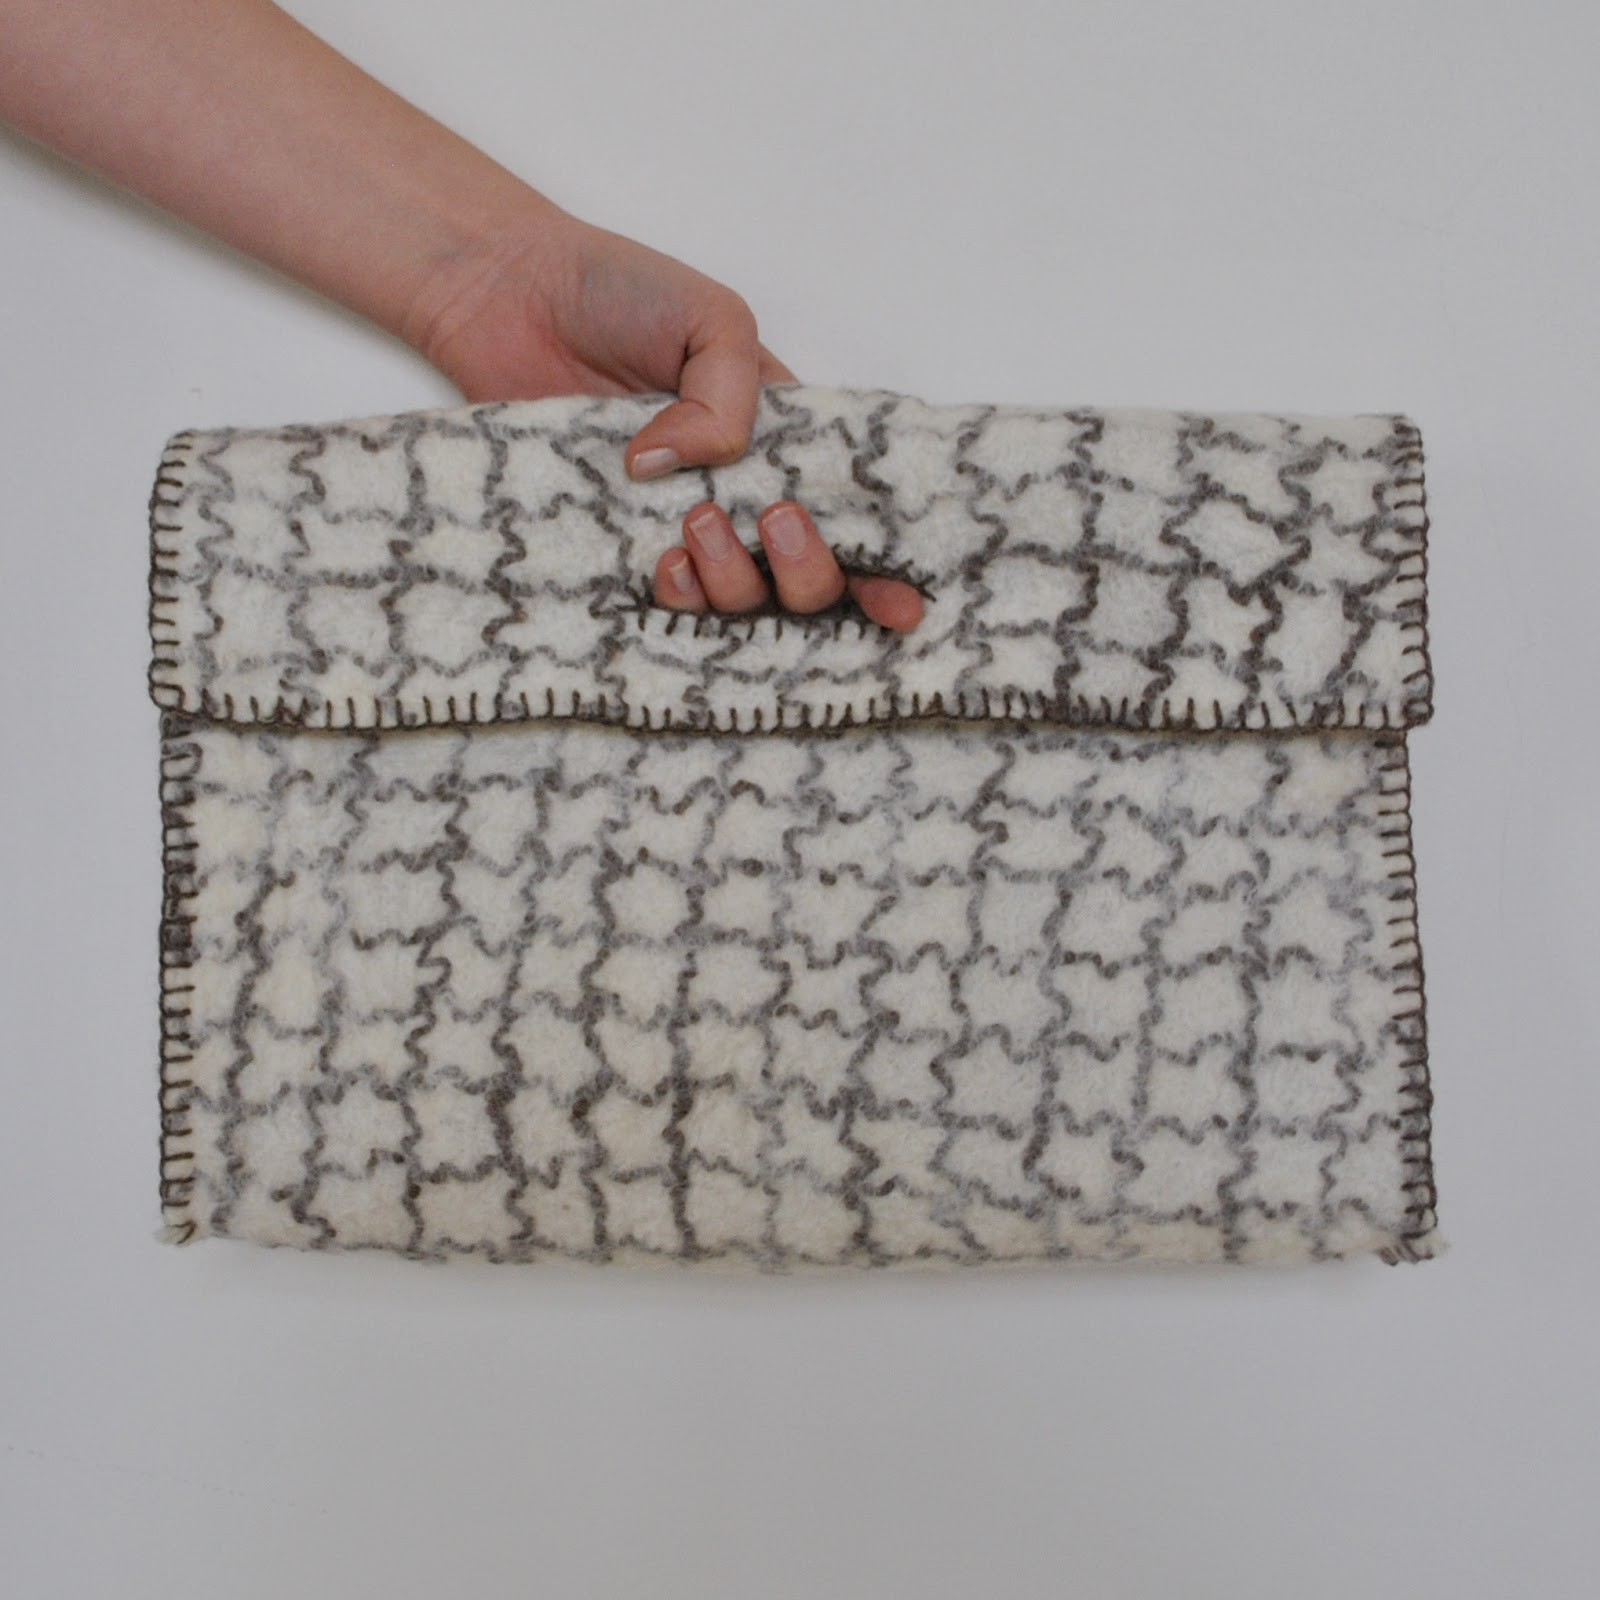
Exhibit two; a bag!

And it perfectly matches my shoes, hehe.  Isn’t that the old fashion must-do advice for a lady from the 50’s or something? I seem to remember reading somewhere that a lady would never dream of sashaying out with non-matching shoes and bag.  Ancient stuff, I know; we definitely do not adhere to such a strict dress code anymore!  But I had enough felt for it so here I am, totally regressing to the standards of a previous era.
ooo yea.
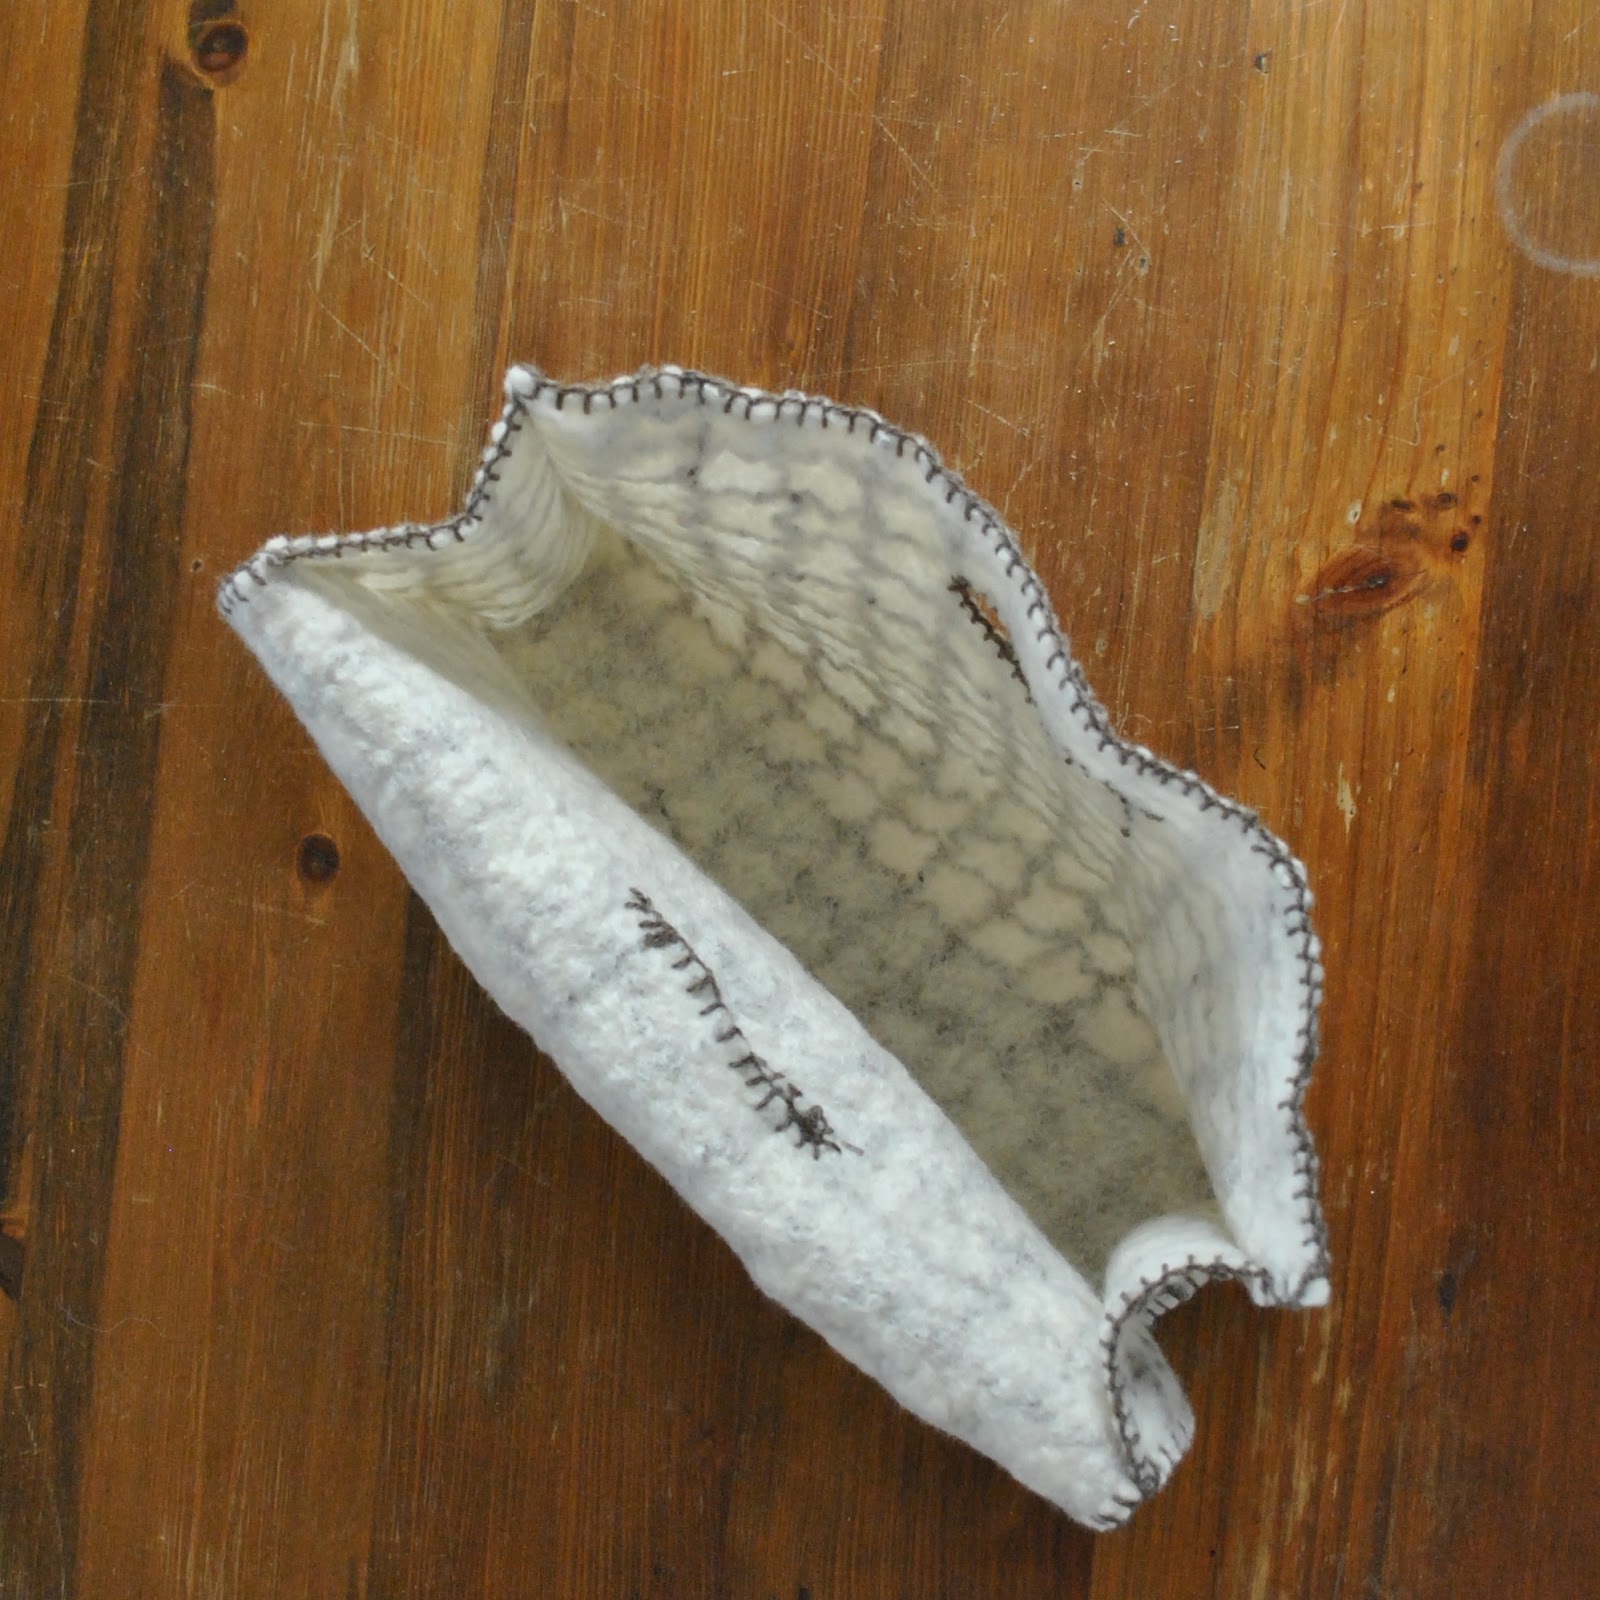
It’s just a simple, um, something-bag?   A sort of rustic briefcase?  I don’t know the correct term to describe this kind of bag.  A fold-over, almost-envelope, with rectangular side gusset thingies to make it box-like.  It’s all held together and decorated with blanket stitch.  For the handhold; I cut and blanket-stitch edged three slits that line up with each other through all layers.  Ta da!  Simple, but it does the trick.

I like the way the felt is thick enough that it can stand up by itself… just.
I am toying with a few extra components for my 1year1outfit project, but minor things that may or may not come to anything.  However, they may; fingers crossed.  If all else fails, at least I do have a complete outfit now!

pinterestmail

snuggly chocolate-y ensemble

True to form, right at the beginning of spring I’ve made a rather wintery ensemble for myself.  Typical!  😀
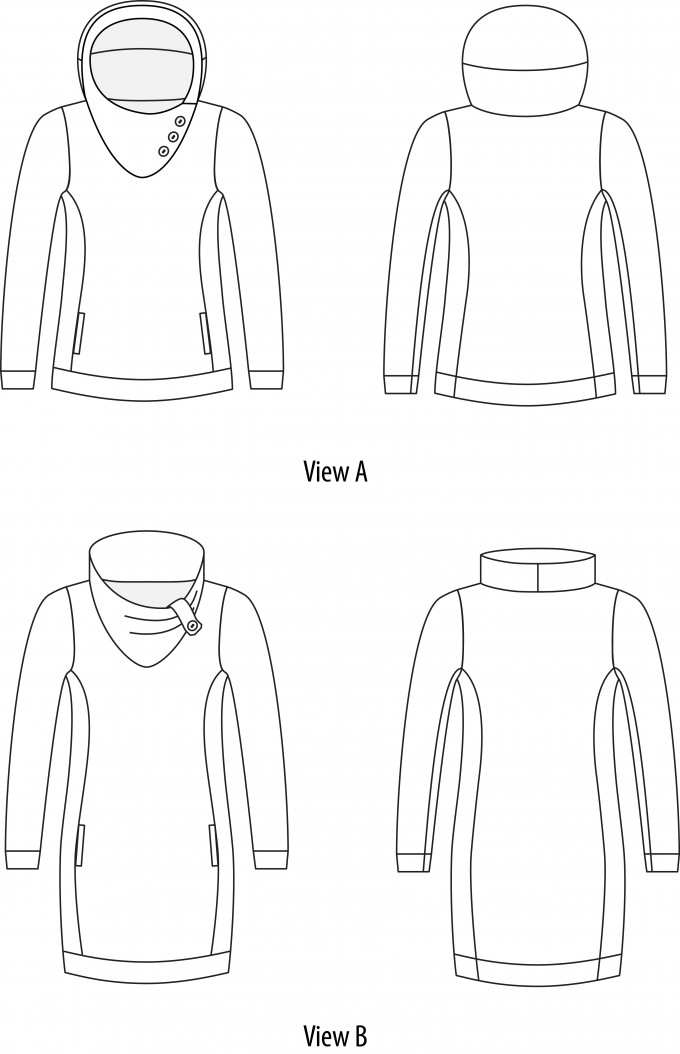
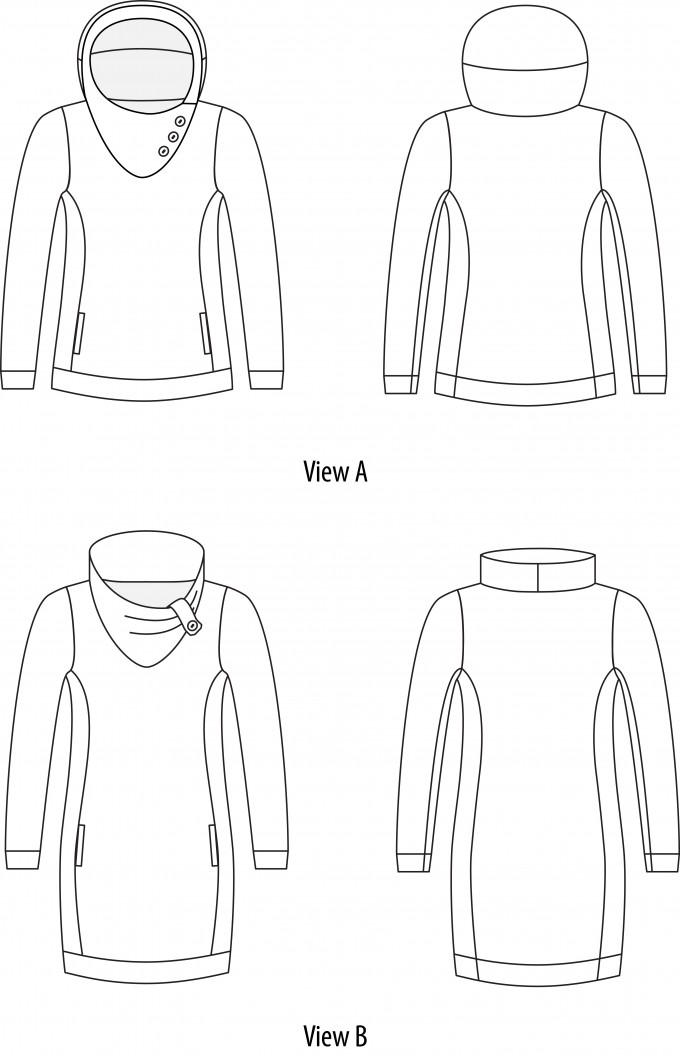
No, actually Mari from Seamster Patterns contacted me again asking me to take part in the second and last part of the SewIndependent month and as luck would have it Paprika Patterns Jasper sweater dress was one of the patterns available.  I’ve had my eye on this pattern thanks to Megan’s and Sue’s versions.  We’re all Perth girls so how fun would it be if we all met up wearing our matching Jaspers, hehe.  For my Jasper, I decided get some of this lovely chocolate-brown marled knit from KnitWit, which I have also had my eye on for some time but been unable to justify the purchase.  It’s gorgeous stuff.  Soft and springy and slightly fluffy and ever so snuggly.  With yet another little bout of luck, I discovered it was on sale for half price.  The advantages to shopping at the end of the season!  Booyeah!!  *does an almighty air fist pump, although only mentally because the lady in the store would have thought I was bonkers*
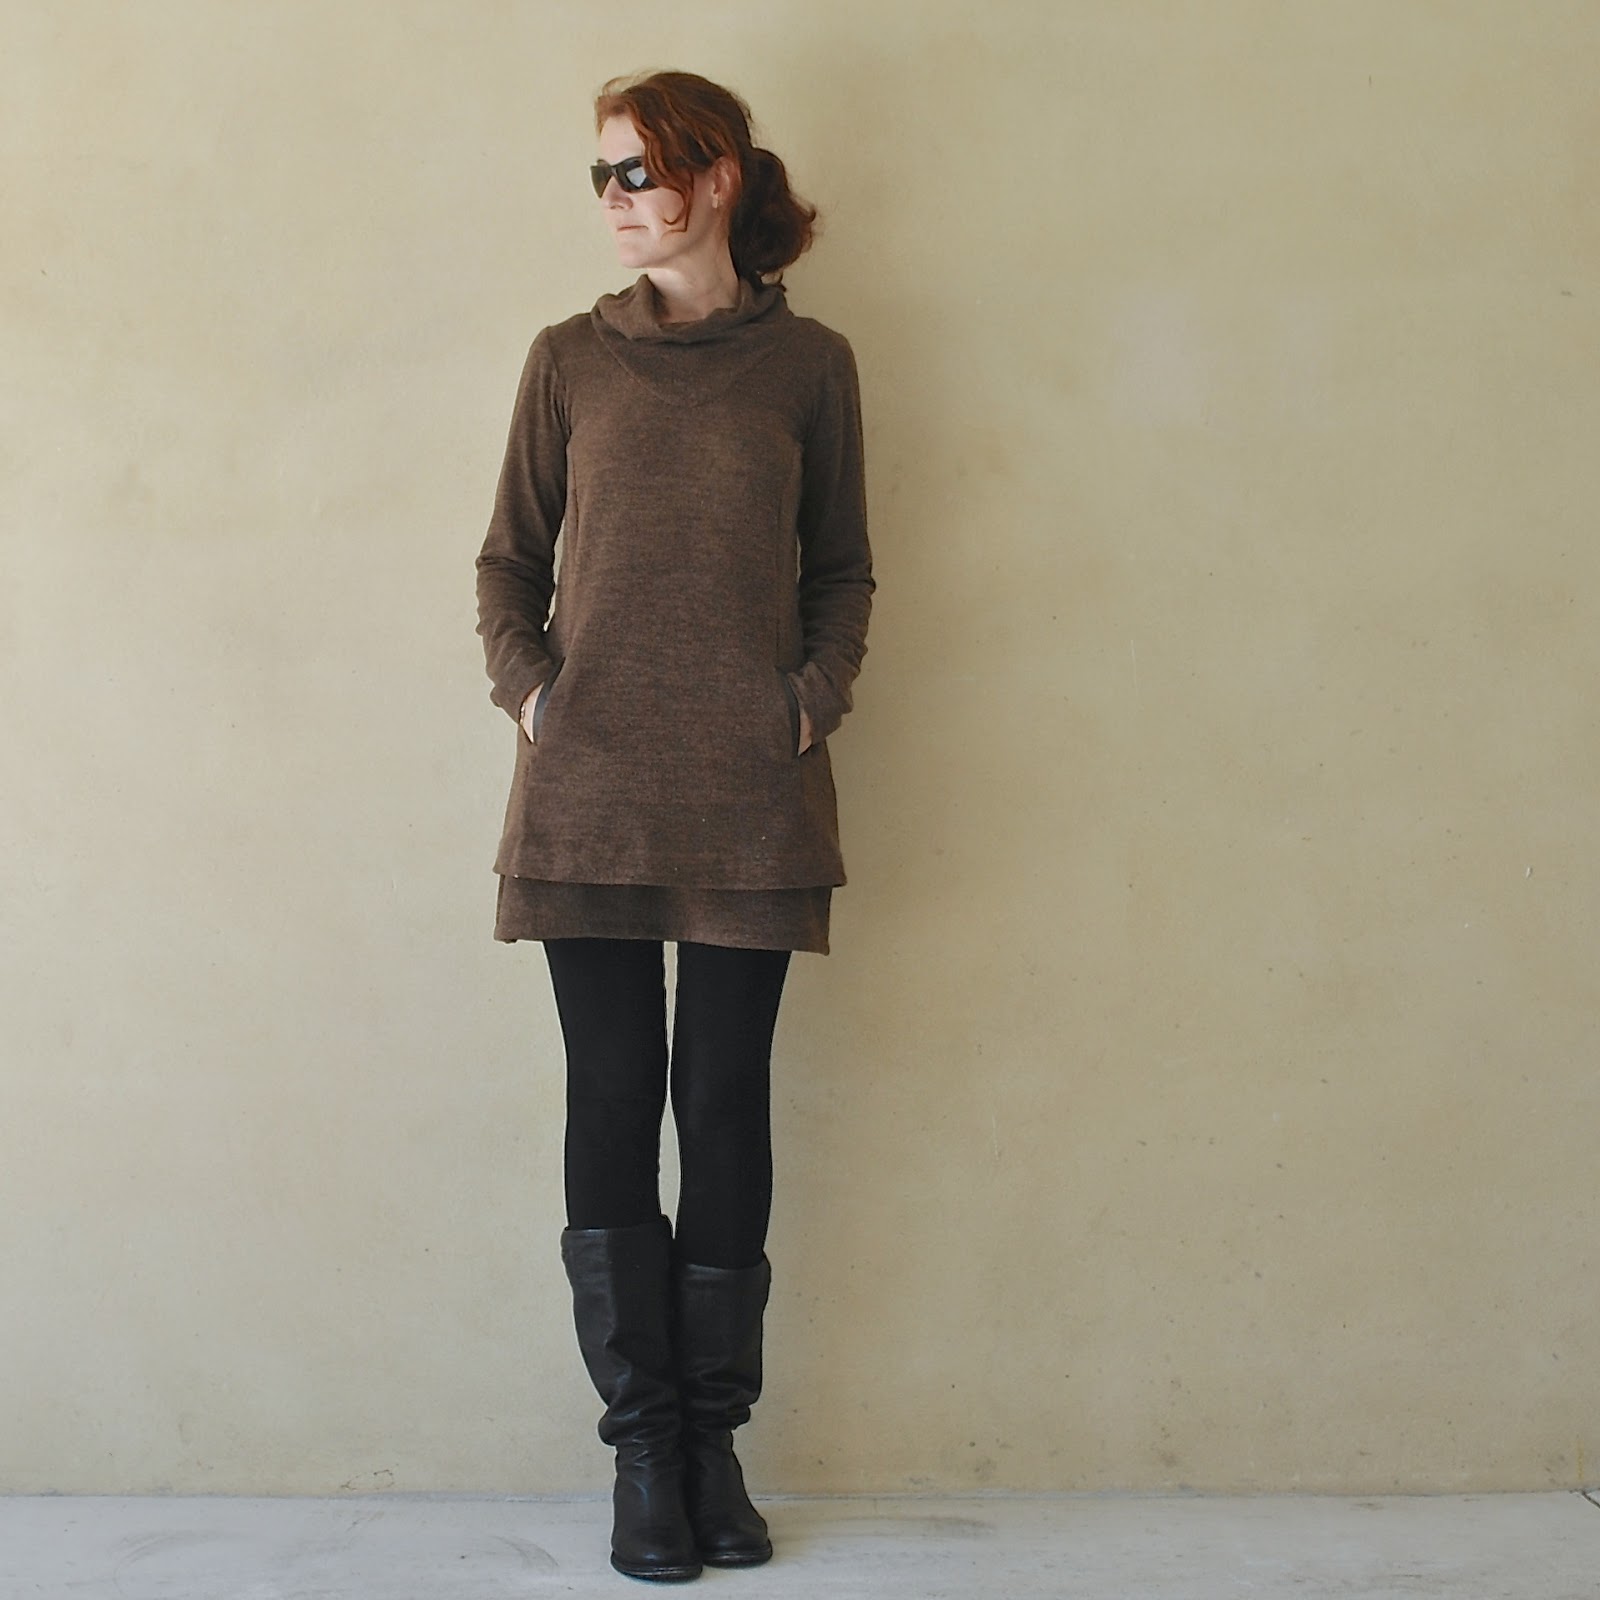
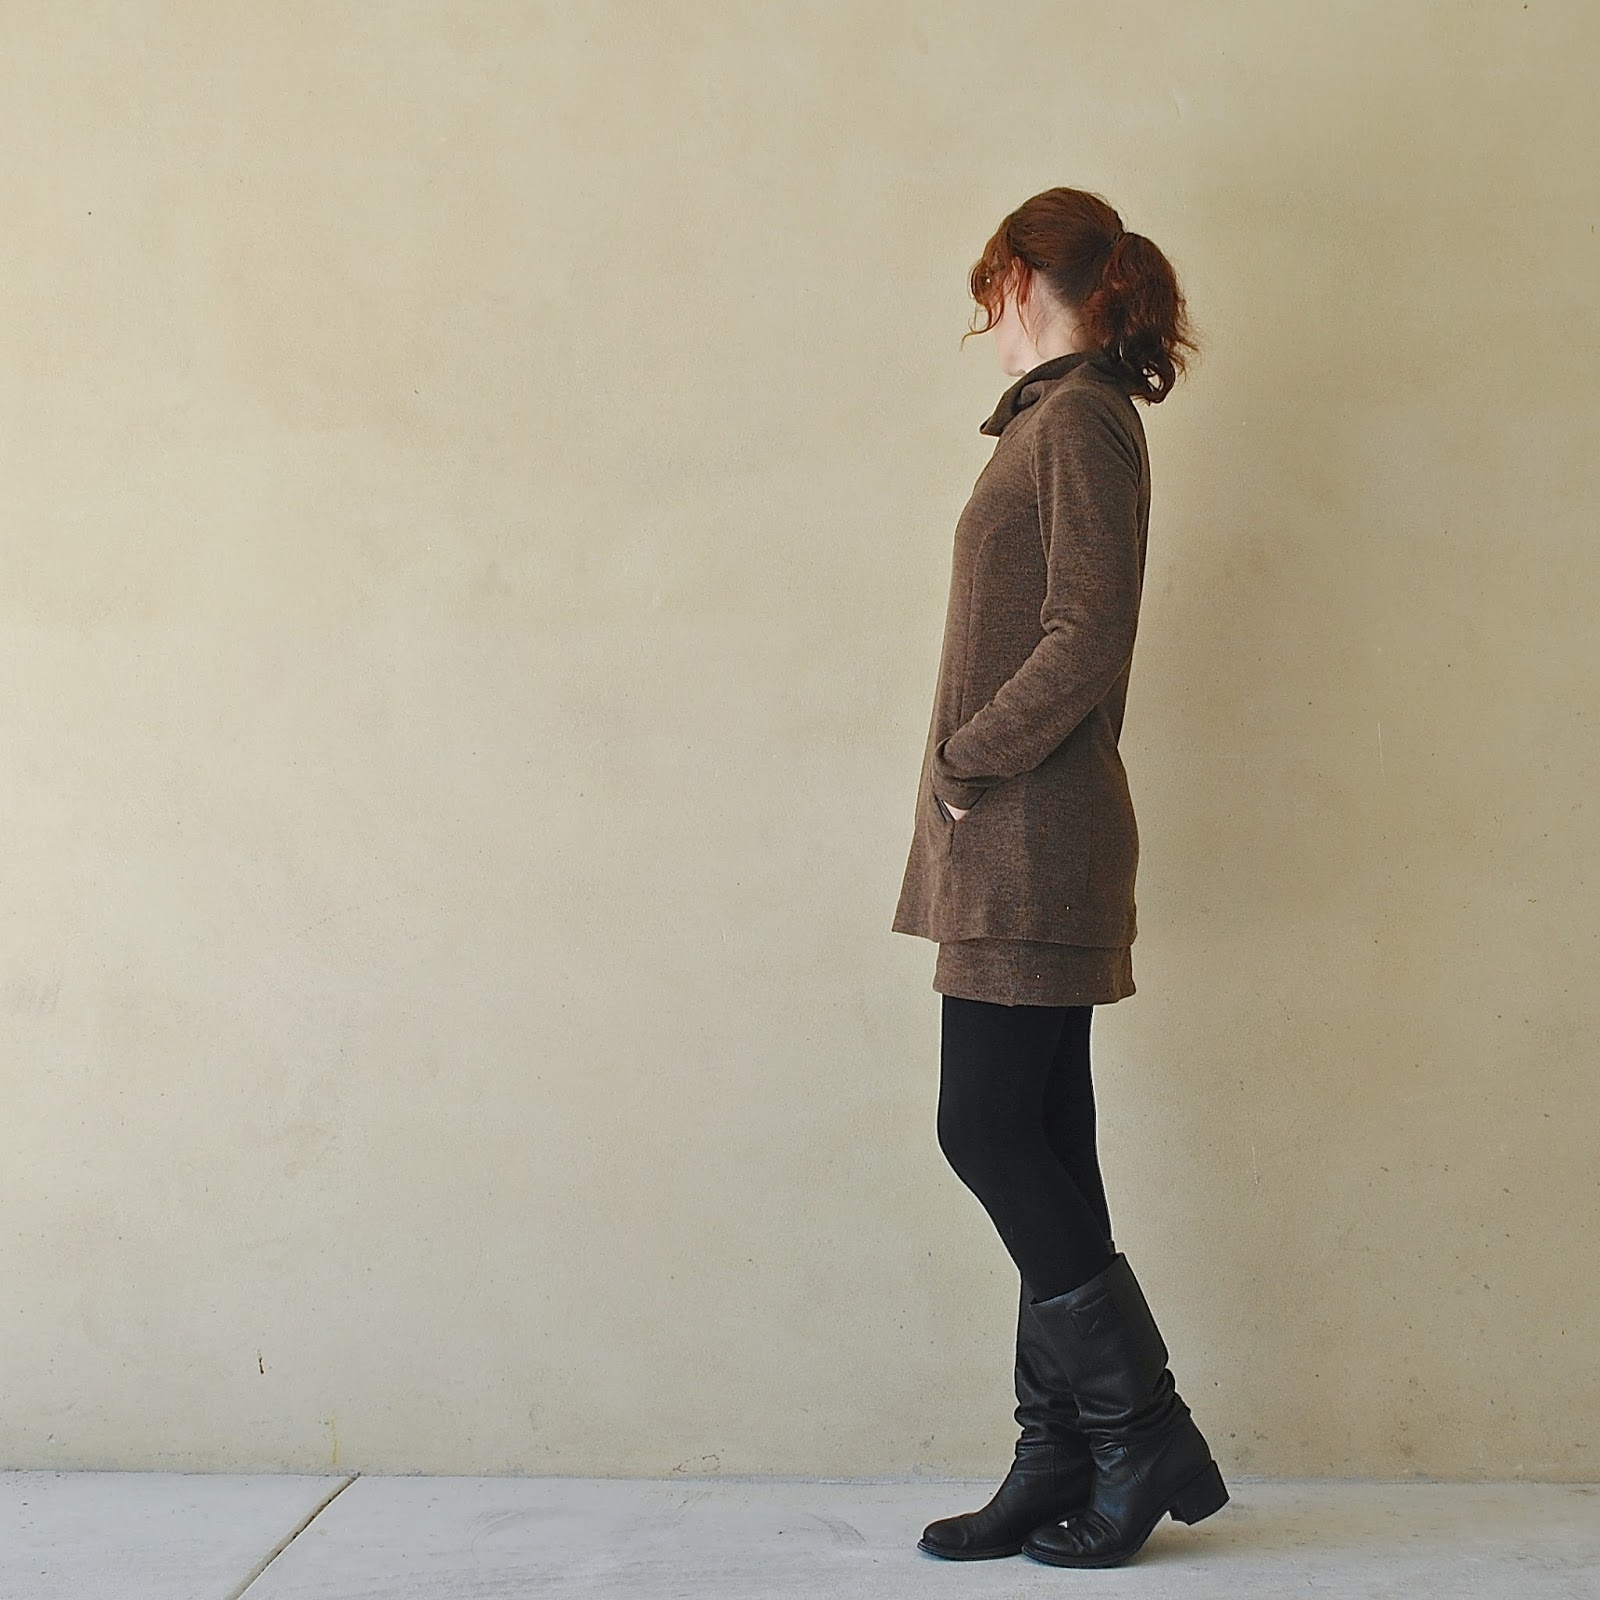
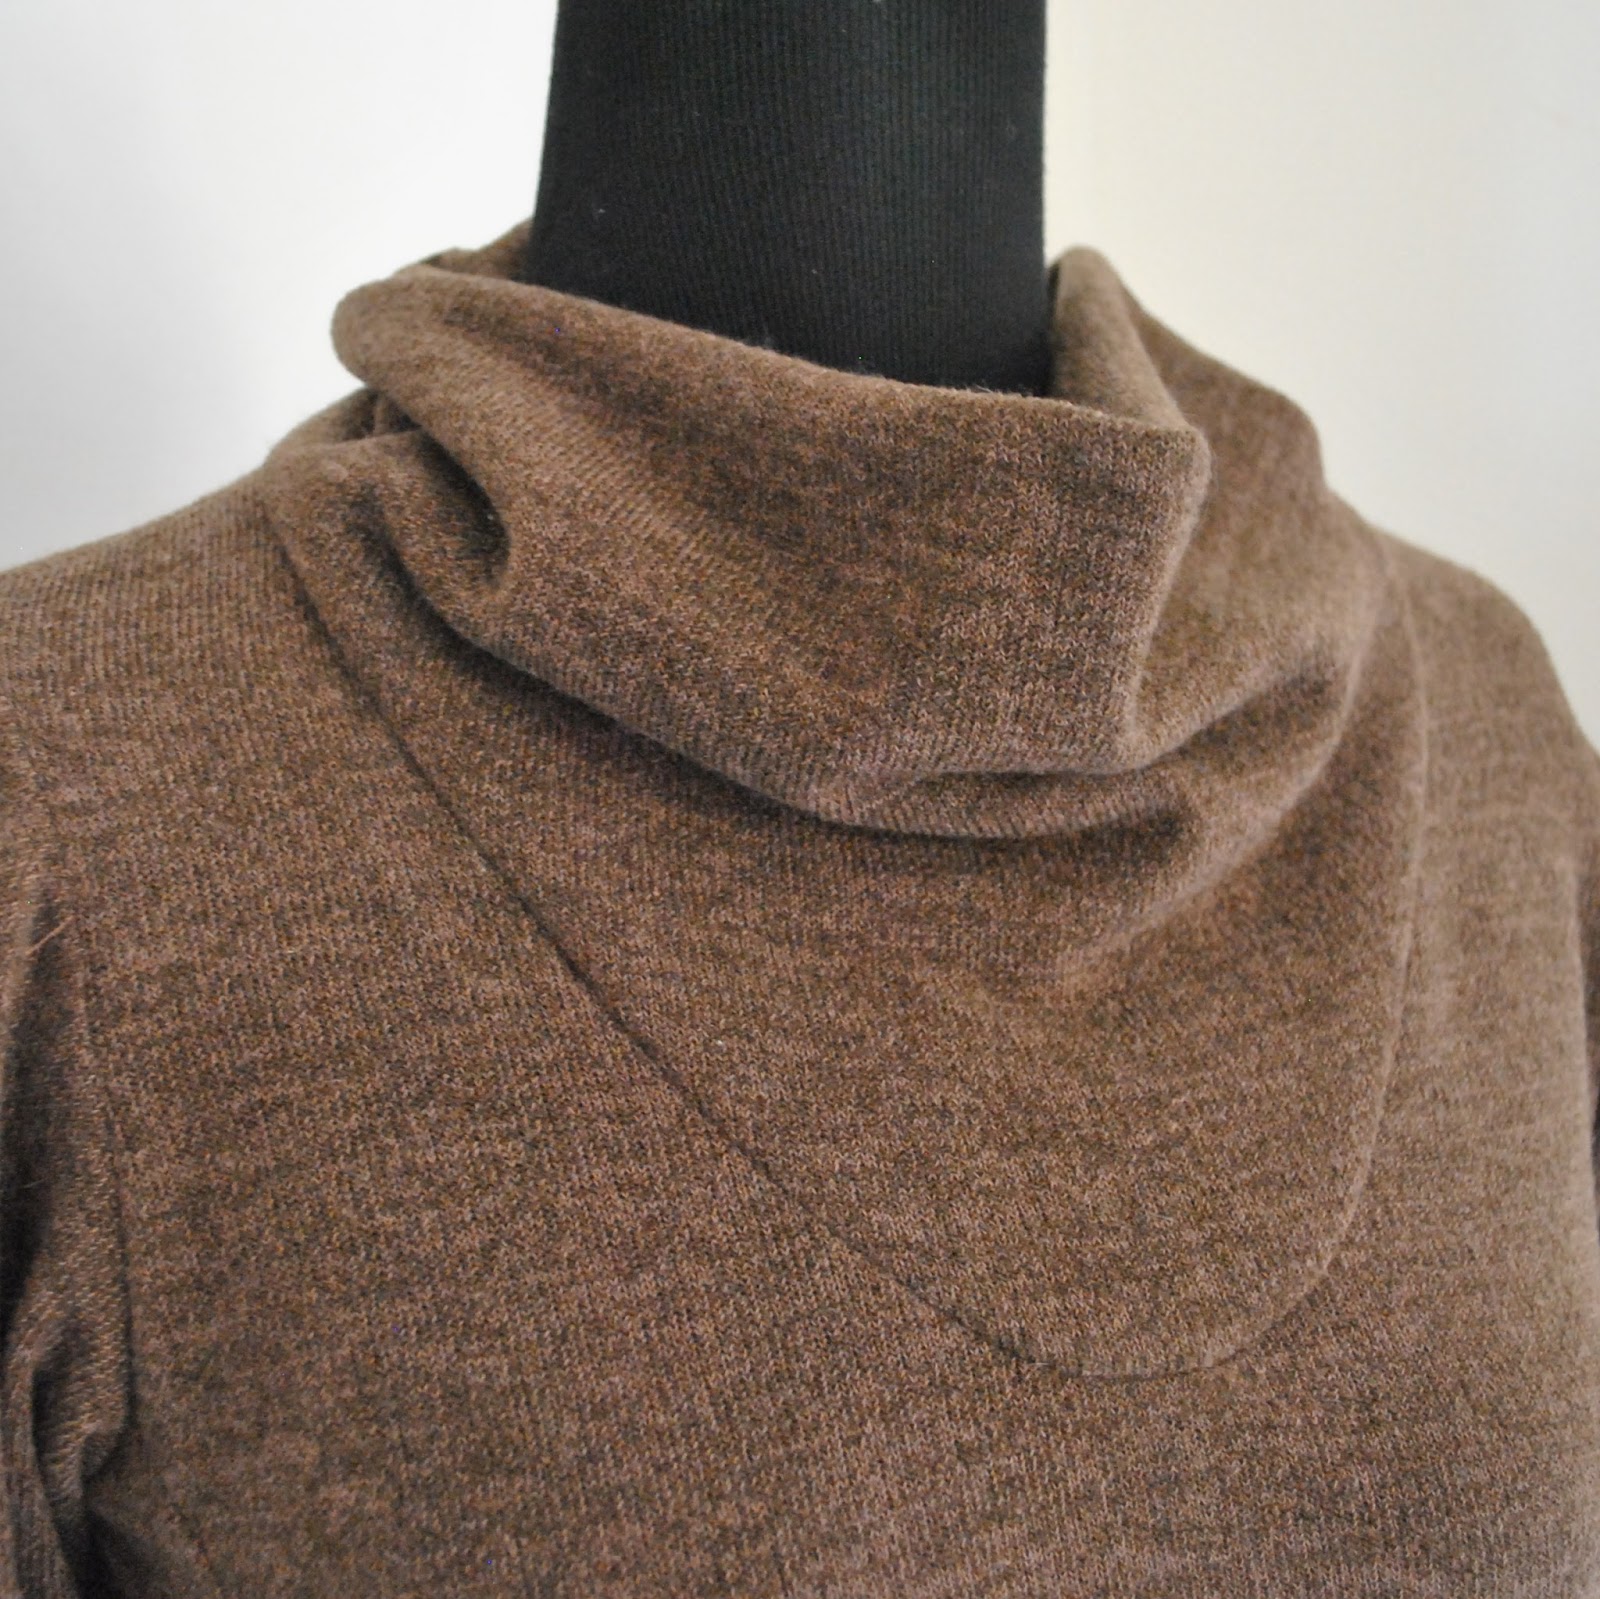
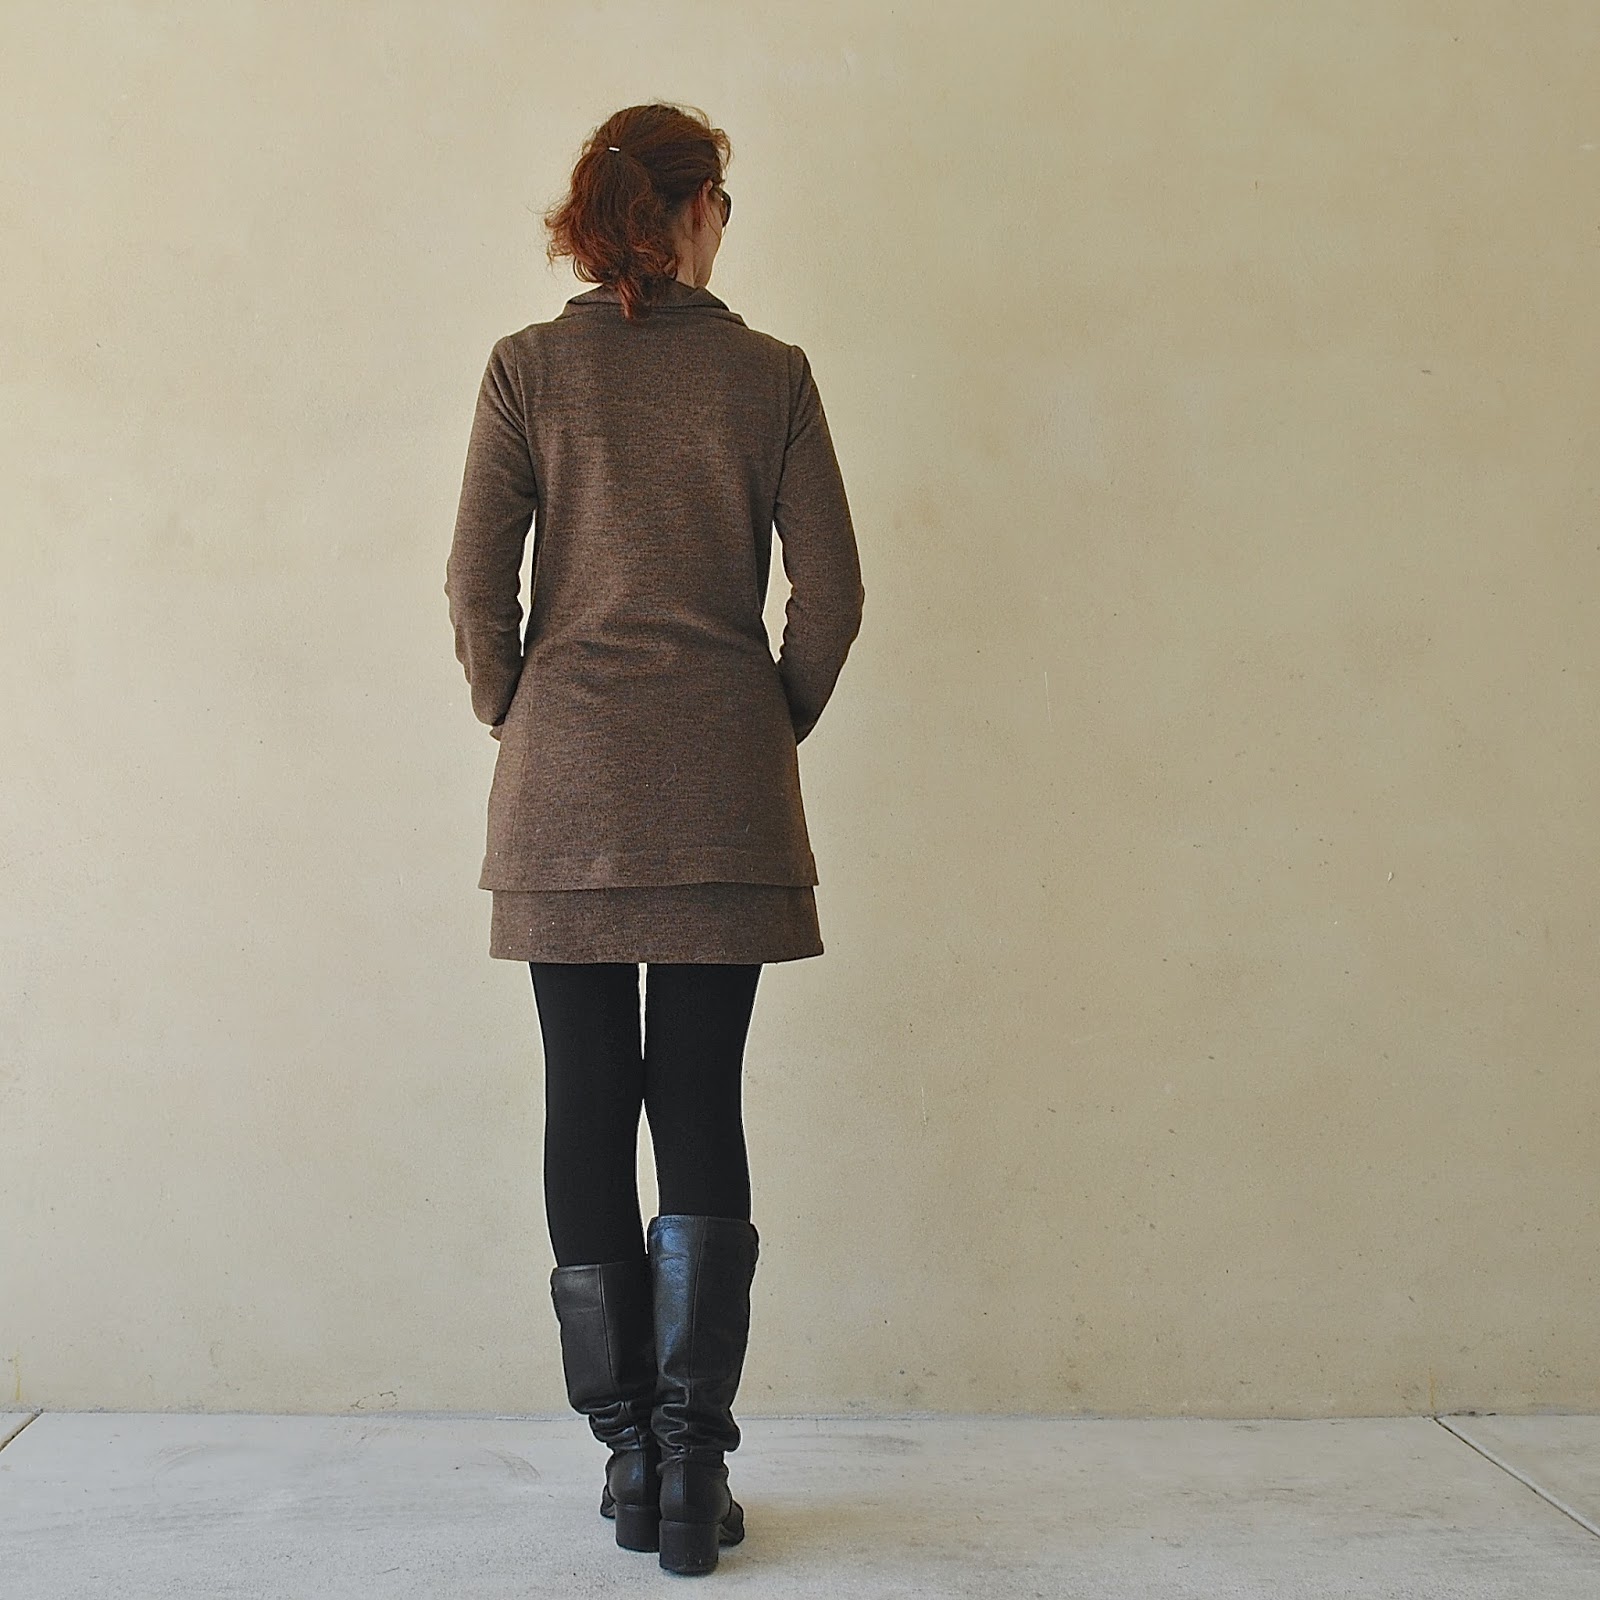
I made up the dress version with collar, and left off that buttoned placket thingie.  I was a little doubtful about how the curved-in nature of the skirt would look on my pear-shaped self, and so I cut the pegged portion edge of the pieces from hip level down to flare out straight and slightly A-line, rather than curving inwards.  I think this silhouette is far far better on me.  

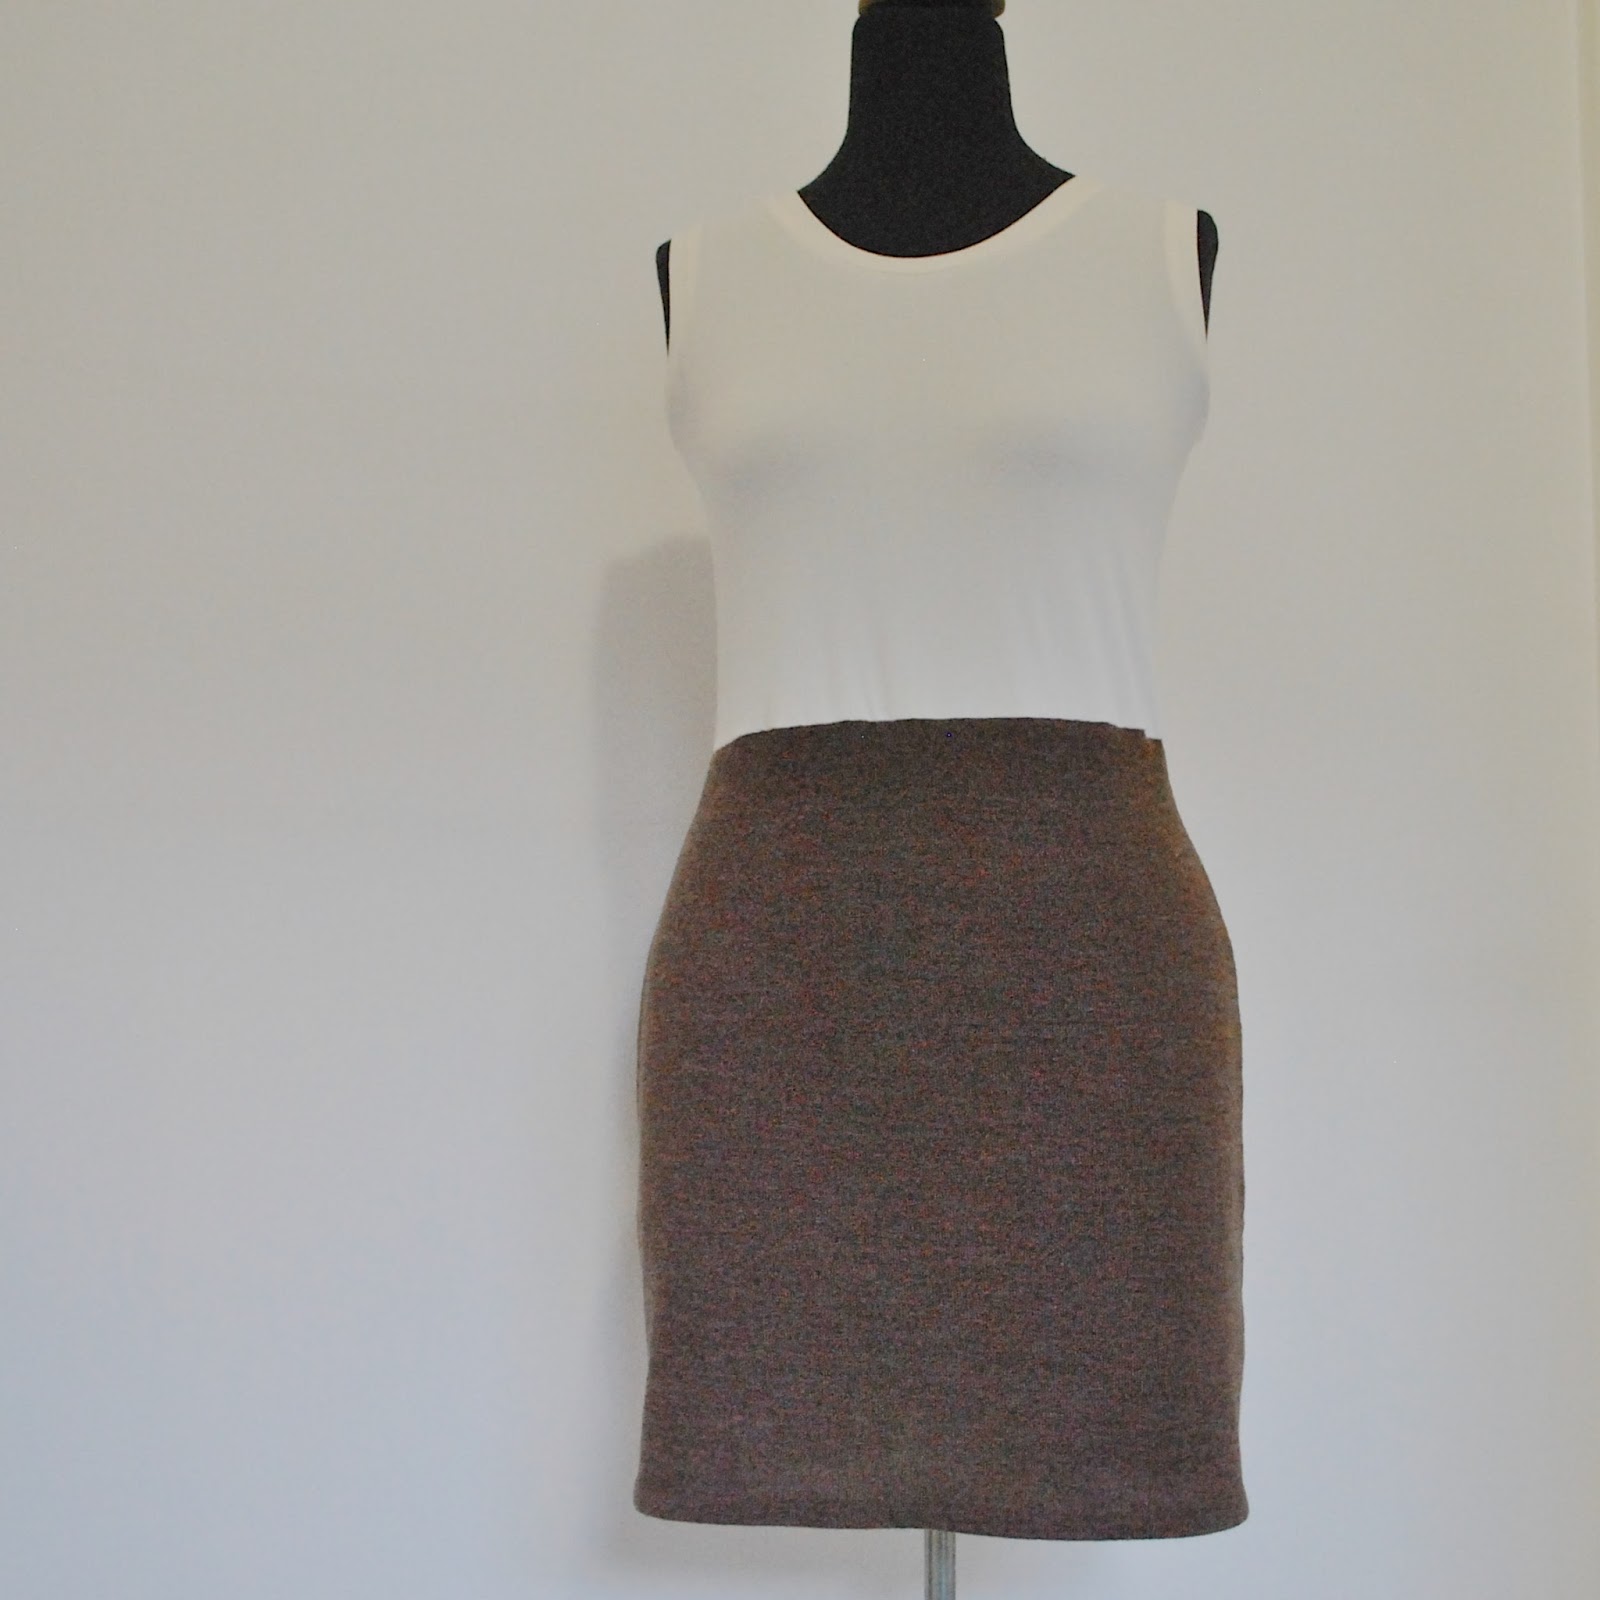
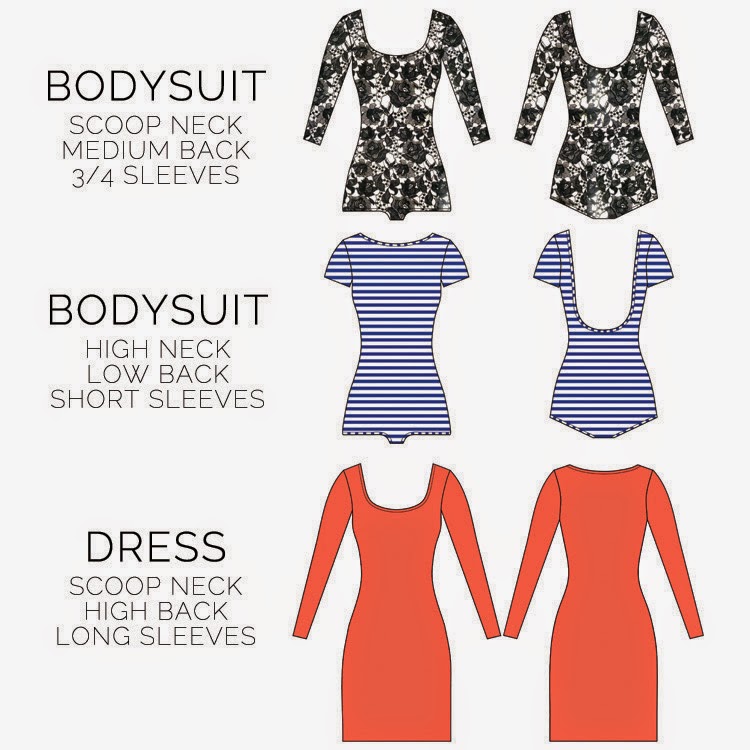
I also left off the lower band and simply hand-hemmed the lower edge instead… this gave me a little fabric leftover, and so I decided to use this to make a kind of mini-slip to wear underneath the dress, so it’s like a set.  My “slip” is the simplest affair; comprising a “skirt” cut from the chocolate brown knit attached to a “singlet” cut from cream-coloured poly stretch knit.  I vaguely used the Nettie bodysuit pattern for this bit; cutting it wider and looser, the armholes quite a bit deeper and wider, and gave a random mid-point scoop to the neckline, to get more of a singlet shape at the top.  I finished the armhole and neckline edges using a self-fabric band and hand-hemmed the lower edge of the skirt.

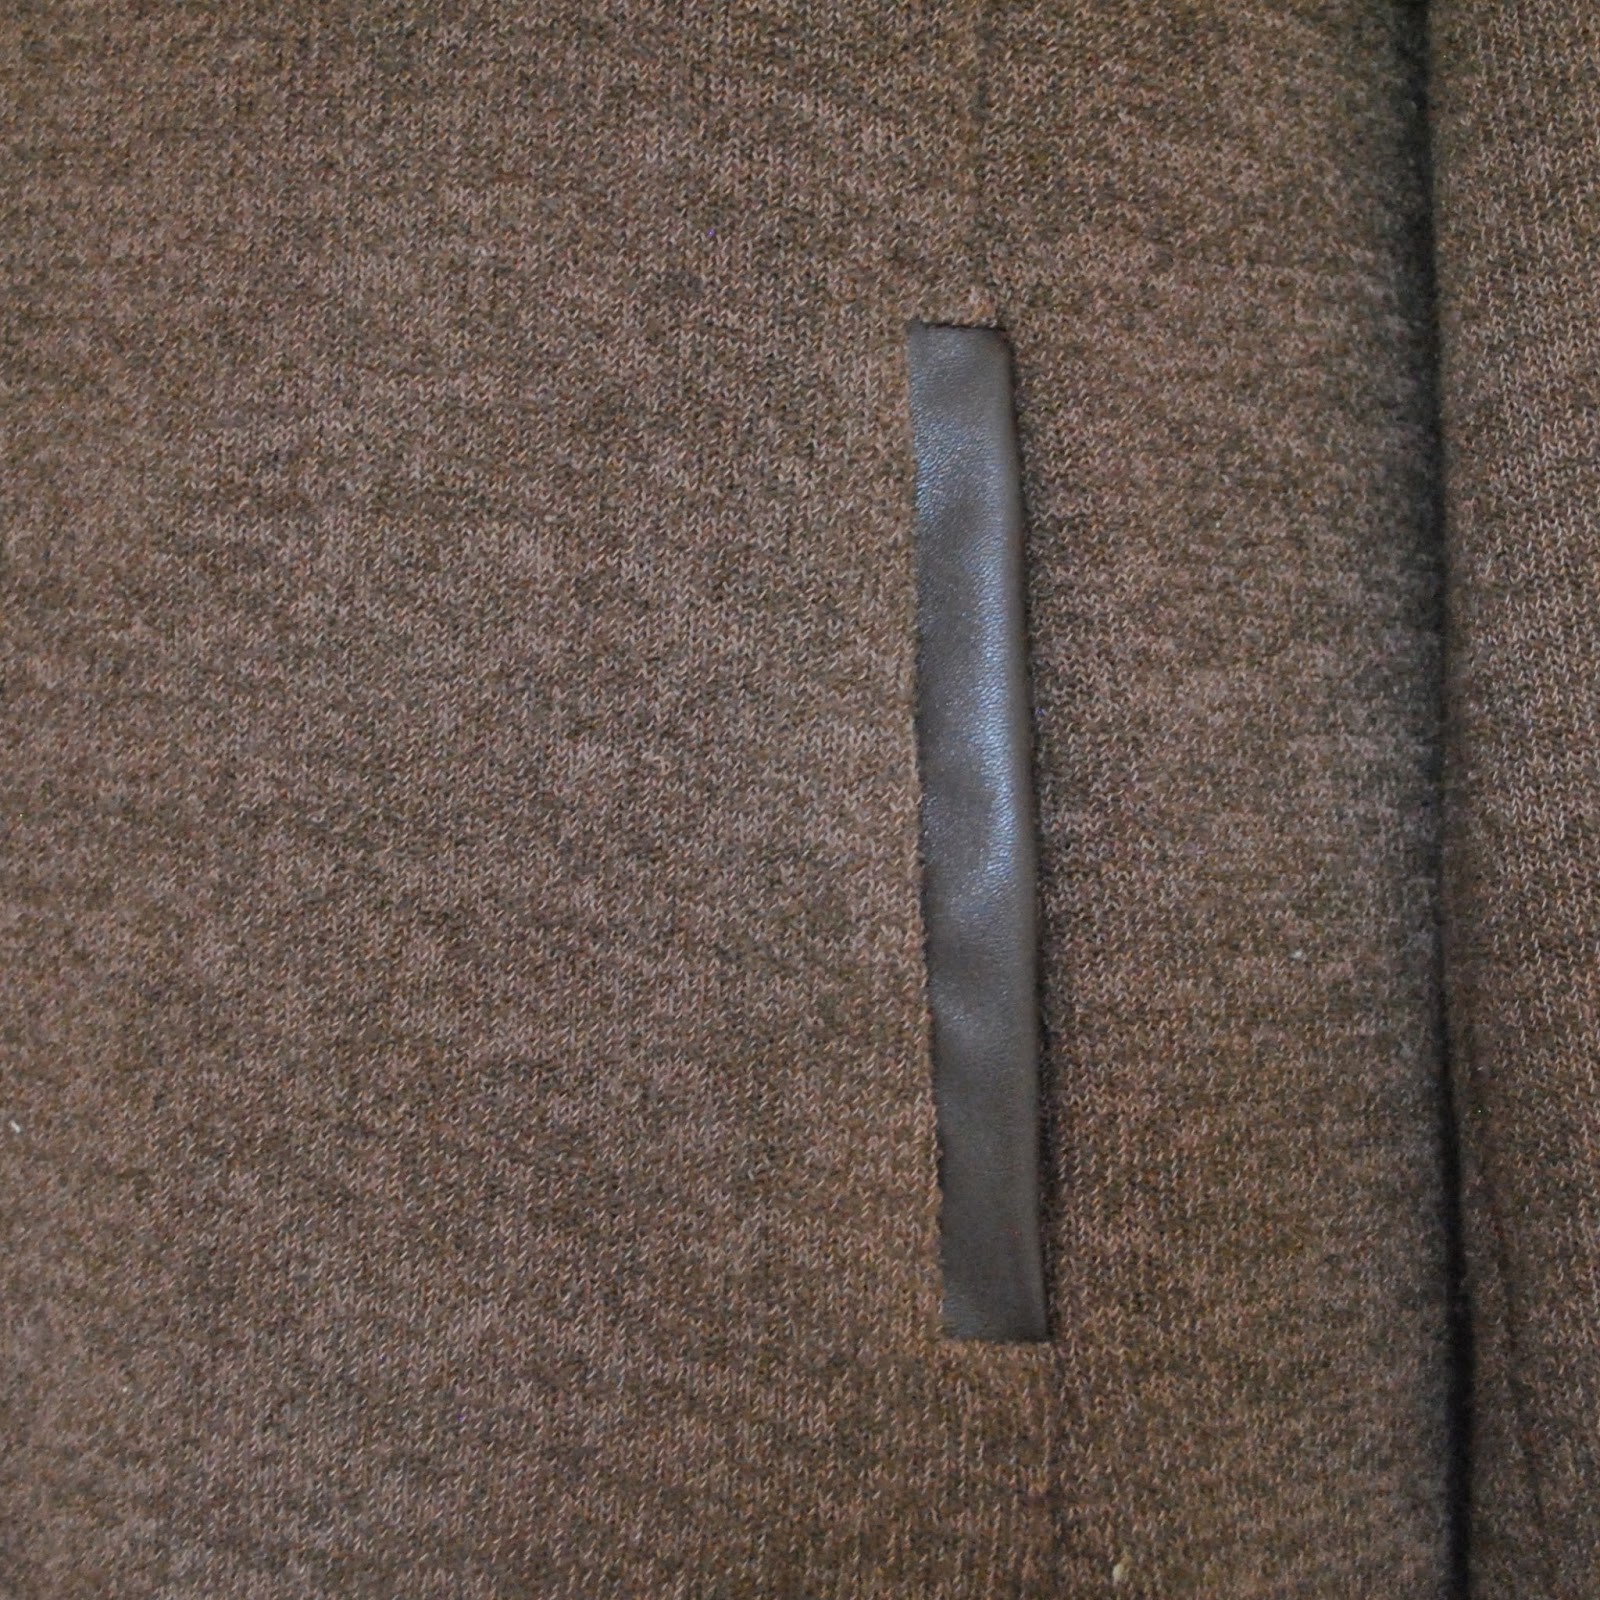
I originally had high-flown ideas of adding a few faux leather details to my ensemble, thanks to a quiet ongoing little love affair with pleather detailing; and so I did the tunic welt pockets in pleather.  Also partly for the extra stability it lends to the welt.  I think they turned out rather well, and aesthetically I LOVE how the shiny smooth pleather contrasts against the fluffy softness of the knit.  

To visually tie the two pieces together, I then proceeded to finish the lower edge of the slip skirt with pleather binding.  I cannot stress enough how hideous this turned out; the pleather was so stiff and structural compared to my soft and super-flowy chocolate knit that it made the hem of the skirt flare stiffly and super-duper-unattractively.  No sooner had I finished it, put it on and laid eyes on it in the mirror than I seized the scissors and cut that bit off; ahem, taking absolutely no pictures to assault the eyes.  Trust me, it was just too awful for words.  So now, the welts are the only lonely bit of pleather appearing anywhere on the ensemble; nowhere else to balance it out. I’m a little disappointed, but think it doesn’t look too ridick.  Maybe a bit.  Anyway, it’s done, so yeah.  There’s no point in getting too upset after the fact.

LOVE this collar.  This colour, too.

Fortunately, I adore it and can see myself wearing it a tonne.  Besides being warm and comfortable and cuddly like wearing a blanket, it’s absolutely my winter style.  I love minis for winter, and I love loose drapey tunic tops, and double-decker love the combination of the two together.  It’s also “my” colour.  Sorry to yammer on about “my” colours, but I’m lately on a bit of a thing about autumnifying my wardrobe, colour-wise.  
Adhering dutifully but very happily to my resolution to be more mindful in my sewing  🙂

Details:
Tunic dress; the Jasper by Paprika Patterns, chocolate brown knit
Slip; Nettie bodysuit modified; chocolate brown knit and cream poly stretch knit
Tights; my own pattern, black poly stretch knit, details here It can possibly be seen from my pictures; these have HAD IT.  I’ve worn these to sags-and-bagsville and back; and desperately need new ones! but with spring here I’m trying to hold off until next year  🙂
Boots; Roberto del Carlo, from Zomp shoes

Funny coindidink; I’ve only just now realised that I mindlessly plucked the Nettie pattern out to eyeball for my slip because I already have this pattern; however it’s actually another one of the patterns on offer in sew indie month!

As mentioned, the pattern is part of the Sewing Indie month.  I received the pattern free in order to help spread the word, but chose it myself, paid for my materials, made it myself and am very happy with the pattern.  Please note that as always, there are no affiliate links on my blog and never will be.
The Paprika Patterns Jasper sweater dress, along with the Nettie bodysuit and eight other patterns, is part of the Indie pattern bundle on sale from Monday 1st September until Thursday 10th September.
As with the first pattern bundle there is a charitable component to the sale, with 20% of pattern sale proceeds to be donated to Women for Women, which helps women dealing with violence, marginalization, and poverty due to war and conflict.

My fellow seamsters participating and making their own version of the patterns are:
pinterestmail

an all Western Australian dress

OK; it’s done, the second and arguably the most time consuming component of my one year one outfit project!  
Can I just interject right here… WOOOOHOOOOO!

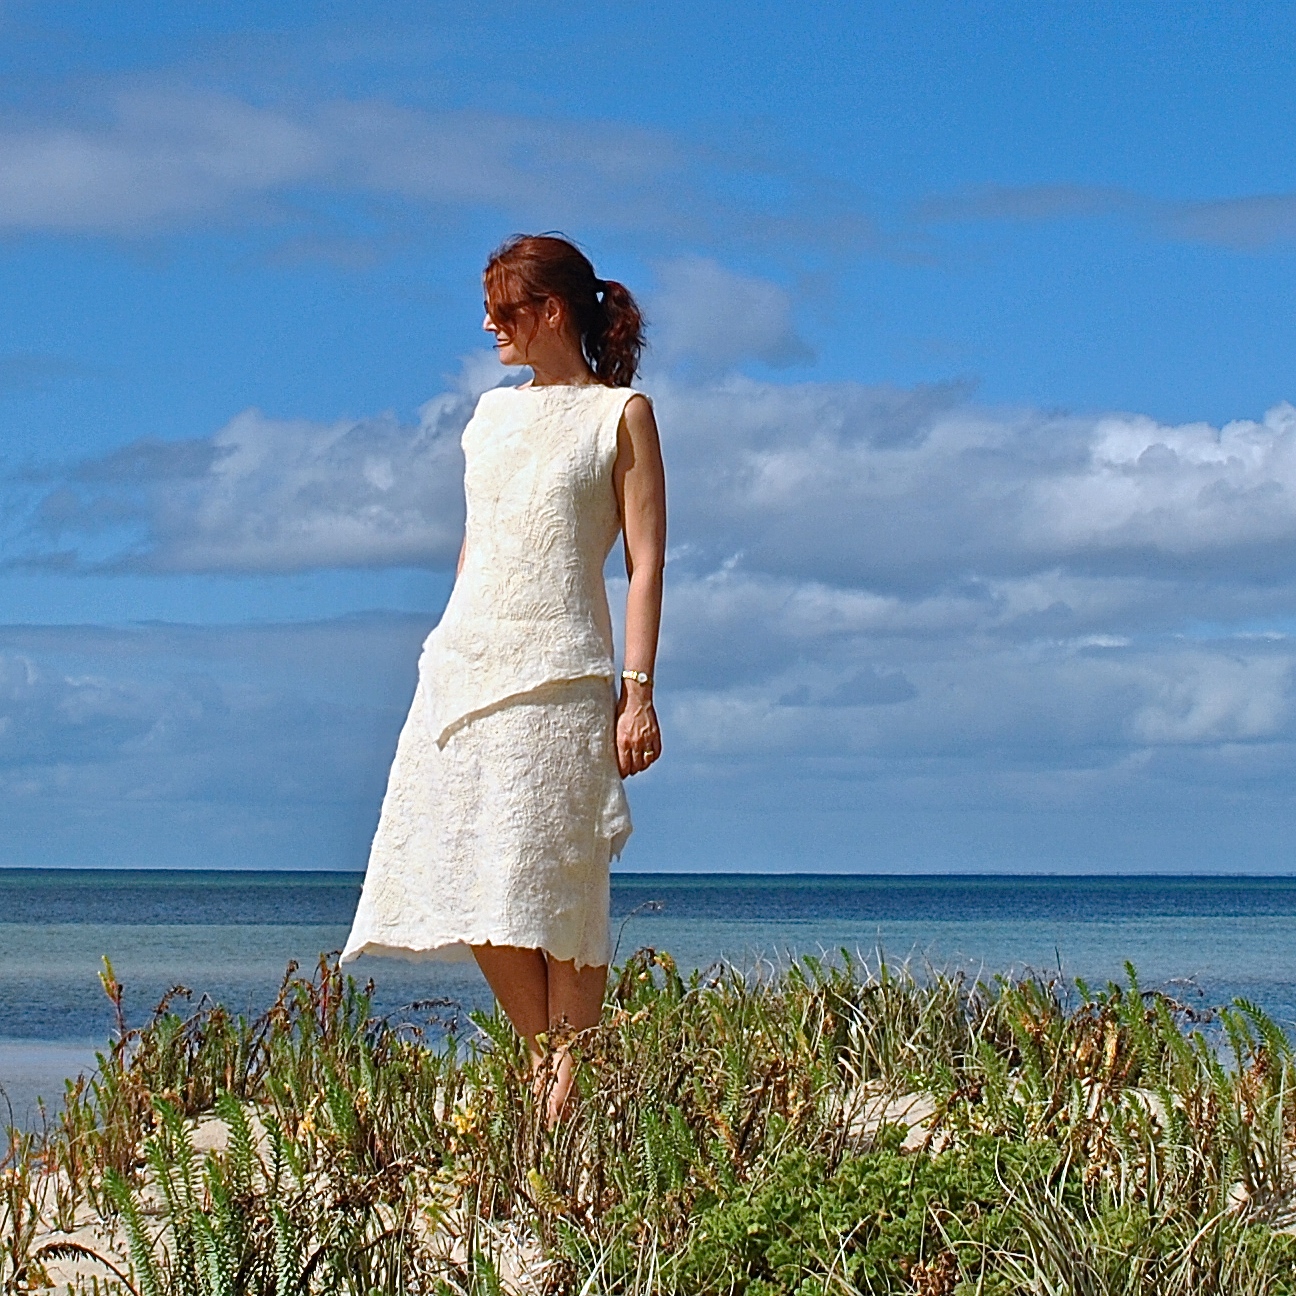
Phew!  so, just saying, but I’m tentatively predicting that this one piece could well be my piece de resistance for the year.  I made the dress, and not only did I make the dress but I made the fabric too!  previously post about making my fabric from Western Australian Merino fleece here.  
And I hand-embroidered it, with a motif of my own design.  Also the dress is of my own design.  Is this a little insane? probably.  
Ok, YES.

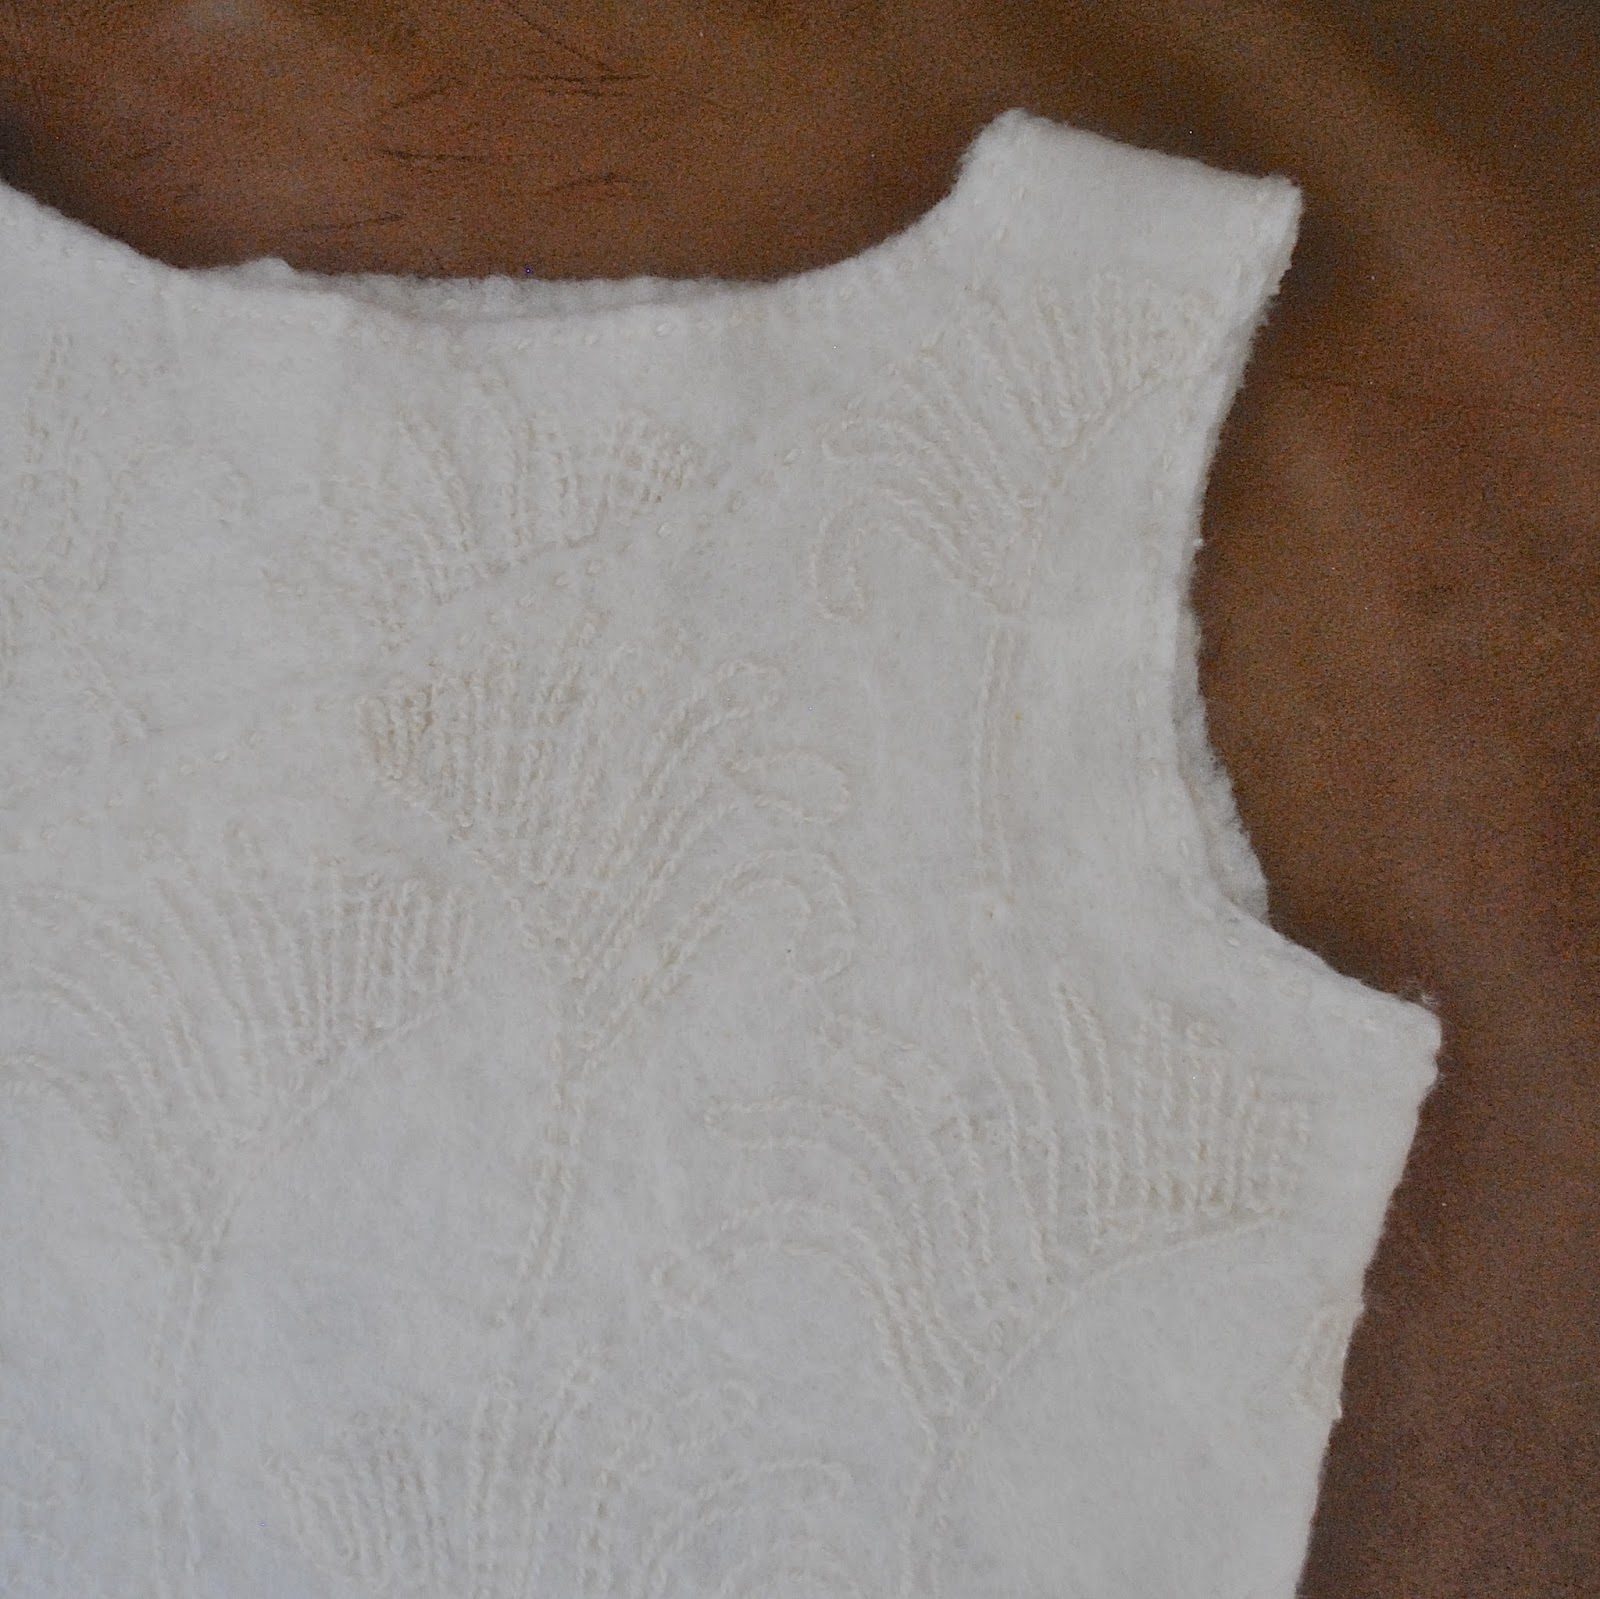
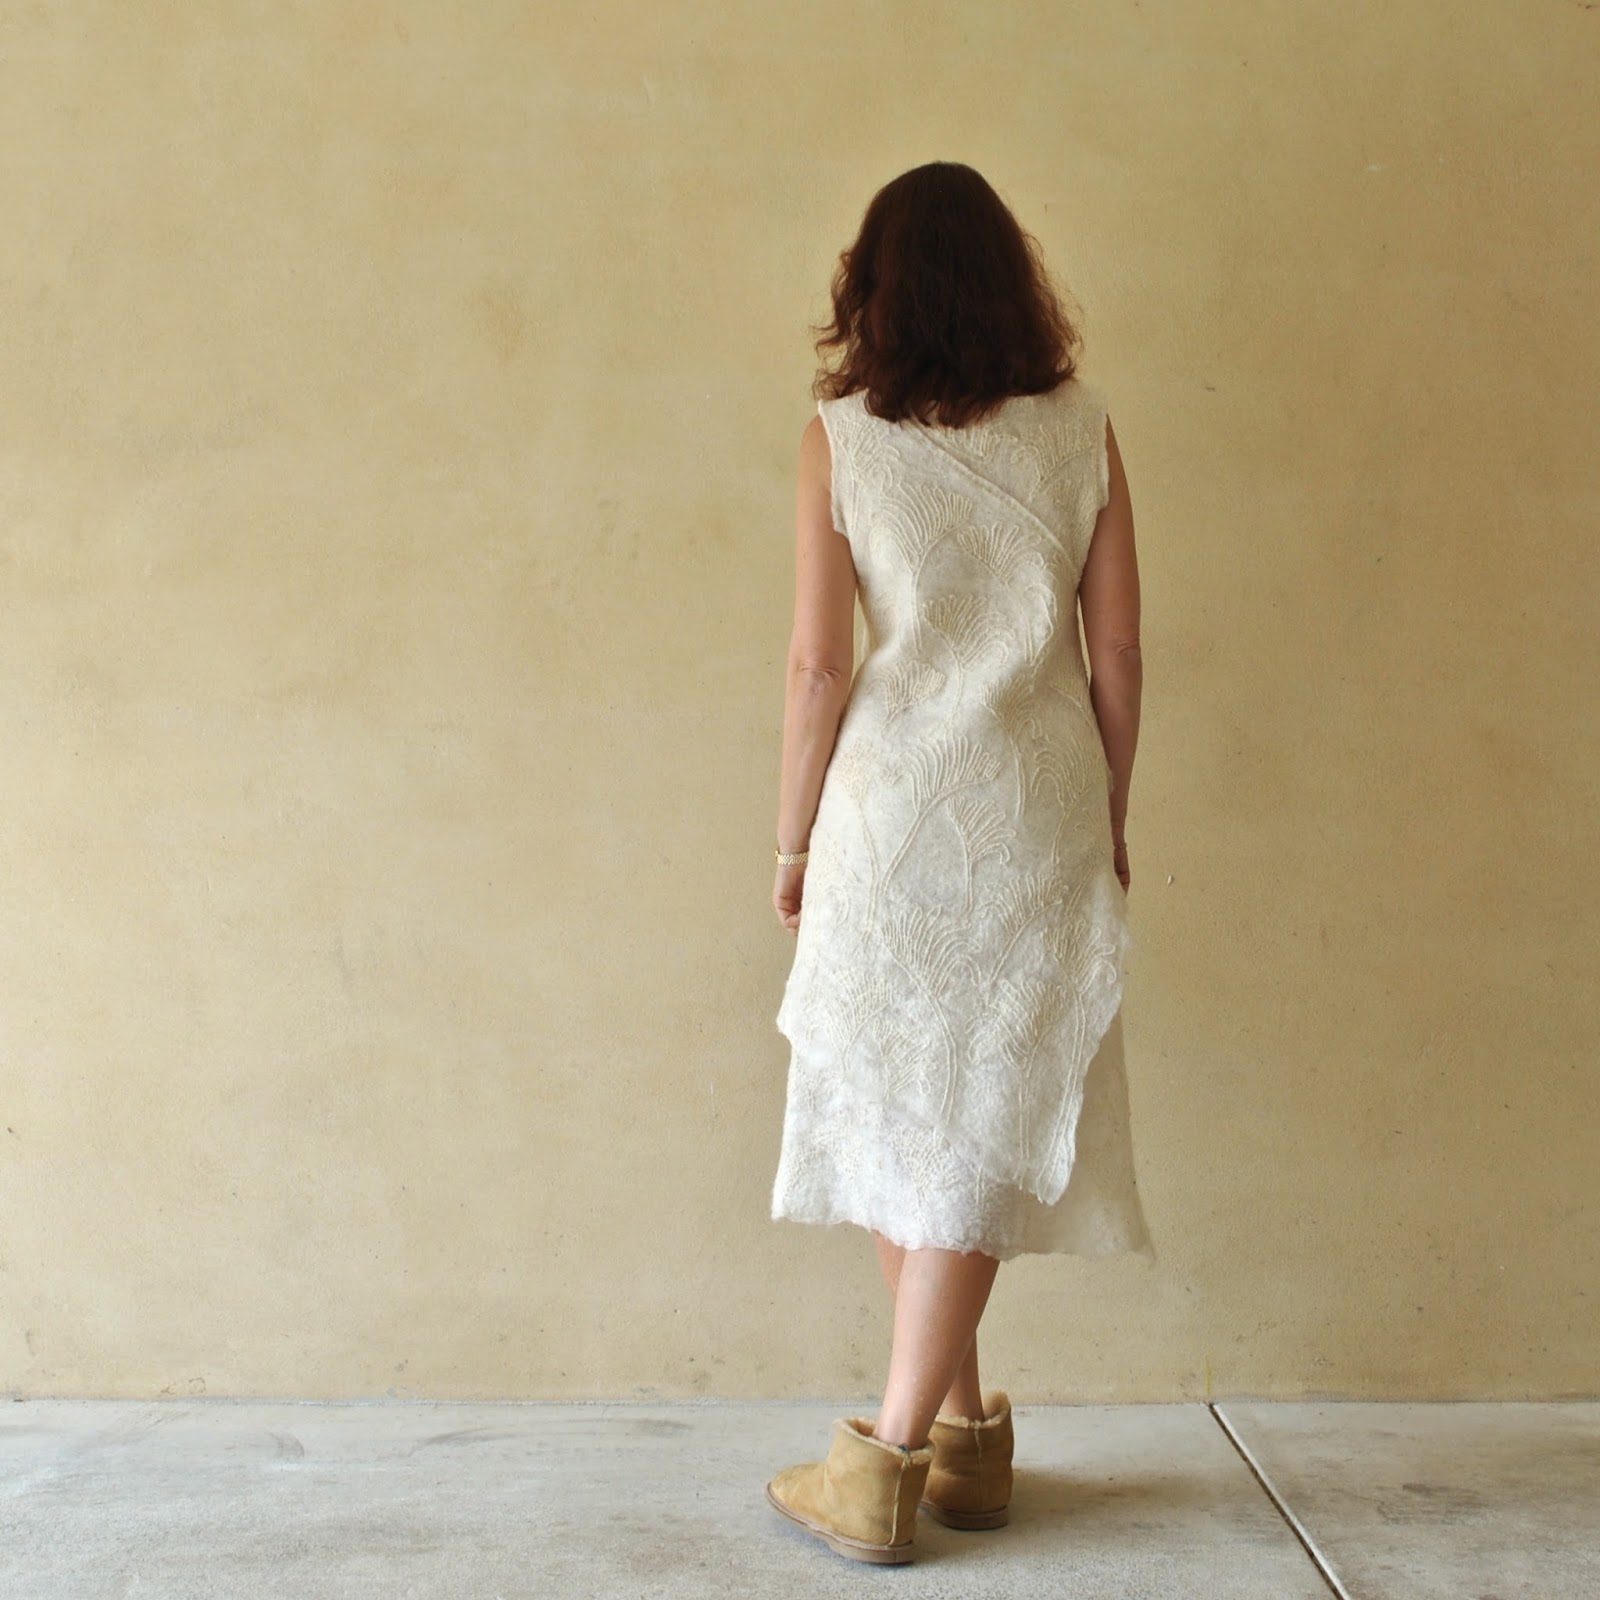
So, the dress.  As mentioned, it is fully embroidered with kangaroo paws.  Why kangaroo paws, you may ask?  Well, the kangaroo paw is our state floral emblem and my project is an all-Western Australian deal, so it seemed like a pretty appropriate choice.  I sketched a stylised kangaroo paw design based upon one from one of my own photographs.  I drew a few in different sizes and then for each section of the dress drew up separate, big all-over patterns.  Some of the paws wrap around the side seams from front to back, which was planned since I wanted to kinda tie the design together as well as I could.

my muse; Anigozanthos manglesii

This style of all-over embroidery is obviously inspired by the Alabama Chanin style, but the design is all mine.  I chose to incorporate embroidery for a few reasons; firstly to give some added strength to my felt, since the felt seemed just a touch fragile on its own.  
Secondly, for decorative impact too, of course!  My felt is quite textured already, but I really liked the idea of something more, and a white-on-white design.   I embroidered the under-dress, below, in a regularly spaced and repeating pattern of identical kangaroo paws, while the overdress, above, has a more random appearance, with different sized kangaroo paws, placed non-regularly and more artfully; as if someone had taken a bouquet of kangaroo paws and scattered it across the piece.

For the embroidery: I used natural, undyed Western Australian Merino yarn, handspun here in Perth by a lady named Beverly.  I bought this from Bilby Yarns.
The side seams are hand-stitched and hand-fellstitched in a thinner version of the same yarn.  I left the lower edge of the dress with its naturally wobbly self-edge, just as how it came out from the felting.

As per the one year one outfit strict criteria, I could not use anything in my dress that was not locally sourced; meaning no thread or zips.  So, I could have used buttons, since I still have some lovely ones made by my Dad using wood from my parent’s block… but I decided to go with a dress that I could just pull on over my head and with no closure required.  I used my standby plainy-plain dress pattern, Burda 8511 and drew up a wide, midi-length, loose, A-line dress pattern; two layered and with slanting asymmetrical hemlines.  The under layer is a full length dress; and the over layer is a shorter and briefer one, one-shouldered with a diagonal top edge disappearing into the side edge/armpit.   I cut out “facings” for the top edge, and these are fused/felted to the inside of the dress, underneath the single layer part of the under-dress.  Meaning, the dress has two layers of fabric all over, which I fused together by felting nearly all over after embroidering.  The front has felted-together layers to waist level, while the back has the layers felted together to below bum level.  The remaining lower portion of the overdress float free, and the only parts that are a completely single layer are the lower portion of the underdress.
Clear as mud?  Yep, I thought so!

Also: it may superficially look like the dress has not a skerrick of shaping, with no visible darts or piecing, but actually that is not the case! It is shaped… with invisible darts!!! yes, really invisible  🙂 The shaping is not drastic since I needed some looseness to enable me to get the thing over my shoulders ok…  but the shaping is there.  I cut out the bust darts and back waist shaping darts, and closed them together by hand-felting the layers together with a felting needle.  This is a clever little needle, long and with tiny serrated point.  You jab it in through the layers of your felt and its serrations enable the wool fibres to meld and mesh together thanks to their own naturally barbed nature, albeit microscopic.  This is how felting is even possible, of course!  Thanks to this wonderful property exclusive to wool, my dress has a nice subtle shape but with no visible evidence of such shaping, such as darts or seams.  It’s also how I felted together the two layers of the dress, all over.
It’s like magic, I’m telling you.

running stitch edging, and invisible bust dart

Once I had completed all my wool embroidery, I went over and painstakingly hand-felted those upper and underdresses together as described above.  Then the very final step was to run a simple running stitch around the neckline and armholes.  I wanted a nice subtle edging to these areas, not only for some strength, as the running stitch is almost like stay-stitching if you like, and stabilises these vulnerable areas that might otherwise get stretched out every time I pull the dress over my head and push my arms through those armholes.  The edging also provide a nice visual border that that does not compete with my embroidery… and obviously I want my embroidery to have the biggest visual impact. 

So!  This is merely part two of my one year one outfit project, part numero uno was my knitted alpaca jacket/cardigan, posted here, and I have a couple more components still going in the works.  What will they be? we shall see, we shall see…  🙂
I may have a few surprises still up my sleeve, mwahaha! 

Details:
Dress; my own design based upon Burda 8511, of self-made wool felt with wool embroidery of my own design
Ugg boots; from some ugg boot shop, forgotten which one

Ahhh, the uggies.  I know they’re pretty awful but I just could not resist!  Seemed only fitting.  I’m gahn the full Strine here, mate.  🙂

pinterestmail

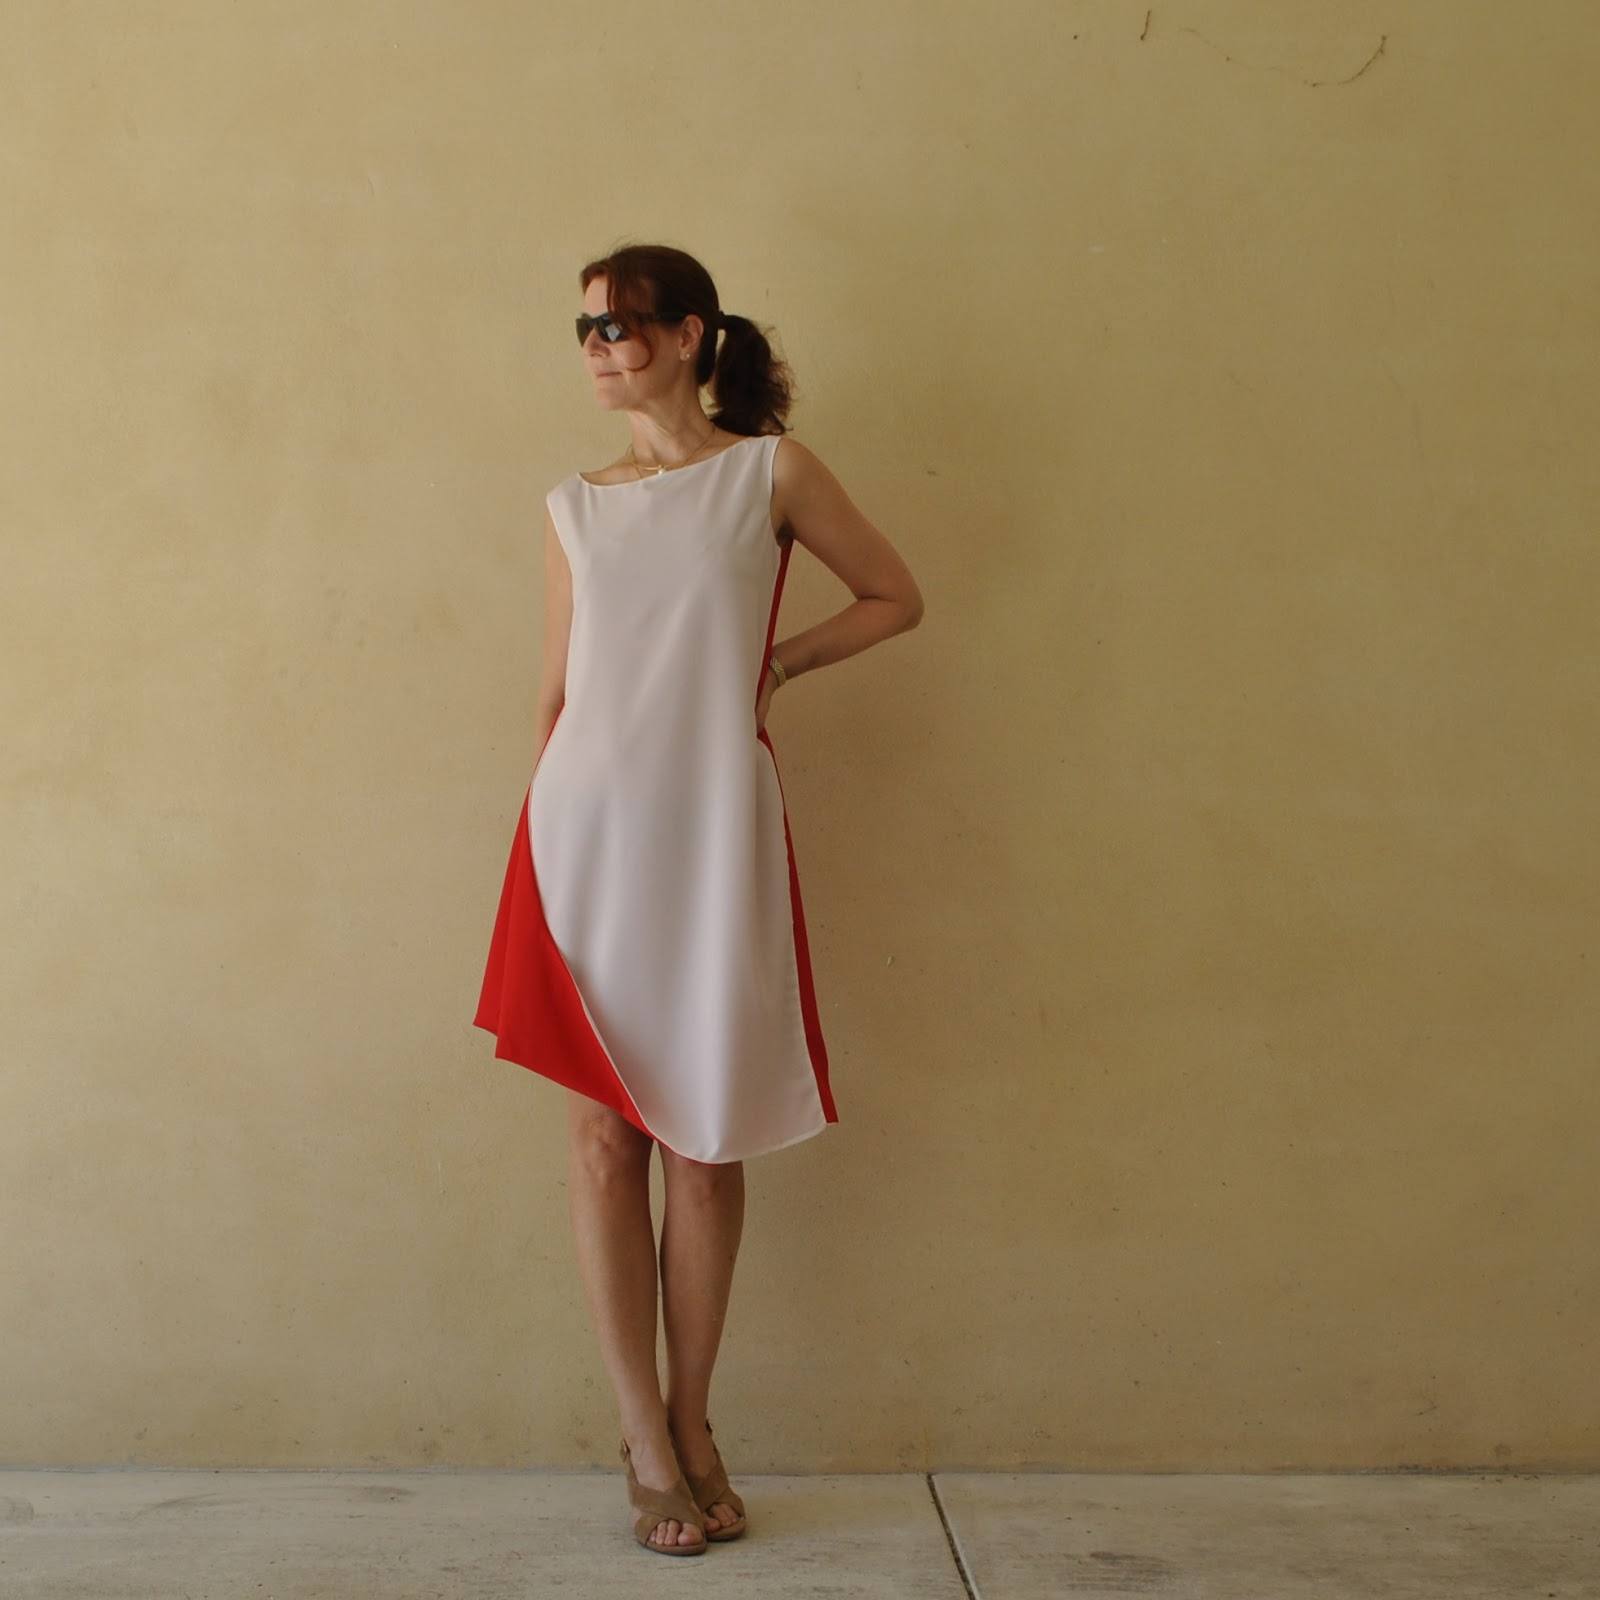
reversible infinity, or twist, dress

I love working out convoluted construction puzzles in the process of sewing something and this new dress ticked that box very nicely.
It looks kinda plain upon first glance, but it’s actually based upon a very unusual twisted design by Anita, of Studio Faro.  
And now I have to apologise right here because I’ve just searched forever for the design on Anita’s blog to link to it, and I find I did not even pin it… so I cannot. I’m sorry! but I’m pretty sure I saw the sketch for the pattern piece on either Anita’s blog, studio faro well-suited, or her Facebook page.


Later edit; thanks to Emily I found it, Anita’s original design is here.
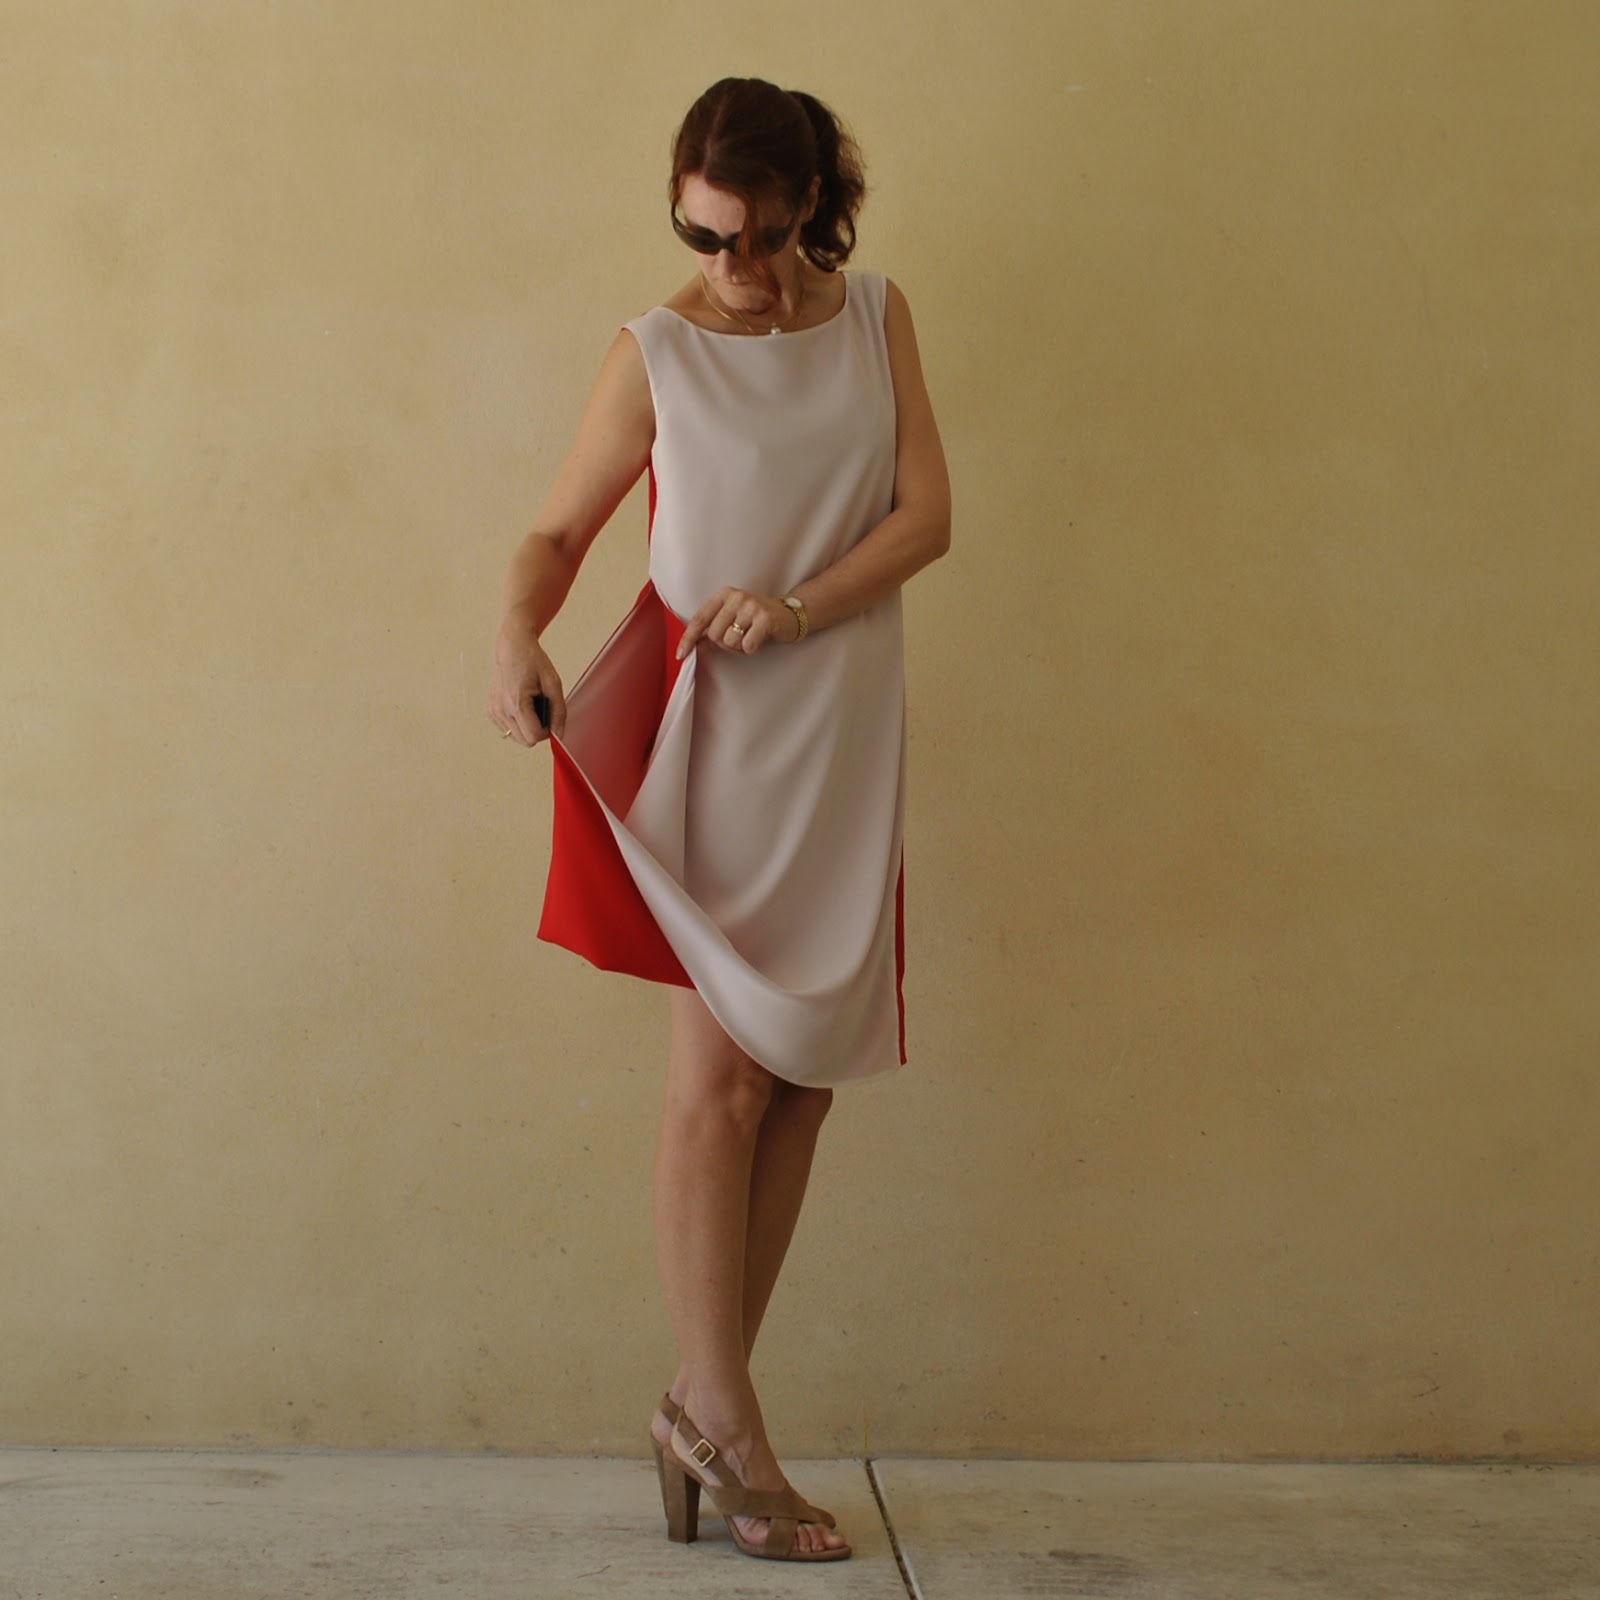
Anyway.   In making it, I realised it was just like an infinity scarf, but in dress form.  Unique!
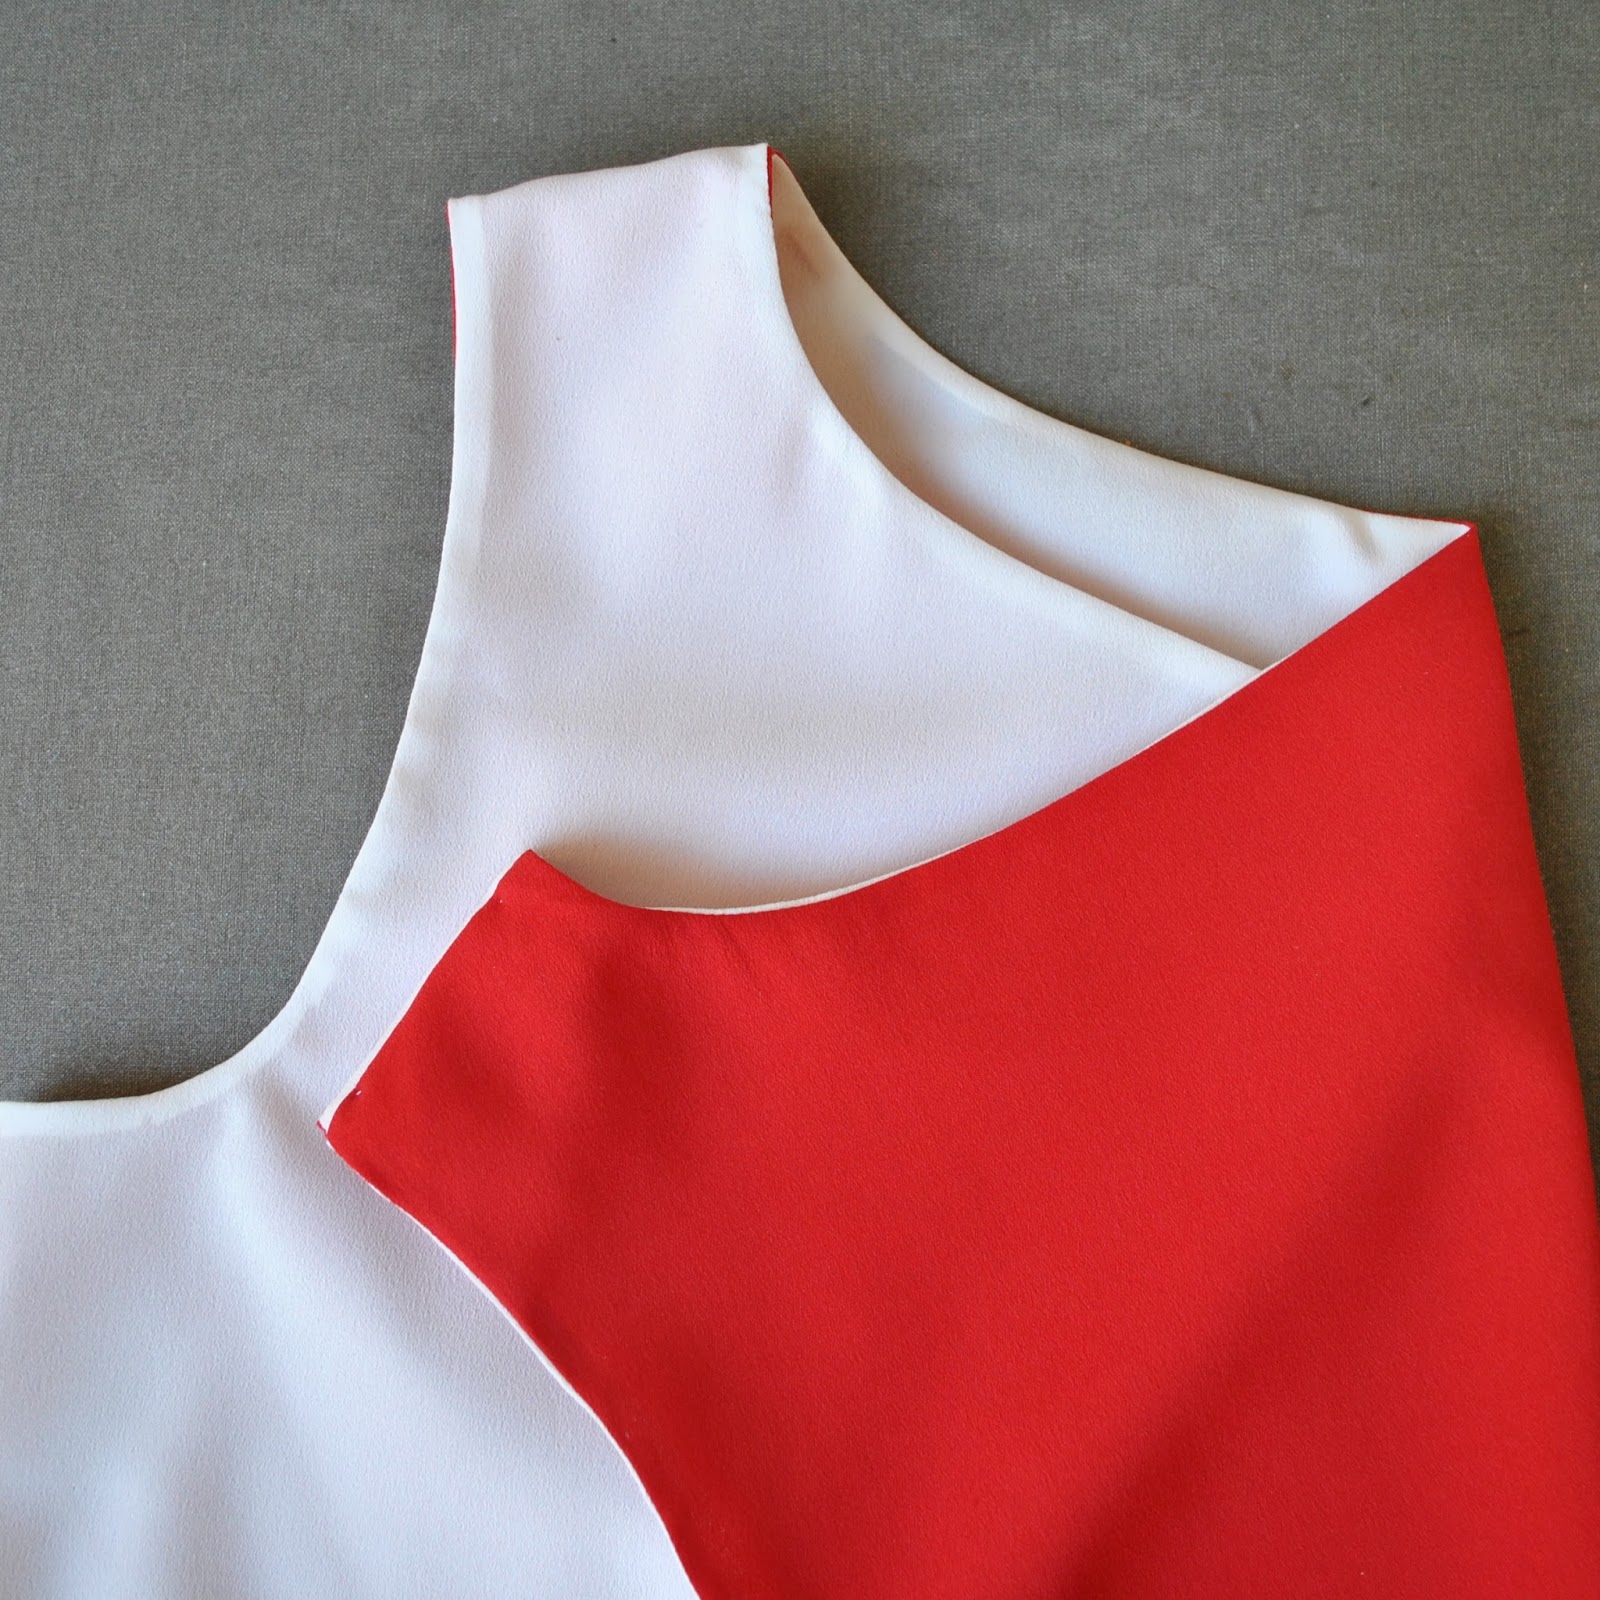
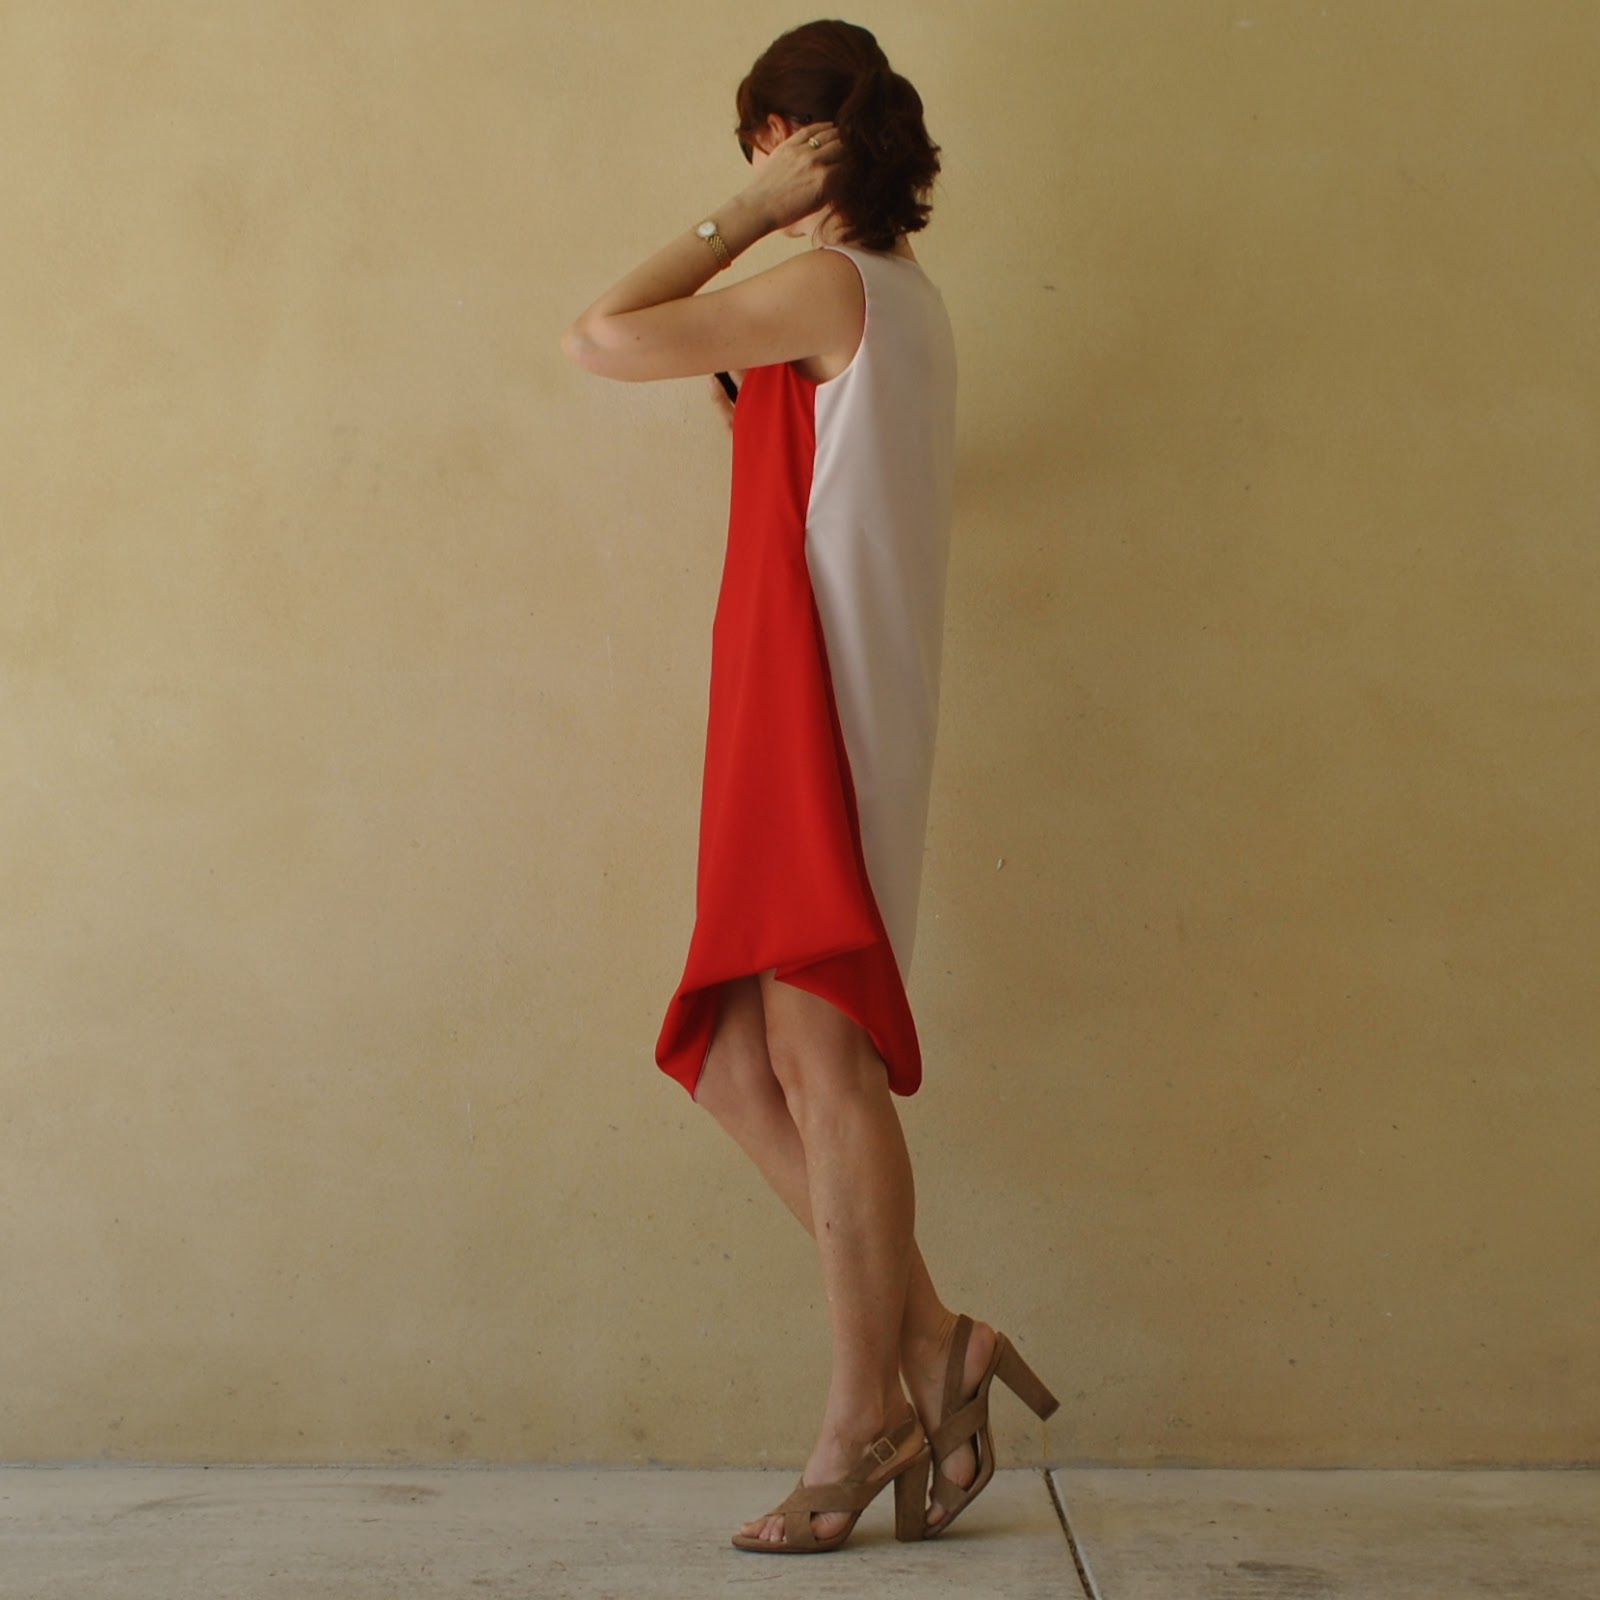
And, my dress is fully reversible! with all the seam allowances enclosed and tucked away neatly between the two layers of the dress.  The construction technique to make it reversible is one that I worked out myself and not something I’ve ever seen in any pattern or design before.  This was the part of it that kept me on my toes, brainstorming a way to make it happen.  I’m super chuffed that it did work out.  🙂
In my initial plans; it was not going to be a reversible design and I wanted to use double-sided fabric for my dress, but the only ones I could find were kinda expensive, and much as I craved the actualisation of that idea I just couldn’t justify the cost…  economy can often be the mother of invention, non?  Eventually I settled with a double layered dress using two lightweight fabrics, and then while I was fiddling about with the two layers I realised I could actually make it a completely reversible dress, meaning I could wear it inside out just as easily … and ta da!  this is the result!

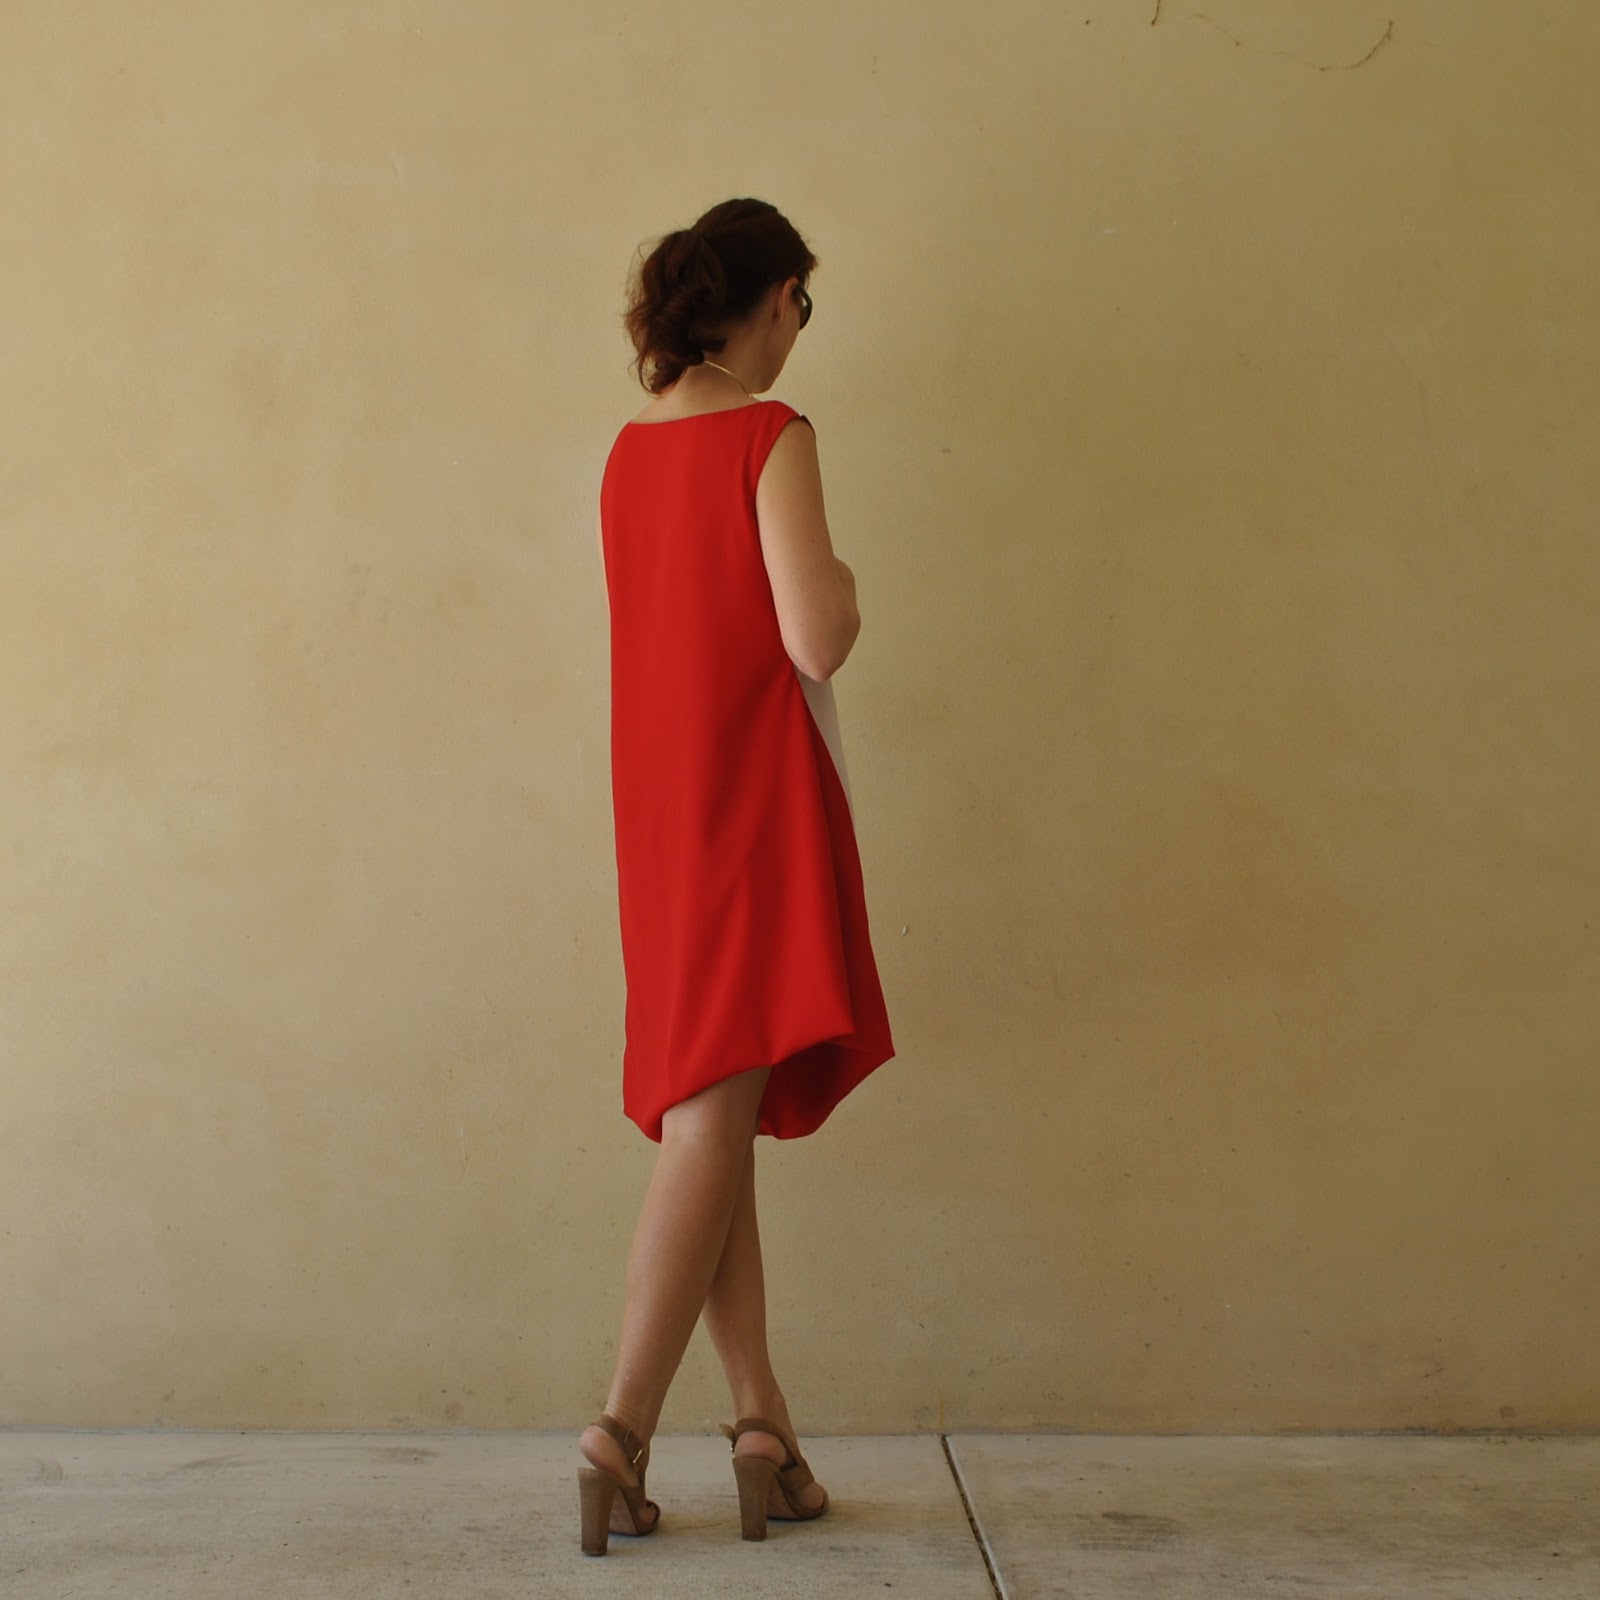
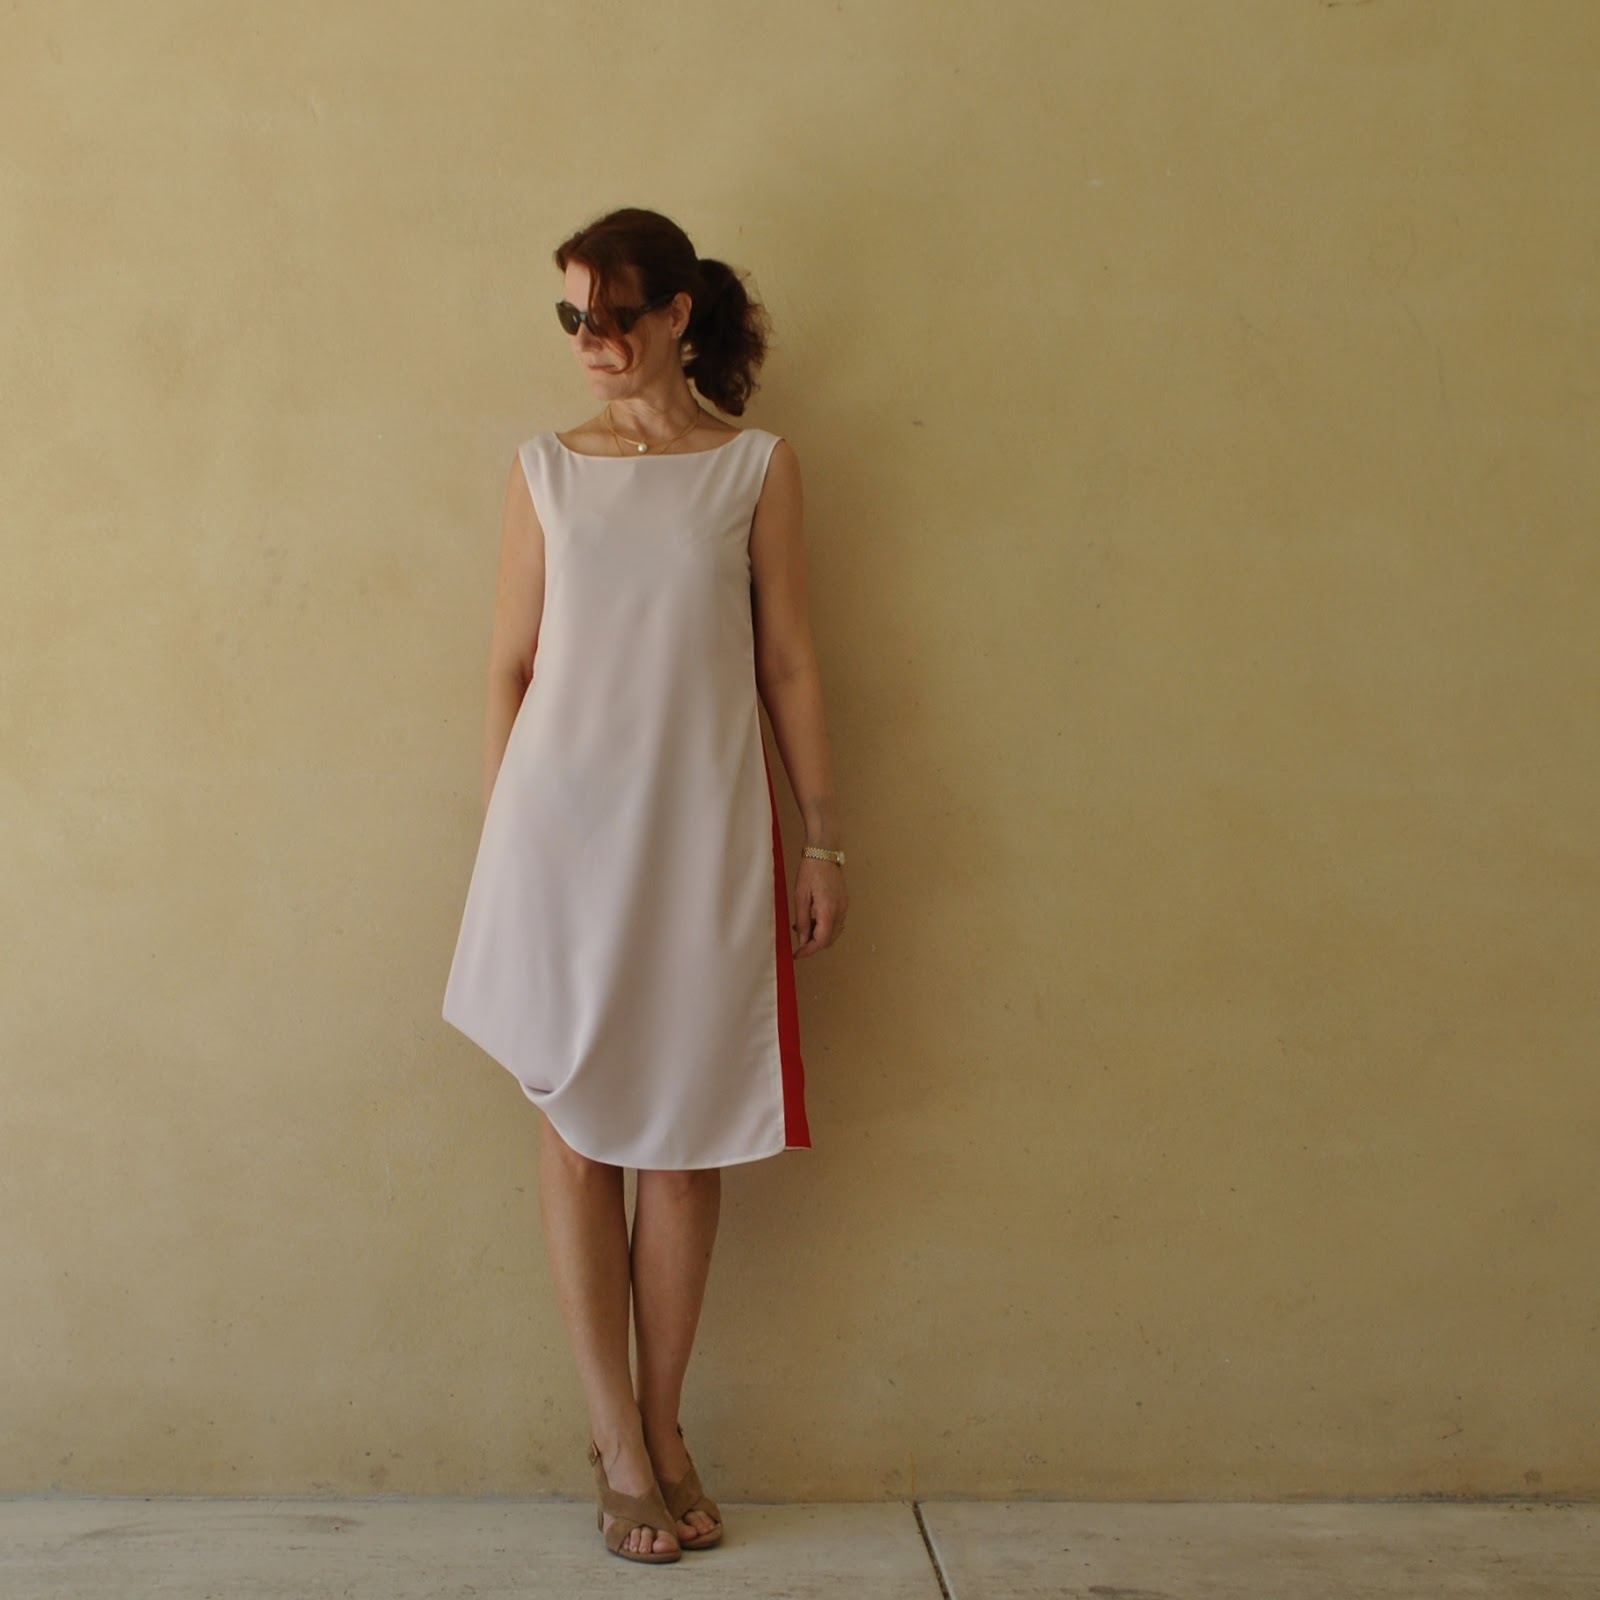
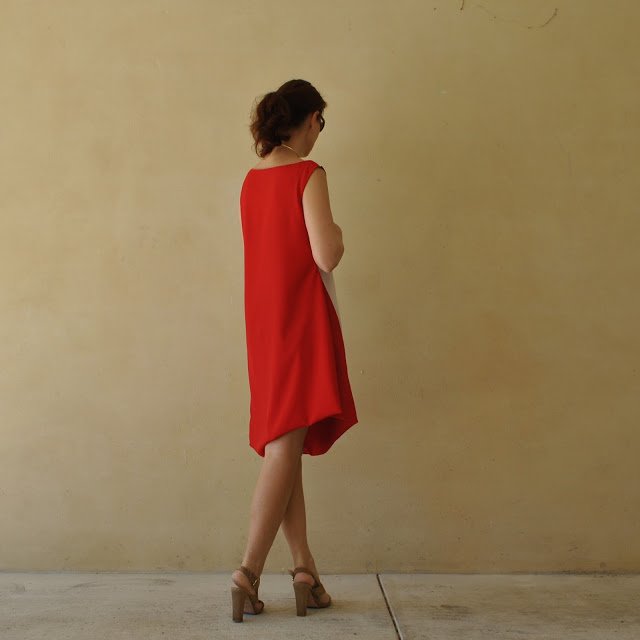
Right way out; I wanted the white at the front and red at the back.  The way the infinity twist goes; the dress is actually mostly open at the right side seam, but the way it crosses over there is a restriction in the drape of the hemline so that it sits with the opening closed quite securely; and there is absolutely no danger of the drape falling open and exposing your knickers at all.  I tried to move and sit in it a few times to see if I could possibly get humiliated from any hint of exposure in the dress and am happy to say I could not make it happen.

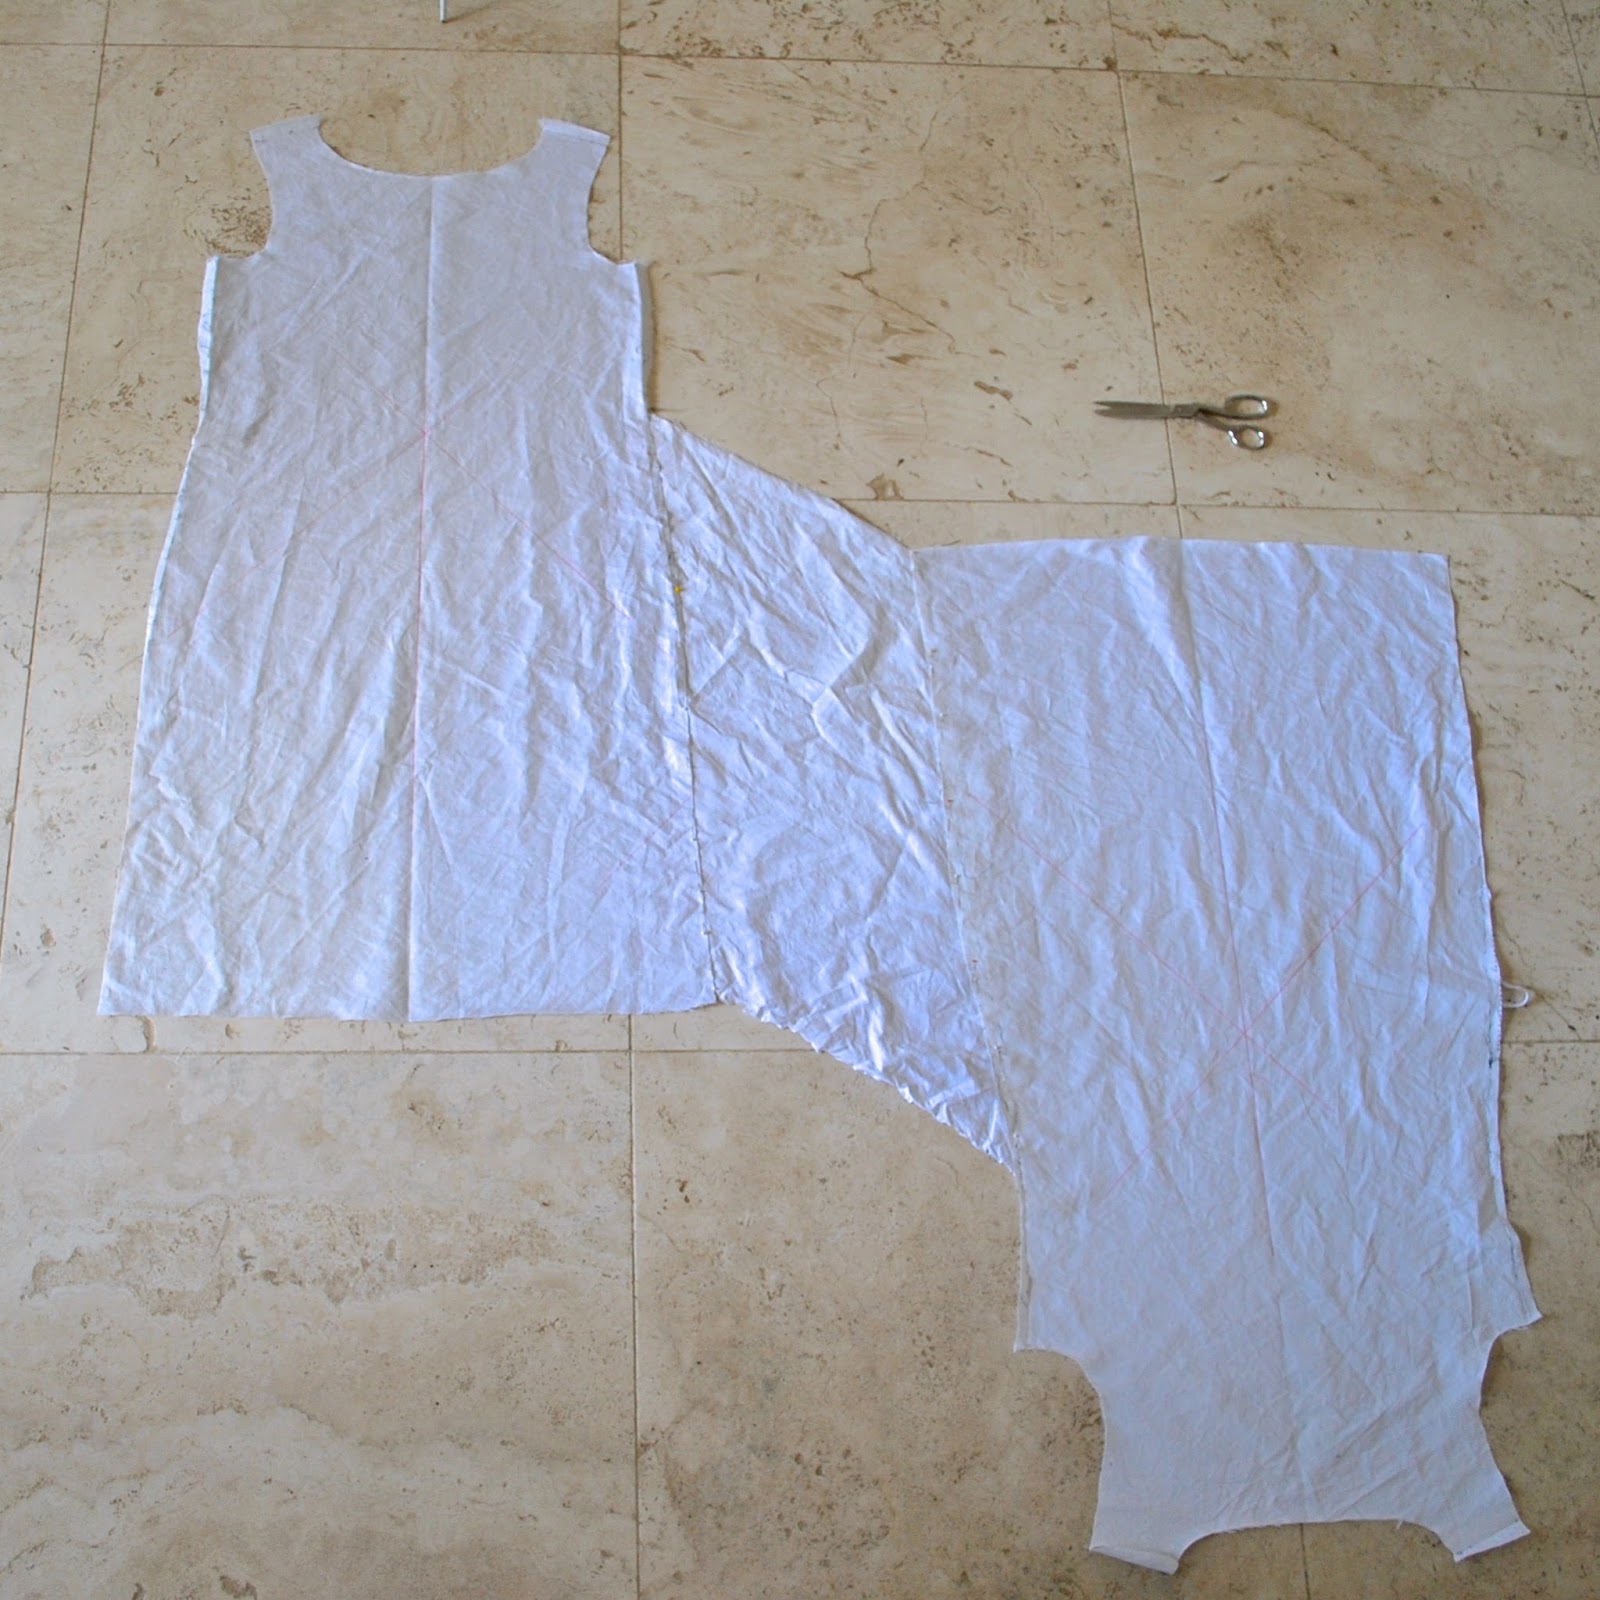
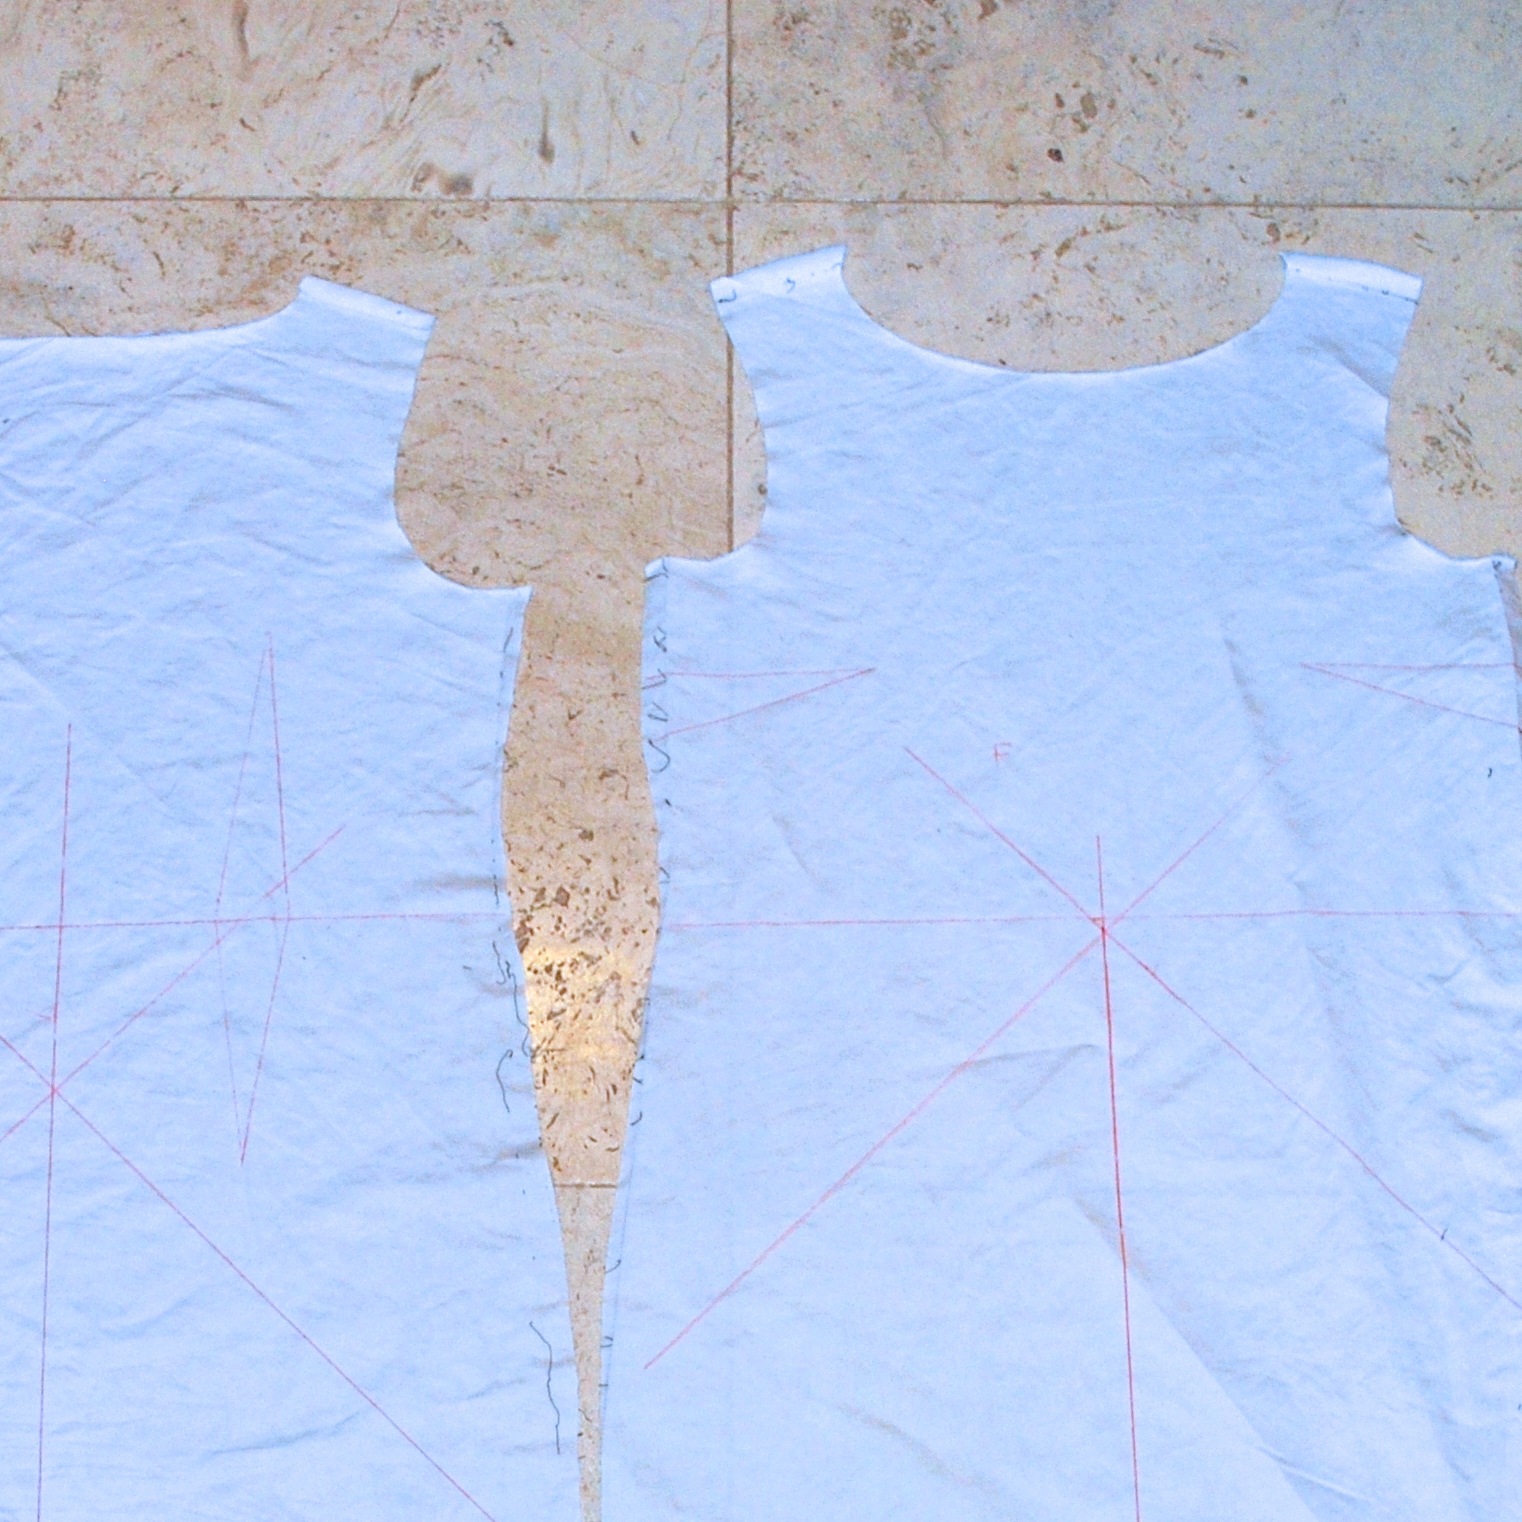
The one single pattern piece looks like this, and you rotate the “upside-down” part around clockwise and up, to lie over on the “right-side up” part.  This naturally forms an infinity-twisted drape at the side, and the wrong side of the fabric against the right side, front and back.
   Any straight or sheath dress design could be used to get this pattern piece;  I used my old standby Burda 8511 as my sheath dress sloper.  It’s one I’ve made enough times over the years to have tweaked and fiddled with it enough to have fine-tuned the fit to my pear-shaped self just about perfectly. 
By the way; if you’re at all interested in creating your own pattern manipulations like this one, and this goes for just about all the Pattern Magic designs too; my recommendation is make a sturdy, fabric sloper.  It’s a good idea to have one for a sheath dress, a bodice and possibly a skirt too.  You could use a well-fitting, tried and true pattern like this one, if you have one; in any case get a basic pattern and make up a few samples to fine-tune your fit.  Once you’ve fiddled and diddled enough to discover the perfect adjustments for you; get some strong fabric that’s not going to rip or fray easily, like an old sheet… these often have the most fabulously high thread count making them super-tough!  Then cut out your perfectly-fitting pattern pieces.  Using a clear, easy-to-see marking pen of some sort, mark on the sloper pieces the waist line, hipline, bust points, back dart points, the straight grainline and the bias grainlines going both ways.  I used bright red marking pen.  This sloper can be kept rolled up with your patterns for whenever you have new ideas and want to play about with making new designs for yourself  🙂
Why fabric, not paper? well obviously so you can baste it together and put it on!  wearing a paper version of a thing is absolutely nothing like the real fabric thing, we all know that!  Paper has zero drape, plus it rips all too easily  😀

The middle, joining piece goes from the waist to the hemline.  I left off all shaping darts, so the “dress” portion is a kinda shapeless sack, a base-point which I think is a good criteria for a double layered reversible design.  I also cut it so that I can just slip the dress over my head, eliminating the need for a zip.  Obviously that feature is essential in a reversible dress too!
I used a lovely rayon crepe from Fabulous Fabrics, in red and white, and needed 1.8m of 150cm wide fabric in each colour.  Having the nice wide fabric meant I could cut my pieces on-grain and with no joining seams in the pieces.
The white is quite sheer, and just about all seam finishes except for French looked absolutely dreadful underneath it; so after a bit of experimenting I went with seam allowances done like this:

Firstly I stitched the seam allowances with a regular 1.5cm(5/8″) seam allowance.  Pressed to set it, pressed open to get the crease set, then pressed back closed again.  Secondly stitched a second pass of stitching just inside the seam allowance.  Lastly, trimmed the seam allowance to an even narrow width.  This should be pretty secure and stable with the double stitching.  And the “ghost” of this seam allowance as it appears showing on the white outside looks quite nice, almost like a French seam.  

By the way, I did consider trying to do actual French seams in this dress for about a hot minute, before I got sensible and realised in that way insanity lies and I would be tearing my hair out and frothing at the mouth in no time at all….  in any case, the reversibility of my construction technique means that all my seam allowances are enclosed with the two layers of the dress, so there’s no danger of any seam allowance coming out on view anyway.  The ultimate in neat-looking insides, yay!
There are only three bits of almost invisible hand-stitching closing the layers: the two inside shoulder seams, and a short length on the inside hanging drape; through which I pulled the entire dress in the very last step before closing it up.

The drape can be adjusted to sit in different ways; like pulled completely through to the front as in the top picture.  I also like it pull it back through on itself a little bit, and have it sitting more balanced.  It does look nice like this, but it does eventually tend to slip naturally back into its default position, probably because my fabric is quite slithery and slippery.  If it were made up in linen, which is more “grabby”, it would probably hold a different position better.

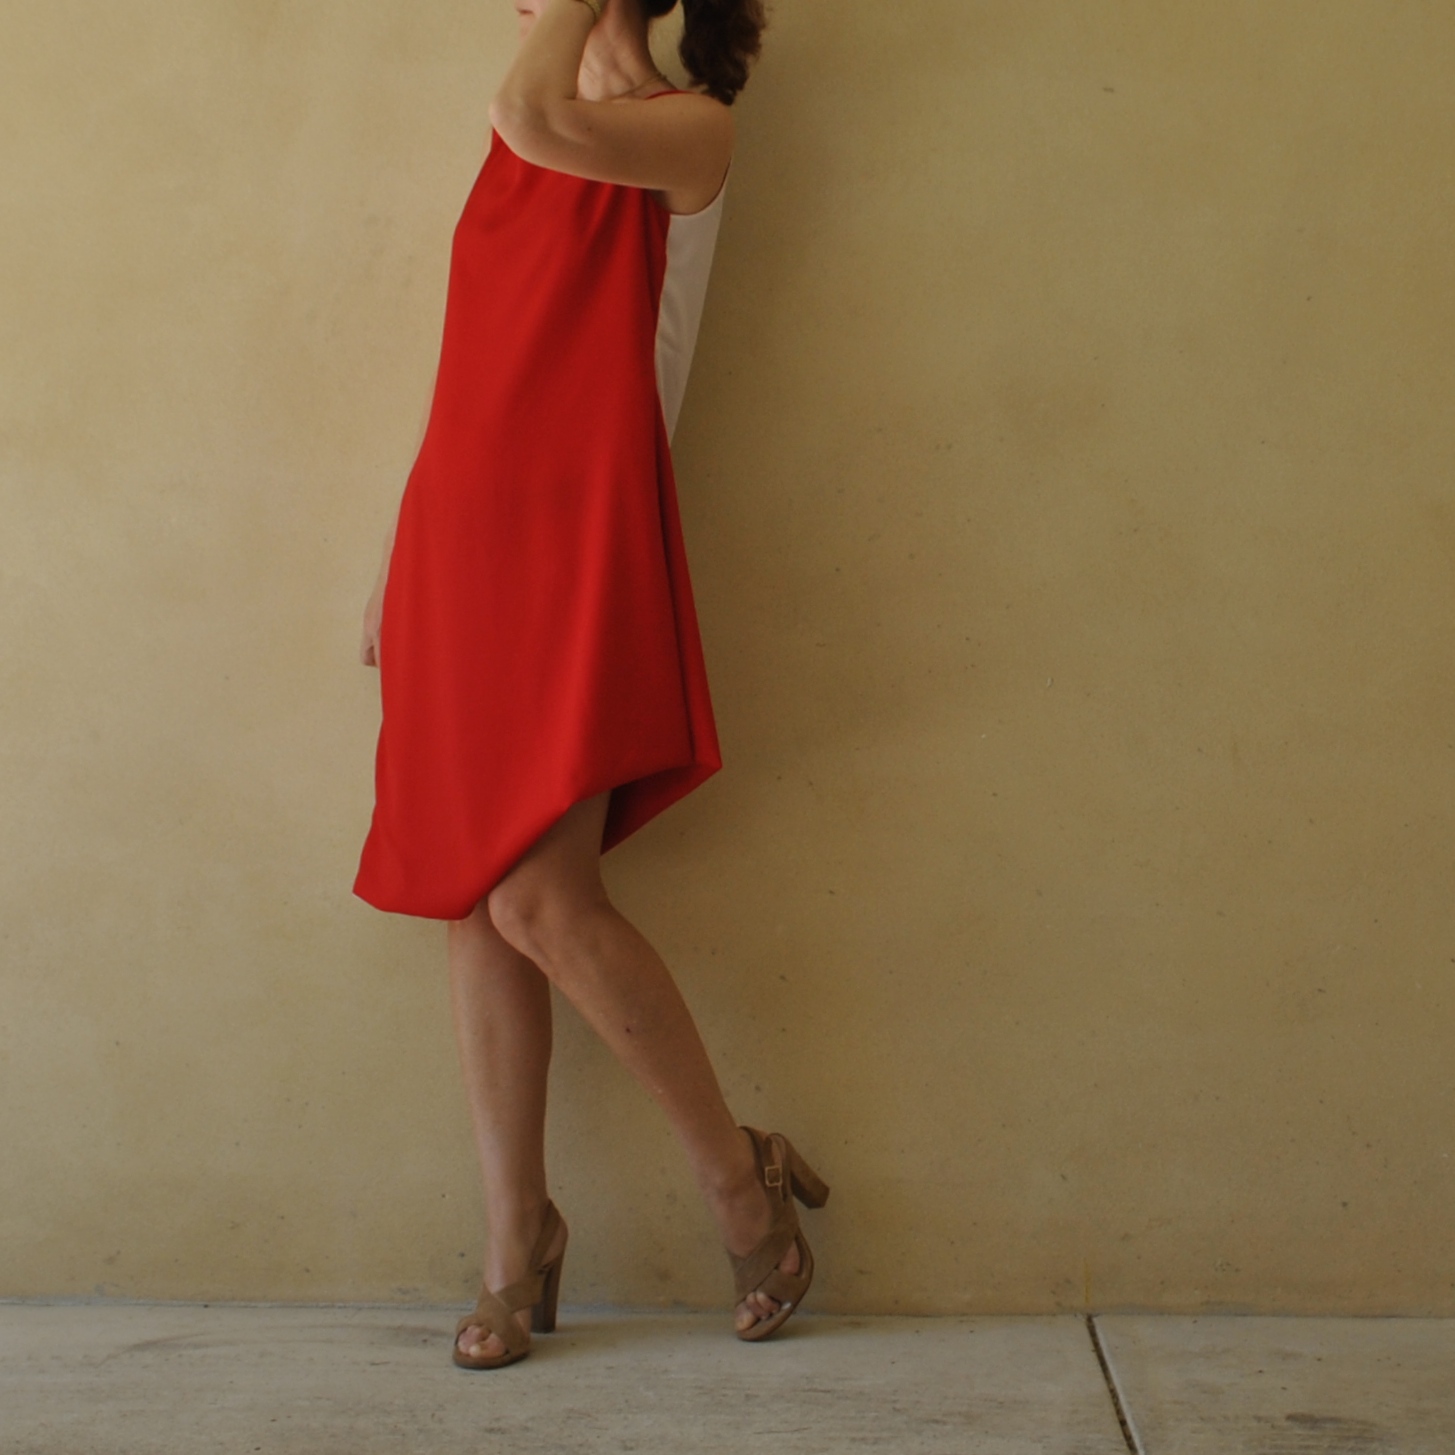
The dress does have a front and a back, the only way to tell them apart is by holding it up at the shoulders so you can see the lower scoop of the front neckline.  However I can wear it with a red front and a white back if I like by pulling it inside out and wearing it with the lining side out… hello, reversibility for the win!  Below is the dress worn in reverse; i.e., with the “lining” on the outside.  It doesn’t look that different to if the dress was worn back to front, just in small details.  Unless you looked closely at the shoulders and saw that they were hand-stitched closed, you probably couldn’t tell this was the inside of the dress!

Although I really like how the dress looks, I’m not completely happy with some of my construction in this one…  I found to my cost that one majorly important aspect is to make sure that the two outer, left side-seam edges are exactly, and I mean exactly the same length!!  This is the boo boo I made; mine were out by a mere 1cm, which was enough to put my side seam out by a touch, so it hangs a weeny bit too wibbly-wobbly for my taste.  So I’m thinking of this one as a kind of prototype or wearable muslin, and want to make another “proper” one for myself, although I will wear this one a lot too.
Maybe if I make it again I’ll do a proper tute on how it all goes together, reversibly.  
Maybe.

Details:
Dress; a variation on Burda 8511 and based upon a design idea of Anita from studio faro; in red and white rayon crepe
Sandals; Zomp, from Zomp shoes

pinterestmail

ziggyzag madness

buzzy buzz
I’ve made some zigzaggy bumblebee pyjamas, but not for me.  This was a request.  It is nice to get a request! well, every now and again I mean.  Not too frequently, hehe.   
I know they look pretty baggy on me but I’m happy to report that they do fit their actual owner very nicely.  🙂
The cotton flannelette is from Spotlight, and the colour and print were the choice of the recipient.  Fortunately I pretty much had design carte blanche; the only stipulation was the yellow zigzag for the bottoms and the black for the top.  I was worried about it all being a bit bland and/or strange looking, so decided to insert some piping from the other colour onto each piece for a bit of interest and to tie them more to each other, make it look more like a “set”.  And it’s funny, because the fabric didn’t turn me on much at first, but doing that piping detail really turned them from “meh” to “hmmm, I think I likey!” for me!  Now they’re finished, I even think, ahem; maybe I love them, just a little?
Serendipitous discovery of the day; chevron makes a rather attractive piping insert.
 The yellow cuffs  might look like an interesting design decision but were really a necessity born of lack-of-fabric, because I barely had enough of the black to squeak out the pieces for the top, and the pyjama-recipient wanted lovely long sleeves.  Much longer than I had enough fabric for! eeeek!  One thing I’ve learnt to my cost is that the Spotlight range of flannelette is very narrow; annoyingly so… grrrrrrr!


Although once I put those yellow cuffs on I actually love them too.  I was very worried they would look weird too.  Miraculously I think they do not.  The top actually looked rather blah without them.
So woot!  New jammies to keep my loved one beautifully warm and cosy for these last nasty days of winter, and I can tick another item off my list.
Also, I discovered there’s nothing quite like a set of oversized pyjamas for bringing out the diva supermodel in one’s posing repertoire…

Patterns:
The pyjama pants are traced from off of a previous pair, and have a faux fly, elastic waistband, side seam pockets and a folded cuffs with piping insert.  The top is based upon Burda magazine 10/2009, top 121, with a minor modification; namely for the neckline to have an almost grandpa-like buttoned placket, but made with a front and back inner facing.  The buttons are navy blue, also as chosen by the recipient.  They work surprisingly well with black and yellow!
I’ve used this same top pattern twice before, firstly for my very own winter jammie top here, and secondly for my olive faux suede top.

pinterestmail
Switch to mobile version
↓