Tag Archives: Dress

the dog bed dress

Hmmm, a totally unromantic, slightly ridiculous and definitely a whaaaat?! title for a dress but to my mind it was just the obvious choice! See, when we knew Clara was coming along I looked out Sienna’s old dog mattresses (yes, doing this did evoke lots of feels) so as to re-cover them for the new arrival… I had a teeny bit of green upholstery fabric left from a previous re-upholstering job, enough for the smallest mattress, but needed some more for the other two, much bigger mattresses.  So off I hopped to Spotlight and bought some lovely bright yellow cotton canvas… our current lounge room colour scheme is all wood, white, neutrals and with spots of yellow and obviously the most important thing about dog beds is that they co-ordinate nicely with not just your dog but the decor too…  😉

After I’d finished, there were a few bits and bobs leftover, too much to throw away and to my delight I discovered the pieces for Vogue 1316 fitted on them, just.  No further incentive required, but off I went, snip snip…

from left: future dress, scraps… and maybe, shoes…?

This interpretation of the pattern; a one colour dress with contrasting strips to highlight the seaming of the design has always been one I had in mind to make some day… only I’d originally pictured white corduroy and with black inset strips to highlight.  But yellow/navy is fine with me.  The inset strips are actually navy blue, the leftovers from the voile binding I dyed especially to make my recent Sydney jacket.  So, it’s pretty much a free dress, something from nothing… the only thing I bought was the zip.  Waste not want not!

So, ta da! what more is there to say?

The fabric is super fray-tastic, so my first step was to overlock every single edge.  The method I used for the inset strips is the exact same method I used for my Swedish dress, … my tutorial for this is here.  The very high contrast between the yellow and the navy meant even the slightest bit of “off” sewing was immediately very very obvious, so I was super precise and accurate in my sewing here.  That’s OK, because I really do love precision work in sewing  🙂

my tip for lining up seams perfectly: only stitch a few cm, and check to see everything is as it should be before stitching the remainder of the seam on either side

pocketses!

I also adapted the pattern so I could have my pockets inside that curved front seam; an adaption I’ve made every single time I’ve made the pattern… if you want to see how I did that, the pictures of the pattern pieces are here.  I did take a little extra finagling to do the pockets with the inset strip, which along that front edge is of course a binding, and not an inset strip, so it’s a slightly different method… to see how I did that, see my tutorial here.  Different dress, but it’s essentially the same technique!

For the neckline, the lower hem and the sleeve edges, I trimmed away the seam allowance and simply bound the edges with the same bias binding.  Simple dimple!

My dog bed dress is unlined… I didn’t think there was any need for it with the nice sturdy canvas fabric.  My previous denim-jeans, version of the pattern is unlined too, and I think that’s fine for a more summer-y, casual style of dress.  Lining is not much fun when the weather is warm.

Haha, it’s funny; this kind of project, with tacky, unprecious fabric, that I just kind of get this idea in my mind and I jut wanna go for it! often turns out to be my favourite kind of project.  I sure enjoyed making this one, and I know I’m going to love wearing it too.

Below is how I wore it for its maiden voyage… Craig forced my hand into revealing it early when he chose it for the last day of my “their choice” challenge.  I’m like, but I haven’t blogged it yet!!  … usually I like to take some “nice” photos, you know… well serves me right for being lazy.  I like my navy cardigan with it but don’t think I would ordinarily choose these sandals to go with it  😉

My previous four versions of this great pattern are here, here, here and here

Details:

Dress; Vogue 1316, cotton canvas, voile strips to highlight seamlines
Tights; made by me, details here, and my tutorial for making your own custom-fit tights pattern is here
Boots; nylon, from Zomp shoes
Cardigan (above); knitted by me, the Miette, details here
Sandals (above): akiel, bought from an op shop a gazillion yonks ago

extra pictures just because Clara’s looking adora-bubs

SaveSaveSaveSaveSaveSaveSaveSaveSaveSaveSaveSave

SaveSaveSaveSave

SaveSave

SaveSave

SaveSave

pinterestmail

french navy forsythe dress x2 and some tights

hello!  I’ve made a couple of new dresses lately… followers of my ootd blog may have seen these pop up over there already.  Remember back in January I made up the free Orla dress pattern designed by Sarah May of French Navy? well Sarah very kindly invited me to be a part of her tester group for her new dress pattern, the Forsythe dress.  That little Orla has been an excellent wardrobe mainstay… my little counter tells me I’ve worn it ten times already since I made it in January, which is pretty good for me!  so I happily accepted.

The Forsythe is a relaxed fit dress with short, cuffed kimono sleeves, a slightly dropped waistline and a gathered skirt with hip yoke pockets, and a back button closure.  However, I have found that that button-back closure is pretty much decorative… the wide neckline and relaxed fit is sufficient enough that I can pull the dress easily over my head without having to undo any buttons.  Win!

I’ve actually made two Forsythes… the floral at top is my second and “real” version of the pattern, and that is me dressed to wear it out out to our recent anniversary dinner, at Cape Lodge in Yallingup.  We’ve been married 29 years! and little chic little floral rayon number paired with black tights, black booties and my chocolate leather jacket was the perfect thing for a special and romantic dinner out.

But maybe I should talk about this one, my first “muslin” version first… I made this one using three pairs of my husband’s old dress trousers, respectively a charcoal wool, charcoal and white cotton/linen pinstripe, and a chocolate/blue cotton pinstripe…  these have been in my refashioning bag so long there was actually an old spider’s nest on one of them!  eeeek! I gave them all a quick brush over the garden and then into the washing machine they went… then it was out with the scissors… snip snip!

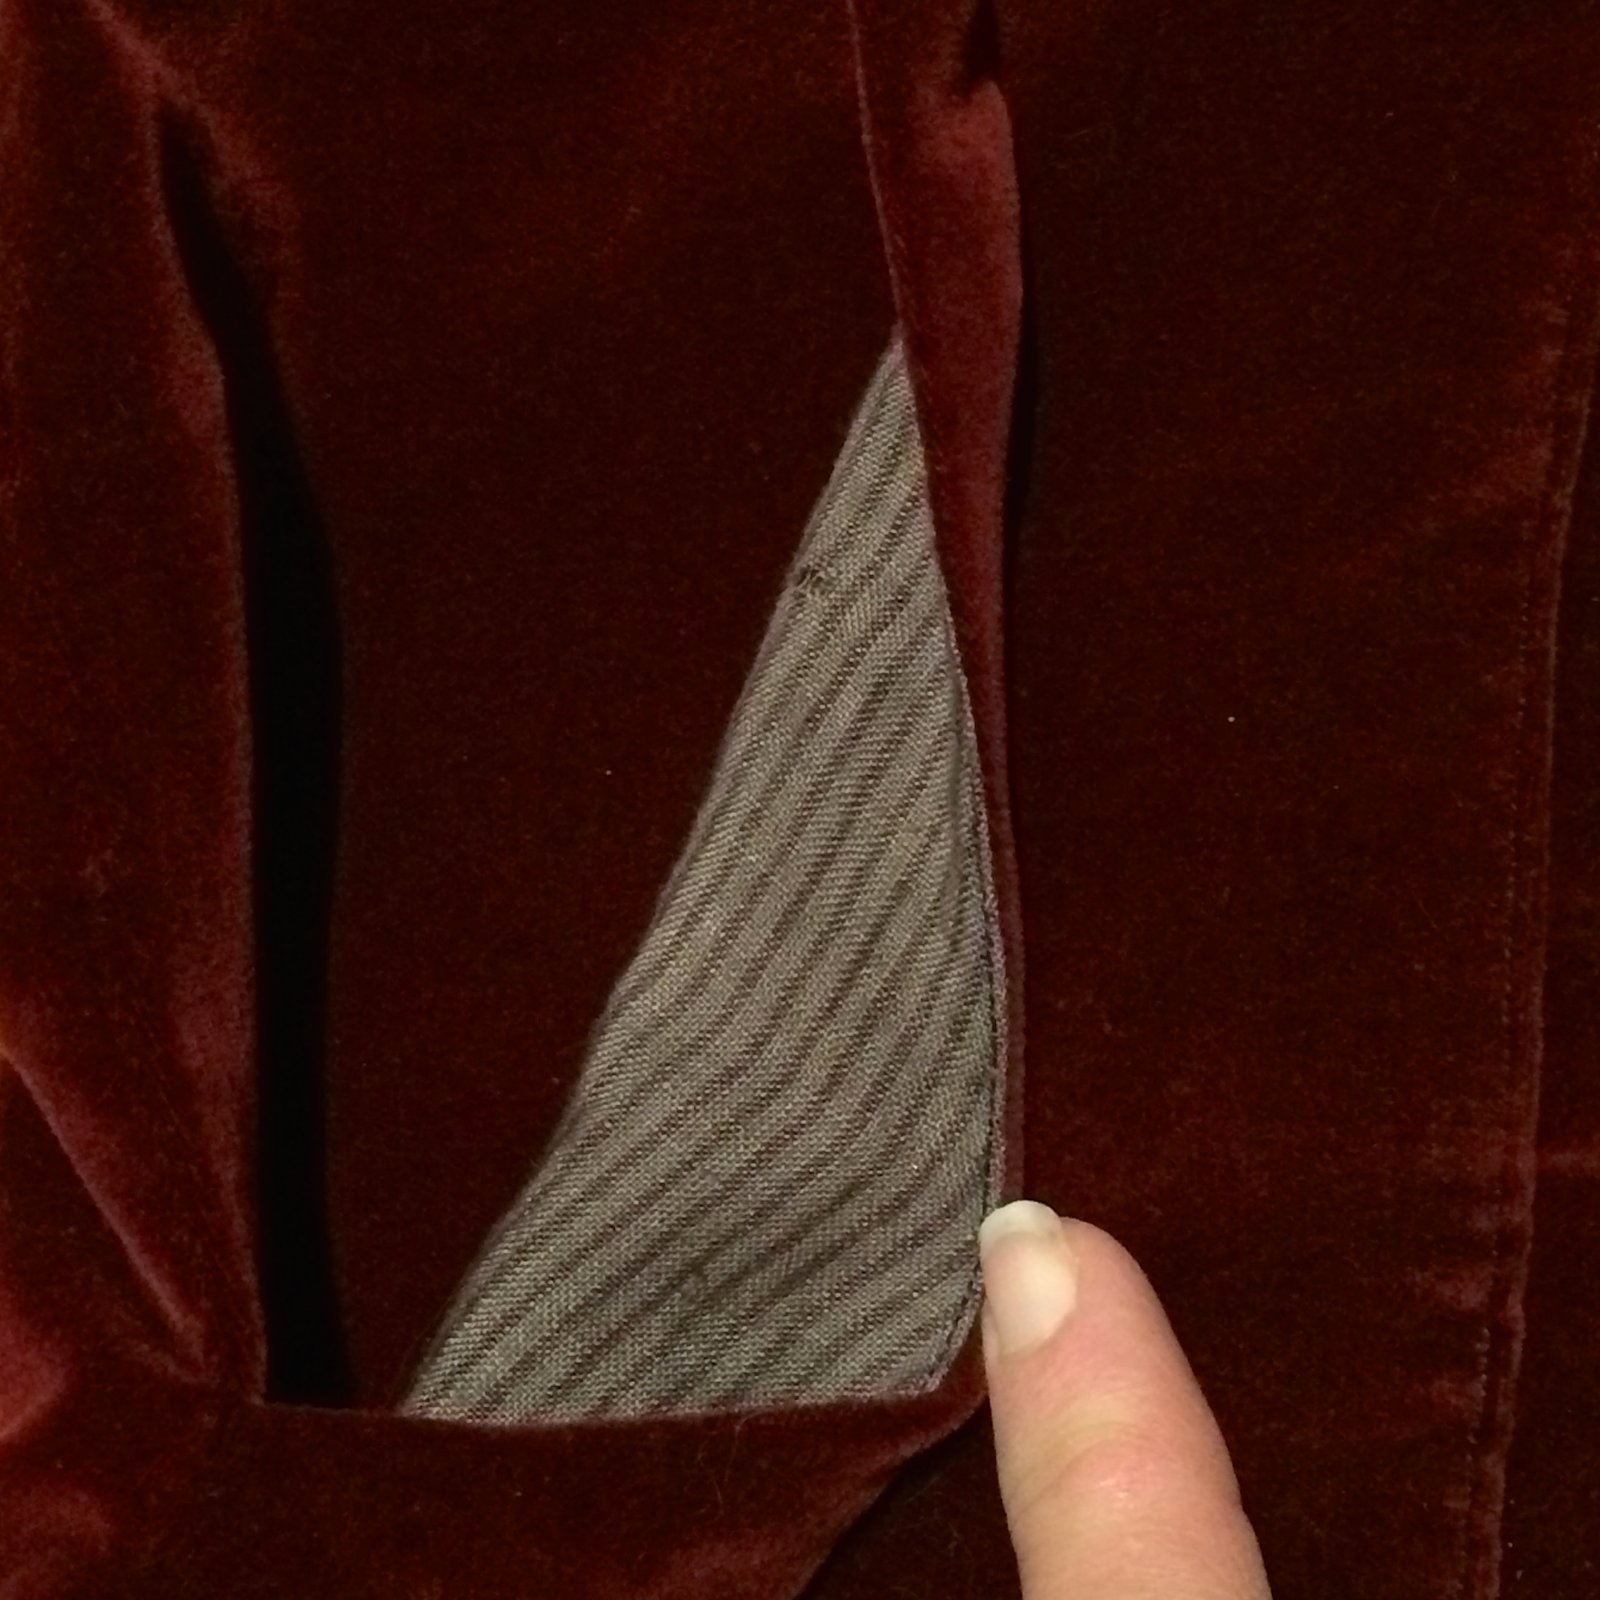
This dress was really just a quick run-up of the pattern to test for fit and to see that it worked.  Of course it did! but the trousers fabric was really too stiff for the gathered skirt as in the pattern, so I instead folded the excess fabric into wide pleats in the front.  I quite like this effect because it also suits the formal “dress pants” vibe of the fabric too.

The relaxed fit in crisp fabric gave a rather boxy result for my taste, so I later unpicked and took in the bodice through those handy princess seams in the bodice.  I think the more shaped and fitted streamlined look suits the crisp, stiff fabric better.

I also put  inset strips of the plain charcoal into the princess seams to highlight the seaming… I LOVE how this looks, and the play of different stripes, blocks, lines and crisp angular intersections

I really like this little “trousers” Forsythe dress, however I felt a bit bad though that I had used cruddy old fabric to make up my dress, and hadn’t even done the recommended gathered skirt either, like I hadn’t done a “proper” job. so I quickly nipped out to Spotlight to get some nicer fabric and make my “real” Forsythe.  I thought the gathered skirt was more suited to a very thin and slinky drapey fabric like rayon.  Sarah May is from Cape Town in South Africa, and so as soon as I saw the selvedge of this lovely rayon floral print I knew it was totally perfect!

Plus it’s sooooo pretty!  I actually like this one a lot more than the “trousers” one, hardly surprising really!  I took care when laying out the pattern pieces in order to get a really nice and hopefully, a visually pleasing print placement on the dress.

This version is made up exactly to the pattern, with the proper gathered skirt and all, the only exception is that I put seven buttons on the button band at the back instead of the recommended five.  The only reason for this is that the little packet of perfect brown tortoiseshell buttons I picked up in Spotlight had seven buttons in it and I didn’t want leftovers.

In other news; some other things I’ve made recently.   Four more pairs of black tights, in polyester stretchy stuff from Spotlight.

I made these using my own custom-fit pattern, devised as described here.

I wear black tights a LOT; I wore last years’ well over one hundred times, the heels on some have worn out and so I chopped off the feet and converted them to leggings now.  So I reckon making a few new pairs each year is very worthy use of my time.  And, for everyday wear, my own handmade tights really are so much better than rtw, for two simple reasons.

  1. FIT!   Take a gander at the side-by-side comparison of my own handmade tights to a pair of extra-tall rtw tights on the right.  Yes, those are extra-talls!!  It’s easy to see why I have to nip into the ladies room several times a day to hoink the tights back up…  SO ANNOYING!  After wearing my own tights for a year I’d forgotten that that was even a thing…  I love the sophistication of beautifully sheer seamless legs that you can only get with rtw, and I don’t mind putting up with the disadvantage of the crotch migrating inexorably southwards for the advantage of that on special occasions, but on an ordinary, everyday, day? Nope.

My custom fit tights have fitted feet, and are shaped all the way up my legs.  They might look a little funny, but they were made to fit exclusively ME!

2) and secondly WARMTH.  I make my own handmade tights from opaque black polyester stretch, and they are super warm and comfy compared to even the thickest of thick rtw tights.  Again, for special occasions, being a bit cold is a small price to pay for the beauty of sleek sheer legs, but not for everyday.

Four pairs of handmade tights can feel like a bit of an unexciting production line to make, but ultimately they are the most hardworking and practical things in my wardrobe.

high-tech method for telling the front from the back in the pre-dawn light that usually illuminates my dressing…

Details:

Floral at top and below;
Dress; the Forsythe dress by French Navy, printed rayon
Jacket; Burda 08/2010;113, chocolate pleather, details and my review of this pattern here
Tights; made by me, my tutorial on how to make your own custom fit tights pattern is here
Booties; nylon, from Zomp shoes

Charcoal/chocolate striped version:
Dress; slightly altered French Navy Forsythe dress, made using three pairs of old business trousers
Tights; made by me, my tutorial on how to make your own custom fit tights pattern is here
Shoes; made by me, details here

location: out to dinner l’anniversaire; Yallingup in the south west of Western Australia

SaveSave

SaveSave

SaveSave

SaveSave

SaveSave

SaveSaveSaveSave

SaveSave

pinterestmail

a red wine pinafore

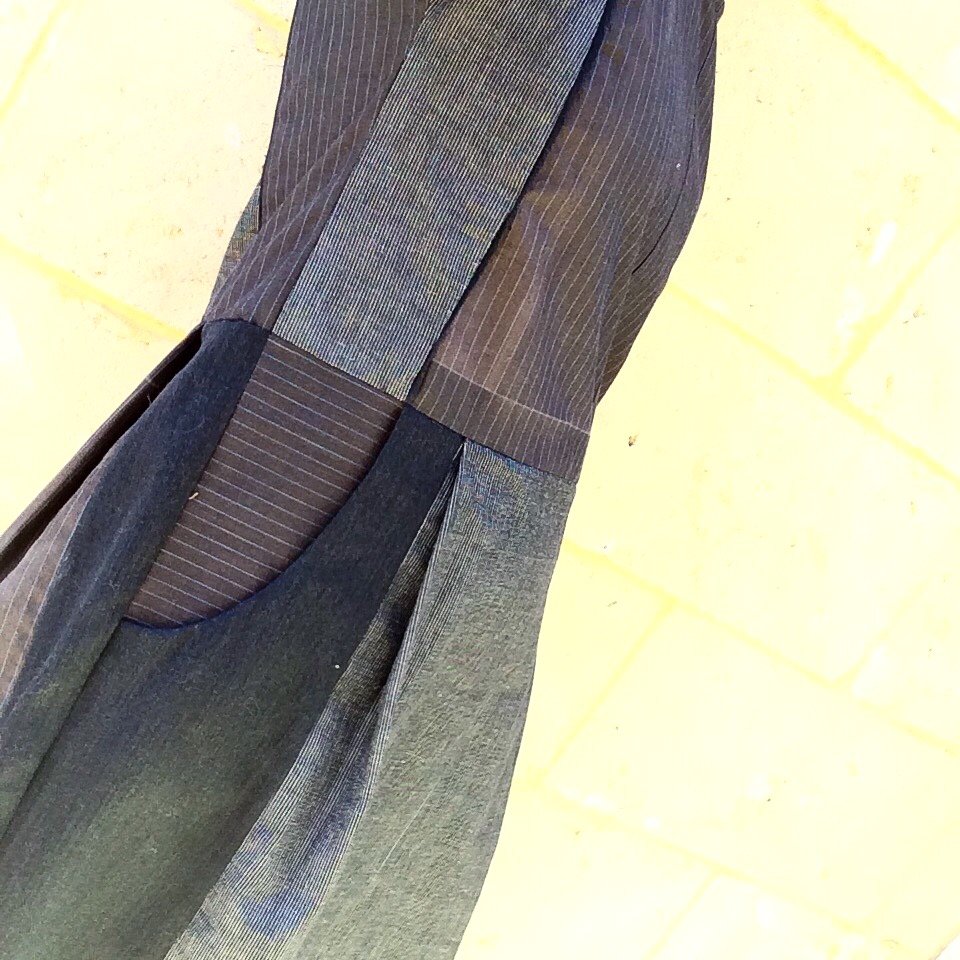
I’m wearing a new … thing. Is it a dress? Dungarees? An overall…?  we used to call these pinafores. Or a pinny.  I think it’s pretty cute anyway 🙂

I used to dress my children in corduroy dungarees when they were little, and LOVED seeing them toddle around in them, how sweet they used to look!  So maybe I’m a little nostalgic.  And maybe it could be argued that pinnies are a funny choice for a woman of my age, that they’re more suited to a younger set; but whatever… I’m just just inexplicably into them right now; I don’t always follow a trend but this one I really liked and I just wanted one.  Nowadays I’m just into wearing what I want to, and am caring less and less if it’s what I’m supposed to be wearing.  It’s kinda freeing, to be honest.

I’m trying to remember when the pinafore first crept sneakily into my head and buried itself comfortably there … was it in Japan? or Melbourne?  just the general collective subconscious?  most likely the last one…  can’t remember, but the idea got wedged in somewhere and at some point I started to fantasise about my perfect pinnie.  I could picture it exactly; velvet or velveteen, and deep purple-y/burgundy/red wine colour.  The only problem was that Spotlight had a wine-coloured corduroy, but not velveteen, and I had my heart set on velveteen… not to worry!  I bought the cherry-red velveteen with plans to dye it.  I also bought my copper-coloured buckles and jean buttons from Spotlight.

the original colour, before dyeing…

Now patterns, patterns…  There re actually precious few pinafore patterns out there.  I ended up using the pauline alice turia dungarees pattern,  I’d seen and liked Sue’s turia dungarees, especially the cute trapezoid pocket with flap on the bib, and thought I could alter the pattern to be a dress pretty easily, although I ended up altering every single pattern piece! with one exception; that front bib pocket, that attracted me in the first place!


For inspiration; I really liked this pink pinny, and this denim one too… though I preferred the pink one. .  I printed out and taped the bodice bits to the shorts bits, and cut them as one piece, like in the following picture…  you can see in the picture I’ve allowed plenty of room around the pattern pieces for custom-fitting, and I basically draped and pinned it directly on myself to get the final version!  It doesn’t even fit either of my dummies!

The front is cut on the fold as one piece, with a wider bodice and a straightish A-line skirt.  The expanse of fabric on the front is nicely cut up by those three patch pockets.  The back I cut with a similarly shaped A-line skirt, and to have a centre back seam, which I overlocked and then felled to one side; it would have been easy to cut the back on the fold as one piece too, but because I was not having any pockets on the back, I thought it needed the centre seam for some visual interest.

I cut my hip pockets to be about 2cm deeper and wider than the pattern pieces, because I wanted them to be more visually weighty than they appeared on the pattern illustration… and positioned them on the dress in an optimum position for me, which is lower than on the patten.

I also ended up cutting my shoulder straps narrower than the pattern, so as to fit into the buckles that I’d bought from Spotlight. The pattern is not intended to be lined, however because I knew I’d be wearing it with tights all winter I decided to fully line it… the bodice, shoulder straps, and all the pockets are all lined with white/purple striped linen from Tessutis in Melbourne, leftover from a shirt I made for Craig a few years ago.  For the skirt part I unearthed a navy blue polyacetate lining fabric from my stash.  I only had a very small piece of this, and by complete sheer luck it was exactly the right size and depth for my lining.

lining; the bodice and skirt are attached together at waist level and cut in the same A-line shape as the pinafore.

pocket lining

I used black thread throughout, and deep chocolate overlocking thread…  resulting in a mishmash of cherry red velveteen, white/purple lining, blue skirt lining, and black and chocolate threads .. sounds like a bizarro dog’s breakfast of a dress, yes?  Yep!

before dyeing

BUT I knew it’d be alright once it was dyed.  And you know what? I’M SO THRILLED WITH IT!  I used both iDye in Brown and some Blue, and TOOK THE PLUNGE!  eeeeek!!! Dyeing is always a little terrifying, but yeah, I couldn’t be happier with the result, the colour is perfect and EXACTLY what I wanted.  I’ve already worn this two days in the week since I finished it!

Details:

Pinafore; some wild ad-libbing upon the pauline alice Turia dungaree pattern
Tshirt; Closet Case patterns Nettie bodysuit, paprika stretch, details here
Scarf; raspberry cotton jersey, detail here
Navy cardigan; the Miette, a free pattern by Andi Satterlund, all yarn details here
Orange arm warmers; made from an old moth-eaten jumper, details here

location; Eagle Bay, in south western Australia


above is how I wore it – in the rain! – on the weekend, and below is how I’m wearing it today… it looks a little more vibrant in the blazing sun!

with self-drafted striped Tshirt, details here, and
my scarlet Miette cardigan, all yarn details here

SaveSaveSaveSaveSaveSaveSaveSave

pinterestmail

white Charlie caftan

Seems like aaaages since I was at the beach for these photos! and I can remember it was a glorious 30C that day.  Right now it’s still sunny but getting pretty nippy here in Perth; and joyously frolicking in the surf in a tiny little dress is kinda out of the question.  SO GLAD I was super-organised and pre-did my little photo shoot!  Anyway, here is this cute and very summery little dress I made a few months ago.

Pattern; the Charlie caftan, designed by Heather of Closet Case patterns, and named after the ultra-cool Charlie, of Noble & Daughter.  It comes in a shortie-short length like this, or you can make it as a glamorous maxi with a titillating thigh slit, so you can flash a little bit of leg in a breezily sexy way while shimmering along poolside in your wide-brimmed hat, oversized sunnies and of course an umbrella-ed cocktail in hand.  Me not being the least bit glamorous, I opted for the mini version and scampering in the surf, no cocktail (sob)  You probably can’t even tell, but I’m wearing it over my black Sophie bikini too.  Closet Case patterns, head to toe!

I must say, it’s an extremely cute little design and also a super quick and easy pattern to whip up.  And it has super deep, therefore by definition awesome, pockets…  easily deep enough to hold your sunnies, car keys and phone while you’re at the beach.  I made view A with the front pleats, and I put in the tie as well since I fancied being able to tie it up and give it a bit of a waist.  I’m still undecided as to whether I prefer it tied or with no tie!  tying it up does make the pleats “pop out” a bit over your tummy, but on the other hand I like it with a defined waist as well… the verdict is still out on that one…  probably I should have made the gathered version!  In the meantime, I took some pictures both tied up, and untied.

Fabric; a gooooorgeous linen/cotton mix from Spotlight.  I bought quite a lot of this when I spotted it, hehehe.  I mentioned it previously when I used it to make the lining for my lace “Brazilian” top too…   I’m actually thinking of doing a spot of appliqué/embroidery on my caftan, snazzy-ing it up a bit.  Still undecided about that one too.  AAAGH I’m so indecisive!

Details:

Dress; Closet Case patterns Charlie caftan, white cotton/linen
Bikini (under); Closet Case patterns Sophie swimsuit, black swimsuit fabric

location; Bunker Bay, Western Australia

SaveSave

SaveSave

SaveSave

pinterestmail

little floral dress; donna karan for vogue

I’ve made this new dress! every year my dear friends give me a Fabulous Fabrics voucher for my birthday… it’s taken me a little while but I finally got around to spending it and making my birthday dress!

Pattern; Vogue 1351, this is my third version of this pattern, my first one is here and my second here.  This time I cut the skirt a bit more flared and actually it was going to be a lot longer to start with too, it was going to be a midi-ankle length dress, but when I tried it on for hemming I decided this particular small-scale floral was not right for a midi-length.  It felt like a big walking cliche, to be honest, as if it was the “before” dress in an op-shop refashion challenge, and I was about to lop a foot off the bottom and go “TA DA!!” LOOK HOW AMAZING IS THIS REFASHION GUYS!!! FRUMP TO FAB IN JUST FIVE MINUTES!!!

Actually, I think the longer the length of a dress, the bigger the scale and more overblown the print needs to be… and a smaller scale print really looks best in a shorter dress.  Also Craig gave a big thumbs up to the shorter length, although that is pretty much ALWAYS his response, so much so that I don’t know why I bother asking…  Anyway, I preferred the shorter length too, which I should say is of course the “right” length!

Fabric; floral chiffon, lined with a warm, peachy/pale-pink crepe, both from Fabulous Fabrics.  I’d tried a few different colours underneath the floral – because it is completely sheer the colour of the lining made a huge difference; white, ivory, and even cream were all too “cold”… I almost went for pale yellow which was quite warm and nice but in the end I settled on this lovely pale peachy-pink.  Pink gave an rosy warm glowing light to it;  just exactly what I want for winter  🙂  I know a chiffon dress seems a strange thing to make for winter, but this dark rich floral just seemed to my mind to be very right for the season, and is what I want to wear right now.

I stitched French seams on all areas of the chiffon, and the seam allowances of the pink crepe lining are overlocked to finish…

 triple-stitched baby-hems for both the shell and the lining…  as described in my tutorial here

… the only difficult bit I had was putting the pale pink invisible zip into the chiffon.  It is tissue thin, and so wouldn’t be able to provide any support for the zip, so I applied thin strips of iron-on interfacing along the stitching lines of the zip, extending it by about an inch either end and was super careful when stitching.

I thought I’d show my lining slip-stitched to the zip tape inside… I always stay-stitch a three-sided “box” at the lower edge of the seam where it will be sewn to the lower edge of the zip, snip into the corners, press the seam allowances under, and stitch along the stitches… this is something the patterns NEVER tell you, but I think they really should, because it’s so much better.  The lining sits a lot flatter and smoother, the stay-stitching gives a little bit of reinforcement to the area, and the squared-off slit really does make a visible difference to how invisibly the zip seam appears in the finished garment, especially in a very thin fabric like this.  Haha, I know that “visible difference to how invisibly etc” sounds like an oxymoron, but you know what I mean!

I wore it for the first time today!   along with my scarlet Miette cardigan, to show it to my lovely girlfriends who had given me the voucher… 🙂

Details:

Dress; Vogue 1351, floral chiffon, crepe lining
Cardigan; the free Miette pattern by Andi Satterlund, all details on my yarn and alterations to the pattern here
Tights; voodoo
Shoes; Vitullimoda, bought in Melbourne during my holiday over there with Mum and Cassie 🙂

location; Kings Park, Perth, Western Australia

SaveSave

SaveSave

pinterestmail

a shirt for David and a dress for Cassie

hey bro!

Woooh!  I’m so excited to finally hand this over!  My brother has had/is having a big BIG birthday… and my sister-in-law made the brilliant suggestion that he would like a shirt made by me for his birthday.  Well, oh my goodness, I don’t know why I didn’t think of it myself!!  So I dutifully and sisterly-lovingly spent LOADS of time and care into making this as perfect as I possibly could, and it pretty much is.  Ta da!

looks like a kinda cool dress when Bessie is wearing it, yes?  Gotta admit, I WAS a little tempted to steal it …

I know what you’re thinking… don’t I pour loads of love and care into making shirts for my husband and two sons too? well of course I do.  Buuuut, see…  my brother’s shirt is going to be handled, worn, laundered, ironed and generally available for up close and personal inspection by someone other than me… and I quaked with fear at the thought   * imagines to oneself, my brother and sister-in-law with a magnifying glass going over each and every stitch*   Ha!

And yeah, this really is a VIB (Very Important Birthday).  and so I just really wanted for this shirt to this to be really really lovely for my really really lovely brother.

Pattern: I used my new mens’ shirt pattern Burda 6874, graded to fit David, plus I made his extra long as per the shirt whose size I was going off.  My sister-in-law had secretly given me a well-fitting shirt of his that I could measure off to custom-fit his shirt … David is a 6’4″ champion swimmer, and built like one too… did I ever mention he has swum the Rottnest Channel swim solo?!   Yep!!  Meaning that I needed to substantially re-grade my pattern to fit his physique.  I didn’t have David himself to check the fit off of, just that one shirt; so I was pretty terrified how mine was going to go.  Luckily the fit turned out to be absolutely spot on!  *pheeeew!!!

Fabric; a really nice deep indigo cotton/linen with a permanently scrunchy texture to it, I went big guns and bought this from Calico House, because well, it IS a special birthday.  The red buttons are from Fabulous Fabrics.

But enough boring chit-chat…  how about some gratuitous detail shots  #shirtporn #oooyouknowyouwantit

buttondown collar

it took me three goes to get the second of these buttonholes looking exactly the same as the first!

sleeve placket.  contrasting red cotton for the cuff and yoke facings, topstitched in a way that a tiny sliver peeked out on the right side


fully flat-felled seams throughout

sorry for collar picture overload.. I was just so thrilled at how nice it turned out!

I was once asked what the inside of these side seam gusset/insert thingies looks like …  Folding the inner edges all around made them pretty bulky so I cut away all seam allowances of “hidden” edges ie. those of the underside of the gusset and the turned under edge of the shirt hem, tucked them inside the upper gusset edge and topstitched them all down… thus considerably reducing bulk here

As soon as he opened it, he put it on.. obviously this made me SO HAPPY to see him wearing it!

Also… recently I mentioned that I had made a dress for Cassie?  well here ’tis!

Pattern; the Sudley by Megan Nielsen patterns,  I gathered up the sleeve hems with skinny elastic, like I had done for my own Sudley blouse, at her request.  All seams are French seams, dress is fully lined with the lining cut as an extended bodice.  The fabric is a very realistic silk-like poly from Spotlight, lining also from Spotlight.


To be honest, halfway through making it I felt pretty down about it, like this was a dress that couldn’t possibly be saved… but fortunately once it was on her it suddenly looked adorable. And she loves it!  Despite that very serious facial expression!

No no no!  I’m not about to be a granny yet… this is just a pose that made us both roar with laughter!  Demonstrating the… um, capacity of this design.

SaveSave

pinterestmail

gingham Kalle dress

My new dress!  Hehe, seems like I’ve got new stuff coming out every day lately but actually this is not new at all! really, it’s months and months old!!  but it is new to my blog here.  And the pattern is brand new to the world too, so… “new”, with caveats.  The pattern is Closet Case patterns’ newest release, the Kalle shirtdress.  I have been SOOOOO looking forward to wearing my version here only like ALL SUMMER LONG, welcoming it into my rotation of little dresses, cos you know how I love wearing my little dresses!  I made it back in October when Heather kindly asked me to be a tester for her new pattern.  SO I made it, bam! and like a good little tester I sat on it and didn’t wear it, well, not publicly, anyway! waiting for the go-ahead from Heather.  Finally!

So, yes, it’s a adorable little pattern, I really love it.  Heather says it is her most requested design yet, and I can well believe it! her own personal first white version was utterly delectable and had me all drool-y want-y too!  The pattern has three variations; I made the dress version C but with the half-length button placket of version B.  Except I used snaps because they were just handy.  I also added three pockets to mine, one breast pocket, and two inseam side pockets… my curved-bottom breast pocket is a lot smaller than the one in the final version of the pattern, because the tester version was pocketless and I just added one for fun and visual interest.  I see Heather has added a breast pocket to the final version of the pattern, yay! and as for the hip pockets, well I mean, who doesn’t LOVE hip pockets?!  Hehe, I tried to not have my hands shoved into them in all my pictures, you know, to show the dress as it’s been designed but they just crept in there every now and again.  I’m sorry, it’s just… pockets!  I couldn’t help it!

The design is beautifully breezy and very comfortably roomy… I love the cute little cut-on sleeves with a simple cuff, the petite collar has prettily feminine proportions, and the exaggerated lower hemline looks quite dramatic and really cool, imo.  That one big box pleat in the back is fabulous, and a pretty dramatic feature too, yes?  love how the folds balloon out and down to that gently shaped back hemline.  In fact I love all the features and the shape of the dress, full stop.  It’s like the perfect little summer shirt-dress.  I’m going to wear this one a tonne, for sure, and and probably going to make a tonne more too!

Fabric; a 100% cotton seersucker gingham.  This is, um, it’s a little embarrassing… ahem, but it is actually an old tablecloth that I bought from the op shop in Toodyay, when I went there with Sue and Nicki on an alpaca-finding mission, a few years back now!  Hohhhh, yeah!!  “Tablecloth” might give one the urge to squeal “ew, groooosss!” but I assure you it was well washed, has no stains, and is in fabulous nick.  The fabric is actually beautiful; crinkly, crisp and strong, but with a soft lovely drape.  They just don’t make tablecloths like they used to!

Alterations: I pretty much made it up exactly to the pattern, because obviously I was testing! and needed to give accurate feedback.  However I did do a few very minor little things…

a) as mentioned previously, I added three pockets; a curved-bottom breast pocket, and two inseam side pockets

b) for the lower hem I didn’t bother with bias tape to finish it, just turned up a skinny hem twice and hand stitched it in place.  I know bias tape is an excellent choice for curved hems in certain types of fabrics, in fact sometimes it’s just about essential; but I found it just wasn’t necessary for my seersucker.  Plus, I wanted my hem to be light and floppy and breezy, without any of the stiffness that comes with the extra fabric and seams.

c) for visual interest, I cut the front plackets, the sleeve cuffs, breast pocket and outer collar on the bias, although the under collar is on-grain, for stability.

d) not an alteration, but I inverted the back pleat on mine, so it’s set the same as for the little cropped shirt version A.  Which, by the way, is OMIGODSOCUTE.  I need to make one of these!

e) also not really an alteration as such, but Heather has reduced the neckline size by a few inches, so my collar doesn’t sit as close to my neck as it would do in the final pattern.

Note; also an excellent design for cat-cuddling

 Sophie!!  it’s hard to tell, but she’s being made to “wave” to the camera


Details:

Dress; the Kalle shirtdress by Closet Case patterns, gingham cotton seersucker, also my tutorial for adding inseam side pockets is here
Hat(below); Vogue 8844, ivory corduroy, details and my review of this pattern here
Shoes; made by me! details here

below; before I could “reveal” it I sneakily did wear it once or twice anyway…  😉

location: Bunker Bay, Western Australia

pinterestmail

couture pour bébés

Hello!

Lately I’ve been making some cute little baby suits!

We have two friends who have recently welcomed babies into their lives, both boys, and I decided to make some little hoodie suits for them.  Aren’t these the cutest?? It was soooo haaaaard to choose which cute little jersey print to use! there were so many super sweet and adorable little prints available.

I agonised a bit, would the Mums prefer funny/cute? or would they prefer chic/cute?  You can’t always predict what people are going to want for their babes, in the end I stuck with the safe option and went with the neutral coloured chic/cute… but just couldn’t resist the bear ears on the hoodies!  So there is a little bit of funny/cute going on.   I hope the new mothers don’t mind this… because I think the bear ears are adorable!


Pattern; Butterick 6372.  For both sets I chose to make a bear eared hoodie, zip fronted with long sleeves, and separate trousers.  There isn’t a pattern for the hoodie with long sleeves, but it’s pretty easy to juxtapose the onesie pattern piece with the armscye that allows for long sleeves, with the vest pattern piece that has the little pockets and a shorter, swingy silhouette.  Yes, I put in the side pockets!!! Completely useless obviously, nearly every single family member who has seen them has asked “but what are they going to put in there???” but they’re so cute that just like the bear ears, I just couldn’t resist adding them.
Fabrics; cotton jersey from Spotlight.  Both are bear prints, which fits in with the bear ears thing going on with the hoodie… am I putting too much thought into this, or what?!  Anyway, I love both of them equally.  Baby T is a bigger baby so the beige “bears camping” one is a bit bigger for him, and the smaller, ivory “bears in the woods” set is for baby J.  To be honest, I’m seriously thinking of getting some of this fabric to make a Tshirt for myself… would that be weird??  I would just have to be vigilant to never wear it while visiting!

It was such fun making these, took me right back to when I used to make cute little baby clothes for my own bubs!  I love fiddling about with the smaller and easy to manage pieces and everything goes together so fast and easy!  the only difficulties I had was with the zips for the front opening.  I don’t really like these ones all that much, they’re called “invisible separating zips” but they were the only ones I could get that were even halfway suitable, as in a) separating, b) the right colour and c) lightweight and “petite” enough to be ok for babywear.  Also it is NOT FUN putting zips into flimsy, lightweight jersey fabric.  I just went as slowly and as carefully as I could, being super careful not to stretch the fabric out very much, and I think they turned out ok.  The zip for the smaller, ivory hoodie had to be trimmed a little in length, and you can’t cut any off the bottom, because you’d lose the separating part!  So I trimmed it from the top and was careful to firmly secure the top edge into the seam so there’s no risk of the zip-pull flying off the top.  I’m speaking from bitter experience there… it’s an old old old war wound, and don’t ask!!  Just that my number one rule with invisible zips is usually; NEVER cut the top off!!

OH!  I forgot to blog about this before, in fact I just checked and I made this back in February!  bad blogger!  but I also made another little work dress for Cassie, another Named patterns Inari tee dress.  This is my fifth Inari made, my third for Cassie, she loves the style just as much as I do! Also it’s like a perfect little design for work, plus being easy and comfortable to wear, and quick to run one up.  I incorporated the same sleeve-widening alteration I devised previously, to counteract the “raise your arms above your head and oh look! now everyone can see your knickers!” effect of this design.

Fabric: a piece of mid-blue suiting fabric from the small stash given to me by my friend L, when she cleaned out her garage.  It’s got that distinctive vintage feel to it; cuts like a dream, a lovely weight, a bit heavy and with a texture almost like brushed wool.  I overlocked the raw edges inside, with the exception of the hem edge which I finished with a Hong Kong seam in mid-blue linen, from my stash.  Since the inside hem edge of this design is often glimpsed while you’re wearing the dress, I think it’s therefore much better to finish it with some beautiful, “meant to be seen” finish, than just roaring it through the overlocker.  I stitched this down over the edge, before slip-stitching the hem invisibly in place.

Other alteration, the addition of inseam side pockets.  Well, duh.  🙂

SaveSave

pinterestmail
Switch to mobile version
↓