So, I have some extremely exciting news… !! I am going to be a granny!!!!
Last week, Tim and Kelly announced they had a “souvenir” from their honeymoon to give to all of us and gave each of us a package… I unwrapped mine and what should I find, but a length of this adorable fabric and a pattern for a weeny little onesie and beanie…! everyone else had suitably themed pressies too; Sam had a T-shirt with “world’s best uncle”, Craig had a book “Grandad jokes”, and Cassie had a “World’s best auntie” Tshirt… oooh, such an incredibly lovely surprise! We were all stunned and then excited; and of course completely over the moon! We all cannot WAIT to welcome the newest and littlest member of the family next year…!! the first one in our next generation!! In the meantime of course I’ve made up the baby fabric immediately! Such fun to be making baby clothes again! #itsbeenawhile
So this is the pattern they chose; Burda 9434, and the cotton jersey is from Spotlight. I’m like, haha, first time parents; they bought a full 1.5m of fabric! Enough for two babies, lol! Wait, what?!! but no no, before we all get too excited Kelly has had a scan and there is just a singleton in there 🙂
I immediately traced off the one month size and ran up a onesie. And a beanie. Eeeee so cute! and it was such an absolute joy to be making these!! By the way; I had to trace the pattern in full, and will need to do so again and again, and probably even again! because obviously all sizes must stay intact since we’ll be needing those down the track too, that’s life… babies GROW 🙂 The pieces are all so tiny though it’s not exactly an unduly cumbersome chore.
I forgot to mention, the beanie is made from navy blue merino from the Fabric Store; I bought in in Melbourne during one of our girly jaunts over there and previously made this T-shirt/sweater using it too.
Kelly also mentioned that she needed to buy maternity clothes, and daa da da daaaa! (bugle call to arms) mum-in-law to the rescue and all that. Well, I do love sewing and have SO MUCH time on my hands now I no longer have a wedding dress to make, haha. I thought this a perfectly good excuse to buy the Closet Case Ebony tee pattern. This is one of the few Closet Case patterns I hadn’t got my hands on already … I had eyed it up a number of times but not pulled the trigger. Anyway, I finally did! And immediately printed out two copies; one for Kelly and one for me.
I know this isn’t a maternity pattern but I also knew it could easily work as one! I sized up from Kelly’s normal size, just in case; and you know what? it fits her perfectly! Pregnancy boobs, you know.
now this is a nice touch! personal. I like. I wonder if I can do this for our patterns?!
This is me here, modelling it for ye olde blog, before I hand it over to Kelly. Maybe I’ll get a shot of her wearing it, one of these days, maybe not. I’m not feeling very strict about blog photos for this one, because it’s essentially just a wearable muslin to check for size. It’s all leftovers; the body was from the leftovers from this top (Fabulous Fabrics) and the sleeves leftover from this, old favourite dress (Spotlight). To be honest, even though they’re both stretch fabrics, I don’t think they had enough stretch actually, but it still worked out, um; reasonable? I think?! And it’s just a muslin, but I still had to obsessively pin each and every stripe, grrr. This is a pretty silly thing to do, but it does result in great stripe-matching so *shrug* it’s worth it? I guess?
One thing I can guarantee; I am going to make lots more of both these patterns, and SOON!!!
So, I made a dress… or something?! I’m not 100% sure about this one. Is it a dress? or a nightie? or maybe a choirboy/celestial angel robe? The jury is out!
One thing I am sure of is that it’s delightfully floaty and breezy to wear. And very comfortable. Another thing I’m sure of is that on its own it’s scandalously see-through… ! so if I’m going to wear it out of the house it requires at least a petticoat or something. Fortunately, I made a beautiful Ruby slip once upon a time, a few years ago, from ivory crepe. I actually wear this slip TONNES, and once again it’s come to my rescue. Thank you Ruby slip! maybe I should make some sisters for you! Take the pressure off!
The pattern I used for the new dress is dress R from the Stylish Dress Book by Yoshiko Tsukiori, and the fabric is a lovely ivory/cream coloured micro-pleated silky stuff from Fabulous Fabrics. For the yoke, which needs to be more stable and “solid”, I used a small scrap of old jeans, leftovers from the small stack that have previously been harvested to produce this dress and these jeans too. To keep up with the recycled jeans vibe, I added double rows of topstitching to all the joins etc, using the same coppery-brown Guttermann’s upholstery thread that I’ve used on previous jeans like my beloved Morgan boyfriends. The yoke lining is the striped shirting cotton that I used for Sandi’s Perth blouse and for Ms Summer’s summer frock.
I’m also wearing with it my matching denim shoes, also made from old jeans #oldjeansfanfromwayback
oh hey gorgeous girl!
I actually had quite a bit of leftover of the pleated silky stuff, so at the same time I traced out the size 8 of the same pattern and whipped up a quick top for Cassie too.
looks a bit small here but it’s far more oversized on my petite little daughter
Actually, this top started out as a dress too, but surprisingly she wasn’t into it as a dress. I’d gone to great lengths to find a piece of matching cream-coloured fabric for the yoke for hers, and was very pleased to unearth an old cushion cover of a really nice cream coloured cotton damask from my stash. Normally, Cassie prefers, nay demands! cream- or ivory-coloured tops, so I was a little nonplussed when she suggested the yoke be dyed! Who is this person and what have you done with my daughter?! However I could appreciate that the all cream number as a dress was a little, um choirboy, thus the snap decision to lop off the bottom to make it a top. Fortunately she was satisfied!
Soooo, what else have I been up to? Well, my friend L had requested that I whip up a simple little dress for her, a replica and replacement for a favourite that had worn out. She bought the green floral from Fabulous fabric, and I found some black silk for the tie. I really enjoyed making this for her, though the silk I used for the tie was, no joke, the worst stuff I’ve dealt with for a looooong time. It was so hideously fray-tastic, and just that little bit too grippy to slide right side out very easily. It took me almost as much time to turn out the tie as it did to draft the dress pattern and make it up! Exaggerating? not by much!
I don’t have a picture of her wearing it, but she did have it on for one of our recent morning teas and she looked gorgeous!
again, looks way better on L…
What else have I been up to??
Well, I’ve been wanting to do this for a while…. my pale grey Acton dress has been worn a lot, but I’d been starting to eye it lately with a jaded, “meh” eye. SO I took the plunge. Or, I should say, my dress did. In to the dye-pot it goes! Et voila!! Now I’m newly enamoured with it all over again! It’s just like having a new dress!! It’s interesting to me how the different components either took or didn’t take, the dye… For instance, the linen shell of course took up the dye superbly, but the grosgrain ribbon shoulder straps did not. The zip pull even took on a shade of pink, but the zip itself; well, zip. The body part of the lining dyed up very intensely, but the bodice part did not!
who is that short-haired doggie?!! she loves her new summer ‘do!!
So I’m knee deep in wedding-dress biz, which I LOVE, of course! but I took a little time out just to make something fripperous and frivolous and quick and easy, just for me. Think of this as like a tiny serve of sorbet in the middle of a lengthy degustation…
Cassie bought this adorable rainbow unicorn printed cotton canvas from Spotlight for me for my birthday last year, and there was just just enough to squeak out a cute and totally age-appropriate little skirt, yay!!
I adapted Vogue 8363, an old favourite that comes with great pockets… I didn’t have enough fabric for the pockets so I cut those pieces from a small piece of white cotton canvas from le stash. Basically the pockets are this pattern’s saving grace for me since I rarely make use of any other of its features. In fact, now I’m wondering, have I ever used any of the views in the pattern in the purest sense even once?? and I think maybe NO! I’ve always tended to make a sort of cobbled together version that incorporates various bits of several views. I like for mine to have; a) those fab deep pockets, b) a one piece front, and c) to open with an invisible zip along a centre back seam… and this skirt pattern allows for all of these things, with a bit of swift and sneaky pattern piece finagling.
Lining; normally I probably wouldn’t line a summer skirt, but in this case while I was trying it on in the process of making it I discovered the wrong side of the fabric had an almost indiscernible rough texture that somehow caused the skirt to stick to my undies and ride up slightly … yes! very VERY weird! So I decided to line, and super-luckily I had the perfectly sized piece of mint-green lining in my stash already, inherited from my grandmother’s stash … my tips on making a lining for a skirt here
I agonised over what button to use! this one seemed cheerful and not twee
Oh, and I made a new little T-shirt too. I’d seen this rather gorgeous apricot-y pink, slubby cotton jersey in Spotlight too, seen it on several occasions actually and staunchly resisted it because… well because I have a rather, shall we say, substantial stash already?! But it was soooo pretty! and well one day they happened to have a cheap remnant sitting there, cut for another customer who changed her mind… so in a weak-willed moment I snaffled it up! Ooo so naughty. But it was just such a pretty colour! I assuaged the guilt by cutting and making it up immediately.
The pattern; my own, if you can give such a grand title as “pattern” to cutting out a few vaguely T-shirt-shaped pieces and bunging them together. I very much like the high boxy collar and the slightly curved hemline.
Now it’s back to the wedding dress!! I’m posting progress shots in my stories on instagram, if anyone would like to follow along… 🙂
Details:
T-shirt; self-drafted, pink cotton jersey
Skirt; adapted from Vogue 8363, cotton drill
Sandals (above); ariel, from an op shop years ago
Thongs (below); fipper, bought in Bali on our holiday
When one wears one’s sparkly rainbow unicorn skirt, then obviously one must go for an elegant and graceful unicornly leap over some puffy cottonball clouds… 😉
So, if I am taking my own picture using my remote control and the timer I can time my jumps to the shutter click perfectly! I’ve got the whole process down to a fine art! However, when I ask Craig to take the picture, this happens…
So, every now and then I tell myself that I’m not going to make any more winter tees since I have quite a nice little collection, really. And I think I really should be making do with less; wearing what I have, more. I tell this to myself quite firmly. But then also every now and then the fashion-loving side of me is dreaming up some outfit and identifies a few colour gaps, and thinks, if only I had a mustard tee? or a nice navy blue…? And that fashion-loving side can be a terribly convincing wench, especially when I’m standing in the Fabric Store in Melbourne, with Mum and Cassie, fingering the diviiiiiiine merino collection for which the Fabric Store is justifiably famous. On our last trip over, suitably enabled, I bought a few pieces. There may be a few other colours that came home with me and are still lurking in Le stash, too…
If I’m allowed to toot my own horn for a bit, I really feel like I’m nailing the tee-construction front at last, which is nice. I have my tried and true pattern, and my technique is pretty solid now. My tried and true pattern? well, my paper pattern was originally the Nettie, but I’ve sliced off here and added on there; and generally butchered it so much that literally nothing of the original remains. Interestingly, I originally used to use a Burda pattern for my tried and true Tshirt pattern, and heavily modified that too. Then I mislaid the Burda, and started using the Nettie instead. Then, at one point I found my old Burda pattern again, yay!! So, of course I had to overlay them, just to see. And hilariously found I’d modified these two, completely different patterns to be basically the same, final pattern, in the end. Hahaha.
blue tee has a wider neckline and lower scoop than the gold one
I’m just laying my construction out here in the interests of documenting my “sewing journey” – ha! – just because this, my current go-to method for making a plain tee nowadays, is one which has been working pretty well for me.
Seams: first I stitch a seam using a medium-long straight stitch, and stretching the fabric slightly as I go. This is partly a basting step, really. Then I go over it with my overlocker, which is both the “finishing bit” and also a reinforcement of the first stitching.
Order of construction; shoulder seams first, and once they’re overlocked I go over and top-stitch the seam allowances down to the back, about 5mm from the join. Then I put in the sleeve caps (no topstitching) and press the seam allowances towards the sleeve. Then stitch the side seams in total, from the bottom hemline right along to the wrist edge of the sleeves. Next step is to measure the neckline… sometimes I cut a low scoop neck, sometimes I leave it a bit higher, depends on my mood at the moment … and cut a strip for the neckline, 95% of the length of the neckline, plus 2cm for the joining seam; width; I generally like about 4cm, resulting in about a 1cm finished width. Stitch it in a loop and insert it, as per this tute. I then go and back edge only! top-stitch the seam allowance of the strip down to back edge of the tee about 2mm, or quite close to the join, to stabilise and strengthen this area and help prevent it from stretching out.
The sleeve edges and hemline edges; variously, I like to either add a strip, of whatever width takes my fancy at the time, or to fold the edge under in a traditional hem and stitch it using a twin needle. I’ll either overlock the edge and simply top-stitch it with the twin-needle, leaving the overlocking showing inside; or do the double fold and baste first before twin-needling if I can be bothered, which is not so often. In the case of my mustard tee, this time I actually could be bothered. If doing the strip method; it can be cut EITHER to 95% the length of the edge for a “pulled-in”, sorta sporty look, or the same length as the edge for a smoother, more sophisticated look (I think) For my gold-y mustard tee, I did a strip edging (same length) for the sleeves, and the twin needle finish for the hemline; while the navy blue tee has a strip edging (again, same length) for both the sleeves and the hemline.
It’s probably hard to tell, but I used the navy blue fabric inside out, because it was a little more intense in colour and duller on the wrong side, which I preferred. The right side of this merino knit is a touch lighter and shinier. For this reason I kinda wish I’d used the wrong side out for the mustard tee, too. Oh well, next time!
I’m wearing the mustard tee/charcoal outfit today, in fact, right now, because basically I finished it and HAD to wear it straight away! THIS COLOUR IS TOO TOO BEAUTIFUL, OUI???? The navy blue tee/red skirt/tartan scarf outfit above was put together just for experimental styling purposes, and to model it for this post; but I adore that one too so I think I’ll be wearing that tomorrow 🙂
also, on a completely different, not-even-sewing related, random note; I was outside by the clothesline with Bessie, taking pictures of her wearing my new tees, and noticed these teeny. tiny, weeny little mushrooms growing in the seat of the jarrah chair I keep by the clothesline, to put my laundry basket on. How cute is that?? I guess we have been getting a lot of rain lately!!
Now, if there’s anyone still left reading who hasn’t raced off already to scroll through the millionty-and-one gorgeous prints on offer over there…. my new outfit; and how gorgeous is this particularly amaaaazing print, huh?
Fabric: cotton sateen, the gorgeous print designed by su_g on Spoonflower. I was contacted recently by Allie, of Spoonflower who asked me if I would like to be a part of their roundup of “makers of Australia”… would I?! well of course I was totally honoured to be invited! and immediately raced over to Spoonflower to check out the Aussie offerings, and discovered there were SO MANY really lovely designs, it was super hard to choose just one… however I just kept coming back to this one and in the end couldn’t resist its humour, its artistry, and of course its Aussie tongue-in-cheekiness.
The Andy Warhol-inspired portrait grid of the humble cocky, designed by by su_g on Spoonflower caught my eye and made me laugh straight away; subtly Aussie, artistic, and witty with a bonus irreverent swipe at the serious art world on the side! So fun and actually it’s rather fabulous too, yes? those lovely bright beautiful colours, I knew whatever I made with it I just couldn’t go wrong! but ultimately decided its amaaaazing eye-catchiness would be the best set off by the most basic of simple shapes, a plain little pencil skirt, and rather featureless top… yes all very plain, all the better to perfectly showcase that chatteringly gorgeous print!
So, did you know that the the collective noun for cockatoos is a chattering? other acceptables are a clattering, a cluttering, a crackle, and last and least excitingly, a family…. I like chattering, personally 😉 and did you also know the term for a group of seamstresses is a “scolding” haha! Hilarious!! NOT how we like to think of ourselves, usually! Unfortunately there isn’t one for bloggers, as yet; but writers have a “worship of writers”… which is weird, no?! But I digress… #yetagain
Patterns: the top is pattern 4, the epaulette top, sans the epaulettes; from the Japanese pattern book “she has a Mannish style” by Yuko Takada… I’ve made this top up five times previously so obviously I love it!! here, here, here, this one for Cassie and lastly here. The skirt; so I keep calling this Vogue 1247 but really I’ve adapted and fine-tuned to the point where it barely has any of its original lines so I feel a bit of a fraud describing it thus. It’s basically just a very plain, darted pencil skirt with a straight waistband and central back zip.
Thoughts… so it does look quite a simple project… deceptively so! she declares with a dramatic twirl of her moustache!! Just kidding, it really was; though I ended up deciding to take the annoying, time-consuming, but ultimately necessary step of tracing full size copies of all my pattern pieces; both sleeves and a full size front skirt piece, both back skirt pieces, and front and back blouse pieces… why? TO FACILITATE THE ALL IMPORTANT PATTERN MATCHING TETRIS, OF COURSE!!! Given the size of those cockatoo motifs, which are actually quite large, well it took a little bit of doing, that’s all I can say…
My plan, in a nutshell; the back has a white dividing line down the centre back of both top and skirt; I knew it would be basically impossible to pattern match around the zip any other way; and then the front of both skirt and top has the opposite, a panel of cockatoos centrally aligned down the centre front of both top and skirt. Little bit of a difference twixt front and back, not a very obvious one…
I also carefully arranged the pieces so there would be a full cockatoo square at the lower hem of both skirt and top… I didn’t want for a row of cockatoos to be chopped in half! Same with the sleeves, and I also managed to arrange the sleeves so my favourite two cocky-portraits were the placed centrally on each sleeve. Obviously I also wanted for the colours to be somewhat “random” and not have an obvious double-up between top and skirt, or either side of the skirt back… It was actually pretty fortuitous than I managed to get all this just how I wanted… super lucky actually… there lots of re-arranging of pattern pieces and sighing and brow-furrowing and even a short period of time when I thought I’d have to order more fabric in order to not completely stuff up *wipes sweat from brow * very fortunately I eventually got the layout I wanted!!
Hehe, I realize now that was a rather looooooong nutshell! with probably a lot of introspective agonising that makes no sense at all, but well; it does to me. In a much more succinct nutshell; laying out the pattern pieces took almost as long as to make the outfit!!
Construction; I fully underlined the bodice and the skirt with pure white cotton voile; bought from Spotlight during one of their “buy the whole bolt and get 40% off sales” I find plain white voile to be one of the most useful fabrics to have on tap, so there was that time Spotlight announced this oft-repeated sale when I took the bull by the horns and just went for it! The cotton voile adds some structure and body to the sateen, which probably doesn’t have quite enough on its own to be a fitted skirt, really. The blouse could have gotten away without underlining, I think; but I opted to treat it the same for the sake of continuity, to give the top and skirt the same visual heft. The sleeves however, are not underlined. And if deep hems are a sign of quality, then yay! ‘cos my hems are DEEP!!
Lastly, because I love to be reminded of the provenance of things, if I can then I like to attach interesting selvedge info on the inside somewhere, in this case, the left side seam on my top…
And lastly lastly, because this bit of awesomeness is really worth repeating… for one month from now, Spoonflower are offering a 10% discount on purchasers of this, or in fact ANY Spoonflower fabric by using the code “carolyn10” at checkout. If you’ve ever been even a little bit tempted to try Spoonflower out then maybe this small incentive could be that time?!
So, we were going to Bali to attend our friends L&L’s wedding in early May… and I decided I wanted to make a special new ensemble to take away with me. Not to wear to the wedding, because, well … is ivory still a no-no for a wedding guest? I’ve always thought so, but then I did notice a few white-ish ensembles at the wedding anyway. So maybe times are a-changing… but I digress.
So… this outfit. Craig and I were planning some special dinners while we were in Bali, because this was a meaningful holiday for us for a reason totally unrelated to our friends’ wedding… it’s our 30th wedding anniversary this year! and the last time we were in Bali was for our honeymoon. When we heard L & L were planning their wedding there, we decided we’d make this trip a kind of second honeymoon for ourselves. And I wanted something new for the occasion 🙂
I bought the very unusual lace fabric from Tessuti’s in Melbourne, during my girls’ trip over with Mum and Cassie. It’s quite a dramatic fabric, very stiff and with a “painted” feel to it… I will admit to a small “what was I thinking?” moment afterwards! but some of my favourite ensembles have come out of crazy, challenging fabrics, so I try not to let that impede the hurtling of the creative trainwreck at all…
I underlined throughout with a creamy cotton voile, that I bought from the Morrison fabric and clothing sale… honestly one of my favourite sales to go to here in Perth, though it is very much a lucky dip. You can get amaaaaaaazing bargains, at the same time there can be a lot of weird and horrible stuff too that you simply can’t believe Morrison would ever use for their beautiful clothing line! But it’s nearly always super cheap, so well worth a look in! This creamy-coloured voile was $10 for a whole roll. Awesome sauce!!
Patterns… the skirt is my regular ol’ standby Vogue 1247, lengthened, with the pieces spliced to eliminate the horizontal seams. btw, Sanni asked about this pattern and how it’s keeping, and the truth is that it is indeed getting pretty tatty!! I really should trace it on something tough to preserve it because it really is a winner and no doubt I will be using it, yet again!
The top is the Collins top, by Sydney designer In the Folds. Emily put out a call on IG for contributors to a kickstarter to help her to get a print run of her previously pdf only patterns, and since she had been kind enough to send me the Acton dress pattern a year ago I wanted to pay it forward … the reward was this pattern! which of course I am super thrilled about. It’s a pretty popular pattern, and I thought its exaggerated swing shape would sit out nicely in the stiffish lace, and make a cool counterpoint to a little fitted miniskirt underneath. I underlined both garments throughout, with the exception of the raglan sleeves, which are just the lace.
Neckline bound with self-made bias binding, from the same cream cotton voile as the underlining.
To keep things light, I just trimmed all the raw edges inside with my pinking shears
The lower edges of the lace are just trimmed evenly with my rotary cutter, the voile is hemmed with a narrow, 1cm hem.
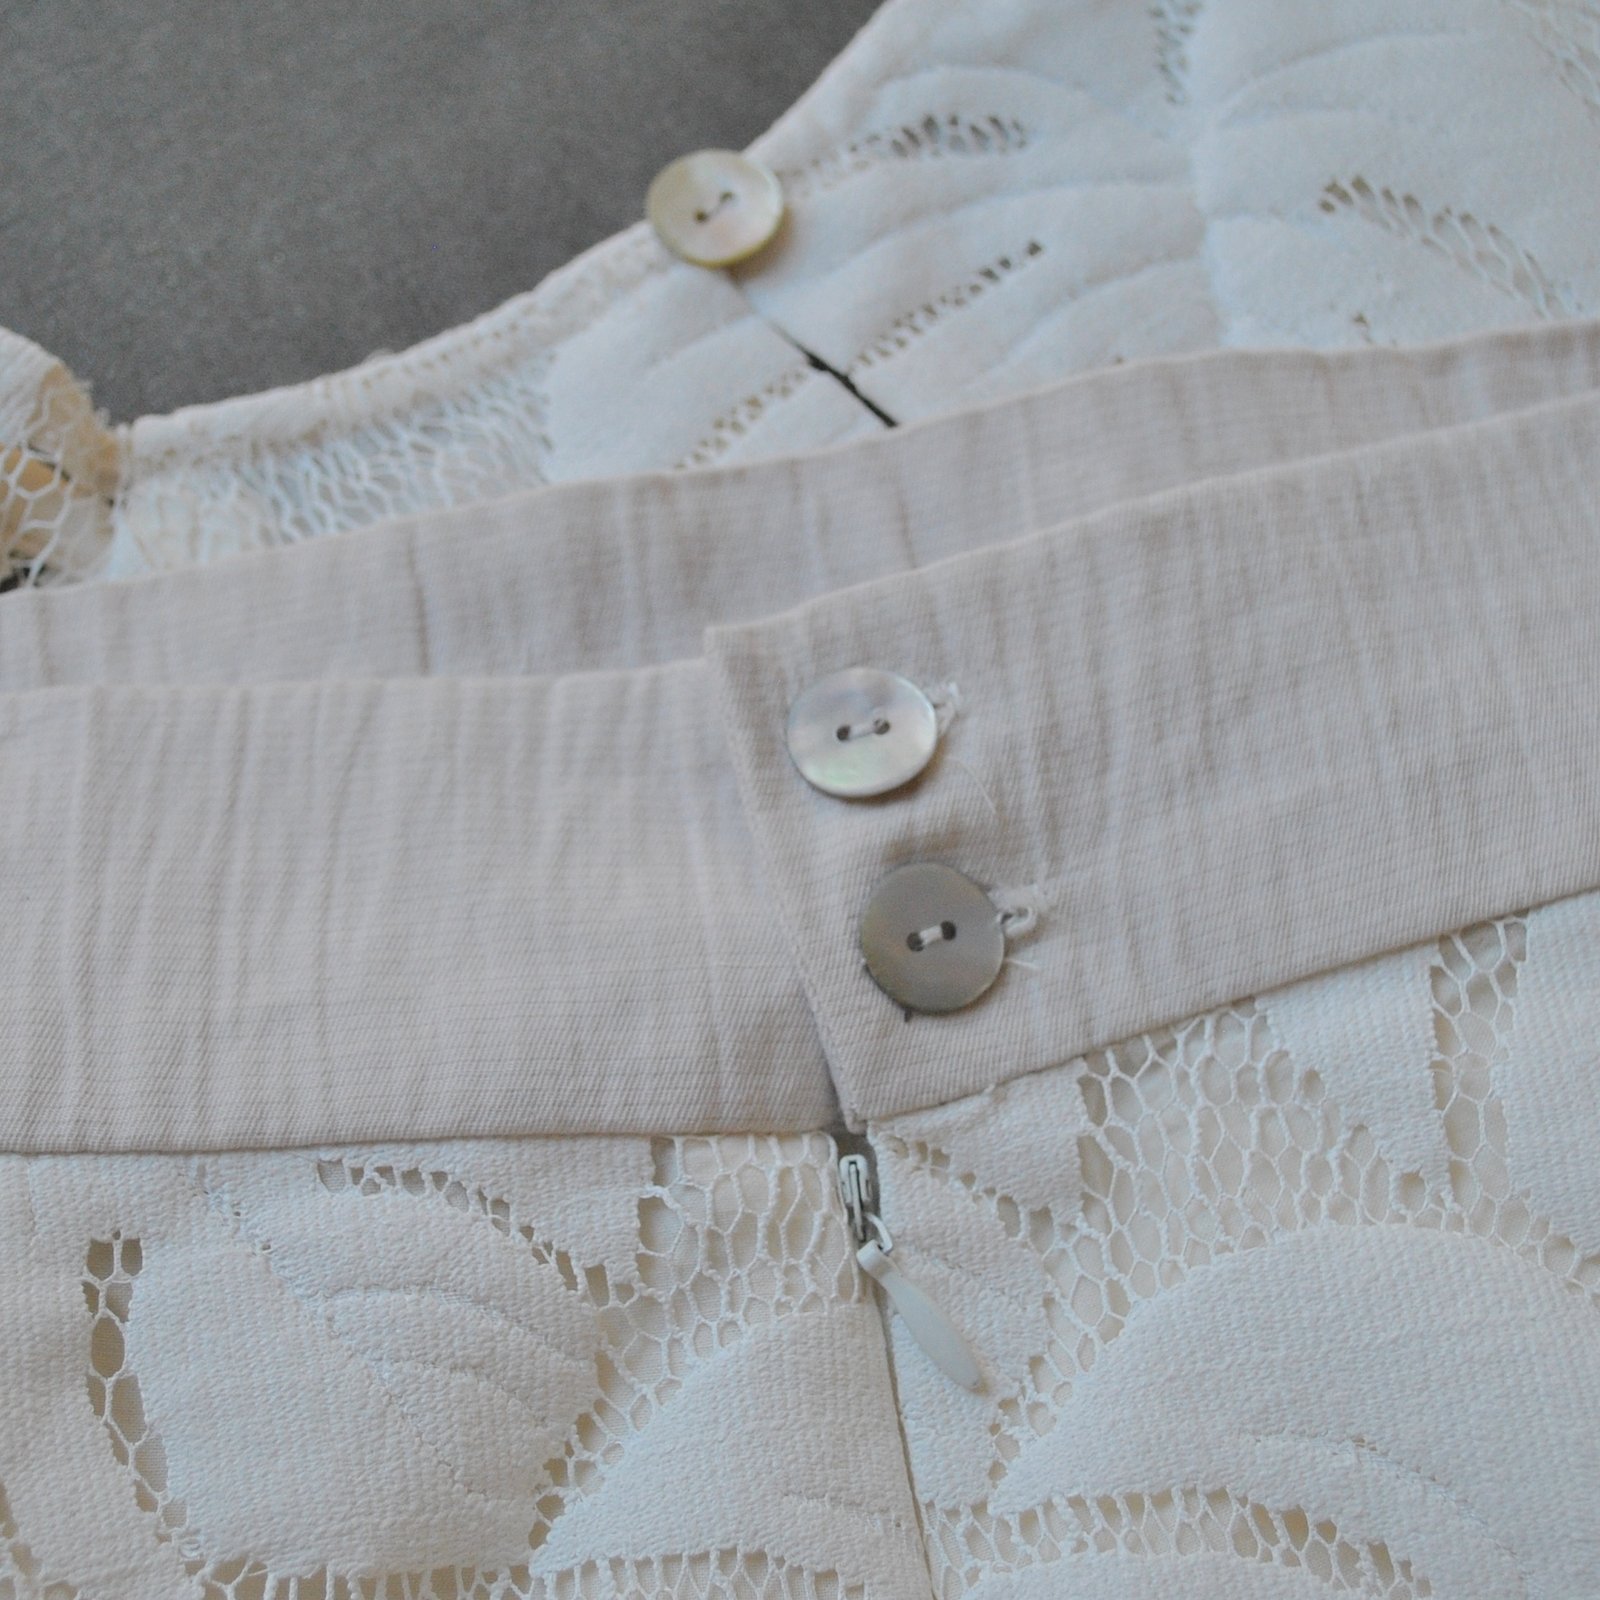
Skirt waistband; cut from a different piece of thicker, naturally crinkle-y, cafe-au-lait cotton, also bought from the Morrison fabric and clothing sale. For closure on both skirt and top I used small mother-of-pearl buttons, found in Le Stash.
Do you wanna hear something funny? See that trapezoidal piece at the back, lower edge of the top? I cut that piece out upside down… with the palm leaves pointing UP instead of down like they are everywhere else… not once, but twice! Once was bad enough, but I couldn’t believe my own stupidity when I found myself doing the same thing, a second time! *facepalm and it was an absolute miracle I had a large enough piece leftover to cut it out a third time in one piece since I really had bought only just enough of the lace in the first place. It is very slightly off-grain… but hey! at least it’s the right way up!!
wot is this pose then, eh?
So that’s it! I really reeeeeally love it, but then again I’ve always had a predilection for white lace things. This one is not too sweet or “young” for me, but just nicely sophisticated enough, I think. I wore it to two separate dinners in Bali, and the tropical feel of the palm leaf motifs combined with the cool airy breeziness of lace and voile in the humidity of Bali made it the most perfect of perfect things to wear for our special outings.
Verdict; very happy 🙂
Oooh! before I forget! a post script/public service announcement… I recently received an email from the Great British Sewing Bee! *cue excited squeal when I had a split second of thinking they were having an Aussie version.. however sadly, NO…the email was to let me know that the next UK season is open to applications and asking me to spread the word. I mean, if we had one here I would love it if someone let me know about it! so I’m like, OK! Also, if we did have one here I would be SO onto that in a hot minute, and if you’re lucky enough to live somewhere where you do have these things, well what are you waiting for?!
THE GREAT BRITISH SEWING BEE is looking for a new collection of brilliant amateur sewers for the fifth series of BBC Two’s The Great British Sewing Bee. For more information or to apply please go to: www.applyforsewingbee.co.uk
Closing Date: Midnight May 28th 2018
Details:
Top; In the Folds Collins top, in a stiff lace underlined with cotton voile
Skirt; based on Vogue 1247
Sandals; (white) designed and made by me, details here
(turquoise) la Soffita di Gilde
So, once upon a time I picked up a lovely remnant of fine-grade sunshine-yellow linen from a sale at Potters Textile … and then at some point decided I wanted to make a yellow skirt. I plucked this, my only piece of yellow fabric, from Le Stash; and selected Burda 2/2015;109, which I’ve been admiring and coveting for some time. I traced it out, noted very happily that the pieces fitted perfectly on my piece of yellow linen with practically nothing to spare whatsoever, cut it out and made it up without much further thought.
And lo, it was horrible. I can’t even begin to describe just how frumptastic it looked. I didn’t even take a picture of myself wearing it, it was that bad, though I did have the presence of mind to force it upon poor Jane to model before taking the scissors to it again.
It actually looks quite nice on Jane here, but trust me, it didn’t look nearly so nice on ME.
I don’t blame the pattern, which I still think will be quite nice with the right fabric, of a stiffness and body that can hold its own with a pleat. In a lightweight linen? NUP.
Anyway, obviously I cannot bear to waste a lovely piece of fabric, and particularly one of such a sunny disposition. And this time I listened to what it was whispering to me in its tiny, squeaky, linen-y little voice (yes, Virginia, fabrics DO have a voice) and realised that this delightfully lightweight loveliness wanted to be a delightfully lightweight, breezy little TOP. Of course I granted its wish. Who am I to deny a fabric its destiny?
Fortunately it wasn’t too difficult… the skirt had long long ties to go around the waist, and it was easy to open out the waistband and let out each of the pleats just a little, to allow what was previously the waistband to be an underarm band instead, and re-jig the old side seams. I harvested what was remaining of the waist ties to be shoulder straps for my new top, unpicked the two big pockets, and re-cut one to be a triangular insert to go in the previous skirt opening to fill in that gap, and re-cut the other to be a big kangaroo pocket to go on the front of the new top. By the way, the old side seams are now at the centre front and back of the top, and the previous centre front and centre back, which is where the big skirt pleats were before, are now situated at the underarm seams. Finally I stitched a buttonhole and a button from my stash to the newly extended underarm band so it can close, since the ties are gone.
Et voila! a bright and sunshine-y little top. I love it in this guise so much! it’s hard to remember how sad and tragic it was as a skirt. I took it to Bali, when we went there for L and L’s wedding – ah such a wonderful time we had! I’ll have to write something about that here soon 🙂
note; Craig does not take pictures of me as a rule! but I basically forced him to each day we were away. I’m like, but it’s me-made May!! Reaffirming long held suspicions that the depths of the feminine nature will forever remain a mystery best left unsolved #instagramhusband
Now we’re back home and winter is creeping slowly into Perth and I’m reluctantly putting it away with the other little summer lovelies… but am happy to think it’ll be waiting in the wings, an cheerful little thing for when summer rolls around again. 🙂
I’m beyond thrilled to announce the publication of our very first pattern! The Perth dress/blouse is an unlined, loose-fitting little summer frock with a bit of a buttoned-up menswear vibe to it. It’s kinda like a shirtdress, but kinda not. A faux shirtdress. The shirtdress to make when you’re not making a shirtdress. Hehe, I joked in my own head while making it that it’s the shirtdress to make if you loathe buttonholes, since there are barely any at all in this one! Also, I say “our”pattern, not because I’m using the royal “we”; but because I’ve gone into partnership with my daughter! #whatdotheysayaboutfamilyandbusiness but it’s OK, Cassie and I get along very well. Plus she has mad magic Illustrator skills, which perfectly complements my complete lack thereof. So we are the Carolyn & Cassie Pattern Co – this warms the cockles of my heart SO much I can’t even tell you! I never dreamed we’d have some kind of venture together like this but now we do I think I can tick it off some sort of subconscious bucket list that I never knew I had.
So we have a brand new Etsy shop, CarolynandCassie; situated here… Right now there’s only one thing in it, well TWO, since the pdf pattern and paper patterns are listed separately, but we harbour big dreams of having lots and LOTS of designs there in the future. Or maybe that’s just the happy glow that comes with having it finally finished… I’ve been basically living and breathing this thing for such a while, well …. it’s out there now!
So this is what I’ve been working on for the past few months, not just pattern making but lots and lots of sewing too. Apart from well over a dozen muslins, I’ve made four Perths in my quest for the perfect Perth. I shall now proceed to bombard you with Perths, ahem…
1. My chocolate/tobacco version above; this is not strictly a Perth but a “sort of” Perth dress, really. This is my prototype Perth, a Perth in spirit since the final pattern is actually quite different everywhere in small ways … you can see in my little movie below that it’s super bouffy, for one thing, and I tamed the boufff in that back with a big ol’ stern box pleat. Down, boufff, down!
I made this one back in April of last year! and because I’d already had the idea of making it into a pattern somehow it never got blogged here, even though I wore it a few times.
2. My white one… a true Perth and currently my favourite mostly because of the perfect fabric. It’s a white shirting cotton from Fabulous Fabrics, almost like a sateen, but a super fine one, crisp, lightweight and with the perfect amount of drape. LOVE IT SO MUCH and actually I’m slightly regretting that I didn’t buy the whole roll #addicted In fact, this might be a good time to state what I think is the ideal fabric for this design… lightweight, thin fabrics that have some drape, yet still have just enough body for the tailored collar to work. Basically, if you can imagine a mens’ business shirt made in it, then it’s probably just about perfect. Sad sad times… I went back to the fabric store yesterday on another quest (long story and a pretty “big” one too in lifetime terms, I’ll relate it another time…) and had a quick but hopeful look out for this perfect white fabric.. they’d sold it all!! *sob* #gottagrabitwhileitsthere
This one has slightly longer sleeves, that I eventually decided to shorten for the final version of the pattern. I shortened them back to the length of my original brown design because I thought the shorter sleeves looked a little more feminine and “perkier”; a nice offset to the overt masculinity of the buttoned-up, very formal looking collar.
3. Further playing upon the menswear influence, I ran up a third version with a smart white collar, a lot like the shirts that I’ve made for my menfolk over the years.. these ones here are prime examples. I used a lovely lemon-y yellow, lightweight pinstriped linen that I bought in Fratelli Bassetti Tessuti in Rome when we visited six years ago. It was my Roman souvenir, and I’m fiiiiinally making something with it. Well, it’s nothing if not well marinated! I used a single black button at the throat as a small but definitive focal point on the dress.
Going back to my point about the perfect fabric, this linen has a little bit of body, maybe if I’m being super picky then I would say it has slightly too much body for the design to drape perfectly? But it’s still pretty nice to wear, and cool!
4. And finally; along the way I realised the design would make quite a nice blouse too, so we went about making this happen. I like this length for a blouse slightly cropped and a little boxy. For the blouse, I used a dark indigo chambray, leftovers from this dress actually! and a wooden button.
The chambray is a touch on the spongy side with some body to it so Im a teeny bit meh about it for this design really, but well… I’m completely ok with it for testing out, and I think it turned out a pretty cute wearable muslin.
Some of the technical deets…
So, want to hear the story behind the pattern?…. it’s ok if you don’t just stop reading now. If you want to know to whole boring saga, carry on! SO: nearly a year ago I made my brown dress, my prototype as it turned out. I’d bought this lovely, slightly blotchy chocolate/tobacco linen from Tessuti’s in Melbourne during my trip there with Mum, Cassie and Tiffany, and drafted my own pattern, using my own block that I made years ago from my own measurements using the diagrams from Pattern Magic (originally blogged about here), though I tacked on the collar and collar stand from my favourite Burda mens’ shirt pattern… but before you cry “plagiarist!” I did NOT use that Burda collar and stand for my own Perth pattern! I drafted the Perth ones myself from scratch, as I did all parts of the pattern. I promise you, I’m very ethical and would never try to claim something as mine that is not…but more about the drafting process-ario later, I’m getting ahead of myself.
So, I made my brown dress. I put quite a bit of thought into the closure, and worked out a solution to get the look I wanted. I liked it, but overall thought the silhouette was a little “booffy” and was definitely planning to streamline it a bit down the track. In the meantime though I’d posted a progress picture on instagram, and there was a small number of polite comments suggesting an interest should I make a pattern for it. The seed was planted…
I thought more and more about it.. I wasn’t daunted by drafting a pattern to fit “me”, but I was wondering how I could grade it. At first I thought I’d get a qualified person to grade it for me. I approached several people I know who have completed fashion design school at tech, none of whom had time. But my friend J, fashion school graduate, and all-round awesomely inspiring lady, was extremely encouraging and assured me I could “easily do it” and it was “super easy”. I secretly had doubts about this… but she piled my arms high with her pattern drafting books and sent me off. I definitely felt challenged, and like I couldn’t possibly not do it now! I was honour bound! J would think I was an idiot! Well… I am obviously, but no need for the world to know that, hehehe…. I spent the next few months studying the books J had given me, taking notes… the best by far was Winifred Aldrich’s Metric Pattern Cutting for Women’s Wear, I pretty much got everything from that. There was also a vintage Burda book, I can’t remember its title at the moment but that one gave some very helpful grading tips too.
So I eventually graded my pattern! I’d drawn it out by hand on large sheets of paper from a flip chart pad, with no seam allowances, graded it all by hand, and proceeded to trace and test each individual size myself before getting it scanned as a full sized pdf. Yes, this is definitely NOT the most efficient way to go about it… I had early, highly romantic ideas about a hand-drawn pattern… aaah, so naive! I quickly abandoned that fantasy!! though hand-grading was an essential step in the process in the end, and I happily had complete confidence that my pattern “worked” in all the sizes… Then I started thinking about learning Illustrator. I made a few low-grade investigations… and then Cassie got wind of what I was doing and reminded me that she basically spent her whole degree using Illustrator. I was like, wow, would you teach me? and she replied, oh Mum, I could make that pattern into a pdf for you in half a day… I was, like OH My GOD! My saviour!!! At first, I was just going to pay her for her time… but as time went on, and we were working side by side on our computers, her on the pattern (it took a lot longer than half a day, btw!) me on the illustrations and instructions (also way longer than half a day!) and the idea of a partnership came up and it felt totally natural. She was keen. And I’m so very happy about it! This means that if either of us come up with an idea then we have this outlet for it, and we have complementary skills.
Of course, it’s our first pattern, and the learning curve has been steep. I reckon I did some things three or four times over, simply because the right way wasn’t immediately obvious. Almost like, you have to kiss a lot of frogs before you get a prince. Or maybe you can’t see the trees for the forest? Making a pattern turned out to be something like that!
The next step was the all-important “real” testing phase, and it’s SUPER important! I’m completely indebted to my delightful and awesomely helpful testers… who went through my amateurish instructions with a fine-tooth comb, thank goodness since I could barely see anything anymore for having re-written them a hundred times over. Those that sent me pictures have made the most beautiful dresses which has been SUPER exciting. I will do a separate post highlighting my lovely testers, soon, once everyone has got “final” pictures in to me.
Making the pattern a tangible thing: well at first I was just like, A4 is enough, yeah? Then one of my lovely testers SaSa of paisley pirouette mentioned a firm preference for A0, and I had a lightbulb moment that I should offer that too. Sounds so obvious in retrospect but truthfully I was kinda overwhelmed with it all at this point, so I really appreciated the reminder! SaSa also kindly recommended to me a massive comment thread about people’s pattern preferences, over on sewbusylizzy, which I sat down and read in a night. I got from this that sewing peeps were pretty evenly divided three-ways in their allegiance to and/or total avoidance of A4, A0 and/or paper patterns. Meaning in fact, a pattern designer pretty much has to offer everything if she/he wants to a. please everyone, and b. be taken even half-way seriously! So Cassie got to work on the A0 file and I went about making paper patterns happen. I got my patterns printed at Officeworks, folded ’em all myself, and printed out and compiled my own instruction booklets, put together the pattern envelopes myself. Goodness, that took an entire day all by itself, phew! And then I set up our etsy shop… aaaand sat on the edge of my seat waiting for my first sale! The excitement when the first one popped in, wheeee! What a rush!
So that’s it! Want to try out my pattern?! We are the Carolyn & Cassie Pattern Co. our shop is CarolynandCassie on Etsy, and we have the Perth dress/blouse pdf pattern and the Perth dress/blouse paper pattern on offer. I’ve also put a link to the shop up in my sidebar. And I would love to see your Perths! If you make one, then please either let me know in the comments, or tag us @handmadebycarolyn and @shyshycassie on instagram, and use the hashtag #perthdress
Perth, and Perth! hehe
Am I thinking about my next pattern…? well, of course!!

 So, I have some extremely exciting news… !! I am going to be a granny!!!!


 So, I made a dress… or something?! I’m not 100% sure about this one. Is it a dress? or a nightie? or maybe a choirboy/celestial angel robe? The jury is out!


 Actually, this top started out as a dress too, but surprisingly she wasn’t into it as a dress. I’d gone to great lengths to find a piece of matching cream-coloured fabric for the yoke for hers, and was very pleased to unearth an old cushion cover of a really nice cream coloured cotton damask from my stash. Normally, Cassie prefers, nay demands! cream- or ivory-coloured tops, so I was a little nonplussed when she suggested the yoke be dyed! Who is this person and what have you done with my daughter?! However I could appreciate that the all cream number as a dress was a little, um choirboy, thus the snap decision to lop off the bottom to make it a top. Fortunately she was satisfied!


 So I’m knee deep in wedding-dress biz, which I LOVE, of course! but I took a little time out just to make something fripperous and frivolous and quick and easy, just for me. Think of this as like a tiny serve of sorbet in the middle of a lengthy degustation…

 I agonised over what button to use! this one seemed cheerful and not twee


 So, every now and then I tell myself that I’m not going to make any more winter tees since I have quite a nice little collection, really. And I think I really should be making do with less; wearing what I have, more. I tell this to myself quite firmly. But then also every now and then the fashion-loving side of me is dreaming up some outfit and identifies a few colour gaps, and thinks, if only I had a mustard tee? or a nice navy blue…? And that fashion-loving side can be a terribly convincing wench, especially when I’m standing in the Fabric Store in Melbourne, with Mum and Cassie, fingering the diviiiiiiine merino collection for which the Fabric Store is justifiably famous. On our last trip over, suitably enabled, I bought a few pieces. There may be a few other colours that came home with me and are still lurking in Le stash, too…


 So, we were going to Bali to attend our friends L&L’s wedding in early May… and I decided I wanted to make a special new ensemble to take away with me. Not to wear to the wedding, because, well … is ivory still a no-no for a wedding guest? I’ve always thought so, but then I did notice a few white-ish ensembles at the wedding anyway. So maybe times are a-changing… but I digress.


 So, once upon a time I picked up a lovely remnant of fine-grade sunshine-yellow linen from a sale at Potters Textile … and then at some point decided I wanted to make a yellow skirt. I plucked this, my only piece of yellow fabric, from Le Stash; and selected Burda 2/2015;109, which I’ve been admiring and coveting for some time. I traced it out, noted very happily that the pieces fitted perfectly on my piece of yellow linen with practically nothing to spare whatsoever, cut it out and made it up without much further thought.


 I’m beyond thrilled to announce the publication of our very first pattern! The Perth dress/blouse is an unlined, loose-fitting little summer frock with a bit of a buttoned-up menswear vibe to it. It’s kinda like a shirtdress, but kinda not. A faux shirtdress. The shirtdress to make when you’re not making a shirtdress. Hehe, I joked in my own head while making it that it’s the shirtdress to make if you loathe buttonholes, since there are barely any at all in this one! Also, I say “our”pattern, not because I’m using the royal “we”; but because I’ve gone into partnership with my daughter! #whatdotheysayaboutfamilyandbusiness but it’s OK, Cassie and I get along very well. Plus she has mad magic Illustrator skills, which perfectly complements my complete lack thereof. So we are the Carolyn & Cassie Pattern Co – this warms the cockles of my heart SO much I can’t even tell you! I never dreamed we’d have some kind of venture together like this but now we do I think I can tick it off some sort of subconscious bucket list that I never knew I had.
 So we have a brand new


