 I MADE THESE!!!
OK, maybe I’m a bit biased here, but to my eyes these are just about the most beautiful things in the world right now!!
So I finally did it! and I’m even extremely happy with them to boot (haha!) and after a month or so of mental anguish and metaphorical hair-pulling even I can find almost no fault with my (eventual) finish. It’s true there were some struggles along the way yes; but I’m so happy now, and those dark moments have faded away in the happy, warm fuzzy pink glow in which surrounds me right now. I even dressed today to match it 😉
 So, the process…

Pattern; self-drafted. I did buy some long black zips, but eventually decided upon a design which I could just pull on, no zip required, and drafted a pattern to accommodate this… Before starting, I padded my lasts with a couple of pairs of thick winter socks so as to give my foot a decent amount of wearing ease and allow enough room for my own feet to be well sock-ed too! and taped them down firmly with masking tape, to protect them from the boot-making process, and made my pattern to fit the padded last, obviously.

Materials; the upper is black vinyl, from Clark Rubber, this comes in two types and I spent a bit extra and bought the UV resistant kind that is highly resistant to whatever the weather may throw at it; sun or rain. Well, since I plan to be wearing them outside most of the time, and given the amount of work you put into making a pair of boots, the small extra cost is completely justified, in my opinion!
The boots are fully lined in faux chocolate-brown suedette (above), bought originally in the Fabric Store in Melbourne, and which I have used to line nearly all my shoes so far. It’s the same stuff I used for my chocolate suedette top, here.
For the soles and heels, I used rubber matting from Bunnings. I cut these to size, and sanded each surface well before glueing them together using contact gel adhesive, also from Bunnings. Inside the boot, I also glued an insole cut from cork matting, and then over that, is laid a foam inner sole (Coles) which I’ve covered with the chocolate brown suedette, to match the interior. Not that you can see it easily, down in the dark innards of the boot, but still

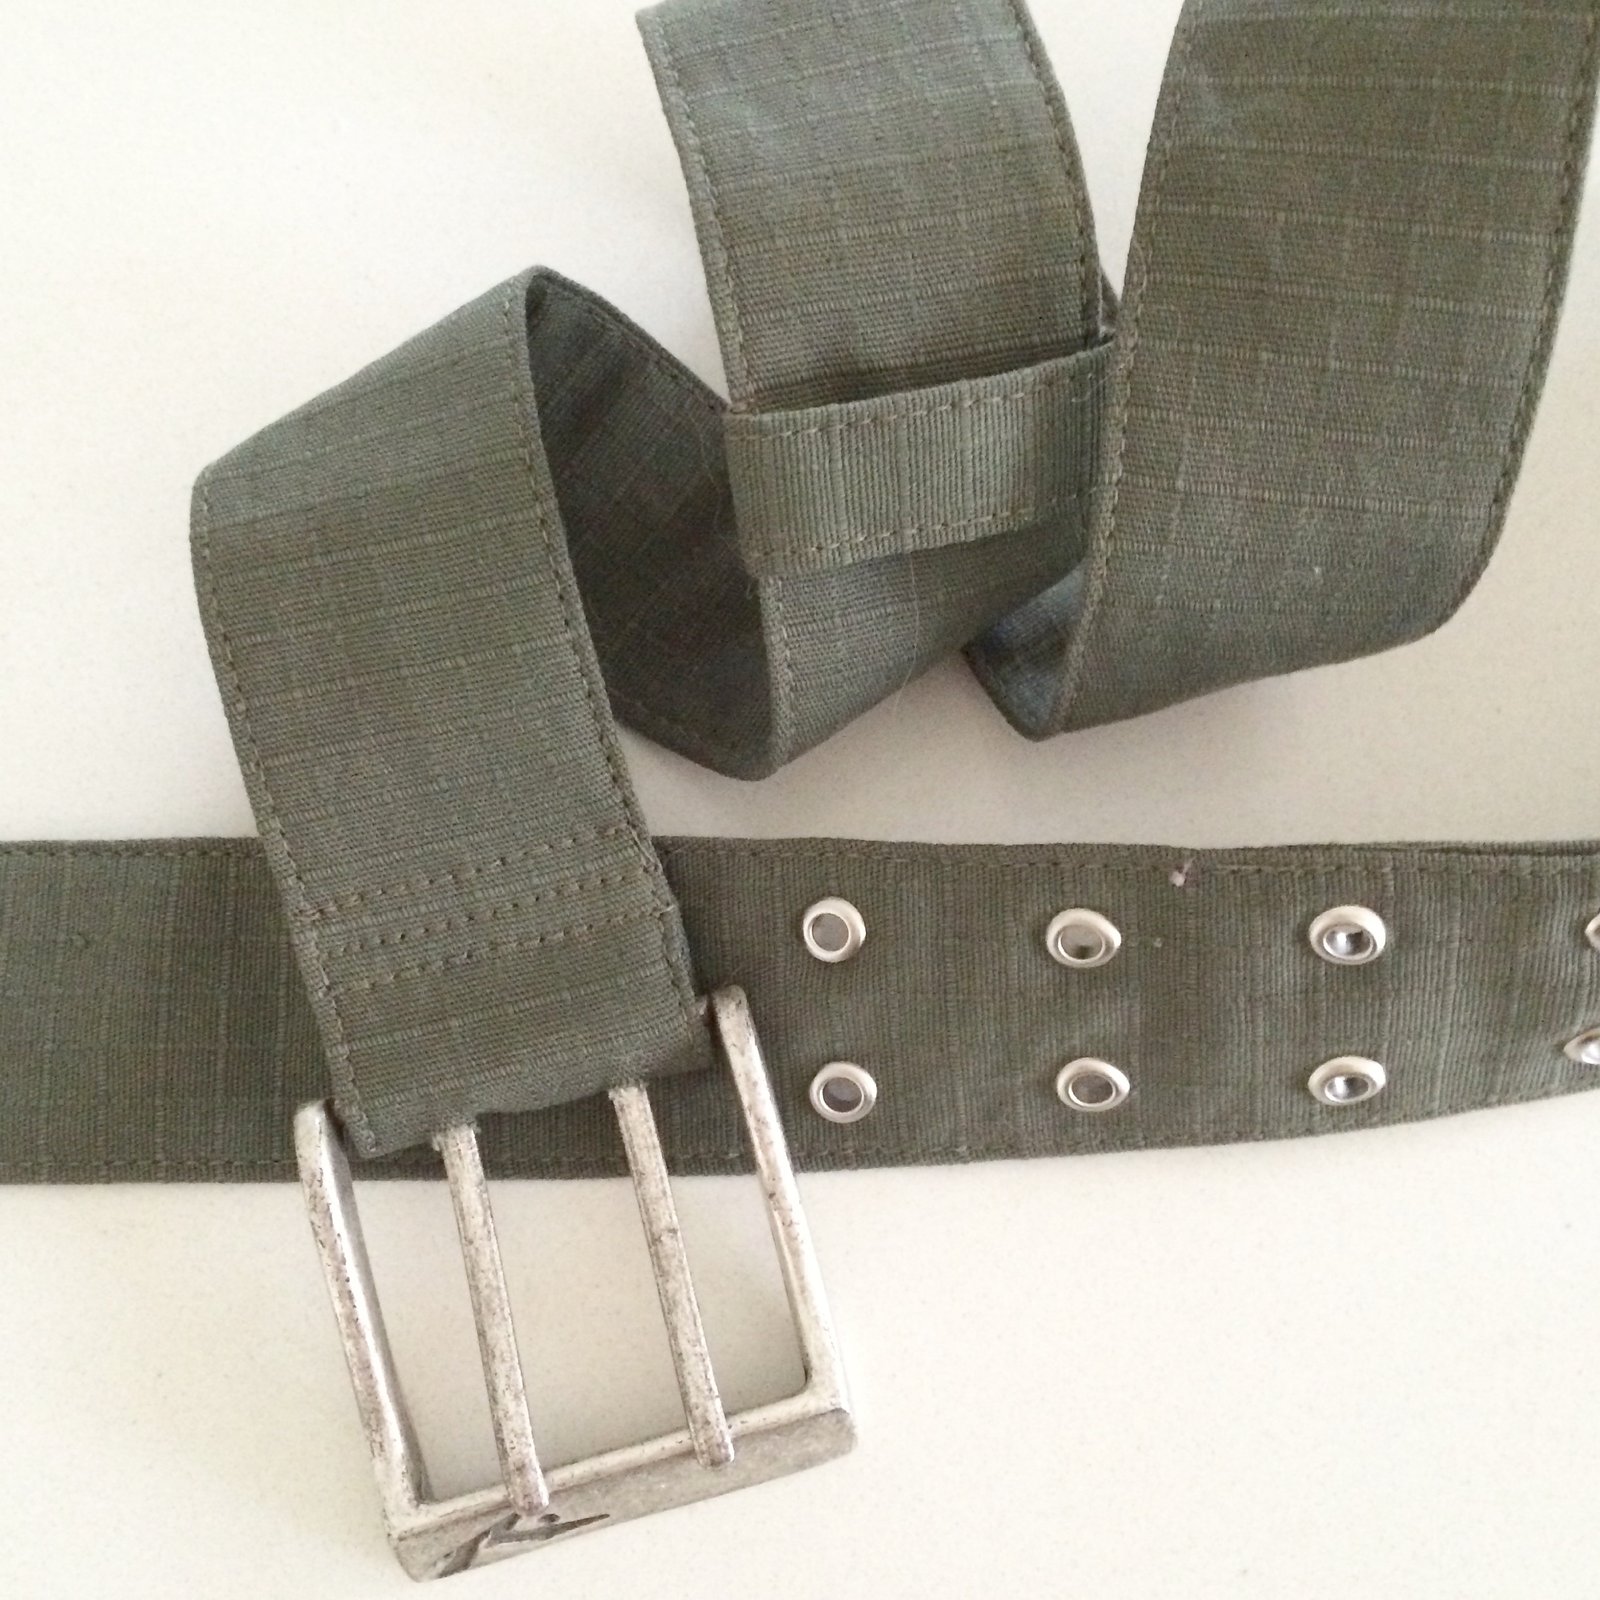
Decorative details: I had “finished” the boots, and they were kinda plain, and I decided they really desperately wanted some hardware, and maybe some straps. I then planned on some “belts” around each boot with buckles… but unfortunately cool buckles are pretty much impossible to find around about here. Everything I saw was either diamante or leopard print plastic and without exception totally hideous. In the end, I compromised with these nickel finished swivel clips to close the “belts” and you know what? I love them SO MUCH and am actually super-happy I couldn’t find the buckles I originally wanted after all! I bought these from Homecraft Textiles. The three “belts” were all sewn on by hand, after the boots were finished. And before you ask; yes, this was pretty difficult. But I reckon it was worth it! Also, I became acquainted at this stage with how very warm the boots were going to be, even before wearing them, since my hands just about broiled while shoved down in the boots, doing this sewing.
Making the boots…

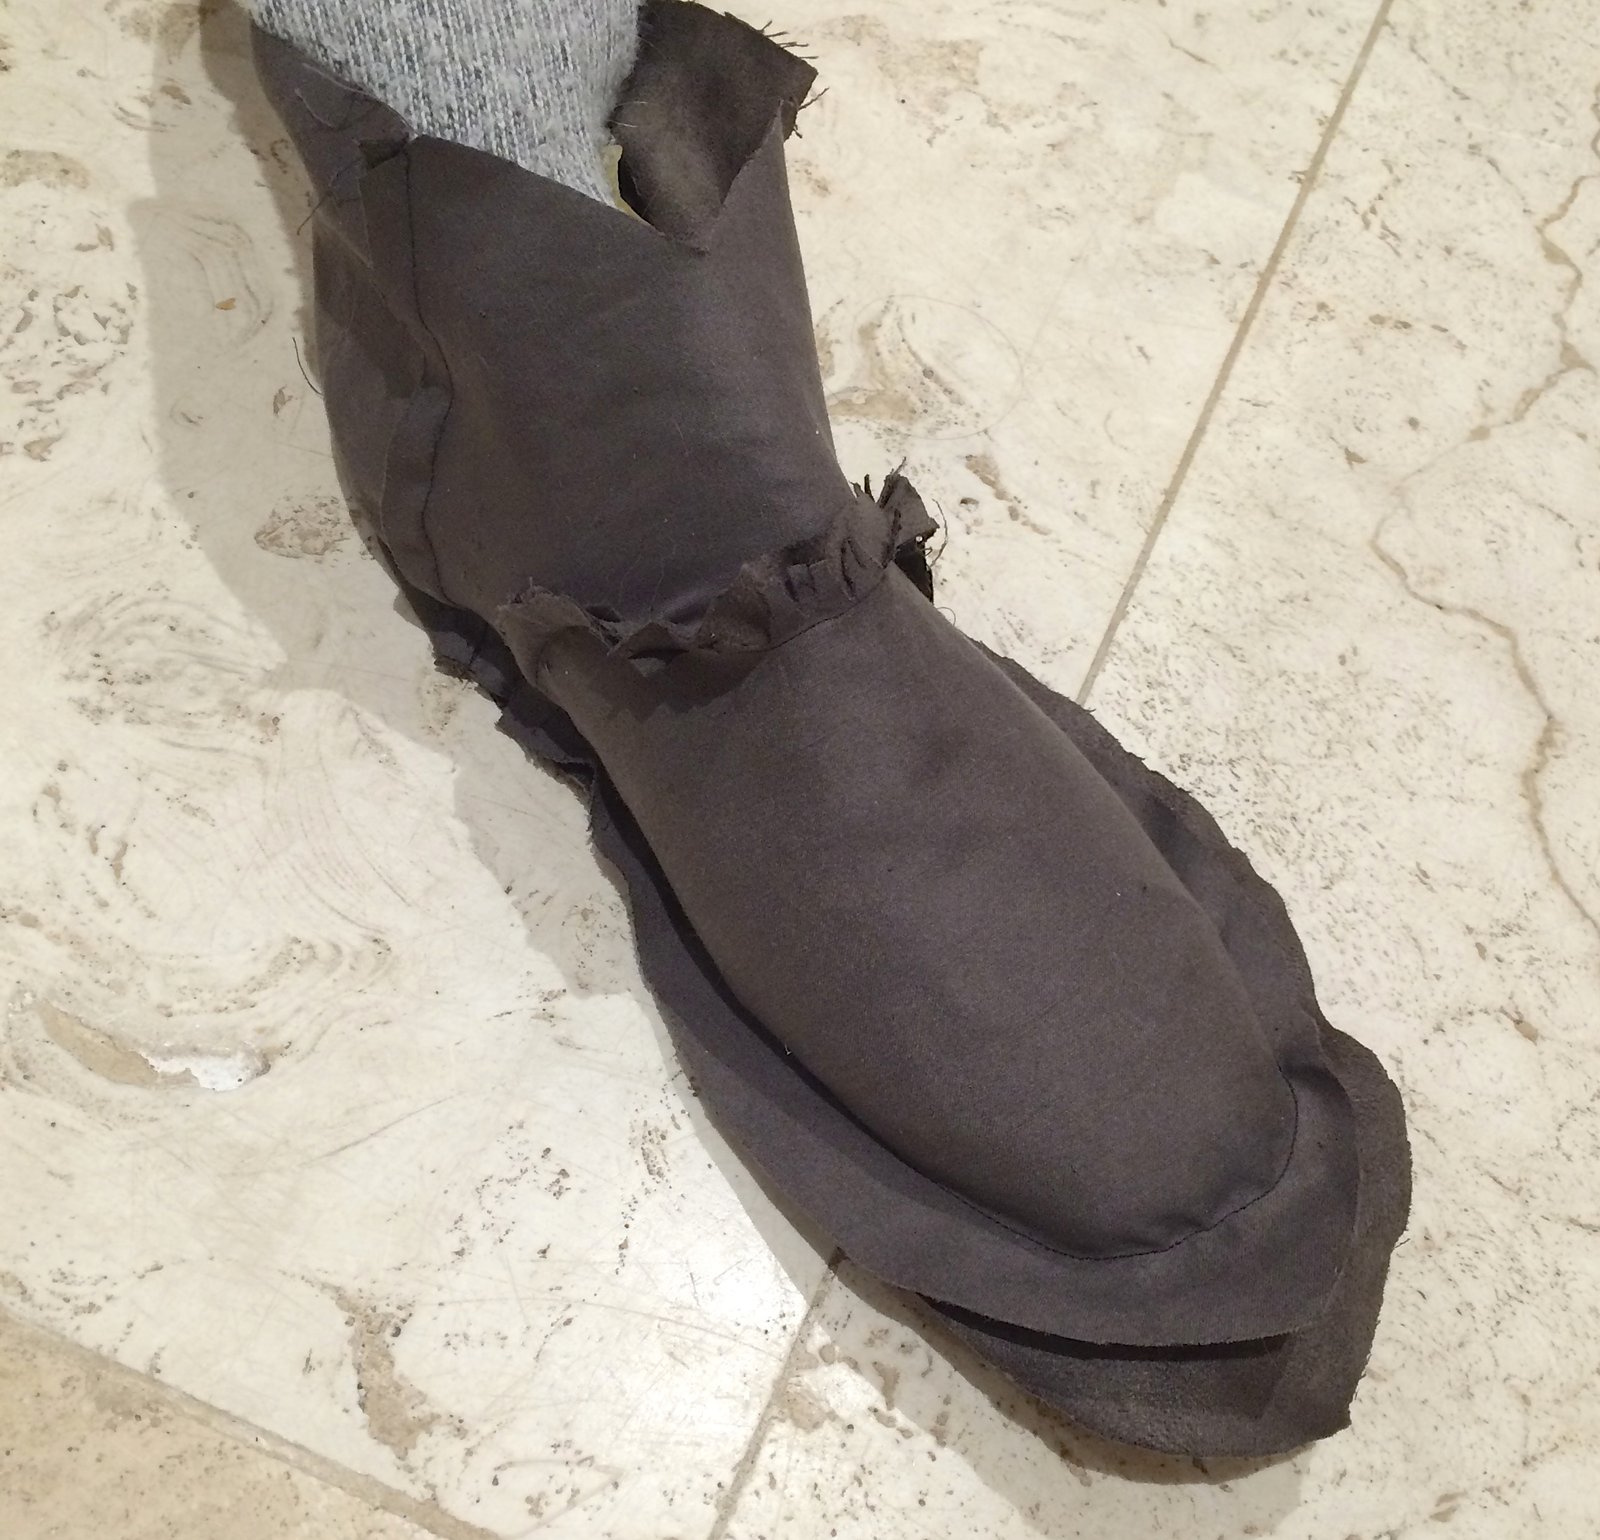
I made the lower part of the boots first, like sort of ankle boots, and did all the lasting and constructing the toe puffs and heels counters using stiff cotton denim with some stretch to it, and PVA glue, just exactly the same way as previously described in the making of my paprika desert boots here.

My vintage wooden lasts are wonderful things, but because they have a metal plate on the bottom it means you can’t nail into them. So, I pulled in the well-glued up (PVA glue) sides in under the shoe by stitching it all in, in like a cobweb of back and forward stitching, using thick strong Gutermann’s upholstery thread (above). You have to do this reasonably quickly, before the glue hardens and dries too much, but it’s not actually difficult. Then I left it all to dry thoroughly, before skiving and trimming much of the bulky folds away underneath. After this, I glued the sole underneath with contact gel adhesive, and glued and nailed the heel into position, just as for all my previous shoes
Once this was finished, I had two completed ankle boots (above), and it was time to add the “calf-tubes”. Yes, I expect there is some proper name for those, but that is how I thought of them! I found it was impossible to machine stitch anything beyond this stage, with my little home sewing machine, and don’t have access to a shoe-maker’s sewing machine, so all the rest of the construction I sewed by hand. I sewed the lining and outer tubes around the top of the “ankle boots” in a way as to enclose the seam within the two layers, then hand stitched the tubes up the centre back seam using a leather needle and tough Gutermann’s upholstery thread. I used back-stitch for the calf-tube to the ankle boot seam, and ladder stitch for up the centre back seam for this.

half sewn up…

Oh, I did manage to sew the upper “hem” by machine! although this was not particularly easy, what with the thick fabric and the boot and all. I cut the lining to sit neatly underneath the hem, glued the layers together as best as I could, then glued the upper vinyl hem down, and stitched it. It’s doesn’t look like it would be hard to sew the top hem by machine but just trust me, a boot is a far from manoeuvrable thing to sew. The final sewing step was to add those three decorative “belts” per boot, as described above.


Then for the finishing off! I’d cut my heels carefully, but they were still a bit uneven. In previous pairs of shoes I’ve sometimes left the unevenness, because I kinda liked the randomness, but in this case I wanted a more smart finish… I sanded the heels till they were all beautifully smooth, and then “blacked” the heels and the sole edges (above). This also camouflaged some stray small blobs of glue that were here and there, that I hadn’t managed to get off with turps. The very final step was to varnish the heels and soles, so they’re all nice and shiny and clean and, dare I say it? almost rtw looking?!

And done!!
 sorry for the picture overload, but honestly; I’m so proud of those boots I could burst!

Details:
Boots; MADE BY ME!!!!!!!!
Jumper; Jo Sharp design and mohair, knitted by me, all details here
Skirt, Paprika patterns Jade skirt, in burgundy silk/cotton knit, details here
Tights; self-drafted, black poly stretch, details here, and my tutorial for making your own custom-fit tights pattern is here
Sienna is thrilled with my boots too; you can tell, yes? 😉


 Pattern: the Sophie swimsuit by Closet Case patterns; and yes, I did make two sets of Sophie bikinis earlier in the year when I was testing this pattern but there were things about both pairs that I wasn’t happy with. With the pink/black one, while I really liked the bikini top, I really didn’t like how the colour blocking on the bottoms looked. And with my grey pair, the bikini cups really were just too scant for my liking.
 With the bottoms; my black fabric is quite thick, almost a little scuba-like and isn’t hugely stretchy, so to be on the safe side I made size 6 bottoms grading out to an 8 at the hips. I didn’t think it needed a full lining but I did incorporate a “panty liner” of white stretch fabric, sandwiched between the front and back in the joining seam and basted it along each leg edge before attaching my swimwear elastic. I topstitched on each side of all vertical seams 1/8″ out from each side (above). You can barely even see this with the naked eye actually because of the black-on-black! but I just wanted it to be all finished off nicely and to stylistically fit in with that same topstitching on the bikini top 🙂


 Firstly, two sage green/pale coffee, checked tweed skirts. I inherited this beautiful quality piece of wool tweed from my grandmother’s stash after she passed away. Although I earmarked it straight away as two skirts for Cassie and myself I just hadn’t got around to it and have sat on it all this time. It was one of those fabrics I couldn’t bring myself to cut into… you know, inherited from Granny, plus exceptionally good quality, equals inevitable thoughts of sewing tragedy followed by eternal self-damnation…. but I’m making myself get over that nonsense nowadays. Make it! Enjoy it! Live dangerously! So, finally… it helps too that I think Cassie has now grown into fabric of this calibre 😉 not that she didn’t deserve high quality fabrics before, but you know what I mean! it’s very much a grown-up fabric and makes a very smart little work skirt for her now that she has a serious and professional career. The fabric really is beautiful stuff… fine and evenly woven, and there are flecks of all sorts of colours in with the sage green/coffee check… blue, red and gold, caramel brown, forest green, and a hint of purple and black. It has no identifier on it but it wouldn’t surprise me if it was a fully English tweed. My grandmother was very much into that sort of thing 🙂


 sie moved out of home she left this fabric behind and I almost started to factor it into my own plans mwahahahahaha… but of course she hadn’t forgotten it, o no! The reason she had deviously left it behind was so that I could make something for her with it! HA! She chose
 Details:

 Hello!
 I just adore jackets with tonnes of hardware and detailing, like zips and lots of different bits and bobs and interesting pockets. So set about planning for this one to be chockablock with loads of that sort of thing. I considered using the same Burda pattern I used for the previous one, but I had to make lots of additions/adjustments to that in order to make it the complex, feature-laden army-style jacket that I wanted, which is fine! but since making that one, lots of great patterns have popped up with all those features already incorporated into the pattern. Eventually I settled upon the


 There is tonnes of topstitching all over, so satisfied that part of me that adores precision sewing. I’m that weirdo that LOVES topstitching! and am pretty much totally and blissfully happy when I’m hunched over the machine, chugging along; churning out lines upon lines of precise, neatly and evenly spaced, stitching. The wonderful thing about this ripstop is that the little squares in the weave of the fabric make precision stitching and lining up pieces to be perfectly square very very easy.


 Did I dive right into that invitingly turquoise water for a frolicsome dip? NO!!!! Since I’m the wussiest wuss that ever wussed I just got my pictures super fast and then threw on my jeans and thick woollen cardi again pretty quick! You can see that turbulent water and my crazy hair, it was blowing a freaking gale and the waves were booming and thundering onto the sand like the proverbial white stallions. I do love the beach in any and all weather, including wintery and wild; I love the sparkle of sunlight on the water, the swirling foamy shallows, and the crashing of the surf. Well, perhaps more so when I’m warmly rugged up snug as a bug in a rug, of course. Sienna loves the beach too, but it’s alright for her, in her thick fur coat! hehe, the things we do…
 It’s funny; when I finished the pink/black one I almost immediately took a violent dislike to the colours I’d chosen… It seemed a bit… I dunno, young and sporty? or something. Then I made the charcoal version. Which I really adore. When I took out the pink/black one again, to take photos in it, of course, you know the story, it didn’t look quite so hideous after all. I actually took quite a shine to it again. The pink seemed a bit warmer and less Barbie than I’d remembered it. I decided I might even like it better than the charcoal one. I don’t know. Oooh, I’m torn! Either way, I expect both are going to get worn this summer 🙂
 Heather has introduced her own sizing chart for the pattern, which I think is a pretty good idea. You know, when you’re making something and you sometimes get too lazy or too cold to disrobe for proper measurements, and go with the same size you always take, or worse; what you think you are. I do find that when faced with an unfamiliar sizing chart, you’re more inclined to get out the tape measure and do a properly slow and careful remeasure, to determine your correct size. Which I did. So saying that, how do I feel the cups fit? well they both fit pretty good. Though I do feel like the cup on my charcoal one, while it fits me; is just a smidge on the scant side for my tastes, if that makes any sense. I believe Heather has upsized them on the final version, which I reckon is a good call. I am small up top but I still kinda like to have lots of coverage there, for personal preference. I might remake the charcoal bikini top, following the new sizing of the final version of the pattern. But maybe not ’til summer!
 Fabrics and bits and bobs: the fabrics are from Fabulous Fabrics; who do get some very nice swimwear fabrics in stock during the season. I bought all these fabrics in previous summers, stocking up during sales. Stashing strategically, as you do 😉 Other supplies from my fast dwindling MakeBra basic kits; the underwires, under wiring channeling and the foam for the cups. The swimwear elastic, plastic swimwear hooks for the straps and back closures are from Spotlight.

 I’ve made some boyfriend jeans! Hehe, I actually made these aaaaaaaages ago! and have been dying for the pattern release, just so I can wear them more often. They’re so comfy and easy to wear, they’re my current favourites. I really really love them 🙂
 Fabric; these are designed for a non-stretch denim, so I found a nice, crisp, deep dark charcoal cotton denim, mid weight and with absolutely zero stretch to it in Spotlight. No stretch, and the jeans still feel fantastic! I also used coppery-brown Guttermann’s upholstery thread for the topstitching, and copper-y coloured jeans buttons, all from Spotlight. The grey cotton for the pockets and waistband lining is the same fabric as my


 I’ve made a softly floaty blouse 🙂 of course just as summer is on the way out… o no, wait, actually summer is over! However we’re still getting days of 40C. Not that I’m complaining, mind you. I love the warmth! Only thing is that I’m getting tired of all my summer things thus the decision to make a new summer thing, ha. #seasonallyinappropriatesewingforthewin It’s light and pretty and easily breezy; and delightfully cool. I fully expect the weather to turn cold now.


