Tag Archives: Daily Outfit

Morgan boyfriend jeans

ootd

morgan jeansI’ve made some boyfriend jeans!  Hehe, I actually made these aaaaaaaages ago! and have been dying for the pattern release, just so I can wear them more often.  They’re so comfy and easy to wear,  they’re my current favourites.   I really really love them  🙂
morganjeans side

Pattern; the Morgan jeans by Closet Case patterns, named for the lovely Morgan of crab and bee.  They are a mid-rise, button-flied, slightly cropped leg jean with a skim-the-body fit *deep breath*  Wow, there are so many descriptors attached to jeans now, yeah?  Jeans are no longer just “jeans” but there are so many defining clarifications that come with each style.  These are quite different from any of the jeans I have made before in shape and fit, but of course they are still “just jeans” in the sense that they have all the features of jeans beloved to us all, like the 5-pockets for example.  Heather kindly asked me to test the pattern, and this is my first go, off the bat.   Apparently the leg has been widened slightly since I made these.

morgan jeans frontFabric; these are designed for a non-stretch denim, so I found a nice, crisp, deep dark charcoal cotton denim, mid weight and with absolutely zero stretch to it in Spotlight.  No stretch, and the jeans still feel fantastic! I also used coppery-brown Guttermann’s upholstery thread for the topstitching, and copper-y coloured jeans buttons, all from Spotlight.  The grey cotton for the pockets and waistband lining is the same fabric as my grey gardens dress (Fabulous Fabrics).

My first button fly!  I wasn’t sure if I’d like it at first, I thought it would be bulky; but now I’ve got it and have worn it a few days, I realised my fears were unfounded, and I really do like it.  Also, it’s nice to have something a bit different, yeah?

fly

Pockets, with lots coppery/brown topstitching  #topstitchingporn

pocket

Leather patch on the back.  I cut this from one of the last scraps of leftovers from my Danish suede jacket.  I forgot to add it at first, doh! but it does make them look just a little more ready-to-wear, no?

Alterations: initially that waistband was quite gape-y in the small of my back, a usual thing for me.  I’m quite hippy, I suppose!  so I took in several inches off the waist at the centre back, tapering out in a straight line out to the hips.  And shortened the waistband at centre back, correspondingly.   This is my usual adjustment to fix that problem for me, and worked just fine for these too.  I didn’t alter the position of the pockets, so on my jeans they are situated a little closer and more slanted inwards to the centre back seam than the pattern intended, but I thought they looked ok and didn’t need moving.

hadn’t added the patch at this stage…

back

I love how they look rolled up a coupa rolls, this makes them three quarter on me and I really love this, a little bit 50’s capri pant-like. I love how they show off a pair of little lace-up shoes.  Hehe it’s probably a bit obvious from my shoe-making efforts that I’m SO right into the flat lace-ups at the mo!   btw, those red sandshoes in my beach pictures below? are fully dead now, (sob)  I’m pretty sad about that, I thought they were cute. #needmoreredshoes

Top picture is my current outfit of the day… I actually put on something else first thing today, inwardly wanting to wear my Morgan jeans and moaning once again that I couldn’t yet, because you know, the Reveal and all.  And then I saw on IG that Heather had released the pattern.  So I could wear them, yay!  Other outfit sloughed and abandoned, Morgan jeans donned with joy and delight  🙂

This style is perfect for the weather we are getting right now; which is starting to get a little crisp in the morning but still quite warm during the day and not cold enough yet for socks!  Not too hot, not too cold, but just right.  These are going to get worn a tonne …

Details:

Jeans; Morgan jeans by Closet Case patterns, non-stretchy cotton denim
Top, (white) loose drapey top from drape drape by Hisako Sato, cotton jersey, details here  (black) self-drafted Tshirt, details here
Raincoat (top picture); made by me, self-drafted, details here
Shoes; red sandshoes (below), made by me here, yellow shoes (top picture), made by me here

morganjeans

pinterestmail

grey gardens

greygardens

vogue1152
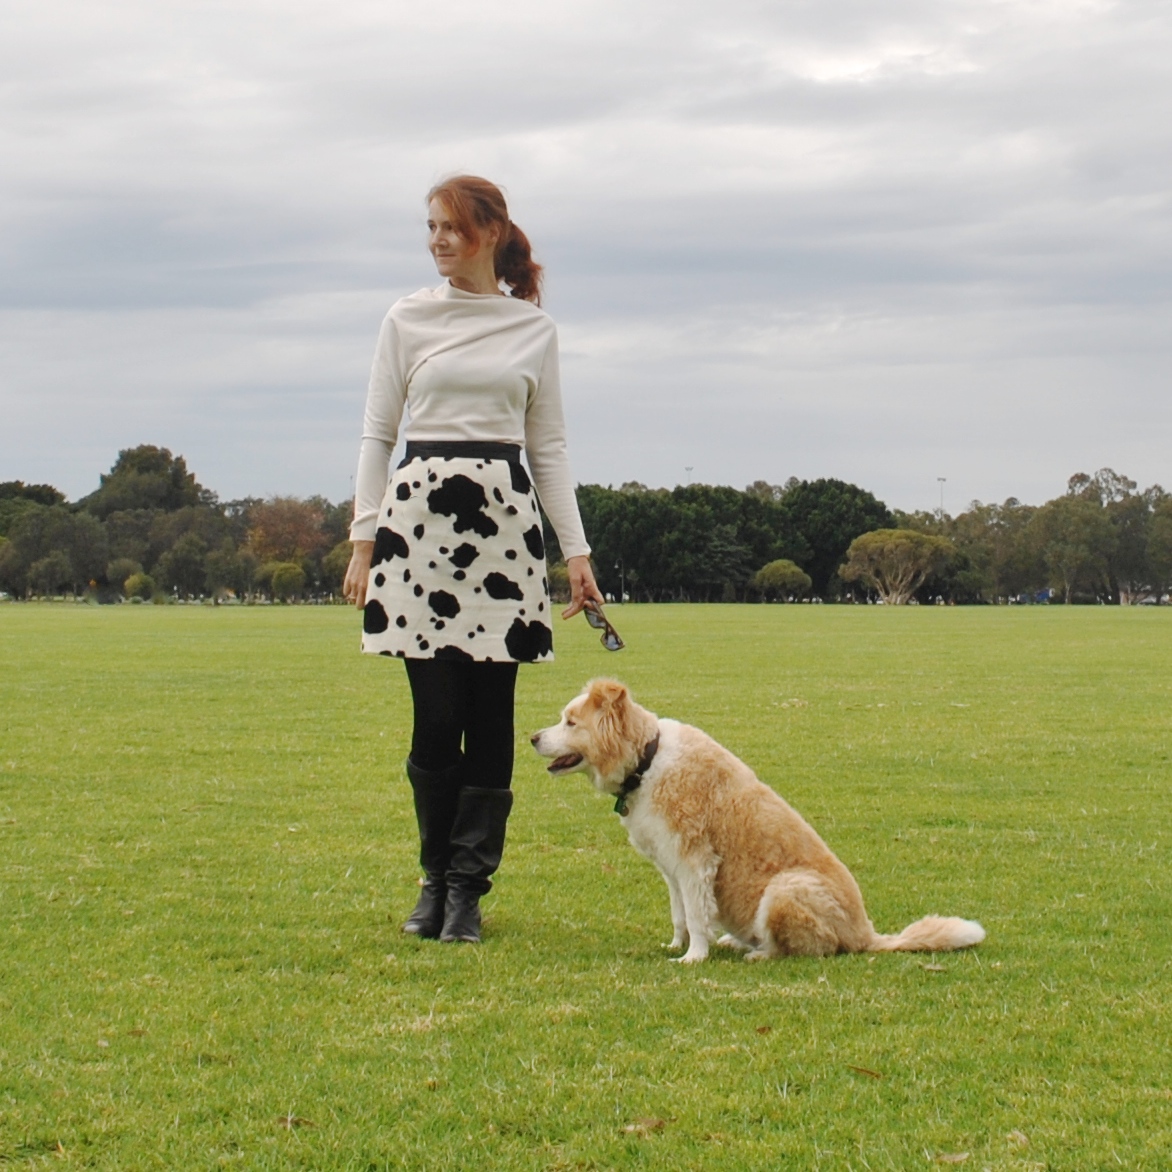
I’ve made a new dress… a sweet little autumn dress.    It’s  a quiet dress, and demurely plain in colour; which really throws up the details of the design into the spotlight.  The colour fits in with my current clothes-making criteria; to have things in my wardrobe that go with as many of my self-made shoes as possible! since I will be wearing only my own shoes this year and some of my shoes are kinda colourful and not basic.

Pattern; Vogue 1152, with minor modifications.  This is the second time I’ve made the pattern up for myself, my previous version has just been transferred to the “possible good sammies pile” since I realised I barely wore it last year.  The additional modifications I made to the pattern for this new version are in line with the things I grew to dislike about my first version.

Fabric; soft slubby cotton from Fabulous Fabrics.  I love the grey; a soft and warmish, almost yellow-y kind of a grey, if that makes sense, and one that actually suits me, I believe.   This fabric originally came out in four colours; red, blue, white and grey, and I bought some of each colour! pretty groundbreaking stuff for me, I generally would not be so extravagant but the fabric really is beautiful quality so I just had to!  Actually I’ve just revised my memory; it came in black too, which I did NOT buy and did kick myself over shortly after..  Doh!  This is the last piece I bought to be made up… I’ve previously made up the blue as a dress here, the red as another dress here and the white as a shirt and shorts set here.

Pattern mods;  the V-neck in my first version was so low-cut as to expose the bridge of my bra; so I either had to be sure to wear a pretty, colour co-ordinating bra that day, or a scarf knotted at the front.  So this time I raised the height of the V-apex by about 2.5cm…  at least I’m decent now.

greygardens front

Sleeves; left off the cuffs, removed about 12cm in width from the middle of each sleeve and lengthened them by 10cm; instead of lots of pleats at the top there is just one single inverted (box) pleat at the top of the sleeve cap.  I also made a separate tab or strap that is sewn near the lower edge of the sleeve and wraps around it, catching in the fullness of the sleeve and buttoning upon itself.  Shell buttons from my stash.  A buttoned tab is not the kind of thing you see on a dress sleeve very often, it is the same principle to the tab/strap that you put on the end of coat sleeves, but I like to be different, appropriating and subverting details like that here and there and thus customising my clothing in some small way.  Just one of the reasons I sew for myself!

grey gardens sleeve

Also, maybe I’m just a rebel, I hardly ever follow a pattern obediently and just always have to deviate in some small thing.  Just one little bit of me in there, somehow, somewhere.

I added an extra row of elastic casing in the back to pull it in more, like I did for the first version, because otherwise it all just looks a bit pouffy back there.Also; added inseam side pockets – well naturelment!.. and lengthened the dress by about 15cm.

greygardens backBelow is my full outfit for today… I included it here because I’m absolutely loving how the grey looks with my mustard cardigan! so much so that I’ve worn this same outfit twice this week, throwing it on again the minute it came off the clothes line!  There’s just something about mustard and grey together, I just have a thing for it.  Though I’m sure it will go really well with all my other cardigans too.  As well as my shoes and some tights.  It’s a real autumnal dress, and I can’t wait to mix and match it with all the rest of my more cool weather-y stuff during me-made May.  Hurrah for new dresses!  🙂

Details:

Dress; Vogue 1152 with slight modifications, see my first version and original review of this pattern here
Cardigan; the Miette, a free pattern by Andi Satterlund, details here
Shoes; sandals worn below made by me here, black thongs in the first picture made by me here

ootd

pinterestmail

light as a cloud

floatytop1

stylish dress book
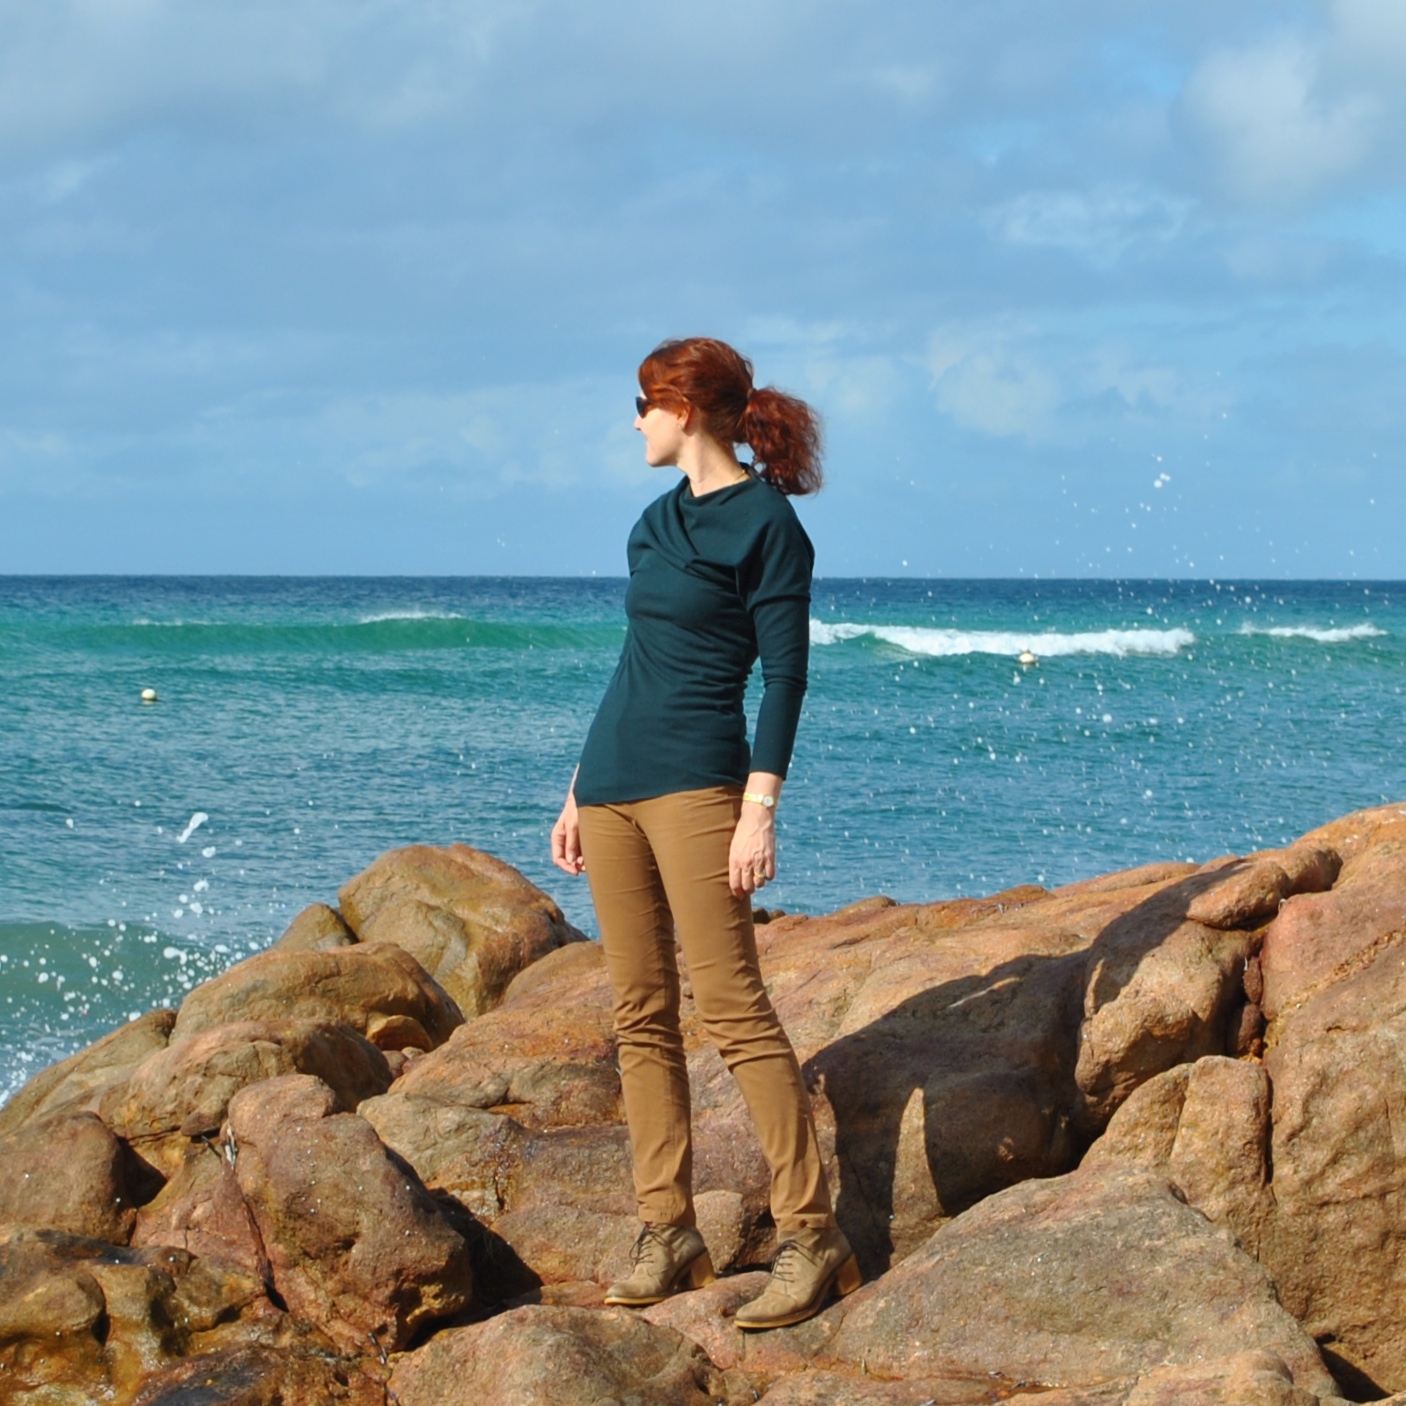
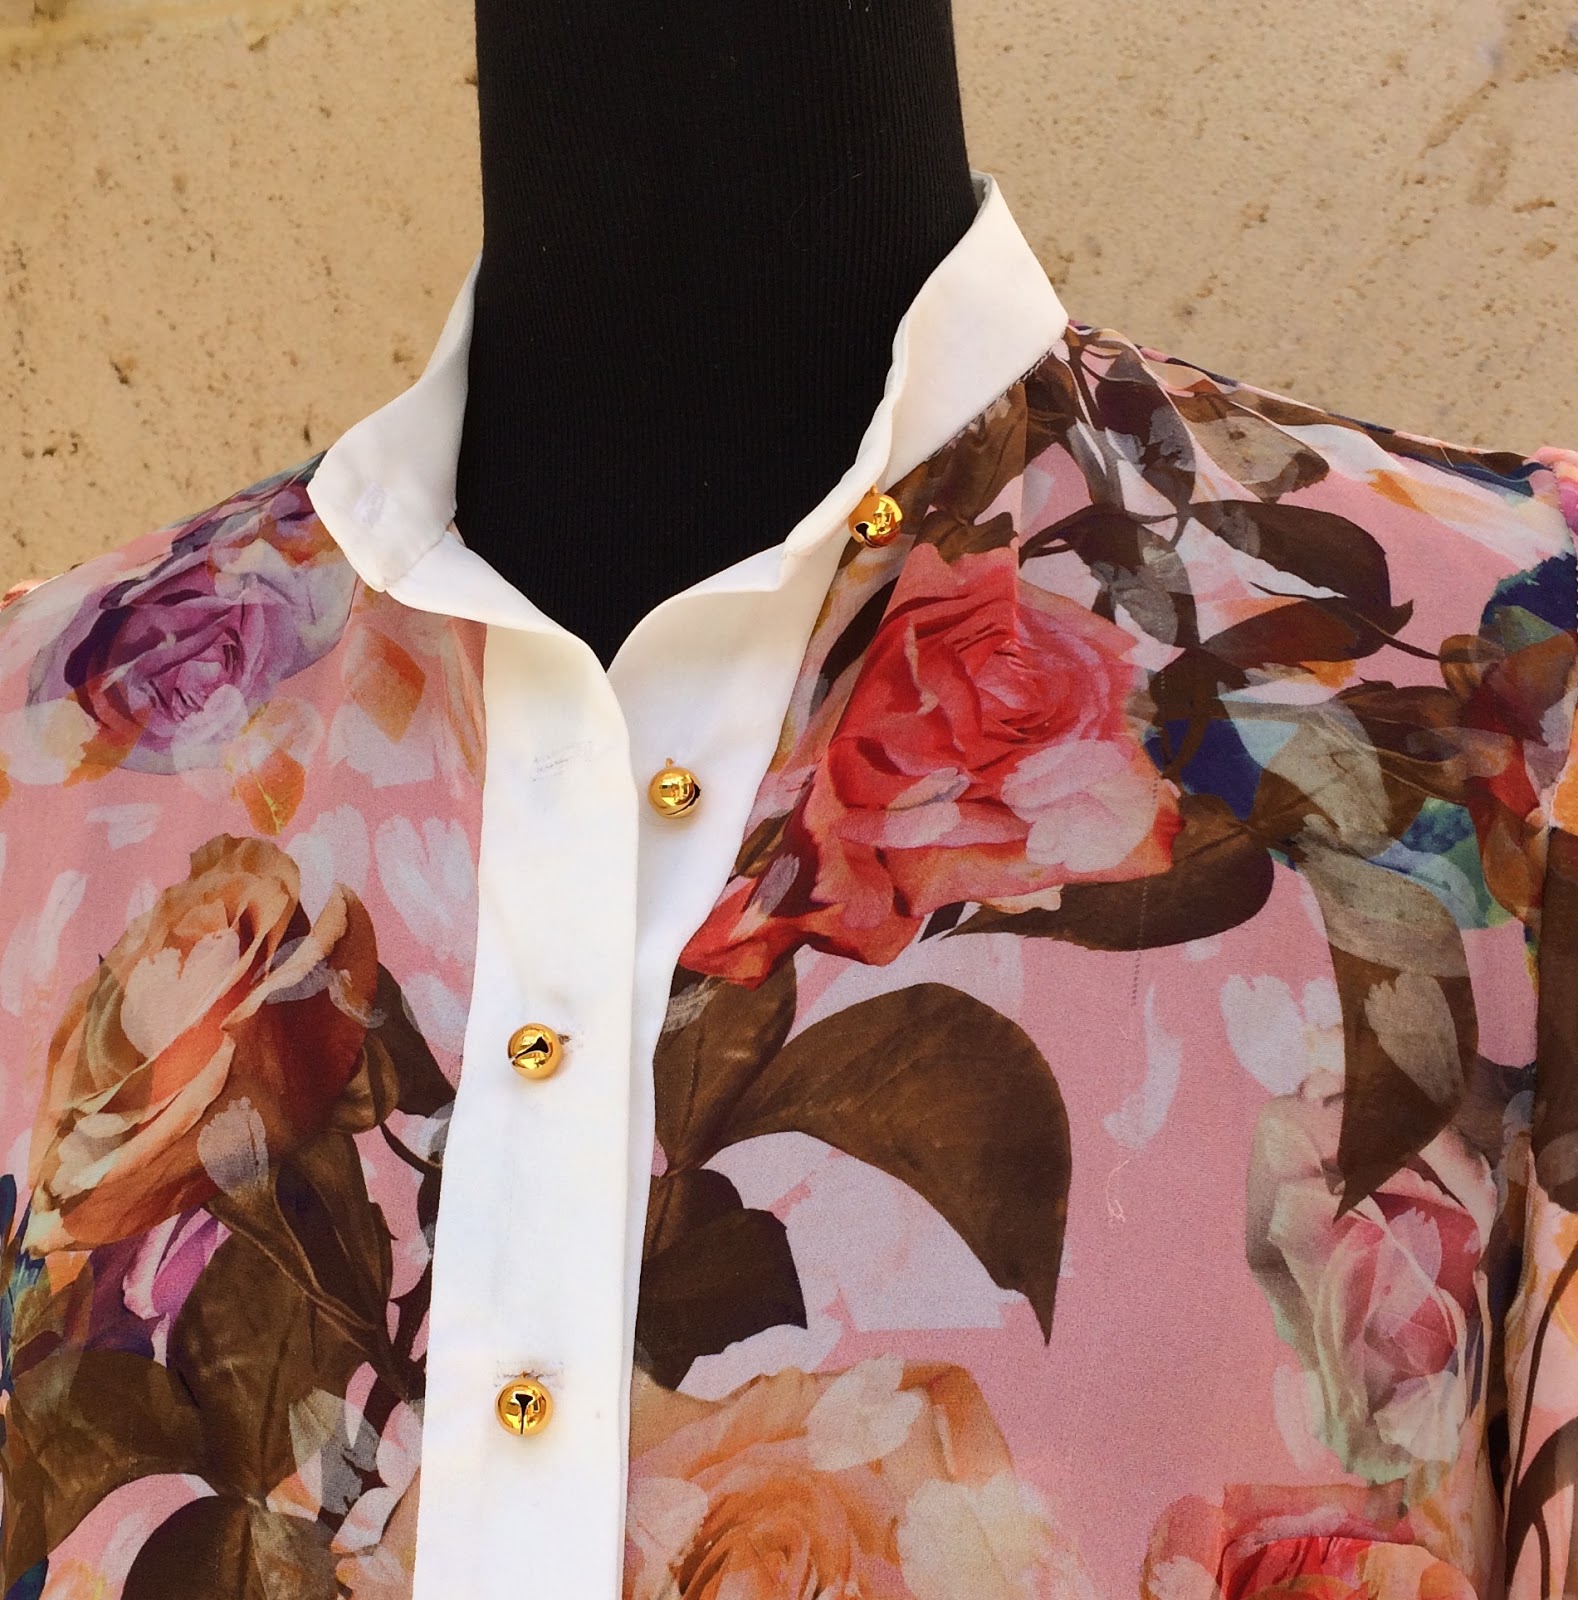
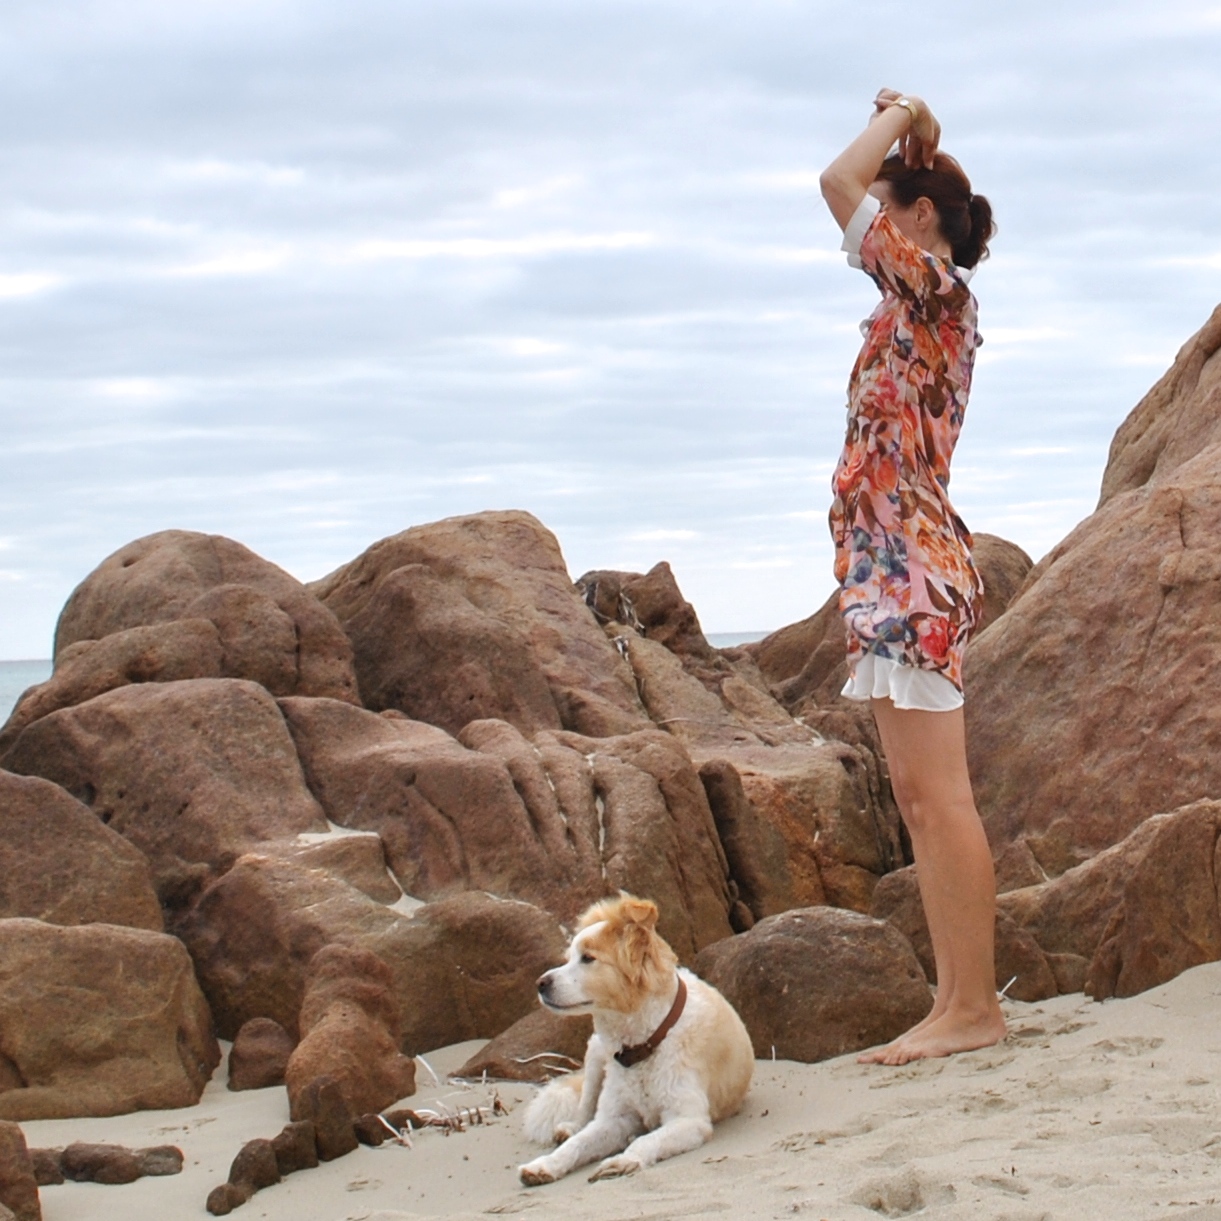
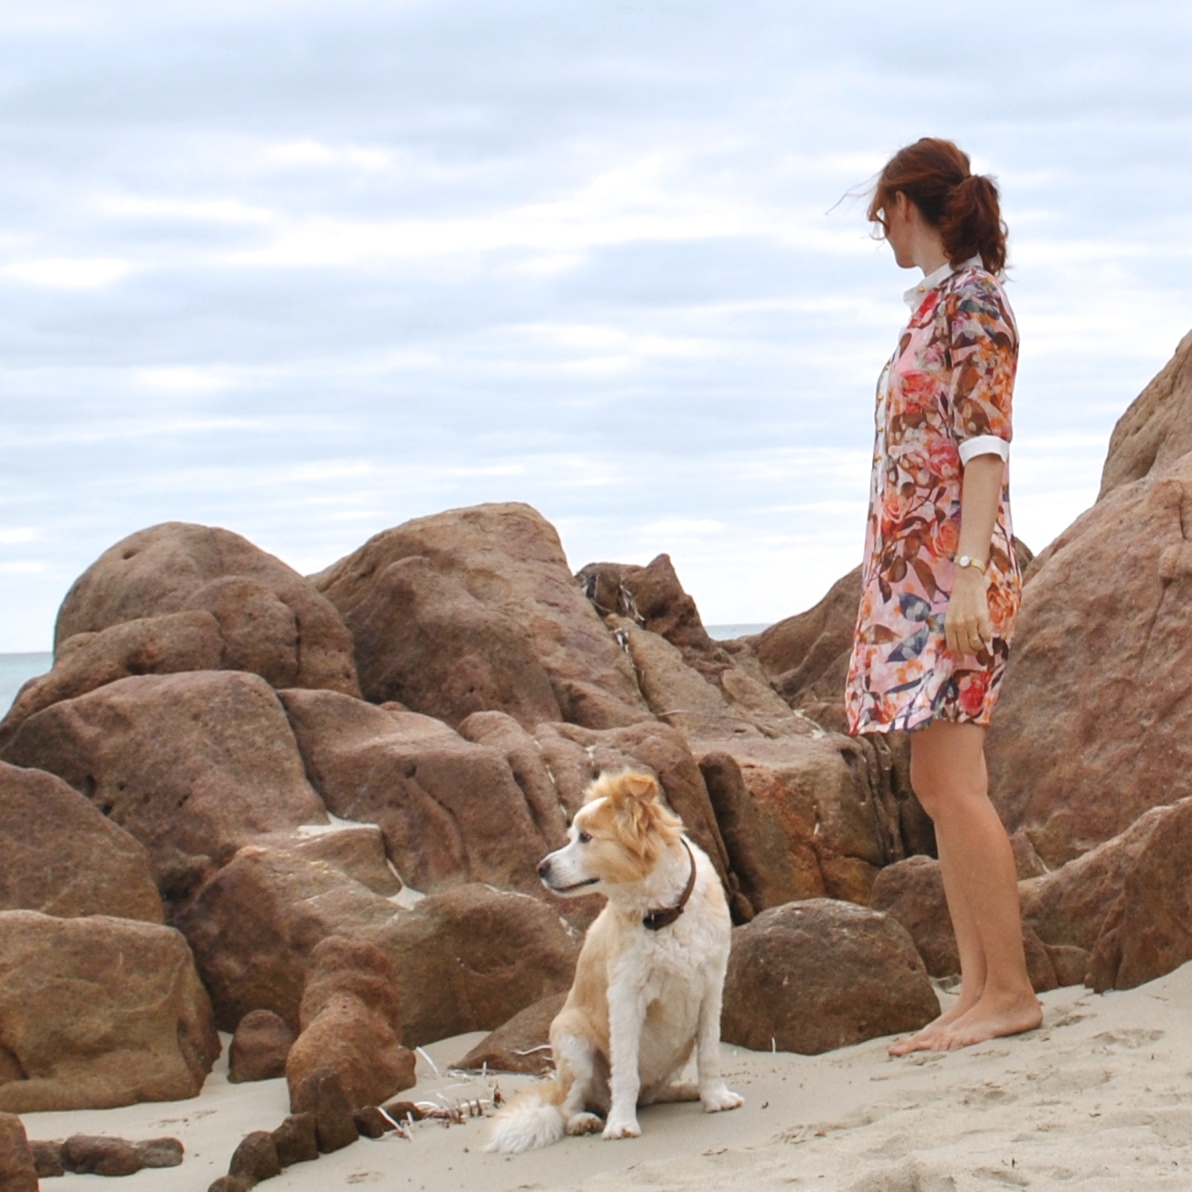
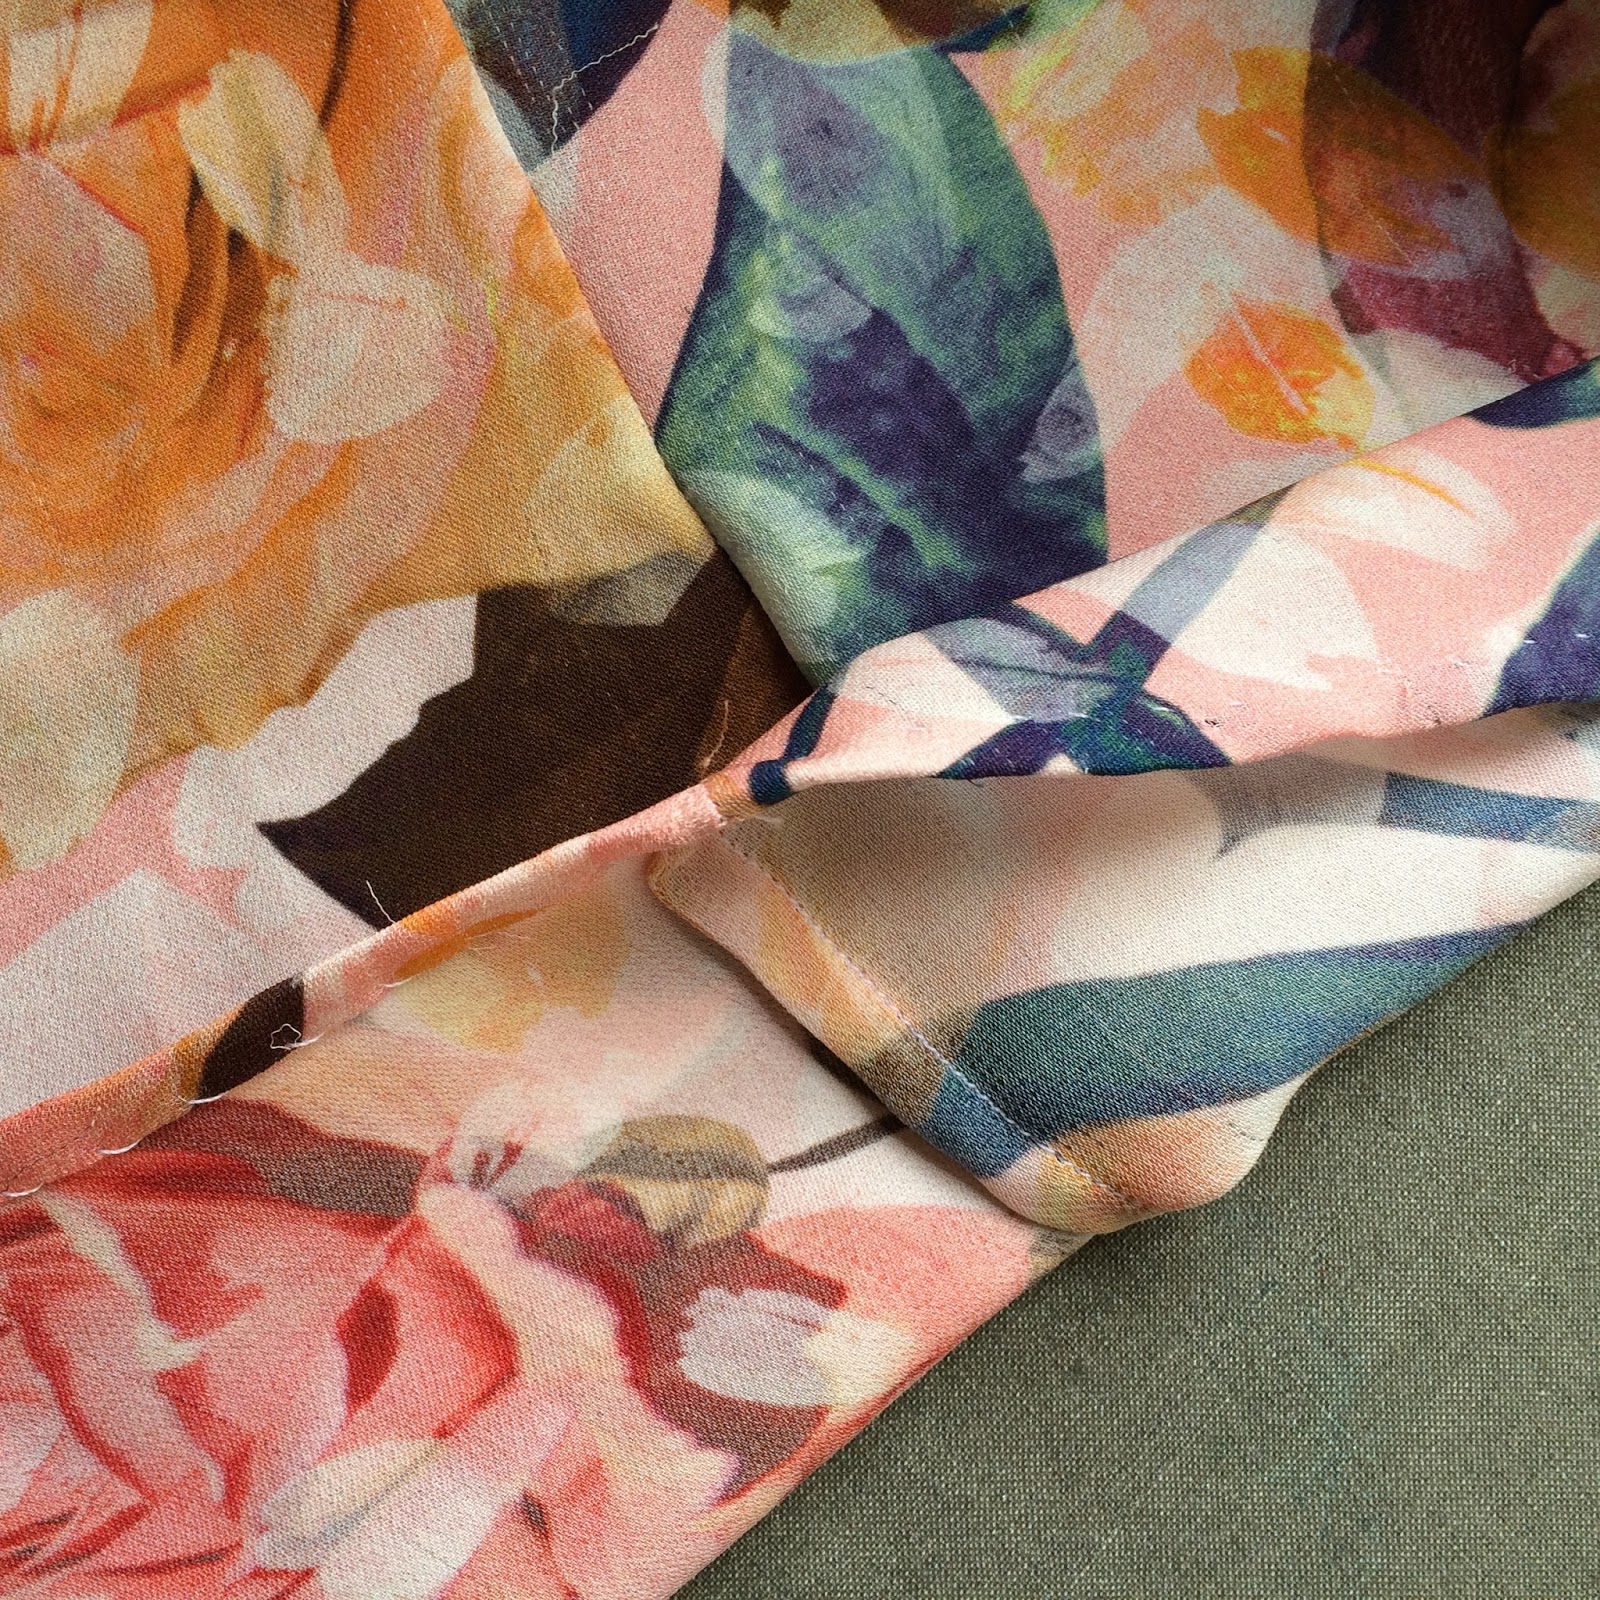
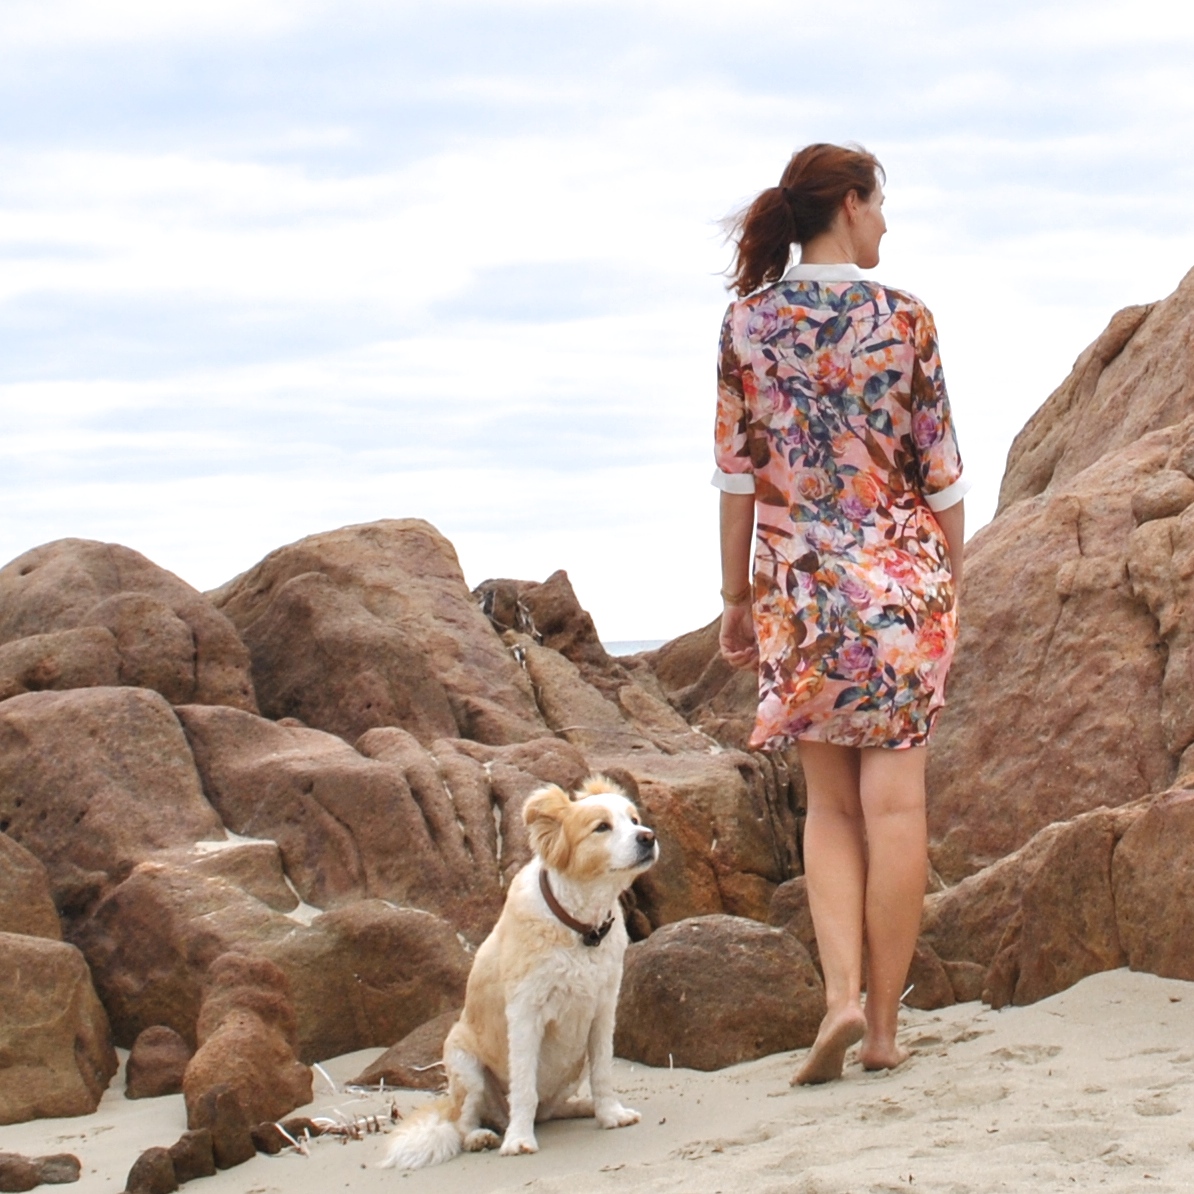
I’ve made a softly floaty blouse  🙂  of course just as summer is on the way out… o no, wait, actually summer is over! However we’re still getting days of 40C.  Not that I’m complaining, mind you.  I love the warmth!  Only thing is that I’m getting tired of all my summer things thus the decision to make a new summer thing, ha.  #seasonallyinappropriatesewingforthewin  It’s light and pretty and easily breezy; and delightfully cool.  I fully expect the weather to turn cold now.

floatytop3

Pattern; based upon dress R from the Stylish Dress Book, by Yoshiko Tsukiori.  I’ve always had luck with the patterns from this book.  But this time … well the pattern is for a short dress, and it’s quite pouffy too, and in this particular fabric it looked just like a nightie! eeeek! this fabric is far too lovely to be a nightie! So I gave it just a little chop and now it’s a top.   Much much better like this… I had also added some rather interesting gathered side pockets to the dress and managed to keep them perfectly intact.  I pinned this picture of a gathered pocket a while ago and have been itching to have a go at incorporating it into a design at some time… And I have! with an added drawstring.  I decided the drawstring was needed with this embroidered fabric, it felt kind of lacking without it.

gathered pocket

Fabric; a rather gorgeous fully embroidered Japanese silk/cotton, bought from the remnants table at Potters Textiles, years’ ago.  Probably about four years ago.   Fully embroidered with a floral motif, the background is very light and fine, quite sheer actually; so a full and voluminous design is just the ticket.  The yoke and bias cut ties on the pockets are ivory crepe from Fabulous Fabrics, cut from the leftovers of my studio faro dress.

floatytopback

Modifications; Shortened to be a blouse.  Also the front and back are supposed to be gathered into the yoke… I tend to steer clear of gathering.  Instead I folded the excess width into box pleats.  There are four at the front, evenly spaced and close to the centre front, and one in the centre of the back.  And I added those two gathered pockets at the sides.  I love the design of these; interesting and practical, and pretty too without being excessively twee, and they’re a little bit different from your average inseam pocket and patch pocket.  I think they add a certain visual “something” to the top that it needed.

I’m thinking of writing a tutorial to show how I made them…  coming soon  🙂

IMG_1263

stylish dress book DSC_2624burda7723-1

Details:

Blouse; based upon dress R from the Stylish Dress Book by Yoshiko Tsukiori, embroidered ivory silk/cotton
Shorts; Burda 7723, green cotton gingham, details here and my review of this pattern here
Thongs, made by me, details here

floatytop4

pinterestmail

dark chocolate suedette

sideIMG_7763burdastop
I’ve made a new little top.  And I’m so happy with it in my outfit! far more than I thought I would be  🙂  Making the little top was almost a spur of the moment thing… see, I’m going out tonight and a few days ago suddenly started to think seriously; what smart/casual outfit with shoes would fit my Year of Handmade?  I’ve got tonnes of lovely dresses but didn’t think any of my current handmade shoes would cut the smart/casual mustard with any of them… aaah first world problems!  anyway long story short; bit of brainstorming later and dreamt up this outfit.  Had the skirt and the shoes already and just needed the top to pull it all together and be the icing on the cake… or should that be the chocolate topping on the cream?  Probably.


DSC_2668

The neutral colours with a variety of textures in my outfit are very pleasing to me: the suede-y deep chocolate brown vs. smooth glossy creamy-ivory satin skirt, vs softy fluffy chocolate and ivory felt in my shoes.  And smooth pine for the base of my shoes.  I feel rather modern and new-age cool.   Almost trendy.  LOL!  Yeah, funny thing; it’s been a long while since I’ve felt this sharp in my handmade clothing!!.

The fabric in my top is faux suede, from the Fabric Store in Melbourne, bought during a trip there with Mum and Cassie.  I have loads left too… not a bad thing since it’s kinda gorgeous!

back

Pattern; Crop Top 127, from Burda magazine 2/2015.  It’s quite a cute little design, boxy with lots of straight choppy lines long and dramatic diagonal darts at the front and boxy angular sleeve seams.  And then the smooth curve of a high-low hemline to break it up.  The bias-finished armholes and neckline are clean and neat.  I do like a bias finished edge!  I used black cotton for this since I didn’t have any chocolate brown.  The top as per the magazine is completely open at the back! instead I chose to seam mine, leaving a slit with a little button and loop closure at the top.  I covered my embroidery cotton loop with tightly spaced blanket stitching along its length, so it’s strong and neatly finished.

details

Adjustments; the pattern is in petite sizes, and in the past I’ve found that the Burda petite bustline sits just a little high on me … I lowered mine very slightly just by making the dart shorter.  I also added 6cm in length to the bottom hem all round, because it looked like it was going to be a tad on the too short side.  And I’m so glad I did!!!  It would have been waaaaaaaaaay too short on me!   Even at this lengthened version, I feel in constant danger of exposing the underthings.  Have to be careful not to lift my arm up too high!  I’m wearing my mocha Sierra bra though, which I  think is a good fit for this expose-errific top… why? because it’s brown, and quite a longline bra and also since I made it very very plain it actually reads more like a cropped camisole than a bra, if anyone happened to glimpse it.  So I’m glad I’ve got that already too.  Honestly, everything in the outfit matches just like they were all made intentionally to go together.  I feel very harmonious  🙂

Smart casual outfit? that pleases me? fully handmade? Tick, tick, and tick!

Details:

Top; Burda magazine 2/2015; 127, chocolate brown suedette
Skirt; Burda magazine 02/2014; 106; cream satin, details here
Shoes; handmade by me in wool felt and pinewood, details here

fulllength

pinterestmail

a shearling jacket

P1130071

As sneaky-peeked previously; my shearling jacket, and mamccalls5276n, I’m so happy with it!!  It turned out just exactly how I hoped, and was the most wonderfully cuddliest, comfiest thing to have with me in our recent visit to Japan; I loved bundling up in it each day in Tokyo and used it as a snuggly rug while on the plane…  without a doubt the warmest coat I’ve ever made formyself, evah.  Like wrapping myself in a fluffy blanket, and I was perfectly snug enough even in the subzero temperatures of Hokkaido.
P1130050

Obviously, and with my usual attention to weather appropriate sewing ahem, I chose to get started on this super fluffy thing during the most heinously hot heat wave… 42C anyone? phew, try-ons were hideous.  Seriously I question my sanity sometimes.  Well, lots of times actually 😉   Anyway it was all worth it in the end, since I’m quite chuffed with how it turned out.

IMG_9612 - Version 2

What is it about making jackets that is so enormously satisfying and fulfilling? I don’t know exactly why, but I always find jackets, and dresses too, to a slightly lesser extent; to be the projects that give me the biggest of happy warm fuzzy buzzes… 🙂

P1130064
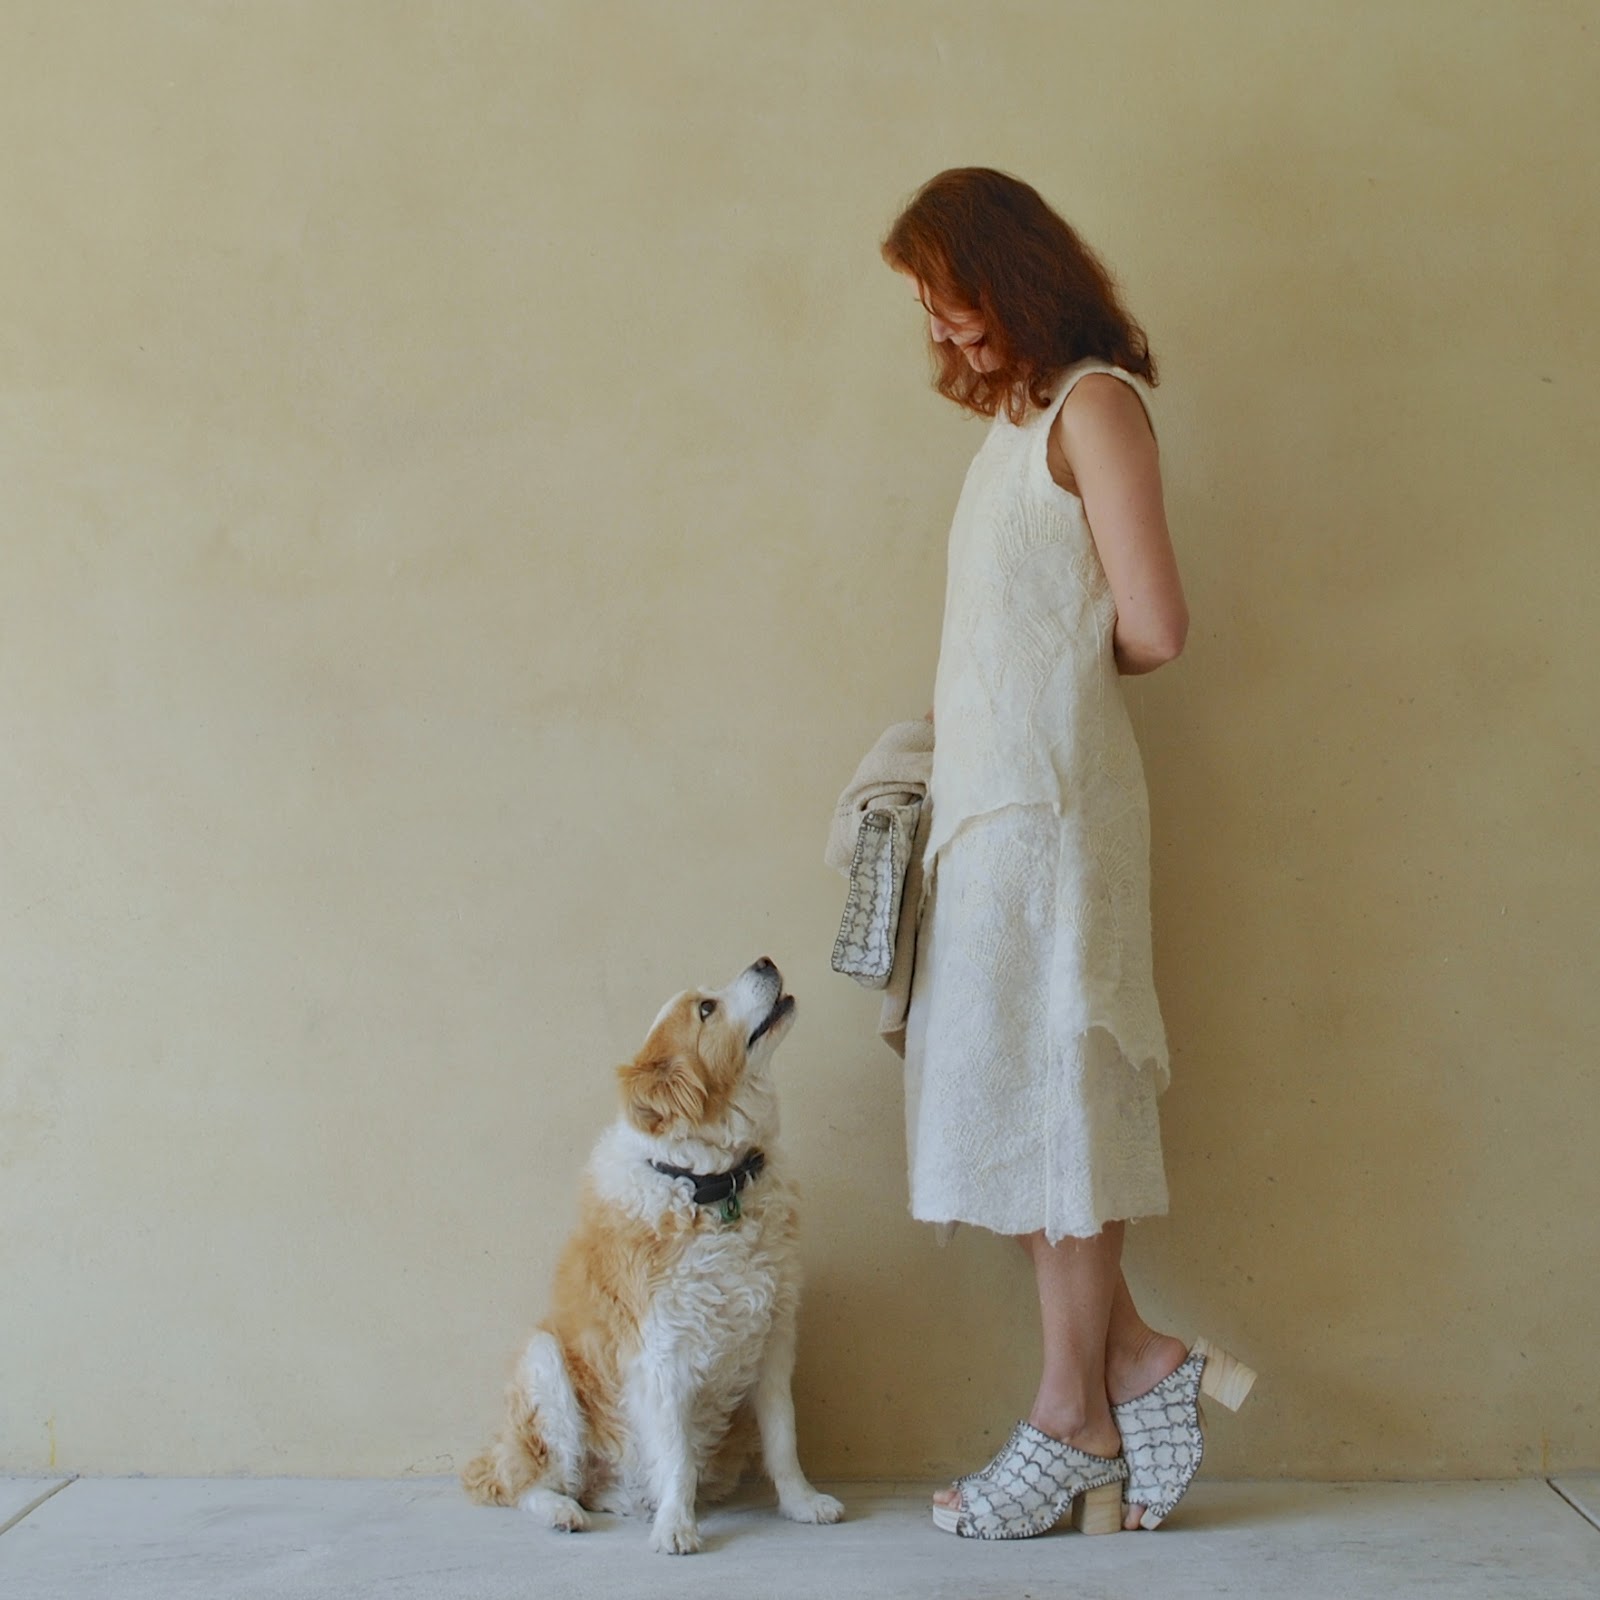
wrt this one; well I’ve wanted to make a shearling jacket for oh, about ten years now.  Ever since the first time I clapped eyes upon one belonging to our friend S; a colleague of my husband’s who is always super suave and cool and has a slightly alternative, very hip and happening taste in clothing.  He owns a beautifully thick, oversized shearling jacket that he’s had for years and years and trots it out every winter once or twice.  Every single time I see it I’m struck all over again by how awesome it is and have harboured a secret desire for one of my own…

IMG_9986

I bought the faux shearling from Spotlight and the burnished, dull metal buttons from Fabulous Fabrics.  The pattern is loosely based upon McCalls 5276, a pattern I’ve had for years but only muslined once and not got any further… oops!  I pretty much chose the pattern  just for the collar alone, since I wanted that big oversized 70’s lapel collar on my jacket, but not much else.

My alterations included;
Body and sleeves slimmed down and lengthened somewhat.
Welt pockets added as described here,
Belt and belt loops added.
I also fine-tuned the front edge and collar to have it so I could happily wear it in a variety of ways… a) open, cardigan style b) buttoned up halfway with the lapels flared, c) buttoned up to the neck with the collar laid down in a peter pan style, and finally d) with the collar turned up and buttoned up right to the very top in a funnel-neck style.  Also, having the belt tightened or hanging loose adds to the wearing options too.

P1130068
Because I was using a shearling obviously I left off all facings and all edges are left raw.  When working out how to seam the pieces together, I checked out a pattern for a shearling jacket from one of my Burda magazines… which mentioned overlapping some edges to be joined and top-stitching the overlaps to minimise bulk.  So; I overlapped the shoulder seams in this way, and also the collar-to-neckline seam.  The other seams; namely the sleeve, side and armscye seams are sewn right sides together in the conventional way.

P1130105

Even though I used the McCalls collar, I still cut it a bit bigger on the edges – just in case!!- never forget the golden rule of sewing… you can always cut away but you can’t add it back… EVER!!!  And then trimmed it here and there to allow it to sit how I wanted it to look, to fit how I was imagining my collar.  I’m particularly pleased with how the collar looks when buttoned up to the neck like this..

IMG_9976I made the sleeves extra long, so I could turn them up and have a woolly “cuff” on the sleeve ends, and also made wrist strips.  These are sewn to the sleeve, then wrapped around and buttoned to themselves.  The seam allowance of the cuffs are topstitched down for a neat look when they are turned back, and then I stitched-in-the-ditch of the sleeve seam down to the sleeve so the cuffs stay folded up permanently.

P1130096

P1130073Welt pockets: my tutorial for how to do the welt pockets is here

Buttonholes: I’ve written a separate post detailing how I did the buttonholes here, so as not to clog up this post more than it is already!  aaaaaagh! picture overload!!

P1120887

In summary; I thoroughly enjoyed having and wearing my cosy new jacket in the subzero temperatures of Japan, and now we’re back home…. and it’s 35C… lol! so it’s off to the back of the wardrobe with this fluffy hulk of a thing.  See you again next winter, you snuggly bundle of cosiness!

mccalls5276burda7863DSC_0001-2

Details:

Jacket; my own design based loosely upon McCalls 5276, faux shearling
Top; the twist top from Pattern Magic by Tomoko Nakamichi, in ivory ponte, and in charcoal ponte
Jeans; Burda 7863 modified to be flares, in ivory cotton denim, and made as regular bootcut in black cotton corduroy
Gloves; hand knit by me in 4ply charcoal merino, details here
Socks; hand knit by me in Noro 4ply, details here
Shoes; Francesco Morichetti, from Zomp shoes

P1130083

pinterestmail

scarlet Miette

P1130024

My newest knitted creation is a cardigan; in a toasty, tomato-y, fiery, hot-chilli scarlet.  Photographed most attractively against the snowy drifts of Hokkaido in Japan where it looks rather stunning, I think!  I should come to Japan more often, so photogenic for photography.  I’ve styled it tres fashion-y with my KMart snow boots, bought circa 2001, and my hired ski pants.  O yea, rockin it fashioneestas!

Sorry to be repeating myself, but yes it is yet another Miette, a free downloadable pattern by Andi Satterlund… my fourth!  Knitted up in Debbie Bliss Donegal Luxury Tweed Aran, again!… and this wool is so divine I just can’t stand it eeeeeeeee!  The last time I was in Calico and Ivy I couldn’t help going over and fondling the new colours, and it took every bit of self restraint I possessed, which is a pretty pathetic supply in the first place I must admit, NOT to buy another new colour for yet another little cardigan.   Honestly, I could easily have something in every colour way.   Just adore each and every one, and can’t help thinking they’ll seem to be so very very me!   This colour way is 360033, Scarlet.

IMG_9239

The buttons are also from Calico and Ivy, and I sewed them on upside down, because the upper side was a little shiny for my taste.  The underside has the perfect level of non-shiny matte-ness to suit the slightly lumpy, comfortable, homely look that this yarn has.

P1130021

Everything else I’m wearing here is made by me, including as hinted on instagram, all the underthingies 🙂  In fact, my skiing holiday is an almost exclusively handmade affair… I knew I was taking a bit of a risk in packing nearly all me-made clothes, and most fortunately it has all worked out quite successfully, if I say so myself.  The one non me-made thing I packed was a ski jacket.  Actually, I’ve been having some thoughts on snow gear and how I reckon a person can make it fit into a handmade ethos…  I think it is entirely possible! not that I’m an expert, haha.  No West Australian can actually ever lay claim to knowing the ins and outs of snow gear, really!  In spite of my snow-noobiness, I’m thinking of writing my thoughts here on the ol’ bloggeroonie soon…

Some knitterly notes mostly for my own alteration purposes…

3 1/4mm needles, size 42, 6 balls of the Donegal Luxury Tweed Aran.  Switched the bust dart shaping to the underarm using the same little fix as described here for my previous, navy-blue Miette.  Added two pattern repeats to the bottom edge; same as I have done for every one of my four versions of this same pattern.  I just like that little bit of extra length, I think this suits me and my figure better than the original design, which is very cropped.  This means picking up 78 stitches along each front edge.  And 9 buttons too, natch.

IMG_9237

Booyeah! done!

Details:

Cardigan; Miette, in Debbie Bliss Donegal Luxury Tweed Aran, colour scarlet 360033
Striped Tshirt; self-drafted, grey and ivory striped cotton jersey, details here
Cowl; own pattern, mustard 8ply merino, details and my pattern for this cowl is here
Armwarmers; own pattern, green 4ply 100% merino, details here and my pattern here
Gloves; from a 1963 Patons pamphlet, charcoal 4ply 100% merino, details here
Beanie; own pattern, cream Patons pure new wool, details here

also wearing socks and leggings made by me
Ski pants; hired
Snow boots; Kmart, circa 2001

P1130026


pinterestmail

2015; a retrospective

The last day of the year! now for some riveting (haha) navel-gazing upon the creation and wearing of my clothing.  Kicking off with my favourite outfit pictures from each month.

January

DSC_2605
DSC_2645 - Version 2
IMG_6807
SO:
What have I made: Quantitatively, 72 things, including 22 things for others.  This number is counting each underwear set of bra with two matching undies as one thing even though technically it’s three things! as well I made some beanie/dress/shirt outfits for preemies, and counted each set as one thing.
Knitted garments: 18

From existing stash: 19

What am I wearing: I keep my daily outfit blog updated pretty faithfully and really do analyse it…  I tot up the numbers last day of the month, and update an excel spreadsheet on the last day of the year; but won’t subject you to that.. you’re welcome #statsfreak #whatcanisayilovenumbers
This year, 93.8% of clothing I wore was made by myself; this number includes underwear, socks and tights but not shoes.  Qualitatively, things I wear that are not made by me are my Metalicus tops, that I’ve had for years and years and have no intention of throwing out just to appease my insane me-made sensibility, and scarves that have been given to me as gifts by family.  Not throwing those out either, obviously!

I have not bought any ready to wear clothing for SIX years now!

My most worn items of clothing this year can pretty much be summed up in the following pics:
DSC_2662 DSC_2582 DSC_2583
DSC_2757 - Version 2 DSC_259723dec

and also my cream infinity scarf and my raincoat got a lot of use


 I took part in the vintage pattern pledge for the first time, and managed to make six things…
 vintage pattern pledge 15
Favourite creations of the year: well, obviously I’m pretty pleased with my 1yr1outfit efforts! although I might not wear them super-frequently I am very proud I managed to fulfil the challenge successfully.
 As far as wearability and suiting my lifestyle; my favourite creations for the year are probably my watercolour silk dress (pictured above), my recently finished Japanese indigo-dyed dress, also my pleather/wool moto jacket rates pretty highly in the satisfaction stakes.

A huge honour was when Heather of Closet Case Patterns named her new pyjama pattern for me!  *pinches self*  pictured in March, above

Fails:  I tried to grow indigo for a home-dyeing experiment… FAIL.  Not a single seed even germinated  *sob*  I’m still getting over that one…   I let my blue sea change top go.  Lesson learnt: panne velvet is awful stuff and good for… well,  practically nothing, actually.    My purple silk tulip skirt was shaping up to be real goodie but got chewed up in the washing machine when it somehow snuck in with a load of denim jeans *sob* like your hand knit lace shawl versus a new puppy, obviously that’s not going to end well.  I discovered lingerie made from old recycled tights does not last nearly as long as lingerie made with new fabric SURPRISE….. NOT!  and also my recurring epiphany that pleather/leather skirts are kinda stupid things and not comfortable at all.  I don’t know why I keep on torturing myself by adding them to my wardrobe really, just a dumb glutton for punishment, I suppose.  Not quite ready to give up on my chocolate one just yet though, I’m going to give it another chance to prove itself next winter….

But anyway; overall, as far as my sewing/wardrobing efforts go I’m pretty happy with the year.

Most importantly of all!  I’d like to take this opportunity to thank everyone who reads my blog and takes the time to leave a comment, every kind word is very much appreciated.  *mwah*  I love that the sewing community are such a busy and happy bunch; creating like mad, inspiring and supporting each other always, wearing our creations happily and proudly, and sharing freely, openly and generously with each other.

Thank you so much! big hugs all round  🙂 and here’s to a wonderful 2016!
pinterestmail

jingle bells

Yes, my new shirtdress literally does have bells on it.  The gold buttons are mini jingle bells, the type you put on cutesie wootsie Christmas decorations.  Whimsical and impractical although many of my sewing/knitting choices may be though, jingle-bells are just kinda… hmmm well the jury’s still out.  See, I just had my heart absolutely set on small rounded gold buttons and this was pretty much it.  I love the festivity of them and am clearly all set up to do Christmas Day with fabulous, jingly panache, but have fears that the relentlessly cheerful chirpy tingalingalinging will become a tad annoying in the interim, and not just to me but to the long-suffering souls who move in and about in my everyday orbit.  So I have not at this stage ruled out carefully injecting a blob of superglue into the opening of each jingle bell, to anchor the ringer thingie to the inside and restore peace and tranquility unto the world.
Glue is on standby and at the ready…

but pretty, non?

Fabric: a very fine coral floral silk georgette from Fabulous Fabric, the very last on the roll.  I bought it using a voucher given to me for my birthday by my dear friends; whom I’ve been meeting every week since our children were in the early school years…  They know my strange predilection for self-dressmaking so very well!  I also bought some ivory crepe; with which I made the slip to go under this dress, and which I also used for the button placket, the cuffs and the collar stand.  Jingle bells were also from Fabulous Fabrics.

I’m so relieved I had the foresight to make a separate slip to wear under this sheer dress, rather than an attached lining… why? because when I go to hang the clothes on the clothesline I’ve found this to happen…

Hmmm, see; the slip, being sleeveless, does not ride up when you lift your arms up over your head, of course.  Just yet another reason to keep a healthy collection of nice slips and petticoats handy in the lingerie drawer.  I have about four hardworking slips currently in rotation and just lately I’m seriously considering increasing the population, particularly since some of the oldies are getting… well, old.  Maybe even double that number wouldn’t be too many.  Slips, seems such a quaint and old-fashioned thing, yeah? the kind of ladylike frippery my grandmother loved and would buy for my birthdays etc and that seemed unnecessary and even rather fuddyduddy-ish to my much younger, more foolish self.  Now I am wearing them.  Am I getting old?  Hmmm, no need to answer that!

arms in regular position, all is well

Pattern: Burda 05/2010;111, a shirtdress pattern I’ve used twice before, a plaid shirtdress and a lace version; with sleeves adapted from another Burda pattern, 05-2010-101.  I’ve used this same sleeve pattern also twice before on different, other Burda patterns; my black Pirate shirt and my pale blue silk shirt.  This is that same sleeve but cut shorter and with a shorter cuff to compensate for being a shorter sleeve.
I chose to leave off the pockets, and the collar and just have the collar stand, I felt this lends a slightly more feminine look to a shirt, goes better with all that girly pink floral explosion that’s already going on in there.

Construction notes: I went with all French seams throughout of course, silk georgette kinda demands those sorts of standards! being sheer and all high quality and all.  Only the armscye seams I overlocked the raw edges to finish.  In a shirting cotton or linen I would flat fell the armscye seam like so, but silk georgette just does not lend itself to that level of tailoring.
Collar, button placket and cuff facing were hand fell-stitched to secure them; I wished for no top-stitching to sully that clean-finished, pristine crepe!  In my opinion, topstitching makes a shirt look a lot more casual and maybe a little masculine? whereas absence of top-stitching keeps a thing looking polished and, somehow feminine.  I know, that’s kinda irrational and I cannot logically explain why I have that masculine/feminine impressions of topstitching, but there it is.
The hem is hand-rolled and stitched, and I did the same technique as I did for my slip, with stay-stitching.  I hemmed this before I hemmed the matching slip, to get the right length for both, but it’s taken me this long to finish all the other little details and get out and take photographs of it.
And I also wanted to wait for its first outing to be a day on which I would be meeting all my friends to show it to them, and simultaneously an appropriately weather-ed day, nice enough to wear it! it’s taken a while for those two things to coincide.  Today was that day! hurrah!

Details:
Dress; Burda 05-2010-111, Burda 05-2010-101 sleeves, floral silk georgette with ivory crepe detailing, my original review of this pattern here
Slip (under); the Ruby slip, pattern by pattern scissors cloth, ivory crepe, details here

pinterestmail
Switch to mobile version
↓