Monthly Archives: December 2021

You are browsing the site archives by month.

#use12 capsule wardrobe

Ta da!  IT IS DONE…

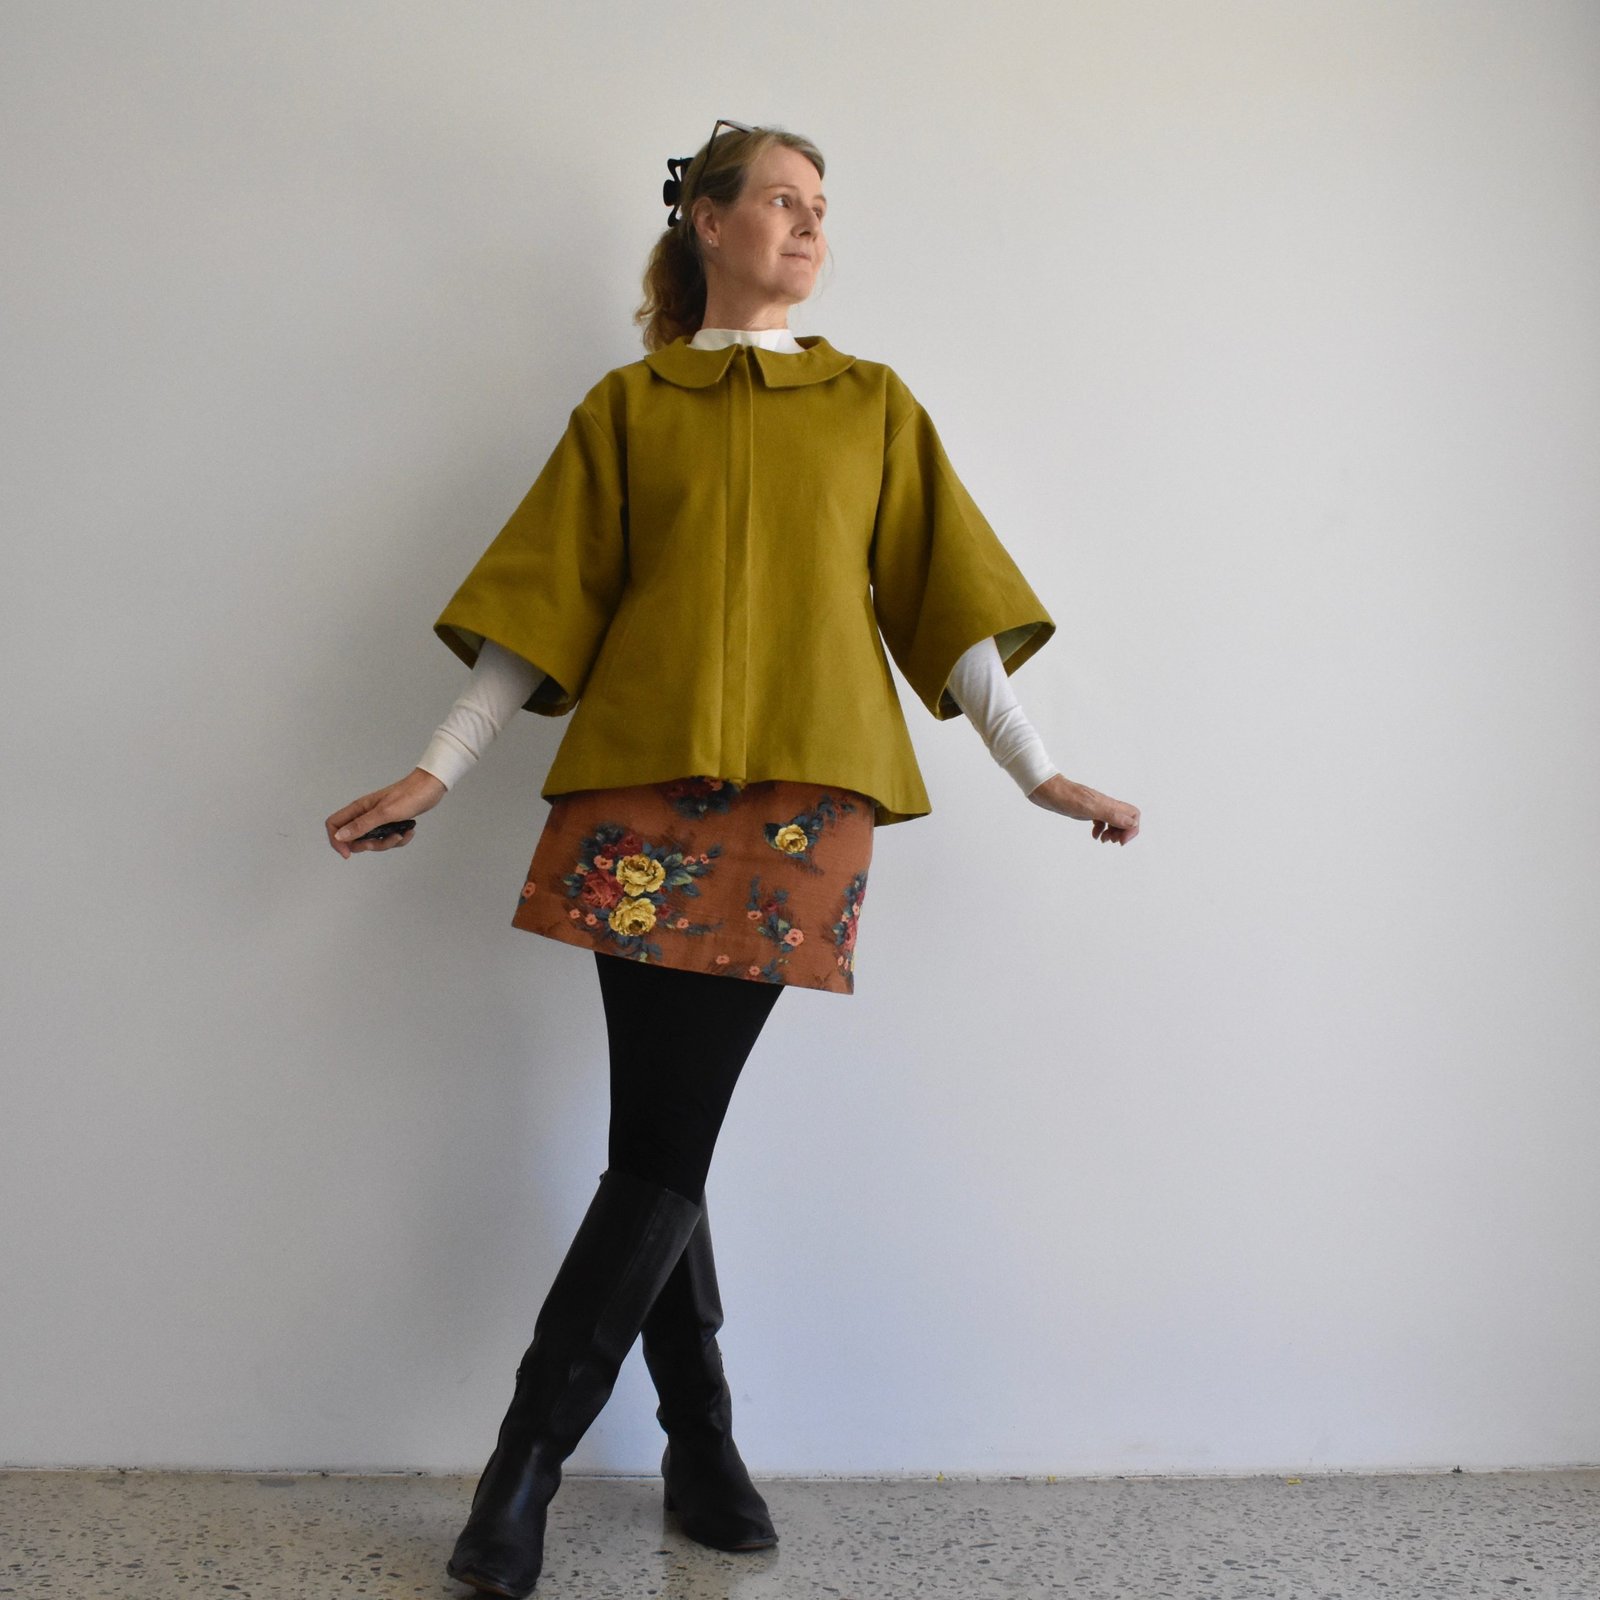
I can finally present, in entirety, my #make12, or #use12, capsule wardrobe… yes, that funny little project I’ve been chipping away at all year… hurray!  Phoar!  I cannot be more thrilled with this funny little collection, right here!  And how it all worked out in the end, with just a few minor nudges and fudges here and there.

The pieces

from left to right; all pieces linked to their own blog post:

raspberry suiting mini skirt

pale blue damask summer skirt

blue corduroy flared skirt

yellow blouse

moss green swing tee top

chocolate brown, wide leg trousers

salmon pink tee

forest green LS merino tee

avocado green jacket

white, appliquéd blouse

mint green leafy dress

teal green clogs/ shoes

and I also got out a bonus set of underwear  Thanks to my sewing buddy Jane for modelling these! She’s such a good sport  🙂


the aforementioned nudges and fudges:  I used all of my fabrics bar one; my precious green fish leather from Iceland… however I used some of another green leather from my stash for the shoes.  At the same time, I used the yellow for underwear, so used the last leftovers from another project for the yellow top, so that was kind of a bonus too.

does the capsule work?  So, I had great fun dressing up and mixing and matching all the pieces as much as I could.  There could be some combos I missed? but this is as far as I got before exhaustion set in… but I’m so excited to get them mingling all together like this!  My beautiful new teal clogs do go with absolutely everything, which is cause for great celebration!! however since some of the outfits are quite wintery, I put on my black tights and black boots for some of the looks, because that is how I’ll wear them in reality.

Phew, that’s a lot, eh.  More outfits that even I thought possible!  Now I’m completely exhausted!  and also have a vaguely over-indulged feeling, like maybe I shouldn’t add any more clothes to my collection for a while…?! but of course I still have fabric in my stash, and I still have plans too!  It might be a good idea to  focus on more things for others though, for a while  😉

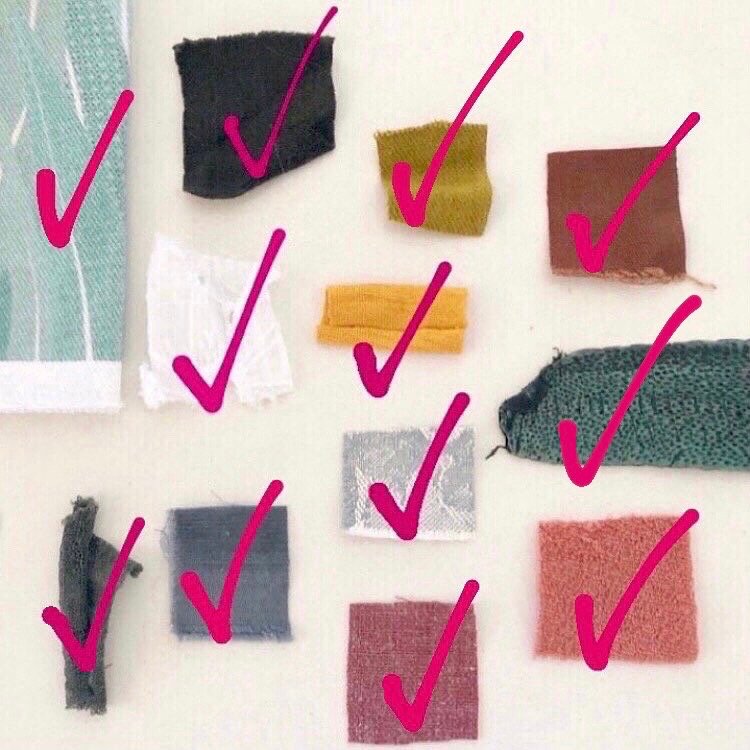
Thoughts?  I think the thing I like the most about all these pieces is that many of the fabrics were precious in some way; souvenir buys, or gifts from family and friends; that I was too frightened to cut into, for some reason or another.  I really wanted to force myself to finally enjoy these lovely pieces, and to wear and appreciate them.   At the same quite a few of the fabrics were smallish, leftover, orphan scraps in my stash, that were too big to throw away, and were just sitting there taking up space.  I feel really good about finally clearing some of these out and usefully; if that makes sense!  I did try to choose a set of colours and textures that I thought looked nice together, and it’s really exciting seeing that most of them really do play together as nicely as I was hoping.

I already know I’ll wear a lot of these outfits, maybe not all of the combinations that I put together here “speak” to me, but just playing with everything like this gave me lots of ideas.  Of course, several of the earlier made pieces have already gone into heavy rotation, and been worn all year long, while some things are nigh on brand new and not been worn at all!

I think this is the second capsule wardrobe I’ve ever made, and doing it was just as much fun as the first time.  I wouldn’t even mind having a go at another one next year?? maybe??  Do I even dare?!  It would have to be very very different from this one… but the cogs are already turning  😉

For the time being though, I am satisfied.

pinterestmail

a yellow Perth top and some teal clogs (shoes)

Hello!  I’ve made a couple more items for my #use12 mini capsule wardrobe that I proposed for myself at the beginning of the year, in fact the last two items! So I’m essentially finished!  Apart from a big mix-y/match-y dress up session that I’m planning… quite excited about that, actually! I’ve purposely held off up until now!

So the second to last item is a mustard-yellow Perth blouse… this pattern was our first offering from our own little Carolyn & Cassie Pattern Co.  My new blouse is actually kind of a blow-in, sort-of/not-really but yeah, sort of.  Let me explain.  See, I had a small piece of mustard yellow jersey in the original #use12 lineup, with which I thought I’d be able to make a simple little top.  However I just didn’t have enough of that fabric, no matter which way I looked at it.  So, if you remember I made a set of yellow underwear with the scrap instead.  Yes, it was a scrap, originally leftover from my yellow Jade skirt, which I’ve worn a tonne, btw.  Anyway, I used the scrap, yay! but I didn’t have my little top.  Fast forward to when I made myself a dress for my niece’s yellow themed 21st, and I actually had enough scraps leftover from that, that I thought I might be able to do a little top after all.  And I did!  I managed to cut out a Perth top, with shortened sleeves.  And I now have zero left of that yellow fabric too.  So; I kinda used up both the scraps, and got my yellow top for the capsule in the end too.  Clear as mud?  I thought so.  Never mind,  Just me rambling.

Not much else to say really!  I double topstitched all the seams throughout, which gives a sort of casual utilitarian look; and used a small, natural wooden button for closure.  I already had the yellow thread in my stash too, from when I made the dress!

The last item for my #use12 is my new pair of clogs!

I’m so so happy with these! although I have to confess that these were quite a departure from my original intentions too… see I’d originally proposed to use a piece of the precious fish leather that I’d bought in Iceland to make a pair of oxfords.  I still want to do that.  However, just at this stage I don’t think I’m quite ready enough for that project….  I had this bottle green leather in my stash though, that I’d bought in the Fabric Store in Melbourne during one of our girly trips over there.  I ordered a refill clog kit from leather needle thread, without leather, and bammo! bob’s your uncle.

Actually, I said I’m happy with these, and I am! but truth be told I think my leather was just a shade on the flimsy side? and the ankle strappy bit flops in when I’m not wearing them, whereas the ones I’ve made using leather supplied with the kit – obviously superior! – does not.  So I’m thinking of going in retrospectively and applying a lining to the straps to stiffen them up.  I think this will be quite easy actually, and I have some very thin pig leather that is supposed to be used to line shoes that I can use for the purpose.  I bought this from Skindhuset in Copenhagen during one of our trips there.

I might not though, because I’m not sure if my worries are just me being nit-picky… which is quite probable.  We’ll see ….

Anyway… next up! the capsule wardrobe in total!

pinterestmail

some more stuff…

just a few more things! I’m trying to get everything that I’ve made this year, also blogged this year, and so far there have been a few things that have fallen through the cracks!

I made another romper for Theo recently.  It’s the same design as the previous few I’ve made for him, just sized up a bit so he can wear it through into autumn..  Seems only fitting, given the very autumnal themed fabric, don’t you think?

Oh! The fabric! it’s very special!  It is designed by Cassie herself, called “Autumn tree swirl” and is one of the suite of autumn designs that she has in her Spoonflower shop, here.  This is the organic cotton jersey.

I also made another top for Cassie’s new work wardrobe, that I’m working on for her… the fabric is the same inherited vintage suiting as the skirt I made for her recently, here. and the pattern is NewLook 6483.  Such a great pattern, I’ve made it loads of times for myself and she has a copy of the pattern for herself too.  She wanted an oversized look so I cut a size 12, but I think it turned out a bit too oversized though…  so will go down to a 10 next time,I think  🙂

I made her skirt too previously; using my heavily modified V 8363 and crackle printed cotton drill from The Fabric Store in Melbourne, bought during one of our girly trips over there… aaah, happy times.  I wonder if we will ever do something like that again…??

pinterestmail

baby swing for Theo

… and the last Christmas present I made this year was a baby swing for Theo.

I’d made one for Arthur last year and it’s been a big hit; he loves sitting in it and being pushed, for quite lengthy periods at a time, actually.  Speaking from personal experience here, ahem …!

Tim cut the dowel for me and I ordered some of Cassie’s own fabric from her line on Spoonflower.  Of course this was all meant to be a surprise, but obviously the designer gets notified of every sale they’ve made, and the buyer’s name too, so it was not much of a surprise in the end!  I like to think she didn’t really know exactly what it was going to be in the end though  😉

This is Cassie’s zebra crossing design, available here, and I ordered it on the lightweight cotton twill base.  I had to keep this little bit from the selvedge and pop it on somewhere, obviously  🙂

I used the same pattern I used for Arthur’s, reproduced here.  It’s based on this one from the blog The Thud, but mine has different measurements, everywhere!  Also I added the safety belt and two cushions to mine, again; one flat cushion to sit in the bottom, and another fat, bouffy one for a little back support.

The “fat” cushion is stuffed, elsewhere I used double layered wadding throughout, and was careful that the print faced “up” everywhere possible.


I had just barely enough fabric from my order of 1m to cut it all out, and had to do a little creative piecing on a two corners of the flat cushion to get it out, I don’t think my piecing is too heinous, but in any case it’s going to spend most of its time squished underneath a cute baby bottom.


Again, if I get a good picture of Theo in his new swing, I will certainly update my blog post here and put one in… I do know that he loves swings so I can’t wait to see him jiggling about happily in this one!

HERE HE IS!!  SO CUTE!!

pinterestmail

Arthur’s backpack

I also made a back pack for Arthur, for Christmas …

I’ve made this pattern a couple of times before, for my own children, and Tim particularly loved his backpack when he was tiny.  He wore it all the time and would toddle about the house with it on his back, with a few precious toys stashed inside… it was very cute!  and he still has it today.  It was Tim who suggested one for Arthur too.

Fortunately I still have all my Topkids magazines, including the one the pattern was in! I still flick through them sometimes, and while some of the patterns might be considered a tiny bit dated, especially some of the ones for older kids; there are still plenty of cute ones in there.  I’m never throwing them out! Love my Topkids magazines!

I had the dark grey denim in my stash already, and also the red check cotton I used for lining throughout… the latter given to me by Mum when she cleaned out her stash.

I hand drew the letters for his name… transferred them to interfered cotton, cut them out, and stitched them to the pocket piece with narrow, closely spaced zig-zag stitches.  I had the velcro, wadding, D-rings and little swivel clip for closure already, but had to buy all the other pieces for the backpack; the red webbing, stops for the straps, and cording.  Still though, it’s been amazing to me what I do have in my stash already and am capable of finally putting to good use!


If you’d like to see Tim’s own backpack, I blogged about his yonks ago here, back in the early days of my blog.  He still has it today and loves it!  This is so heartwarming to me, and I just hope Arthur loves and enjoys using and wearing his own backpack too.  If I get a nice picture of Arthur wearing his own backpack I will certainly update here, and put it in  🙂

pinterestmail

a very dapper bunny

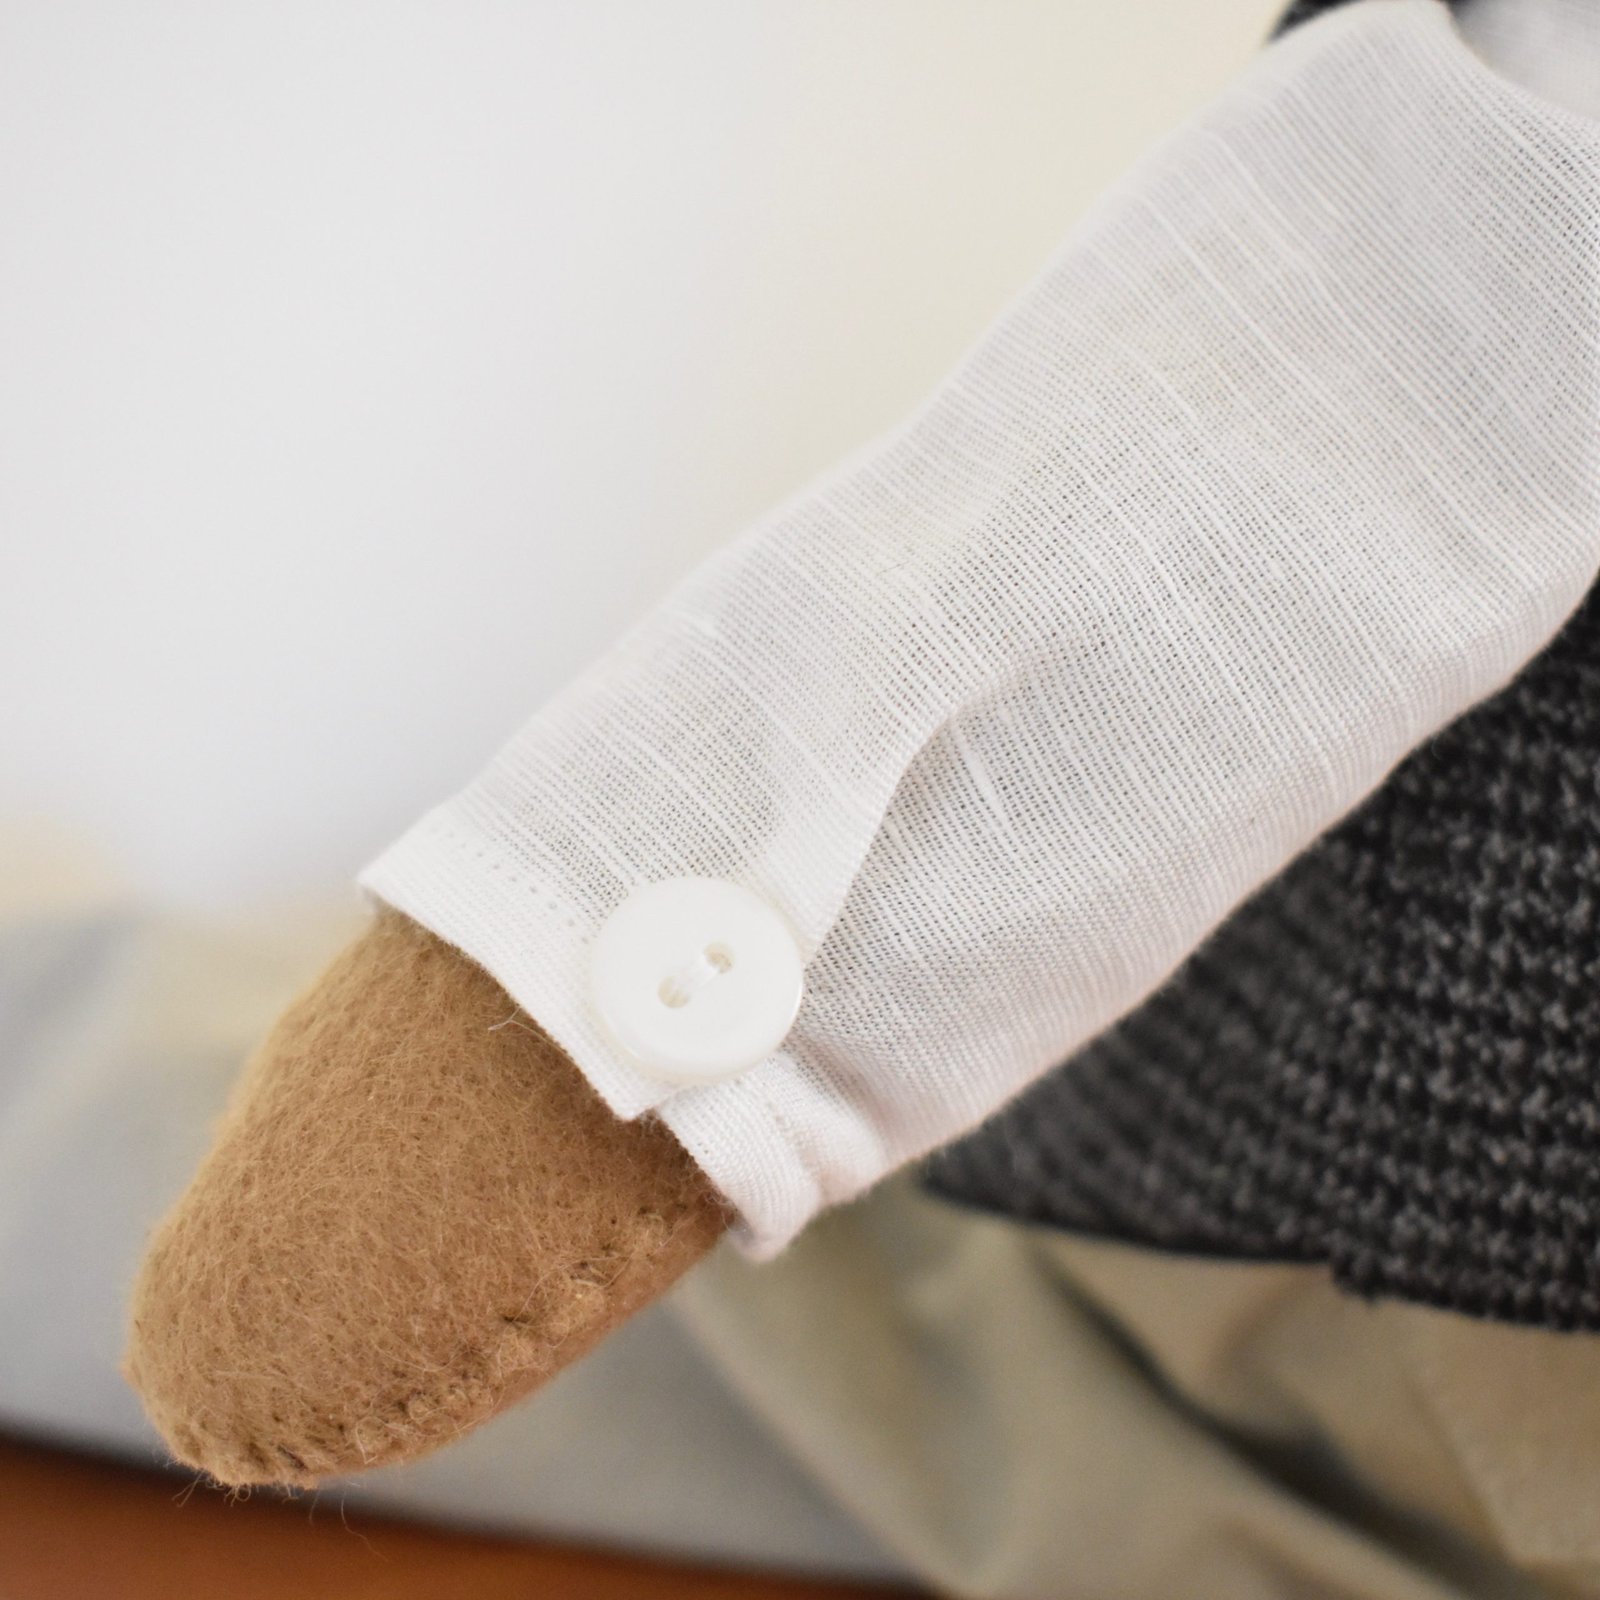
Hello!  phew!  well after an absolute whirlwind Christmas is just gone, whoosh, just like that…  This year I made a small collection of gifts for my grandsons, including this rather dapper young buck for Arthur!


I used the book “Making Luna Lapin” by Sarah Peel.  I’d bought this book from Calico and Ivy at the beginning of this year, using a birthday voucher that my children bought for me for my birthday the year before.  What can I say, I do love making tiny clothes for animals and dolls!  Obviously Arthur is a boy so I decided to make a boy bunny.  Of course, the clothes are kinda gender neutral really,  so if Arthur decides the bunny is a girl then I’m very open to making girl clothes too!

I made the, as yet, un-named bunny using camel felt from spotlight, and the purple cotton paw pads, ears and buttons were harvested from one of Tim’s old shirts.  Yes, I really do love making things for the babies using their parents’ old clothes!  Just feels very special to me for them to have this connection  🙂

I have made another, previous bunny from this book, as yet unblogged here, and that one has a distinct tendency to topple over sideways, due to it being quite lightweight overall.  To counteract this, I baked a handful of rice and made a little rice-sack, which I sewed into the bottom of this bunny.  It really has helped to stabilise it, and he/she sits up very nicely.

The little chinos are cut from an old pair of cargo pants belonging to Cassie originally… these are so cute!  I absolutely love the hole for his pom pom tail to poke out of, and the totally unnecessary topstitching on those totally unnecessary pockets… CUTE!

The crisp white linen shirt is, if I say so myself; ADORABLE!  It even has a double layered yoke, for which I did the world’s tiniest burrito.  I didn’t take a picture of the white one, but here’s the purple one from the other shirt that I made.  No, it didn’t end up being a part of the outfit, but I may use it for a future bunny.  The white linen is leftover from my Charlie beach caftan that I made a few years ago… my favourite thing about the shirt is the button tucks on the sleeves.

The waistcoat is cut from a really nice wool tweed suiting that Mum gave me during her last cleanup, and lined with a small scrap black silk habotai, deep stash stuff.

Arthur isn’t quite up to operating these tiny buttons yet, but I hope he enjoys adding it to the plushie fold for now.   I expect one day I’ll go over and find it naked, then I’ll know the button issue has been conquered!

pinterestmail

Yallingup, with sleeves!

Hello!   Just a quick post today… for those of you who wished our Yallingup pattern had sleeves, well Cassie has designed one!  We’ve made it available as a free add-on to the pattern currently in the shop… if you’ve already bought the pattern and are unable to access the add-on through your Etsy download then please feel free to get it here from my blog as well.

CAROLYN_CASSIE_Yallingup_sleeve_addon

SuperMum mode; activated!!  I love these pictures of her!

Cassie used superhero cotton fabric from Spotlight; it’s pretty cute, eh?!

pinterestmail

(almost) zero waste jacket…

Hello!


I’ve made a new thing… an “almost” zero waste jacket.  I’m pretty proud of this fact!  Ok, to be totally honest; I didn’t set out to make an almost zero waste jacket; I actually just set out to make a mere jacket.  This whole exercise turned into a case of sheer dog-at-a-bone stubbornness and a masochistic refusal to be beaten by my own plans…

Storytime; so, I had this lovely stuff and I wanted to make a jacket … It’s kinda hard to tell but there’s a little less than 1.5m of 106cm width fabric, folded lengthwise in the pic here.

I took out my first chosen paper pattern and laid it down onto the fabric; absolutely no way was it going to fit.  I got out another paper pattern from my stash, same story.  Damn!  I then searched through my entire collection of Burda magazines for a smallish, or at least cropped jacket; selected and traced out a pattern.  Laid it out on the fabric, hmmm, that didn’t fit either.  Searched for and selected yet another, even tinier, cropped jacket, and traced this out too.  Nope.  I felt like my fabric was gaslighting me! because it certainly “looked” like I could get a jacket out of it, but absolutely nothing was even close to fitting!

Ordinarily I might have given up and just gone for a skirt or something, in this case I was absolutely determined to make that jacket … why the stubborn insistence on a jacket, you might ask?  well, only that I had previously selected the fabric for my #use12 capsule wardrobe for this year, and this was earmarked to be a jacket.  I can’t have a capsule wardrobe without a jacket!  and of course I’ve already used all the other fabrics for other things, so this HAD TO WORK.

And it did, obviously, and I may be feeling just a wee bit smug about it!  I did a quick mud map of my design… in case anyone is interested.  F = fold, S = selvedge

You can see the back and two fronts to take up the entire width of the fabric, even so the width wasn’t enough to be comfortable over my hips, especially with the pockets I sorely wanted, so that is what the triangular “side gussets” are for.  These are stitched into the side seams.  I stitched all my seams at 6mm – also for minimum waste reasons! then overlocked all raw edges and faux-flatfelled the seams down.

The jacket length was determined by the length of a nice, heavy, open ended zip that I already had in my stash; its colour blended in nicely with my fabric which is partly why I chose it over buttons.  Also for the minimal streamlined look!  I don’t have any perfectly matching buttons, and I’m still on the buy-almost-nothing stint that I’ve been on most of the year.

The “front placket” sits underneath the zip inside the jacket, the “back neckline facing” was stitched together down the straight edge, and attached to the back lining.  I didn’t even have enough fabric to cut the under collar, so this is cut from brown cotton corduroy, leftover from these jeans.

No, it’s not ideal to have that different colour there, but I don’t think it’s too visible.  You can also see the corner of a patch pockets stitched to the lining there… there’s one on each side, just for extra, just in case.  You can never have too many pockets!

“Pocket welts” is self-explanatory, and “pocket facings” are stitched to the pocket bags at the opening so that this is the fabric you see when the pocket peeps open.  The inner pockets themselves are cut from the lining fabric.

The fabric.. oh btw, I bought it in Japan, in Stripe & Check in Tokyo during our last trip there… and posted about here.  It’s a beautiful, quick thick brushed cotton, almost like flannelette but more solid and “coat-like” in its weight and feel.  The colour!!  Isn’t it gorgeous?!  I’ve already mentally dubbed it my pickle jacket, for some reason…  🙂

The lining is from a pale green polyacetate that was already in my stash.  I cut it a tiny bit bigger than the pattern all the way around, and then widened the seams towards the edges so that they would fit at the sleeve hems and bottom hem, though there is a small tuck in the lining at each side seam of the hem. The lining is machine stitched to the neckline and zip tape, and hand stitched to the sleeve and bottom hems.  The hems themselves were also invisibly hand-stitched to the jacket.  The only thing I had to buy for this was some matching thread!

obligatory boastful pic of scraps…

I’ve got something to say about the collar and zip opening… so, when I had my Mundaring raincoat tested by all my lovely testers; one of them commented that the front opening was “off-centre”.  What that meant: was that while the zip is actually bang on centre front, it has a weather placket over the zip, and the opening edge of the placket is obviously not centre front, but a little off to the side.  It was planned that way, but her comments certainly gave me some pause, as though maybe it was perceived as “wrong”??  Well, it’s not, of course because coats have their openings situated in many different ways…  however, I’m mentioning it because with this coat I decided to make it so that the edge of the jacket opening was situated at the centre front.  It’s neither right or wrong either way, of course; and while the opening edge of this jacket is satisfactorily right boom in the middle, the zip is, by necessity, off centre underneath.  The collar comes up to the opening edge of the “uppermost” front, while falling short of the “underneath” front, if that makes sense.  It’s no big deal, of course, just thought I’d mention it.

This is the 11th thing in my #use12 from my stash, wardrobe capsule.  Only one thing to go! although, to be honest I’ve since added another piece to the collection actually, which I am making next before the real “final thing”, hehe.  So the project is now a use 13 really… All will become clear soon!  I’ve even started photographing my final mix-and-match of my capsule wardrobe for a final post on the project.  I’m so excited for it!

Oh, sincere apologies to Sanni, but I did some more baking this week from the cooking tree… I made these oreo macarons, using this recipe.  SO YUMMY!!  I don’t know how I’m going to stay away from them until the family gets some!

pinterestmail
Switch to mobile version
↓